I’m sharing a celebration card using 3D Foam Stars and white glitter to Wear Your Adhesives on the Outside! Hello everyone! It’s Marilyn, I’m using the 3D Foam Stars to bring dimension and textures to the background of my card.
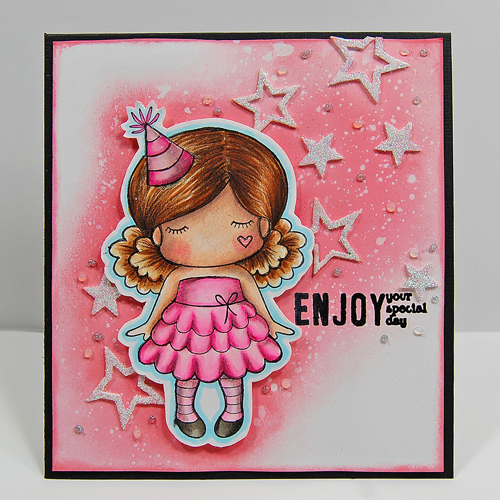
Creating the background of my Celebration Card
Starti with a 5 1/2 x 5″ white cardstock as the card panel, paint with distress oxide ink. Then adhere the 3D Foam Stars on the background.
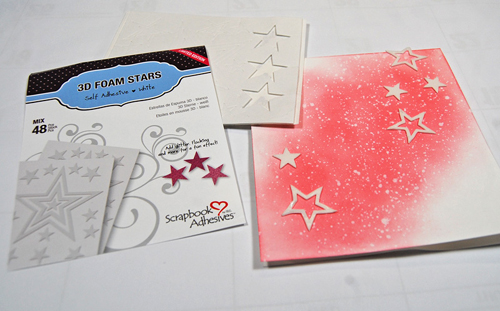
Next, let’s create a design on the card panel. I used different types and sizes of the 3D Foam Stars. Make sure to keep the top liner on for now.
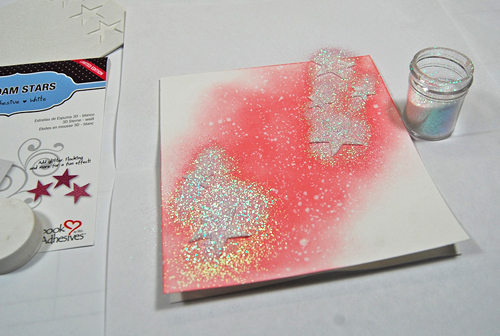
Now for the fun part: Wear Your Adhesives on the Outside! Carefully peel off the top liner from the 3D Foam Stars and sprinkle white glitter over all the stars. Press glitter lightly into foam stars and then tap off excess.
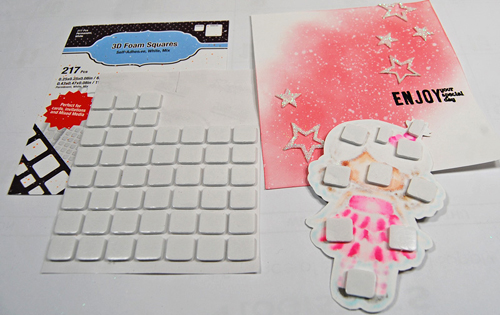
I stamped and embossed the sentiment in black on the card panel. For the little girl die cut, I first stamped with white cardstock. Then colored the image with a combination of Copic markers and Prismacolor pencils. After I die-cut with its coordinating die, I placed 3D Foam Squares White Mix on the back and adhered it to my card front.
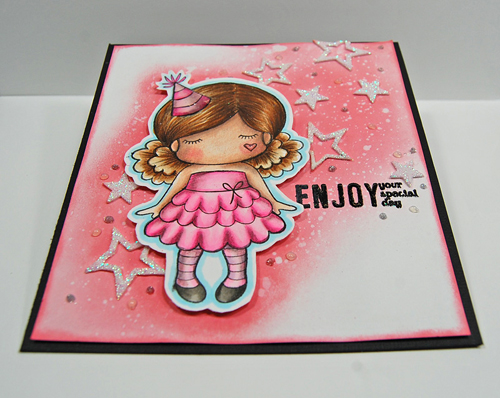
From this angle of the image, you can see all the dimension the 3D Foam adhesives add to the card. The stars look fantastic! Next, adhere the card panel to the black card base with Dual Tip Glue Pen.
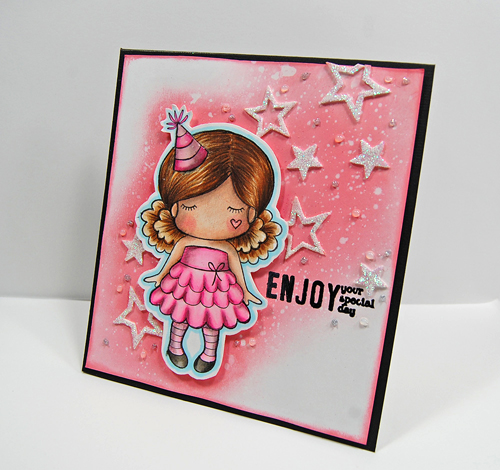
It’s easy and fun to create this fantastic background, especially with the 3D Foam Stars! I love how it turned out and hope you find some inspiration from this card.
Thanks for visiting today!
Marilyn Rivera
Scrapbook Adhesives by 3L® Products:
3D Foam Stars
3D Foam Squares White Mix
HomeHobby Dual Tip Glue Pen

By Susan Ackerman November 4, 2017 - 8:26 am
I absolutely love this Idea, so cute. I have some new really cute girl stamps now I need to purchase some of the stars and hearts. They will make great Valentines Day cards for my Grandaughters.
Thank You for Sharing
Susan
By Virginia Abbe November 4, 2017 - 3:31 pm
I just love learning about new products to me and how to use them. Can’t wait to try this
By Marjorie Dumontier November 4, 2017 - 10:13 pm
That’s such a beautiful card ! Your background is so gorgeous and you did such a great job on coloring your little girl !!
By Terrie November 4, 2017 - 11:33 pm
What an adorable card! I love it 🙂