
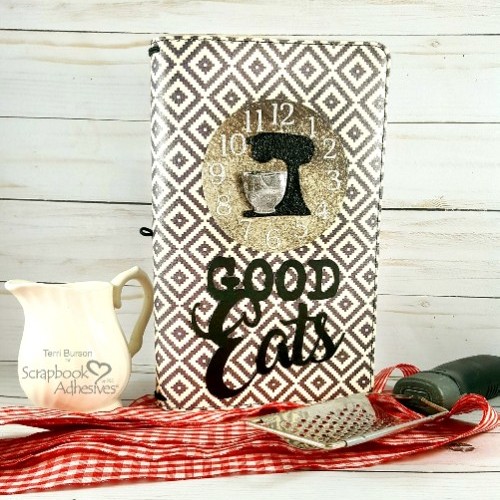
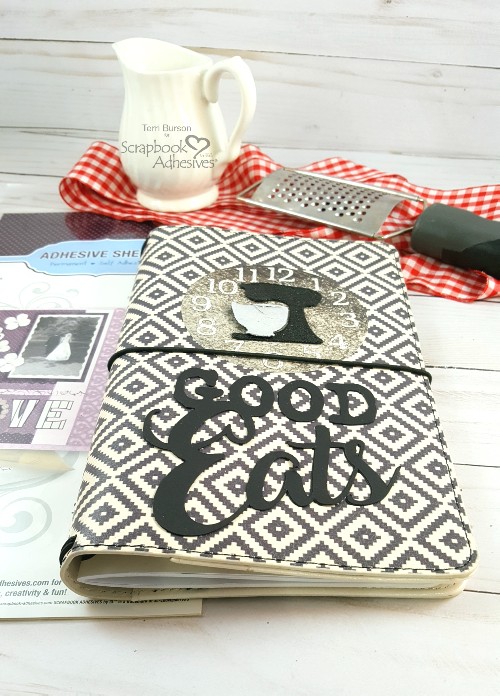
Travelers notebooks are a great way to document life moments in a convenient diary-style format. Although this journal cover is designed to chronicle my teenager’s culinary adventures, the theme works perfectly for documenting your own food travels, weight loss journey or other diary usages. Hello, Terri here, sharing ideas to help you create a fun, themed cover for your special journey!
Themed Elements for Your Travelers Notebook
No matter the topic of your journal, you’ll want to tie everything together. Since I have a teenager involved in the culinary world, I’ve been slowly building a little nest egg of food themed craft supplies, many of which are featured in today’s project. My “clock” represents setting the timer and also, the timed cooking competitions that he participates in. I chose the words “Good Eats” to represent the various recipes and food adventures that will be chronicled here, as well. Lastly, I’m using food themed designer papers and die cuts for added “spice”!
Die Cutting with Adhesive Sheets
Today’s project features the Adhesive Sheets 6×12 in for my paper clock background, the clock numbers and the sentiment. Whether using a hand crank or electric die cut machine, you’ll love the versatility of the entire adhesive sheets product line. Keeping in mind that my TN journal is 5″ x 8.25″, I’ve designed all my elements accordingly.
Here’s a quick run-down of my element dimensions:
- 3.5″ Circle for clock
- 1/2″ numbers for clock
- 4″W x 3.5″H Sentiment
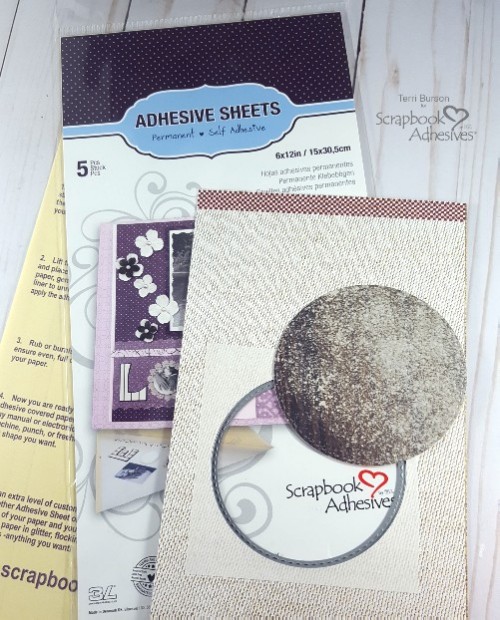
Place a 4″ section of the adhesive sheet to the back of your designer paper, then die cut your circle, peel backing and apply to upper half of journal.
Embellish Your Die Cuts
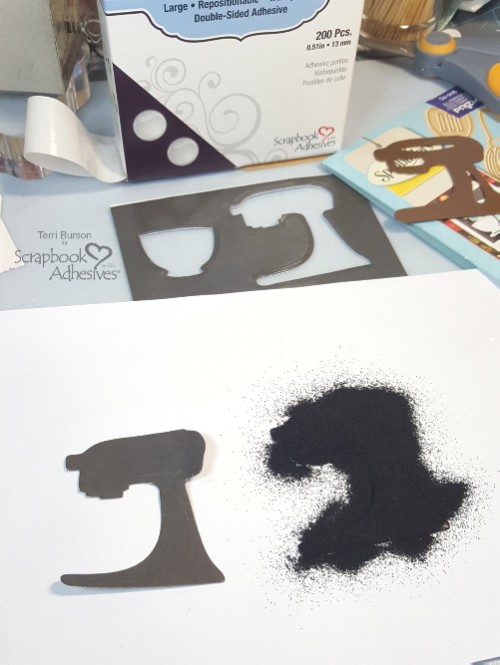
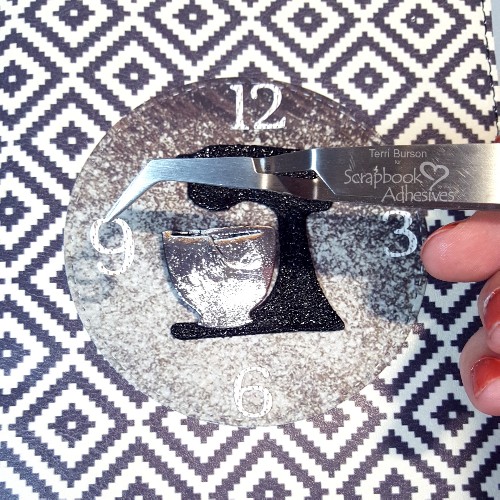
Next, use the black sheet from the 3D Foam Creative Sheets to cut images from the Spellbinders What’s Cookin’ die cut set with your table top die cut machine. For the bowl, peel the top lining off, then apply silver foil from the 3D Foam Creative Embellishment Kit, shiny side up. Gently rub and peel lining. For the mixing blender die cut, I stabilized my die cut with one of the dots from the Adhesive Dots Large Repositionable, placing it on the backing. Next, peel the top lining, and sprinkle with black embossing powder. Tap off excess and heat with a craft heat tool. Peel the back lining on both die cuts and adhere to center of the circle. A great way to Wear Your Adhesive On The Outside!
I used my electric die cut machine with the adhesive sheets for the numbers and sentiment. For the die cut numbers, peel adhesive backing, then place your numbers at the 15 minute mark first, to better center the rest of your numbers. Cut your sentiment in the same manner and adhere to the lower portion of your journal. I actually, cut two sets of the adhesive sentiments and stacked them for more dimension.
I’m so happy with how my cover turned out. Hopefully, I can show you some journal pages in the future, once we start documenting, which will be very soon; my teen is headed to the FCCLA National Competition in Atlanta this summer!
Be sure and visit my blog for the full product list.
See you next time! Terri
Scrapbook Adhesives by 3L®:
3D Foam Creative Embellishment Kit
3D Foam Creative Sheets
Adhesive Sheets 6×12 in
Adhesive Dots Large Repositionable
Other:
Carpe Diem travelers notebook, die cut machine, steel dies, black cardstock, Kaisercraft Bon Appetit papers, black embossing powder

By Deena Canup April 8, 2018 - 9:03 am
Lovely!! I have been wanting to try out the adhesive sheets, especially for my intricate die cuts.
By Terri Burson April 9, 2018 - 4:07 pm
Thanks so much Deena. You will LOVE the adhesive sheets!