
Hi crafters! Valerie here today, and I’d like to show you how to create two cards out of a single piece of patterned paper. These Happy and Hello cards are so easy to make for any occasion!
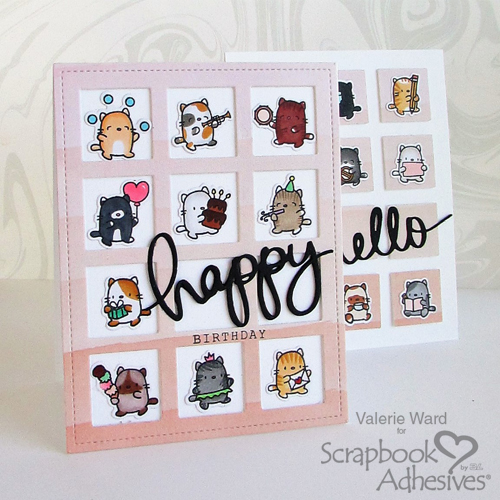
2 Cards from One Sheet of Paper
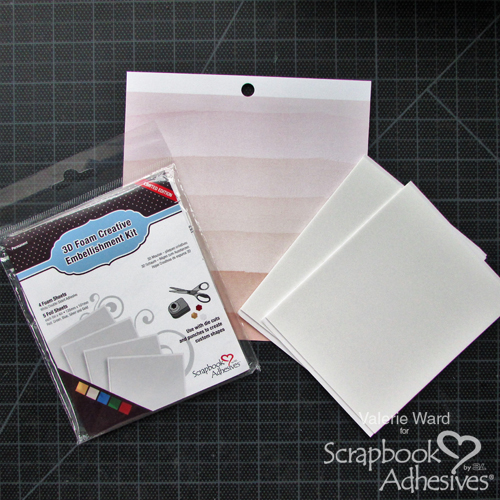
First, select a sheet of patterned paper. Get out two 3D Foam Creative Sheets or the 3D Foam Creative Embellishment Kit:
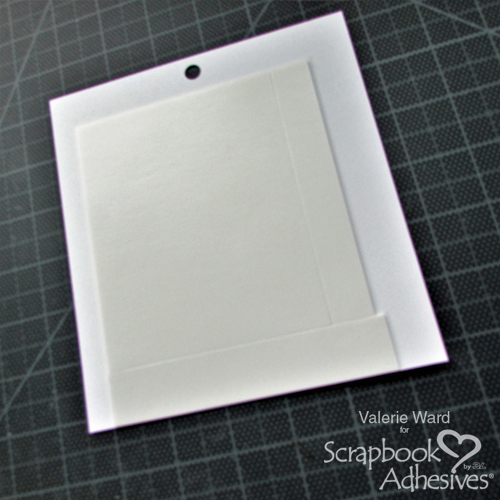
On the back side of the patterned paper, adhere a full 3D Foam Creative Sheet, and then trim the second sheet and add it at the side and the bottom of the first piece of Creative Sheet, to make it big enough to fit the die you’ll be using.
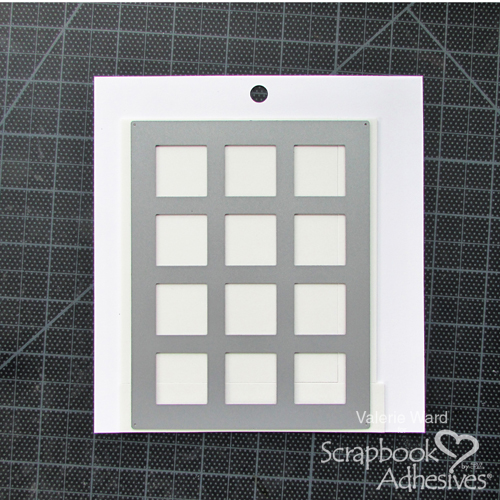
Position the grid die on the front of the patterned paper and die cut.
Note: THIS IMAGE SHOWS IT APPLIED OVER THE TAPE, BUT YOU ACTUALLY NEED TO LAY THE DIE OVER THE FRONT OF THE PAPER
Here are the pieces you’ll get:
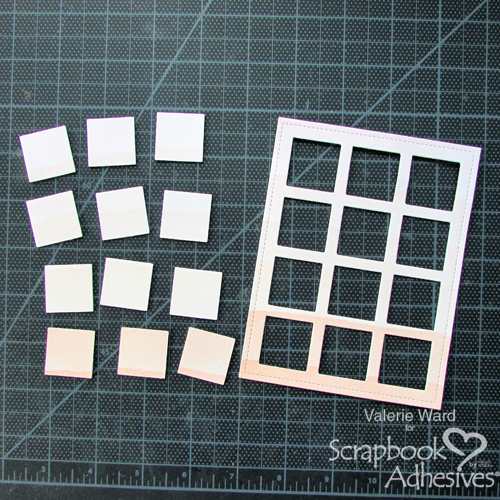
The rest is very simple! Peel off the liner from the pieces to reveal the adhesive of the 3D Foam Creative Sheets. Now just adhere the pieces onto the card fronts!
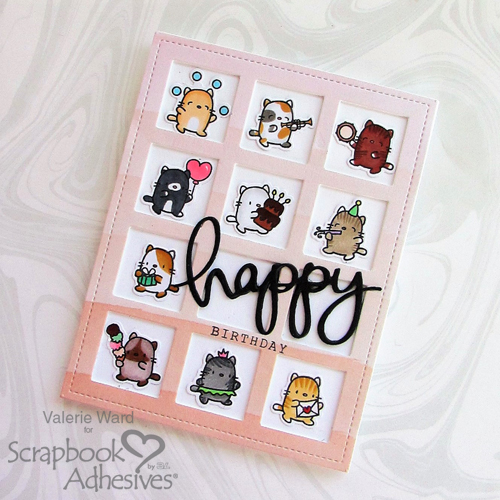
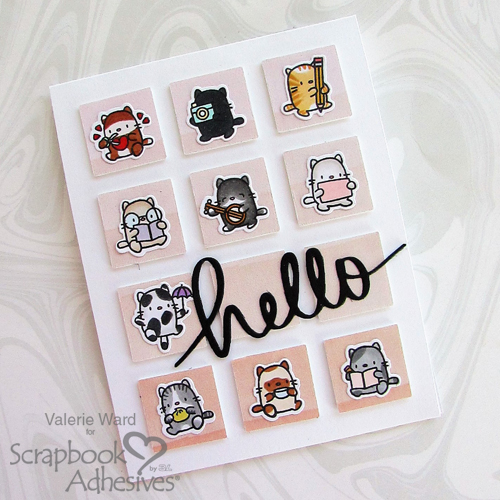
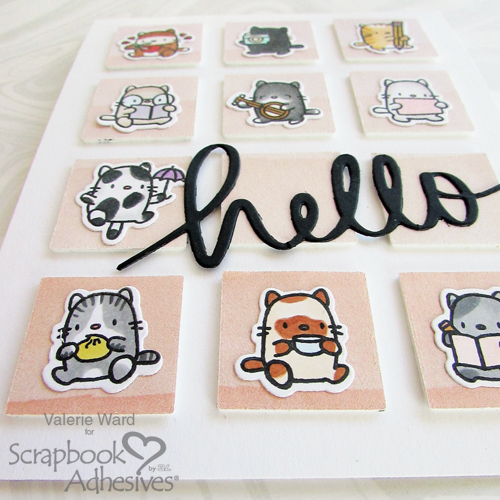
Stamp, die cut and color some small images, here I have cute kitties. They’ll fit inside the die cut frame.
I used my E-Z Runner Permanent Fine Adhesive Dispenser to adhere the cute kitty images.
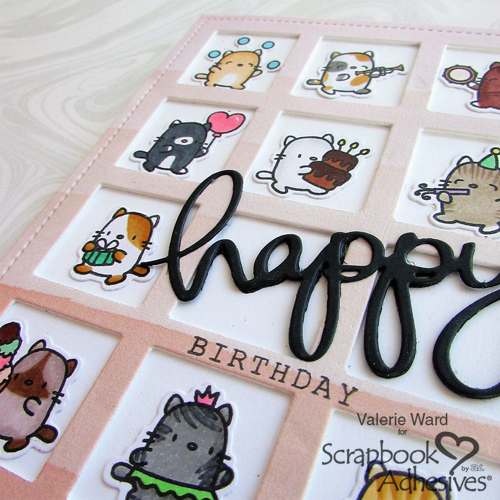
Stamp, color and die cut another set of images. Adhere them to the squares and arrange them on a card front. You can use the die to line up the squares precisely.
I used a black paper to die cut the sentiments. Glue them with the Dual Tip Glue Pen. It has a fine tip that lets me get just enough clear glue on intricate embellishments without adding to much!
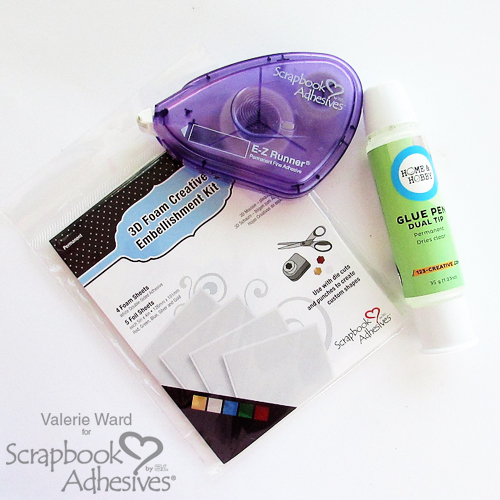
These are the three Scrapbook Adhesives by 3L products I used for this simple project:
I hope I was able to inspire you today! Have a wonderful day, and happy crafting!
Valerie
- Creative Time: 30 minutes
- Skill Level: Beginner
Materials Needed:
Scrapbook Adhesives by 3L®:
E-Z Runner Permanent Fine Adhesive Dispenser
3D Foam Creative Embellishment Kit
HomeHobby by 3L®:
Dual Tip Glue Pen
Visit these other all occasion cards by clicking on them:
 Hello Sunshine Card |
 Hello Rose Card |
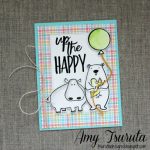 Up the Happy |