
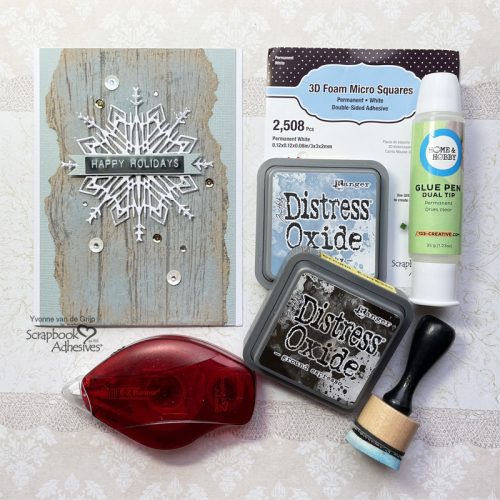
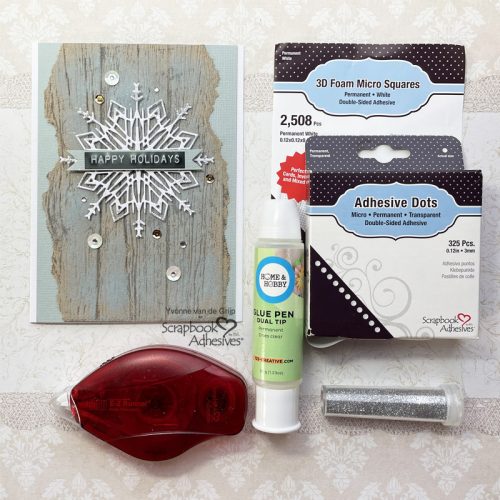
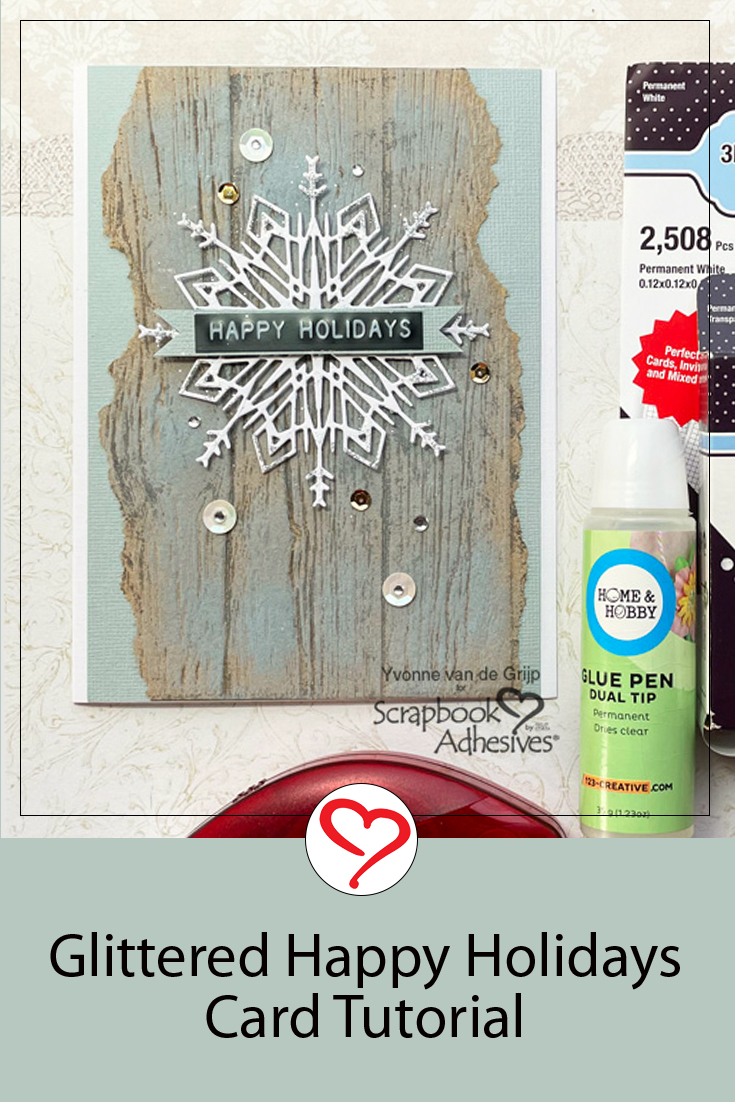
Hi everyone, Yvonne here with a glittered Happy Holidays card. With the countdown to Christmas and a little more than a month to go, it’s time for some Christmas card inspiration. And what is more fun than adding glitter to a festive card?
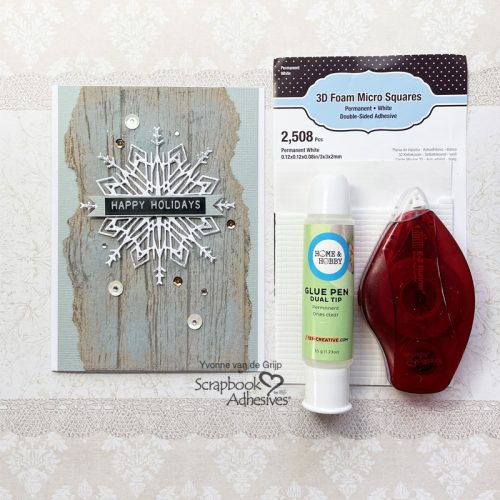
With the Dual Tip Glue Pen, it’s super easy to add that glitter touch. And the 3D Foam Squares Micro White are great for detailed adhering with a 3D effect. Wanna join me in making my card? Let’s get started!
Happy Holidays Card Panel
Start by tearing a piece of kraft cardstock. Then ink a wood pattern embossing folder on the top inside using dark brown ink. Note: the inked side is to be inking the front side of the card panel.
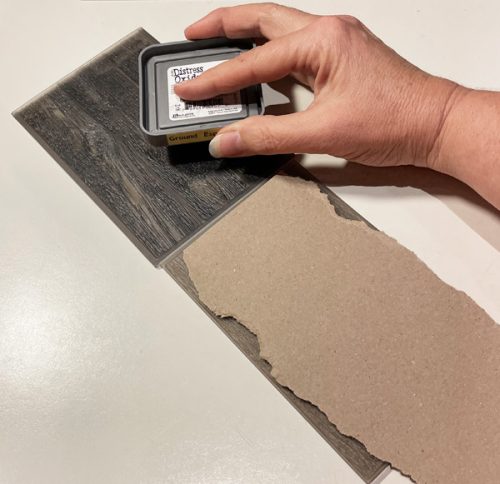
Next, run the embossing folder through your die-cutting and embossing machine using the sandwich recommended by its manufacturer. Now remove the embossed cardstock and let the ink dry.

Next use a grey/blue ink pad and an ink blending tool to color the card panel softly.
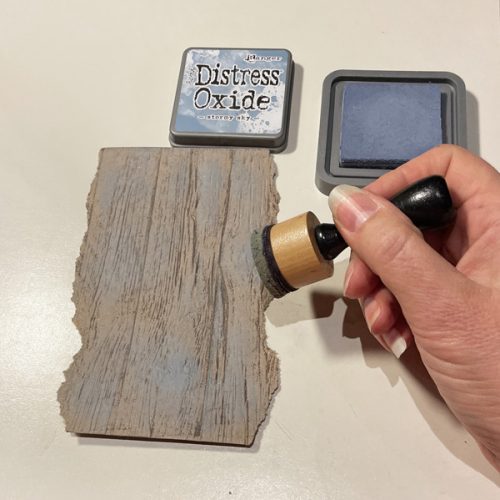
This creates the look of an old wood plank. Isn’t that a fun effect?
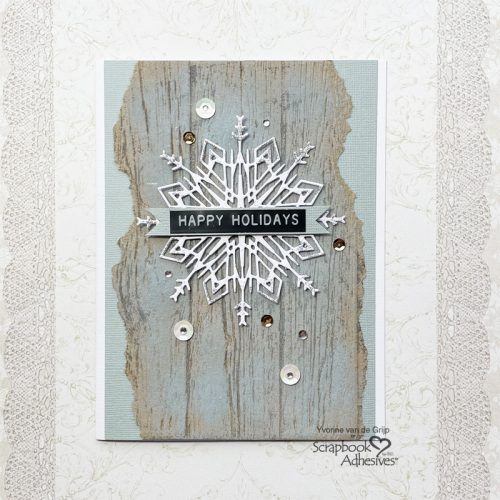
Making the Card Base
Trim the top and bottom sides of the embossed and inked card panel. Then adhere to a grey card panel using the E-Z Runner® Permanent Strips Refillable Dispenser.
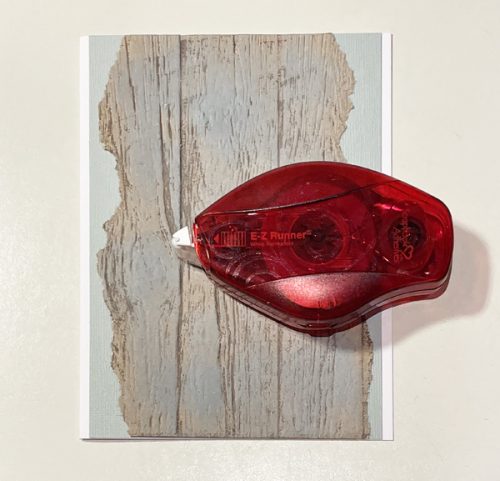
And then adhere to a white card base using the E-Z Runner® Permanent Strips Refillable Dispenser.
Making the glittered Snow Flake
First die-cut a snowflake from white cardstock. Then rub a little glue from the Dual Tip Glue Pen over the edges of the snowflake.
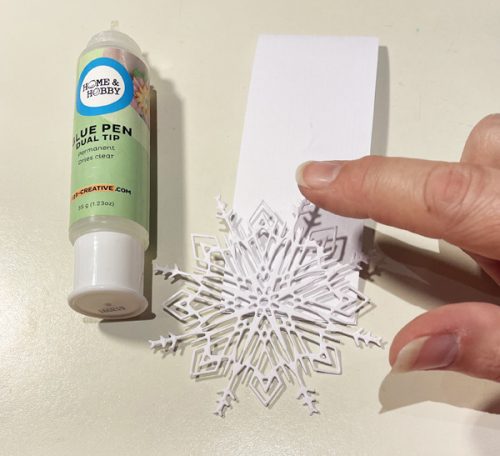
Next, dip the edges into silver glitter and tap off any excess glitter. Now let dry. Adhere the glittered snowflake onto the card base using 3D Foam Squares Micro White.
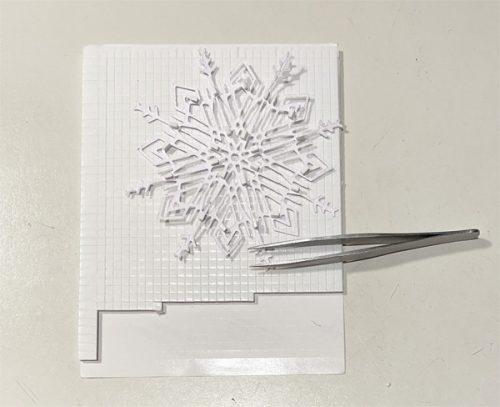
Since the snowflake is very detailed I cut the 3D Foam Squares Micro White in half so no adhesive will stick out from under the snowflake shape.
Embellishing the card
First, adhere a sentiment sticker onto a banner cut from grey cardstock. Then adhere to the card using 3D Foam Squares White Mix. Next, adhere some sequins onto the card using Adhesive Dots Micro for adhering. For a finishing touch adhere some rhinestones onto the card.
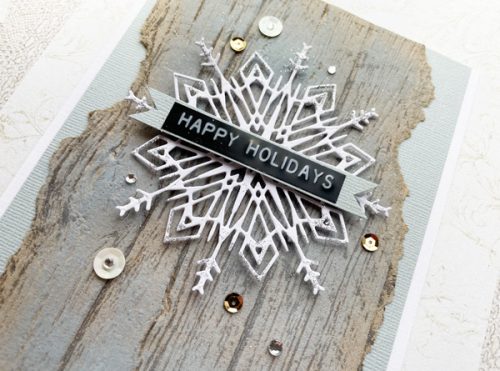
And voilá, the glittered happy holidays card is ready to be sent!
Wishing you happy holiday crafting!
Yvonne van de Grijp
Creative Time: 40 minutes
Skill Level: Intermediate
Materials needed:
Scrapbook Adhesives by 3L®
E-Z Runner® Permanent Strips Refillable Dispenser
3D Foam Squares White Mix
3D Foam Squares Micro White
Adhesive Dots Micro
HomeHobby™ by 3L
Dual Tip Glue Pen
Other
Cardstock (White, Grey, Kraft); Embossing folder (Sizzix: Tim Holtz: 3D Texture Fades: Lumber); Etched dies (Sizzix: Tim Holtz: Thinlits Flurry#1); Die Cutting and Embossing Machine (Spellbinders Paper Arts: Platinum 6 Machine); Inkpads (Distress Oxide: Ground Espresso, Stormy Sky; Inkblending Tool; Sentiment (Tim Holtz Label Stickers Christmas); Silver Glitter; Craftknife; Paper Trimmer
Save to Pinterest!
Visit our Website and Blog!
Sign up for our Newsletter so you never miss a contest or giveaway!


