
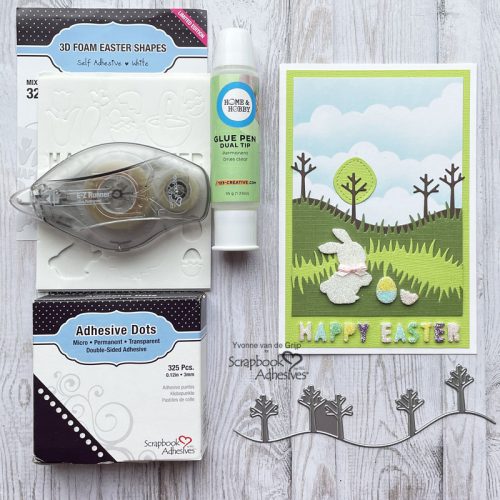
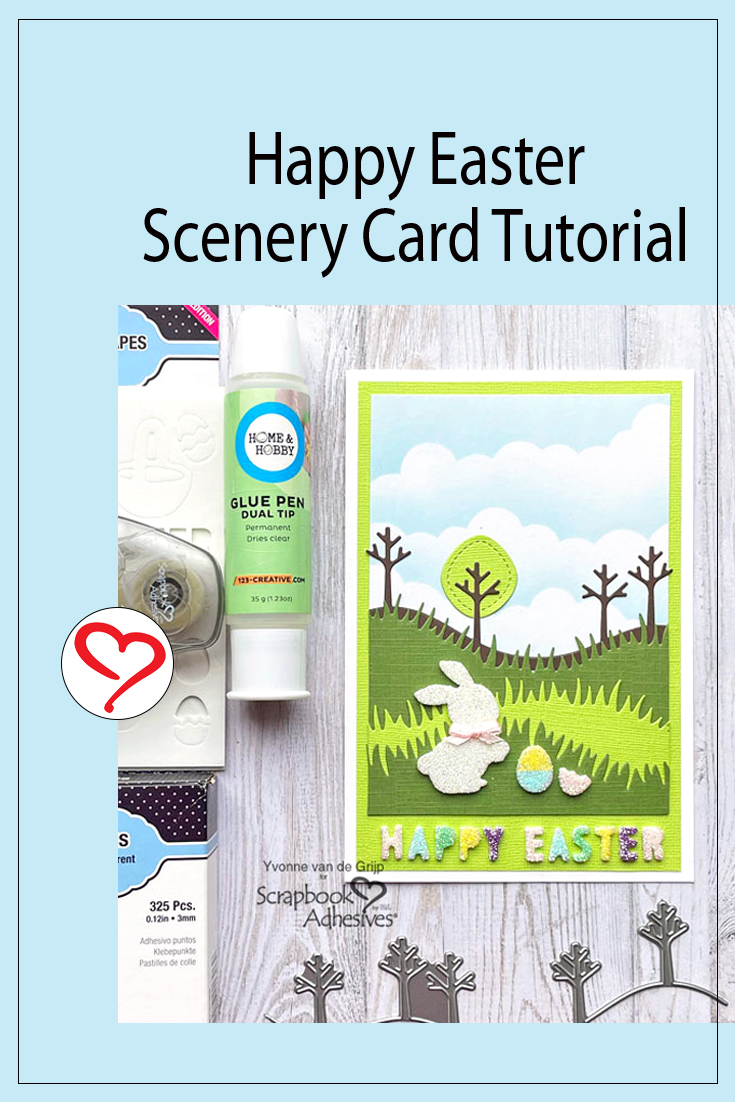
Hi everyone, Yvonne here sharing a fun and sweet Happy Easter Scenery Card. Glitter and 3D Foam work so well together so why not put them together featuring the 3D Foam Easter Shapes? It’s super easy to create to come up with this cute Easter bunny card. I would love to share how I created my card. Shall we get started?
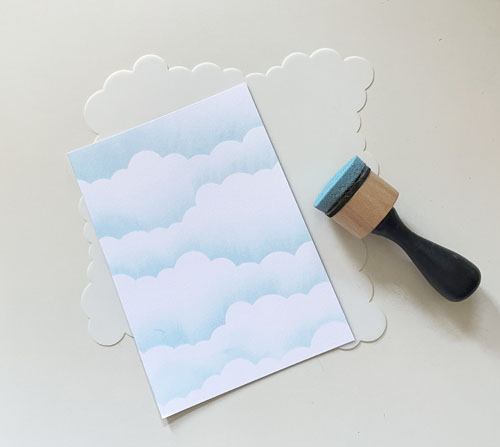
Easter Scenery Cloudy Card Panel
First trim a piece of white cardstock to a rectangle cardpanel. Then use a cloud stencil to create a cloudy background for the Happy Easter Card. Hold the stencil over the cardpanel and use an inkblending tool and soft blue ink to create a cloud- line. Then repeat untill the panel is fully covered with clouds.
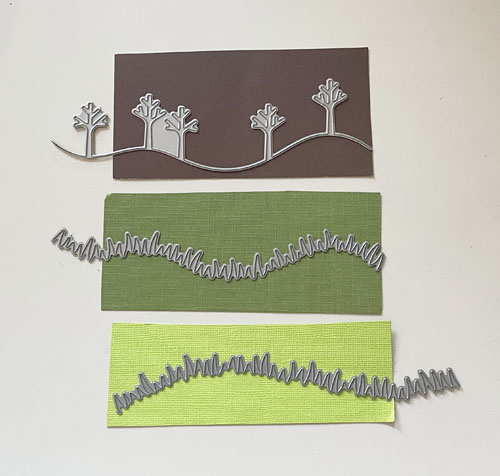
Creating a Scenery
To create a scenery for the Happy Easter Card, die-cut trees from dark brown cardstock and grass borders from green cardstock.
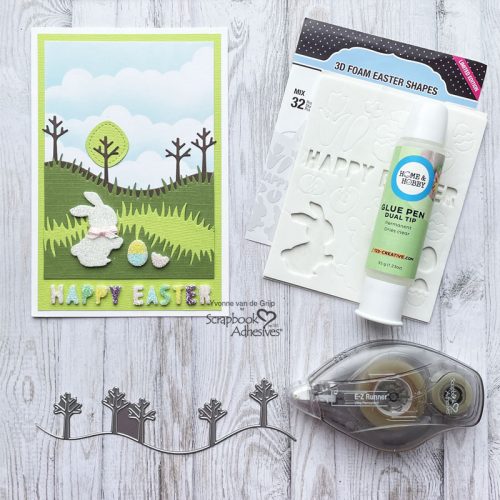
Next adhere the elements onto the top card panel using the Dual Tip Glue Pen as your adhesive. It’s fine tip is perfect for precise adhering!
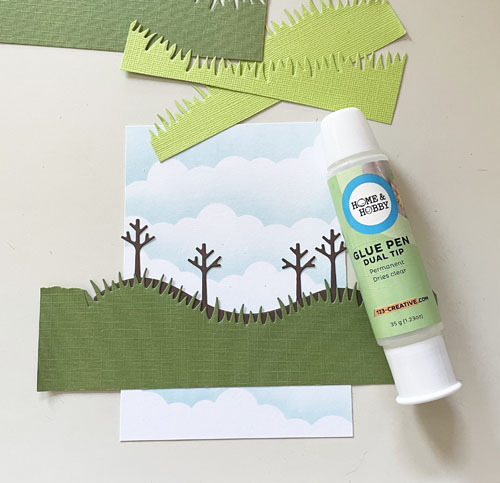
Let dry and cut of any parts sticking out of the card panel.
Making the Card Base
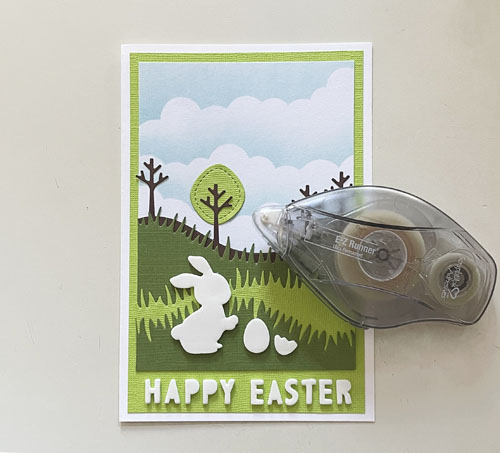
First adhere the scenery card panel onto a green card panel using the E-Z Runner® Ultra Strong Refillable Dispenser. Make sure you leave space for adhering the text on the bottom. Then adhere onto a white card base.
3D Foam Bunny Fun
Now the 3D Foam fun starts… all you need is the 3D Foam Easter Shapes! Start by adhering the bunny and eggs onto the the card and leave the top liner on.
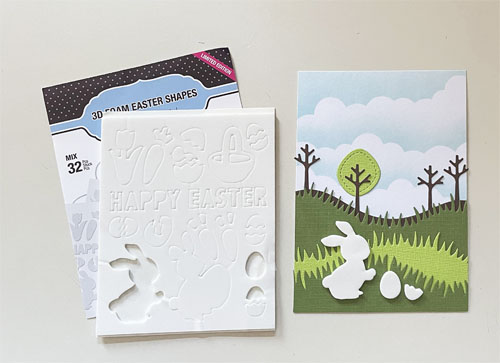
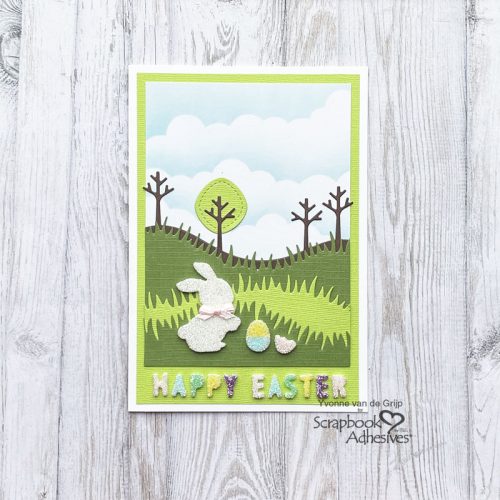
Then remove the liner of the bunny and sprinkle white glitter upon. Rub the glitter over the bunny and tap off any excess glitter. To create a dual color Easter egg I used a craft knife to cut the top liner in half and peeled of only half of the top liner, ten sprinkled glitter upon and used a different color glitter for the bottom part of the Easter egg.
Making the Card Base
First adhere the scenery card panel onto a green card panel using the E-Z Runner® Ultra Strong Refillable Dispenser. Make sure you leave space for adhering the Happy Easter text on the bottom. Then adhere onto a white card base.
Rainbow Text
First adhere the Happy Easter text from the 3D Foam Easter Shapes onto the card. Then, to create a lovely rainbow effect for the Happy Easter Card I peeled of the “H” and sprinkled pink glitter upon. Next rubbed the glitter over the “H” for secure adhering. Now tap off the excess glitter. Repeat with the rest of the text and use different colors of glitter.
Finishing Touch
For a finishing touch I adhered a cute little satin bow and used Adhesive Dots Micro for invisible and stainless adhering. Voilá, your Happy Easter Card is ready! I hope you enjoyed this tutorial and wish you Happy Easter crafting!
Creative Time: 40 minutes
Skill Level: Intermediate
Materials needed:
Scrapbook Adhesives by 3L®
E-Z Runner® Ultra Strong Refillable Dispenser
Home Hobby™ by 3L:
Other Cardstock (White, Green, Brown); Die-Cutting and Embossing Machine (Spellbinders® Paper Arts: Platinum 6 Machine); Etched Dies (Lawn Fawn: Stitched Trees Border, Grass Hillside Borders); Stencil (My Favorite Things: Mini Cloud Edges); Glitter (Pink, White, Green, Yellow, Blue, Purple); Satin Bow; Inkpad (Ranger: Distress Oxide: Tumbled Glass); Ink Blending Tool; Scissors; Paper Trimmer
Save to Pinterest!
Visit our Website and Blog!
Sign up for our Newsletter so you never miss a contest or giveaway!


