You are in our US store • Switch to Europe store

Origami Wall Art with Adhesive Sheets

Hi! Dana here today sharing how to create a piece of 3D origami wall art for the home. Did you know that Adhesive Sheets come in 3 sizes? Strong, clear, permanent edge-to-edge adhesive coverage is available in 4×6-inch, 6×12-inch, and 12×12-inch sheets! I went big with this project and created artwork using an entire 12×12 Adhesive Sheet.

Origami Wall Art with Adhesive Sheets by Dana Tatar for Scrapbook Adhesives by 3L

I chose map print patterned papers for this project. While these papers were purely decorative, I think it would be a fun way to remember a great vacation and use maps from a favorite travel destination. I folded up 132 4×4-inch pieces of patterned paper for this piece of wall art that measures just over 12×12 inches.

How to Create 3D Origami Wall Art

I find that I can learn new techniques much faster visually, so I created a process video.

Not all of my paper folds were perfect, and as a result, my finished piece did not fit together as tightly as I would have liked. If you have a similar problem, it is OK!

Origami Wall Art with Adhesive Sheets by Dana Tatar for Scrapbook Adhesives by 3L

I fixed this problem with embellishments. The new 3D Foam Circles were the perfect way to secure small cork circles to the center of each hexagon shape.

I hope I have inspired you to use paper to create a fun home décor piece! If you would like to see how to use Scrapbook Adhesives by 3L products to create 3D home décor that can sit on a shelf, click over to my previous post about how to create a 3D Paper Cactus Trio.

Thanks for stopping by today!
~Dana Tatar

Creative Time: 120 minutes
Skill Level: Intermediate

Materials Needed
Scrapbook Adhesives by 3L®

Adhesive Sheets 12×12 Inch
3D Foam Circles White Mix
Adhesive Dots Medium Ultra Thin

Other
Map Print Patterned Paper (Pepin van Roojen); Cork Circles (Recollections); Cardboard

Find more Wall Art inspiration on our blog, click the links below, or on our Home Decor Pinterest Board


Pin It!

Origami Wall Art with Adhesive Sheets by Dana Tatar for Scrapbook Adhesives by 3L Pinterest


Easter Card using Paper Piecing with Adhesive Sheets

Hi everyone, Christine here with an Easter card using Adhesive Sheets 4 x 6″ and paper piecing. Find out how to use up scraps to make this lovely card.

Our Easter here in the UK is spread across the full four-day holiday weekend so I make sure I have a good supply of cards (and chocolate eggs).  Having a speedy card design is perfect!

Easter Paper Piecing Card by Christine Emberson

 Paper Piecing with Adhesive Sheets

Firstly, I delve into my scrap box for various colored pieces of cardstock.  Take off the top liner sheet of a 4×6-in Adhesive Sheet and apply cardstock on to it. I find this size of Adhesive Sheet is perfect for using up my smaller card and paper scraps.

Now die cut with your chosen dies. Do this again with the various colors of cardstock.  Each die cut (and fallout piece) now has a layer of permanent adhesive with edge-to-edge coverage, this makes paper piecing perfect.

My card base has an aperture that I am going to place a design into. I affix two white cardstock mats with the E-Z Runner Grand® Refillable Dispenser.

Next, position and affix the flower die cut to the mat, just a little pressure and it’s fine. I’ve also die cut a further flower from silver mirror card to act as a drop shadow behind.  Using your fall out pieces, begin to paper piece.

Use a pokey tool to help placement, the die cuts will slot into place and because of that adhesive sheet backing, they will stay there!  This is the relaxing part.

Once my design is completed with all paper piecing, I used Crafty Foam Tape White on the reverse to insert inside the card aperture.

Lastly, add a few more of the flower die cuts in white cardstock for the base of the card to finish and a stamped sentiment.

 How to use Adhesive Sheets Video


Thanks for stopping by today. Don’t forget to check out all the great products on the website.Christine

Scrapbook Adhesives by 3L® Products used:
Adhesive Sheets 6″ x 4″
E-Z Runner Grand® Refillable Dispenser
Crafty Foam Tape White
Others:
Dies: Spellbinders Paper Arts (Dainty Florals, 6×6 Matting Basics)
White, Green, Pink Cardstock; Pearls; Silver Mirror Card; Creative Expressions Lavish Sentiment Stamp.

Find more Easter inspiration on the blog!

DIY Easter Craft Ideas and How-to Instructions

Easter Card Featuring Foil and Personalizing Tips

Did you know the Easter egg has special meaning?  Although Easter eggs are especially fun for children, egg hunts and Easter baskets, it also represents the Resurrection of Christ.

Hello, Terri here, with an Easter Egg card that features foil, adhesives and creative ways in personalizing your card.

Easter Card Featuring Foil and Personalized Tips by Terri Burson for Scrapbook Adhesives by 3L

Personalizing an Easter Egg Card: Hand Cut versus Die Cut

If you don’t have shaped metal dies for this project, fear not. Draw your own images and hand cut!  It doesn’t get any easier than drawing an egg, so give it a try. Mine is approximately 3 inches and layered with various ink and splattered with acrylic white paint. You can also use pretty patterned paper, if you prefer. For the cross, use a ruler and trace onto the sticker backing of a foam sheet from the 3D Foam Creative Embellishment Kit. Make it a little larger than the egg, then trim the edges.  Lay silver foil on the foam cross, shiny side up, gently rub and peel back the lining.

Other Creative Ways to Embellish

To enhance and give dimension to the card edges, use the Creative Photo Corners Kraft and the brand new 3D Foam Circles Black Mix, heating the top with black embossing powder. For a little sparkle, tap tiny dots of glue from the Dual Tip Glue Pen onto the egg, sprinkling with extra fine glitter. There are so many ways to Wear Your Adhesive On The Outside!

Finish with a Phrase or Sentiment

If you don’t have lettering skills, simple handwriting looks great too!  Just pick your favorite phrase or quote and hand write plain or cursive, but take your time.  Don’t rush!  I’m using lyrics from an old hymn for my quote.  A nice sentiment works as well if you prefer to stamp or add a die cut phrase.  Lastly, adhered the panel to a black top-fold card with the E-Z Runner® Grand Refillable Dispenser.

I’ve had several friends ask how I previously made this galaxy background. I hope to do a video soon, so be sure you’re following me on social media if you’re interested in this.

Check out this blog post for more Easter inspiration

DIY Easter Craft Ideas and How-to Instructions

Scrapbook Adhesives by 3L®:
3D Foam Creative Embellishment Kit
E-Z Runner® Grand Refillable Dispenser
3D Foam Circles Black Mix
Creative Photo Corners Kraft

HomeHobby by 3L®:
Dual Tip Glue Pen

Other:
Fine-tip scissors, black cardstock, white mixed media paper, calligraphy pen, glitter, black embossing powder, trimmer.

Scrapbooking Spring with 3D Foam Circles

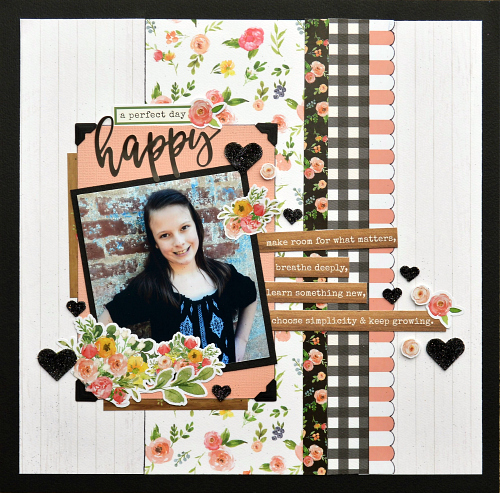
Spring is finally here! It’s Christine, I’m so happy the weather is warming up. My layout today features spring colors and a bit of sparkle and dimension from the new 3D Foam Circles. Join me as I walk you thru how I used them and 3D Foam Squares both on the same scrapbook layout but for very different reasons!

Scrapbooking Spring with 3D Foam Circles and 3D Foam Squares by Christine Meyer for Scrapbook Adhesives by 3L

Using 3D Foam Circles

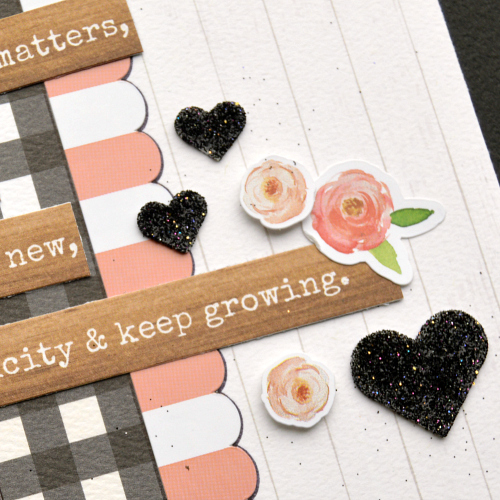
I used the 3D Foam Circles as an embellishment on my clouds. After securing them in both sizes (1/2-inch and 1/4-inch circles come in each package) I sprinkled them with glitter. They have permanent adhesive on both sides, which makes this step quick and easy. Glitter adds sparkle and dimension to an otherwise simple piece of white cardstock.  But can you imagine using 3D Foam Squares for this?!? It totally would not work!


Adding glitter to these is just one way you can use them as embellishments!  You can also add microbeads, embossing powder (yes, they can be heat embossed), flocking, and so much more!

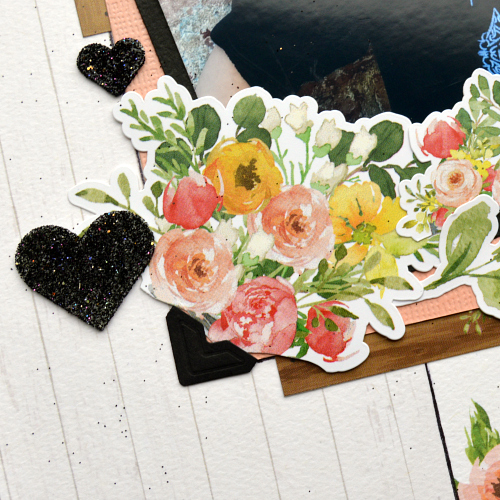
I used the 1/4-inch 3D Foam Circles under some of the flowers as well! They’re the perfect shape and I have no square edges to trim! To adhere the tiny sequins I pulled out my Mini Adhesive Dots.

For both the banner title and the banner subtitle I used 3D Foam Squares.  Although the circles would have worked, the 3D Foam Squares cover a little more surface area so they are ideal for embellishments without the round or curved edges.

The rest of the scrapbook page is secured with my E-Z Runner® Grand.

Not only do great adhesives make your paper craft projects go more smoothly but they also can help add to the beauty of your project.  Be sure to check out the new 3D Foam Circles today and keep an eye out for a variety of ways to be using them!

Thanks for stopping by today!

Christine

Supplies from Scrapbook Adhesives by 3L®:
E-Z Runner® Grand Refillable Dispenser
Adhesive Dots Mini
3D Foam Squares White Mix
3D Foam Circles White Mix

Other Supplies: March Kit from The ScrapRoom Kit Club, Sequins: Spiegelmom Scraps

Thank You So Much Card with Adhesive Sheets

This Thank You So Much card is what I call a “scrap” card. What does that mean? Well, I use bits and pieces of leftover die cuts and papers – you never waste anything! LOL!

Hi everyone!  Judy here today to share my “go to” technique when I need a card in a hurry and to use up some leftovers in my box.

Thank You So Much Card with Adhesive Sheets by Judy Hayes for Scrapbook Adhesives by 3L

Making my Thank You card

I found the circle, flower, branch and embossed heart in my box of scraps. All leftovers too good to throw away! With a scrap of red cardstock on my work table, I applied Adhesive Sheets 4 x 6 inch to the back and die cut the thank you verse.  The little branch already had Adhesive Sheets applied to it so that was ready to go.  Next, I added glitter to Adhesive Dots Medium for the flower center.  So easy!

To assemble this Thank You So Much card, I used E-Z Dots® Permanent Refillable Dispenser to fasten the circle to a white card.  For the embossed heart, I fastened with E-Z Runner® Ultra Refillable Dispenser. Since the Ultra adhesive is a very strong adhesive, it was especially good for the embossed heart which isn’t flat.

I peeled Adhesive Sheets backing from “Thank You So Much” die cut and placed it over heart and circle.

Tip: use the heating tool to warm the intricate sentiment a bit after it was in place and pressed it well so the adhesive would stick better to the embossed heart.  Repeat the same step with the branch.  Lastly, the flower is fastened with  Adhesive Dots Medium.

Thank you so much for stopping!  Have a creative day!
Judy Hayes

Scrapbook Adhesives by 3L®:
E-Z Dots® Permanent Refillable Dispenser
E-Z Runner® Ultra Refillable Dispenser
Adhesive Dots Medium
Adhesive Sheets 4 x 6 inch

Other: Cardstock (Red, Brown, White, Kraft), DecoArt® Metallic Lustre, Distress Glitter, Penny Black (So Many Thanks), Sizzix Holiday Greens, Spellbinders (Cinch and Go III, Heart Felt, Standard Circles LG, Cane Weave Embossing Folder)

Find more Adhesive Sheets instruction and inspiration!

How to Use Adhesive Sheets


National Tolkien Reading Day Carousel Card

Hello, fellow book lovers! Dana here with you to celebrate National Tolkien Reading Day! According to the National Day Calendar, this day was started by the Tolkien Society to encourage the readings of J.R.R. Tolkien. This specific date honors the fall of Sauron in Tolkien’s The Lord of the Rings. I know I won’t be able to read an entire Tolkien book in one day. I created a carousel card to hold some of my favorite inspirational quotes from the author, which is a much more manageable read.

J. R. R. Tolkien Quotes Carousel Card with EZ Runner Grand by Dana TatarIt is important to select the right adhesives when creating cards with movable parts or small books. My two favorites, and what I chose for this project, are the E-Z Runner® Grand Permanent Dots and Extreme Double-Sided Tape. My favorite feature of the Permanent Dots is that the dots are initially removable with just a swipe of the finger after which they become a permanent bond. This allows me to apply adhesive to small areas, like the points of triangles, very easily. I used the Extreme Double-Sided Tape to secure the ribbon to this card. I know that I will be able to pull on the closure of this book without worrying about the ribbon releasing.

Tolkien Carousel Card From Every Angle

J. R. R. Tolkien Quotes Carousel Card with EZ Runner Grand by Dana Tatar J. R. R. Tolkien Quotes Carousel Card with EZ Runner Grand by Dana Tatar J. R. R. Tolkien Quotes Carousel Card with EZ Runner Grand by Dana Tatar J. R. R. Tolkien Quotes Carousel Card with EZ Runner Grand by Dana Tatar

This is such a fun card! I love that the inner pages of the card pop up to create a 360-degree experience. If you can’t decide on one favorite quote, a design like this has room for eight.

J. R. R. Tolkien Quotes Carousel Card with EZ Runner Grand by Dana Tatar

Here is a view from the top of the card. There is plenty of space to add journaling on the triangle shaped areas to take this design away from a card and use more for a small art journal.

I hope I have inspired you to create something fun. If you’d like more information about how to assemble this card design, please stop by my blog for a link to the tutorial I used as a guide.

~Dana Tatar

Scrapbook Adhesives by 3L Supplies:
E-Z Runner® Grand Refillable Dispenser
E-Z Runner® Grand Permanent Dots Refill
Extreme Double-Sided Tape 1/4″

Other Supplies: Carousel Card Template (Sandibella); Patterned Paper: Harmonie (Cover), Rose Moka (Brown), Lucky7 Factory (Green); Letter Stickers (Jillibean Soup); Enamel Dots (My Mind’s Eye); Ribbon; White Cardstock

Pin It!

J. R. R. Tolkien Carousel Card Quote Book by Dana Tatar for Scrapbook Adhesives by 3L

Mixed Media Birthday Card

I have a mixed media birthday card to share. It uses a little bit of everything – my eclectic birthday card 😉

Good morning! Michele here with my last post for Scrapbook Adhesives.  Loved being a part of such a talented design team and working with such sweet “bosses!” (Thank you, Michele, for sharing your wonderful +inspiring projects with us! We will miss you xo).

Mixed Media Birthday and a Fond Farewell by Michele Kovack for Scrapbook Adhesives by 3L

Mixed Media Birthday Details

With the background, I did a bit of inking on a piece of white cardstock card panel. Then I stamped my image and sentiment in black.  For some fun elements, I used a stencil and vibrant inks for the bottom piece.  To add interest, I used a scalloped die to cut it out.  It was placed on top of my stamped pieces using…you guessed it,Crafty Foam Tape!. It is such an easy way to add dimension to any project!

I used E-Z Squares® to adhere the peach cardstock to the yellow card base.  For the finishing touch, I slipped a wide ribbon around the scalloped piece and secured the bow with Adhesive Dots Medium.

Thank you all for your sweet comments and support over the last few years!  I will miss being a part of this incredible company, but I will still be around stalking the blog! 😉

Scrapbook Adhesives by 3L®:
E-Z Squares®
Adhesive Dots Medium
Crafty Foam Tape

Other:
Ink, Ribbon, Stamp, Scalloped Die, Cardstock

Spring Love with 3D Foam Hearts

With spring in the air, one cannot be but happy and full of love for new beginnings that the season brings! Add hearts (as in 3D Foam Hearts), lots of glitter and bright colors…well, that puts me in a happy place…lol!

Hello everyone, Yvonne here sharing a love themed card. It is easy to make such a card using 3D Foam Hearts and Craft Foils from the 3D Foam Creative Embellishment Kit. 3D Foam Shapes can create gorgeous dimensional effects on your cards on its own or by stacking them to add an even extra layered element to your project.

Spring Love with 3D Foam Hearts by Yvonne van de Grijp for Scrapbook Adhesives by 3L

Creating a Heartful Spring Card

On a square kraft card base, layer two panels of white and corrugated cardstock. Adhering both with the E-Z Runner® Grand Refillable Dispenser.

Then let’s start embellishing the card front with 3D Foam Hearts.

For the pink stacked hearts:

  • Remove the top liner of the Large Foam Heart and place a Small Heart (leave top liner on) on top.
  • Repeat this with a Medium Foam Heart and place a Small Heart (leave top liner on) on top.
  • Sprinkle pink glitter onto the Large and Medium Hearts and gently rub the glitter into them to secure.
  • Tap off the excess glitter or use a soft brush.
  • Remove the top liner off the Small Hearts and apply Red Craft Foil from the 3D Foam Creative Embellishment Kit (red side UP). Rub gently and peel away.

For the gold glittered and other hearts:

  • Remover the top liner of the Medium Foam Heart and Small Foam Heart and sprinkle gold glitter on top. Again, gently rub the glitter into them to secure. Tap off excess.
  • Add self-adhesive rhinestone in the center of the Medium Foam Heart. Tip: just to make sure that it sticks to the rough surface, I used Adhesive Dots.
  • Add some more hearts using either glitter or foil – your choice.
  • Note I added embossing powder to the 3D Foam Hearts and melted it with a heat tool for another amazing effect. Yes, the foam is heat resistant!

Finishing Touches:

Cut a banner from black cardstock (which was heat embossed with a stamped sentiment)  and adhere to the card using Crafty Foam Tape Black. Then finish the card using some self-adhesive rhinestones.

I hope you enjoyed the instructions on how to make the card and wish you happy crafting!

Hugs from Holland,
Yvonne

Scrapbook Adhesives by 3L®:
E-Z Runner® Grand Refillable Dispenser
3D Foam Hearts
3D Foam Creative Embellishment Kit
Crafty Foam Tape Black

Other:
Quietfire Design (The Love We Give Away), Cardstock (kraft, white, black, corrugated), glitter, rhinestones, Versamark (Watermark Stamp Pad), WOW (Embossing Powder Opaque Bright White), self-adhesive Rhinestones, Paper trimmer, Tweezers

Working with Ribbon

Welcome back scrappy friends. Today I have a layout tutorial about Working with Ribbon.

When working with different ribbon, trims and fibers, finding an adhesive that works for them all could be a challenge. But NOT with Scrapbook Adhesives by 3L. Here are all of the sticky details:

Working with Ribbon

I created a simple mixed media background, starting with Stampin’ Up resist patterned cardstock. Using ink and a blending tool, I added colour to the edges of the cardstock. Then using a mister, I added colour to the middle of the layout. Then using coordinating misters, I added splatters across the middle of the layout.

Using Crafty Power Tape I added a couple of small strips in the middle of the layout where the photo will eventually cover, as well as long strips on the backside of this cardstock on the top and bottom. This strong adhesive is sure to keep all of your ribbons and trims in place.

I started by adding the wide ribbon knotted at the top and bottom, right up to the middle of the layout. Then added the next trims one by one crossing in the middle and widening with each new trim. Using Crafty Power Tape again, I added the white mixed media layer to the purple cardstock 12×12 layer.

I used circle dies to cut the photo and cardstock mat, and then adhered them together using my E-Z Runner® Permanent Fine Adhesive Dispenser. Then added 3D Foam Squares to the back and adhered the matted photo to the pink doily.

I added the doily and matted photo to the layout using multiple layers of Crafty Foam Tape to bring it up above the trims. Then add buttons and gems using Adhesive Dots Mini.

To finish the layout, I added a few stickers to suit the layout.

Scrapbook Adhesives by 3L®:
Adhesive Dots Mini
3D Foam Squares White Mix
E-Z Runner® Permanent Fine Adhesive Dispenser
Crafty Power Tape Dispenser 81′
Crafty Foam Tape White

Other:
Stampin’ Up Resist Cardstock, Stampin’ Up Ink, Blending Tool, Heidi Swapp Shimmer Misters, Buttons, Gems, Doily, Purple Cardstock, Ribbon and Trim

DIY Easter Crafts on Parade

DIY Easter Inspiration Right Here!

We have a wide range of Easter ideas and tutorials below! Are you getting ready for Easter but not sure where to start? Take a look at some of these creative DIY Easter crafts and tutorials from home décor to cards to cute baskets, and more! You still have time to make them!

Click on the images or text to go to the blog posts.

Easter Card by Margie Higuchi
Patchwork Easter Egg Cards by Connie Mercer Glittered Bunny Easter Card by Judy Hayes Foiled Easter Card by Terri Burson Hippity Hop Dimensional Easter Card by Margie Higuchi
Fab Easter Card by Tracy McLennon
Scrapbook Adhesives by 3L®; E-Z Runner® Petite Permanent Dots Refillable Dispenser; 3D Foam Squares Small Size; HomeHobby by 3L®; Extreme Double-Sided Tape 1/8in; Extreme Double-Sided Tape 1/4 in; Dual Tip Glue Pen; Yvonne van de Grijp; Home Decor; Easter, Papercraft; Tutorial
Ephemera Bunny Caddy by Shellye McDaniel Mason Jar Ring Wreath by Dana Tatar Drab to Fab Easter Card by Tracy McLennon Framed Easter Bunny by Yvonne van de Grijp

For even more Easter themed crafts,
CLICK: DIY Easter Craft Tutorials and Inspiration.

Save It to Pinterest!

Spring & Easter Crafts on Parade 2020 Long Pinterest by Yvonne van de Grijp for Scrapbook Adhesives by 3L
DIY Easter Crafts on Parade by Scrapbook Adhesives by 3L Pinterest

Visit our Website and Blog!
Sign up for our Newsletter so you never miss a contest or giveaway!

instagram purple icon facebook icon purple pinterest purple icon twitter purple icon YouTube icon blog subscription purple icon