We are thrilled to announce the winner of the World Card Making Day (WCMD) Prize Package!!! Congratulations to ……. (drum rolling)….. Juliana T.!!! Check your email IN box 🙂 MANY MANY thanks to all who participated in the FUN!
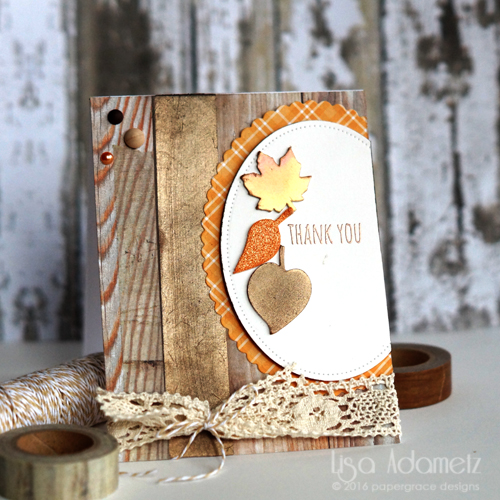
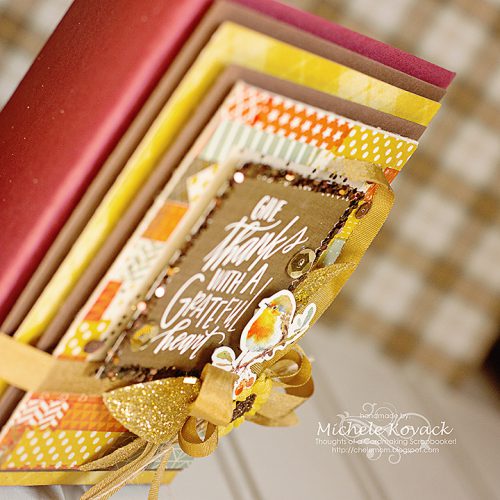
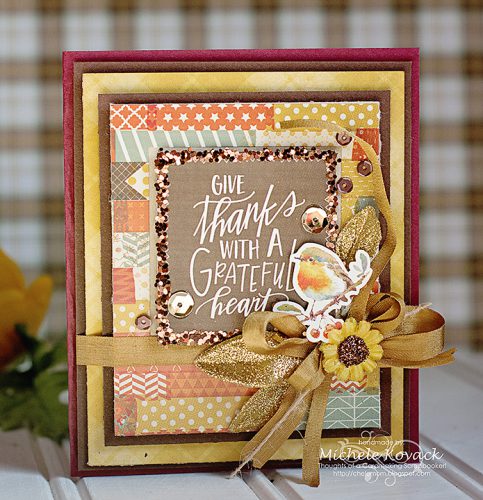
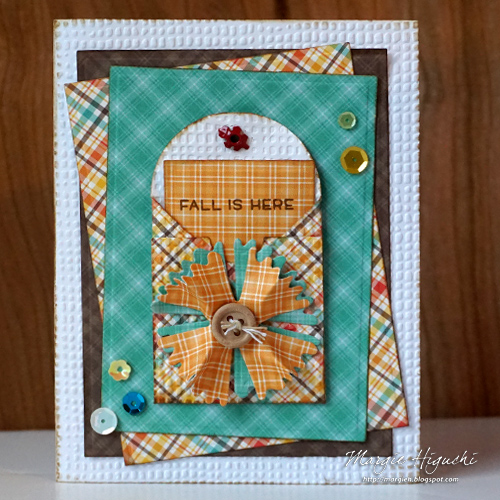
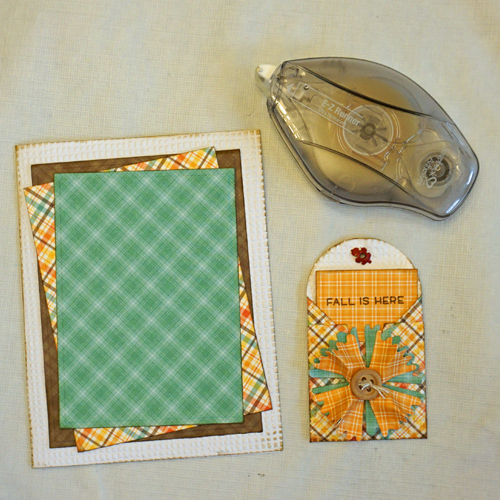
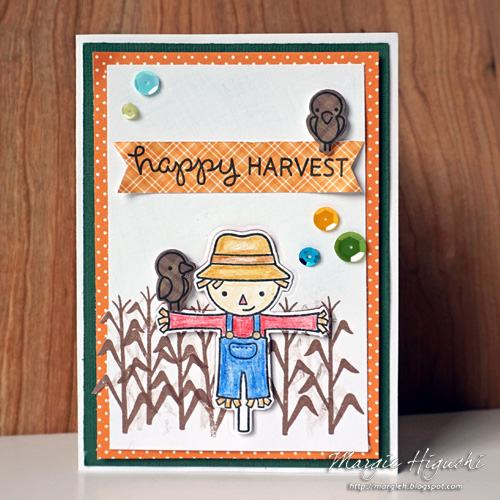
Fall is here in Chicago and I am excited!! So why not create a card just for the occasion? The newest release (E-Z Runner® Ultra Refillable Dispenser and E-Z Runner® Micro Refillable Dispenser) is perfect to hold my layered card and in assembling my small envelope element.
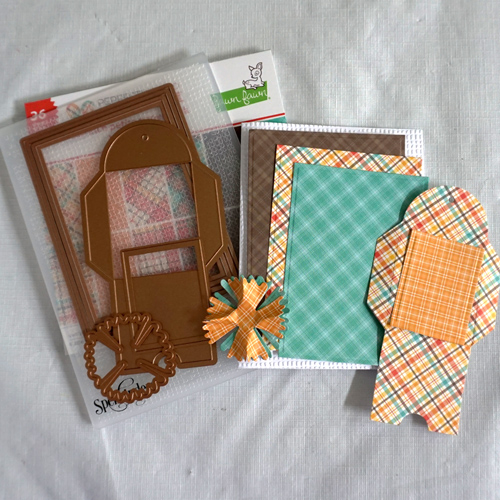
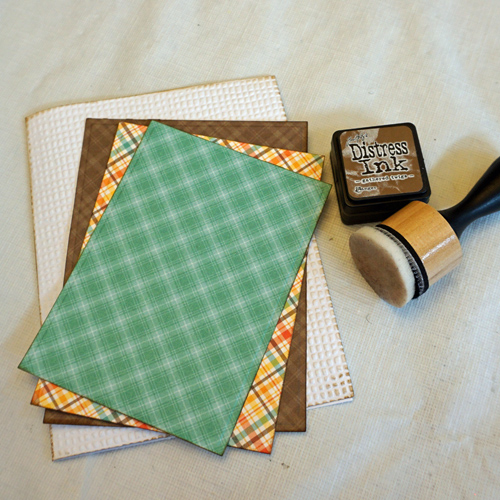
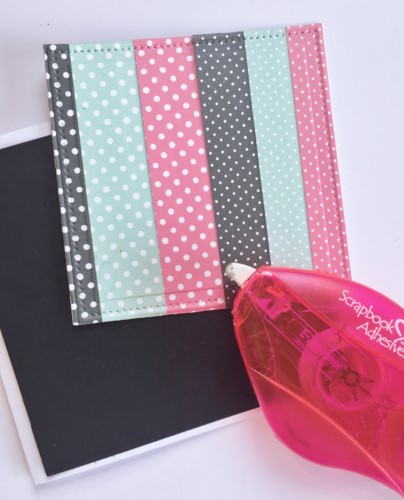
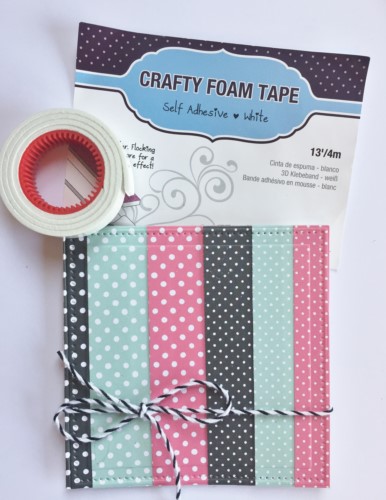
These are the supplies I used in addition to my Scrapbook Adhesives by 3L® items…
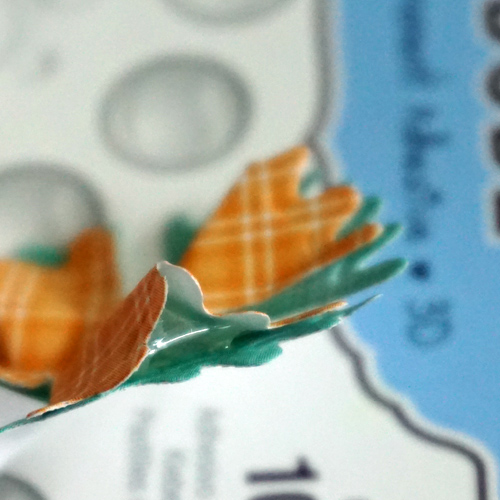
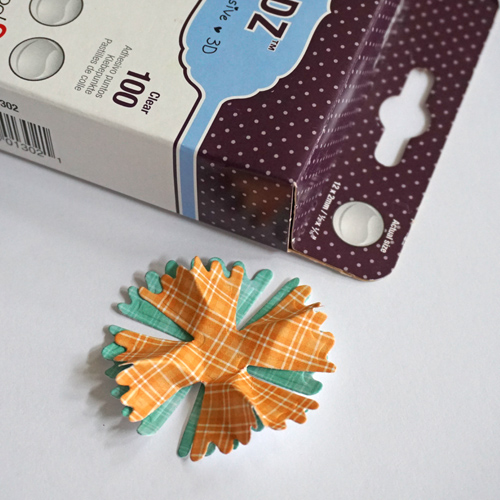
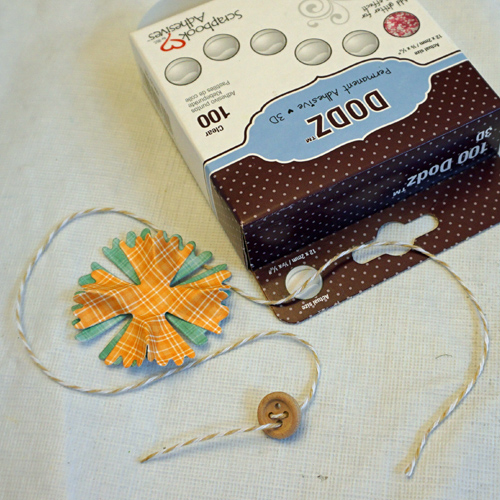
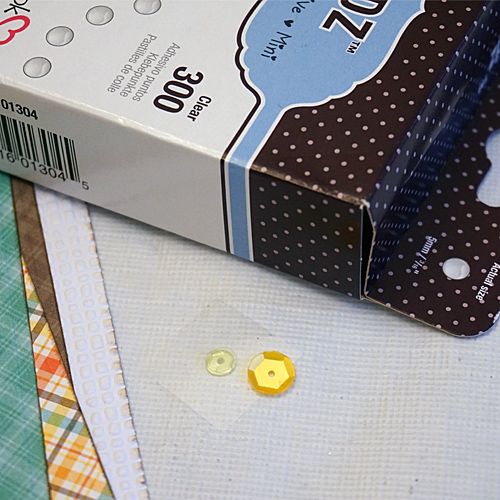
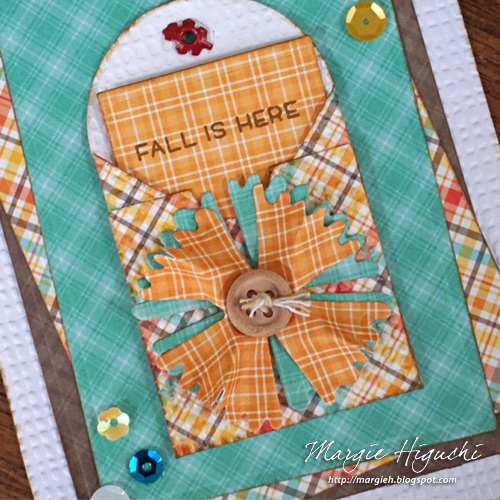
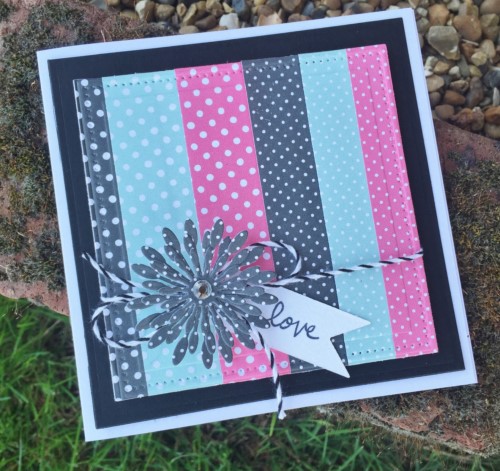
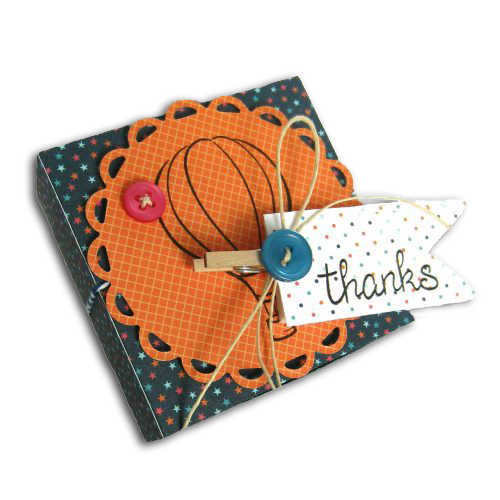
My flower embellishment, I layered two die cuts with Dodz Adhesive Dots 3D in the center. Next I took each petal on top (orange) and pinch to create a mountain. Underneath I placed a 3D dot to support.
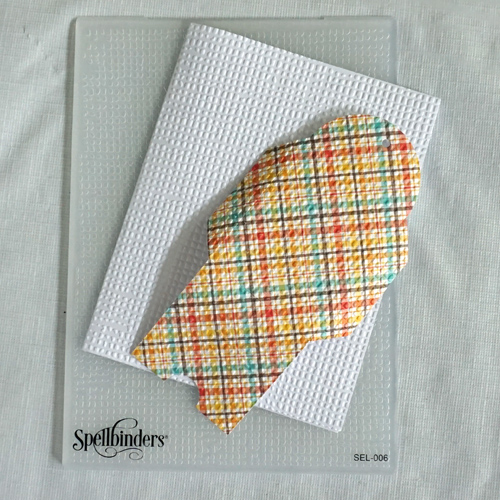
To add interest and dimension, I embossed both the card base and my envelope element – turned out cool!
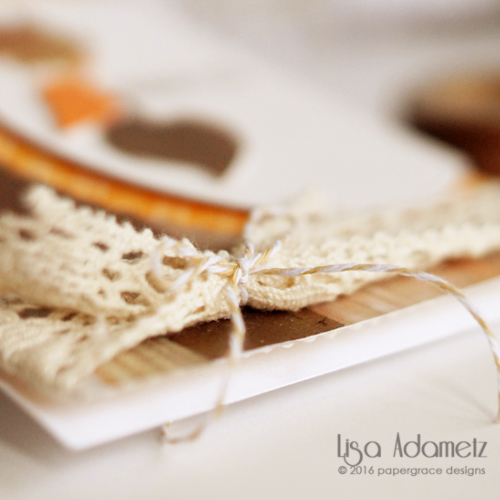
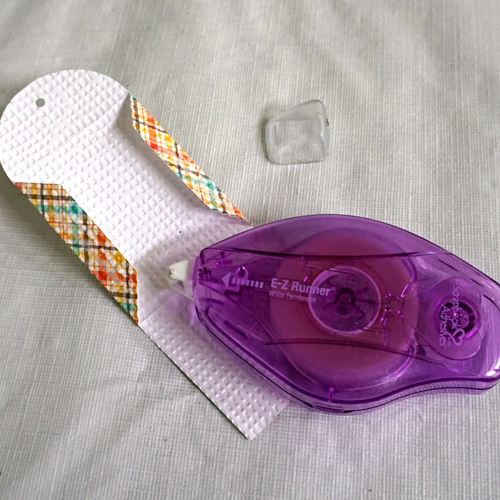
I assembled the envelope with my E-Z Runner® Micro Refillable Dispenser – perfect to apply adhesive on narrow tabs. Later I inked the edges to the envelope.
Going back to the flower, I threaded twine in Natural through the wooden button and placed on the flower center with a Dodz Adhesive Dots 3D. Then placed another 3D dot on the back of the finished flower and adhered to the envelope.
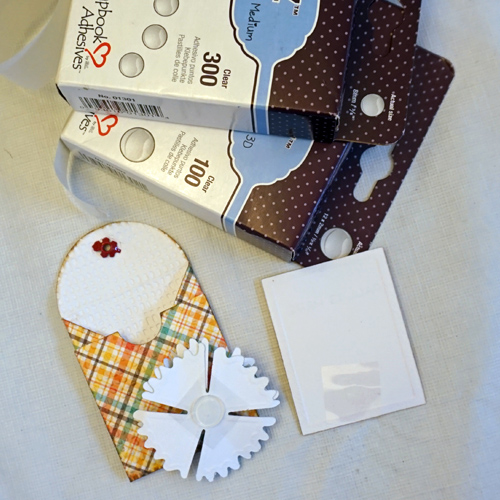
I had a fall leaf eyelet which I had to use! Next I stamped a sentiment on the top half of a rectangle die cut, edge it with ink and placed a Dodz Adhesive Dots Medium on the front and back to secure inside the envelope.
This is how it turned out – LOVE!!
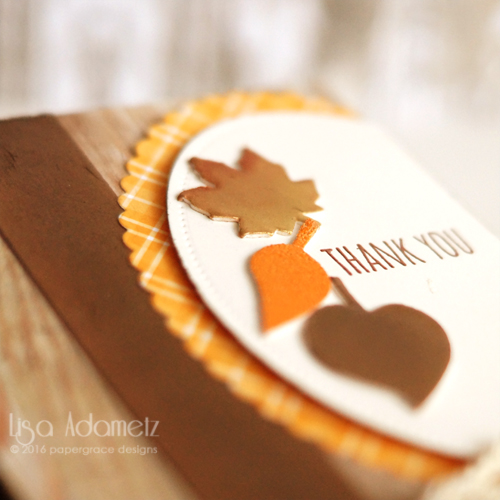
To give a subtle edge/finish to my layers I inked the edges of all (including the card base). Wanted a playful look so I tilted the layers and adhered all with E-Z Runner® Ultra Refillable Dispenser for a strong and secure hold.
For the finishing touch, I added sequins to the card front using Dodz Adhesive Dots Mini which is perfect for small embellishments like these!
Hope you are enjoying the fall season wherever you are Northern Hemisphere!
Thanks for joining me and congrats to the winner of the World Card Making Day Giveaway!
Margie Higuchi
Supplies:
Scrapbook Adhesives by 3L®:
E-Z Runner® Ultra Refillable Dispenser
E-Z Runner® Micro Refillable Dispenser
Adhesive Dots 3D
Adhesive Dots Medium
Adhesive Dots Mini
Others:
Spellbinders® Creative Arts: A-2 Matting Basics A, B Dies, Notched Mini Envelope Dies, Pinked Posies Dies, Horsehair Embossing Folder Lawn Fawn: Jump For Joy Stamp Set, Perfectly Plaid Fall Petite Paper Pack and Into the Woods Mixed Sequins (retired) Maya Road: Wooden Button Ranger Inks: Distressed Ink by Tim Holtz (Gathered Twigs), Foam Applicator and Round Foam Darice: White Cardstock Leaf Eyelet and Eyelet SetterSave
Visit our Website and Blog!
Sign up for our Newsletter so you never miss a contest or giveaway!


Save