You are in our US store • Switch to Europe store

Christmas Tree Ornament using 3D Foam Shapes!

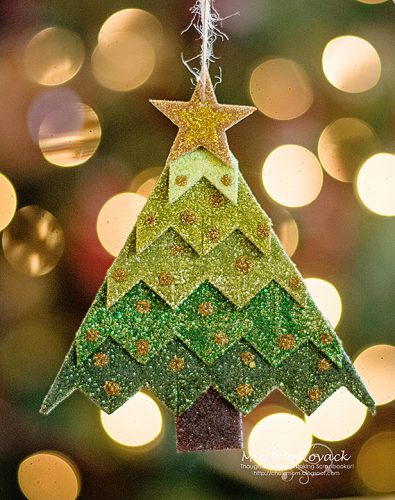
This fabulous Christmas tree ornament is a fun and out-of-the-box idea by Michele Kovack featuring 3D Foam Pennants and other 3D Foam Shapes from Scrapbook Adhesives by 3L®!

Good morning friends! Michele here with an easy Christmas ornament using a few of my favorite 3D Foam Shapes! (And lots of glitter!)
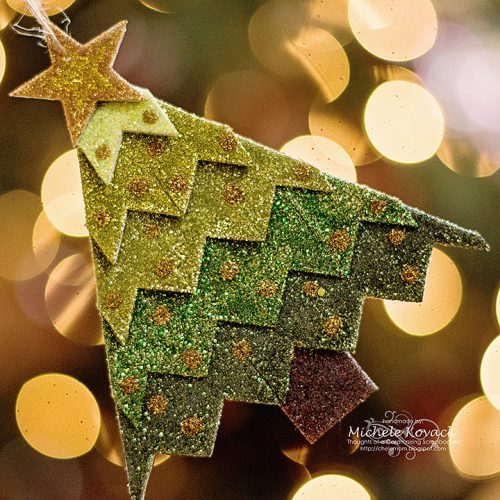
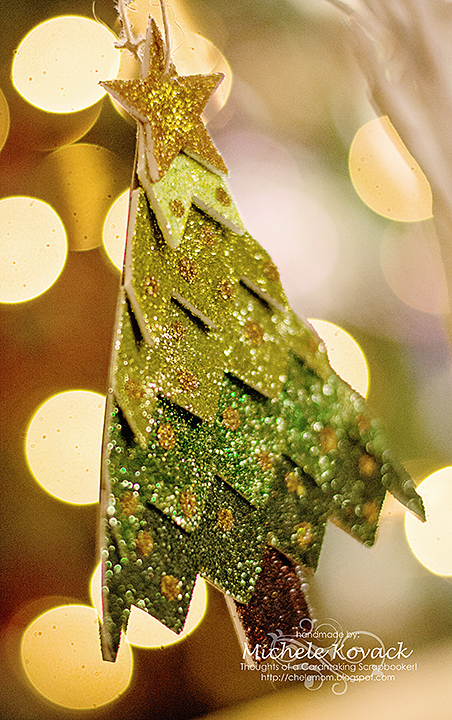
Christmas Tree Ornament using 3D Foam Shapes by Michele Kovack for Scrapbook Adhesives by 3L

banner-tree-ornament3

banner-tree-ornament

Making a Christmas Tree Ornament

Want to know how to make one of your own?  First, I took the 3D Foam Pennants and lined them up on a piece of kraft cardstock. My bottom row had five pieces and then I decreased them by one on each row.
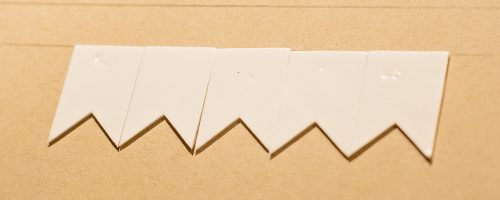
banner-tree-ornament4

I peeled off the liners on the bottom row and sprinkled my darkest green glitter.  Each row above was layered on top of it and sprinkled with a lighter green shade of glitter.
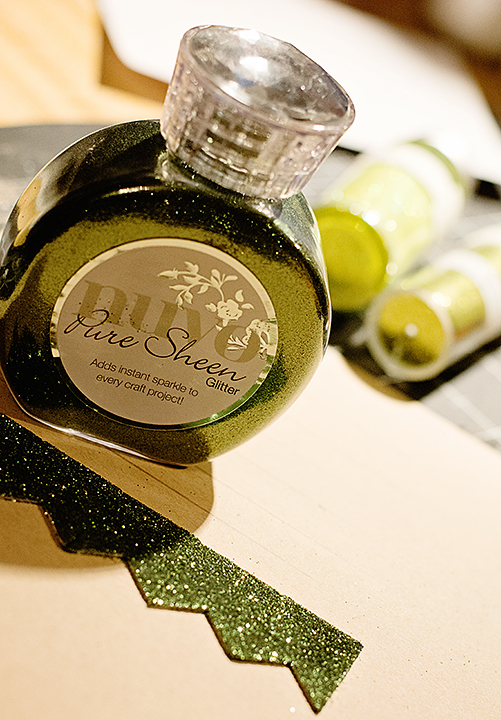
banner-tree-ornament5

For the trunk of the tree, I simply turned the pennant around and hid the pointy part under the rest of the tree.  It was sprinkled with brown glitter. I added a bit of liquid glue between layers using the Dual Tip Glue Pen.  I wanted to make sure all the layers stayed together well.
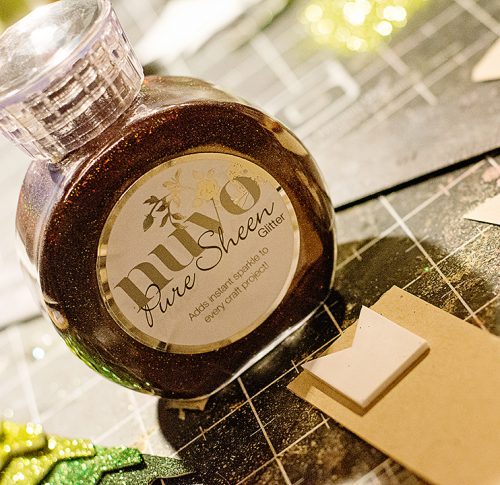
banner-tree-ornament6

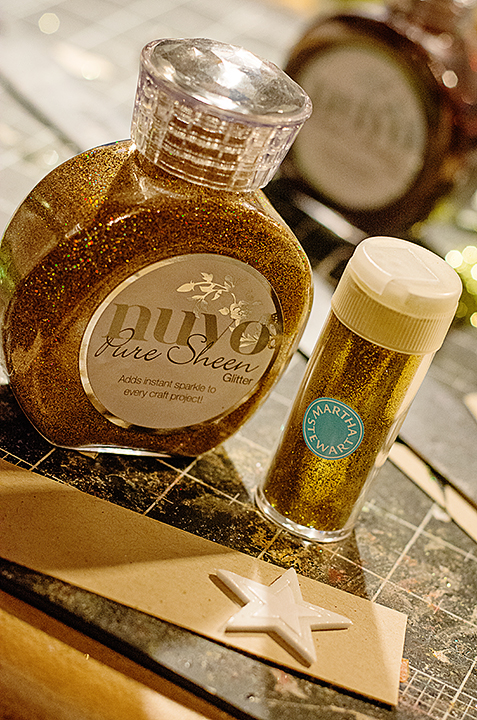
And of course, no Christmas tree would be complete without a gold star at the top!  I used two shades of gold glitter on the 3D Foam Star. I added a dab of Dual Tip Glue Pen behind the star as well for extra security! 😉
banner-tree-ornament7

One last peek at my ornament all put together!

banner-tree-ornament2

Thank you so much for stopping by!

Scrapbook Adhesives by 3L® Used:
3D Foam Stars
3D Foam Pennants
HomeHobby by 3L®:
Dual Tip Glue Pen
Other:
Glitter (Tonic & Martha Stewart); Cardstock (Papertrey Ink)
Advent Calendar with Keepsake Envelopes Mix

Hi there! Today I want to show you an Advent Calendar using Keepsake Envelopes Mix from Scrapbook Adhesives by 3L®. These envelopes are SO perfect to celebrate the December holiday countdown.

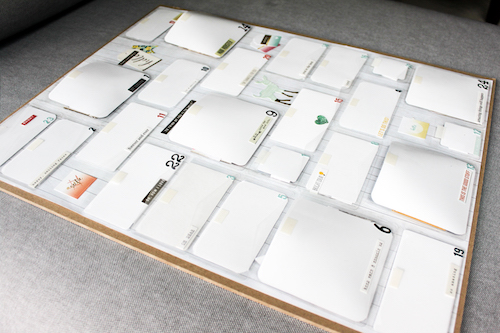
Keepsake Envelopes Advent Calendar by Stephanie Schütze

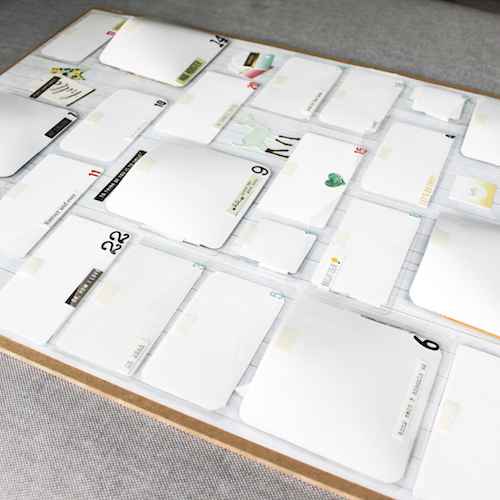
In Germany, children and adults alike get a Christmas Calendar to count down the days to THE day. What an exciting way to anticipate the wait. It’s a wonderful tradition! I made one for my parents this year 🙂

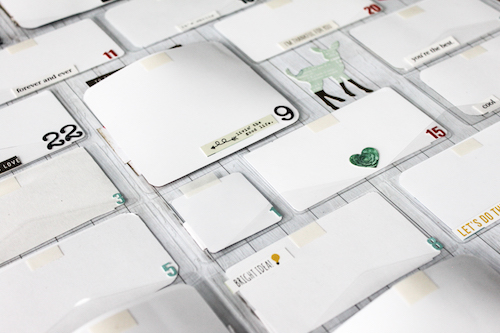
You can see I used for each day a Keepsake Envelope in different sizes. Behind every envelope there is a photo with a little message. In the bigger ones are also tiny little presents and drawings of the girls. With each day they will see more photos and at the 24th of December they will have a complete photo collage.

And next year I can fill it again with photos from 2017…

stephanie_calendar_2-1-von-1

stephanie_calendar_4-1-von-1

Thanks for visiting us today! I wish you a nice creative day!
Stephanie 🙂

Supplies:
Keepsake Envelopes Mix

Save

Save

Save

Visit our Website and Blog!
Sign up for our Newsletter so you never miss a contest or giveaway!

instagram purple icon facebook icon purple pinterest purple icon twitter purple icon YouTube icon blog subscription purple icon

Easy Holiday Tags with Extreme Double-Sided Tape, Buttons and Glitter

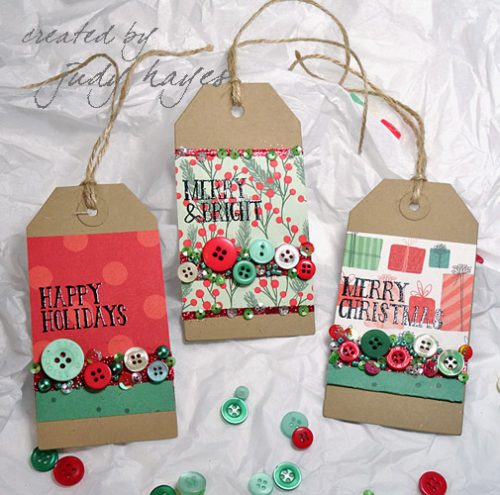
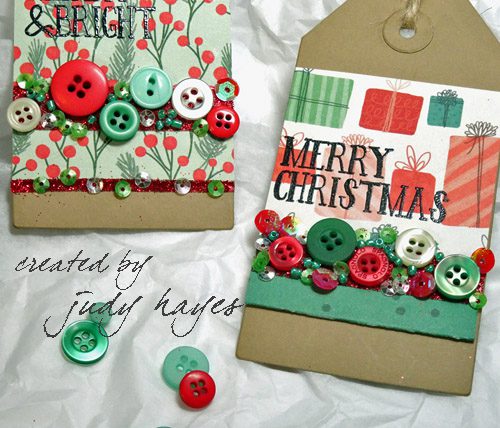
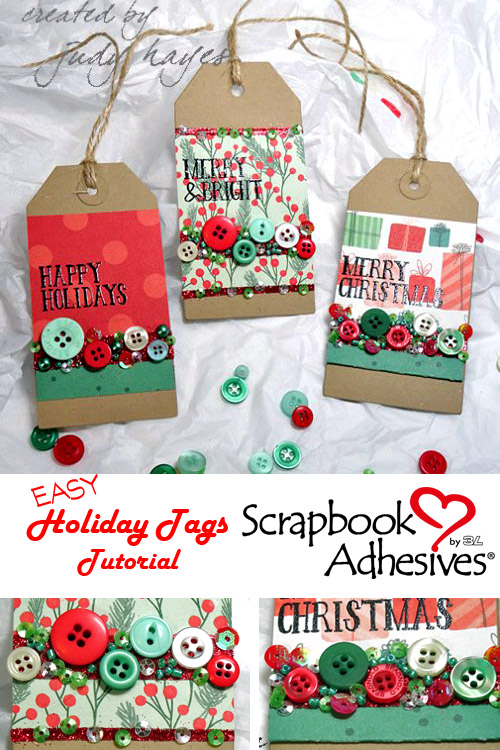
Hi everyone!  It’s Judy here today with some fun and easy holiday tags with buttons, glitter and Extreme Double-Sided Tape! When I finally get to wrapping gifts, there’s no time for making tags, so it’s good to get these done now.

I started with tags that I die cut from card stock. The patterned papers that I used are from a holiday paper pad. Bits and pieces of scrap papers would work just as well.

judy_hayes_holidaybuttontags1

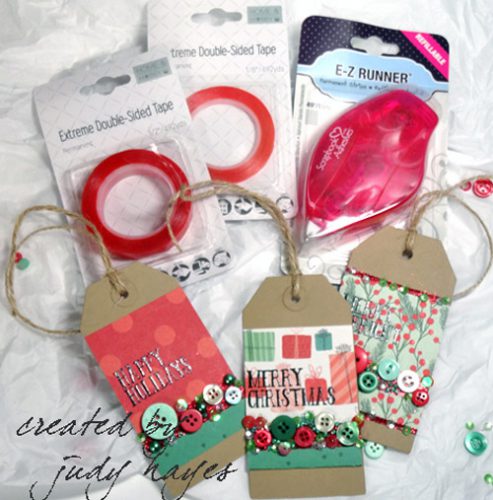
For each tag, I used E-Z Runner® Permanent Strips Refillable Dispenser to fasten pattern paper. Then applied a strip of Extreme Double-Sided Tape ½ʺ and pressed it firmly onto the tag. Place an assortment of buttons with beads and sequins around.

Tip: a packaged collection of holiday colored buttons, sequins and beads made it easy!

Finally, I sprinkled red glitter over the buttons, etc. to fill in any space on the Extreme Double-Sided Tape ½ʺ. On the Merry & Bright tag, I added strips of Extreme Double-Sided Tape ⅛ʺ with a few sequins and glitter.

judy_hayes_holidaybuttontags2

The verses were stamped with black ink and clear heat embossed.  I added twine strings to these tags but they could simply be fastened to a gift with E-Z Runner® Permanent Strips Refillable Dispenser or Extreme Double-Sided Tape ½ʺ. Add the Extreme Double-Sided Tape ½ʺ now, then when it’s time to wrap gifts, simply remove tape backing and place on package!

judy_hayes_holidaybuttontags3

These tags are fun to make! They’re kind of addicting! Let your imagination go and try your own combination of colors. Do you  make your own tags?

Happy crafting!
Judy

Supplies:
Scrapbook Adhesives by 3L®:
Home Hobby Extreme Double-Sided Tape ½ʺ
Home Hobby Extreme Double-Sided Tape ⅛ʺ
E-Z Runner® Permanent Strips Refillable Dispenser

Other Supplies: Art Glitter True Red; Buttons Galore & More 28 Lilac Lane Yuletide Greetings; Imagine Crafts/Tsukineko Versafine Onyx Black ink; My Mind’s Eye Christmas on Market Street 6 x 6 pad; Stampers Anonymous Tim Holtz Holiday Drawings stamps; Spellbinders Contour Die – Tag, You’re It; Worldwin® Papers Mocha; Clear Embossing Powder, Twine

Pin it!

Easy Holiday Tags Tutorial by Judy Hayes for Scrapbook Adhesives by 3L

Visit our Website and Blog!
Sign up for our Newsletter so you never miss a contest or giveaway!

instagram purple icon facebook icon purple pinterest purple icon twitter purple icon YouTube icon blog subscription purple icon

Two Tips on How to Complete Holiday To-Do List Projects

It’s December 5th, and Christmas is just 20 days away (eeekkk!).  Got a LONG to-do list of holiday projects to finish? Two big projects to do this past weekend were co-worker gifts and Christmas cards, using a combination of Premium Double-Sided Tape 1/2″, Creative Photo Corners Silver, and a touch of twine.

Co-Worker GIft by Erica Houghton for Scrapbook Adhesives by 3L

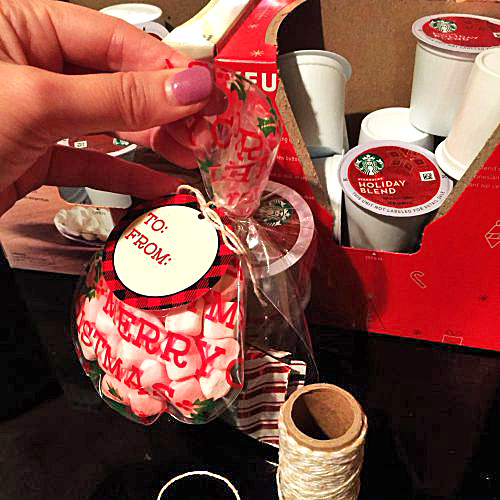
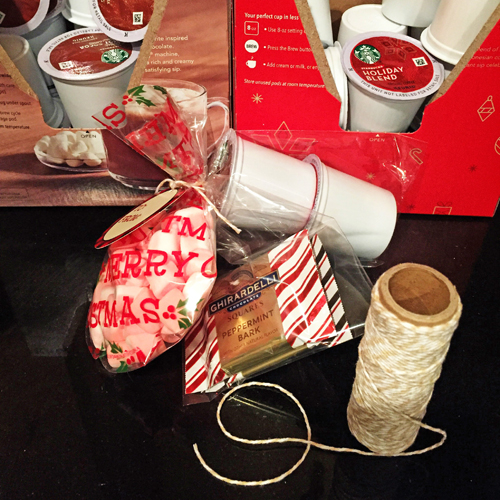
Co-worker Gifts: I bundled up coffee and hot chocolate k-cups with peppermint bark pieces and marshmallows in clear decorative bags. To tie up the bags, I used a 12″ piece of Twine to close…SO CUTE!

Co-Worker GIft by Erica Houghton for Scrapbook Adhesives by 3L

Christmas Cards: Each year I include a short, personal letter that summarizes our year. In previous years I’ve simply folded the letter and placed it inside the card, but Creative Photo Corners makes it super easy to include my letter. Did you know they come in Silver and Gold – perfect for the holidays!

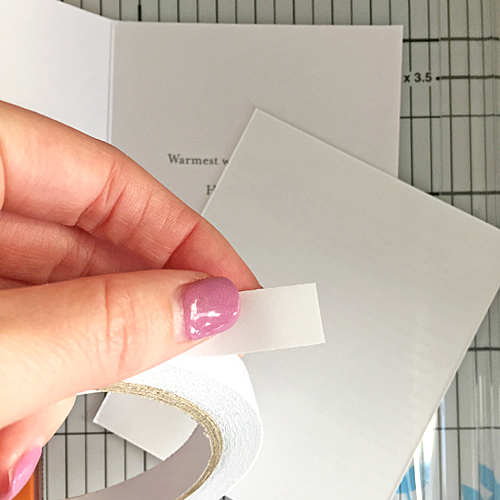
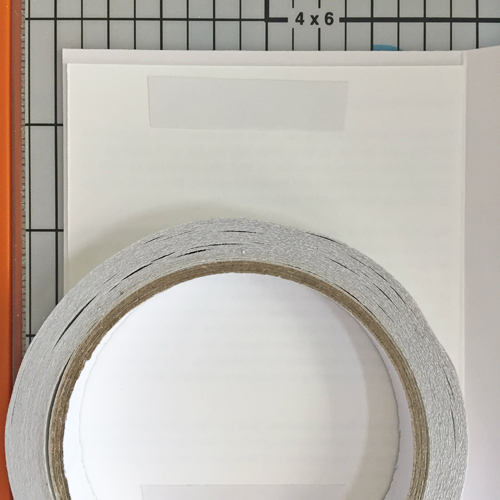
I cut my letter down to size and then placed a small piece of Premium Double-Sided Tape 1/2″ near the top to keep my letter in place.

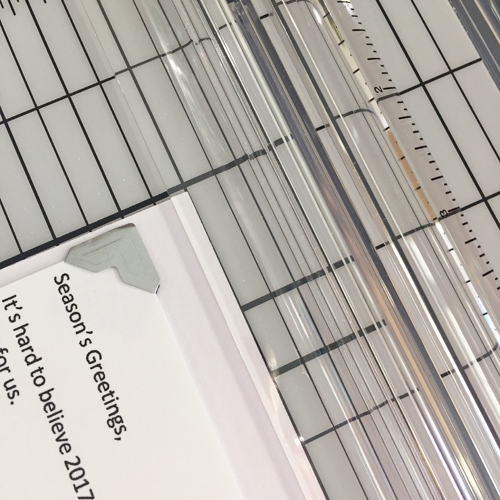
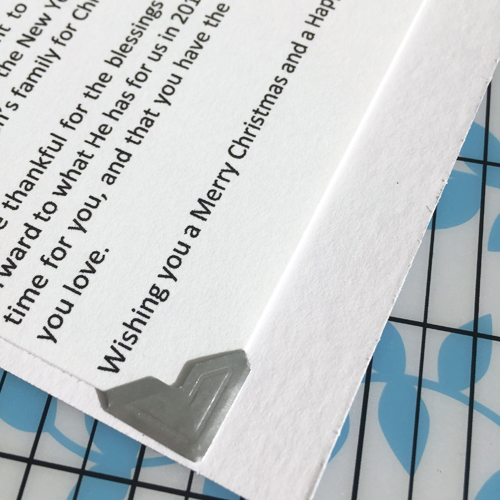
I added Creative Photo Corners Silver to all four corners, holding my personal letter in place with a decorative touch!

These projects are now complete and marked off my to-do list! I hope these ideas will help you quickly tackle items on your list!

Scrapbook Adhesives by 3L®:
Premium Double-Sided Tape 1/2″
Creative Photo Corners Silver

Thanks for joining me today!
Erica Houghton

Save

Clear Shaker Ornament Tutorial

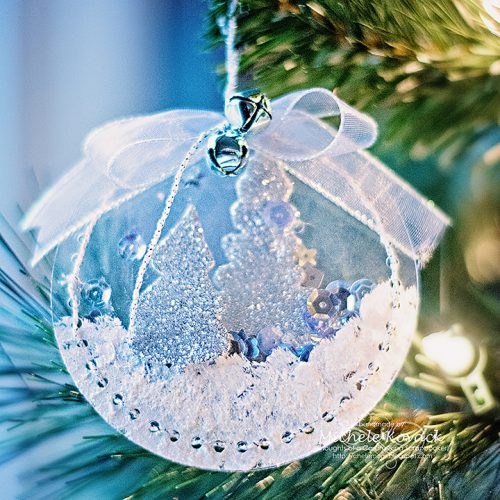
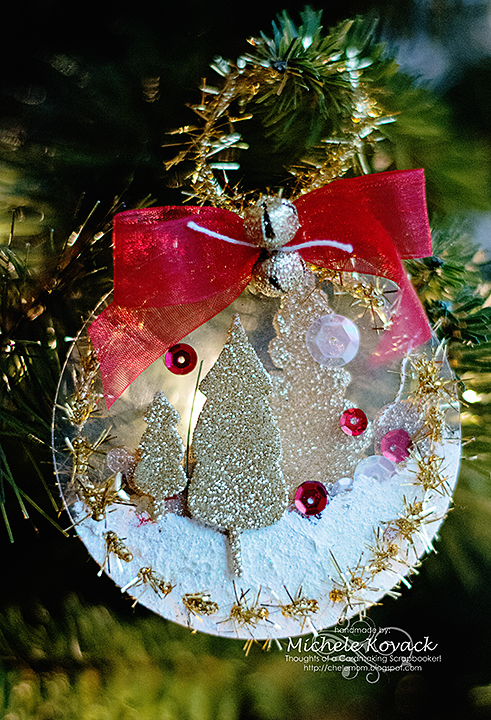
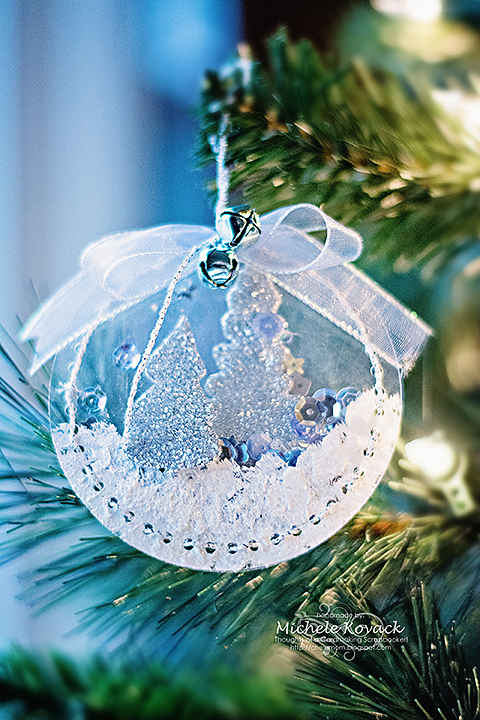
Good morning! Michele here with a couple of festive shaker Christmas ornaments!  I love using acetate for the base of the ornament because it is easy to fill with sequins and allows the Christmas lights to shine through!  I made two for today’s post, one in a cool color scheme and the other in warm colors.

Clear Christmas shaker ornament tutorial by Michele Kovack

clear-ornament9

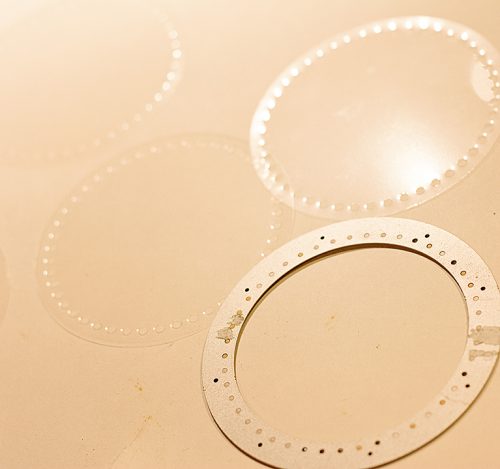
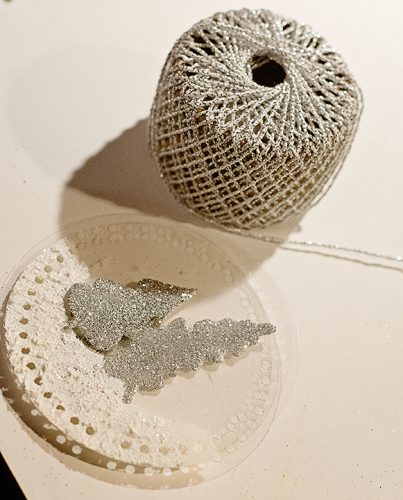
To make my ornaments I die cut 2 circles for each ornament.

clear-ornament7

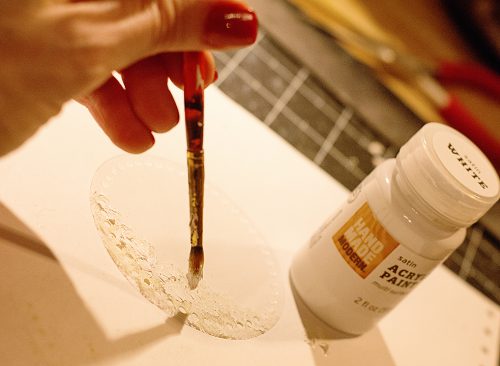
White acrylic paint, dabbed on at the bottom of each circle made a “snowy” hill.

clear-ornament6

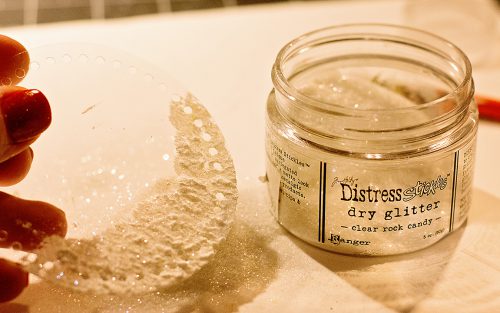
I sprinkled glitter over it while it was still wet.

clear-ornament-6

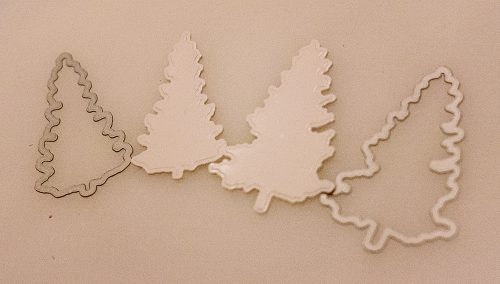
3D Creative Foam Sheets were used to die cut my evergreen trees. I also added in some smaller trees from the 3D Foam Trees.

clear-ornament5

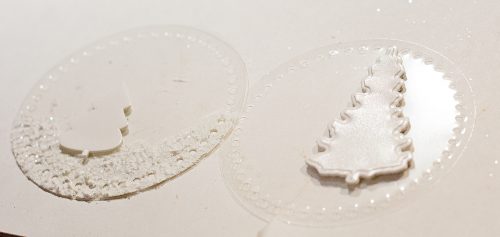
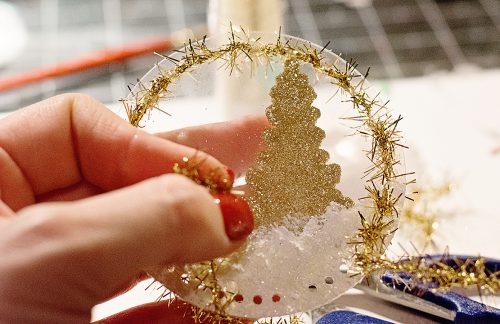
They are sticky on both sides – I LOVE that! ….one side to stick to the acetate….

clear-ornament-4

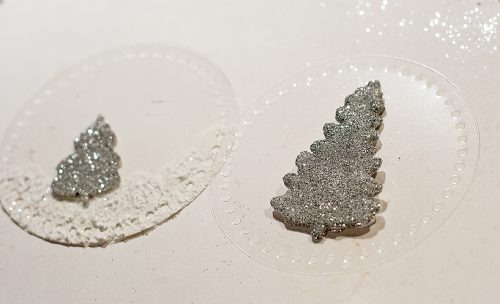
….and the other for sprinkling glitter over!

clear-ornament3

I took silver twine to sew the ornament together.  Right before closing it up, slip in a handful of sequins.

clear-ornament-2

This would be a perfect opening for those sequins!

clear-ornament1

To secure the jingle bells in place, I slipped a Dodz Adhesive Dots Small under each one. Here’s one last look!

clear-ornament8

clear-ornament9

Thanks so much for stopping by today!

Michele Kovack

Supplies:
Scrapbook Adhesives by 3L®:

3D Creative Foam Sheets
Dodz Adhesive Dots Small
3D Foam Trees
Other:
Circle Die (Tattered Lace); Distress Glitter (Ranger Tim Holtz); Tree Dies (JustRite Papercraft); Sequins (Lucy’s); Jingle Bells (Darice); Acrylic Paint

Save

Save

Save

Thank You Card using my ‘Go To’ Adhesives

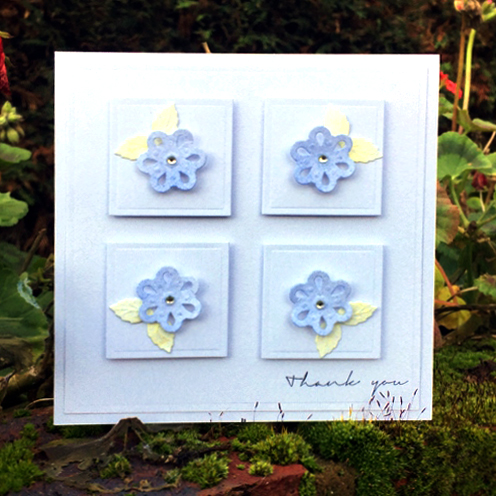
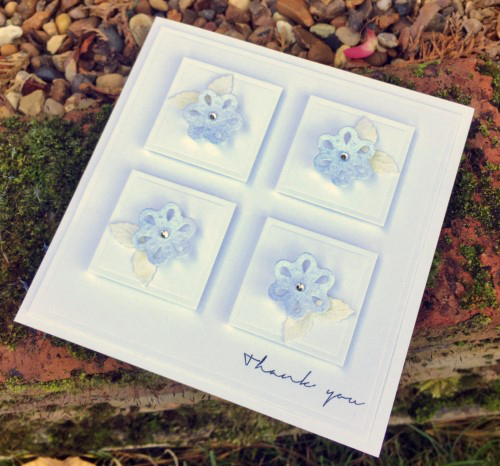
Hi everyone! Christine here today with a Christmas thank you card featuring my  ‘go to’ Scrapbook Adhesives by 3L® products.  I’ve made a delicate card that could be adapted to any colors you wish and in a few simple steps.

Thank You Card by Christine Emberson for Scrapbook Adhesives by 3L

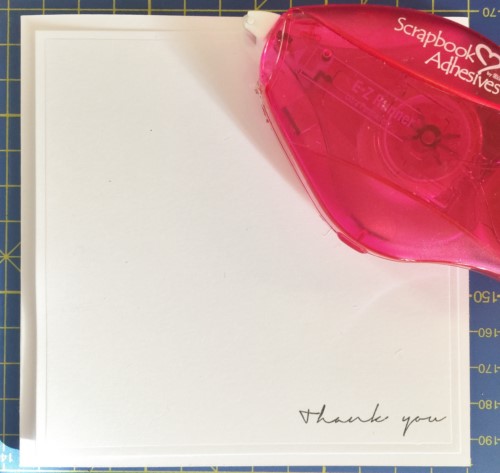
First – attach a square mat to a base card using E-Z Runner® Permanent Strips Refillable Dispenser.

cemberson-thank-you-2

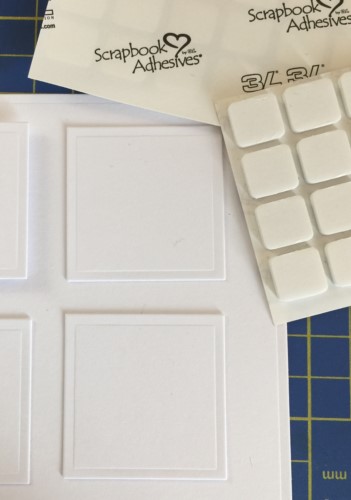
I then proceeded to die cut four squares and affixed these with 3D Foam Squares White Regular.

cemberson-thank-you-3

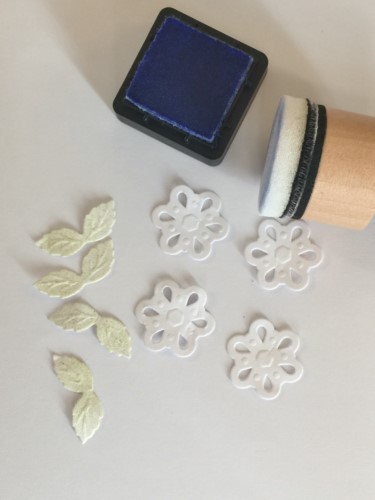
Embellishments for my card are coloured with distress ink.

cemberson-thank-you-4

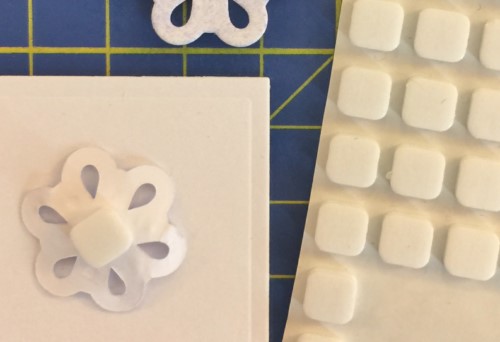
3D Foam Squares – White, Small – ideal to affix the small flowers as extra embellishment and dimension.

img_5755-1600x1200

The finished card.

cemberson-thank-you-final


Thanks for stopping by today and don’t forget to check out all the great products on the Scrapbook Adhesives by 3L® Website.

Christine

Products used:
Scrapbook Adhesives by 3L®:

E-Z Runner Permanent Strips Refilliable
3D Foam Squares – White, Small.
3D Foam Squares – White, Regular
Others:
Dies: Spellbinders® Paper Arts (Sapphire Set A), Classic Squares
White card blank, white cardstock, distress ink, gemstones, sentiment stamp.

Christmas Treats with Extreme Double-Sided Tape

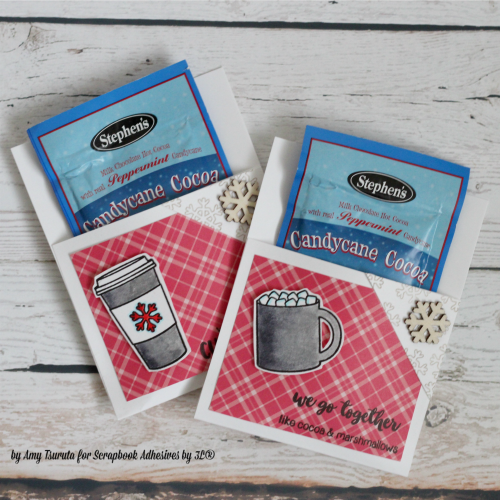
Hello and Happy December!  It’s Amy here!  Where have the days gone?  I simply cannot believe that we’re already into December!  I have a fun little giftie idea for you today using Extreme Double-Sided Tape 1/4″.

amytsuruta_cocoa1

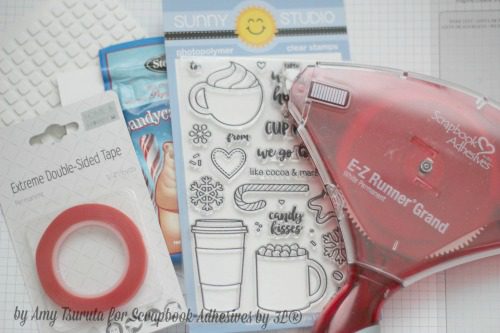
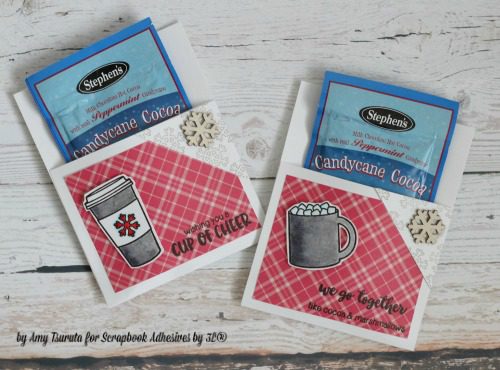
I made Cocoa pockets!  Here’s a peek at my supplies:

amytsuruta_cocoa2

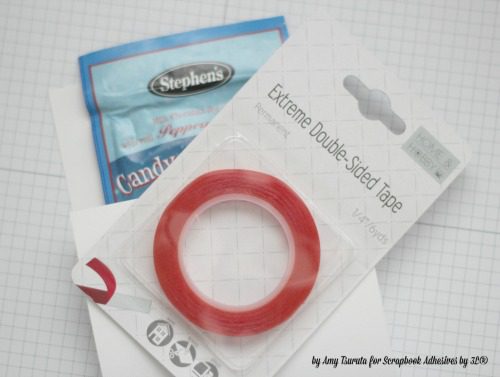
I started off with an A2 card base that was top folded.  I flipped it upside down so that the scoring was on the bottom.  I trimmed the top panel down to 3 1/2 inches.  The Extreme Double-Sided Tape 1/4″ is the perfect adhesive for this type of project.  I constructed the pocket by adhering strips on either side of the pocket panel.  I make sure to burnish the area with my bone folder.

amytsuruta_cocoa3

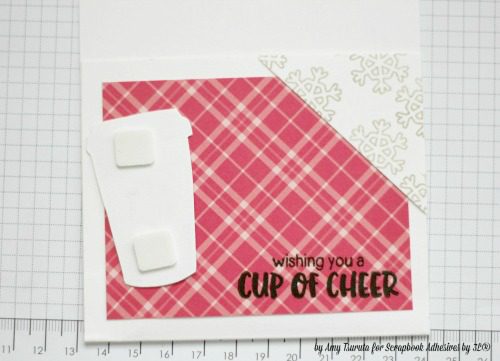
The cup/mug have been adhered with Thin 3D Foam Squares Mix White.  All the other panels on my pocket front have been adhered with the E-Z Runner® Grand Dispenser .

amytsuruta_cocoa4

I finished off the fronts with wood veneer snowflakes.  These will go postal to my kids who are in college.

amytsuruta_cocoa5

Thanks so much for stoppin’ by!
Amy

SUPPLIES
Scrapbook Adhesives by 3L®:
E-Z Runner® Grand Refillable Dispenser
Thin 3D Foam Squares Mix White
Extreme Double-Sided Tape 1/4″ Permanent
Other:
Marshmallow Cardstock: Bazzill Basic Papers
Paper:  Lawn Fawn
Stamps:  Sunny Studio

Save

Snowflake Thanks Card with Washi Tape Accents

Hi all! Tami Mayberry here with you today to share a quick and easy card you can create using your Scrapbook Adhesives by 3L® products. While this card has a winter/thank you theme, the colors and sentiments can easily be changed to fit any occasion.  Keep reading to see just how easy it can be!

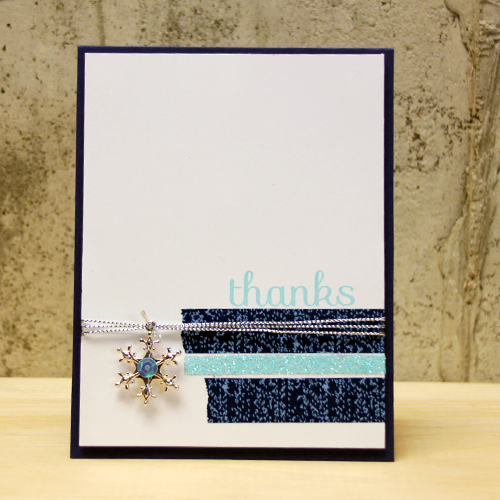
Snowflake Thanks Card by Tami Mayberry for Scrapbook Adhesives by 3L

Instructions

  1. Form a 4 ¼ x 5 ½-inch card from navy cardstock.
  2. Cut a panel slightly smaller than card front from white cardstock.
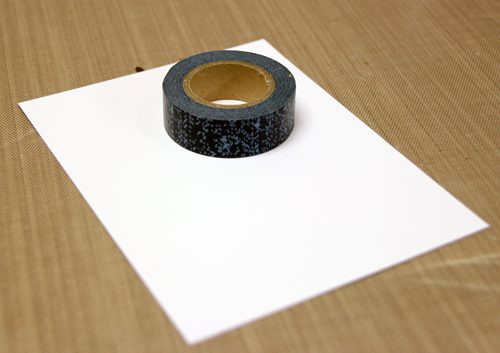
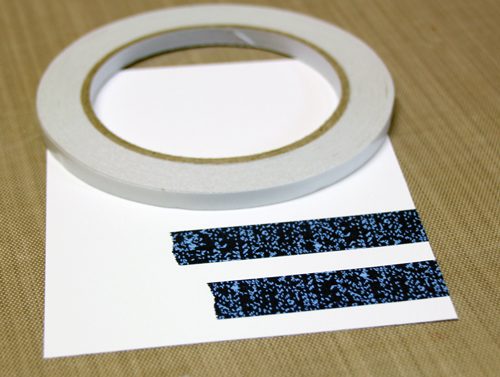
  3. Attach two pieces of Denim washi tape to panel as shown.

tamimayberry-snowflakethanks1

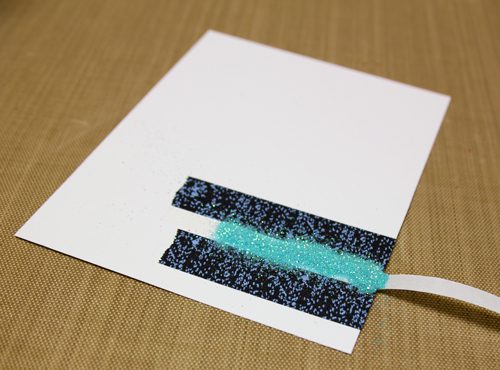
  1. Attach a piece of Premium Double-Sided Tape 1/4″ between strips.

tamimayberry-snowflakethanks2

  1. Peel off backing; sprinkle with glitter and burnish to set.

tamimayberry-snowflakethanks3

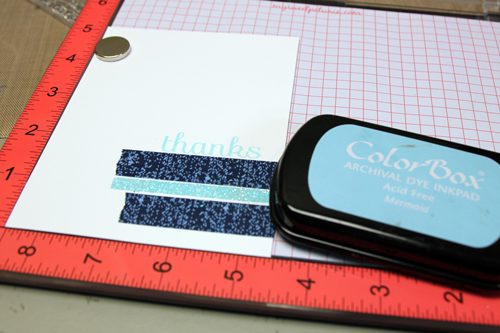
  1. Stamp sentiment onto panel.

tamimayberry-snowflakethanks-4

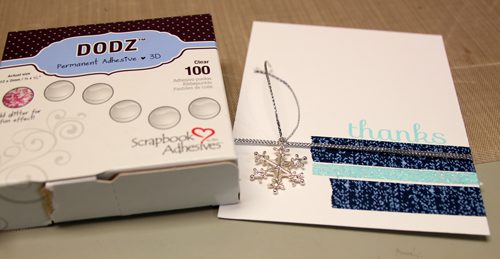
  1. Wrap panel with silver thread. Tie snowflake charm to thread; secure in place with Dodz Adhesive Dots 3D.

tamimayberry-snowflakethanks-5

  1. Attach panel to card front using 3D Foam Squares White Regular.

Scrapbook Adhesives by 3L® supplies

Other

  • Cardstock: white, navy
  • Simon Says Stamp! Thanks stamp set
  • Clearsnap mermaid ink pad
  • Aqua glitter
  • MISTI stamping tool
  • Buttons Galore and More 28 Lilac Lane Let it Snow embellishment kit

How Dodz Adhesive Dots Help with Home Decor Projects

Hello! AJ here to share how you can use your Dodz Adhesive Dots anywhere in your home, including helping with your home decor projects.

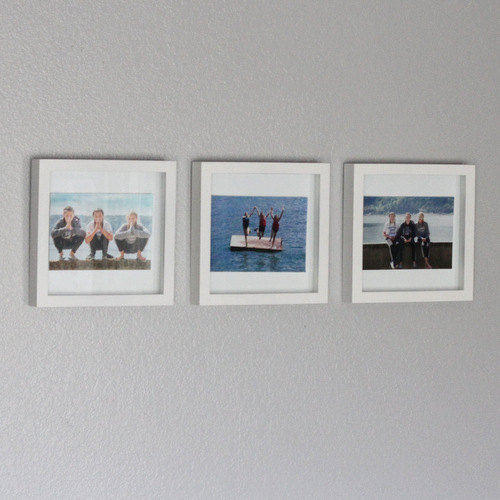
ajotto-dodz3d-1

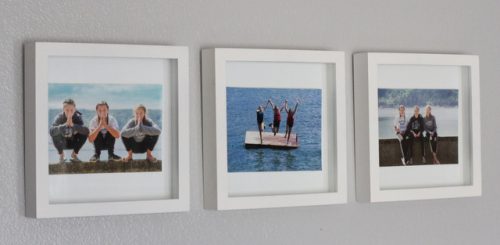
My daughter recently turned 13, and with that came the need for a room refresh.  She has been asking for pictures of her friends to hang on her walls, so we did just that.

ajotto-dodz3d-2

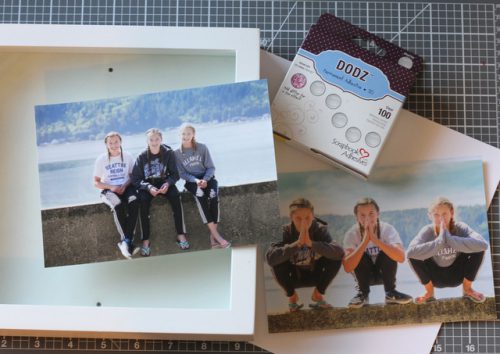
I got these shadow boxes on clearance a while back and while the pictures aren’t square, I opted to use them for these prints anyways.

ajotto-dodz3d-3

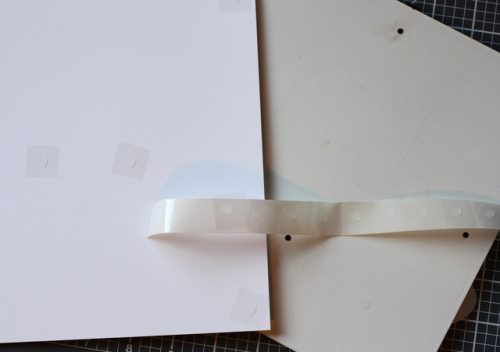
As you can see, the back has black dots where the hardware is attached that can be seen through the glass, so I had to cover each one with a piece of white cardstock.  I used the Dodz Adhesive Dots Small here.

ajotto-dodz3d-4

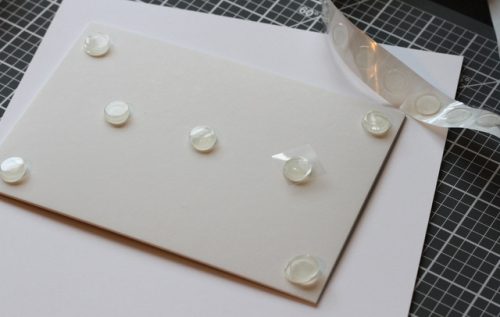
I thought the look of a floating picture would be fun to try, so I used the Dodz Adhesive Dots 3D and doubled them up.

ajotto-dodz3d-5

Here’s a close up of the final three all hung on her wall.  Sorry for the side angle shot, best way to avoid glare and reflection on the pictures.  You can easily swap the pics out with new ones, and or make them seasonal as well.

Enjoy!
AJ

Products used:
Scrapbook Adhesives by 3L®:
Dodz Adhesive Dots 3D
Dodz Adhesive Dots Small
Other:
Pictures; Cardstock; Shadow Box Frames

Glitter Band Card with Premium Double-Sided Tape

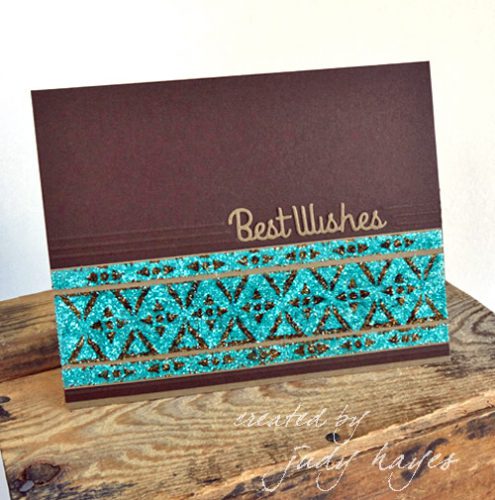
Hello everyone!  Today, I’m sharing a card with a patterned glittery band that I created with Premium Double-Sided Tape 1ʺ, glitter and a stencil.  I love how well the pattern shows!

judy_hayes_glitterbandcard-1

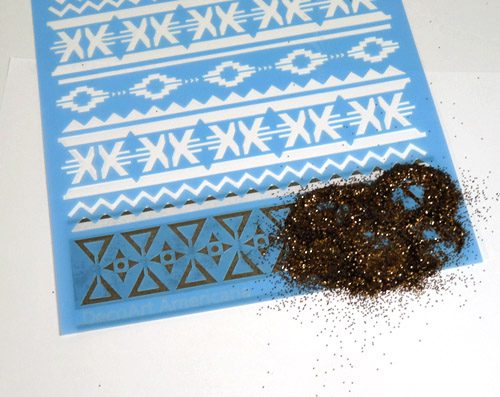
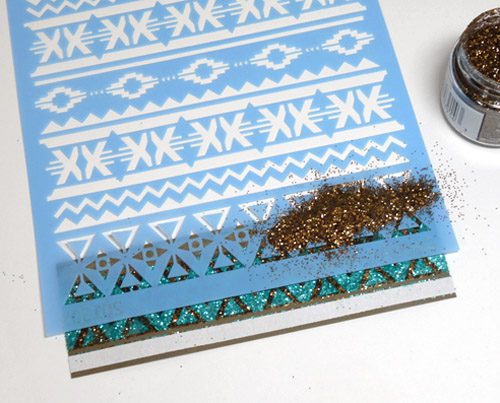
A word of caution if you try this technique. Use a heavy plastic stencil. Avoid any patterns with fine stencil cuts as they may not remove easily from the Premium Double-Sided Tape and could be damaged. I didn’t have any trouble with this stencil by peeling it slowly from the tape.

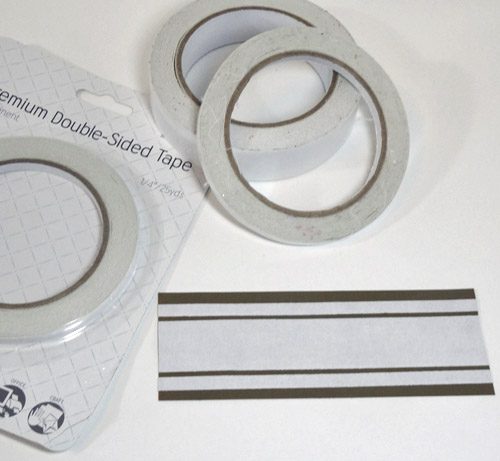
To make the glitter band, I started with a strip of Premium Double-Sided Tape 1ʺ applied to sage cardstock. Along each side I added  Premium Double-Sided Tape ¼ʺ about ⅛ʺ from 1ʺ tape. Then I trimmed the cardstock close to tape and 5½ʺ long.

judy_hayes_glitterbandcard-2

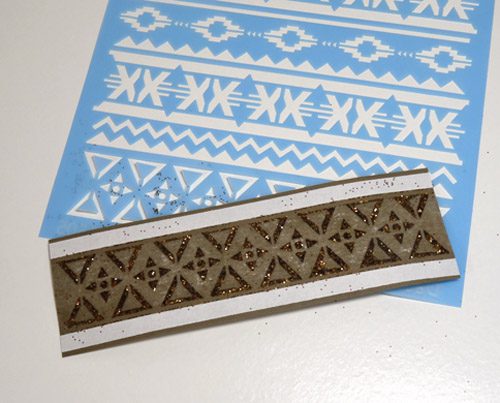
Remove the backing from Premium Double-Sided Tape 1ʺ and center the stencil over it. I covered it with brown glitter, pressed it into the tape and then removed excess.

judy_hayes_glitterbandcard-3

Next I carefully removed the stencil.

judy_hayes_glitterbandcard-4

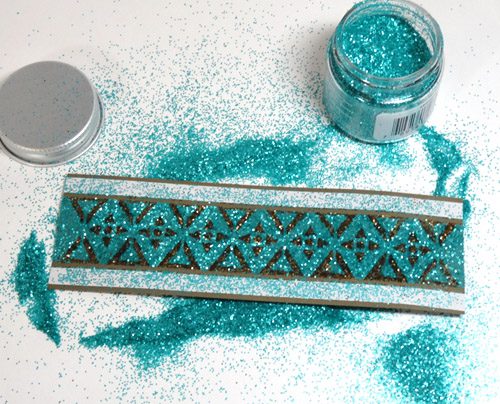
Sprinkle turquoise glitter over it, press it into the tape and remove excess.

judy_hayes_glitterbandcard-5

To make the pattern on the narrow tapes, I used the center of the stencil pattern. I used the same glitter process to apply brown glitter through stencil, remove stencil and apply turquoise glitter on each tape strip.

judy_hayes_glitterbandcard-6

My card is 4¼ x 5½ʺ. I made a score line along the bottom edge on the inside of the card. I fastened a narrow strip of sage cardstock along lower edge with E-Z Dots® Permanent Refillable Dispenser.

Then I fastened the glitter band with E-Z Dots® Permanent Refillable Dispenser.

I applied Premium Double-Sided Tape 1ʺ to back of sage cardstock. I die cut the greeting, removed the tape backing and fastened it to the card.

Add 3 score lines on each side of the greeting. These were scored from inside of card to make ridges on card front.

I hope I’ve inspired you today!  Thanks for visiting!
Judy

Scrapbook Adhesives by 3L®:
E-Z Dots® Permanent Refillable Dispenser

HomeHobby by 3L®
Premium Double-Sided Tape ¼ʺ
Premium Double-Sided Tape 1ʺ

Other: DecoArt® Aztec Pattern Stencil; Ranger Distress Glitter: Brushed Corduroy, Peacock Feathers; Spellbinders® Sentiments One die; Worldwin Cardstock: Cocoa, Sage; Scor-Pal®