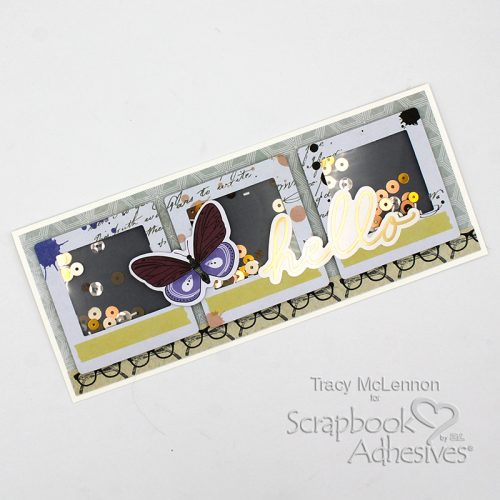
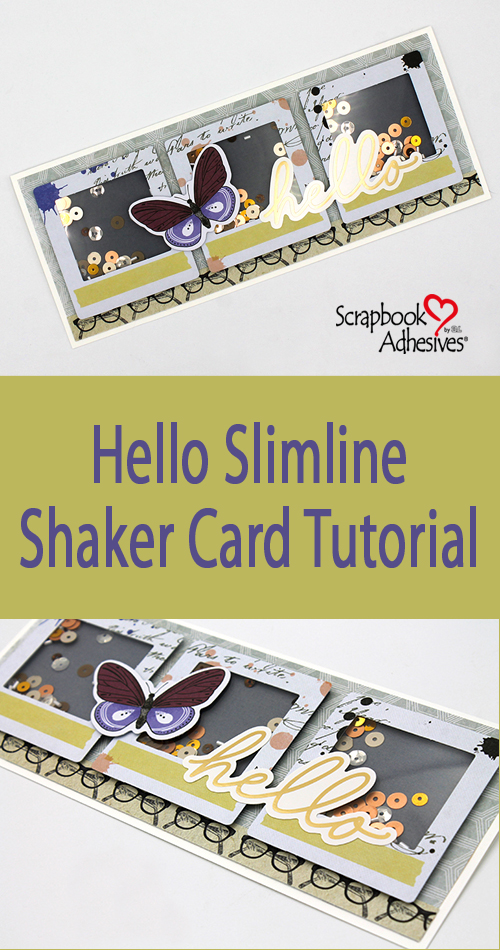
Hello crafty friends! Tracy here, and today I have a fun little Hello Slimline Shaker Card to share. Here are all of the crafty details.
Building the Hello Slimline Card Front
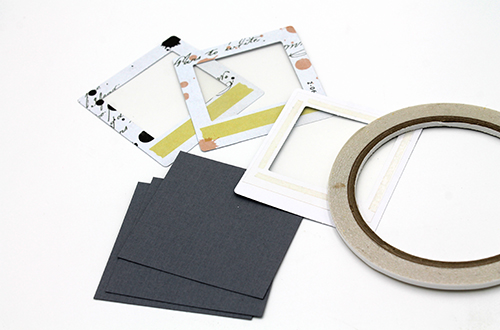
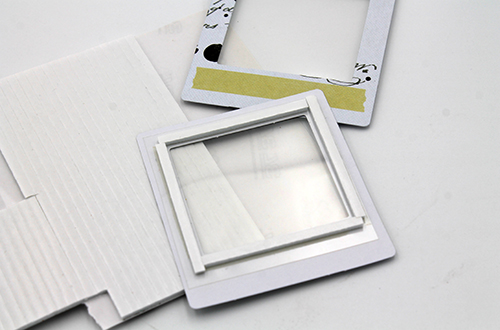
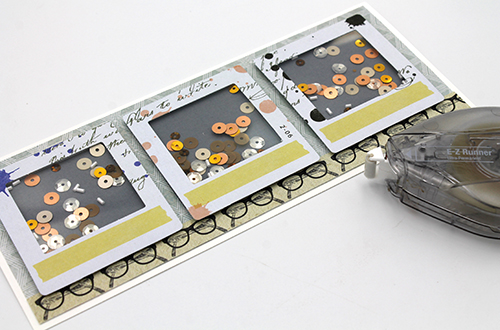
After creating some layouts with this collection, I was left with a few pretty bits and pieces and decided to create a Hello Slimline Shaker Card with those leftovers. These three mini frames inspired me to use them as a focal point. Cut acetate pieces and grey cardstock pieces to fit behind each. Using Premium Double-Sided Tape 1/8in, adhere the acetate to the back of each frame.
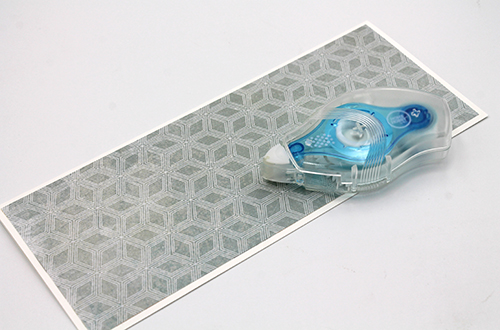
Create the Hello Slimline Shaker Card base from 8.5×7 white cardstock and fold it in half. Cut a piece of 8.25×3.25 patterned paper and adhere it to the card front using the Double-Sided Tape Runner Petite Dots Permanent.
Add 3D Foam Strips around the window of each mini frame. This is when you can choose and add your shaker bits. Next, attach the grey cardstock shaker bases, and secure your shakers for the Hello Slimline Shaker Card.
I decided to add another strip of patterned paper to the bottom of the card front. Then attach the shaker frames to the card with the E-Z Runner® Ultra Strong Refillable Dispenser.
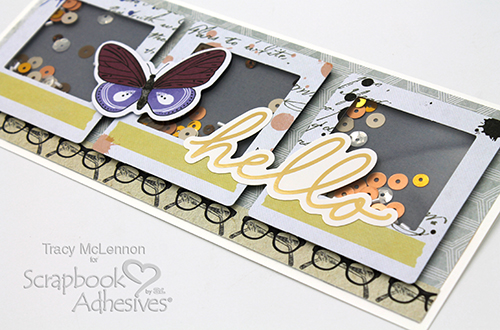
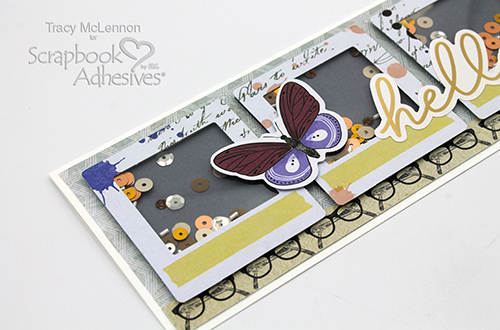
The final touch was to add a couple of die-cuts. The sentiment and the butterfly piece were added to the Slimline Shaker Card using Thin 3D Foam Strips Black Mix.
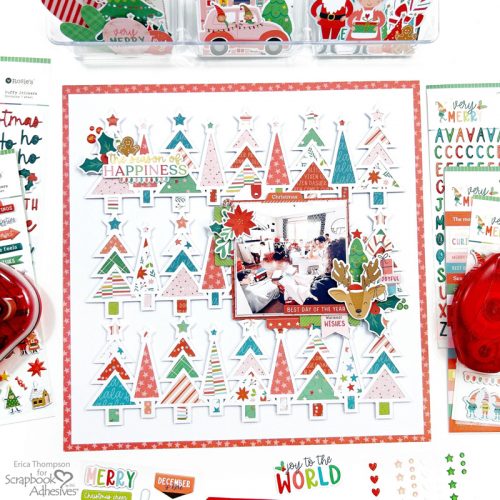
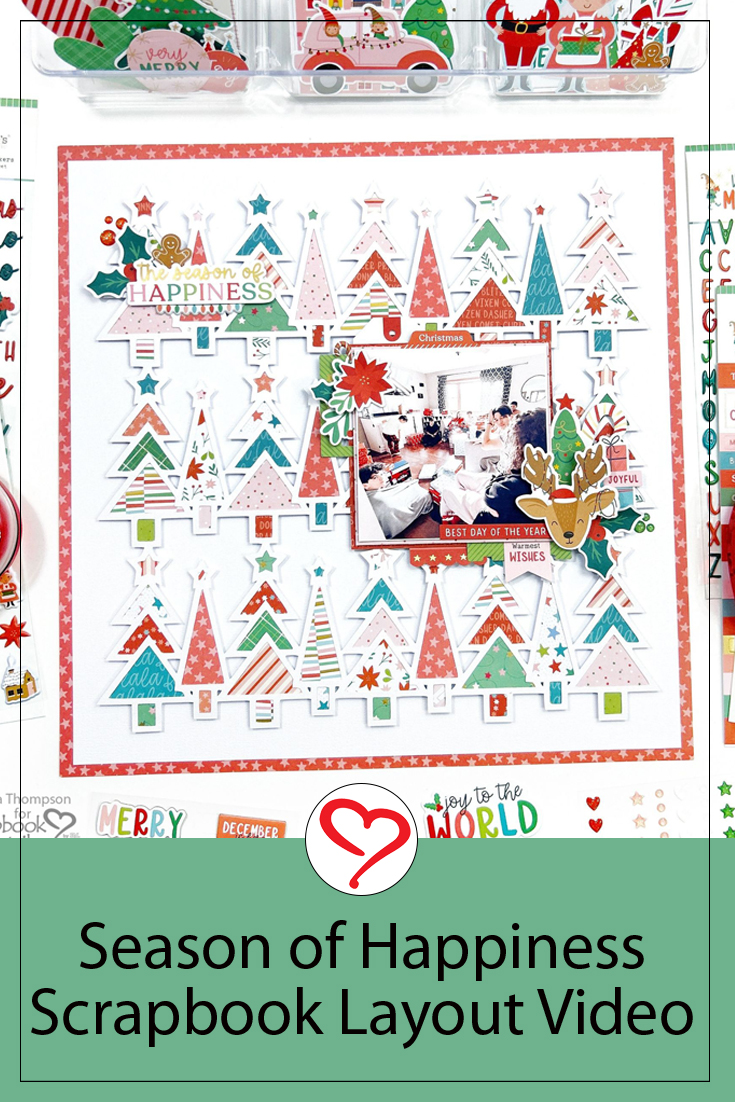
Hi, Erica here today! I am so excited to share my first project for the Scrapbook Adhesives by 3L design team member! Today I have a Season of Happiness Scrapbook Layout to share with you.
Working on the Cut File for the Season of Happiness Scrapbook Layout
I started by backing the cut file with 6×6 holiday-themed patterned papers. This process does take some time but the result is so worth it! It’s great that I can showcase so many different colors and patterns on one layout. To adhere the patterned papers to the cut file, I used the Dual Tip Glue Pen.
Once covered, I added the Crafty Foam Tape White 108ft all over its back. This gives it some height and pops up off the layout. The Crafty Foam Tape White 108ft is my favorite foam tape to use with cut files because it is the perfect thickness to give just a little bit of dimension to my layouts.
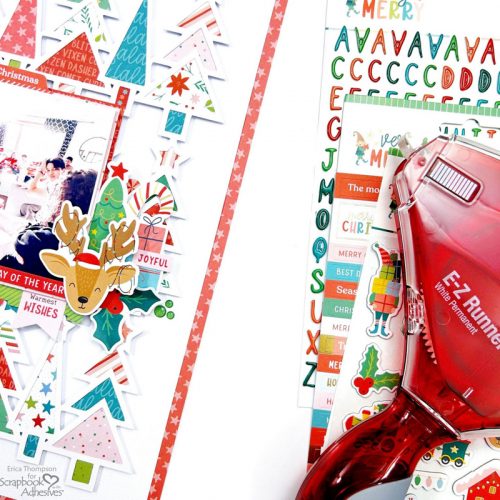
Mat my photo onto some pink polka dot patterned papers using the E-Z Runner® Permanent Strips Refillable Dispenser. Then apply the 3D Foam Creative Sheets Medium White on the back of a piece of red patterned paper. I love to cut these up (they come in 6×12 sheets) to pop up my photos. I can cut the perfect size for my 4×4 photo and it covers the entire back of the photo.
Adding the Finishing Touches
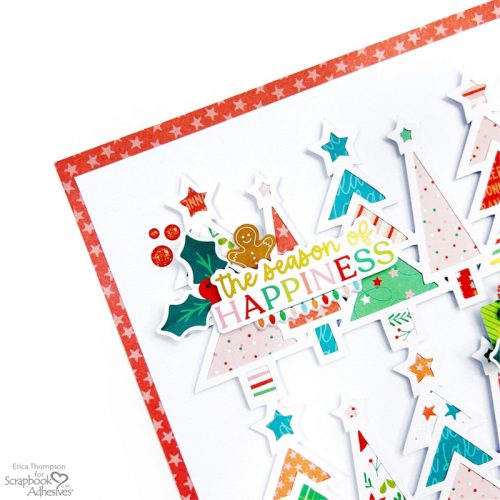
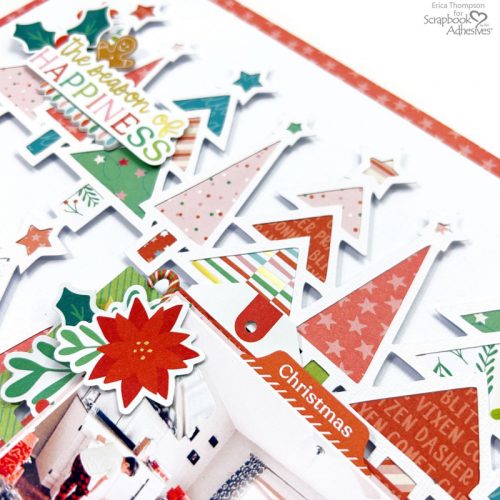
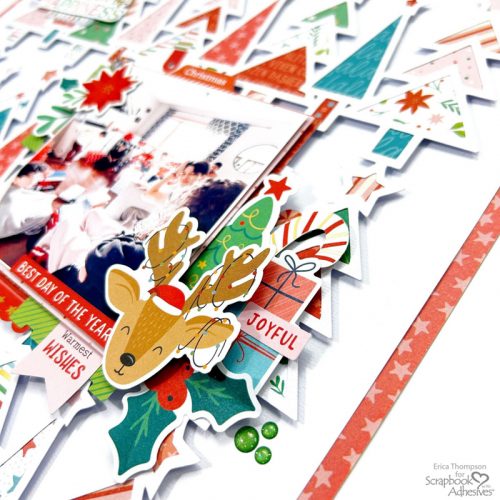
Creating layered embellishment clusters with die cuts and stickers and Crafty Foam Tape White 108ft. I double up the foam adhesive behind the reindeer to start the cluster to the right of my photo. I can tuck other embellishments behind this die cut to help create a fun and dimensional cluster. To finish off the layout, I add some enamel dots.
I hope you are inspired by my holiday layout! You can check out my process video over on my YouTube channel HERE!
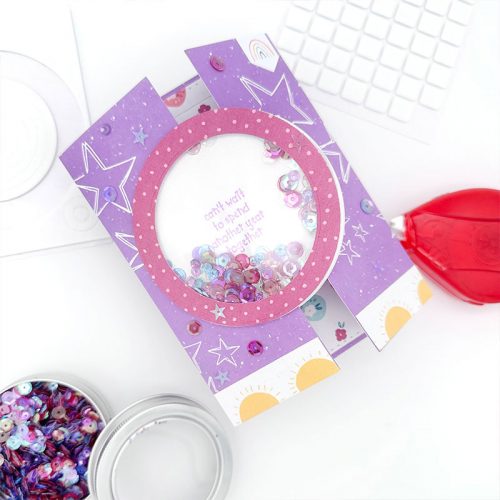
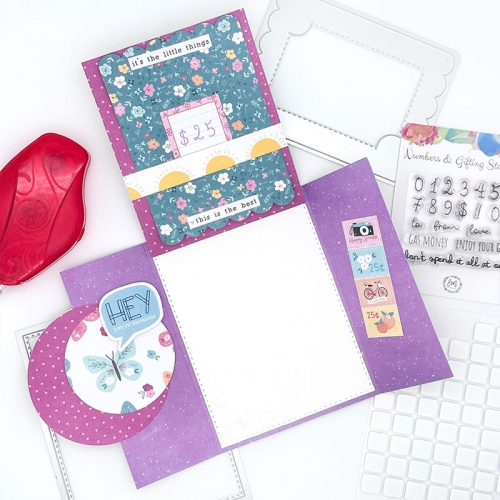
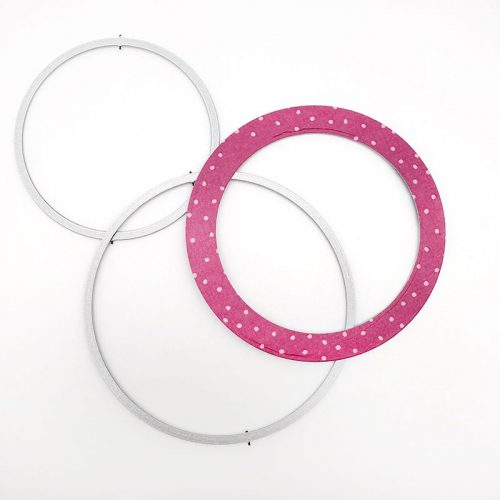
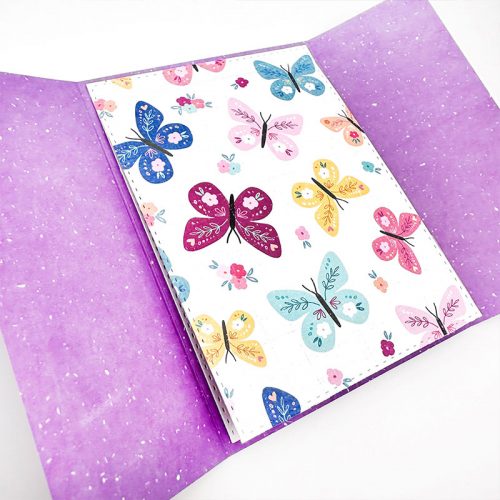
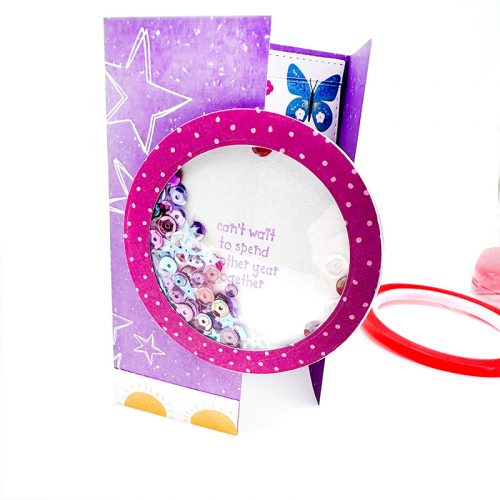
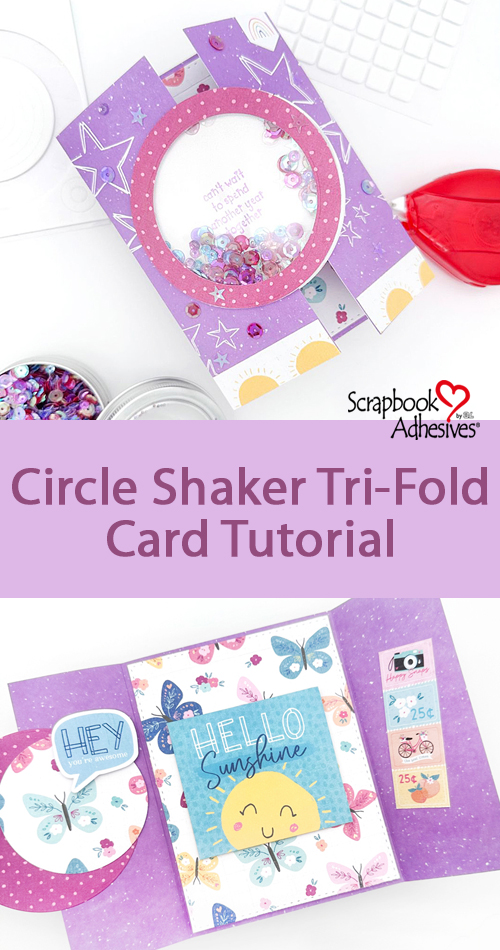
Hi crafty friend! Emily here today! I’m so excited to be a new designer for Scrapbook Adhesives by 3L. Today, I am going to share a fun take on a tri-fold or gatefold card with a circle shaker. One of the hardest parts of creating a shaker, in my opinion, is making sure the foam tape around the edge is all sealed so nothing spills out. These 3D Foam Circles Frames come in rings so all you have to do is make the correct size frame and bam! It’s that simple!
Creating the Circle Shaker Element
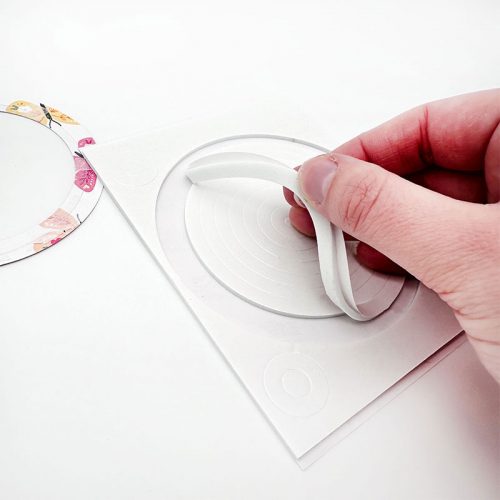
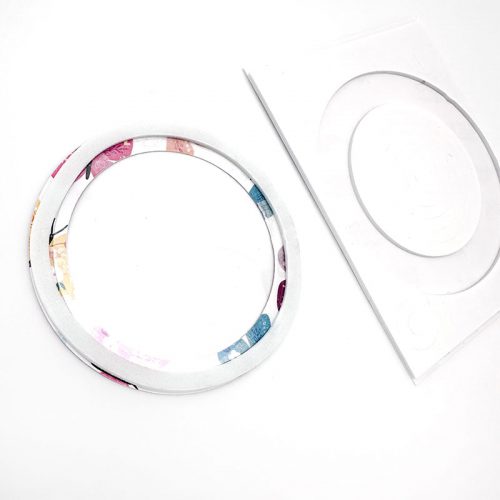
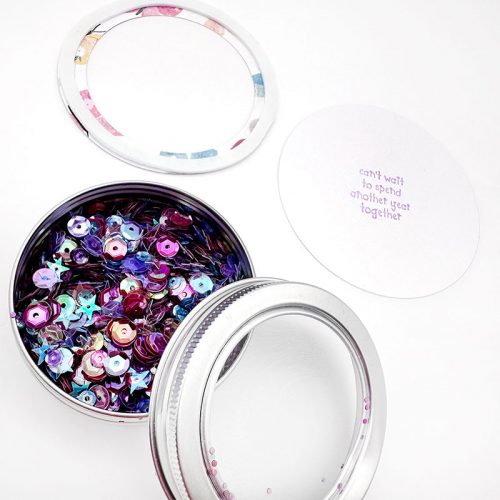
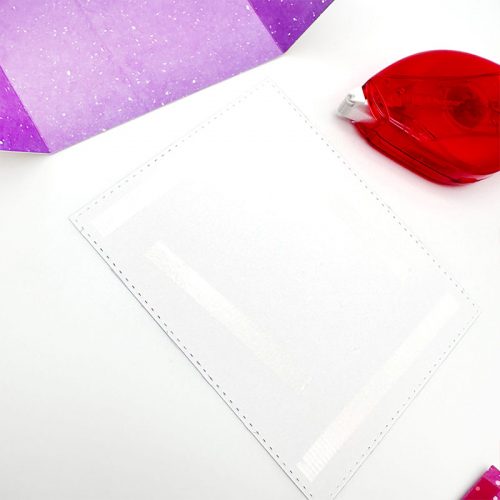
To create your shaker, you will need a base, some pretty sequins (of course), acetate, foam adhesive, and a frame. With the 3D Foam Circles, the foam adhesive is done! Nest two circle dies to create a ring and die-cut with patterned paper for the frame. With the larger circle die and a piece of acetate, I cut a circle for the window and adhered it to the frame with the E-Z Runner® Permanent Strips Refillable Dispenser.
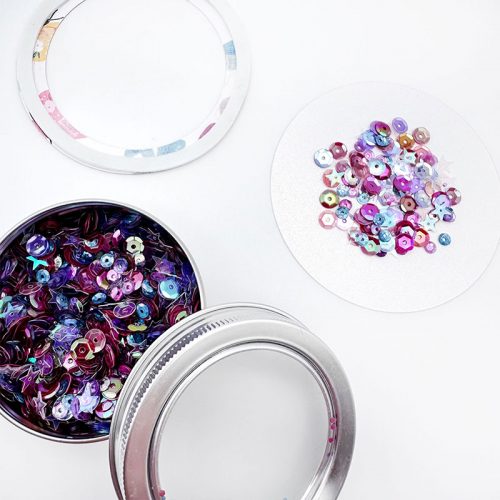
Cut another large circle for the background and stamp the sentiment. I chose this sentiment because it felt right heading into the new year! Next, grab the lovely assortment of sequins, these have stars in them, and knew I wanted to use them for my shaker element and had just the right paper to go with it.
Place the sequins on the base, make sure not to put too many! Then carefully assemble the shaker element!
Creating the Tri-Fold Card Base
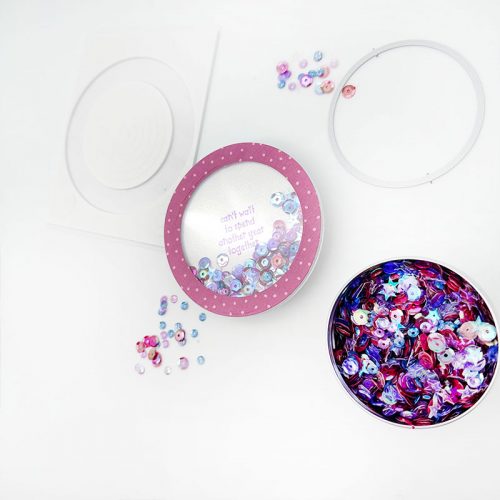
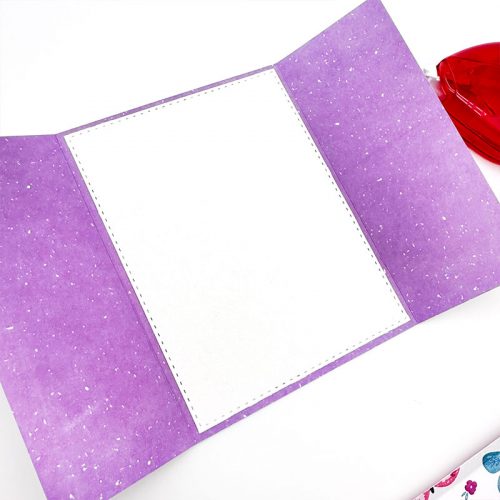
My next step was to create my card! Using this fun 8.5 x 5.5-inch star patterned paper, I scored my paper at 2 1/8 inch and 6 3/8 inch with the 8.5-inch side facing up. For the inside of my card. I cut the A2 Liner Die as a mat to write or stamp on it, and it gives a finishing touch.
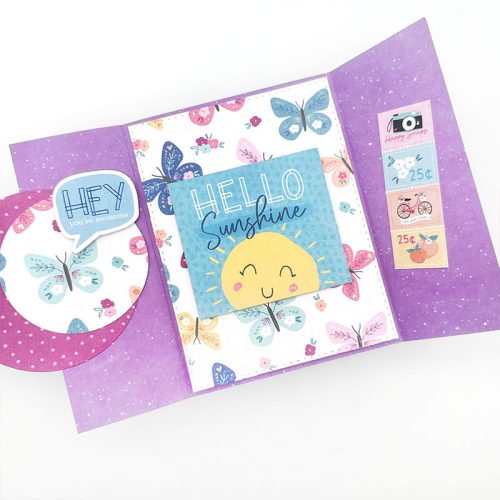
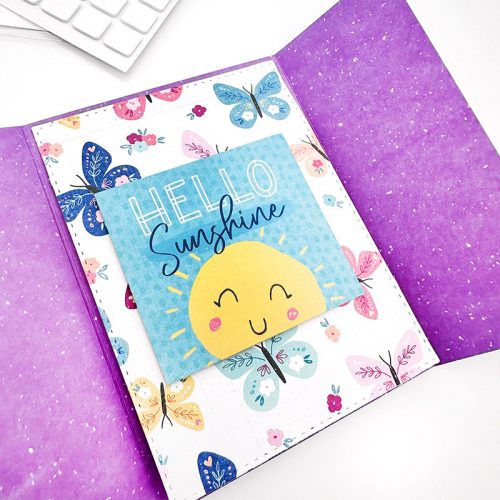
Adding a Surprise Fold
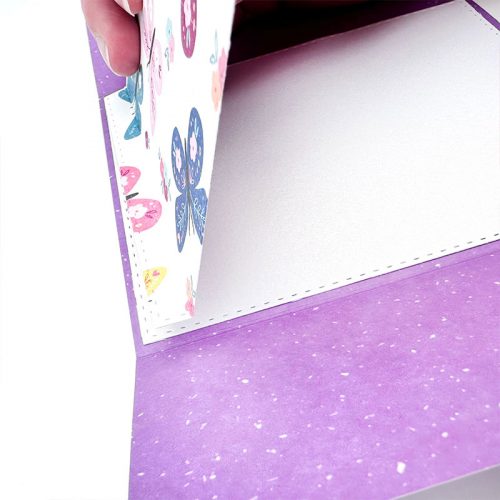
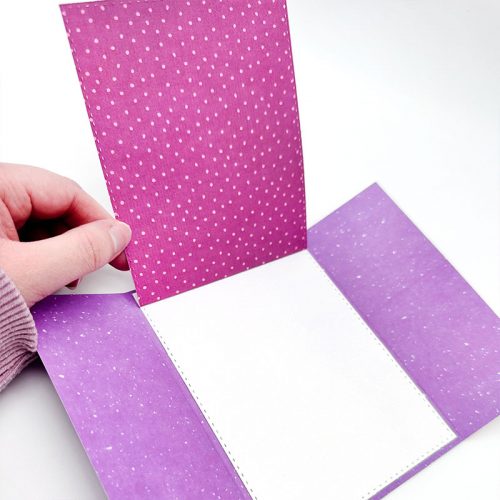
I cut out another piece of patterned paper in the A2 Liner Die, and then scored it at 3/8 inches just at the top. This creates a tab so I can add it over the top of the inside of my card. Secure it with some Extreme Double Sided Tape 1/4 in. This surprise fold covers where your sentiments would be written, and creates another design element!
Embellish the Suprise Fold
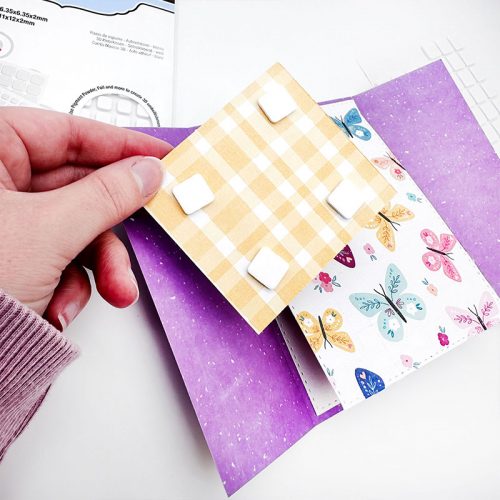
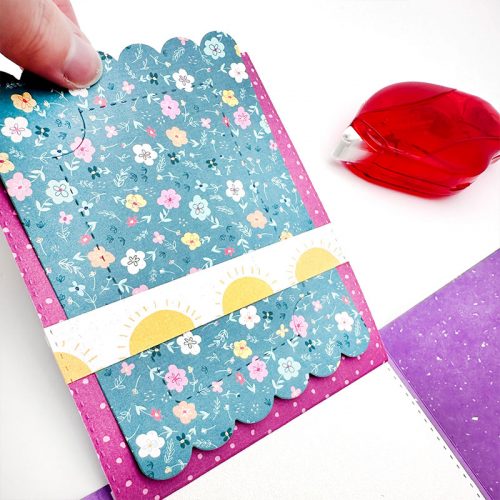
For interest and dimension, I placed a cute ephemera piece with 3D Foam Squares! Inside the top half of the flap, I added a space to insert a gift card. Create a holder with the Gift Card Holder Die and patterned paper. Here, I cut out a strip of the patterned paper (it has a row of suns on it – so cute!). Add the E-Z Runner® Permanent Strips Refillable Dispenser on each side of the strip to create a holder for the gift card holder to slip into and out of.
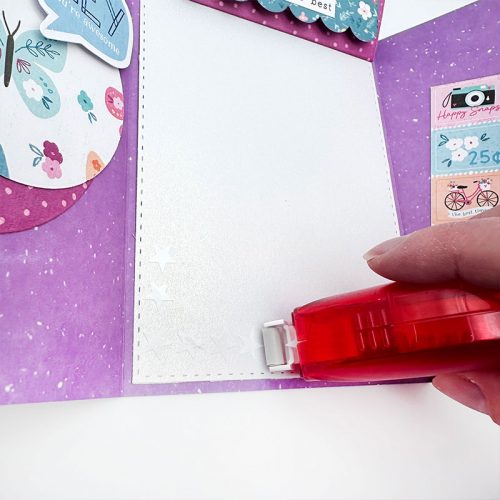
Wear Your Adhesive on the Outside with Foil
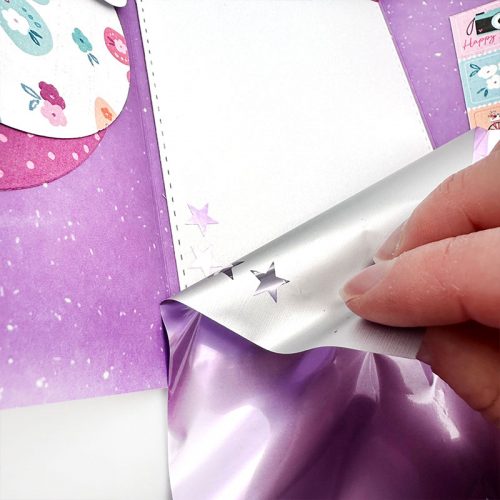
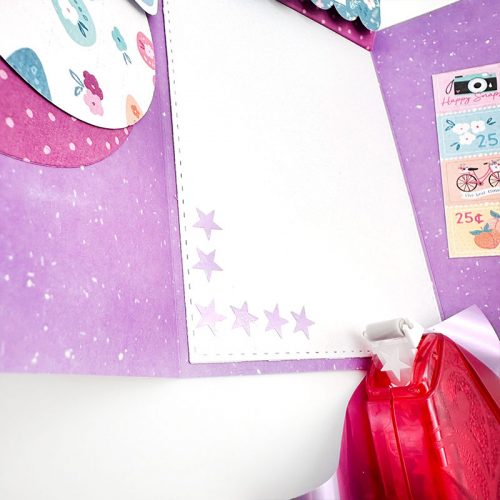
Time to decorate! Did you know Scrapbook Adhesives by 3L has different shaped tape runners? I had to use the E-Z Runner® Stars Refillable Dispenser! They also offer beautiful foils, here I am using the purple foil from the Metallic Transfer Foil Sheets Pastel Colors to match my card. Apply the stars on the inside bottom base of my card for a little touch of shine! Simply roll your tape like usual, place the foil onto the adhesive stars (or whatever shape you have) color side facing you, and rub the foil to transfer the color. Peel off, and it’s like magic! Such a beautiful and simple trick to add some shine and different embellishments to your cardmaking.
Assemble the Card
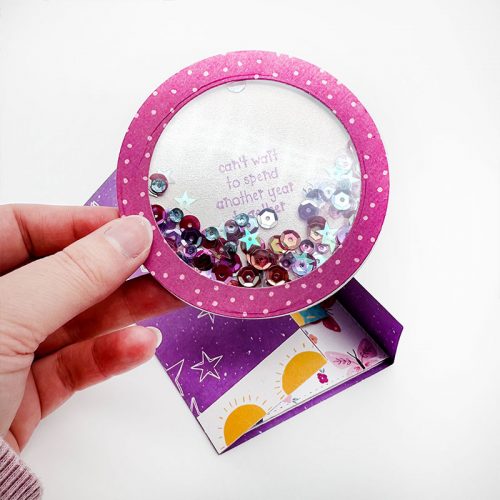
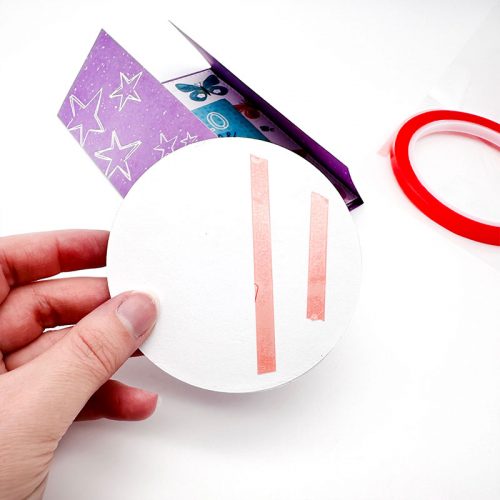
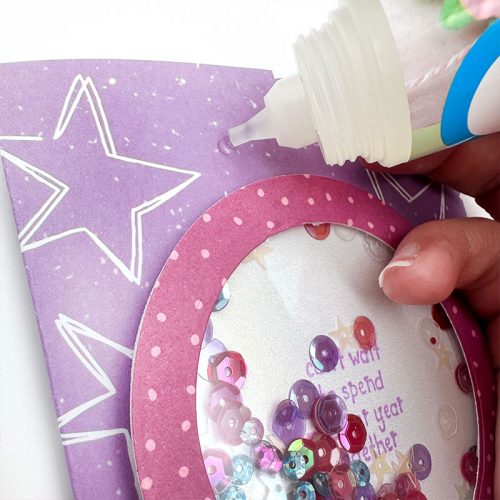
Time to add my shaker onto the base of the front of my card! Make sure you add the adhesive on only ONE SIDE of the back of your shaker element. This adds such a fun touch to your card! Finish this off by adhering more of those star sequins and the front of my card base, as well as some stickers and other ephemera to the rest of my card.
That’s it! This was such a fun card to make, with a lot of different elements! Have you ever made a tri-fold card before? Have you ever done it with a shaker element? You should try it!
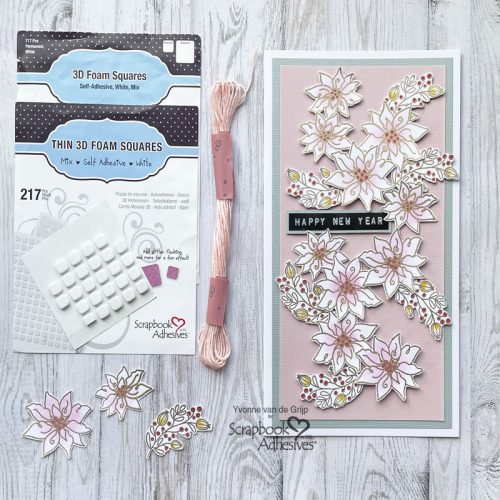
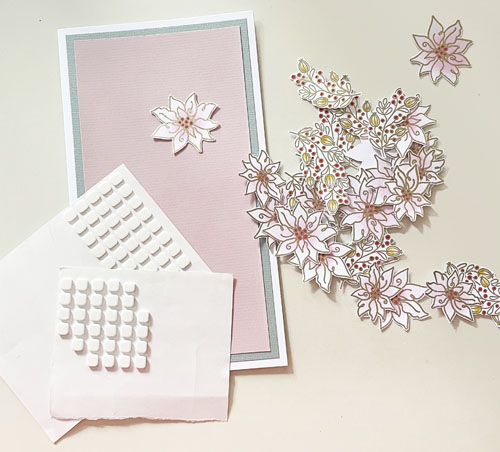
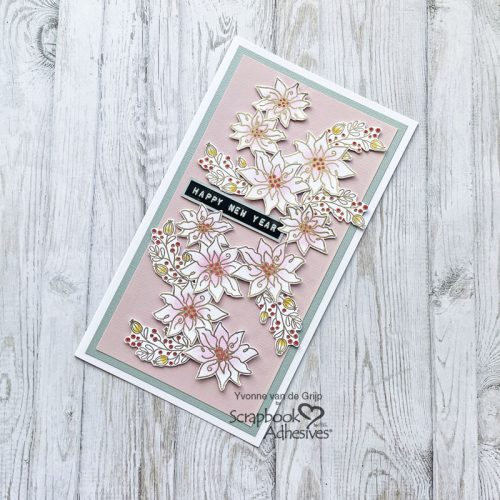
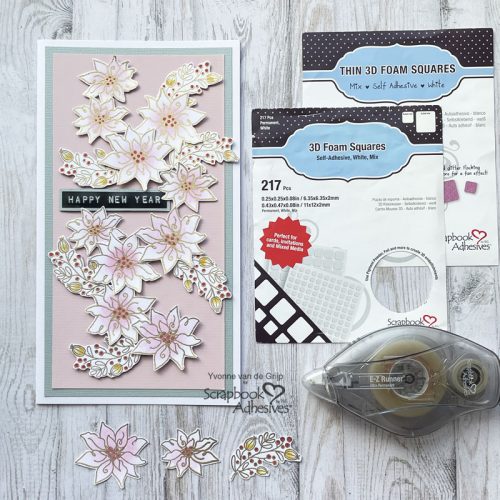
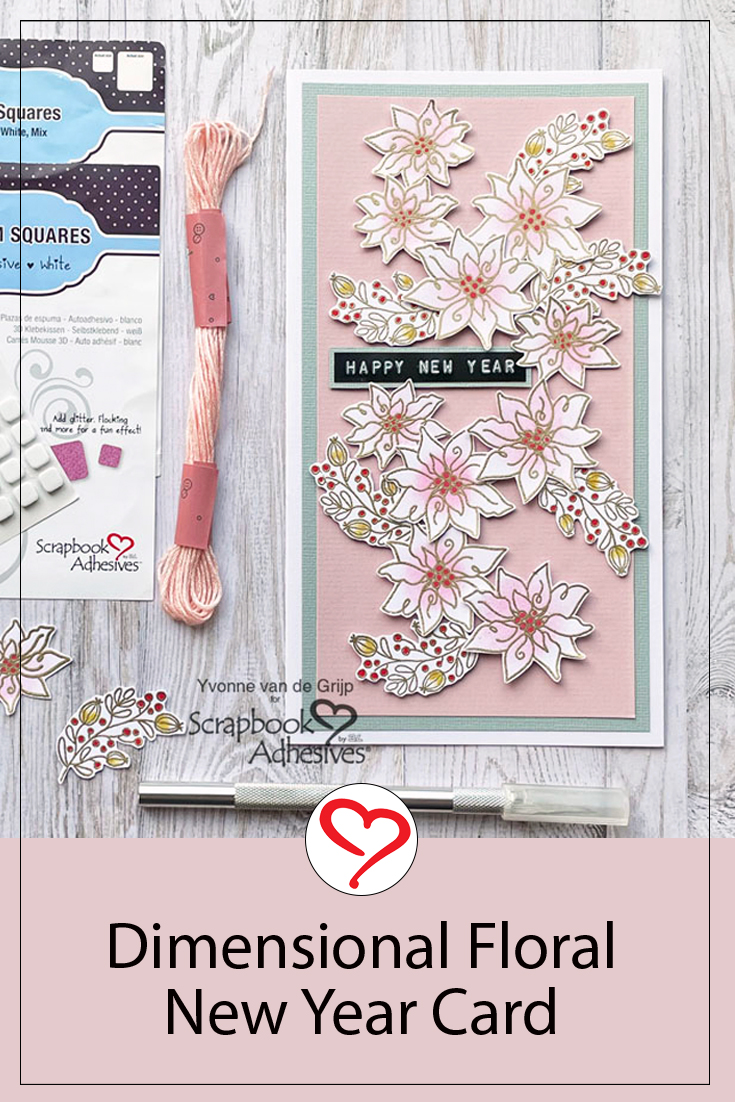
Hi everyone, Yvonne here. With this sweet Dimensional Floral New Year Card, I would like to wish you all a happy and healthy 2024! This card is all about stamping, fussy cutting, layering, and of course, lots of dimensions! Adding a combination of the 3D Foam Squares White Mix and the Thin 3D Foam Squares White Mix for various uplifting heights is so easy to create. I would love to show you how I made my card.
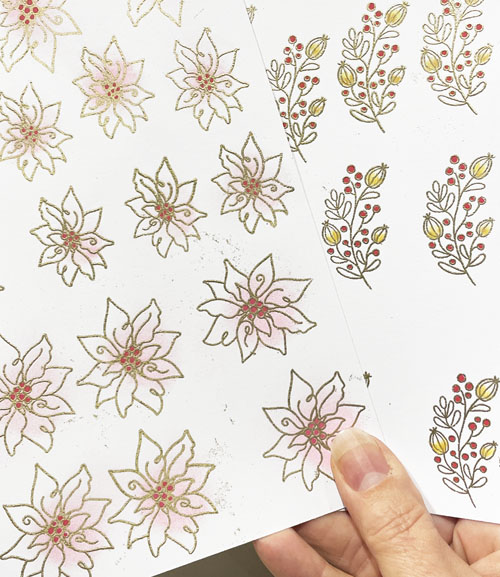
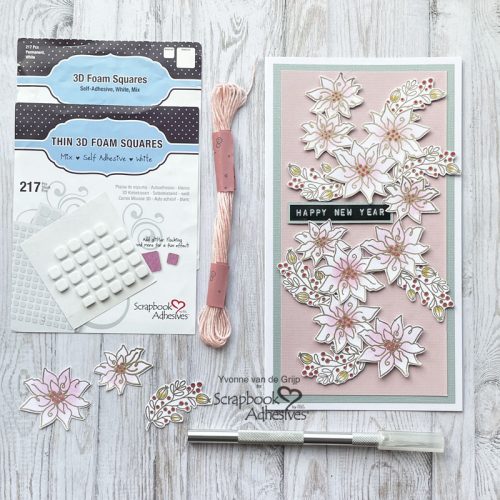
I used a poinsettia stamp set…yep, poinsettias are not limited to Christmas only! Start by stamping multiple poinsettias and branches onto white cardstock with an embossing ink pad. Sprinkle gold embossing powder over the wet ink, tap off any excess embossing powder, and use a heat tool to melt the embossing powder.
Now use an inkblending tool and a spot of pink ink to color the poinsettias. To color the hearts of the poinsettias and the branches I used color pencils. Now fussy cut the flowers and branches.
Building a Scene
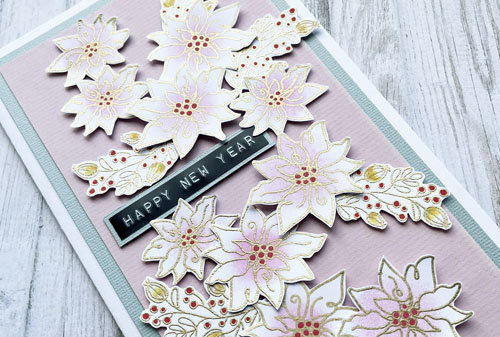
To create a lovely Dimensional Floral New Year Card, I used a combination of the Thin 3D Foam Squares White Mix and the 3D Foam Squares White Mix to adhere the flowers and branches onto the card. Make sure to leave a little space to place a sentiment.
For the sentiment, I used my Dymo label maker to print out Happy New Year and then place it on a grey banner. Tuck the banner in the flowers with the Thin 3D Foam Squares White Mix.
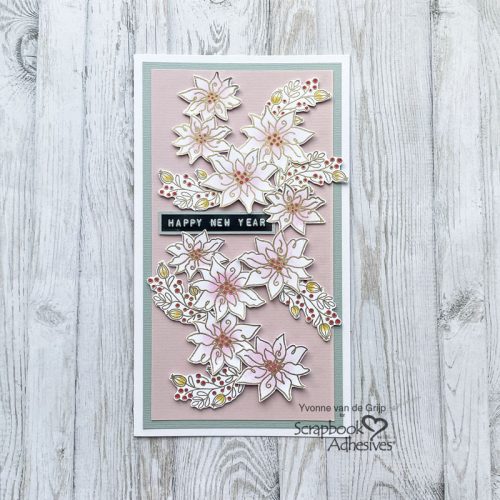
And voilá, your Dimensional Floral New Year Card is ready! I hope you enjoyed this tutorial and wish you happy crafting in 2024!
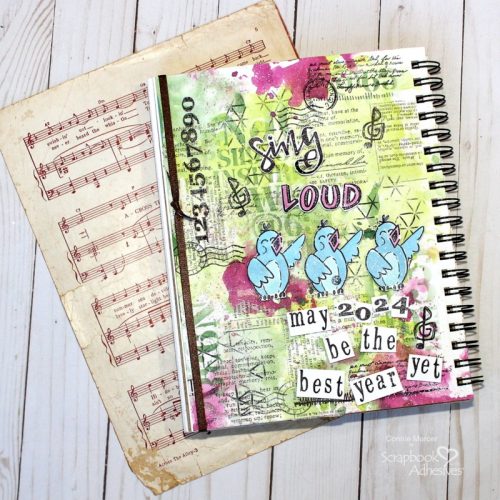
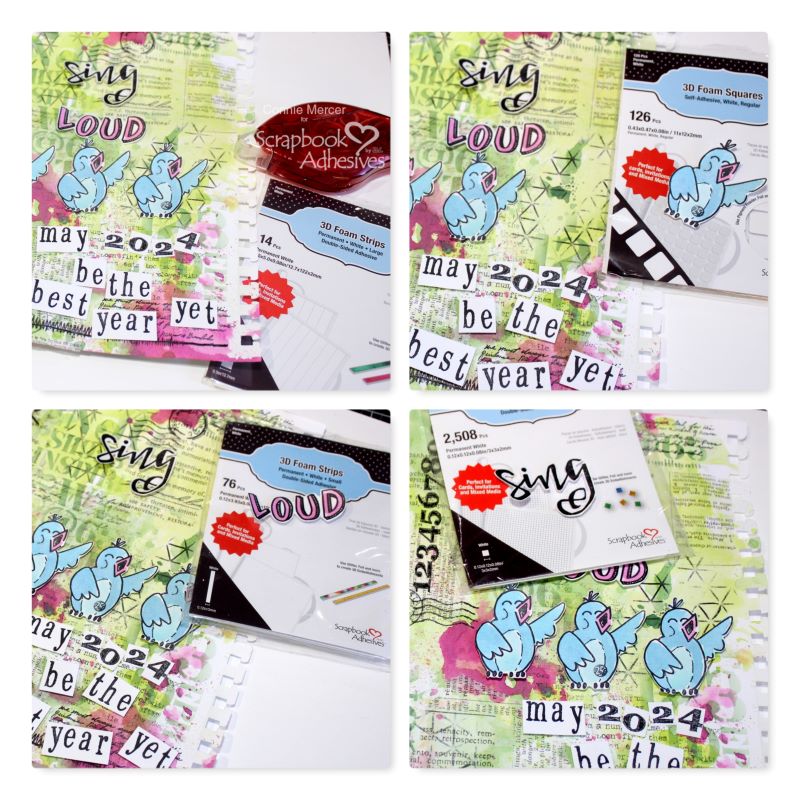
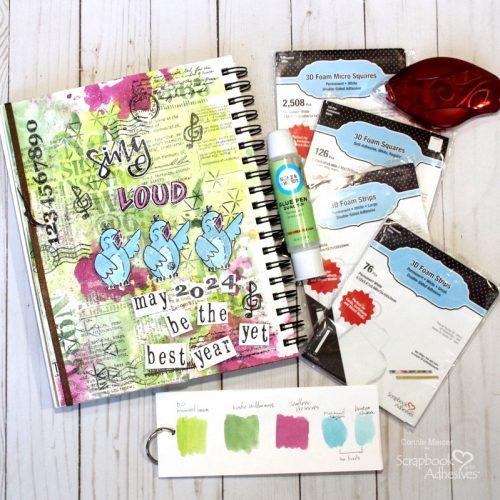
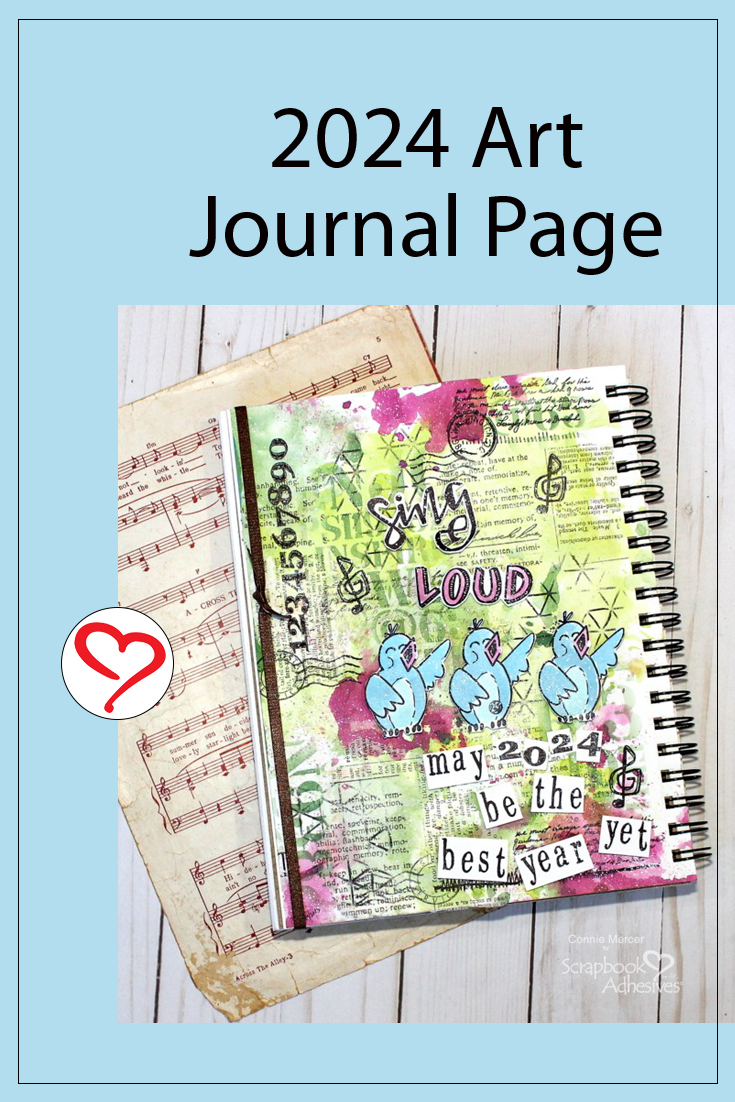
Hi, Connie here bringing in the New Year with a 2024 Art Journal page. I’m using 3D Foam Adhesives for that dimension that we all love to add to our projects. Art journal pages are no exception! They make everything look better.
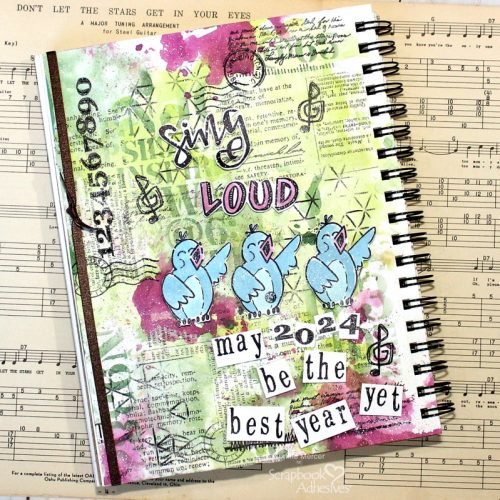
Starting my art journal page with the idea (for lack of a better word) that 2024 will be the Best Year yet. Believing that it will be that for all, I have my bird friends singing it loud.
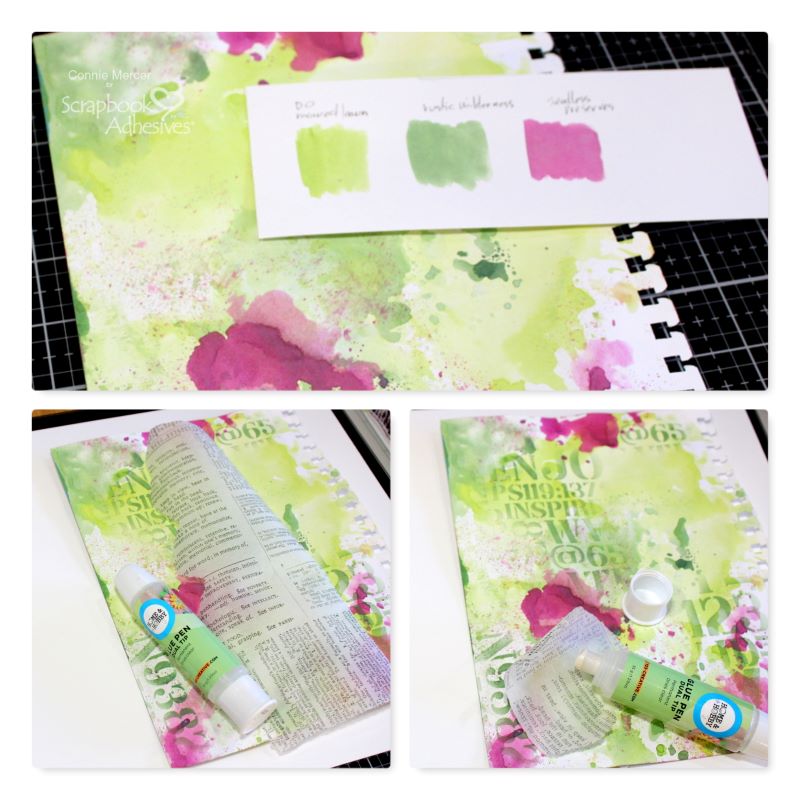
The 2024 Art Journal Page Background
1. Select your ink colors, I’m using Distress Oxide ink. Water the ink down and dab the paper into the ink. Dry after each layer. Repeat the process for your desired look. 2. For a more distressed look, add tissue paper with text on it. 3. Use the large tip of the Dual Tip Glue Pen to apply on the tissue paper. Then with the background stamps, randomly place them in areas of the page. Go crazy!!! This is the fun part!
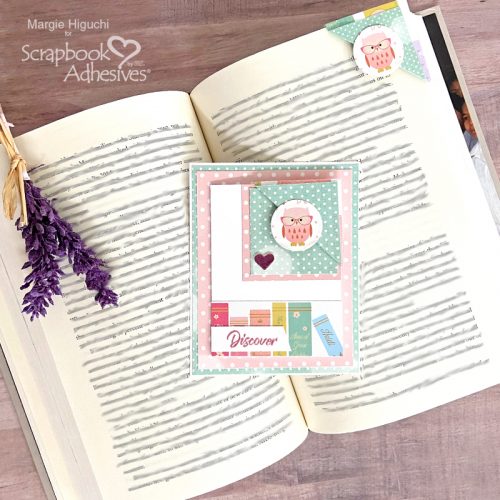
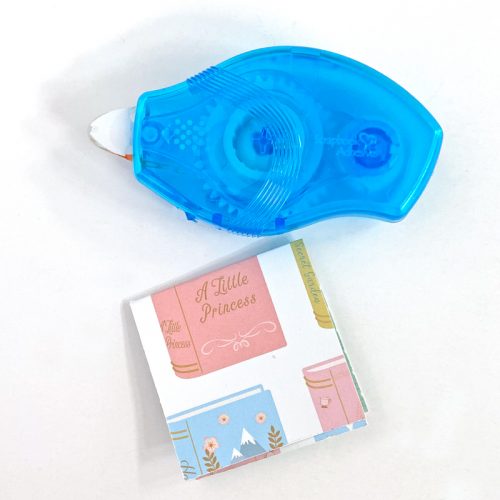
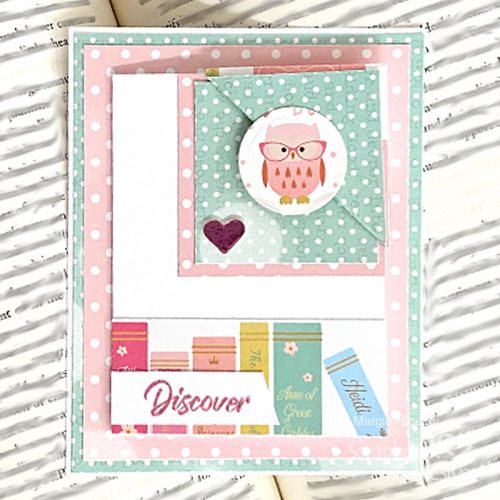
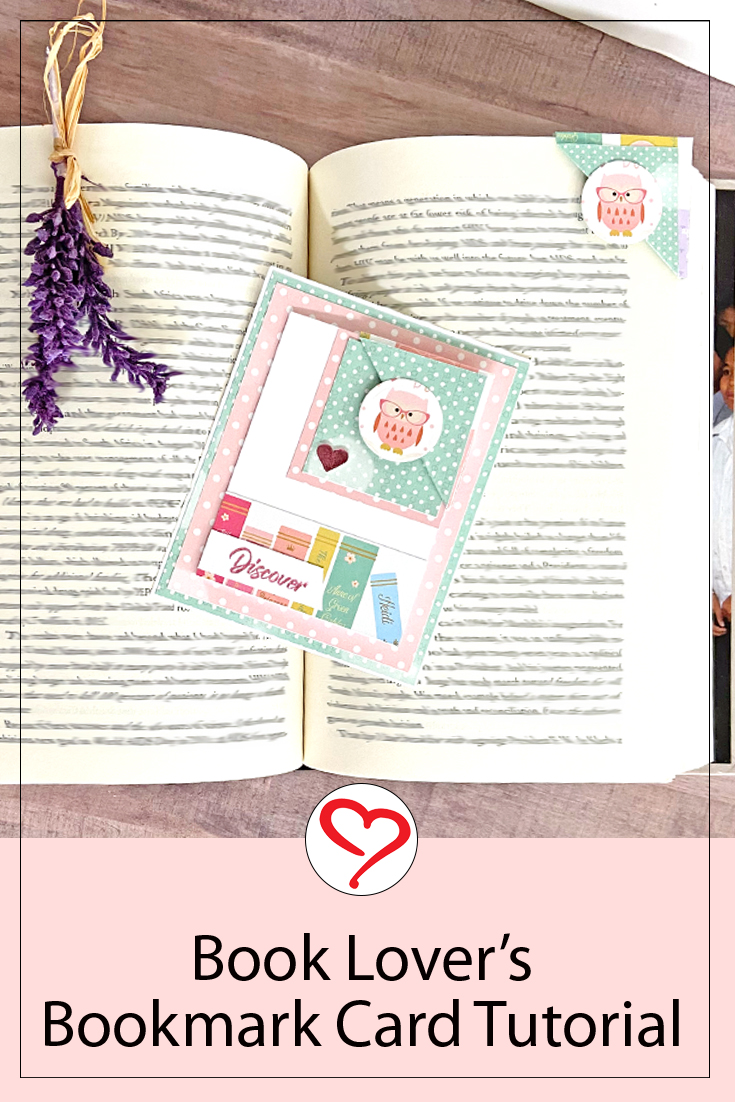
Hi, Margie here today…Happy New Year! My resolution for the year is to read more books! Inspired by this goal, I created a Book Lover’s Bookmark Card because it can house a corner bookmark and it’s a perfect gift for any of my bookworm friends. Let me show you!
Book Lover’s Bookmark Base
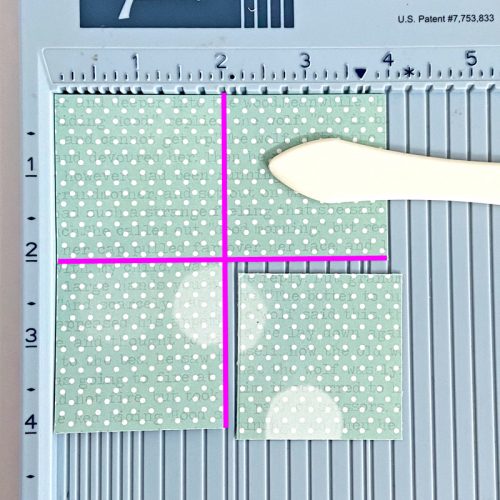
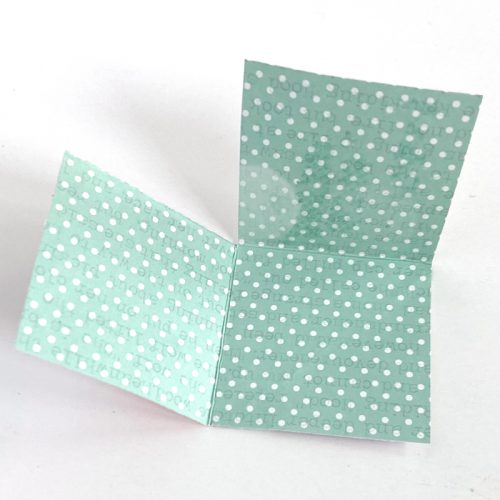
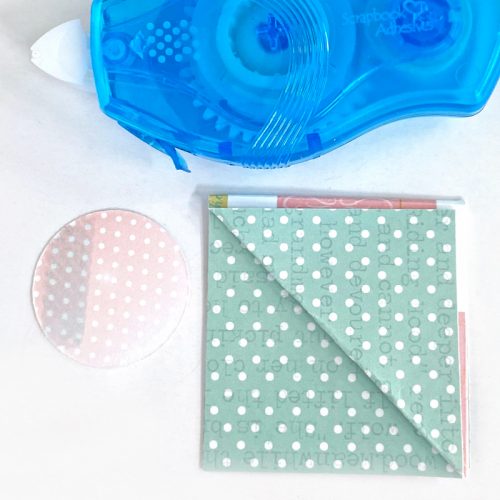
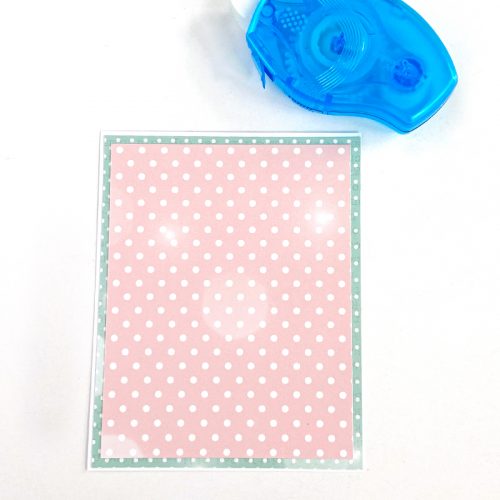
Score a piece of a 4-inch square of patterned paper into four 2-inch quarters. Cut one square off and set it aside to use for the card base. Adhere the flaps together with the E-Z Runner® Petite Permanent Dots Refillable Dispenser to create a square pocket shape.
Bookmark Assembly
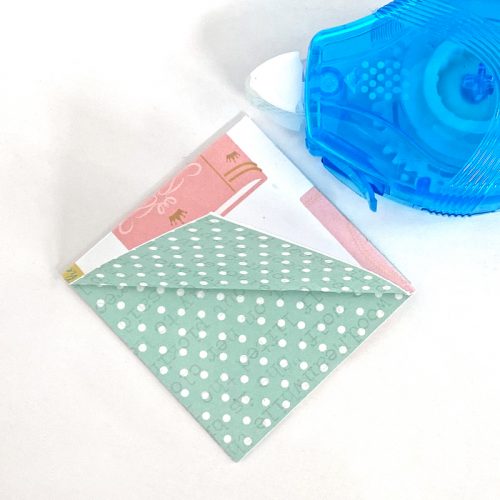
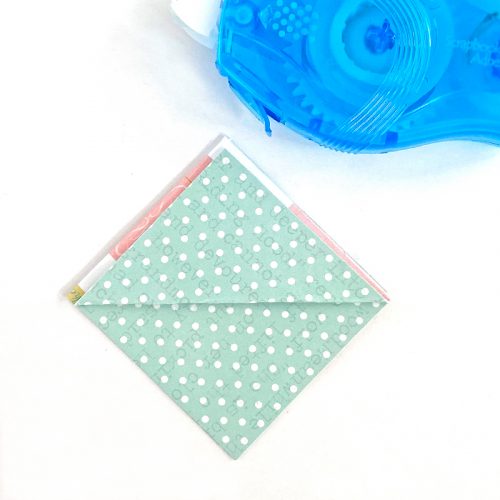
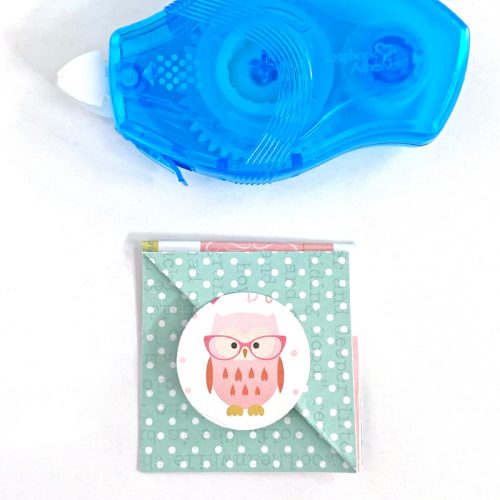
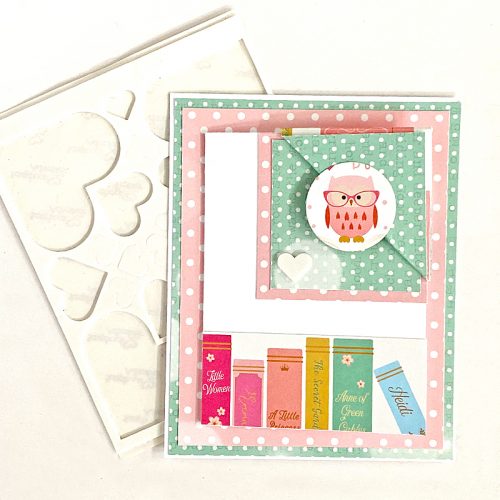
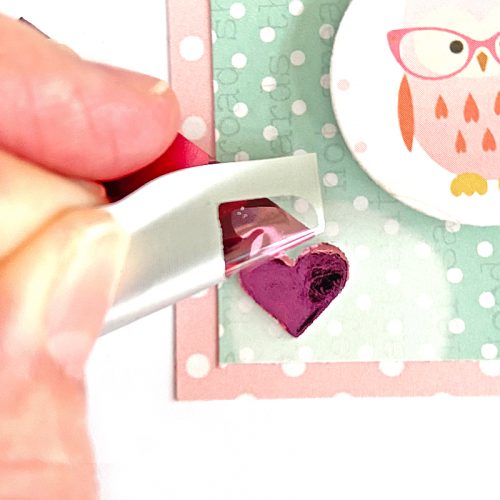
One side will have a double layer – open and fold over one layer, leaving the outside pattern as a 1/8-inch border as shown in the upper right corner image. Secure it with the E-Z Runner® Petite Permanent Dots Refillable Dispenser. Next, apply half of a 1.25-inch decorative circle with the E-Z Runner® Petite Permanent Dots Refillable Dispenser and adhere to the middle of the square, leaving half overhang on the edge. Your bookmark is done. Set it aside.
Embellish the Card Base
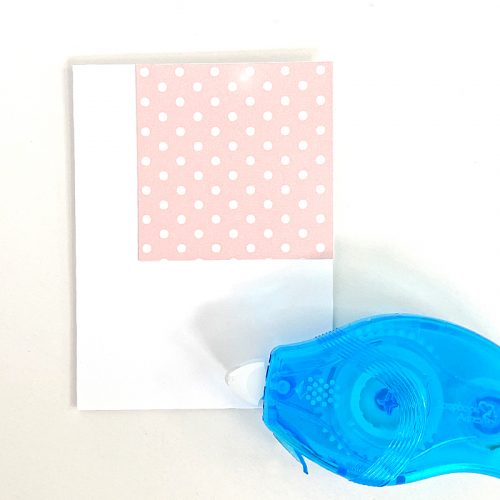
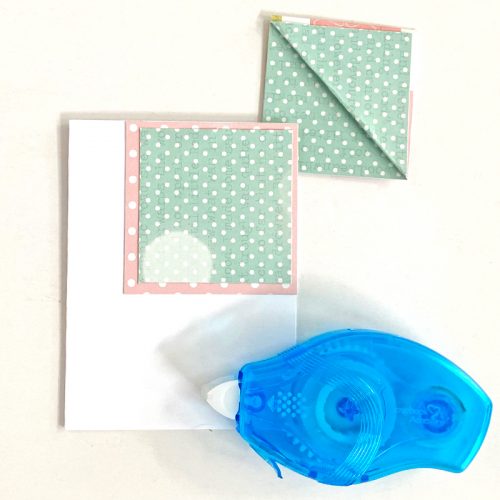
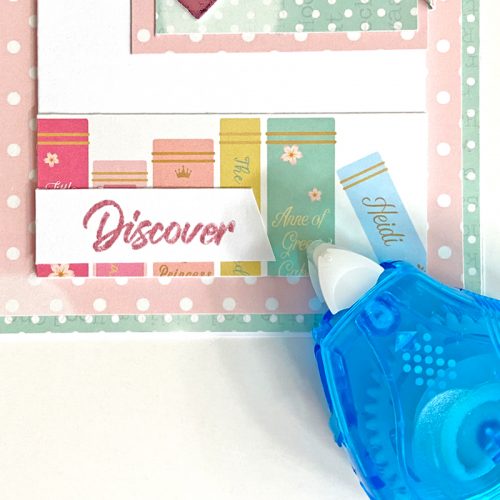
Fold a piece of 6 x 4-inch white cardstock in half to create a 3 x 4-inch side fold card base. Adhere a 2.25-inch square on the upper right corner and layer the 2-inch square cut from the bookmark base. Use your bookmark as a guide for placement. Adhere a border at the bottom edge of the card base.
The Finishing Touches
Mat a piece of 3 5/8 x 4 5/8-inch of pink patterned paper on top of a 3 7/8 x 4 7/8-inch of green patterned paper. Place it on top of a 4 x 5-inch white cardstock panel. Center the 3 x 4-inch white card base and add the bookmark in the upper right corner.
I hope you enjoyed my Book Lover’s Bookmark Card! So what is your New Year’s Resolution? Share with me in the comments below. Wishing you a better and wonderful year in 2024 (the Year of the Dragon)!
Other: Patterned Papers and Stamp: Memory Place (Knowledge + Read On! Papers from Book Lover Collection and Travel Stamp Set); Ink: Ranger Ink (Distress Oxide in Victorian Velvet); Score Board and Crease Tool; White Cardstock; Stamp Positioner
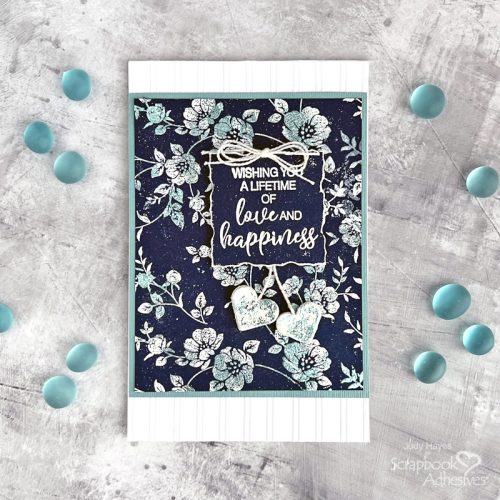
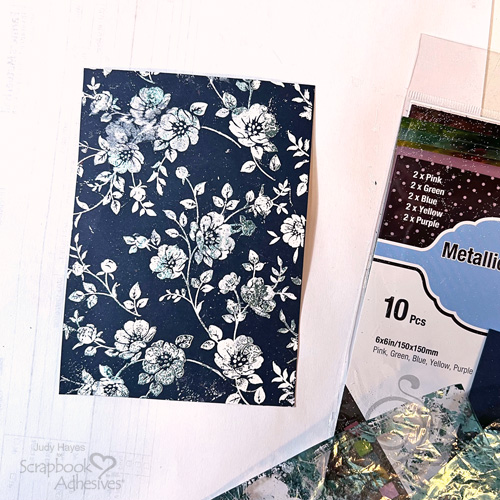
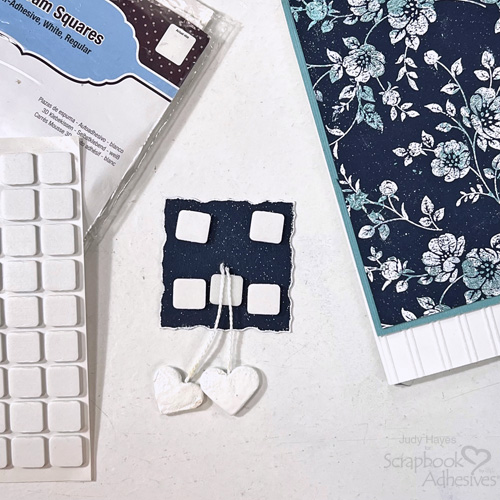
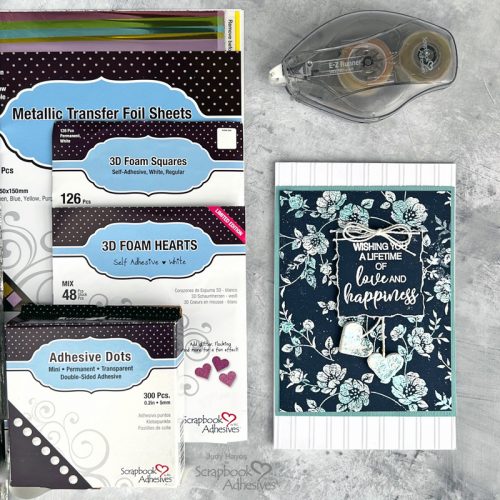
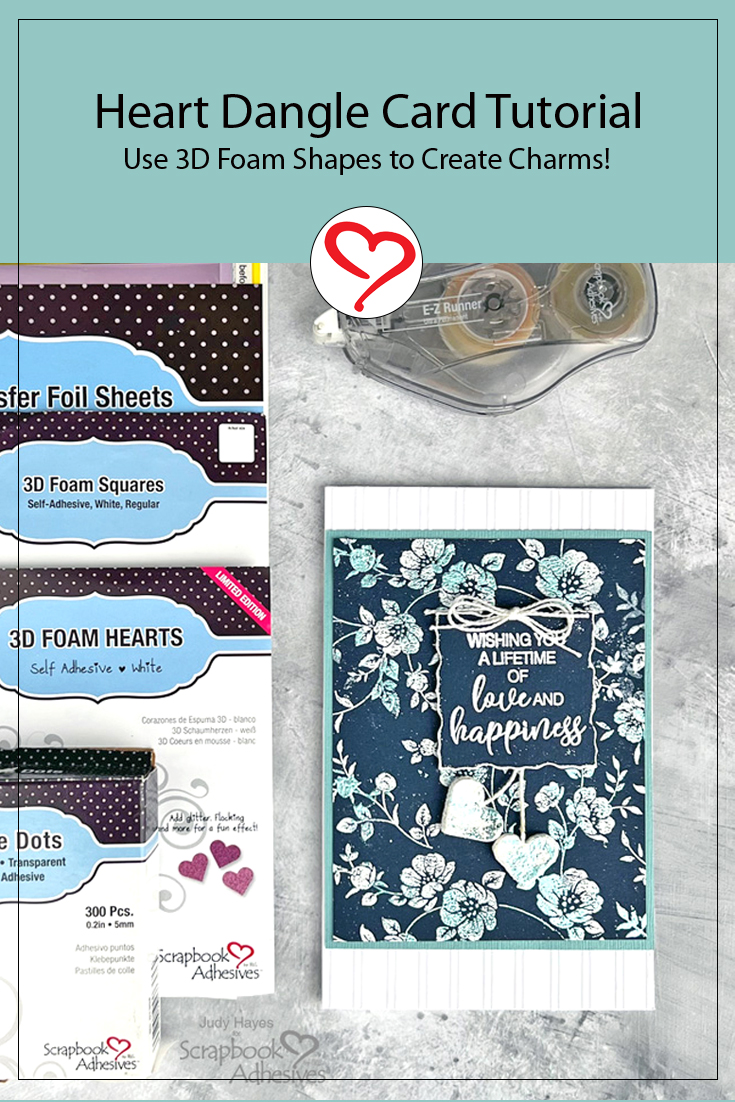
Hi, Judy here today! This Heart Dangle Card features a technique of randomly applying foil over a stamped design that has been embossed with embossing powder. I used the technique on the 3D Foam Hearts as well.
Stamp Background
Cut 4 x 5-inch navy cardstock for a card panel.
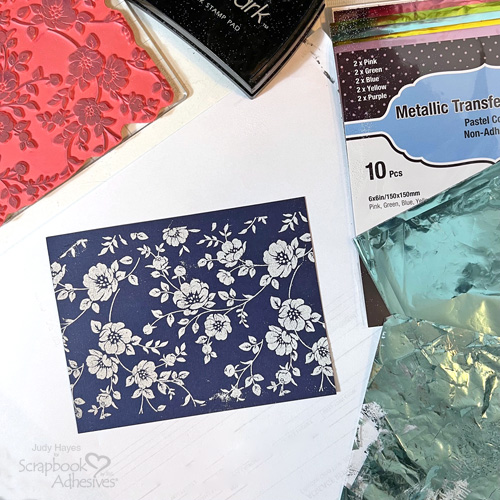
Ink background stamp with Versamark ink and stamp on navy cardstock. Cover the image with white embossing powder, remove excess and heat emboss with a heat tool.
Apply Foil
Take out blue foil from Metallic Transfer Foil Sheets Pastel Colors. This is a good technique to use foil that has been used and still has areas of color as this technique is meant to add touches of foil rather than completely cover images.
Use a heat gun to reheat the area of the embossed design, place foil over the heated area, and press lightly. Allow to cool slightly and then peel away the foil sheet. Repeat until desired foil transfer is achieved. It’s important to heat emboss just enough to be sticky but not too soft as to smear. It may take a little practice.
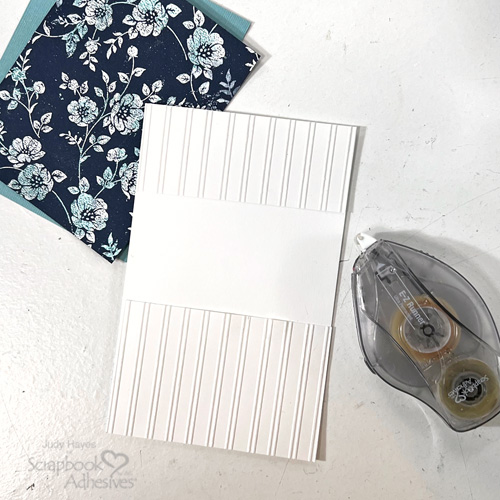
Assemble Card Base
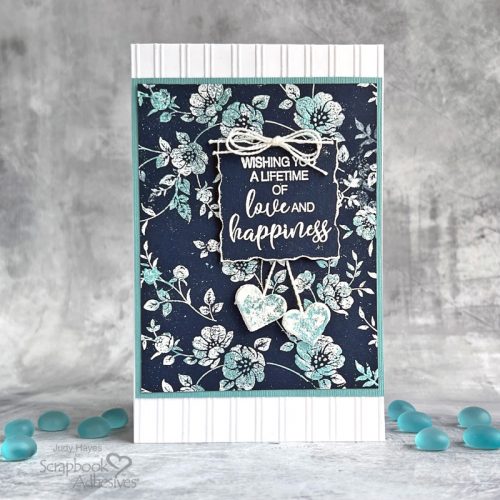
Cut an 8.25 x 6.5-inch piece of white cardstock, score, and fold to a 4.125 x 6.5-inch card.
Use an embossing folder and die-cutting machine to emboss the bead board design on 4 x 4.25 piece white cardstock. Trim to 4.125 inches wide and cut in half (across bead board pattern). Fasten each half to the top and bottom of the card front using the E-Z Runner® Ultra Strong Refillable Dispenser to apply adhesive to the card. It’s easier to apply to a flat card front than an embossed piece.
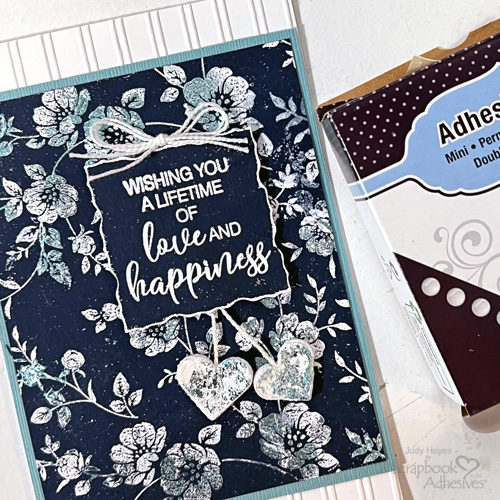
Stamp greeting with Versamark ink on navy cardstock, cover with white embossing powder, remove excess and heat emboss with a heat tool.
Use a die and die cutting machine to cut decorative edge square around verse. Tap edge of verse on Versamark ink pad, cover edge with white embossing powder, remove excess and heat emboss with heat tool. Repeat on all edges of verse.
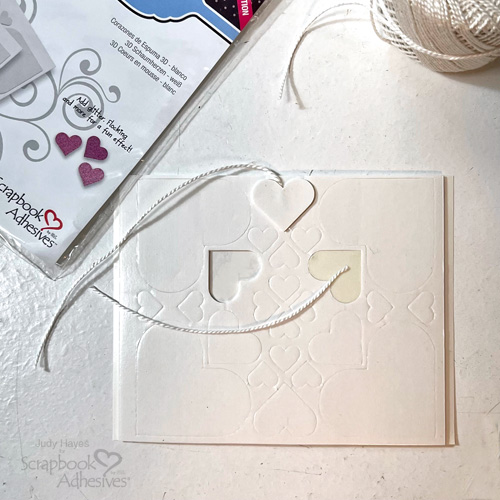
Make Heart Dangles
Cut 2 lengths of white pearl cotton about 3 inches long.
Take out sheet of hearts from 3D Foam Hearts, peel liner from a medium heart and place end of pearl cotton on it. Remove another medium heart and place it over heart with string. Repeat for a second heart.
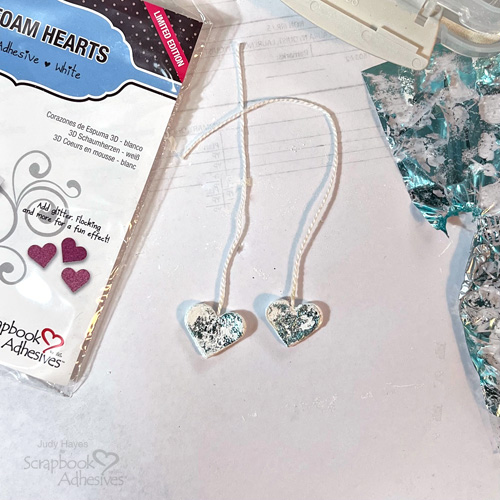
Peel liner from one side of a heart, press into white embossing powder and heat with heat tool. Repeat for second heart. Peel liner from back side of heart and heat emboss with white embossing powder. Gently reheat heart and place foil on it, allow it to cool slightly and peel foil away. Repeat as needed for desired effect. Apply foil to other heart in same way.
Fasten Greeting
Place 3D Foam Squares White Regular on back of stamped greeting piece with extra one at center bottom. Peel liner from center foam square and place strings of hearts on it, press string into adhesive and trim string ends. Peel liners from remaining 3D Foam Squares and fasten greeting to card front.
Add Bow
Tie 2 strands of pearl cotton in a small bow and trim ends. Place Adhesive Dots Mini on back of knot of bow and fasten at top of greeting.
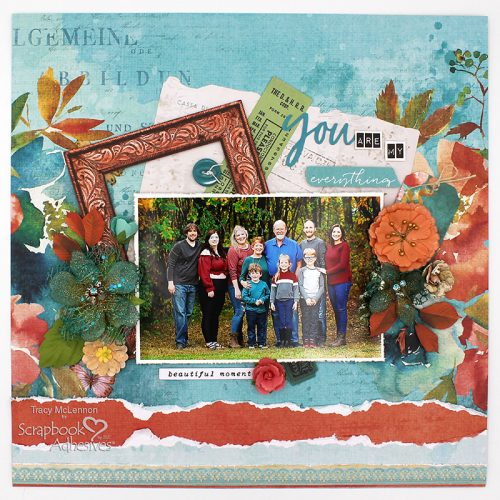
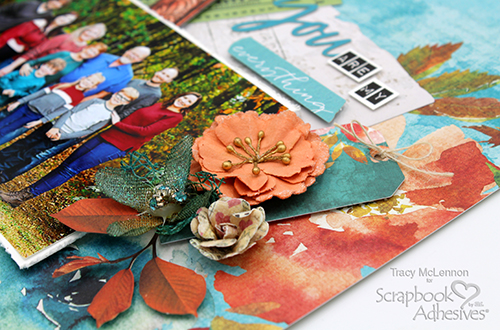
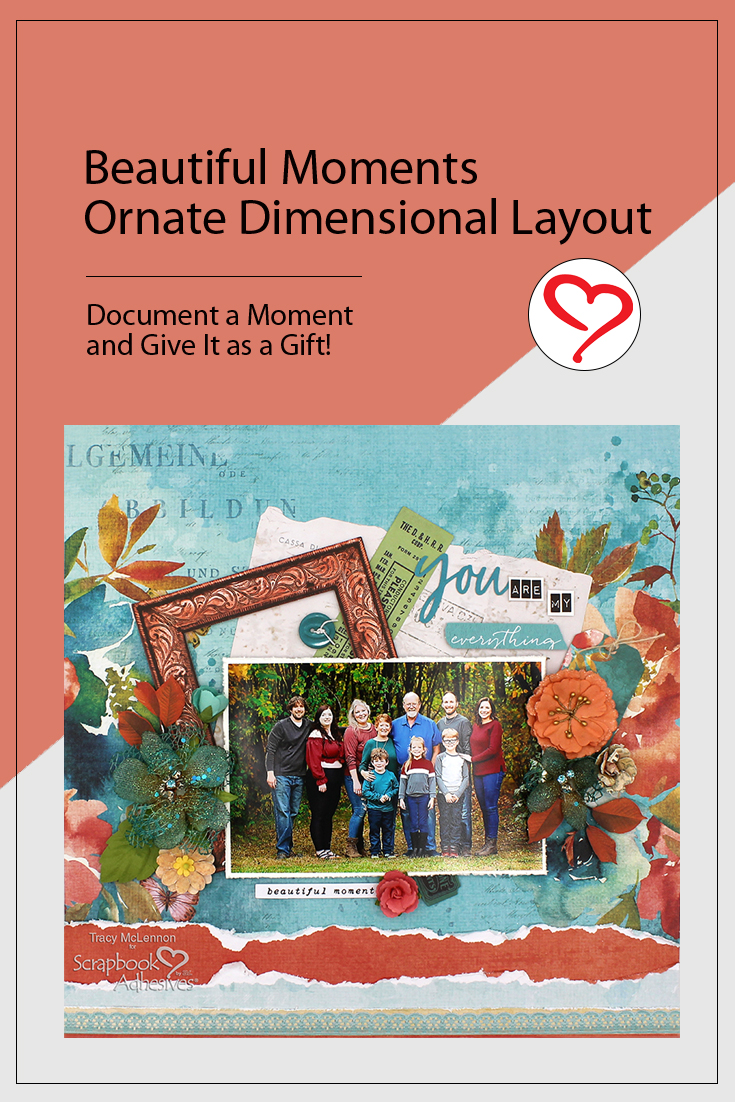
Hello crafty friends! Tracy here, and today I am sharing a layout that I created for family of their 2023 Family Photo. This Ornate Dimensional Layout will be housed in a shadowbox frame, so I was able to create with tons of dimension. Here are all of the details on how I created it.
Let’s Get Started
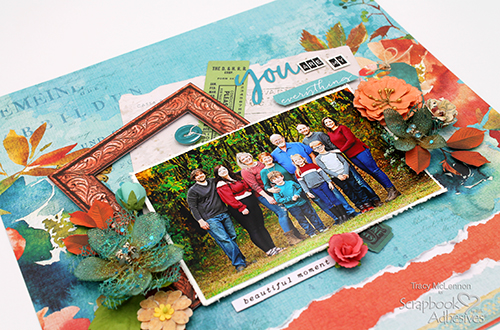
These beautiful patterned papers make stunning backgrounds. I created a simple one with some torn strip at the bottom, adhered using the E-Z Runner® Ultra Strong Refillable Dispenser. When creating a layout that will be hanging on a wall or displayed, my go to adhesive is the E-Z Runner® Ultra Strong Refillable Dispenser. This will make sure that any Ornate Dimensional Layout will stay together.
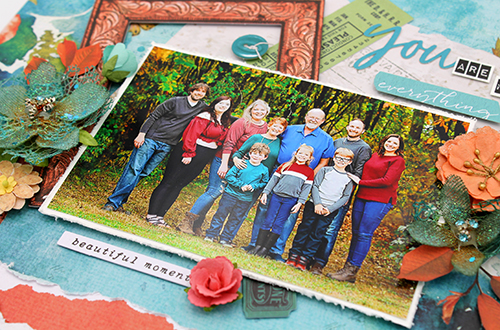
Next step is to mat the 4×6 photo in white cardstock, adhered together using the E-Z Runner® Ultra Strong Refillable Dispenser. Add the large ephemera pieces behind the matted photo using the same adhesive. Adhere the ephemera frame using Crafty Foam Tape White. Then add the matted photo to the middle of the layout using 2 layers of Crafty Foam Tape White.
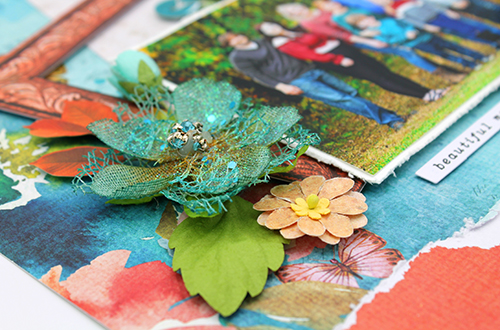
Attach more smaller ephemera pieces around the matted photo using both Thin 3D Foam Squares White Mix and 3D Foam Squares White Mix. using different depths of foam adhesive can add so much more dimension. Some of the laser cut pieces are very delicate, like the “You” of the title. This was added using the Dual Tip Glue Pen.
Next step is to attach the flowers to the Ornate Dimensional Layout. I added flowers to either side of the matted photo using Adhesive Dots 3D. My last step was to add the laser cut leaves around the flowers using 3D Foam Squares White Mix.
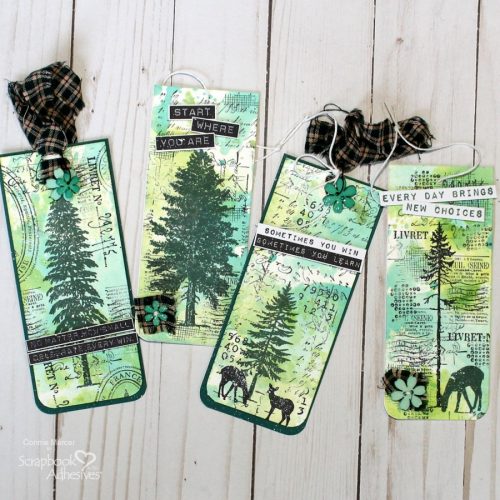
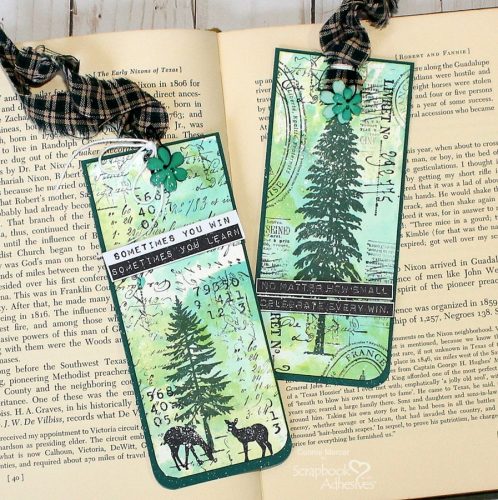
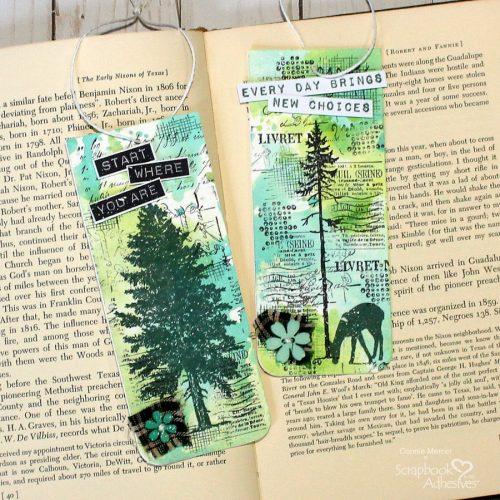
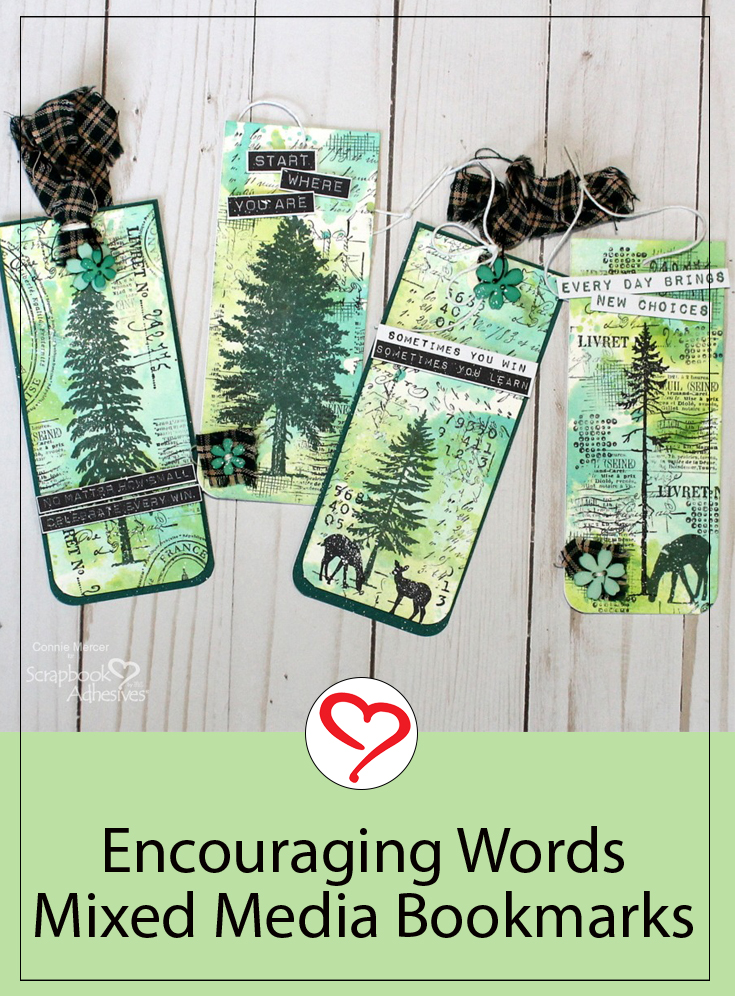
Hi, Connie here to share a set of Encouraging Word Mixed Media Tags. They can be used as bookmarks…that was my plan all along! The encouraging words are a plus too.
The inspiration came from the flower button by Buttons Galore and More. The color and the homespun fabric made for a beautiful starting point.
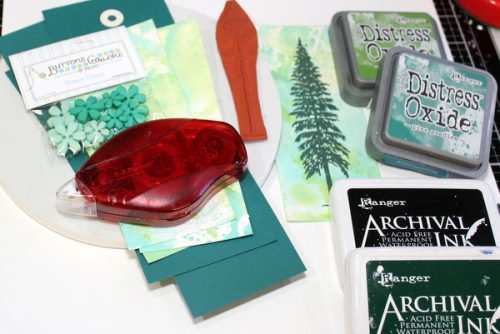
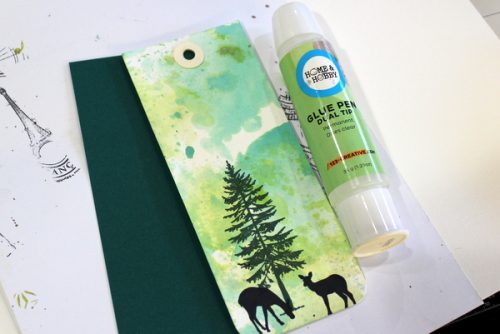
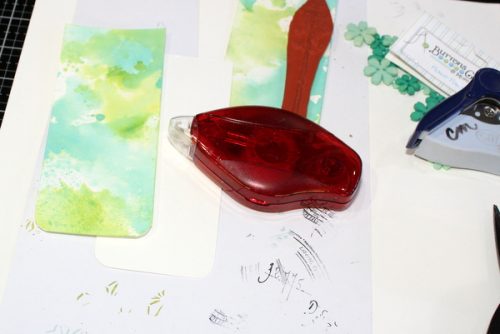
A look at the products used and a few more to create the tag bookmarks. I started with the Distress Oxide Inks to get a mixed-media background for the focal image. Follow along with my step-out tutorial.
Encouraging Word Mixed Media Tags Details
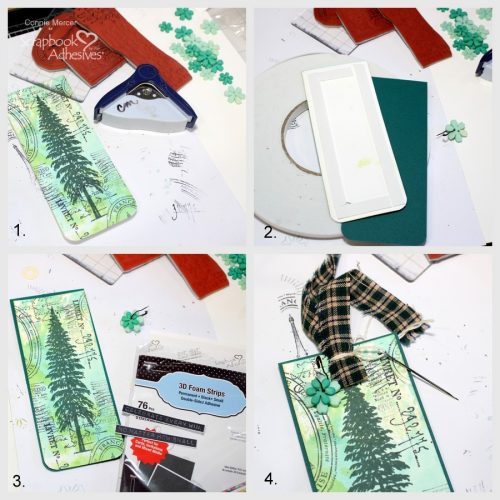
1. Cut the tags to 2 1/2″ x 6″ cut from heavy white cardstock. Stamp a focal image on the tag first. Add other accent stamps to create the desired mixed-media look. Using a corner rounder tool, punch the bottom corners. 2. Mount the tag with a coordinating cardstock mat with Crafty Foam Tape 108′. 3. Stamp word strips and adhere to the tag front using 3D Foam Strips Black. 4. Finish the tag with a fabric tie and button charm.
I used 3D Foam Strips White to adhere the word strip to the bookmark tag that has the deer on it. The Dual Tip Glue Pen was used to adhere a tag reinforcement to the top of the tag (for the fabric tie).
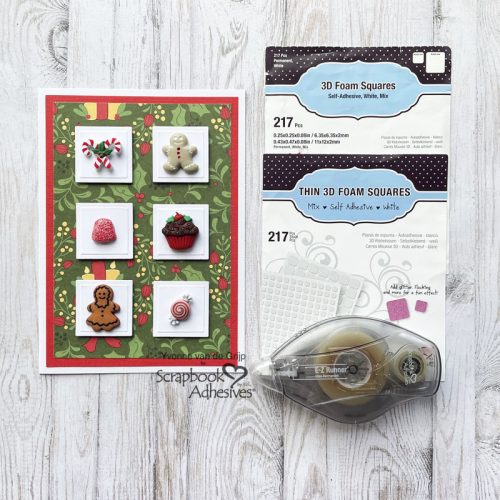
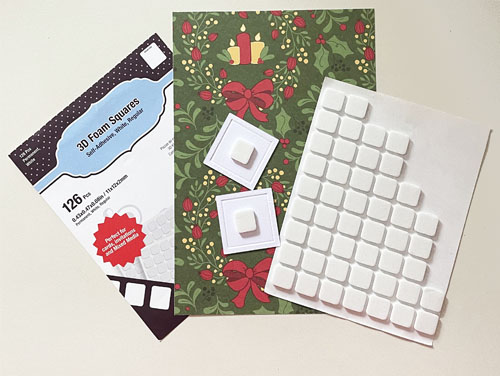
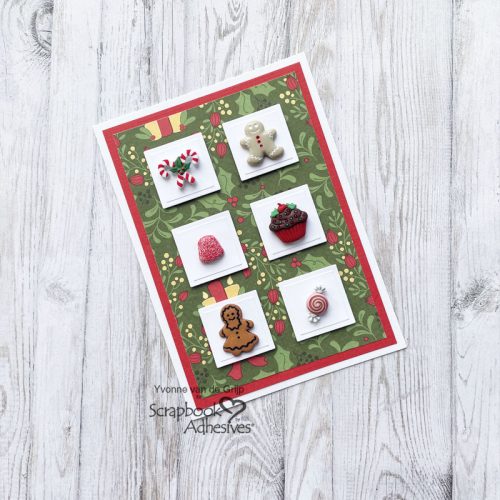
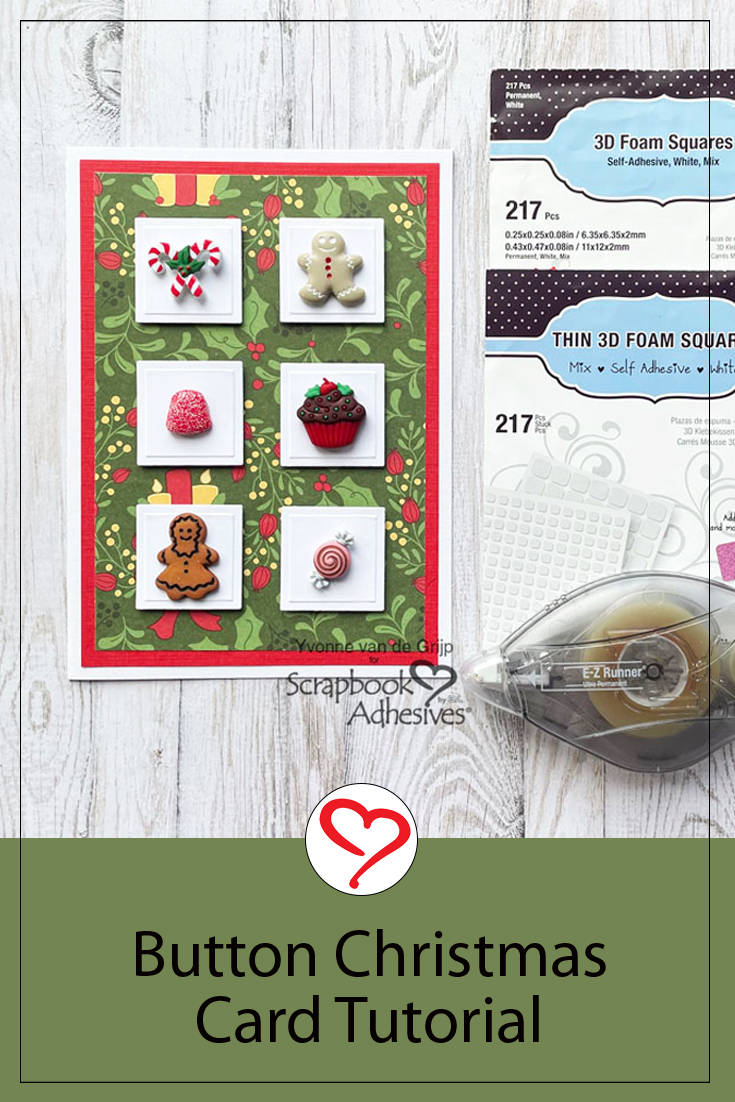
Hi everyone, with Christmas only a few days away, it’s time for some last-minute Christmas card inspiration so I made this Button Christmas Card. The great thing about this card is that it’s super easy and quick to create.
And… it’s so easy to create that it’s also suitable for beginning cardmakers. The eyecatcher of this card is….buttons! Shall we get started?
Top Card Panel
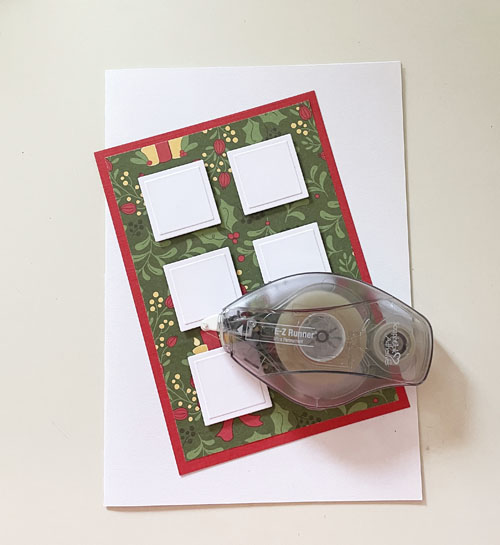
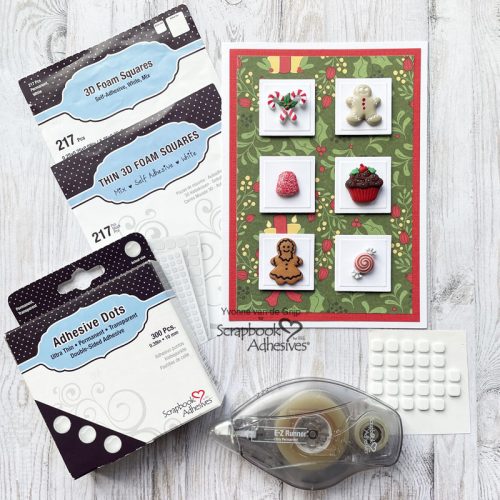
To create the top Card Panel of the Button Christmas Card start by die-cutting and embossing six small squares from white cardstock. Then adhere them to a piece of green patterned paper.
I used a ruler to line the squares perfectly. For a nice uplifting effect, I adhered the embossed squares onto the card panel using 3D Foam Squares White Mix.
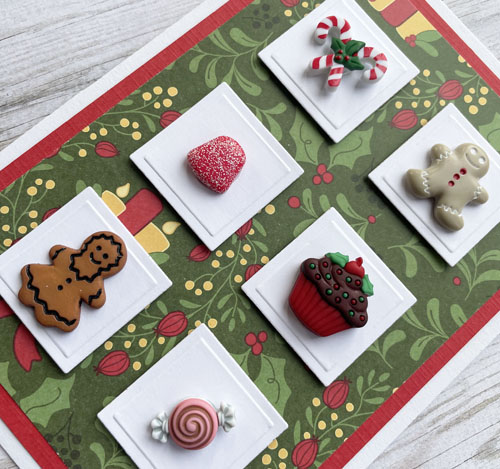
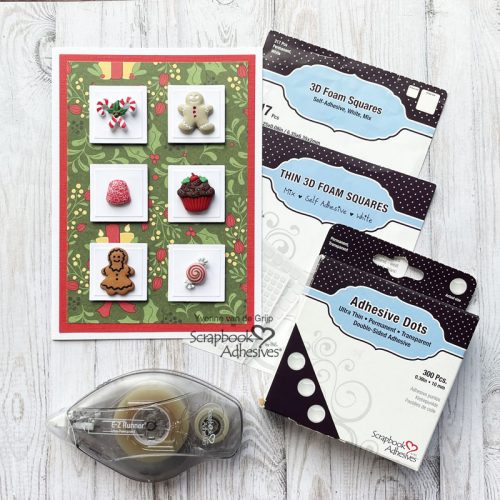
To dress the Button Christmas Card up I used….buttons! First I cut off the loops on the back using pliers and then adhered these gorgeous Christmas-themed buttons onto the white embossed squares using Adhesive Dots Medium Ultra Thin. Adhesive Dots is a great adhesive to adhere to all kinds of materials and it won’t leave any glue stains!
And voilá, your Button Christmas Card is ready. Super easy and quick to make! Wishing you a happy Christmas crafting!
Etched Dies and Die-Cutting and Embossing Machine (Spellbinders Paper Arts®: Platinum 6 Machine; Nestabilities Classic Squares SM Etched Dies); Cardstock (White, Red); Patterned Paper (Dare2BeArtzy®: Home For the Holidays); Buttons (Buttons Galore & More: Gingerbread Novelty Button Assortment); Pliers; Scissors; Paper Trimmer