You are in our US store • Switch to Europe store

Make Today Count Card

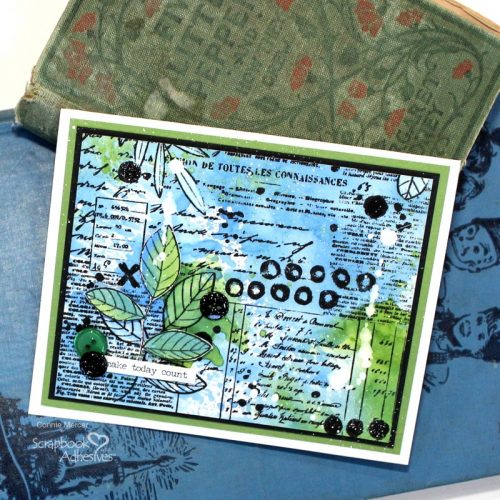
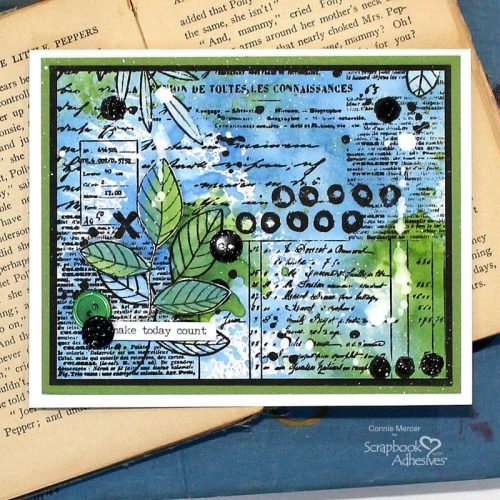
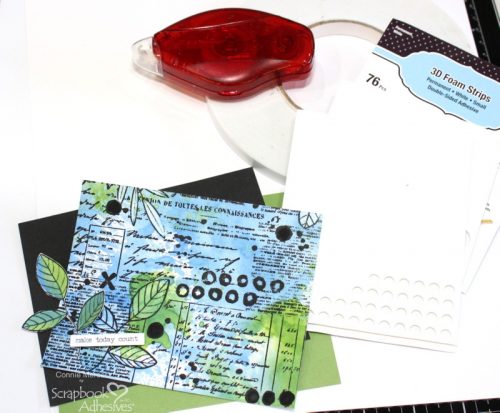
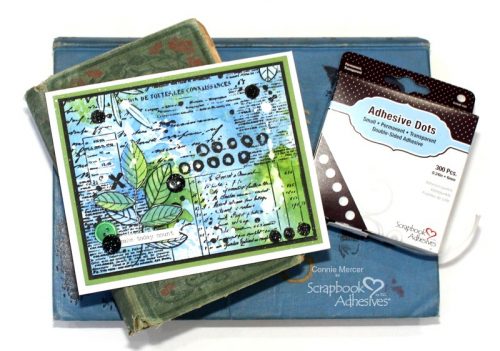
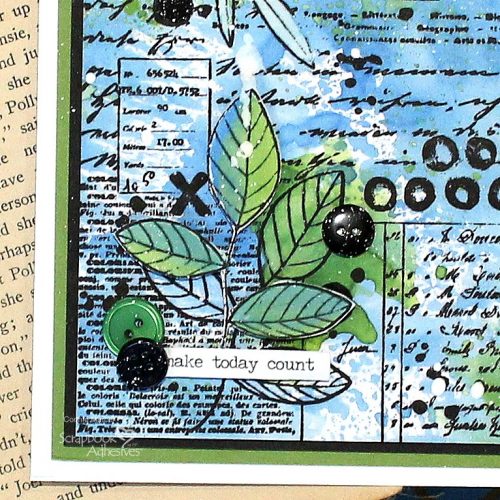
Hi, Connie here with a Make Today Count Card using the Adhesive Dots Small, to connect the buttons to the card front, making it so easy!!!

Make Today Count Card by Connie Mercer for Scrapbook Adhesives by 3L

The Make Today Count Card background is a mix of Distress Oxide Inks and acrylic paint making it a perfect backdrop to the stamped images.

Assembling the Make Today Count Card

Make Today Count Card by Connie Mercer for Scrapbook Adhesives by 3L

So perfect to add the buttons with!!!

Make Today Count Card by Connie Mercer for Scrapbook Adhesives by 3L

I hope you enjoyed this fun and easy mixed media Make Today Count Card. I didn’t even get ink on my fingers :):)
Thanks for stopping by!
Connie Mercer

Creative Time: 30 mins
Skill Level: Intermediate

Materials Needed:
Scrapbook Adhesives by 3L®
3D Foam Strips
3D Foam Circles White Mix
Crafty Foam Tape 108′
E-Z Runner Permanent Strips Refillable Dispenser
Adhesive Dots Small

Other:
Stamps: Carabella Studio; Inks: Ranger Ink (Distress Oxide Inks); Stickers; Tim Holtz; Acrylic Paint; Buttons

Save to Pinterest!

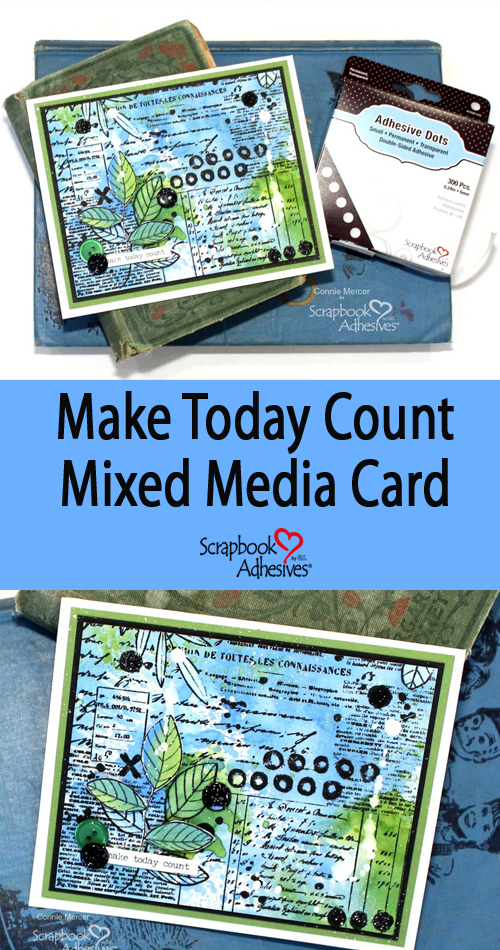
Make Today Count Card by Connie Mercer for Scrapbook Adhesives by 3L Pinterest

Visit our Website and Blog!
Sign up for our Newsletter so you never miss a contest or giveaway!

instagram purple icon facebook icon purple pinterest purple icon twitter purple icon YouTube icon blog subscription purple icon

Cute Cat-Titude Card

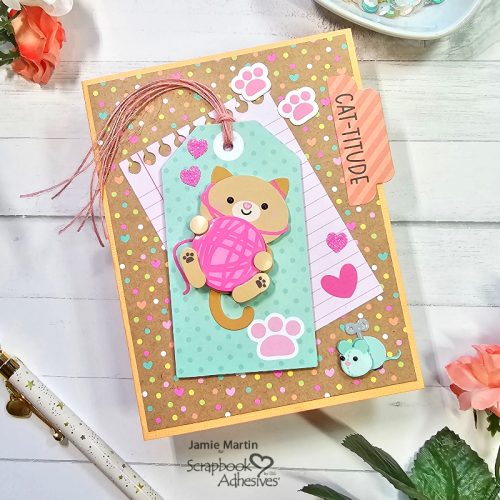
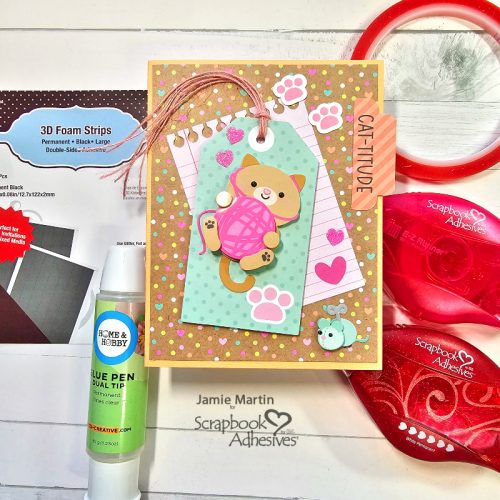
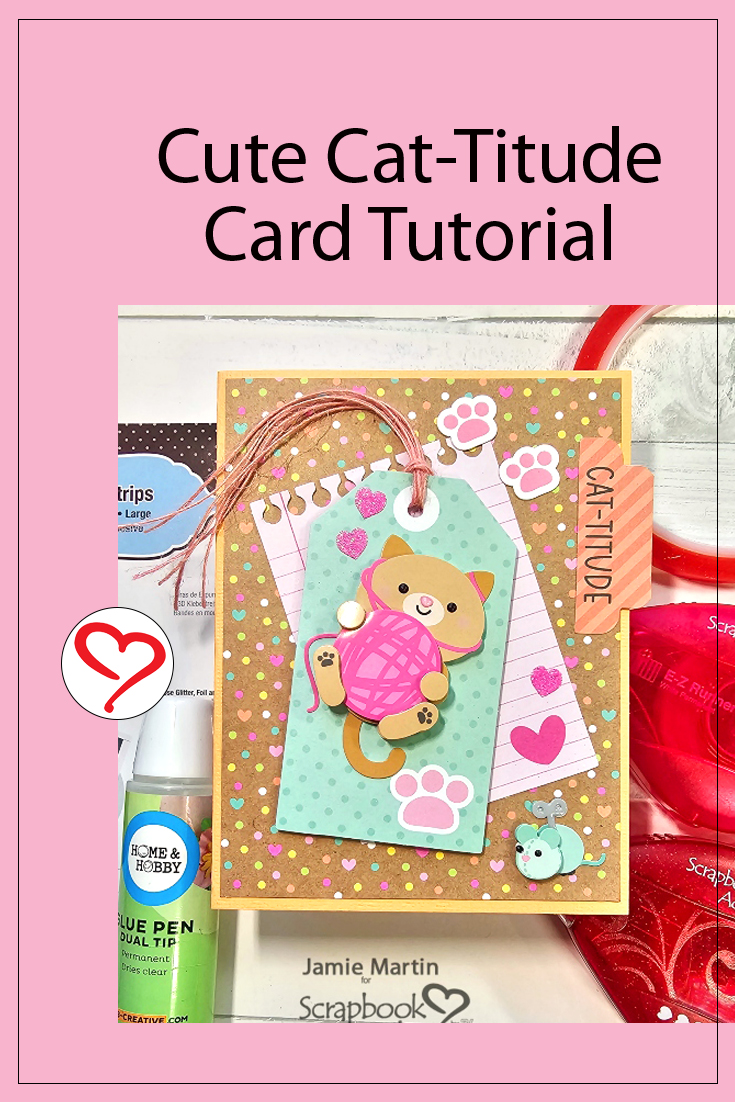
Hi, Jamie here today! Since so many of us are on the go during the summer, I thought of a quick card using cute papers and stickers from Doodlebug Designs to create a Cute Cat-Titude Card!

Cute Cat-Titude Card by Jamie Martin for Scrapbook Adhesives by 3L

Prep the Cat-Titude Card Base

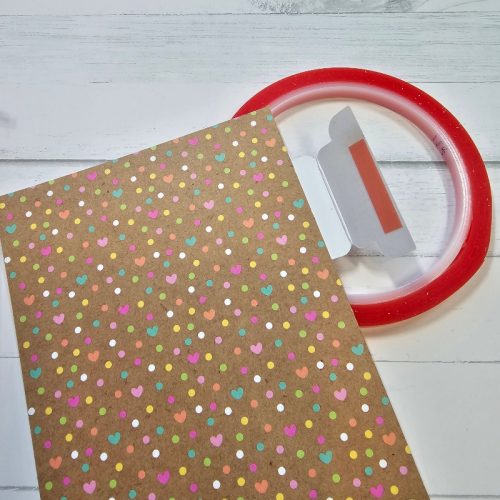
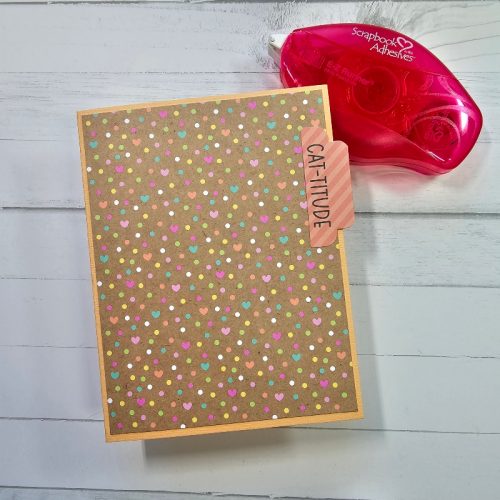
Cut a piece of decorative paper to 4″ x 5 1/4″ for the card panel. Attach a tab piece from the Doodlebug Bits & Pieces pack, using Extreme Double-Sided Tape 1/4in. I applied the tape on both the front and back sides of the tab so it’s attached to the top right of the patterned panel.

Cute Cat-Titude Card by Jamie Martin for Scrapbook Adhesives by 3L

Secure it to a peach-colored card base using the E-Z Runner® Permanent Strips Refillable Dispenser.

Cute Cat-Titude Card by Jamie Martin for Scrapbook Adhesives by 3L

Let’s Embellish

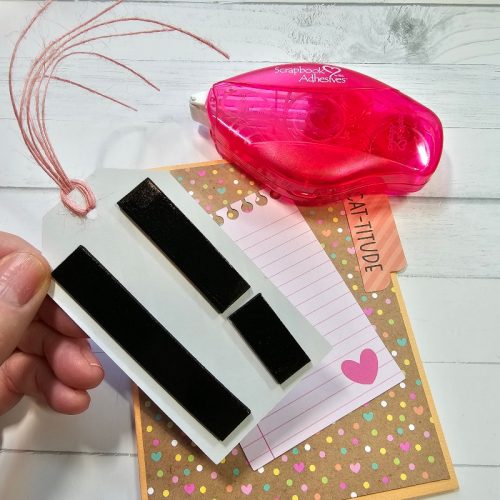
Also, use the E-Z Runner® Permanent Strips Refillable Dispenser to attach the heart note paper to the card.  Place 3D Foam Strips Black on the back of a tag from the paper collection and add pink jute to the top of the tag. Pop this up on the card.

Cute Cat-Titude Card by Jamie Martin for Scrapbook Adhesives by 3L

Wear Our Adhesive on the Outside with Glitter

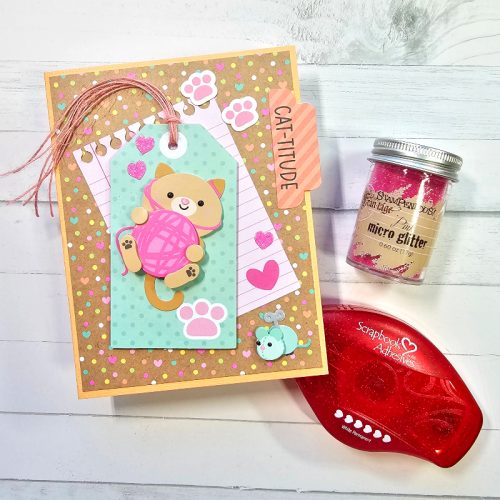
Using the Doodle-Pops Playtime, place the cat sticker on the tag, the mouse stick on the bottom right of the card, and the two cat prints on the upper right of the card.

Apply three hearts from the E-Z Runner® Hearts Refillable Dispenser on the card, two on the tag, and one on the pink panel the tag is layered onto. Sprinkle the hearts with pink glitter, press to secure, and shake off the excess. I love how easy that is and without any special tools!

Cute Cat-Titude Card by Jamie Martin for Scrapbook Adhesives by 3L

Final Touches

In order for the pink jute to bend vs sticking up, I dabbed a little glue from the Dual Tip Glue Pen on the card and placed the jute in it. Once it dries clear, you won’t know what happened! Shhh..our secret! 🙂

Cute Cat-Titude Card by Jamie Martin for Scrapbook Adhesives by 3L

Thanks for Visiting!
Jamie Martin

Creative Time: 30 mins
Skill Level: Beginner

Materials Needed:
Scrapbook Adhesives by 3L®
E-Z Runner® Permanent Strips Refillable Dispenser
E-Z Runner® Hearts Refillable Dispenser
3D Foam Strips Black

HomeHobby™ by 3L
Extreme Double-Sided Tape 1/4in
Dual Tip Glue Pen

Other: Doodlebug Designs- Pretty Kitty Sprinkling of Love Decorative Paper, Pretty Kitty Pits & Pieces, Doodle-Pops Playtime

Save to Pinterest!

Cute Cat-Titude Card by Jamie Martin for Scrapbook Adhesives by 3L Pinterest

Visit our Website and Blog!
Sign up for our Newsletter so you never miss a contest or giveaway!

instagram purple icon facebook icon purple pinterest purple icon twitter purple icon YouTube icon blog subscription purple icon

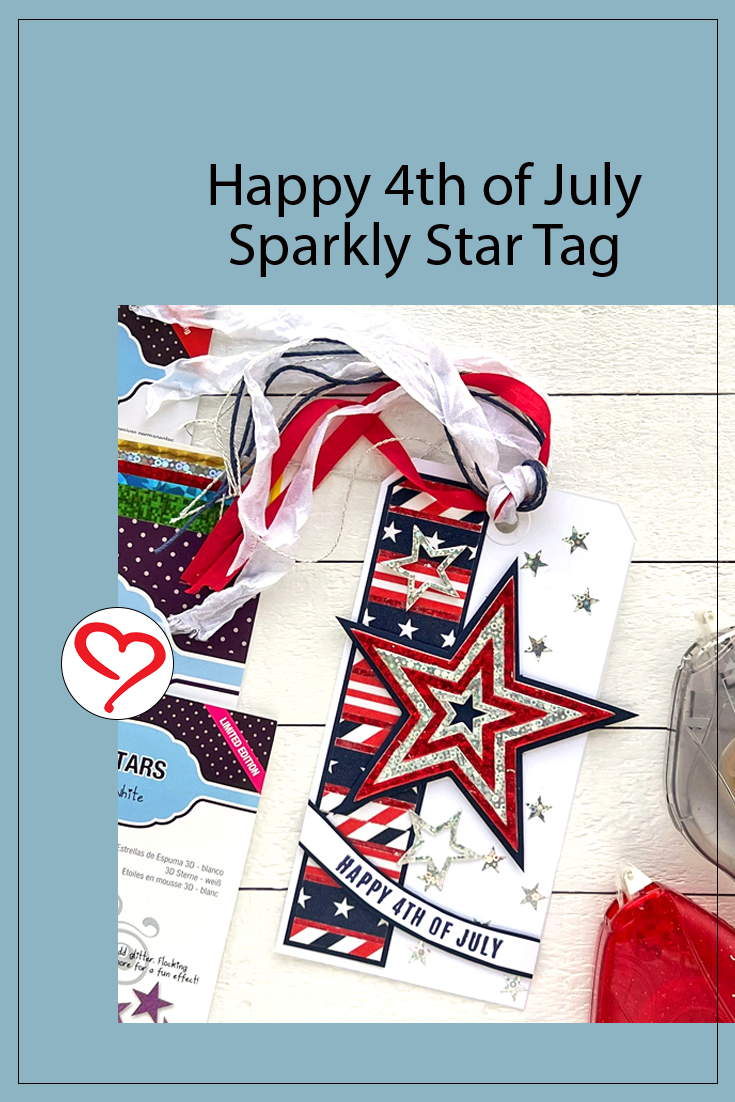
Happy 4th of July Star Tag

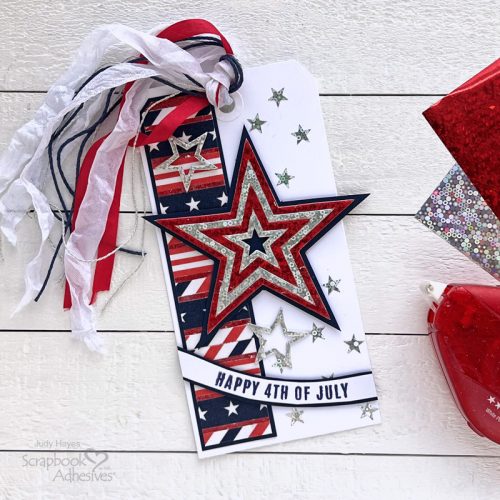
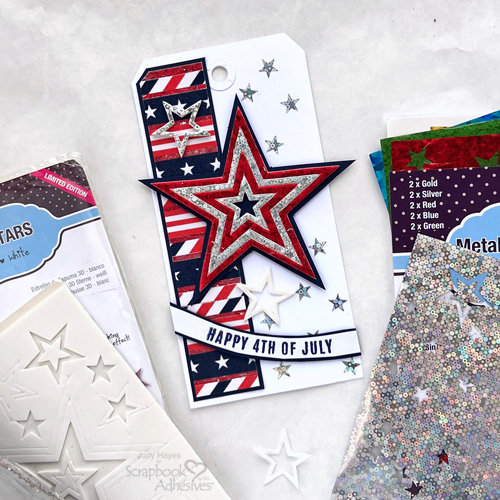
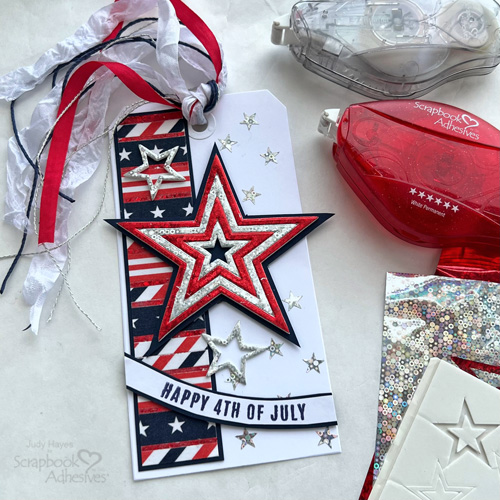
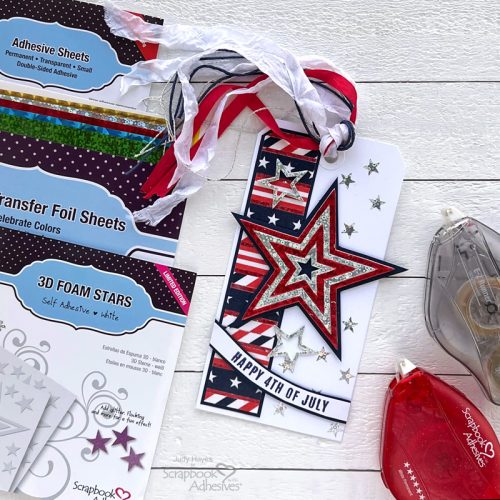
Hi, Judy here today! Wow! Where did June go? it’s only a couple days until July. With 4th of July just around the corner, I put together a Happy 4th of July Tag featuring 3D Foam Stars and Metallic Transfer Foil Sheets Celebrate Colors that add shine and sparkle.

Happy 4th of July Star Tag by Judy Hayes for Scrapbook Adhesives by 3L

Make Background Panel

Happy 4th of July Star Tag by Judy Hayes for Scrapbook Adhesives by 3L

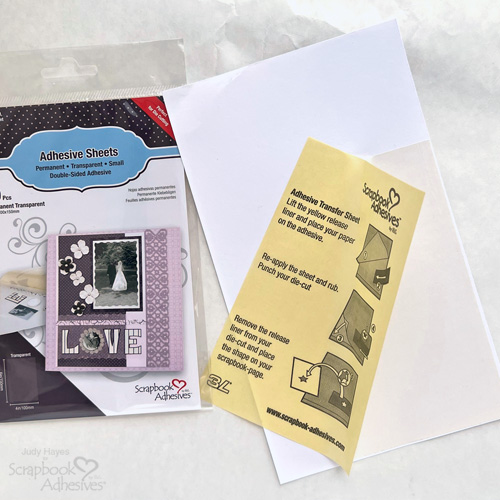
Fasten Adhesives Sheets 4 x 6in. to piece of white cardstock and trim to 4 x 6 inches.

Happy 4th of July Star Tag by Judy Hayes for Scrapbook Adhesives by 3L

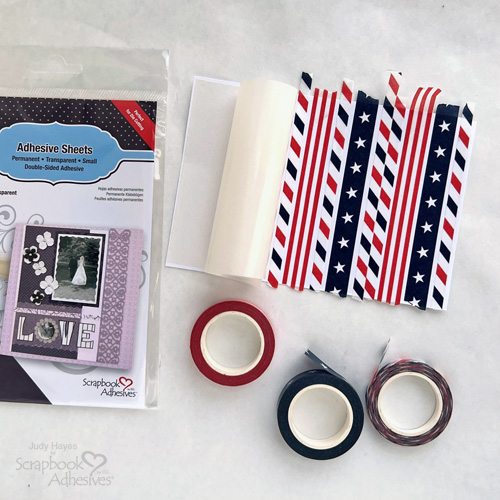
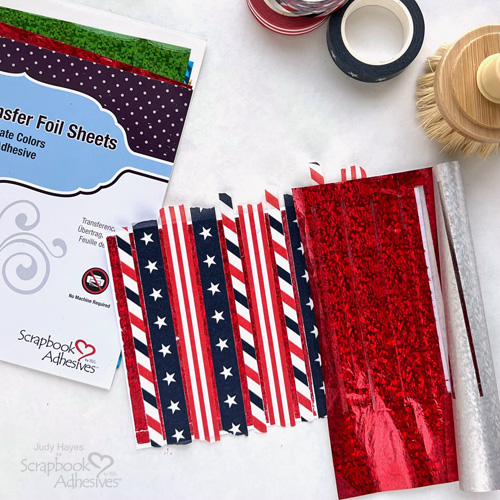
Partially peel liner from Adhesives Sheets 4 x 6in. at one end. Attach pieces of washi tape across the panel leaving about .125 inch gap between each one. Continue to peel the liner back and fasten washi tape until the entire piece is covered. Avoid touching adhesive between tapes as much as possible.

Happy 4th of July Star Tag by Judy Hayes for Scrapbook Adhesives by 3L

Place red foil from Metallic Transfer Foil Sheets Celebrate Colors over adhesive between washi tapes and press to transfer foil. Continue until all gaps are covered with red foil.

Happy 4th of July Star Tag by Judy Hayes for Scrapbook Adhesives by 3L

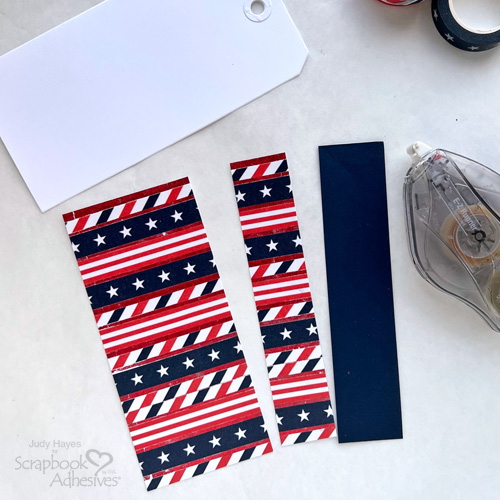
Trim off washi tape ends and edges of the panel if needed to remove any areas without foil or washi tape. Cut a 1.125 x 5.75 inches strip from washi-covered paper and a 1.25 x 6-inch piece of navy cardstock. Use the tag as a guide to trim the top corner of washi paper and navy mat to match the tag corner. Fasten together using E-Z Runner® Ultra Strong Refillable Dispenser to apply adhesive.

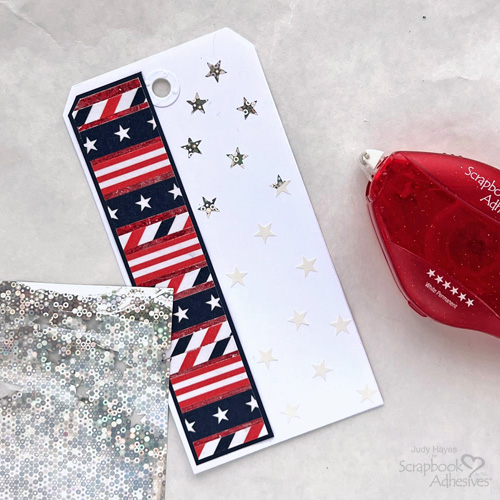
Apply adhesive with E-Z Runner® Ultra Strong Refillable Dispenser to the back of the matted washi tape panel and fasten in place along the left edge of the tag.

Add Small Stars

Happy 4th of July Star Tag by Judy Hayes for Scrapbook Adhesives by 3L

Use E-Z Runner® Stars Refillable Dispenser to randomly apply stars along the right side of the tag. Cover stars with silver foil from Metallic Transfer Foil Sheets Celebrate Colors, rub to transfer foil, and peel away foil. Continue to cover all stars with foil.

Create a Large Foil Star

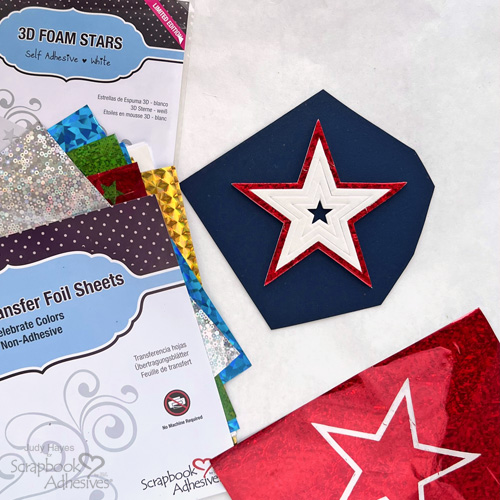
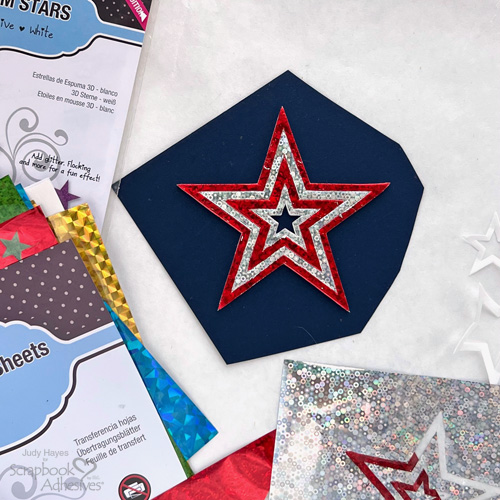
Remove the small star from the center of the largest stars on the sheet of 3D Foam Stars. Carefully lift the points of the large star along with the inner three stars. When all points are lifted, continue to lift the entire group of 4 stars and place them on navy cardstock.

Happy 4th of July Star Tag by Judy Hayes for Scrapbook Adhesives by 3L

Peel liner from the largest star, cover with red foil from Metallic Transfer Foil Sheets Celebrate Colors, rub gently to transfer foil to the star, and peel away.

Happy 4th of July Star Tag by Judy Hayes for Scrapbook Adhesives by 3L

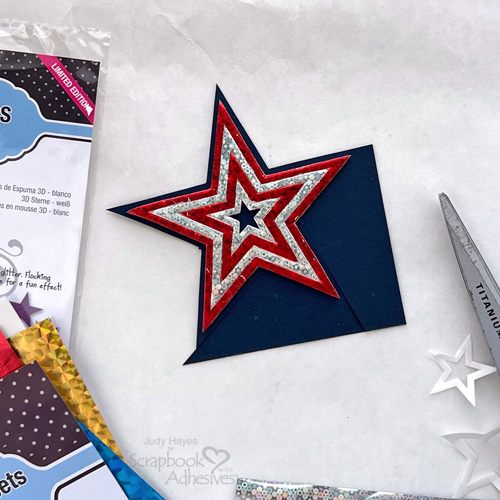
Repeat for the next star using silver foil. Continue with the remaining two stars alternating red and silver foils.

Happy 4th of July Star Tag by Judy Hayes for Scrapbook Adhesives by 3L

Use scissors to cut around the star leaving a narrow border of navy cardstock.

Make Greeting Strip

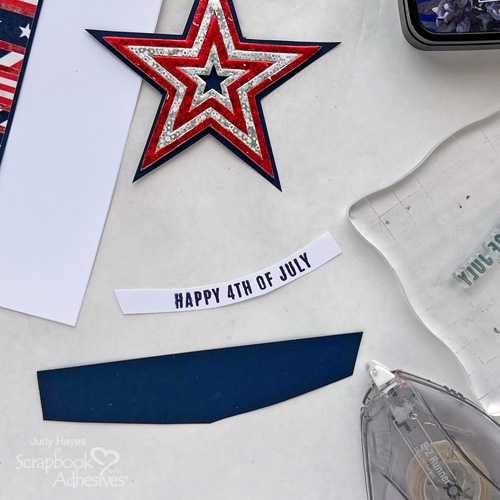
Stamp the greeting on white cardstock and cut along the curve of the greeting and beyond to make the strip long enough to fit across the tag.

Happy 4th of July Star Tag by Judy Hayes for Scrapbook Adhesives by 3L

Use E-Z Runner® Ultra Strong Refillable Dispenser to apply adhesive to the back of the stamped greeting and fasten it to a piece of navy cardstock. Cut along the greeting strip leaving a narrow border of navy.

Attach Star and Greeting

Happy 4th of July Star Tag by Judy Hayes for Scrapbook Adhesives by 3L

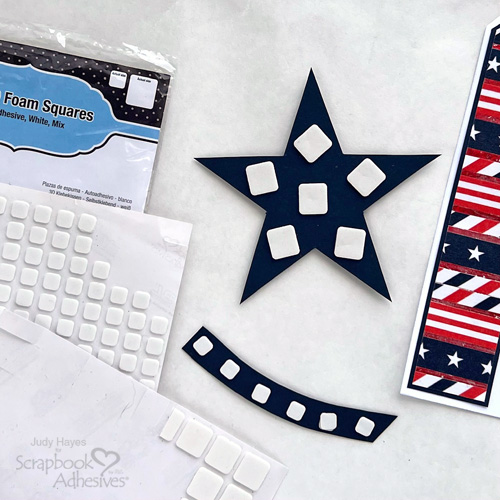
Attach Thin 3D Foam Squares White Mix to the back of the large star and greeting strip, remove liners, and attach both to the tag.

Place Open Stars

Happy 4th of July Star Tag by Judy Hayes for Scrapbook Adhesives by 3L

Remove a medium open star from a sheet of 3D Foam Stars and attach it over the background panel near the top of the tag. Remove the liner, cover it with a silver foil sheet from Metallic Transfer Foil Sheets Celebrate Colors, rub to transfer foil, and peel away. Place another medium open star between the large star and greeting and apply the foil.

Tie Fibers on Tag

Happy 4th of July Star Tag by Judy Hayes for Scrapbook Adhesives by 3L

Cut 2 lengths of white seam binding, 3 silver strings, 2 navy cords, and 1 red silk ribbon about 15 inches long, insert them together in the hole of the tag, and tie a knot.

Happy early 4th of July!

Happy 4th of July Star Tag by Judy Hayes for Scrapbook Adhesives by 3L

Thanks for Visiting!
Judy Hayes

Creative Time: 30 mins
Skill Level: Intermediate

Materials Needed:
Scrapbook Adhesives by 3L®

E-Z Runner® Ultra Strong Refillable Dispenser

E-Z Runner® Stars Refillable Dispenser

Thin 3D Foam Squares White Mix

3D Foam Stars

Adhesives Sheets 4 x 6in.

Metallic Transfer Foil Sheets Celebrate Colors

Other: Heidi Swapp. (Land of Liberty Stamp Set, Stars and Stripes Washi Set); Ink: Imagine Crafts/Tsukineko (Versafine Clair Medieval Blue); Ranger Ink (Dina Wakley Media White Tag #8); White, Navy Blue Cardstock, White Seam Binding, Navy Cord, Silver String, Red Silk Ribbon

Save to Pinterest!

Happy 4th of July Star Tag by Judy Hayes for Scrapbook Adhesives by 3L

Visit our Website and Blog!
Sign up for our Newsletter so you never miss a contest or giveaway!

instagram purple icon facebook icon purple pinterest purple icon twitter purple icon YouTube icon blog subscription purple icon

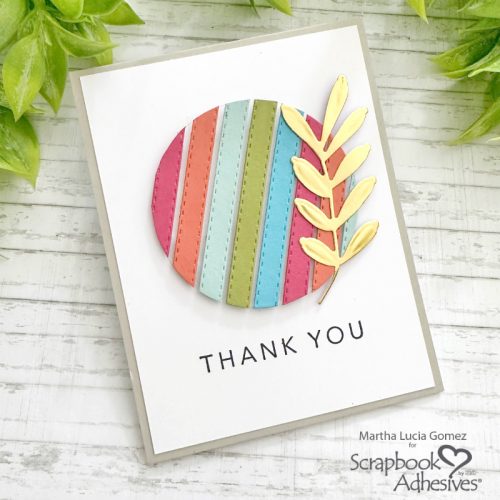
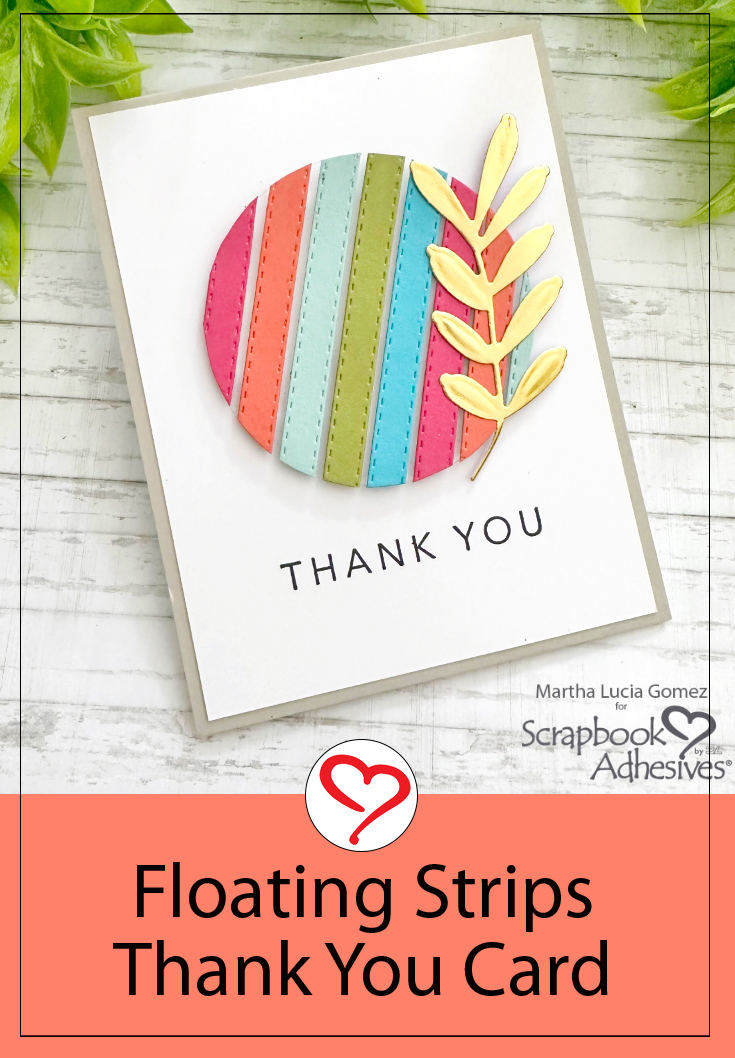
Floating Strips Thank You Card

Hello crafty friends, Martha Lucia here! Today I have a fun tutorial to share with you on how to create Floating Strips in a Thank You Card. This is a technique that you can use for any occasion.

Floating Strips Thank You Card by Martha Lucia Gomez for Scrapbook Adhesives by 3L

Creating the Floating Strips

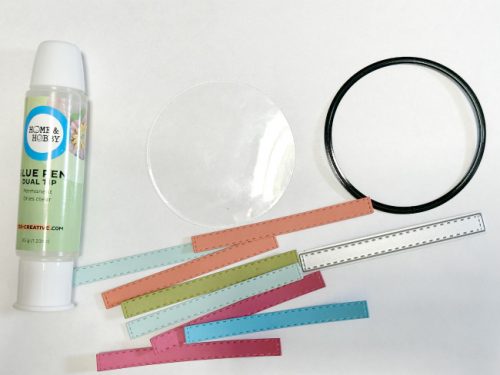
To make a fun and creative card with floating strips, you can use acetate or window sheets and strips of cardstock! I’ll show you how to use dies to cut different shapes.

For this sample, I went for a circle die but you can use any shaped die for this technique. Additionally, I used strips of cardstock, but you can also use strips of patterned paper and use up your scraps.

Floating Strips Thank You Card by Martha Lucia Gomez for Scrapbook Adhesives by 3L

To make this type of card, you’ll use a window as your base and put strips of cardstock or patterned paper over the top. First, I die-cut a circle in heavyweight acetate and several strips in different colors of cardstock.

Floating Strips Thank You Card by Martha Lucia Gomez for Scrapbook Adhesives by 3L

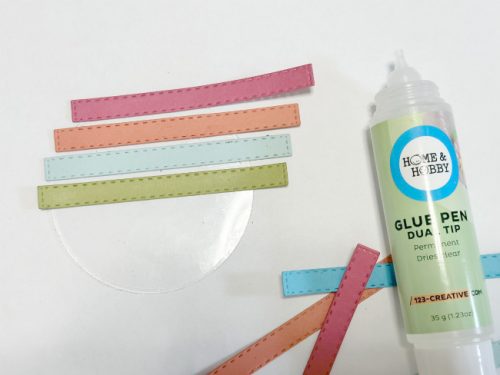
With Dual Tip Glue Pen, I started to adhere the strips one by one, leaving a tiny gap in between. But don’t worry if the glue seeps through, simply wipe the excess and it will dry clear.

Floating Strips Thank You Card by Martha Lucia Gomez for Scrapbook Adhesives by 3L

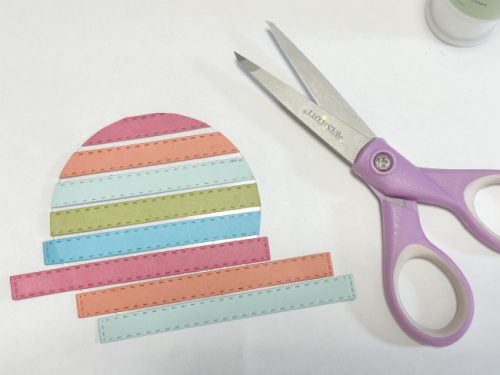
After adhering the strips, let them dry well. Then trim the excess strips off around the circle with a pair of scissors.

Floating Strips Thank You Card by Martha Lucia Gomez for Scrapbook Adhesives by 3L

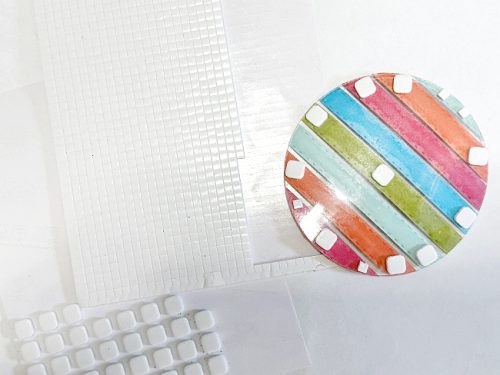
For added interest and dimension, I placed small 3D Foam Squares from the 3D Foam Squares White Mix and a few from the 3D Foam Squares Micro White. This makes my Floating Circle work on my card. Love it!

Finishing the Card

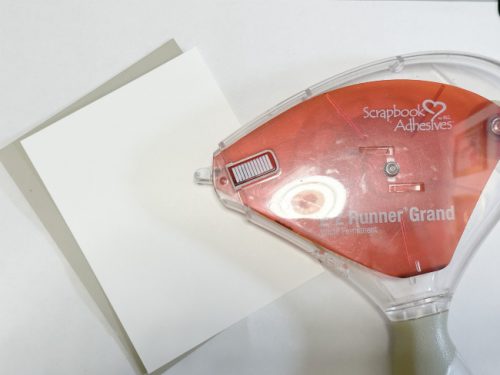
Make the card base and the top layer. For the card base, I used Sahara Sand cardstock, and for the top layer, White Smooth cardstock. Cut the top layer a little small than the card base and secure it on top with the E-Z Runner® Grand Permanent Strips Refillable Dispenser.

Floating Strips Thank You Card by Martha Lucia Gomez for Scrapbook Adhesives by 3L

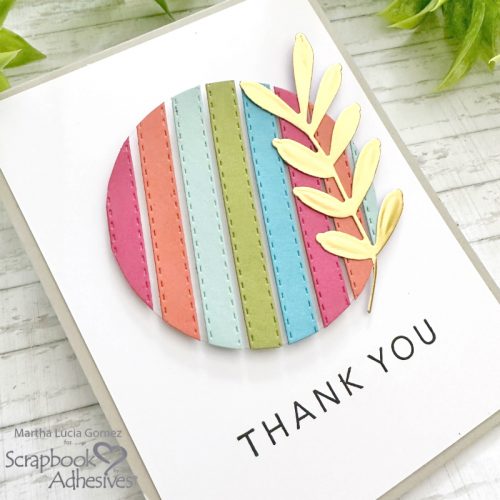
Then, I centered the floating circle and stamped a Thank You sentiment with Black Ink to create a striking contrast. As an accent, I added a gold leaf over the floating strip circle using the Dual Tip Glue Pen.

Floating Strips Thank You Card by Martha Lucia Gomez for Scrapbook Adhesives by 3L

Thanks for visiting and believe me, it has been my complete pleasure to share this idea with you! Give it a try!
Martha Lucia

Creative Time: 60 mins
Skill Level: Intermediate

Materials Needed:
Scrapbook Adhesives by 3L®

E-Z Runner® Grand Permanent Strips Refillable Dispenser
3D Foam Squares White Mix
3D Foam Squares Micro White,

HomeHobby™ by 3L

Dual Tip Glue Pen,

Other: Stamp and Craft Die: Diamond Press (Embellishment Pack and Die Greenery Set); Ink: Tsukineko (VersaFine Clair Nocturne); Foil Paper: Rinea (Gold Foiled Paper); Sahara Sand and White Smooth Cardstock

Save to Pinterest!

Floating Strips Thank You Card by Martha Lucia Gomez for Scrapbook Adhesives by 3L Pinterest

Visit our Website and Blog!
Sign up for our Newsletter so you never miss a contest or giveaway!

instagram purple icon facebook icon purple pinterest purple icon twitter purple icon YouTube icon blog subscription purple icon

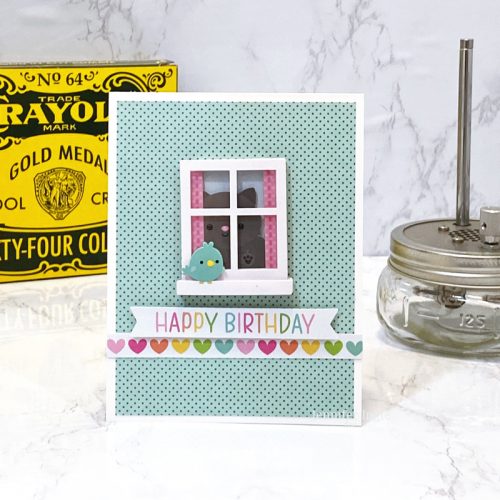
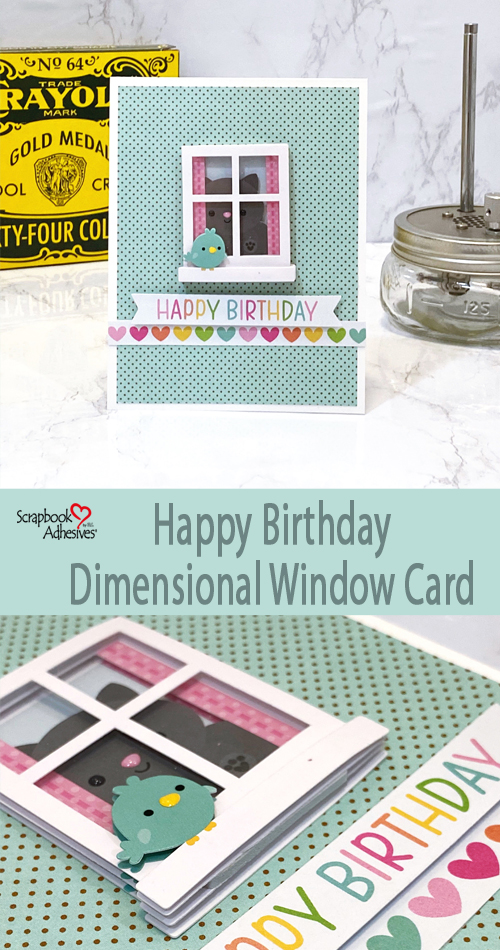
A Little Birdie Told Me Birthday Dimensional Window Card

Hi, Jennifer here today with my second project as a guest designer at Scrapbook Adhesives by 3L! I love how easy it is to combine adorable patterned papers, stickers, and great Scrapbook Adhesives by 3L products to bring together a super cute Birthday Dimensional Window Card in no time at all! 

A Little Birdie Told Me Birthday Dimensional Window Card by Jennifer Ingle for Scrapbook Adhesives by 3L

Dimensional Window Card Front

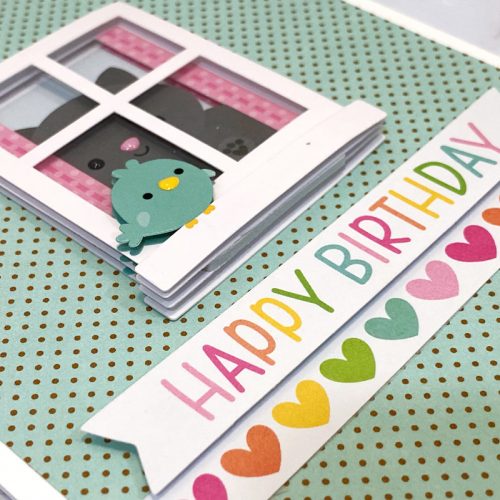
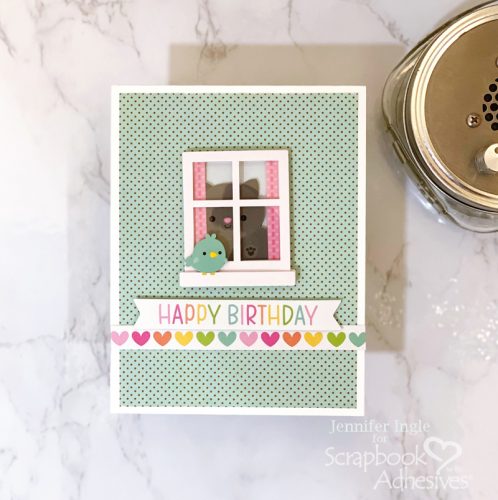
For this card, I used the Pretty Kitty collection from Doodlebug Design. You guys…I am not even a cat person, but these elements are just TOO CUTE! First, trim the background panel and adhered it to my card using the E-Z Runner® Grand Permanent Strips Refillable Dispenser. Then add the window sticker to the center of the card with that cute little kitty peeking out! 

A Little Birdie Told Me Birthday Dimensional Window Card by Jennifer Ingle for Scrapbook Adhesives by 3L

Sentiment Placement

I trimmed one of the border pieces to size (the hearts) and then added that across the entire card, again, using the E-Z Runner® Grand Permanent Strips Refillable Dispenser to adhere it. Finally, I added the Happy Birthday banner strip using Crafty Foam Tape White 54ft. (from the giant roll, of course… because that is EXACTLY how I roll). Adding that bit of extra dimension coordinates perfectly with the layered sticker and is so easy to do!

A Little Birdie Told Me Birthday Dimensional Window Card by Jennifer Ingle for Scrapbook Adhesives by 3L

Thanks for Visiting!
Jennifer Ingle

Creative Time: 35 mins
Skill Level: Beginner

Materials Needed:
Scrapbook Adhesives by 3L®

E-Z Runner® Grand Permanent Strips Refillable Dispenser

Crafty Foam Tape White 54ft.

Other: Papers, Stickers + Ephemera: Doodlebug Designs (Hello Kitty Collection); White Cardstock

Save to Pinterest!

A Little Birdie Told Me Birthday Dimensional Window Card by Jennifer Ingle for Scrapbook Adhesives by 3L Pinterest

Visit our Website and Blog!
Sign up for our Newsletter so you never miss a contest or giveaway!

instagram purple icon facebook icon purple pinterest purple icon twitter purple icon YouTube icon blog subscription purple icon

Masking Technique with Metallic Transfer Foil Sheets for Cards

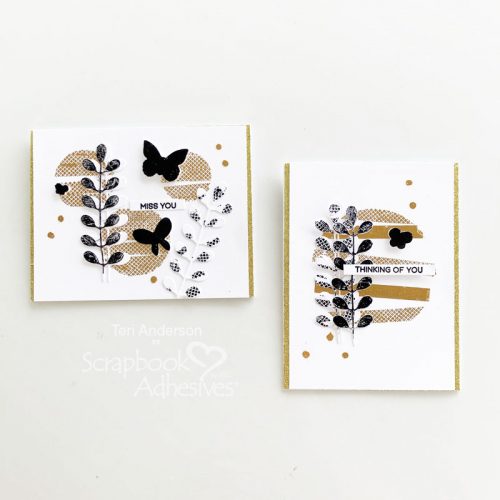
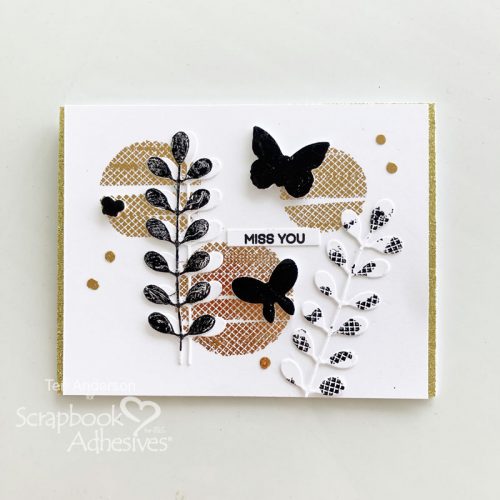
Hi, everyone! Metallic Transfer Foil is a such fun way to add a hint of glitz and sparkle to your handmade cards! Teri here to show you how to pair it with a masking technique to create some super sparkly cards!

Masking Technique with Metallic Transfer Foil Sheets for Cards by Teri Anderson for Scrapbook Adhesives by 3L

This technique is so easy! You just need a few adhesive dispensers, some Metallic Transfer Foil and cardstock!

Prep the Masking Technique and Create the Background

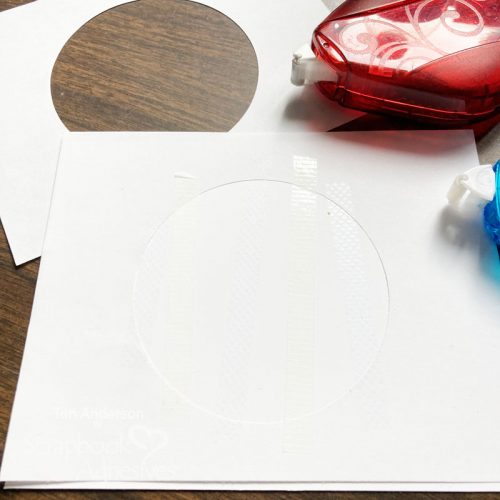
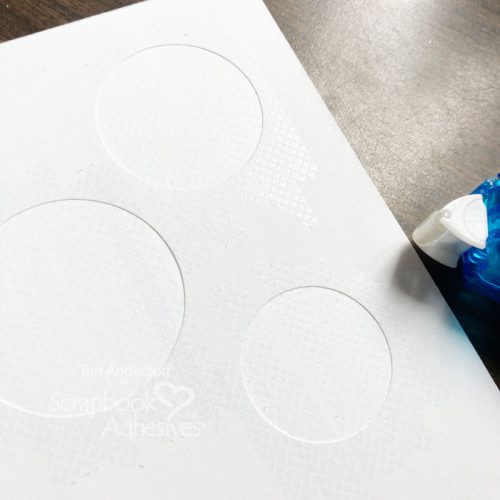
Start by cutting a circle (or some other simple shape) from a piece of paper. This is your mask. Set your mask on a panel of cardstock. Randomly place lines of adhesive across it.

Masking Technique with Metallic Transfer Foil Sheets for Cards by Teri Anderson for Scrapbook Adhesives by 3L

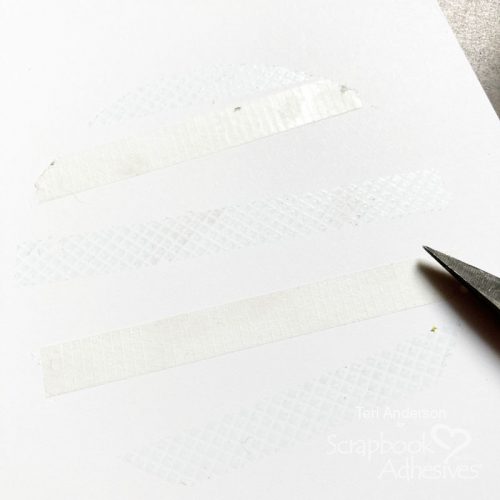
Carefully remove mask from the panel of cardstock. If you are having a difficult time removing it, use a craft knife or your scissors to gently cut and loosen any adhesive holding it down.

Masking Technique with Metallic Transfer Foil Sheets for Cards by Teri Anderson for Scrapbook Adhesives by 3L

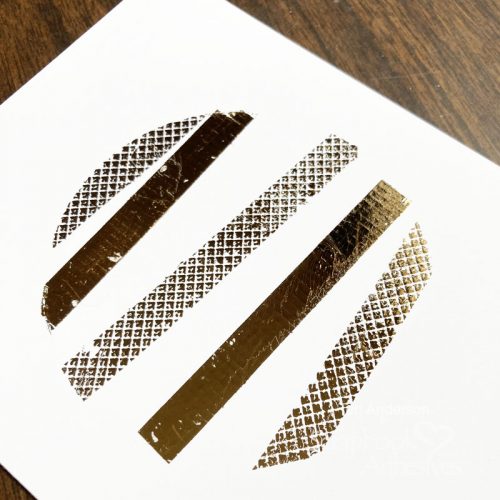
Burnish foil onto your adhesive strips until they are completely covered. If you miss a spot, just place the foil on it again and burnish some more onto it. Set your background aside and work on some elements to turn it into a card.

Masking Technique with Metallic Transfer Foil Sheets for Cards by Teri Anderson for Scrapbook Adhesives by 3L

Embellish Die-Cut Shapes

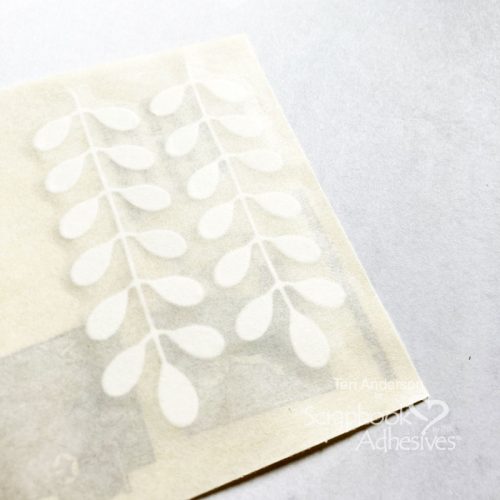
Die-cut a couple of leaves from white cardstock.

Masking Technique with Metallic Transfer Foil Sheets for Cards by Teri Anderson for Scrapbook Adhesives by 3L

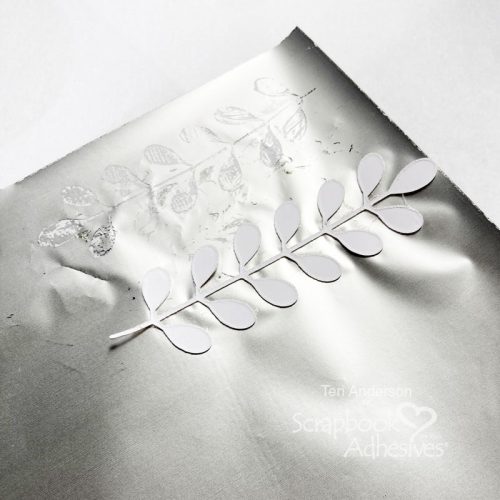
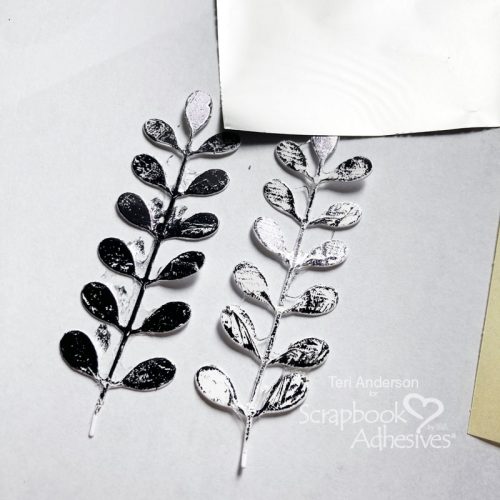
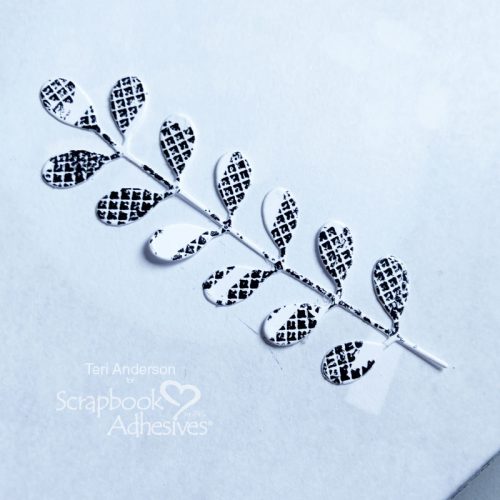
Set them on an adhesive sheet and pick up some of the adhesive. Place a die-cut on the non-pretty gray side of the foil and pick up a little bit of the foil. This will result in a distressed look. Flip the foil over with the die-cut on it and apply a little pressure with your fingers to randomly add more foil to the die-cut. The more pressure you add, the darker the foil will be.

Masking Technique with Metallic Transfer Foil Sheets for Cards by Teri Anderson for Scrapbook Adhesives by 3L

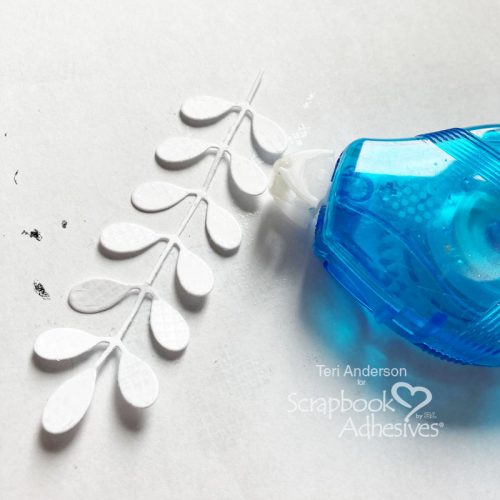
Another way to embellish your leaf die-cuts is to simply apply some dots to it. Burnish foil onto to the dots for a unique look.

Masking Technique with Metallic Transfer Foil Sheets for Cards by Teri Anderson for Scrapbook Adhesives by 3L

Use Your Background and Die-cuts to Make a Card

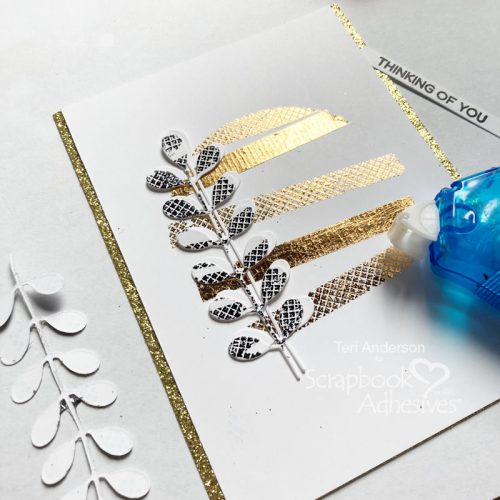
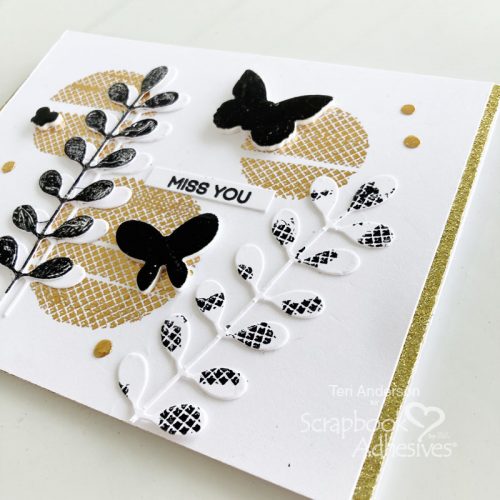
Turn your elements into a card by mounting your masked cardstock panel to glitter paper and then to a card. Add some leaf die-cuts to it.

Masking Technique with Metallic Transfer Foil Sheets for Cards by Teri Anderson for Scrapbook Adhesives by 3L

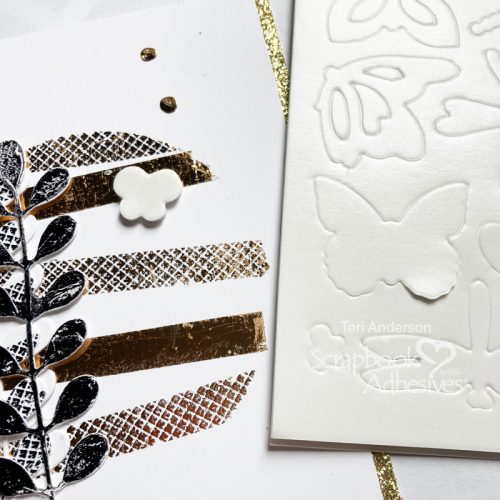
Decorate the card by applying Adhesive Dots and 3D Foam Shapes onto it and applying foil onto them.

Masking Technique with Metallic Transfer Foil Sheets for Cards by Teri Anderson for Scrapbook Adhesives by 3L

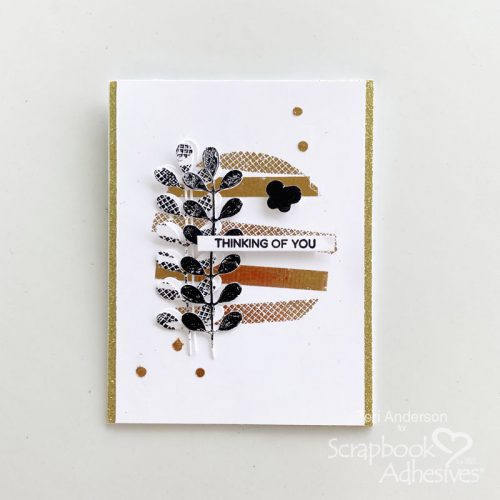
Complete your card by mounting a sentiment strip onto it with a 3D Foam Strip.

Masking Technique with Metallic Transfer Foil Sheets for Cards by Teri Anderson for Scrapbook Adhesives by 3L

Create a Masked Background with Multiple Shapes

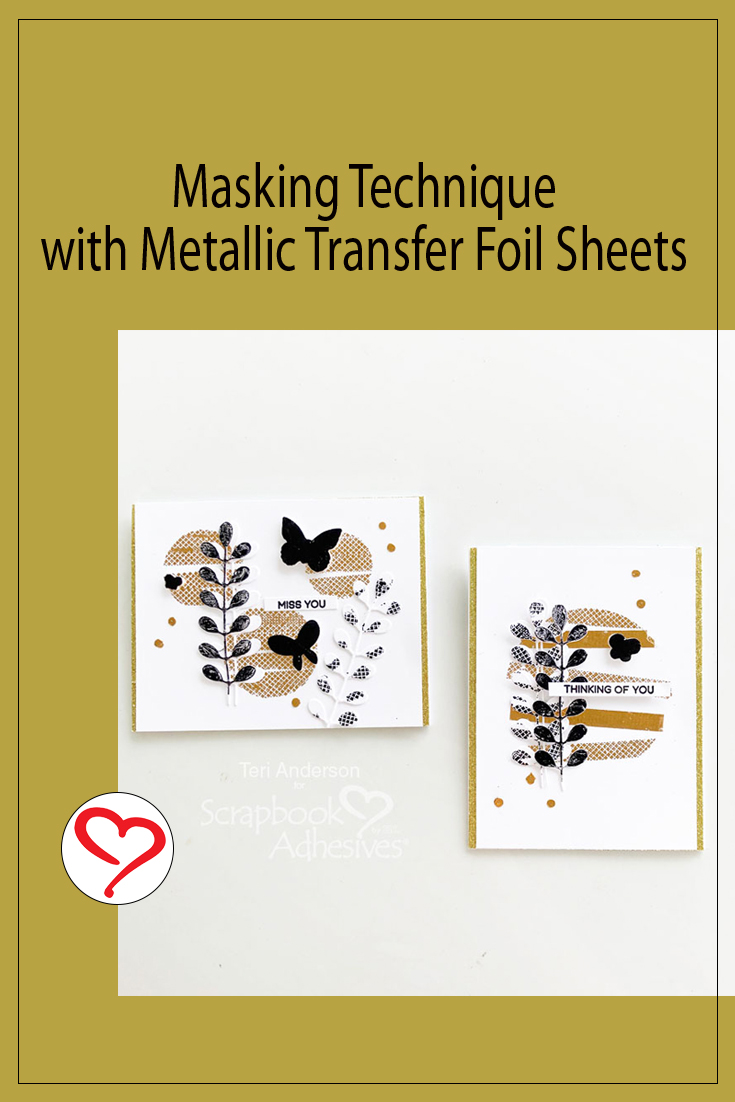
You are not limited to masking off just one shape for your card. Try using multiple shapes as I did here.

Masking Technique with Metallic Transfer Foil Sheets for Cards by Teri Anderson for Scrapbook Adhesives by 3L

I created a mask with three different circle sizes for a unique look.

Masking Technique with Metallic Transfer Foil Sheets for Cards by Teri Anderson for Scrapbook Adhesives by 3L

I hope you are inspired to pull your Metallic Transfer Foil Sheets out and try doing this masking technique with them!

Happy Creating!

Teri Anderson

Creative Time: 60 mins
Skill Level: Intermediate

Materials Needed:
Scrapbook Adhesives by 3L®

E-Z Runner® Permanent Strips Refillable Dispenser

E-Z Runner® Petite Permanent Dots Refillable Dispenser

3D Foam Strips

3D Foam Butterflies

Adhesive Sheets 4×6 inch

Metallic Transfer Foil Sheets Nature Colors

Adhesive Dots Micro

Other: Cardstock: Neenah; Glitter Paper: American Crafts: Stamps and Dies: Hero Arts (Everyday Sentiments Stamp Set, Circles Dies, Sentiment Strips Die), Simon Says Stamp! (Leaf Column Background Die); Ink: Ranger Ink (Black)

Save to Pinterest!

Masking Technique with Metallic Transfer Foil Sheets for Cards by Teri Anderson for Scrapbook Adhesives by 3L Pinterest

Visit our Website and Blog!
Sign up for our Newsletter so you never miss a contest or giveaway!

instagram purple icon facebook icon purple pinterest purple icon twitter purple icon YouTube icon blog subscription purple icon

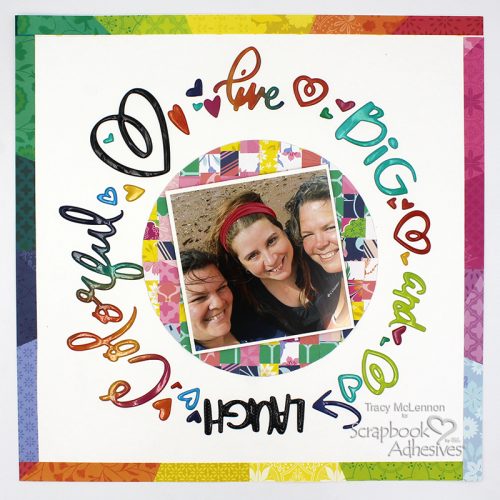
Friendship Layout with Paper Weaving

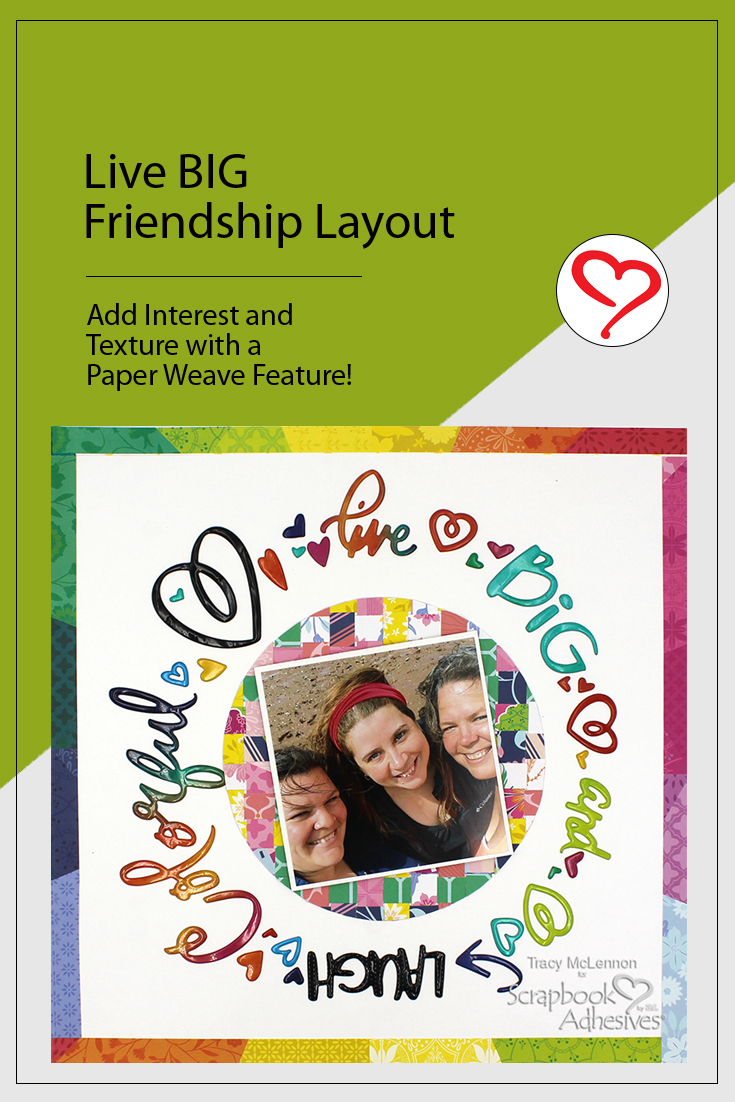
Hello scrappy friends! Tracy here, and today I am sharing a pretty layout created using a favourite old collection of mine. All I had left of this collection were little scraps of beautiful patterns, and embellishments. So here is how I created this layout using scraps.

Friendship Layout with Paper Weaving by Tracy McLennon for Scrapbook Adhesives by 3L

Let’s Get Started!

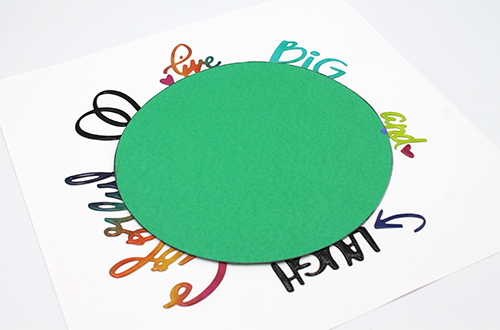
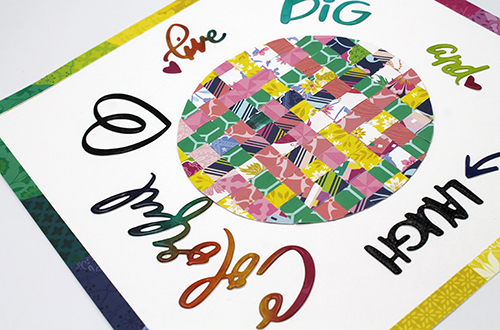
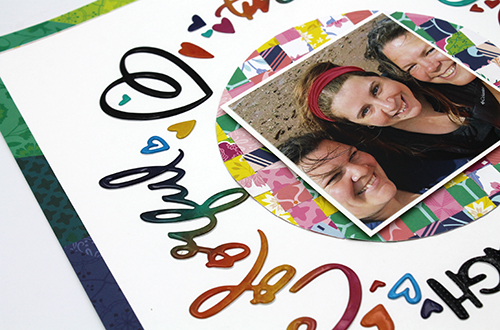
A sheet of 12×12 cardstock is the background of the layout using scraps. I used a cardstock circle template as a guide to adhere the puffy sticker titles around the layout.

Friendship Layout with Paper Weaving by Tracy McLennon for Scrapbook Adhesives by 3L

Paper Weaving Feature

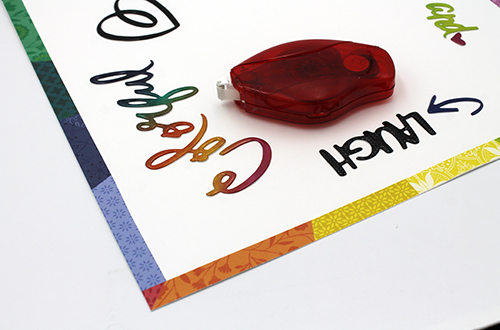
Next, I added strips of patterned paper around the edges of the 12×12 cardstock using the E-Z Runner® Permanent Strips Refillable Dispenser.

Friendship Layout with Paper Weaving by Tracy McLennon for Scrapbook Adhesives by 3L

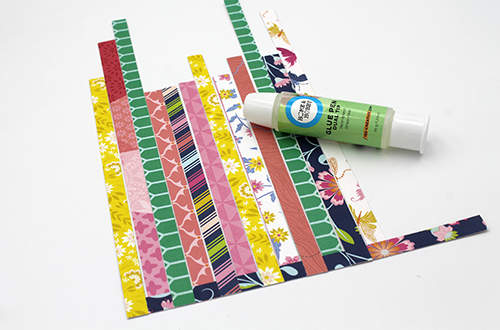
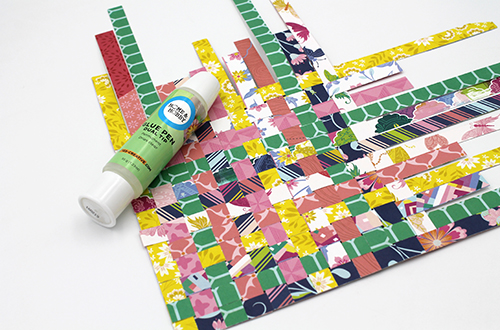
From my scrap pile of beautiful patterned papers, I cut 1/2″ strips. I created a paper weaving base using the Dual Tip Glue Pen.

Friendship Layout with Paper Weaving by Tracy McLennon for Scrapbook Adhesives by 3L

Add each strip of patterned paper weaving until you have a nice little square of woven patterns. Adhere the ends using the Dual Tip Glue Pen for more stability.

Friendship Layout with Paper Weaving by Tracy McLennon for Scrapbook Adhesives by 3L

I used a slightly smaller cardstock circle template and cut my woven piece into a circle. Adhere this to the middle of the layout using the Dual Tip Glue Pen again.

Friendship Layout with Paper Weaving by Tracy McLennon for Scrapbook Adhesives by 3L

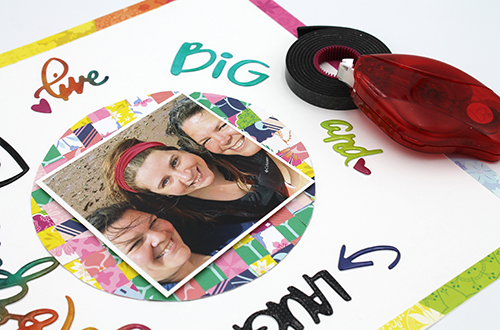
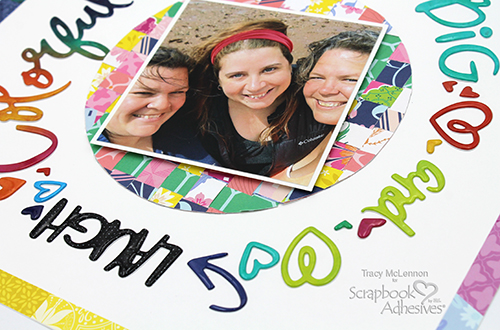
Mat the 4×4 photo in white cardstock using the E-Z Runner® Permanent Strips Refillable Dispenser and then adhere to the middle of the layout using Crafty Foam Tape Black.

Friendship Layout with Paper Weaving by Tracy McLennon for Scrapbook Adhesives by 3L

Next fill in the empty areas around the title circle border using more of the puffy sticker leftovers. This used the remainder of my collection scraps and embellishments to create this layout using scraps.

Friendship Layout with Paper Weaving by Tracy McLennon for Scrapbook Adhesives by 3L

Thanks so much for stopping by!
Tracy

Creative Time: 60 minutes

Skill Level: Intermediate

Materials needed:

Scrapbook Adhesives by 3L®
E-Z Runner® Permanent Strips Refillable Dispenser
Crafty Foam Tape Black

HomeHobby™ by 3L
Dual Tip Glue Pen

Other:
Cardstock- White; Pink Paislee Patterned Paper and Embellishments; Circle Templates

Save to Pinterest!

Friendship Layout with Paper Weaving by Tracy McLennon for Scrapbook Adhesives by 3L Pinterest

Visit our Website and Blog!
Sign up for our Newsletter so you never miss a contest or giveaway!
instagram purple icon facebook icon purple pinterest purple icon twitter purple icon YouTube icon blog subscription purple icon

An Adventurous Heart Card

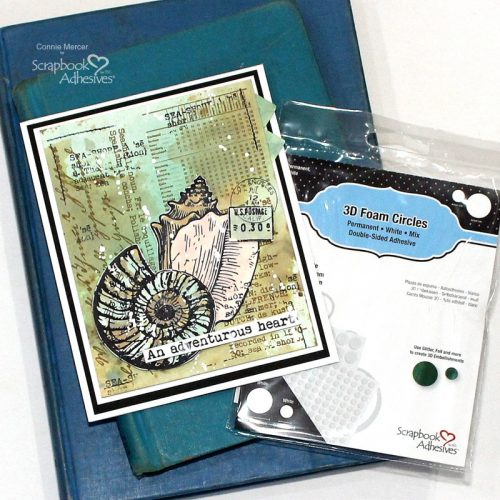
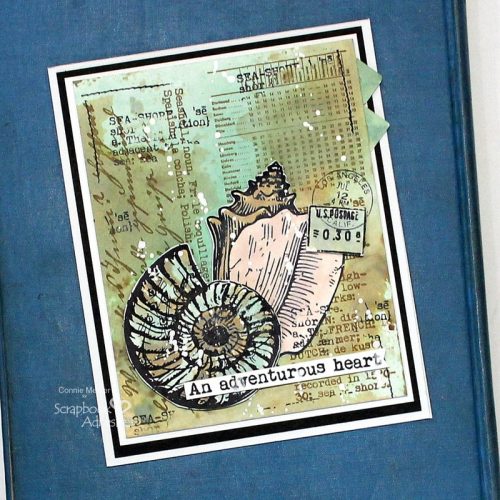
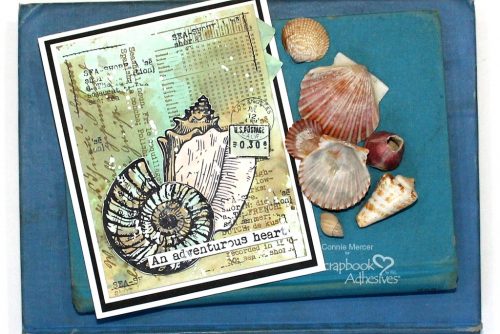
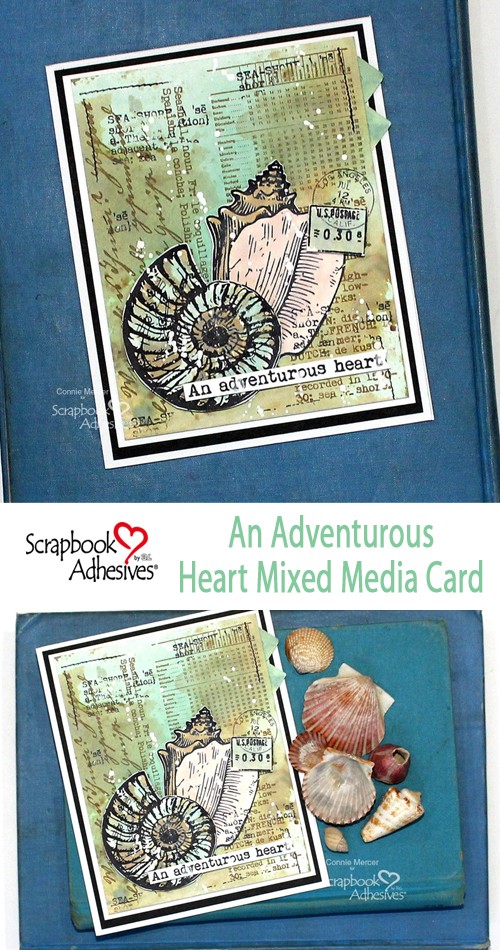
Hi, Connie here with a summer-themed An Adventurous Heart Card. I am featuring the Creative Corners White and combining them with some messy ink mixes along with red rubber stamps. I also have a tip to share using the 3D Foam Circle Mix. It is more than meets the eye!

An Adventurous Heart Card by Connie Mercer for Scrapbook Adhesives by 3L

Create the Adventurous Heart Card Elements

An Adventurous Heart Card by Connie Mercer for Scrapbook Adhesives by 3L

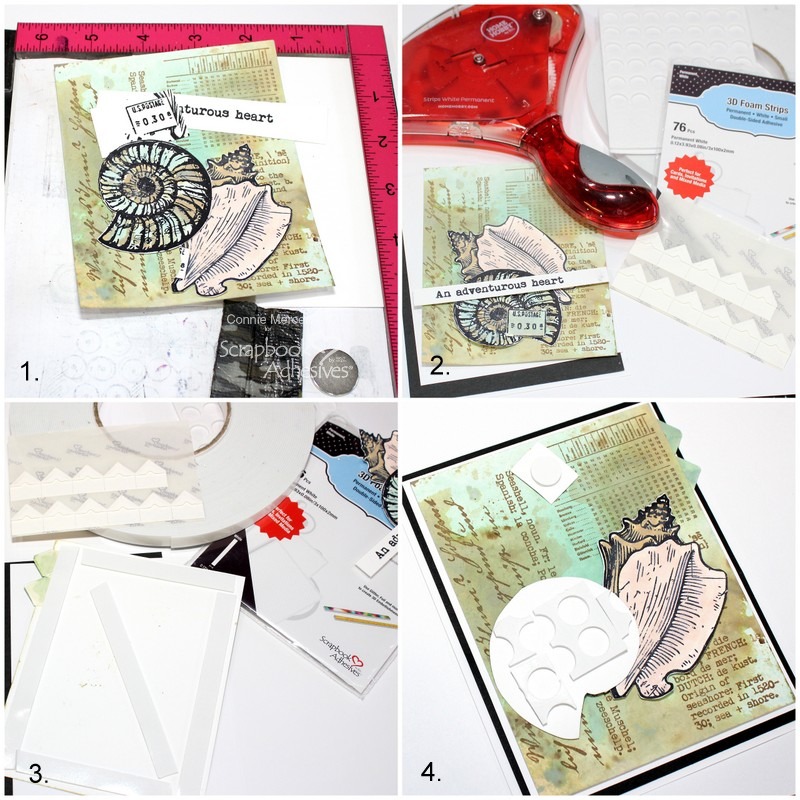
1. Create a card background using inks. Stamp out focal images, color, and cut out. Stamp out the sentiment and any other element to be added to the card front.
2. Gather adhesives being used to adhere the card together. Add ink (watered down) to two Creative Corners White. Dry with a heat tool. Insert between the card layers.
3. Using the Crafty Foam Tape 108ft. adhere the card front to the white cardstock mat. Adhere the sentiment with the 3D Foam Strips White to the card front.
4. Designer’s Tip: Use it all up. Don’t waste any. The negative part from the 3D Foam CircleMix/White is great dimension and can be used on projects too. Adhere the Conch shell with the E-Z Runner® Grand Refillable Dispenser to the card front and then overlap the round shell using the 3D Foam Circle Mix White.

An Adventurous Heart Card by Connie Mercer for Scrapbook Adhesives by 3L

Thanks for stopping by!
Connie Mercer

Creative Time: 40 minutes
Skill Level: Intermediate

Materials Needed:
Scrapbook Adhesives by 3L®

3D Foam Circle Mix White
3D Foam Strips
Crafty Foam Tape 108′
Creative Corners White
E-Z Runner Grand Refillable Dispenser

Other: Stamps – PaperArtsy and Darkroom Door; Ink – Ranger Ink (Distress Oxide and Archival); Acrylic White Paint

Save to Pinterest!

An Adventurous Heart Card by Connie Mercer for Scrapbook Adhesives by 3L Pinterest

Visit our Website and Blog!
Sign up for our Newsletter so you never miss a contest or giveaway!
instagram purple icon facebook icon purple pinterest purple icon twitter purple icon YouTube icon blog subscription purple icon

Lovely Day CAS Card

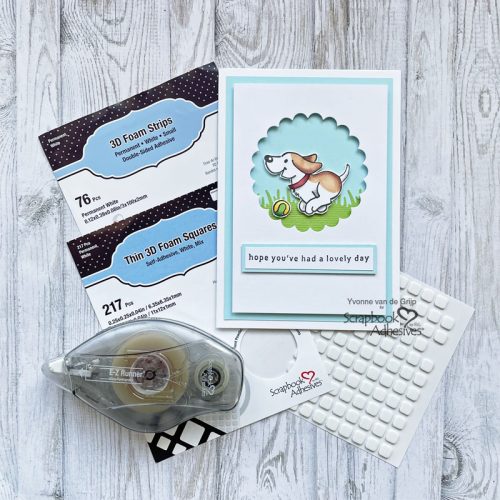
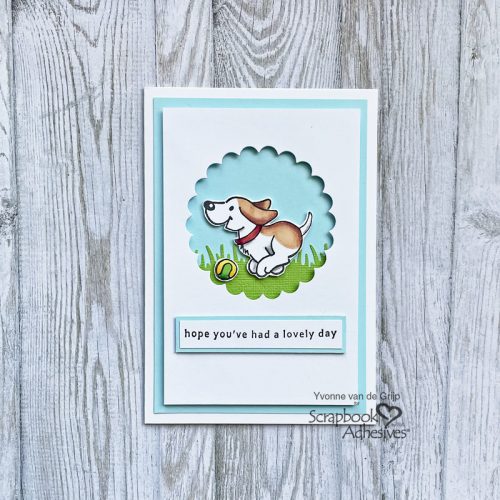
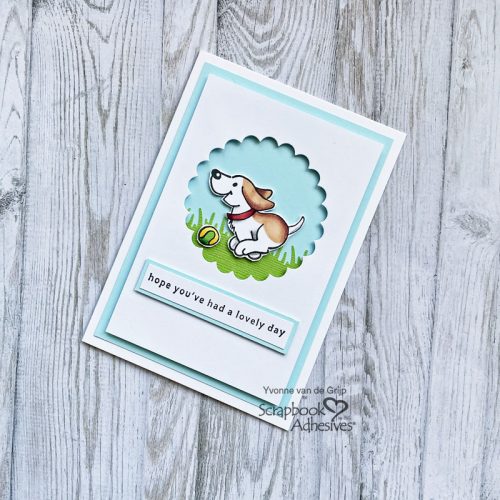
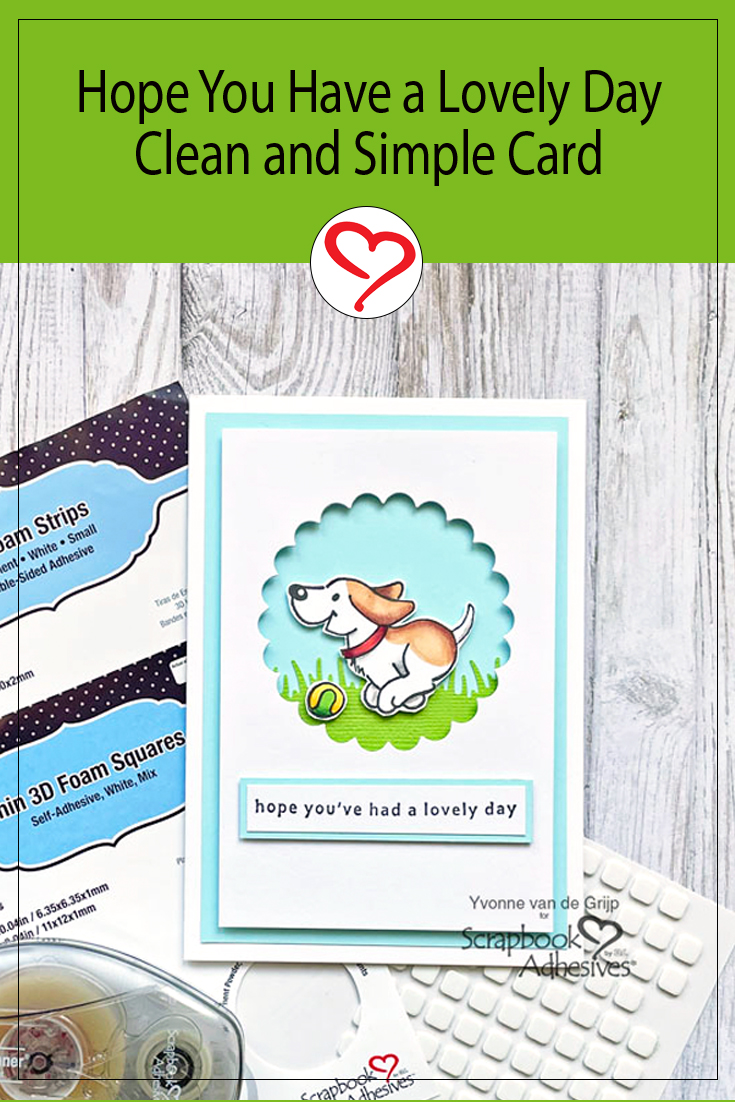
Hi everyone, Yvonne here with a sweet Lovely Day CAS (Clean And Simple) Card that is really easy to make, which makes it suitable for beginner card makers too!

Lovely Day CAS Card by Yvonne van de Grijp for Scrapbook Adhesives by 3L

A Card Base for a Lovely Day CAS Card

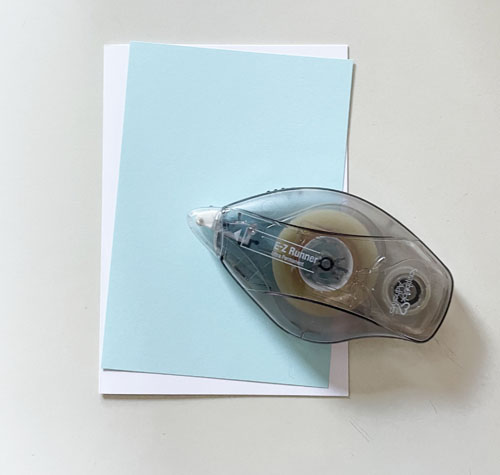
Start by folding a piece of white cardstock to a rectangle card. Then trim a piece of blue cardstock to a card panel that is slightly smaller than the card base. Next, adhere the blue card panel onto the white card base using the E-Z Runner® Ultra Strong Refillable Dispenser.

Lovely Day CAS Card by Yvonne van de Grijp for Scrapbook Adhesives by 3L

Making a Frame

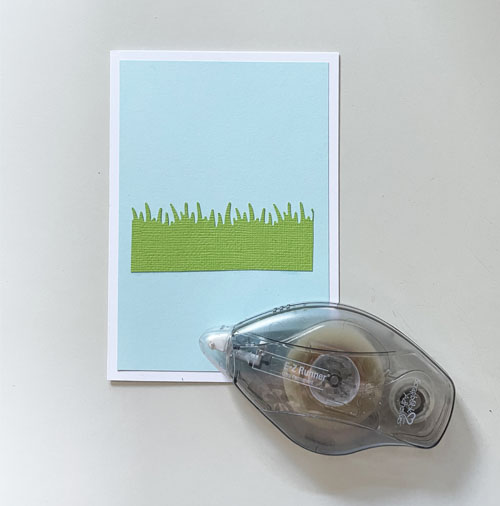
First, trim a piece of white cardstock to fit the card base. Make sure that the panel is slightly smaller than the blue card panel. Then die-cut a circle from the white card panel to create a circle frame. Now make a grass border. To make the border, I used some green cardstock and a punch. If you don’t have such a punch, you can also die-cut or fussy cut the grass border. Now adhere the grass border onto the blue card panel using the E-Z Runner® Ultra Strong Refillable Dispenser to adhere it.

Lovely Day CAS Card by Yvonne van de Grijp for Scrapbook Adhesives by 3L

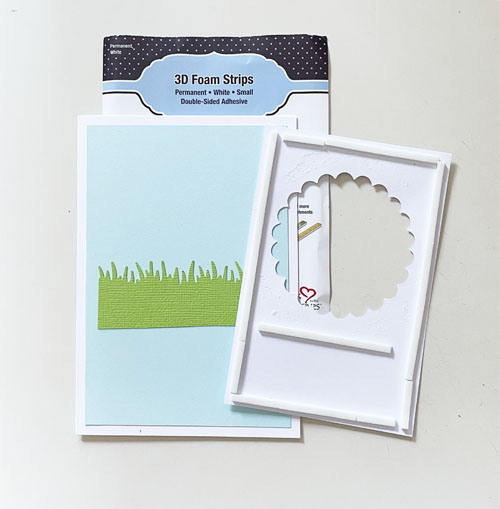
Make sure that the grass is located so it shows within the die-cut circle frame. Then adhere 3D Foam Strips to the back of the frame card panel. Next, remove the back liner and adhere to the card base. You’ve just created a dimensional frame for your Lovely Day CAS Card!

Lovely Day CAS Card by Yvonne van de Grijp for Scrapbook Adhesives by 3L

Making Layers

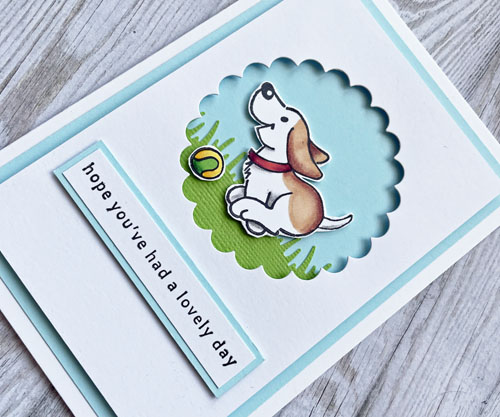
First stamp the dog and its ball onto white cardstock using black ink and then color the image. Next fussy cut the images. Adhere both into the frame using Thin 3D Foam Squares White Mix. This way you create extra depth on your card since the frame is adhered with the slightly thicker 3D Foam Strips.  Now stamp the sentiment onto a white banner using black ink and then adhere it onto a blue banner using the E-Z Runner® Ultra Strong Refillable Dispenser. For a subtle uplifting effect, adhere the banner onto the card using Thin 3D Foam Squares White Mix.

Lovely Day CAS Card by Yvonne van de Grijp for Scrapbook Adhesives by 3L

And voilá, your Lovely Day CAS Card is ready. I hope you enjoyed this simple tutorial and wish you happy crafting!

Yvonne van de Grijp

Lovely Day CAS Card by Yvonne van de Grijp for Scrapbook Adhesives by 3L

Creative Time: 30 minutes

Skill Level: Beginner

Materials needed:

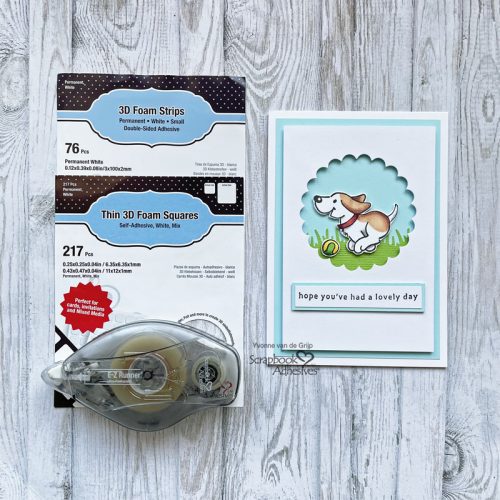
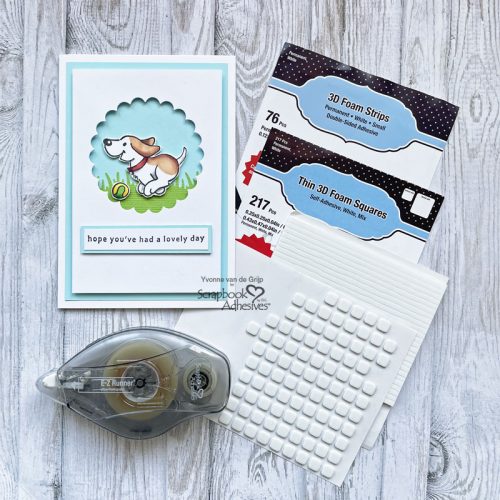
Scrapbook Adhesives by 3L®

E-Z Runner® Ultra Strong Refillable Dispenser

Thin 3D Foam Squares White Mix

3D Foam Strips

Other

Craft Dies and Die-Cutting Machine: Spellbinders Paper Arts® (Fancy Scallop Edge Circle Etched Dies, Platinum 6 Machine);  Ink: Tsukineko (Versafine™ in Onyx Black); Stamps: Marianne Design (Eline’s Cute Animals); Border Punch: Martha Stewart Craft (Grass Border); Color: Alcohol Markers and Coloring Pencils; White and Blue Cardstock; Tweezers; Scissors; Paper Trimmer

Save to Pinterest!

Lovely Day CAS Card by Yvonne van de Grijp for Scrapbook Adhesives by 3L Pinterest

Visit our Website and Blog!
Sign up for our Newsletter so you never miss a contest or giveaway!
instagram purple icon facebook icon purple pinterest purple icon twitter purple icon YouTube icon blog subscription purple icon

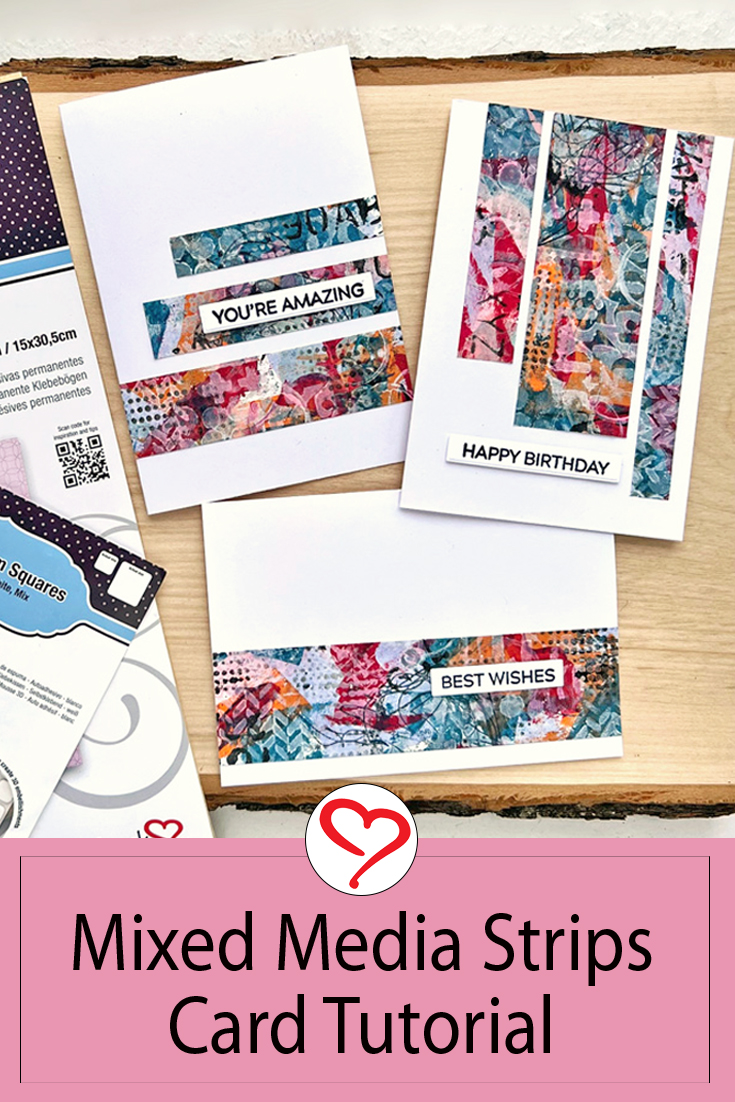
Mixed Media Strips Cards

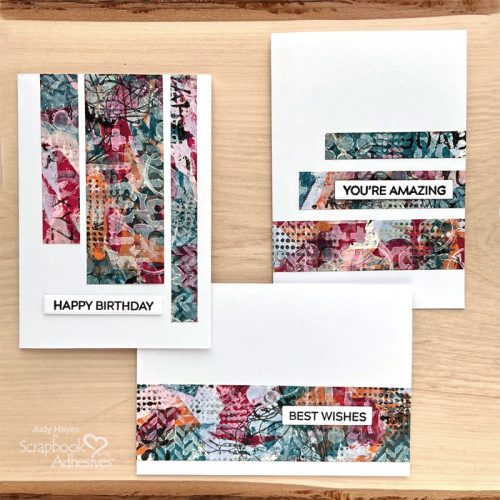
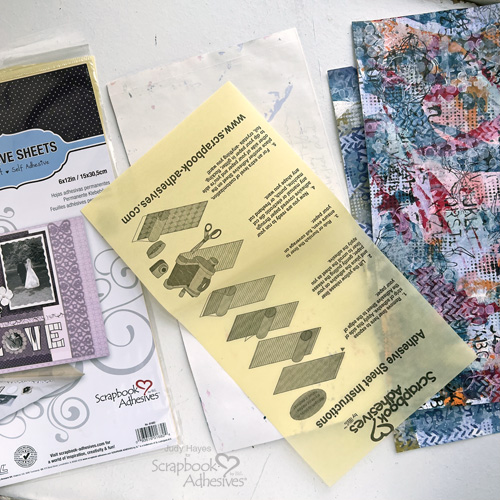
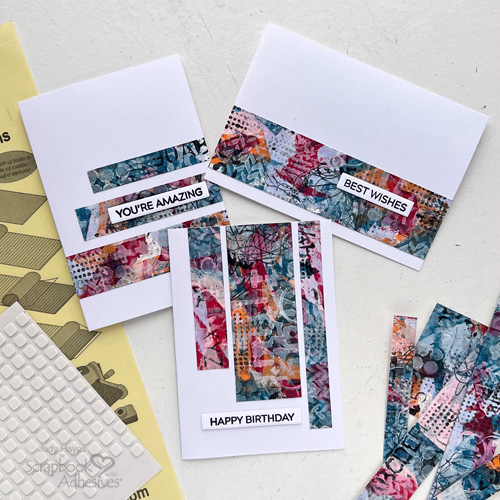
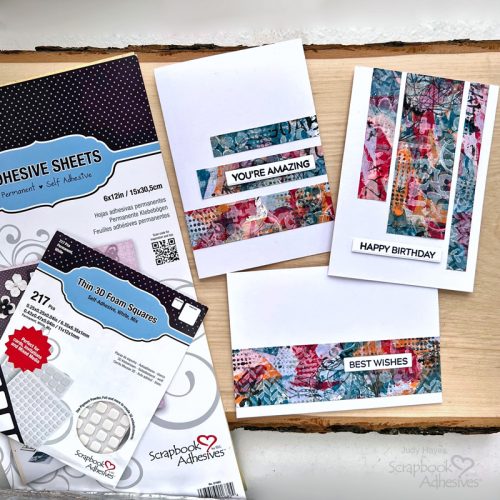
Hi, Judy here today! These three cards are made with mixed media strips made with painted paper and Adhesives Sheets 6 x 12in. The patterns are one of a kind and nice to have on hand for quick cards. As shown in the photo below, I painted three different papers and used one for these cards.

Mixed Media Strips Cards by Judy Hayes for Scrapbook Adhesives by 3L

Make Painted Paper Strips

Cut white drawing paper or card stock to 6 x 12 inches. Use a credit card to apply thin layers of assorted colors of Distress paint to completely cover the paper. Allow to dry.

Next, use mini stencils with black and white paints to add patterns randomly over the entire sheet. Add squiggle lines with stamp and black ink. Allow to dry or speed dry with a heat tool. Note that I applied all stenciling without allowing dry time between colors which lets the colors blend somewhat.

Designer’s Tip: To avoid shifting the stencil when applying any time of media, try the E-Z Dots® Repositionable Refillable Dispenser

Mixed Media Strips Cards by Judy Hayes for Scrapbook Adhesives by 3L

Apply Adhesives Sheets 6 x 12in. to the back of the painted paper and rub well with a bone folder to secure the adhesive.

Mixed Media Strips Cards by Judy Hayes for Scrapbook Adhesives by 3L

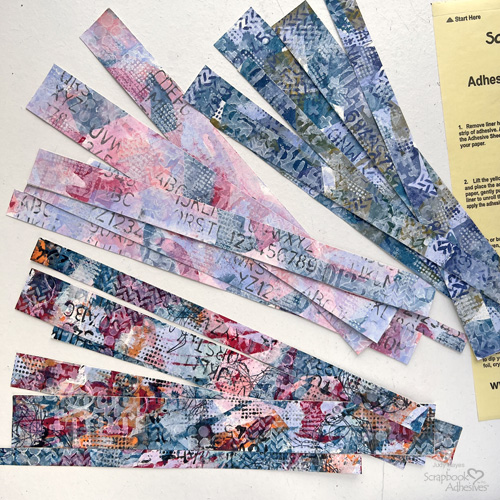
Cut paper into various sizes of strips. I cut to the following: 0.50, 0.75, 1.00, 1.25, and 1.50 inches in width. Look at each card assembly below for length measurements.

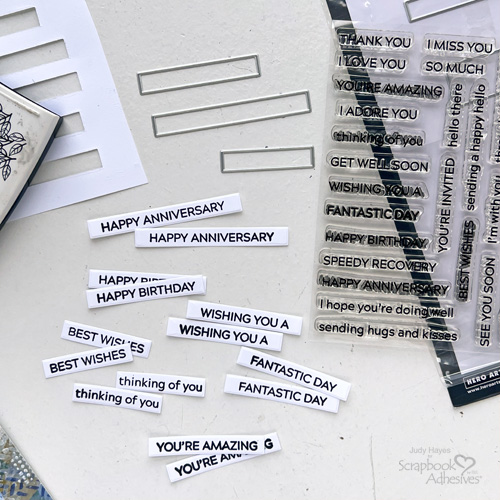
Sentiment Strips

Use black ink to stamp greetings on white cardstock. Then with its coordinating die, cut greeting strips. Choose which sentiments to use and leave the rest for another project

Mixed Media Strips Cards by Judy Hayes for Scrapbook Adhesives by 3L

Assemble the Cards

For card bases, cut three pieces of white cardstock to 5.375 x 7.50 inches and fold them in half to make three 3.75 x 5.375-inch cards.

Card 1 (Best Wishes):

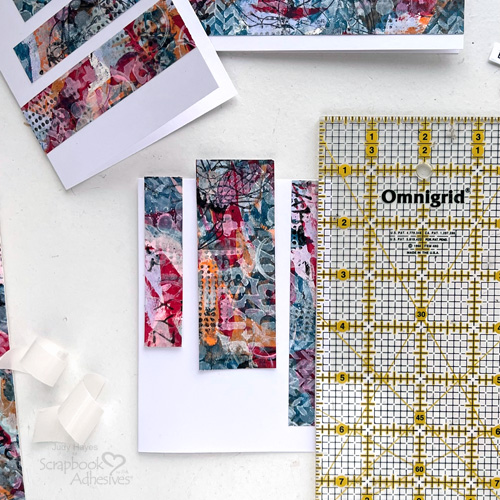
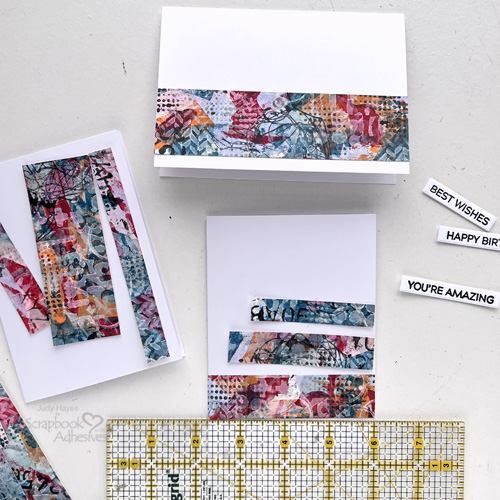
This one is a really simple design, simply cut the 1.50-inch painted strip to 5.375 inches long. Then peel the backing from the Adhesive Sheet on the back, and attach it across the card front. Place it about 0.25 inches from the cut edge of the card. Press well to secure.

Card 2 (Happy Birthday):

Mixed Media Strips Cards by Judy Hayes for Scrapbook Adhesives by 3L

Cut painted strips to the following length sizes:

  • 0.50-inch strip cut to 4.75 inches long
  • 1.50-inch strip cut to 4 inches long
  • 0.75-inch strip cut to 3.25 inches long

Peel the liner off from the 0.50-inch strip and secure it about 0.25 inches from the open edge of the card and end even with the card top. Designer’s Tip: A quilting ruler is very helpful for straight alignment.

Remove the liner from the 1.50-inch strip, position it about 0.125 inches from the first strip with the top edge even with the card top, and press in place. Repeat with the 0.75-inch strip.

Card 3 (You’re Amazing):

Mixed Media Strips Cards by Judy Hayes for Scrapbook Adhesives by 3L

Cut the following length for the painted strips:

  • For the 1.00-inch strip, cut to 3.75 inches long (width of card)
  • 0.75-inch strip cut 3.25 inches long
  • 0.50-inch strip cut 2.75 inches long

Peel the liner off from the 1.00-inch strip and align 0.75 inches from the bottom of the card, and press in place. With the 0.75-inch strip, remove the liner and position one edge flush with the open edge of the card, about 0.25 inches above the other strip, and press in place. Repeat with the 0.50-inch strip.

Finish with Greeting Strips

Mixed Media Strips Cards by Judy Hayes for Scrapbook Adhesives by 3L

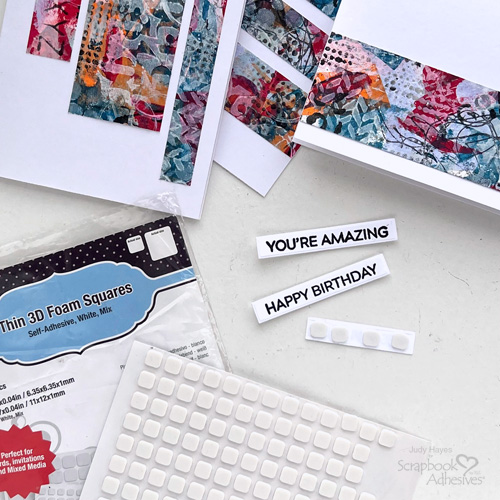
Attach small squares from the Thin 3D Foam Squares White Mix to the back of each greeting strip, peel the liners, and secure each greeting to the following cards: Card 1- Best Wishes, Card 2 – Happy Birthday, and Card 3 – You’re Amazing.

Mixed Media Strips Cards by Judy Hayes for Scrapbook Adhesives by 3L

I challenge you to try making some painted paper strips and Adhesives Sheets 6 x 12in. for quick cards! It’s fun!

Mixed Media Strips Cards by Judy Hayes for Scrapbook Adhesives by 3L

Thanks for Visiting!
Judy Hayes

Creative Time: 30 mins
Skill Level: Intermediate

Materials Needed:
Scrapbook Adhesives by 3L®

Thin 3D Foam Squares White Mix

Adhesives Sheets 6 x 12in.

Other: Ink: Tsukineko (Versafine Onyx Black); Stamp and Craft Dies Combo: Hero Arts (Message Strips Stamp & Cut XL); Stamp: Stampers Anonymous (Tim Holtz Grunged); Paint: Ranger Ink (Distress Paints in Shaded Lilac, Lumberjack Plaid, Uncharted Mariner, Carved Pumpkin, Kitsch Flamingo, Saltwater Taffy, Black Soot, Picket Fence); Stencils: Stampers Anonymous/Tim Holtz (Mini Stencils from Set 1,8,13) White Cardstock; White Drawing Paper or Cardstock

Save to Pinterest!

Mixed Media Strips Cards by Judy Hayes for Scrapbook Adhesives by 3L Pinterest

Visit our Website and Blog!
Sign up for our Newsletter so you never miss a contest or giveaway!
instagram purple icon facebook icon purple pinterest purple icon twitter purple icon YouTube icon blog subscription purple icon