You are in our US store • Switch to Europe store

Faux Embossed Easter Layout

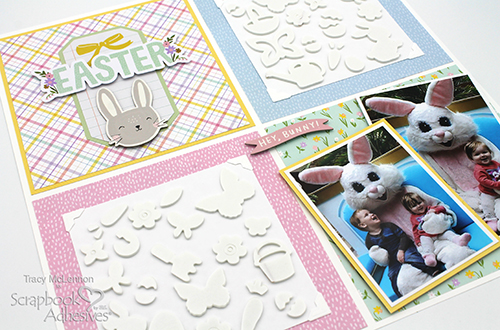
Hello scrappy friends! Tracy here and today I have a little Easter-inspired layout to share featuring 3D Foam Shapes to create a clever trick, embossing! It’s easy to create. Let’s get started!
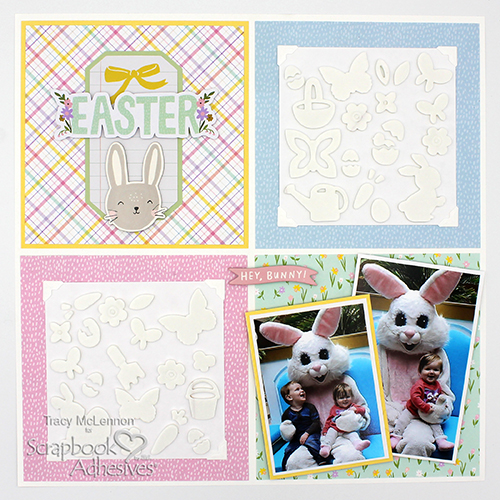
Faux Embossed Easter Layout by Tracy McLennon for Scrapbook Adhesives by 3L

Easter Layout Basics

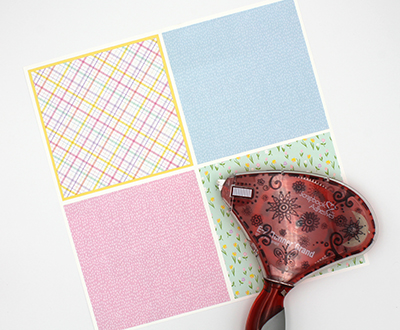
Start by cutting patterned papers and coordinating cardstock to create this simple grid background. The squares are 5.75″, and the light plaid pattern is cut to 5.5″. Adhere these to a full sheet of white cardstock using the E-Z Runner® Grand Refillable Dispenser.
Faux Embossed Easter Layout by Tracy McLennon for Scrapbook Adhesives by 3L

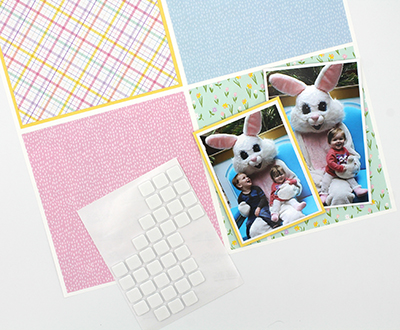
Next, I matted my cropped photos in white cardstock, and then the smaller photo also in yellow cardstock. Adhere the layers together using the E-Z Runner® Grand Refillable Dispenser, and then adhere to the layout using 3D Foam Squares White Mix.
Faux Embossed Easter Layout by Tracy McLennon for Scrapbook Adhesives by 3L

Faux Embossed Technique

Cut two squares from white cardstock at 4.75″ and adhere to the pink and light blue patterned squares using Creative Photo Corners White.
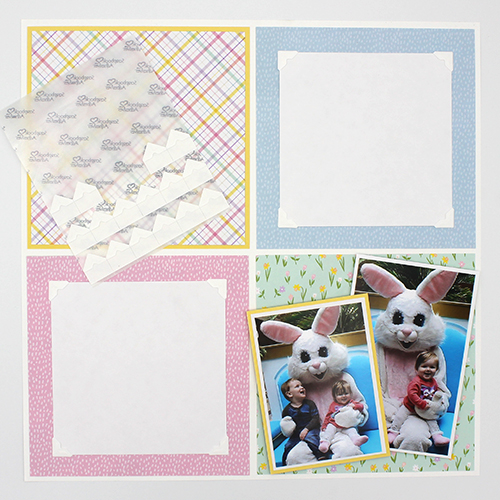
Faux Embossed Easter Layout by Tracy McLennon for Scrapbook Adhesives by 3L

Now to add the Easter to this Easter Layout. Three kinds of 3D Foam Shapes were used for my layout: 3D Foam Butterflies; 3D Foam Easter Shapes and 3D Foam Garden Shapes.

Choose simple and monochromatic Easter/Spring designs for these white on white blocks. Add the 3D Foam Shapes filling the spaces.
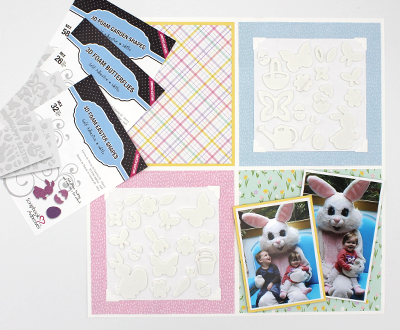
Faux Embossed Easter Layout by Tracy McLennon for Scrapbook Adhesives by 3L

The Final Touches

Start filling the spaces with the larger images spreading them out, then come back and fill spaces with the smaller pieces. Quick and easy Easter Layout dimension.
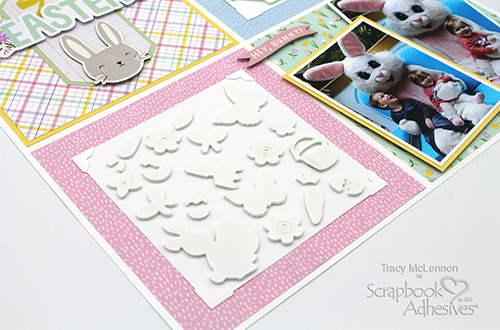
Faux Embossed Easter Layout by Tracy McLennon for Scrapbook Adhesives by 3L

Add the final embellishment pieces using E-Z Runner® Grand Refillable Dispenser. The chipboard pieces are self-adhesive.
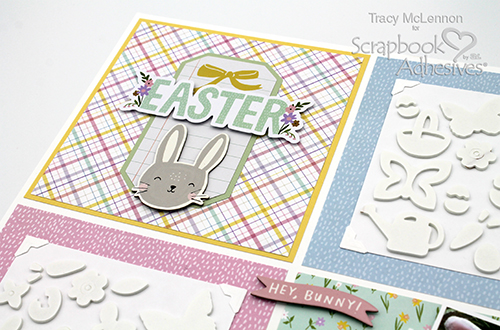
Faux Embossed Easter Layout by Tracy McLennon for Scrapbook Adhesives by 3L

Thanks so much for stopping by!
Tracy

Creative Time: 30 Minutes
Skill Level: Beginner

Materials Needed
Scrapbook Adhesives by 3L®

Creative Photo Corners White
3D Foam Easter Shapes, 3D Foam Butterflies, and 3D Foam Garden Shapes
3D Foam Squares White Mix
E-Z Runner® Grand Refillable Dispenser

Other: Cardstock (Pale Yellow, Pastel Green, White); Simple Stories Bunnies & Blooms Collection (6×8 pad, chipboard stickers, bits & pieces, journal bits)

Save It to Pinterest!
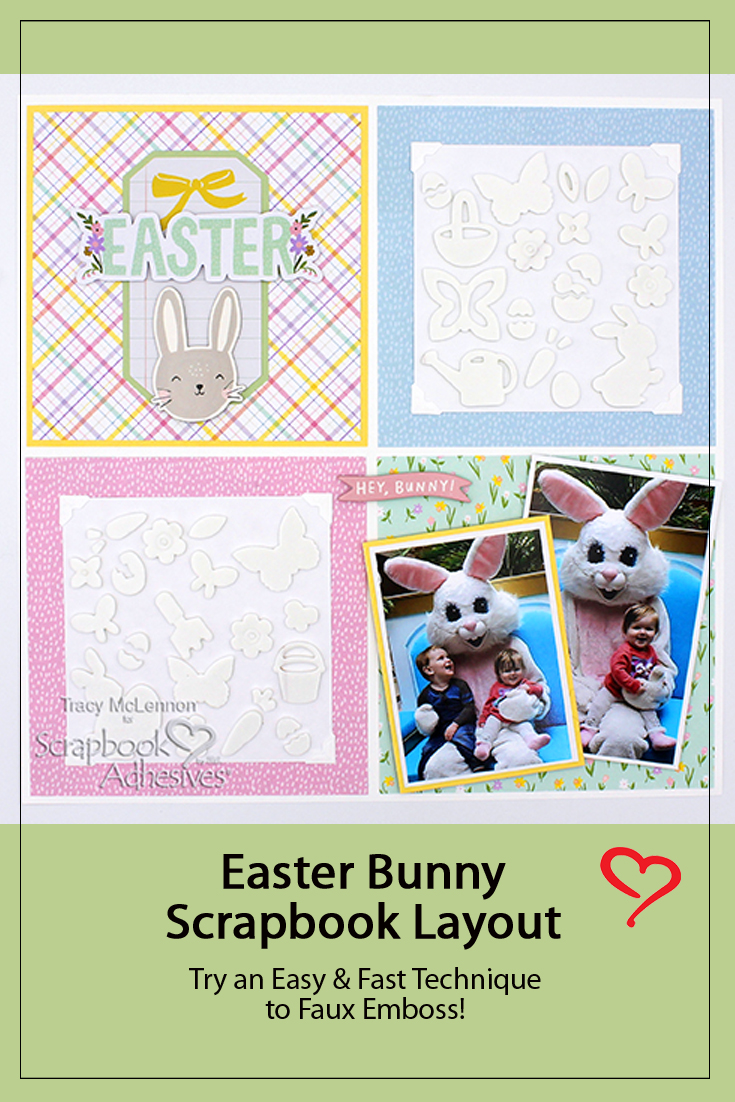
Faux Embossed Easter Layout by Tracy McLennon for Scrapbook Adhesives by 3L Pinterest

Visit our Website and Blog!
Sign up for our Newsletter so you never miss a contest or giveaway!

instagram purple icon facebook icon purple pinterest purple icon twitter purple icon YouTube icon blog subscription purple icon

Mixed Media Happiness Card with Coffee Lovers!

Welcome! It’s time for the Spring/Summer Coffee Lovers Blog Hop with this fabulous Mixed Media Happiness Card! As a SUPER SPONSOR, we’ve provided great prizes too! Grab a cuppa and join the hop with your own beverage-themed artwork!

What is Coffee Lovers? It is a coffee-loving (or tea or cocoa) community of card makers open to everyone. Their blog offers inspirational coffee-related posts and bi-annual coffee blog hops that YOU can join. You get a chance to win the giveaways as a blogger! So read until the very end!

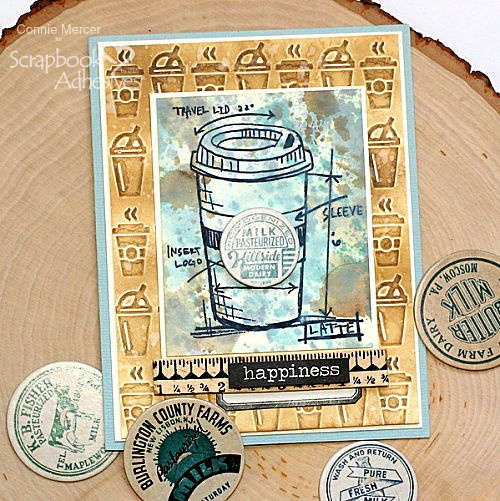
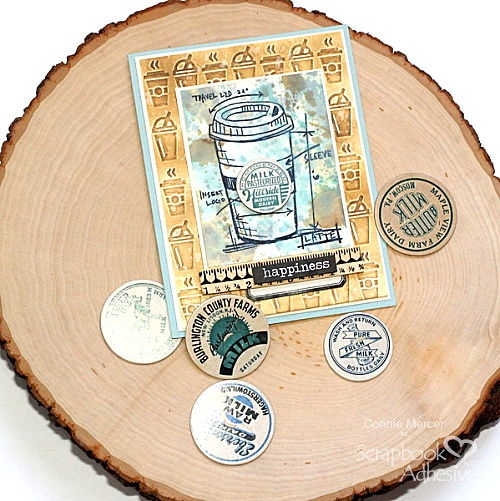
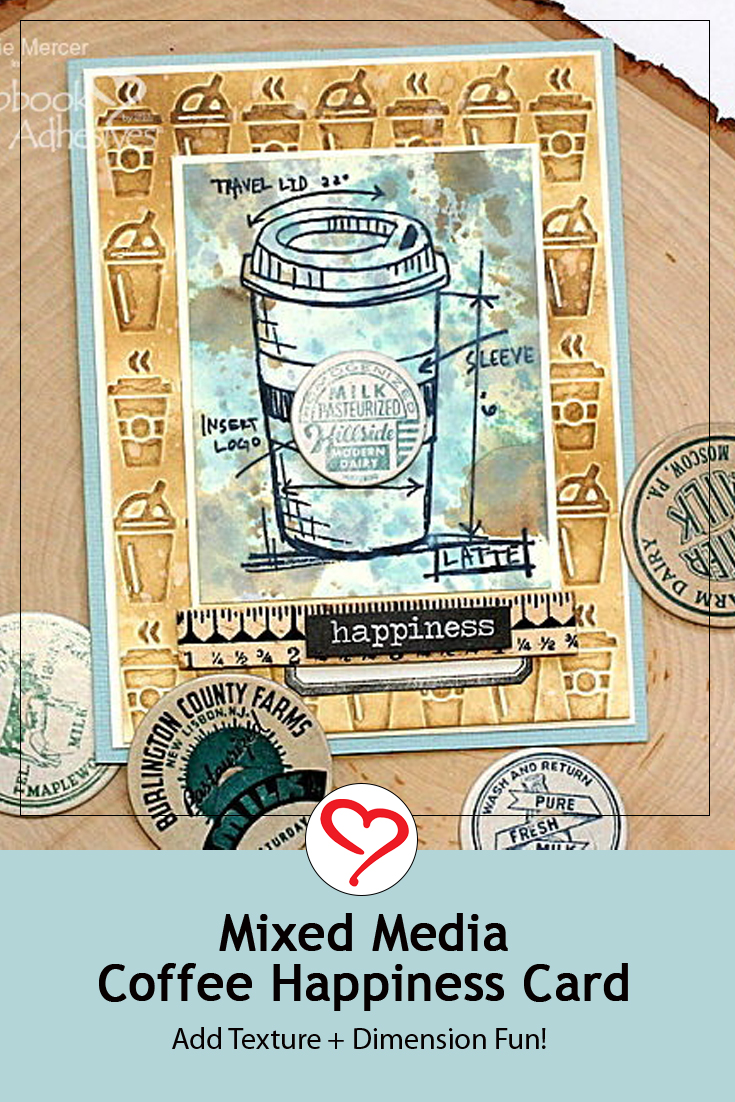
Mixed Media Happiness Card by Connie Mercer

Hi, Connie here with a Coffee Card using a cool coffee stamp set and some pretty impressive 3D Foam Adhesives. It makes putting this card together so easy!!!

Mixed Media Happiness Card with Coffee Lovers by Connie Mercer for Scrapbook Adhesives by 3L

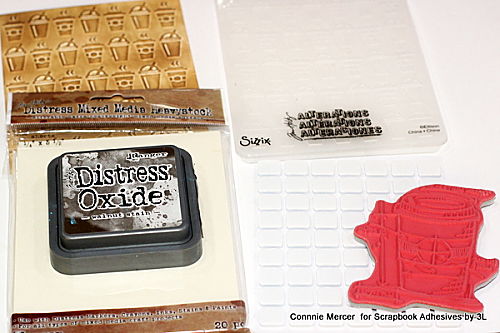
I started with a coffee themed embossing folder and a coffee stamp. After the mixed media paper was embossed, color was added using Distress Oxide ink. The Coffee Stamp was then stamped on a mixed media background, created using Distress Oxide inks. We are ready to start assembling the card.

Mixed Media Happiness Card with Coffee Lovers by Connie Mercer for Scrapbook Adhesives by 3L

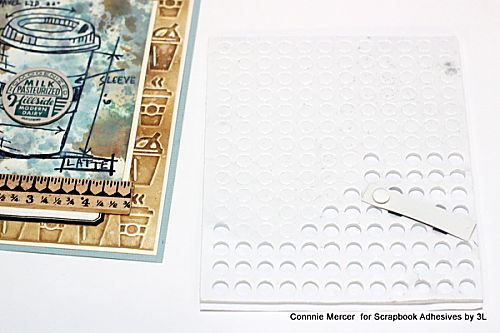
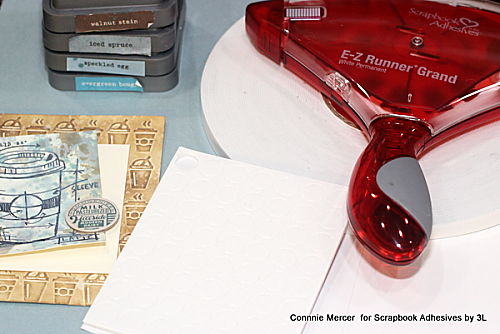
The pictures show 3D Foam Squares ( but I ended up using 3D Foam Circles White Mix). I picked up the wrong 3D foam set when taking the photo, but these would have worked also.

Mixed Media Happiness Card with Coffee Lovers by Connie Mercer for Scrapbook Adhesives by 3L
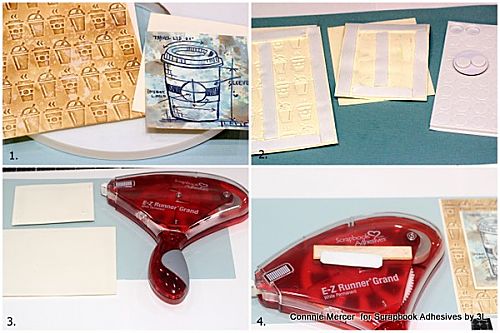
  1. Crafty Foam Tape 108′ worked perfectly to add dimension to the card front.
  2. Apply the Crafty Foam Tape 108′ to the backs of the stamped and embossed pieces.
  3. Using the E-Z Runner Grand Refillable Dispenser adhere the two sections to the card base. Adhere the embossed section to the card base first and then the stamped image.
  4. Using the E-Z Runner Grand Refillable Dispenser adhere the sticker to the back of the small ruler embellishment.
Mixed Media Happiness Card with Coffee Lovers by Connie Mercer for Scrapbook Adhesives by 3L

Apply the sentiment sticker with 3D Foam Circle White Mix to the small ruler embellishment.

Mixed Media Happiness Card with Coffee Lovers by Connie Mercer for Scrapbook Adhesives by 3L

Use the 3D Foam Circle White Mix to adhere the milk cap to the travel coffee cup image.

Mixed Media Happiness Card with Coffee Lovers by Connie Mercer for Scrapbook Adhesives by 3L

I hope you are enjoying a cup of coffee or tea!

Thanks for stopping by.
Connie Mercer

Creative Time: 40 minutes
Skill Level: Beginner

Materials Needed
Scrapbook Adhesives by 3L®

E-Z Runner Grand Refillable Dispenser
Crafty Foam Tape 108′
3D Foam Circle White Mix

Other
Mixed Media Cardstock, Sizzix Embossing Folder, Label Sticker, Small Ruler Embellishment and Milk Caps, Ranger Ink’s Distress Oxide Ink and Archival Ink, Coffee Stamp

Pin It!

Mixed Media Happiness Card with Coffee Lovers by Connie Mercer for Scrapbook Adhesives by 3L Pinterest

Click the button below to participate, and/or see more inspiration

If you can’t find the comment section at the bottom of this post, click on this button and scroll down to the bottom of the post and leave a comment.

Visit our Website and Blog!
Sign up for our Newsletter so you never miss a contest or giveaway!

instagram purple icon facebook icon purple pinterest purple icon twitter purple icon YouTube icon blog subscription purple icon

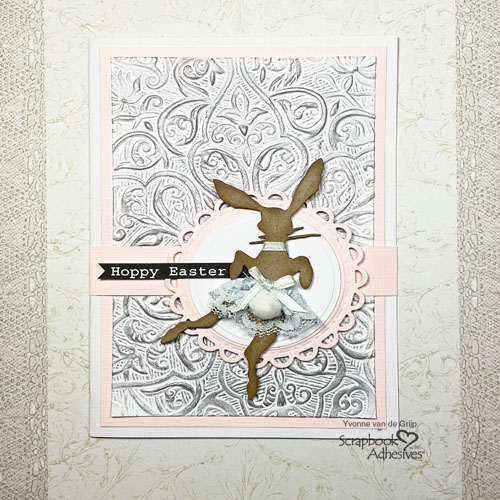
Textured Hoppy Easter Card

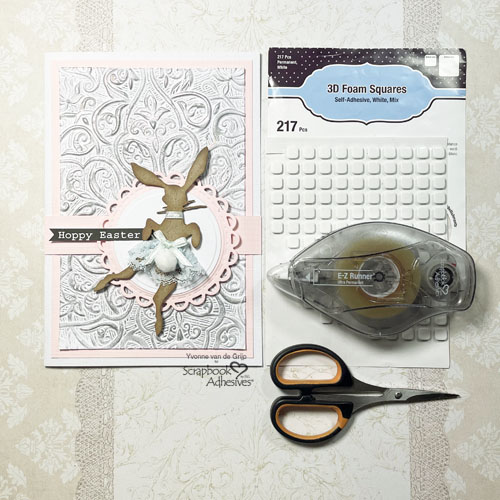
Hi everyone, Yvonne here. With Easter coming up soon I would like to share with you all a beautiful Textured Hoppy Easter Card. It’s cute and elegant at the same time.

Textured Hoppy Easter Card by Yvonne van de Grjip for Scrapbook Adhesives by 3L

Making a Hoppy Easter Bunny

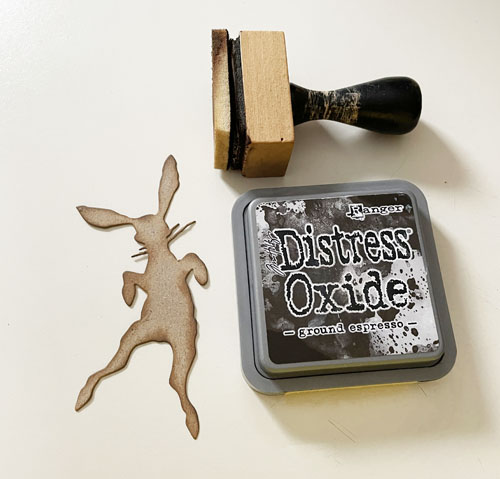
Start by die-cutting an Easter bunny from kraft cardstock. Then ink the edges using brown ink and an ink blending tool.

Textured Hoppy Easter Card by Yvonne van de Grjip for Scrapbook Adhesives by 3L

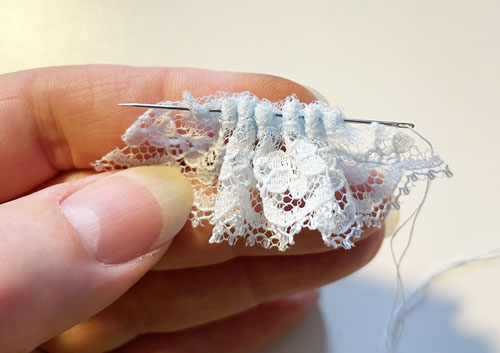
Now use a needle and thread to gathering and pleat a piece of blue lace for the skirt.

Textured Hoppy Easter Card by Yvonne van de Grjip for Scrapbook Adhesives by 3L

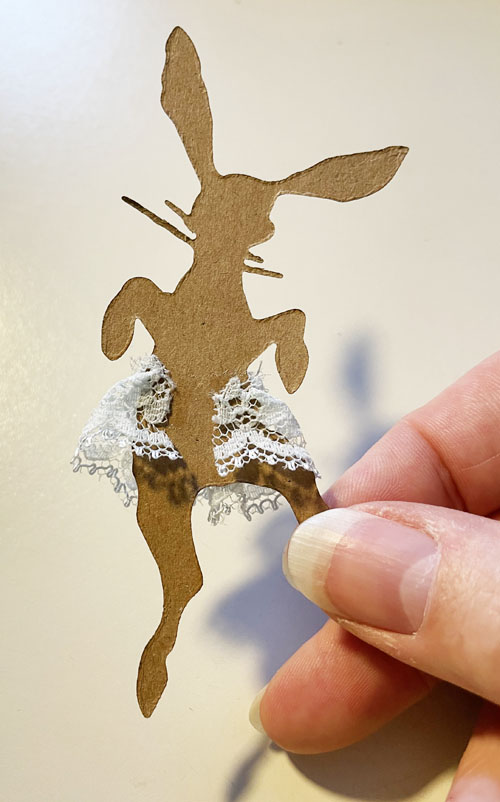
Then adhere to the bunny shape using the E-Z Runner® Ultra Strong Refillable Dispenser. Secure the ends to the back of the Easter bunny with the E-Z Runner® Ultra Strong Refillable Dispenser.

Textured Hoppy Easter Card by Yvonne van de Grjip for Scrapbook Adhesives by 3L

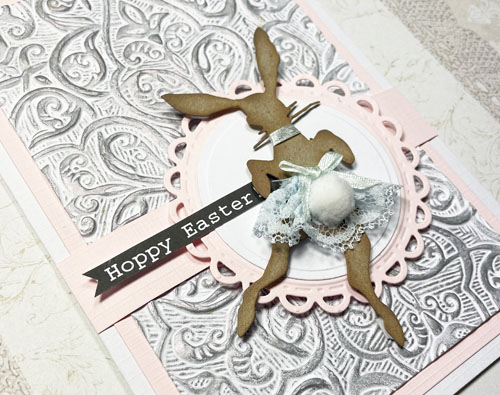
To finish the bunny embellishing, wrap a piece of blue satin ribbon around its neck and adhere the ends to the back using the E-Z Runner® Ultra Strong Refillable Dispenser. Make a blue satin bow and adhere to the skirt with an Adhesive Dots Mini. For the tail, place a small cotton ball onto the skirt using Adhesive Dots Mini.

Emboss the Card Panel

Lightly mist a piece of white cardstock and place it in an embossing folder. This result will give an even more detailed design and prevents tearing. Then run it through your die-cutting and embossing machine as instructed by its manufacturer. Let dry after embossing.

Next, use gilded wax to accent the embossed paper. Put a tiny bit of wax on your fingertip and rub over the embossed parts. Then trim the card panel to a rectangular size.

Making the Card Base

Adhere the embossed card panel onto a piece of pale pink cardstock using the E-Z Runner® Ultra Strong Refillable Dispenser. Then mat on a white card base with the E-Z Runner® Ultra Strong Refillable Dispenser.

Next, trim a strip from pale pink cardstock and adhere horizontally over the card.

Die-cut and emboss a pink laced circle from pink cardstock and adhere to the card base using 3D Foam Squares White Mix. Die-cut and emboss a white circle from white cardstock and adhere to the pink die-cut circle using the E-Z Runner® Ultra Strong Refillable Dispenser.

Finishing the Card

Now it’s time to adhere the bunny onto the card using 3D Foam Squares White Mix. For a finishing touch, adhere the sentiment to the card using 3D Foam Squares White Mix.

Textured Hoppy Easter Card by Yvonne van de Grjip for Scrapbook Adhesives by 3L

I hope you enjoyed this tutorial and wish you happy crafting!
Yvonne van de Grijp

Textured Hoppy Easter Card by Yvonne van de Grjip for Scrapbook Adhesives by 3L

Creative Time: 45 minutes
Skill Level: Intermediate

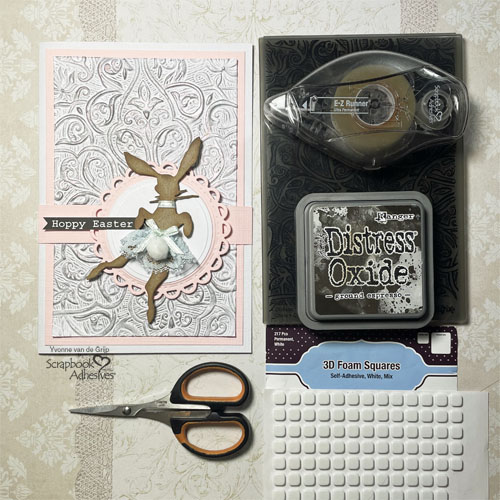
Materials needed:
Scrapbook Adhesives by 3L®
E-Z Runner® Ultra Strong Refillable Dispenser
3D Foam Squares White Mix
Adhesive Dots Mini

Other
Cardstock (White, Kraft, Pale Pink); Embossing Folder (Sizzix 3-D Texture Fades – Engraved); Etched Dies (Sizzix: Tim Holtz: Thinlits Bunny Hop; Spellbinders® Paper Arts: Open Scallop Edge Circles, Standard Circles Large); Die-Cutting and Embossing Machine (Spellbinders® Paper Arts: Platinum 6 Machine); Gilded Wax: Blue Lace; Blue Ribbon; Needle and Thread; Tiny Cotton Ball; Sentiment

Save to Pinterest!

Textured Hoppy Easter Card by Yvonne van de Grjip for Scrapbook Adhesives by 3L Pinterest

Visit our Website and Blog!
Sign up for our Newsletter so you never miss a contest or giveaway!

instagram purple icon facebook icon purple pinterest purple icon twitter purple icon YouTube icon blog subscription purple icon

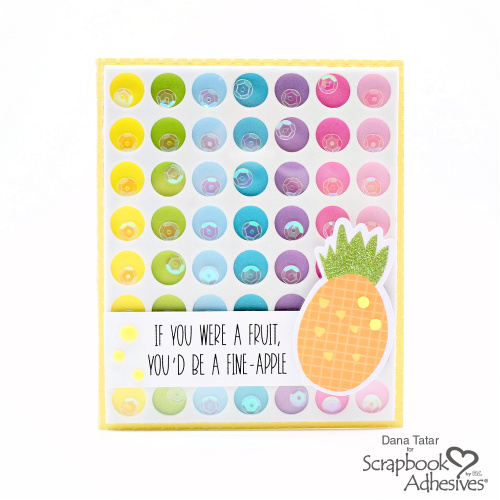
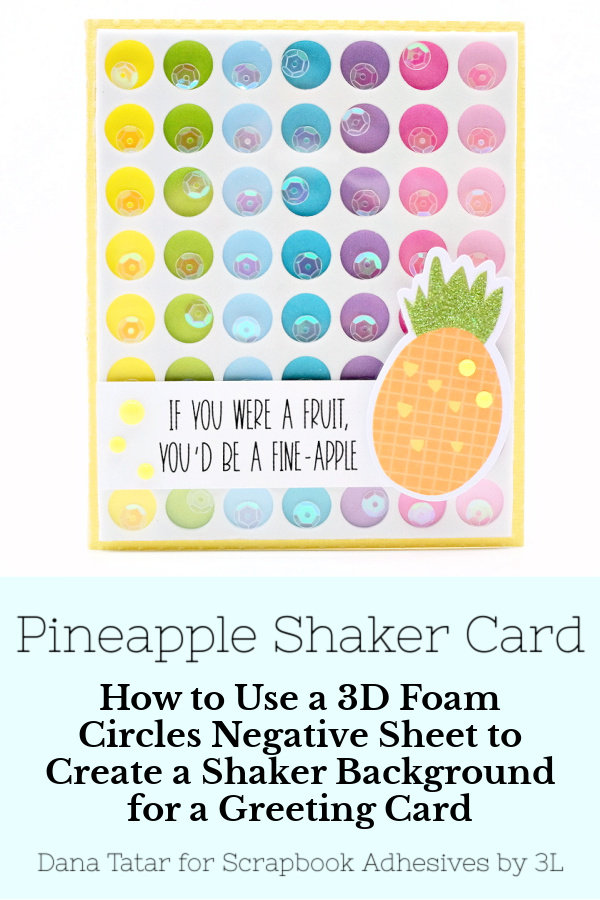
Pineapple Pun Shaker Card

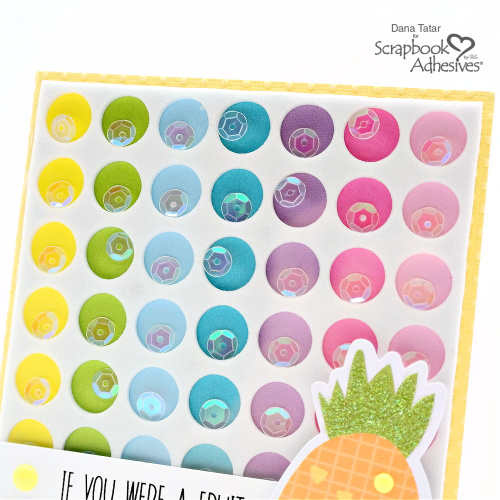
Hi friends! Dana here today sharing a quick and easy way to create a colorful shaker card featuring a fun pineapple pun. I created this card after seeing the new Dot Cover Plate Die from the Say it With Stamps line by Becky Moore and Photo Play Paper. Becky’s example card contained die-cut circles filled with mini sequins.

Pineapple Pun Shaker Card by Dana Tatar for Scrapbook Adhesives by 3L

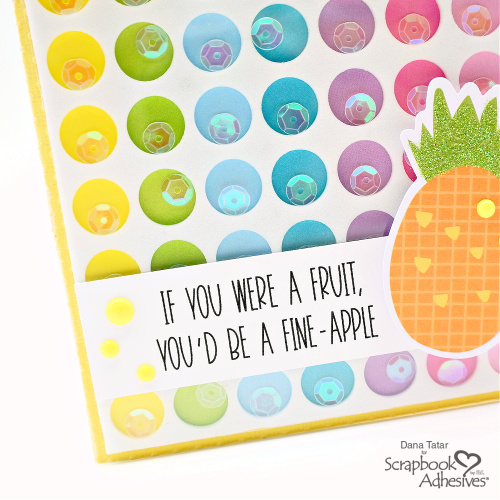
The new dies are shipping this month, but I didn’t want to wait. I knew I could create a similar design using an empty 3D Foam Circles Sheet. I filled each empty circle with an iridescent clear sequin. They really took on the color of the colorful stripes from the base patterned paper. I added a quick die-cut sentiment and pineapple and some easy embellishments to finish the card in no time at all.

Colorful 3D Shaker Assembly

Pineapple Pun Shaker Card by Dana Tatar for Scrapbook Adhesives by 3L

First, I selected a piece of colorful striped patterned paper that matched up with the empty circles of a Large 3D Foam Circles sheet. Then I simply peeled off the white liner and secured the foam sheet onto the paper. Filling the circles was super fun! I chose a simple clear sequin, but any small embellishment would work. Lastly, I applied a sheet of acetate over the top of the foam sheet. The high-density foam is stronger than paper, so it will keep it’s shape for a seamless design.

Pineapple Puns and Finishing Touches

Pineapple Pun Shaker Card by Dana Tatar for Scrapbook Adhesives by 3L

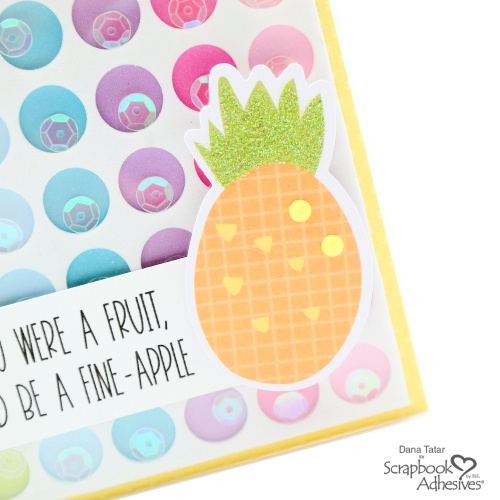
I selected a die-cut sentiment and secured it to the bottom of the card using Crafty Power Tape. Then, I added a pineapple die-cut using 3D Foam Circles to fill the space on the right side of the card. Next, I secured the shaker feature to a cardstock card base using Crafty Power Tape.

Pineapple Pun Shaker Card by Dana Tatar for Scrapbook Adhesives by 3L

Finally, for extra sparkle, I used the Dual Tip Glue Pen to secure glitter to the pineapple top. Yellow enamel dots add dimension and a pop of color.

Thanks for stopping by today! I hope I have inspired you to use ALL of your adhesive.
~Dana Tatar

Creative Time: 30 Minutes
Skill Level: Beginner

Materials Needed
Scrapbook Adhesives by 3L®

HomeHobby™ by 3L

Other: Acetate; Cardstock: Core-dinations; Patterned Paper: Waffleflower Crafts; Die-cut Sentiment: Photo Play Paper; Die-Cut Pineapple: Bella Blvd; Enamel Dots: Waffleflower Crafts; Sequins; Glitter: American Crafts

Pin It!

Pineapple Pun Shaker Card by Dana Tatar for Scrapbook Adhesives by 3L Pinterest

Visit our Website and Blog!
Sign up for our Newsletter so you never miss a contest or giveaway!

instagram purple icon facebook icon purple pinterest purple icon twitter purple icon YouTube icon blog subscription purple icon

Embossed Dots Birthday Card

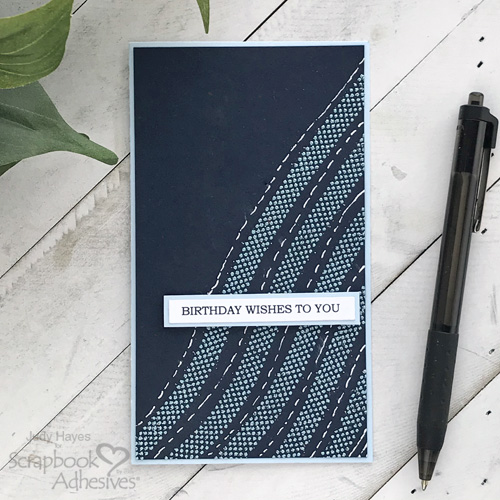
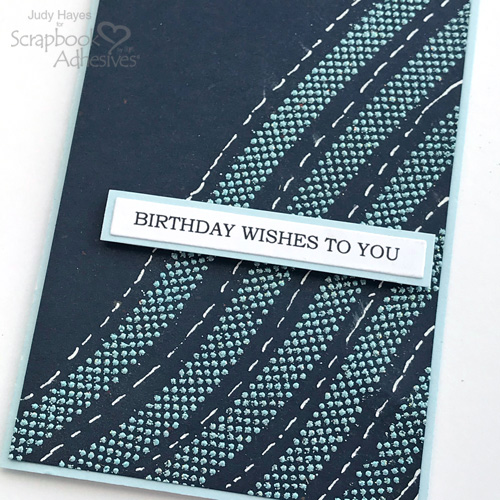
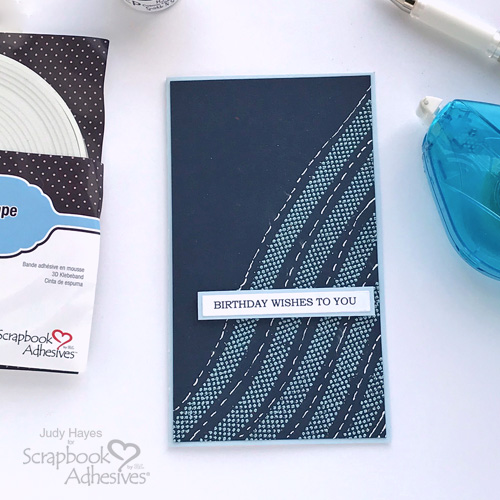
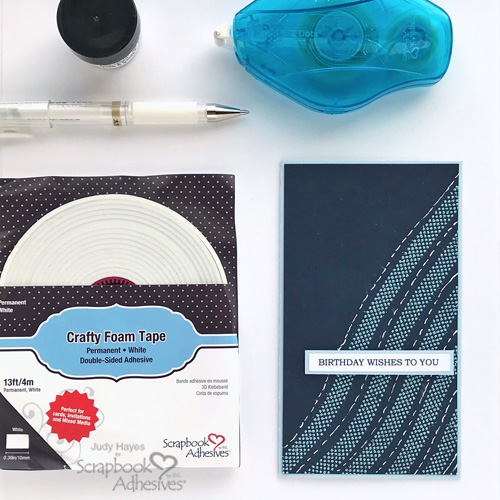
Hello! Judy here today with a quick birthday card featuring lines of embossed dots. If you think that must be hard to do, think again! It’s easy with E-Z Dots® Permanent Refillable Dispenser and embossing powder.

Embossed Dots Birthday Card by Judy Hayes for Scrapbook Adhesives by 3L

Behind the Embossed Dots

First of all, my design inspiration was basically to make curvy lines because it was easier for me to do that than straight ones. LOL!

The card panel was cut from dark blue cardstock to 3.25 x 5.75 inches. This is slightly larger than needed as I like to allow a little wiggle room for missing dots along the edge. I can trim later.

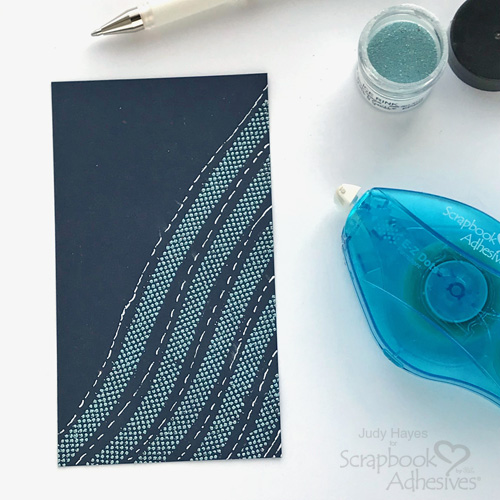
Place dark blue cardstock over a scrap piece of paper. Start with E-Z Dots® Permanent Refillable Dispenser on the scrap paper off the edge of dark blue cardstock and pull it in a curved line diagonally across the lower part of card. Continue with the rest of the dotted lines leaving a space between each one.

Embossed Dots Birthday Card by Judy Hayes for Scrapbook Adhesives by 3L

Cover all the dotted lines with embossing powder, remove excess, and melt with a heating tool to emboss them. Use a white pen to make lines of dashes between the embossed dot lines.

Layers of Cardstock

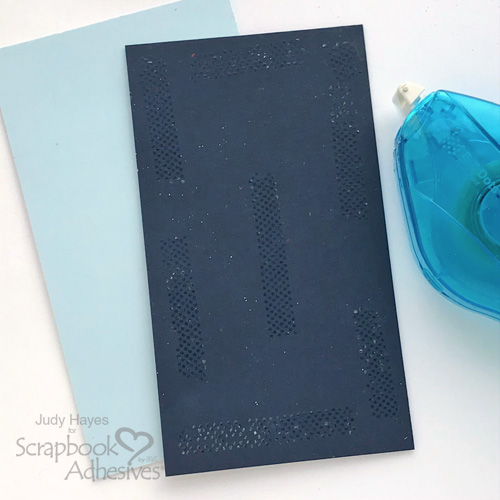
Trim the card panel to 3.125 x 5.625 inches and form a 3.25 x 5.75-inch card base from a light blue cardstock.

Embossed Dots Birthday Card by Judy Hayes for Scrapbook Adhesives by 3L

Adhere the dark blue panel to the card base using E-Z Dots® Permanent Refillable Dispenser. It’s a multi-use adhesive as it can make dot lines on card front and also hold dark blue piece to the card front!

Finish with a Verse

Print a verse with my computer on white cardstock. I print multiples and cut them apart to have them on hand. Of course, a stamped verse would be easy to use as well.

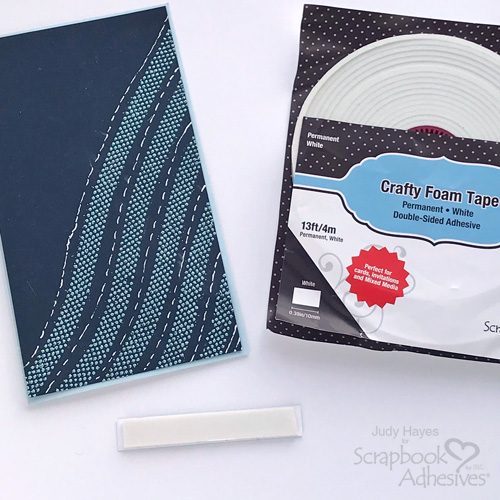
Secure the verse to a mat of light blue cardstock with E-Z Dots® Permanent Refillable Dispenser. Then apply a piece of Crafty Foam Tape White to the back of the matted verse and press it in place on the card front.

Embossed Dots Birthday Card by Judy Hayes for Scrapbook Adhesives by 3L

Crafty Foam Tape White works well to give dimension and it’s also very sticky to hold over the embossed dots.

Embossed Dots Birthday Card by Judy Hayes for Scrapbook Adhesives by 3L

Other Embossed Dot Ideas

To decide on a color scheme for this card, I experimented with different colors of embossing powders and paper colors to find a good combination. I used a semi-transparent embossing powder which allows some background color to show through and that affects how it looks. An opaque embossing powder would not have that characteristic.

Embossed Dots Birthday Card by Judy Hayes for Scrapbook Adhesives by 3L

I challenge you to try this technique and experiment with different colors!

Embossed Dots Birthday Card by Judy Hayes for Scrapbook Adhesives by 3L

Thanks for Visiting!
Judy Hayes

Creative Time: 20 Minutes
Skill Level: Easy

Materials Needed
Scrapbook Adhesives by 3L®

Other:
Sparkle N Sprinkle® Ice Rink Embossing Powder; Uni-Ball Signo White Pen; Cardstock (Dark Blue, Light Blue, White); Printed Greeting (Greeting printed on cardstock with computer and printer)

Save It on Pinterest!

Embossed Dots Birthday Card by Judy Hayes for Scrapbook Adhesives by 3L Pinterest

Visit our Website and Blog!
Sign up for our Newsletter so you never miss a contest or giveaway!

instagram purple icon facebook icon purple pinterest purple icon twitter purple icon YouTube icon blog subscription purple icon

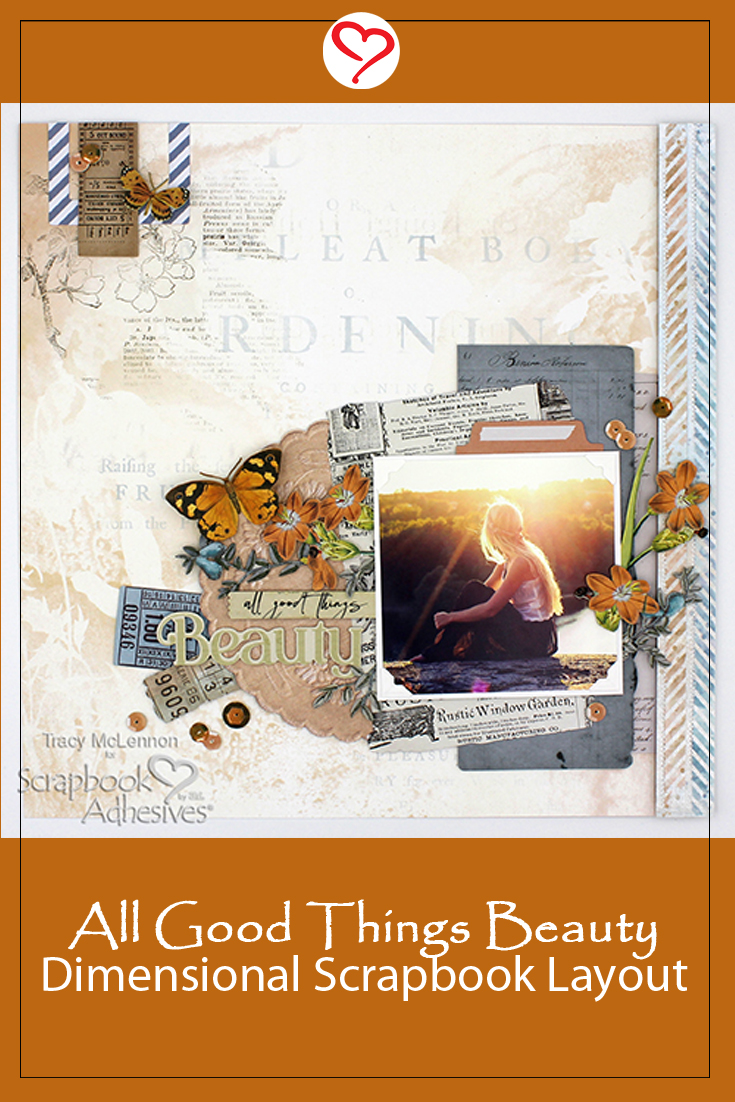
All Things Beauty Dimensional Layout

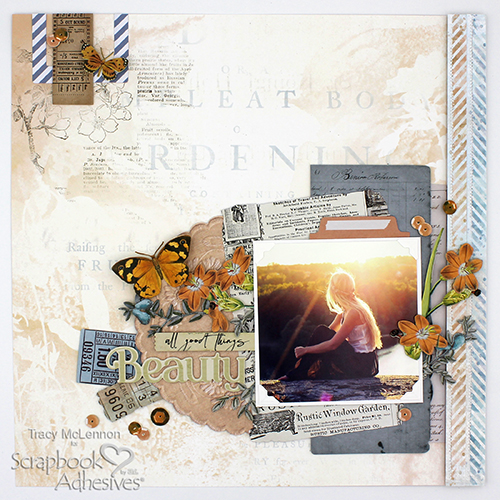
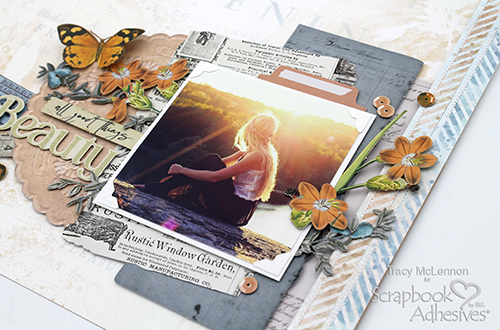
Hello crafty friends! Tracy here, and today I have a pretty All Things Beauty Dimensional Layout. I am showcasing how to create layers and pop elements up for interest. Let me show you.

All Things Beauty Dimensional Layout by Tracy McLennon for Scrapbook Adhesives by 3L

All Things Beauty Layout Layers

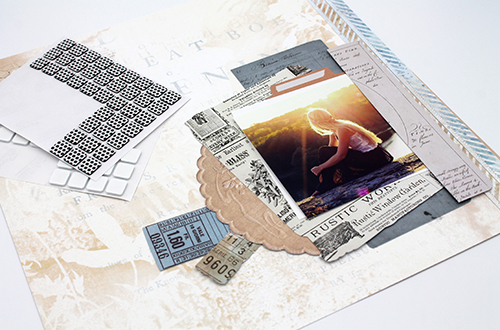
My first step when creating a layout is to find the pieces I want to layer for basis of the page. Almost always I mat my photo in white cardstock, adhering using the E-Z Runner® Grand Refillable Dispenser and adding Creative Photo Corners White.

To adhere these base layers to the dimensional layout I used a combination of Thin 3D Foam Squares Black Mix, 3D Foam Squares White Mix and Crafty Foam Tape White.

All Things Beauty Dimensional Layout by Tracy McLennon for Scrapbook Adhesives by 3L

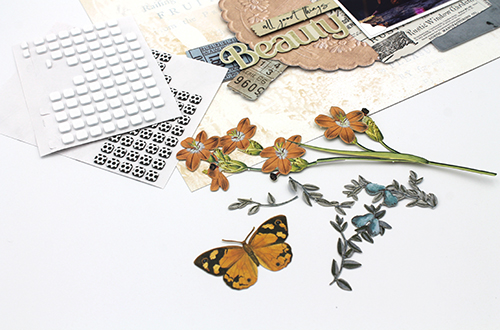
The next step I take to create a layout full of dimension is to pick out my decorative embellishments. All of these layers are beautiful 49 & Market pieces that are all paper. To add them I used a combination of Thin 3D Foam Squares Black Mix and 3D Foam Squares White Mix, this time using the smaller 1/4″ of each.

Quick Tip

At my usual crafting station I use 3D Foam Squares White Mix and Thin 3D Foam Squares Black Mix. Reason being is that I can grab either quickly by colour when I need it. Making adding dimension to any project so much easier.

All Things Beauty Dimensional Layout by Tracy McLennon for Scrapbook Adhesives by 3L

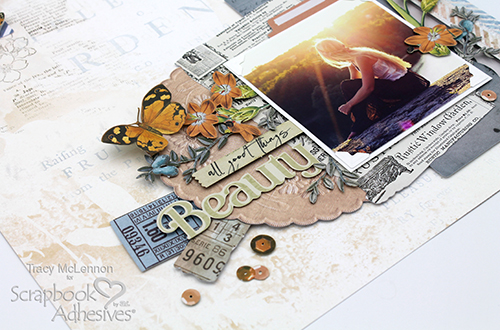
Add a few final touches of dimension with the laser cut sequins around the layout using Thin 3D Foam Squares Black Mix.

All Things Beauty Dimensional Layout by Tracy McLennon for Scrapbook Adhesives by 3L

Thanks so much for stopping by!
Tracy

Creative Time: 45 minutes
Skill Level: Intermediate

Materials needed:
Scrapbook Adhesives by 3L®
E-Z Runner® Grand Refillable Dispenser
Thin 3D Foam Squares Black Mix
3D Foam Squares White Mix
Creative Photo Corners White
Crafty Foam Tape White

Other: Cardstock- White; 49 & Market Vintage Artisty Wedgewood Collection (patterned paper, ephemera pack, laser cut ephemera)

Save It to Pinterest!

All Things Beauty Dimensional Layout by Tracy McLennon for Scrapbook Adhesives by 3L Pinterest

Visit our Website and Blog!
Sign up for our Newsletter so you never miss a contest or giveaway!

instagram purple icon facebook icon purple pinterest purple icon twitter purple icon YouTube icon blog subscription purple icon

Lucky Scrapbook Layout

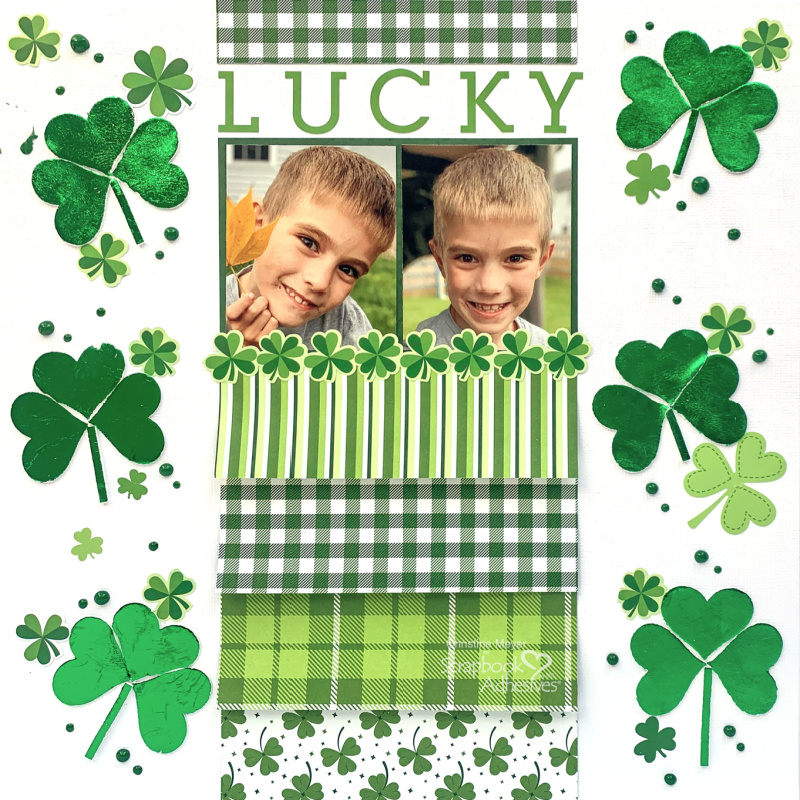
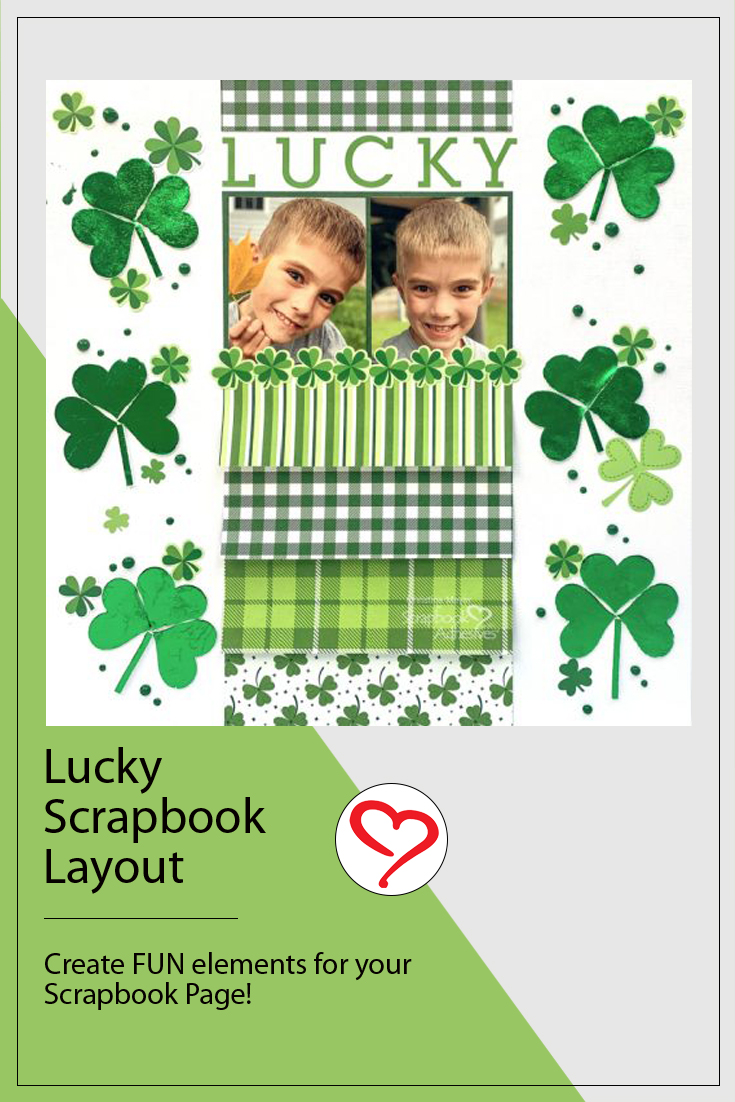
Being a mom is hard work, but it’s also pretty great. I often feel lucky that I get to parent this incredible and unique little guy. So it felt perfect to document that feeling and have some fun with adhesives while I did. Christine joining you today, let’s take a look at how I used adhesives on this Lucky Scrapbook Layout.

Lucky Scrapbook Layout by Christine Meyer for Scrapbook Adhesives by 3L

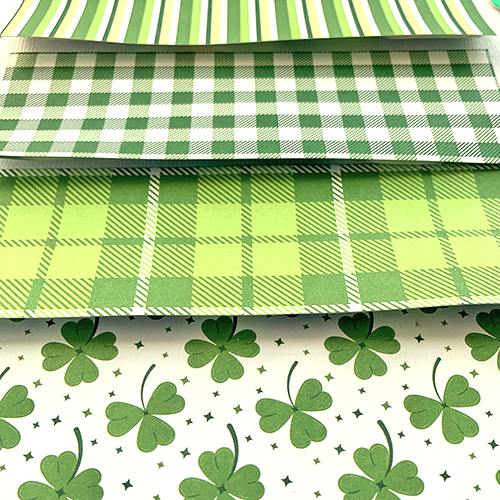
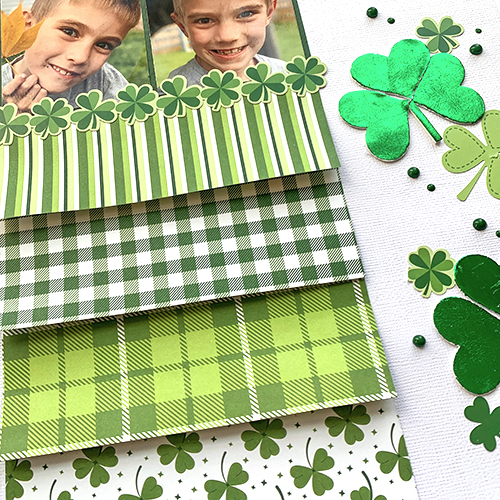
I was inspired by the various papers that I had, so I decided to work those into my main design. I cut them down to be the same width as my picture block. Along the top, I used the E-Z Runner Grand Permanent Strips to secure each strip.

Lucky Scrapbook Layout by Christine Meyer using Scrapbook Adhesives by 3L

Along the bottom, I added Crafty Foam Tape so that the bottom edge would have dimension, kind of looking like a ruffle.

Lucky Scrapbook Layout by Christine Meyer for Scrapbook Adhesives by 3L

This was an easy way to change up the look of patterned paper and also help it to separate from the other layers. In addition to that, I also had some fun creating shamrocks to play up the theme of this Lucky Scrapbook Layout.

Lucky Scrapbook Layout by Christine Meyer for Scrapbook Adhesives by 3L

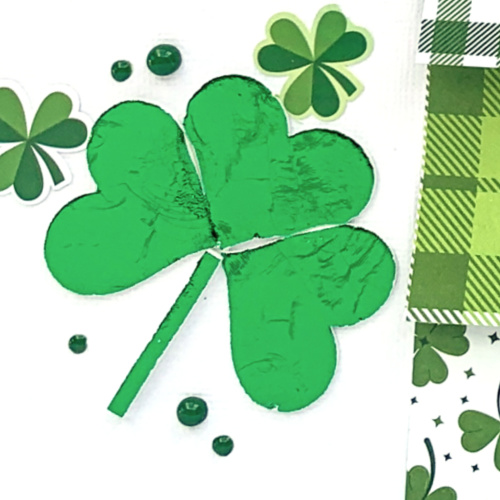
I combined 3D Foam Creative Embellishment Kit with Foil with the green foil included in them. This process is not the easiest to explain in text, but fear not, there’s a video below. Using a heart punch, I punched three hearts for each one. I adhered them in a shamrock shape. Then revealed the top adhesive before rubbing the foil on them. The stems were created with the same process but using 3D Foam Strips.

Lucky Scrapbook Layout Process Video

Thanks to some handy adhesive work, this layout looks more complicated than it actually is! Thanks for joining me today and I hope you enjoyed this Lucky Scrapbook Layout!

–Christine

Creative Time: 45 minutes
Skill Level: Intermediate

Materials Needed
Scrapbook Adhesives by 3L®

3D Foam Creative Embellishment Kit with Foil
Crafty Foam Tape
E-Z Runner Grand Permanent Strips
3D Foam Strips

Save It to Pinterest!

Lucky Scrapbook Layout by Christine Meyer for Scrapbook Adhesives by 3L Pinterest

Visit our Website and Blog!
Sign up for our Newsletter so you never miss a contest or giveaway!

instagram purple icon facebook icon purple pinterest purple icon twitter purple icon YouTube icon blog subscription purple icon

Cute Bunny Shaped Cards

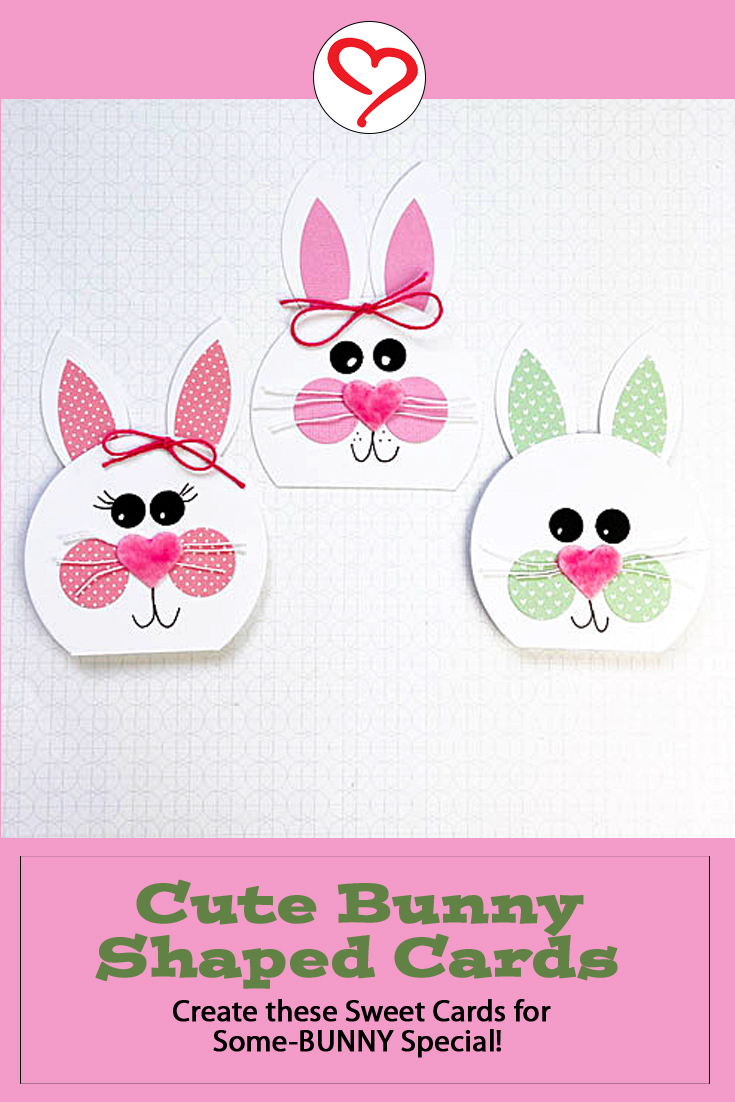
Hi, everyone! Easter will be here before you know it! Teri here to show you how to make some super cute bunny shaped cards that you are going to love sending to all your special some-“bunnies!”

Cute Bunny Shaped Cards by Teri Anderson for Scrapbook Adhesives by 3L

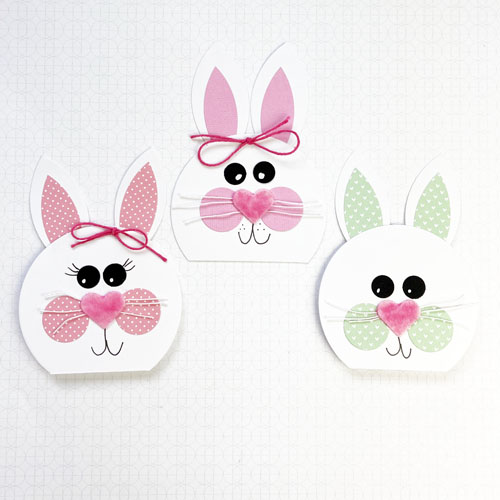
These bunny shaped cards can be put together with basic paper crafting supplies!

Bunny Shaped Card Base

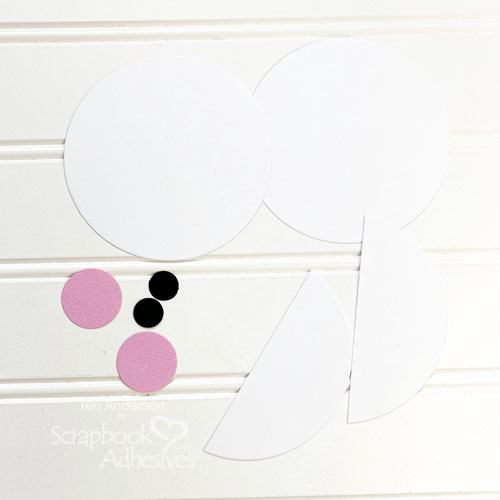
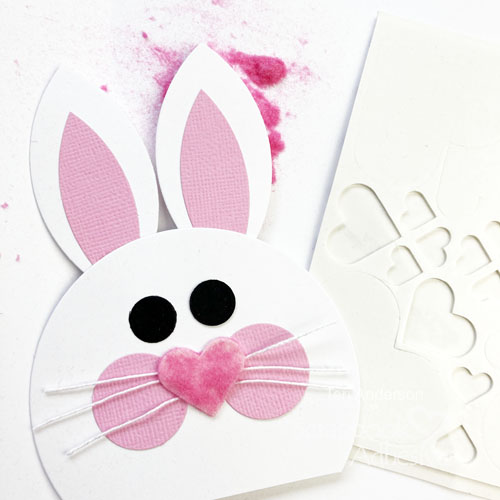
Start by cutting two large circles from white cardstock, as well as two half circles. You’ll also need to cut two small circles from black cardstock and two medium circles from pink cardstock.

Cute Bunny Shaped Cards by Teri Anderson for Scrapbook Adhesives by 3L

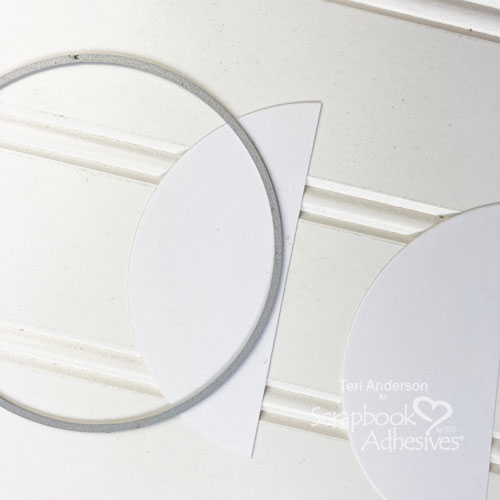
Take your half circles and set your circle die on them to make and cut ears. You’ll also want to cut two half circles from pink cardstock and then use your circle die to cut two ear centers.

Cute Bunny Shaped Cards by Teri Anderson for Scrapbook Adhesives by 3L

Embellishing into a Bunny

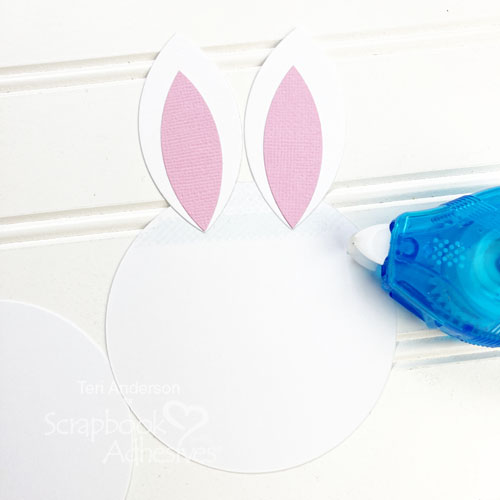
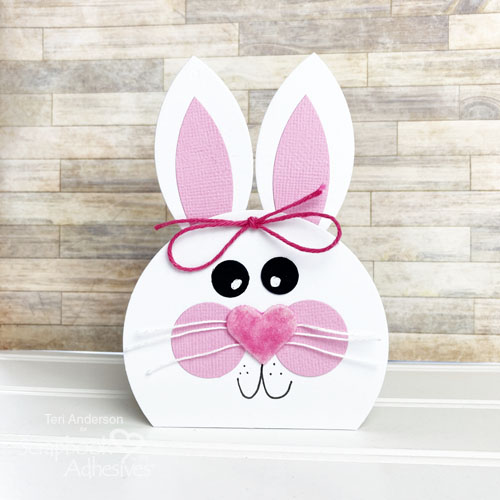
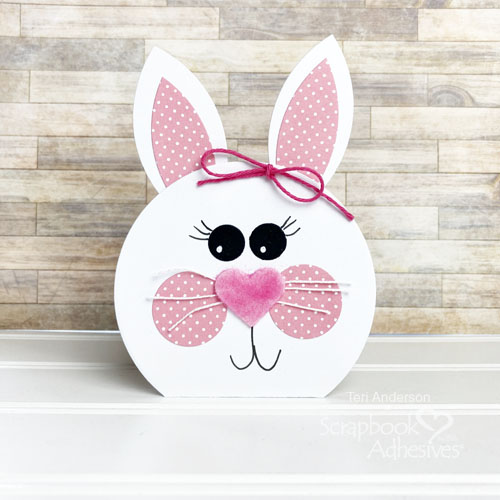
Assemble your ears and mount them to one of your large circles. Place adhesive only at the top of the circle. Mount the other circle on top, which will give you a card base. Use your paper trimmer or scissors to cut a little off the bottom of the card.

Cute Bunny Shaped Cards by Teri Anderson for Scrapbook Adhesives by 3L

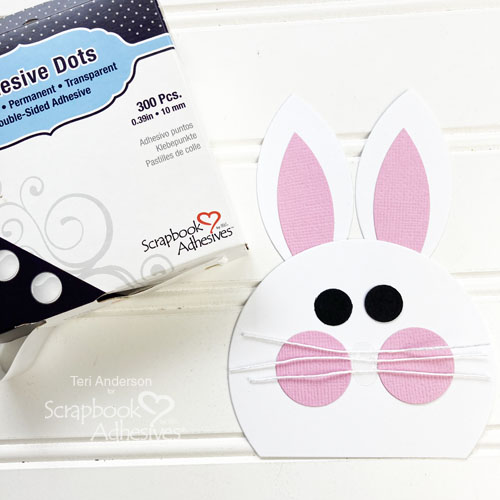
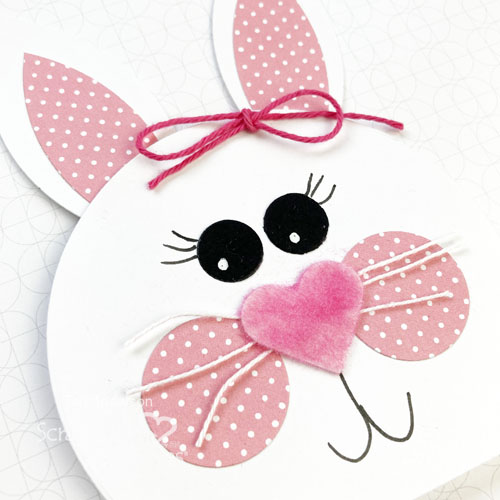
Adhere your black and pink circles to your card. Place an Adhesive Dot (or two) between the medium circles. Set three pieces of white floss (or twine) on it.

Cute Bunny Shaped Cards by Teri Anderson for Scrapbook Adhesives by 3L

Place a 3D Foam Heart over your Adhesive Dot. Cover it with the pink flock.

Cute Bunny Shaped Cards by Teri Anderson for Scrapbook Adhesives by 3L

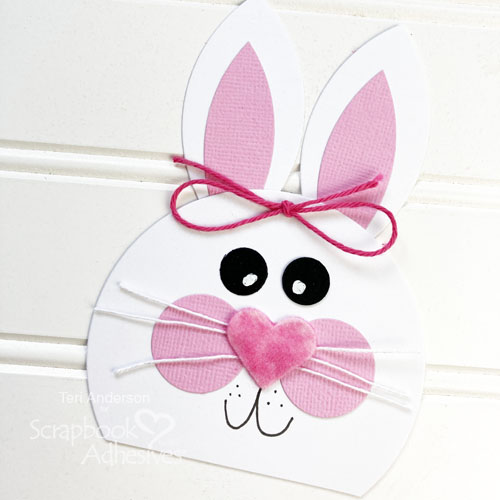
Complete your bunny card by using a white pen to draw on the eyes. Use a black pen to draw a mouth, as well as some dots. Tie a bow and adhere it near the bunny’s ears.

Cute Bunny Shaped Cards by Teri Anderson for Scrapbook Adhesives by 3L

Change Up the Card Design

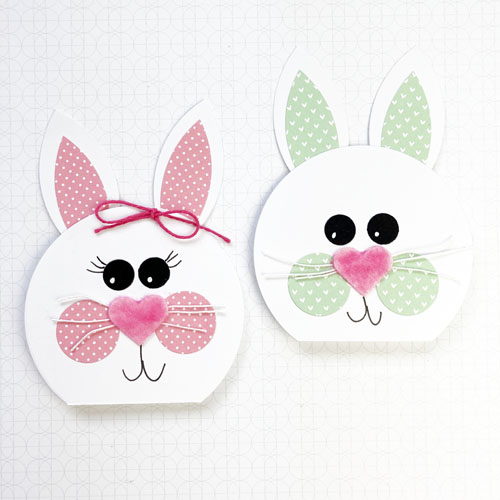
You can easily change up your shaped cards by using patterned paper instead of cardstock.

Cute Bunny Shaped Cards by Teri Anderson for Scrapbook Adhesives by 3L

Another fun idea is to add eyelashes to your bunny’s eyes with a pen. Feeling adventurous? Create eyelashes with floss instead.

Cute Bunny Shaped Cards by Teri Anderson for Scrapbook Adhesives by 3L

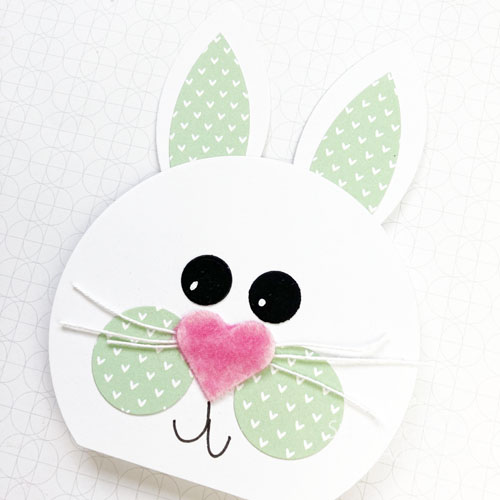
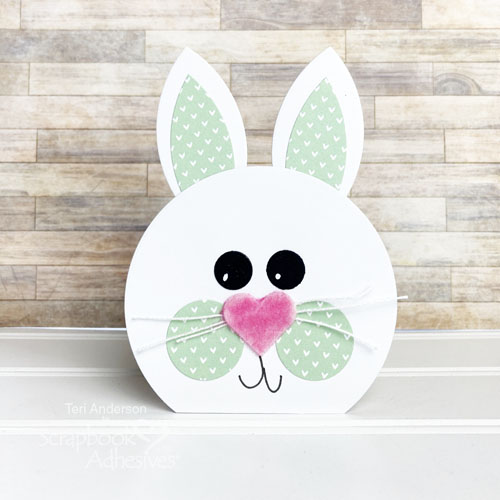
Want your bunny to be a boy? Rather than using pink patterned paper or cardstock, use green or blue instead.

Cute Bunny Shaped Cards by Teri Anderson for Scrapbook Adhesives by 3L

I hope you are inspired to hop along and make a few bunny shaped cards of your own!

Happy crafting,
Teri Anderson

Creative Time: 45 Minutes
Skill Level: Beginner

Materials Needed
Scrapbook Adhesives by 3L®

Other
White and Black Cardstocks: Neenah Paper; Pink Cardstock: American Crafts; Patterned Papers: Lawn Fawn (Let’s Polka, Mon Amie 6×6 Paper Pack); Dies: Hero Arts (Circles); Twine: The Twinery; White Floss: DMC; Pink Floss: Stampendous; White and Black Pens

Save It to Pinterest!

Cute Bunny Shaped Cards by Teri Anderson for Scrapbook Adhesives by 3L Pinterest

Visit our Website and Blog!
Sign up for our Newsletter so you never miss a contest or giveaway!

instagram purple icon facebook icon purple pinterest purple icon twitter purple icon YouTube icon blog subscription purple icon

March Giveaway Galore

March is roaring in with a galore of giveaways that are happening now. We are excited to be sponsoring adhesive prizes for some of our friends in the industry.

Look at what is being offered below. Remember to read the rules as each host has their own way of conducting them. If you have questions, please reach out to them. Entry details can be found by clicking the image.

Keep scrolling because there’s a lot including an intro of our new release for 2021!

FaveCrafts/Prime Publishing

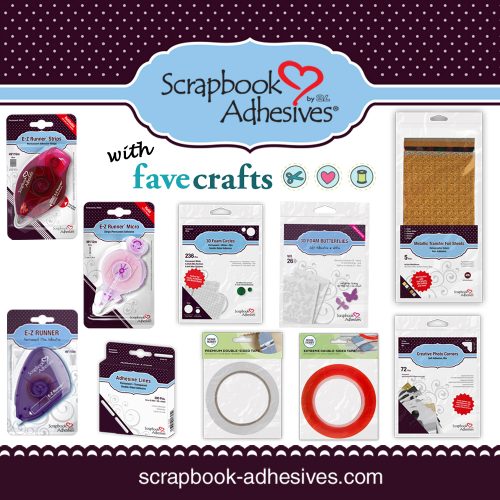
We are delighted to be sponsoring a Must-Have Scrapbook Crafting Supplies Giveaway with FaveCrafts. Valued at $40, it has all you need for any kind of paper crafting! Click the image for entry details. Ends March 21, 2021 at 11:59 PM Eastern. Good Luck!

To celebrate National Craft Month, we are offering an adhesive prize package valued at over $60. The contest ends on March 31, 2021 at 11:59 PM Eastern. For entry details, click the image. Fingers crossed!

What’s New at Scrapbook Adhesives by 3L!

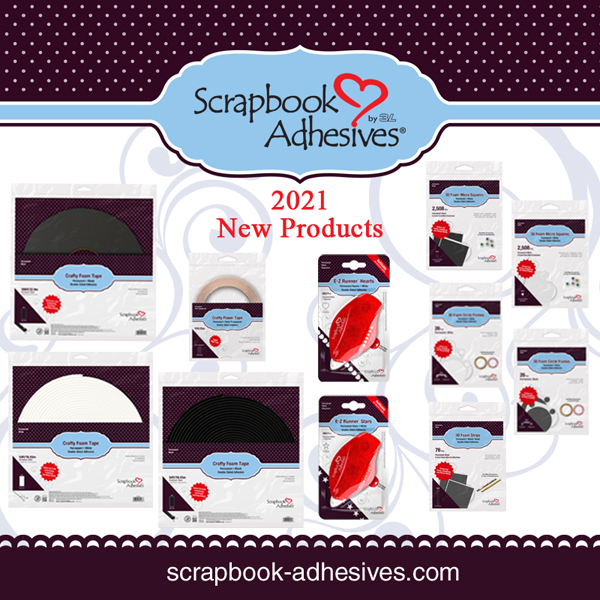
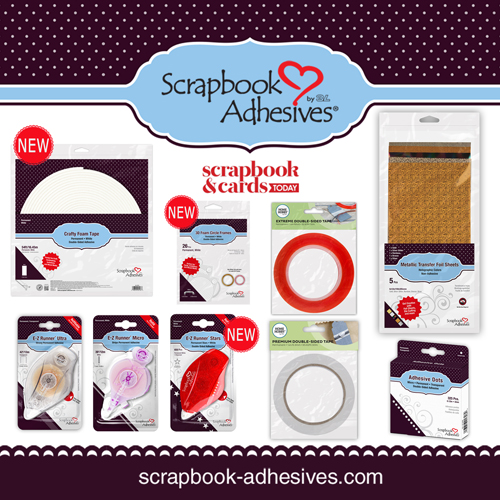
As in we have an offering of new releases for 2021! We even made a post on them in detail and a video tour! Come take look to see what adhesive product will help you make your projects STICK! You know the drill – CLICK THE IMAGE to take you there!

Scrapbook & Cards Today Magazine

Congrats to Winner, Angela Lunn!!

March 1 - 5 2021 is Adhesives Week at Scrapbook & Cards Today Magazine. Scrapbook Adhesives by 3L was featured and sponsoring an adhesive giveaway. Ends 3/11/21 at midnite.

ETA: This contest is closed!! Thanks to all who participated!!

We are thrilled to be participating with our friends at SCT (Scrapbook & Cards Today) Magazine on a feature called Adhesive Week! There is an interactive card tutorial, along with an adhesive prize package to recreate the card. Go check it out by clicking the image! Hurry to enter as this contest will close on Thursday, March 11, 2021 at Midnight!

March 1 - 5 2021 is Adhesives Week at Scrapbook & Cards Today Magazine. Scrapbook Adhesives by 3L was featured and sponsoring an adhesive giveaway. Ends 3/11/21 at midnite.

Visit our Website and Blog!
Sign up for our Newsletter so you never miss a contest or giveaway!

instagram purple icon facebook icon purple pinterest purple icon twitter purple icon YouTube icon blog subscription purple icon

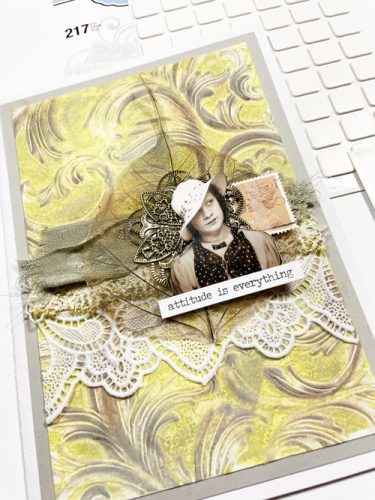
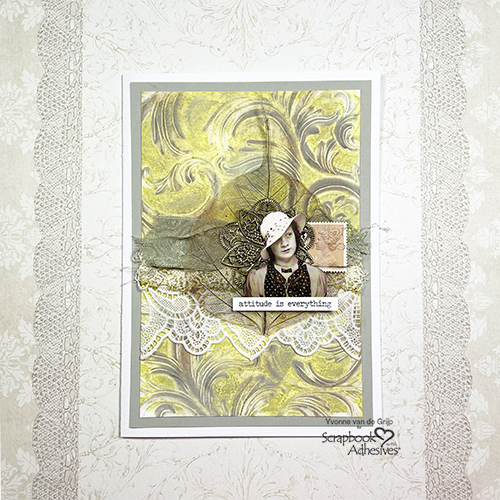
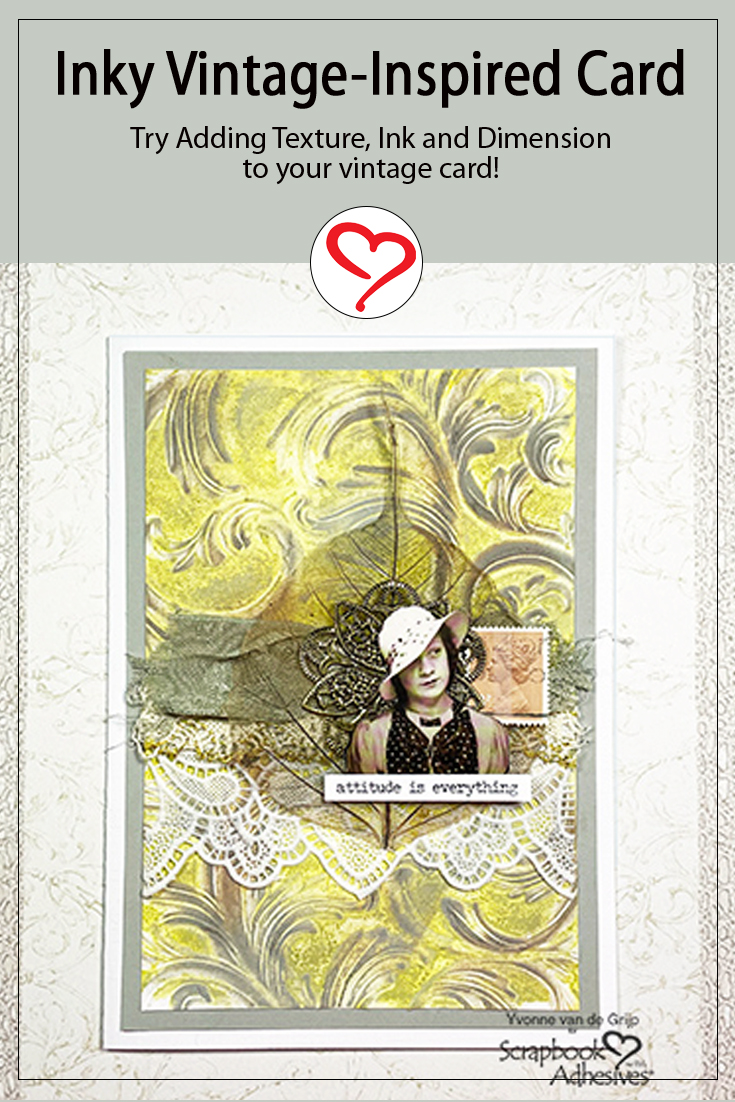
Inky Vintage-Inspired Card

Hi everyone, Yvonne here with an inky vintage-inspired card. If you like multiple layered cards with perfect adherence, Scrapbook Adhesives by 3L is the best.

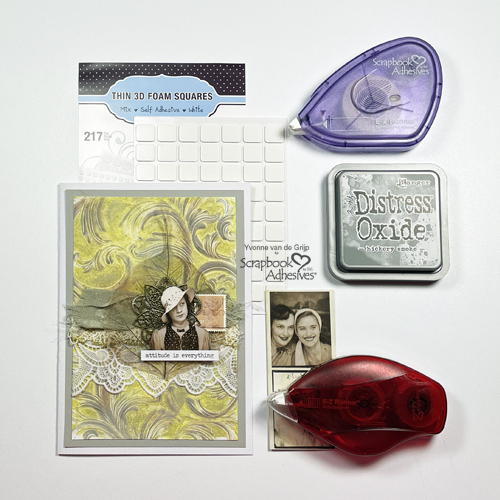
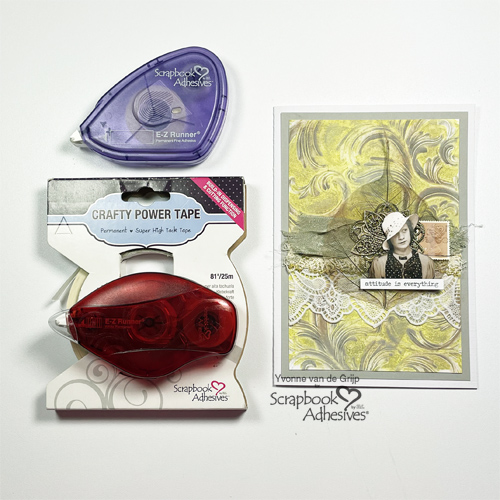
Scrapbook Adhesives by 3L®, EZ Runner® Permanent Strips Refillable Dispenser, Crafty Power Tape, EZ Runner® Permanent Fine Adhesive Dispenser, Crafty Power Tape Dispenser 81ft, Thin 3D Foam Squares White Mix, Card, Card Making, Tutorial, Vintage, Yvonne van de Grijp

For my card, I used different adhesives for different products. I would love to share with you how I made my vintage-styled card. Come join me!

Embossing Vintage-Inspired Card Panel

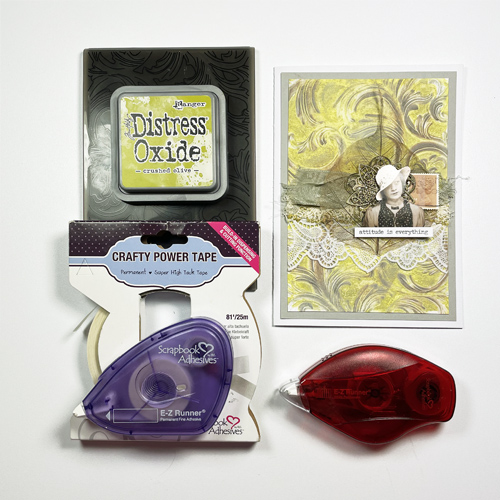
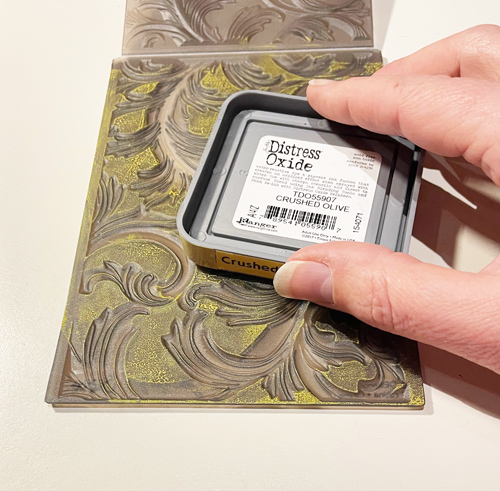
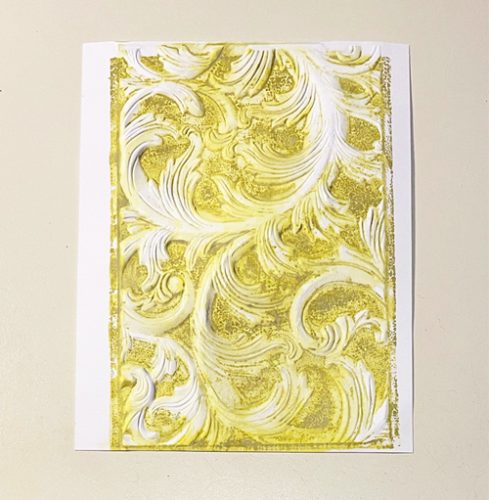
First, trim a piece of white cardstock to a size that fits the embossing folder you want to use. Then ink the front inside of the embossing folder with olive green chalk ink.

Mist a little water over the inked embossing folder. Do not overspray you don’t want the ink to run down the embossing folder. Next, with the inked side up, place the white cardstock panel into the folder. Now run through your die-cutting machine as instructed.

Vintage-Inspired Layered Look

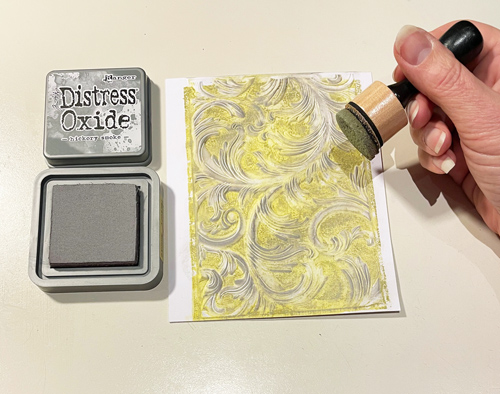
To alter the embossed card panel I first used some grey ink and an ink blending tool. Gently rub the inked ink blending tool over the embossed parts to highlight them. Repeat the step with brown ink.

For my vintage-inspired card, I used chalk ink pads to create a velvety look. I love how it turned out!

Assembling the Card Front

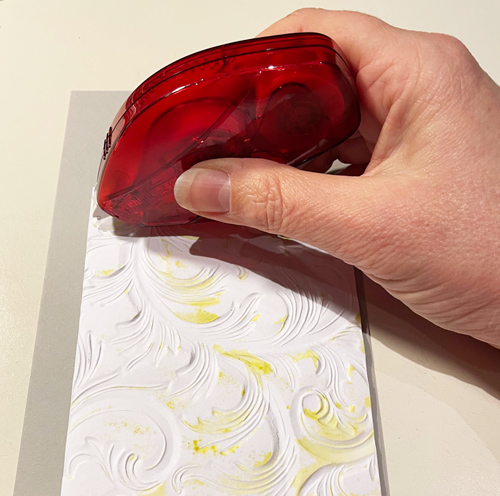
Trim the edges of the inked embossed card panel to the desired size. Then mat upon a grey card panel and use the EZ Runner® Permanent Strips Refillable Dispenser to adhere.

Next, adhere onto a white card base using the EZ Runner® Permanent Strips Refillable Dispenser.

Adding Lace and Ribbon

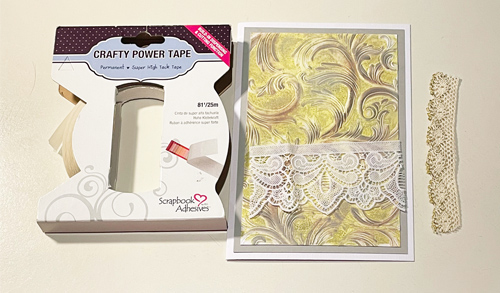
Adhere a piece of white lace onto the card using Crafty Power Tape Dispenser 81ft.

Adhere some creme lace on top also using Crafty Power Tape Dispenser 81ft. For an extra vintage touch, I tore some olive ribbon and wrinkled it. Then adhere to the card using Crafty Power Tape Dispenser 81ft again.

Adding a Skeleton Leaf

As you know the EZ Runner® Permanent Fine Adhesive Dispenser is perfect for invisible adhering of vellum paper. But did you know it is also perfect for adhering skeleton leaves? Because it dries to become invisible without a trace!

Finishing the card

I used Crafty Power Tape Dispenser 81ft to secure my metal finding to the card front. Then tuck an old stamp behind the metal finding with again the Crafty Power Tape Dispenser 81ft.

To pop up the image of the lady slightly, I used Thin 3D Foam Squares White Mix. Lastly, I add a sentiment sticker to the card and voila…your vintage styled card is ready.

I hope you enjoyed this Vintage-inspired Card tutorial and wish you happy crafting!
Yvonne van de Grijp

Scrapbook Adhesives by 3L®, EZ Runner® Permanent Strips Refillable Dispenser, Crafty Power Tape, EZ Runner® Permanent Fine Adhesive Dispenser, Crafty Power Tape Dispenser 81ft, Thin 3D Foam Squares White Mix, Card, Card Making, Tutorial, Vintage, Yvonne van de Grijp

Creative Time: 45 minutes
Skill Level: Intermediate

Materials needed:
Scrapbook Adhesives by 3L®
Crafty Power Tape Dispenser 81ft
EZ Runner® Permanent Strips Refillable Dispenser
EZ Runner® Permanent Fine Adhesive Dispenser
Thin 3D Foam Squares White Mix

Other
Embossing folder (Sizzix  3D Texture Fades Embossing Folder Elegant); Die Cutting Machine Spellbinders® Paper Arts (Platinum 6 Machine); Inkpads (Distress Oxide Hickory Smoke, Crushed Olive, Vintage Photo); Ink Blending Tool; Lace and Ribbon; Photo and sentiment (Tim Holtz Idea-ology: Photobooth, Small Talk); Metal Finding; Old Stamp; Skeleton Leave; Paper Trimmer; Scissors

Save It to Pinterest!

Visit our Website and Blog!
Sign up for our Newsletter so you never miss a contest or giveaway!


instagram purple icon facebook icon purple pinterest purple icon twitter purple icon YouTube icon blog subscription purple icon