
Hello there, Latisha here today with a fall card created with die cuts & some of my favorite adhesives.
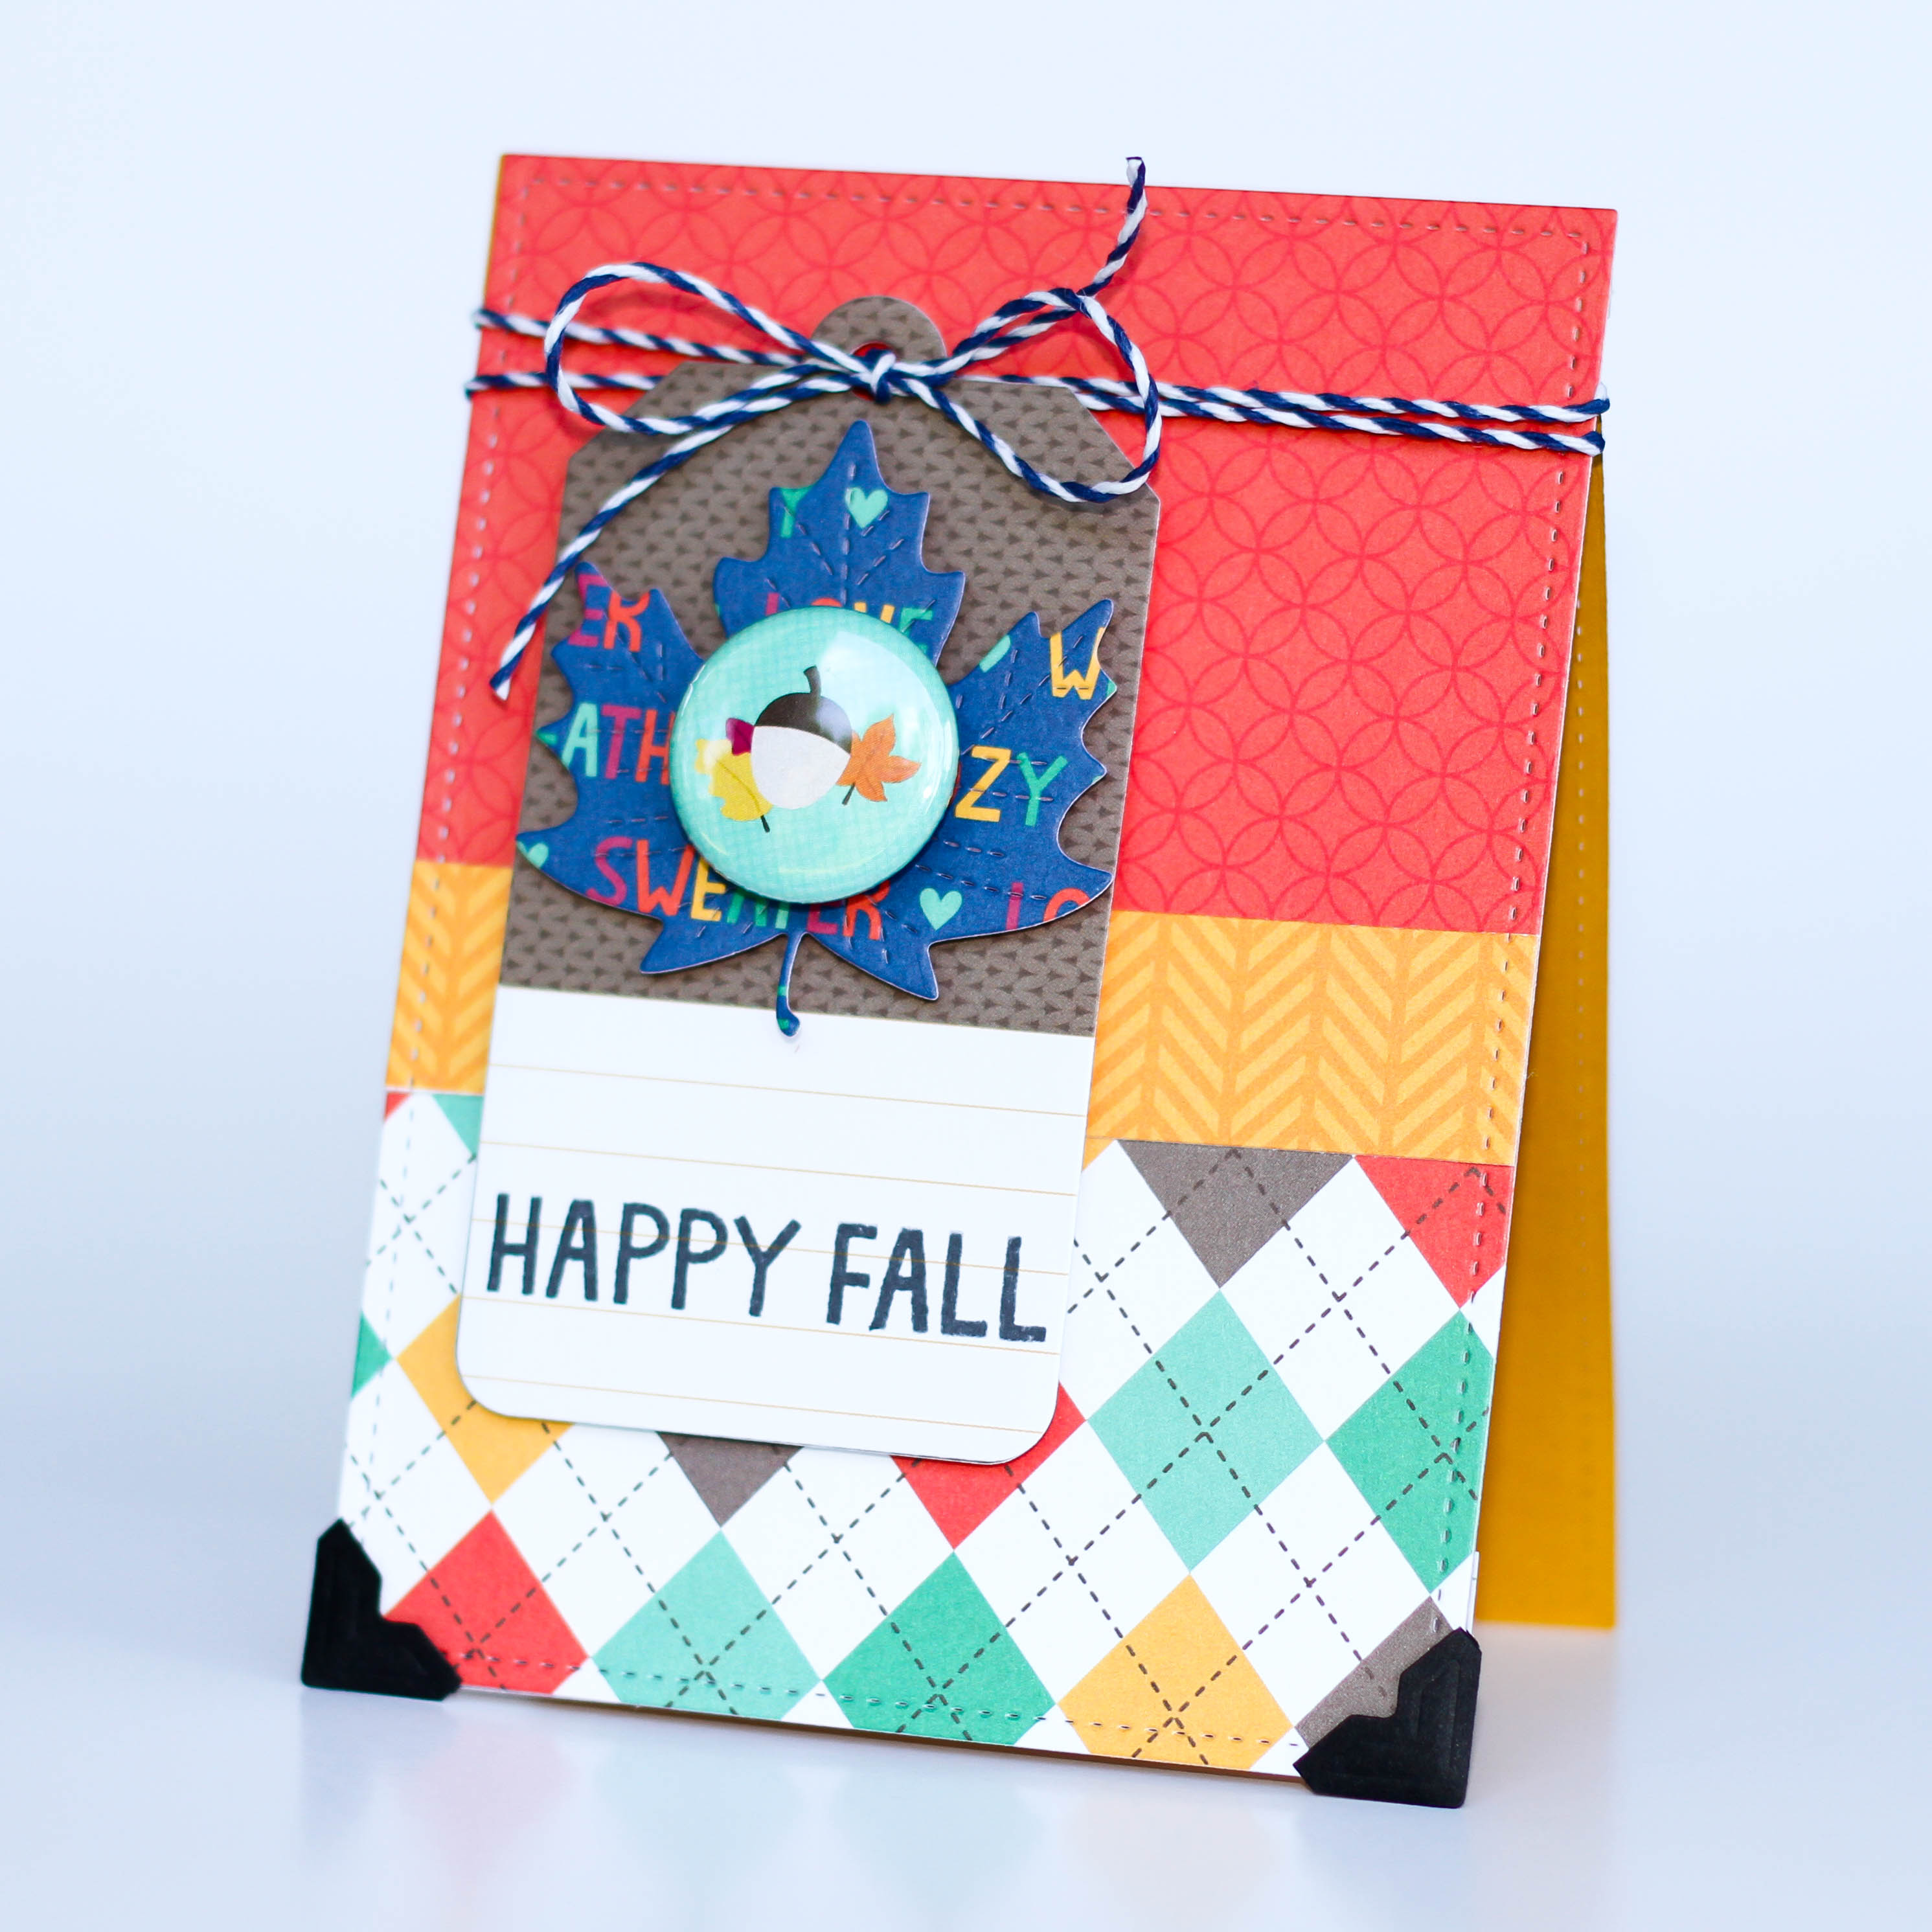
This card can be made the traditional card base way, but I created the card base using two rectangle stitched diecuts.
1. Create card base. My base is the orange pattern paper & yellow orange card stock. Adhered together using Scrapbook Adhesives by 3L E-Z Dots® Permanent.
2. Adhere pattern paper to the front of the card front using Scrapbook Adhesives by 3L E-Z Runner® Permanent Strips.
3. Add Scrapbook Adhesives by 3L Creative Photo Corners black, to the two bottom corners.
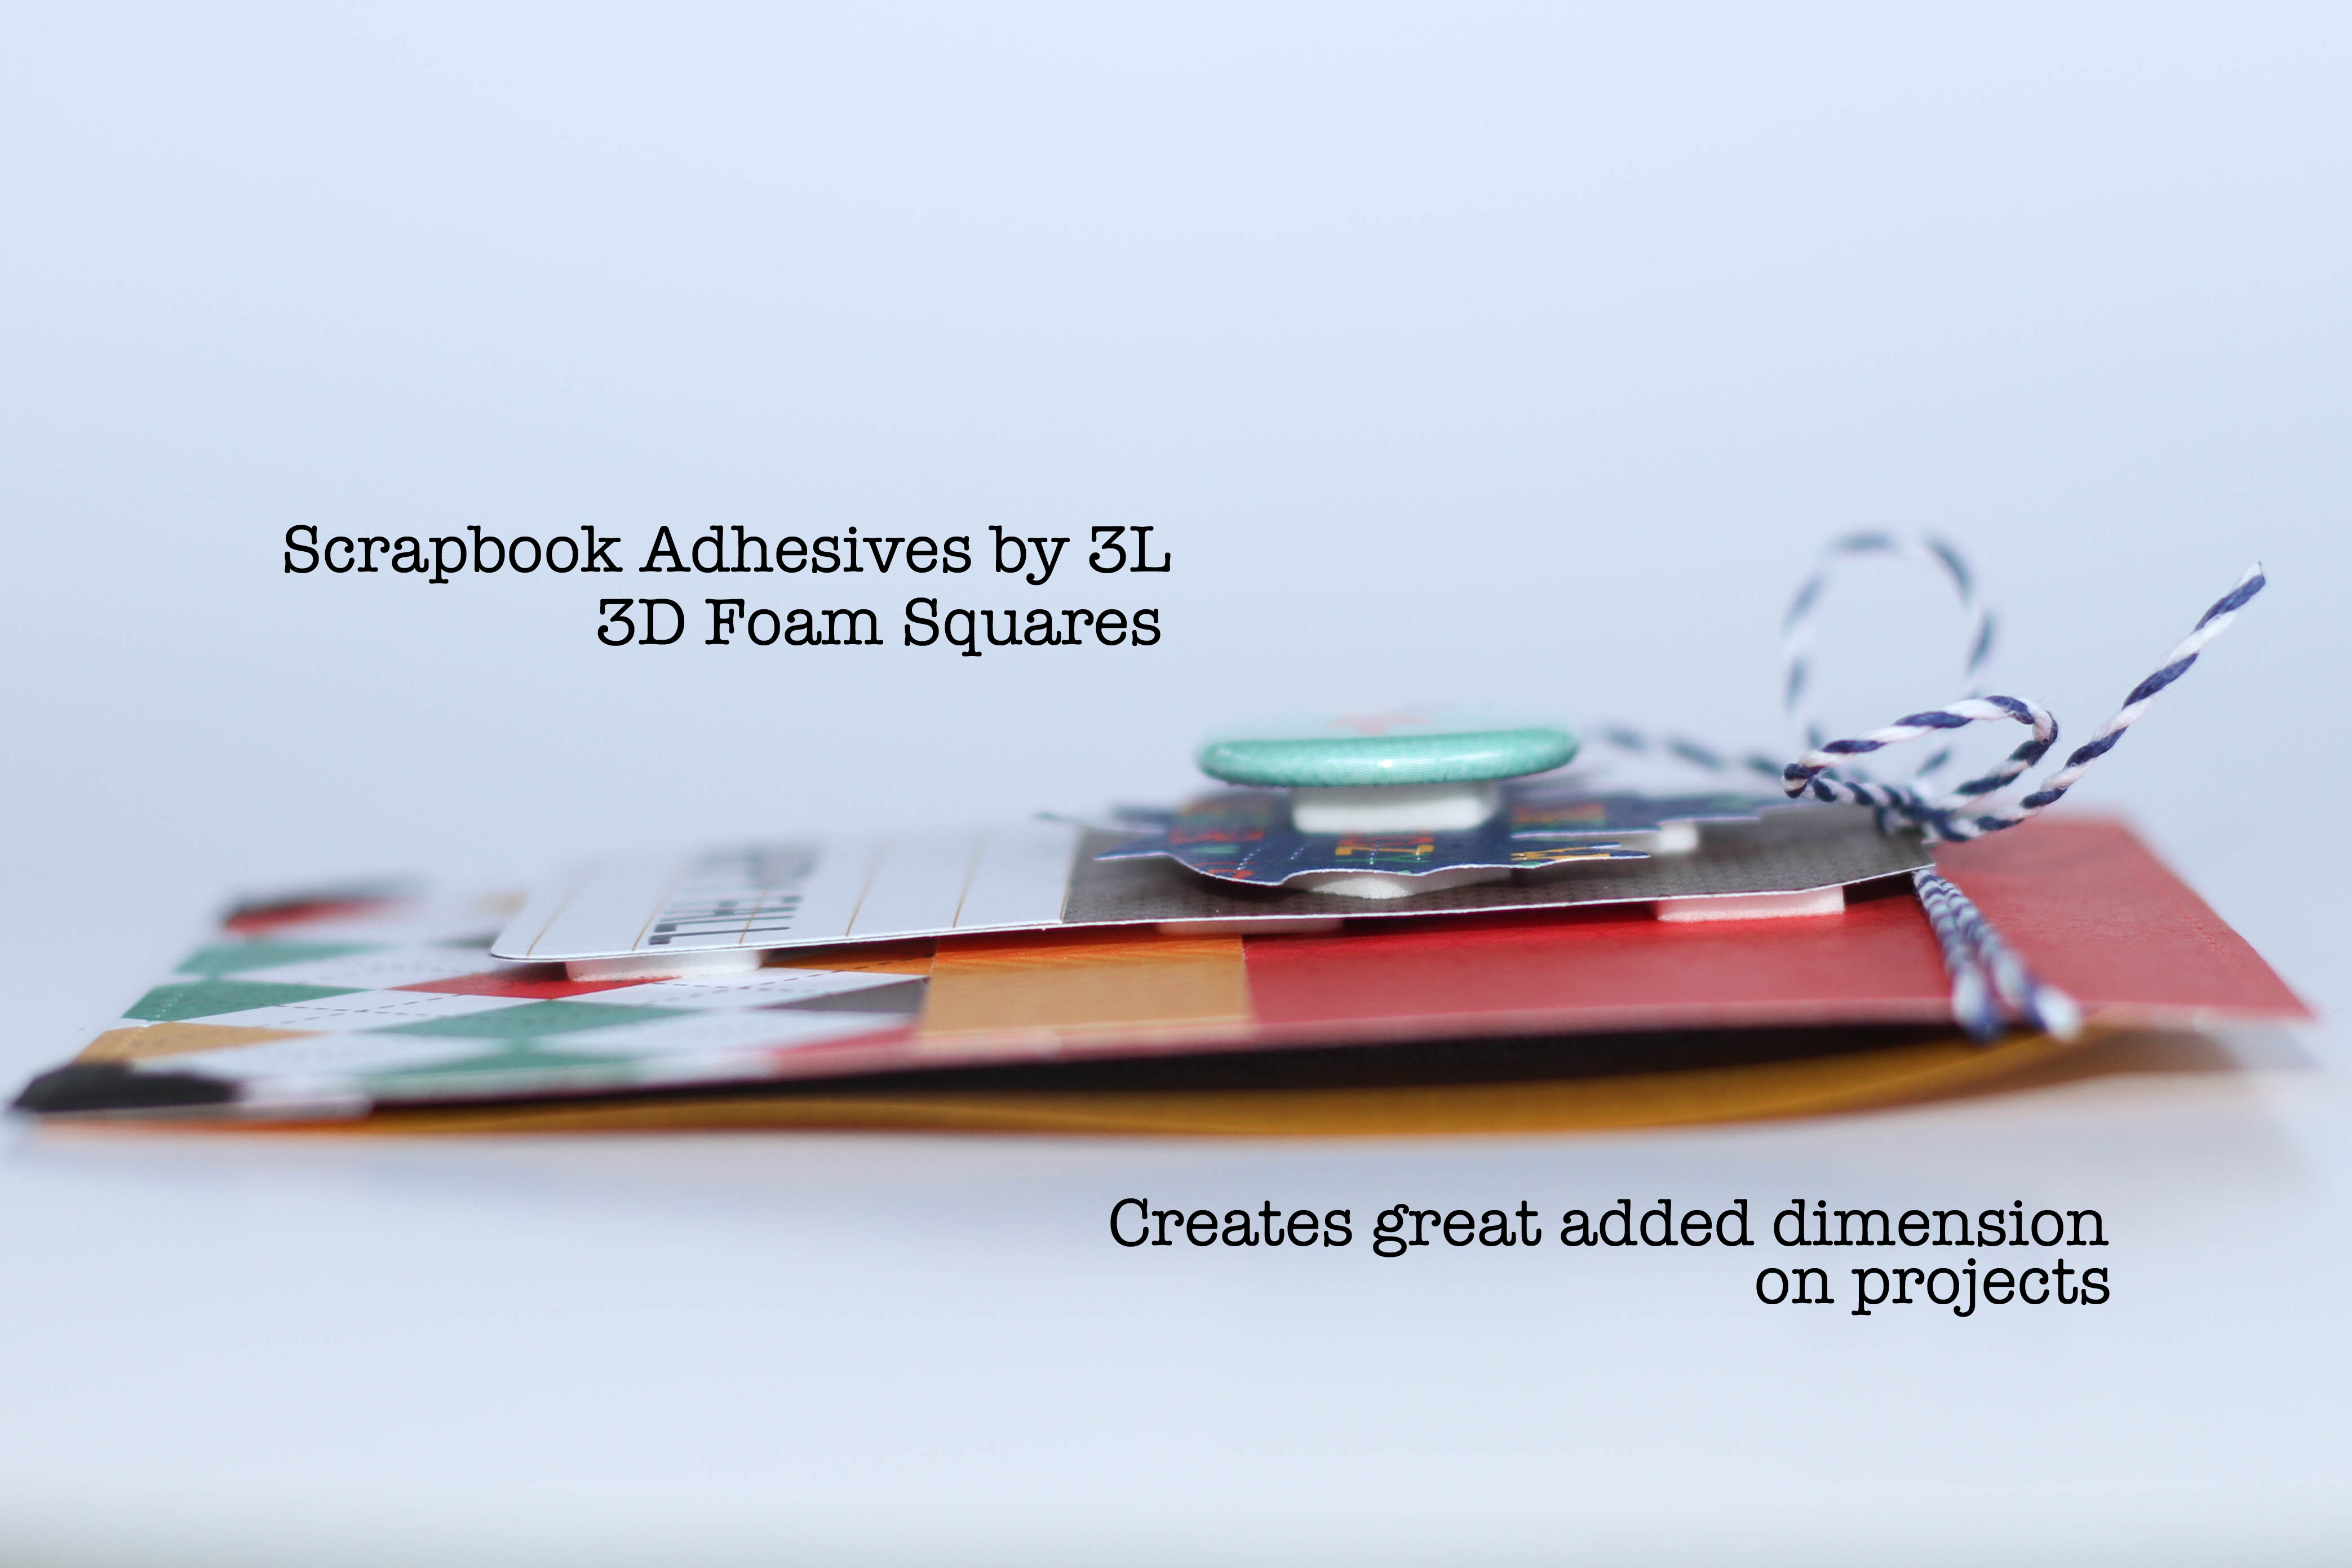
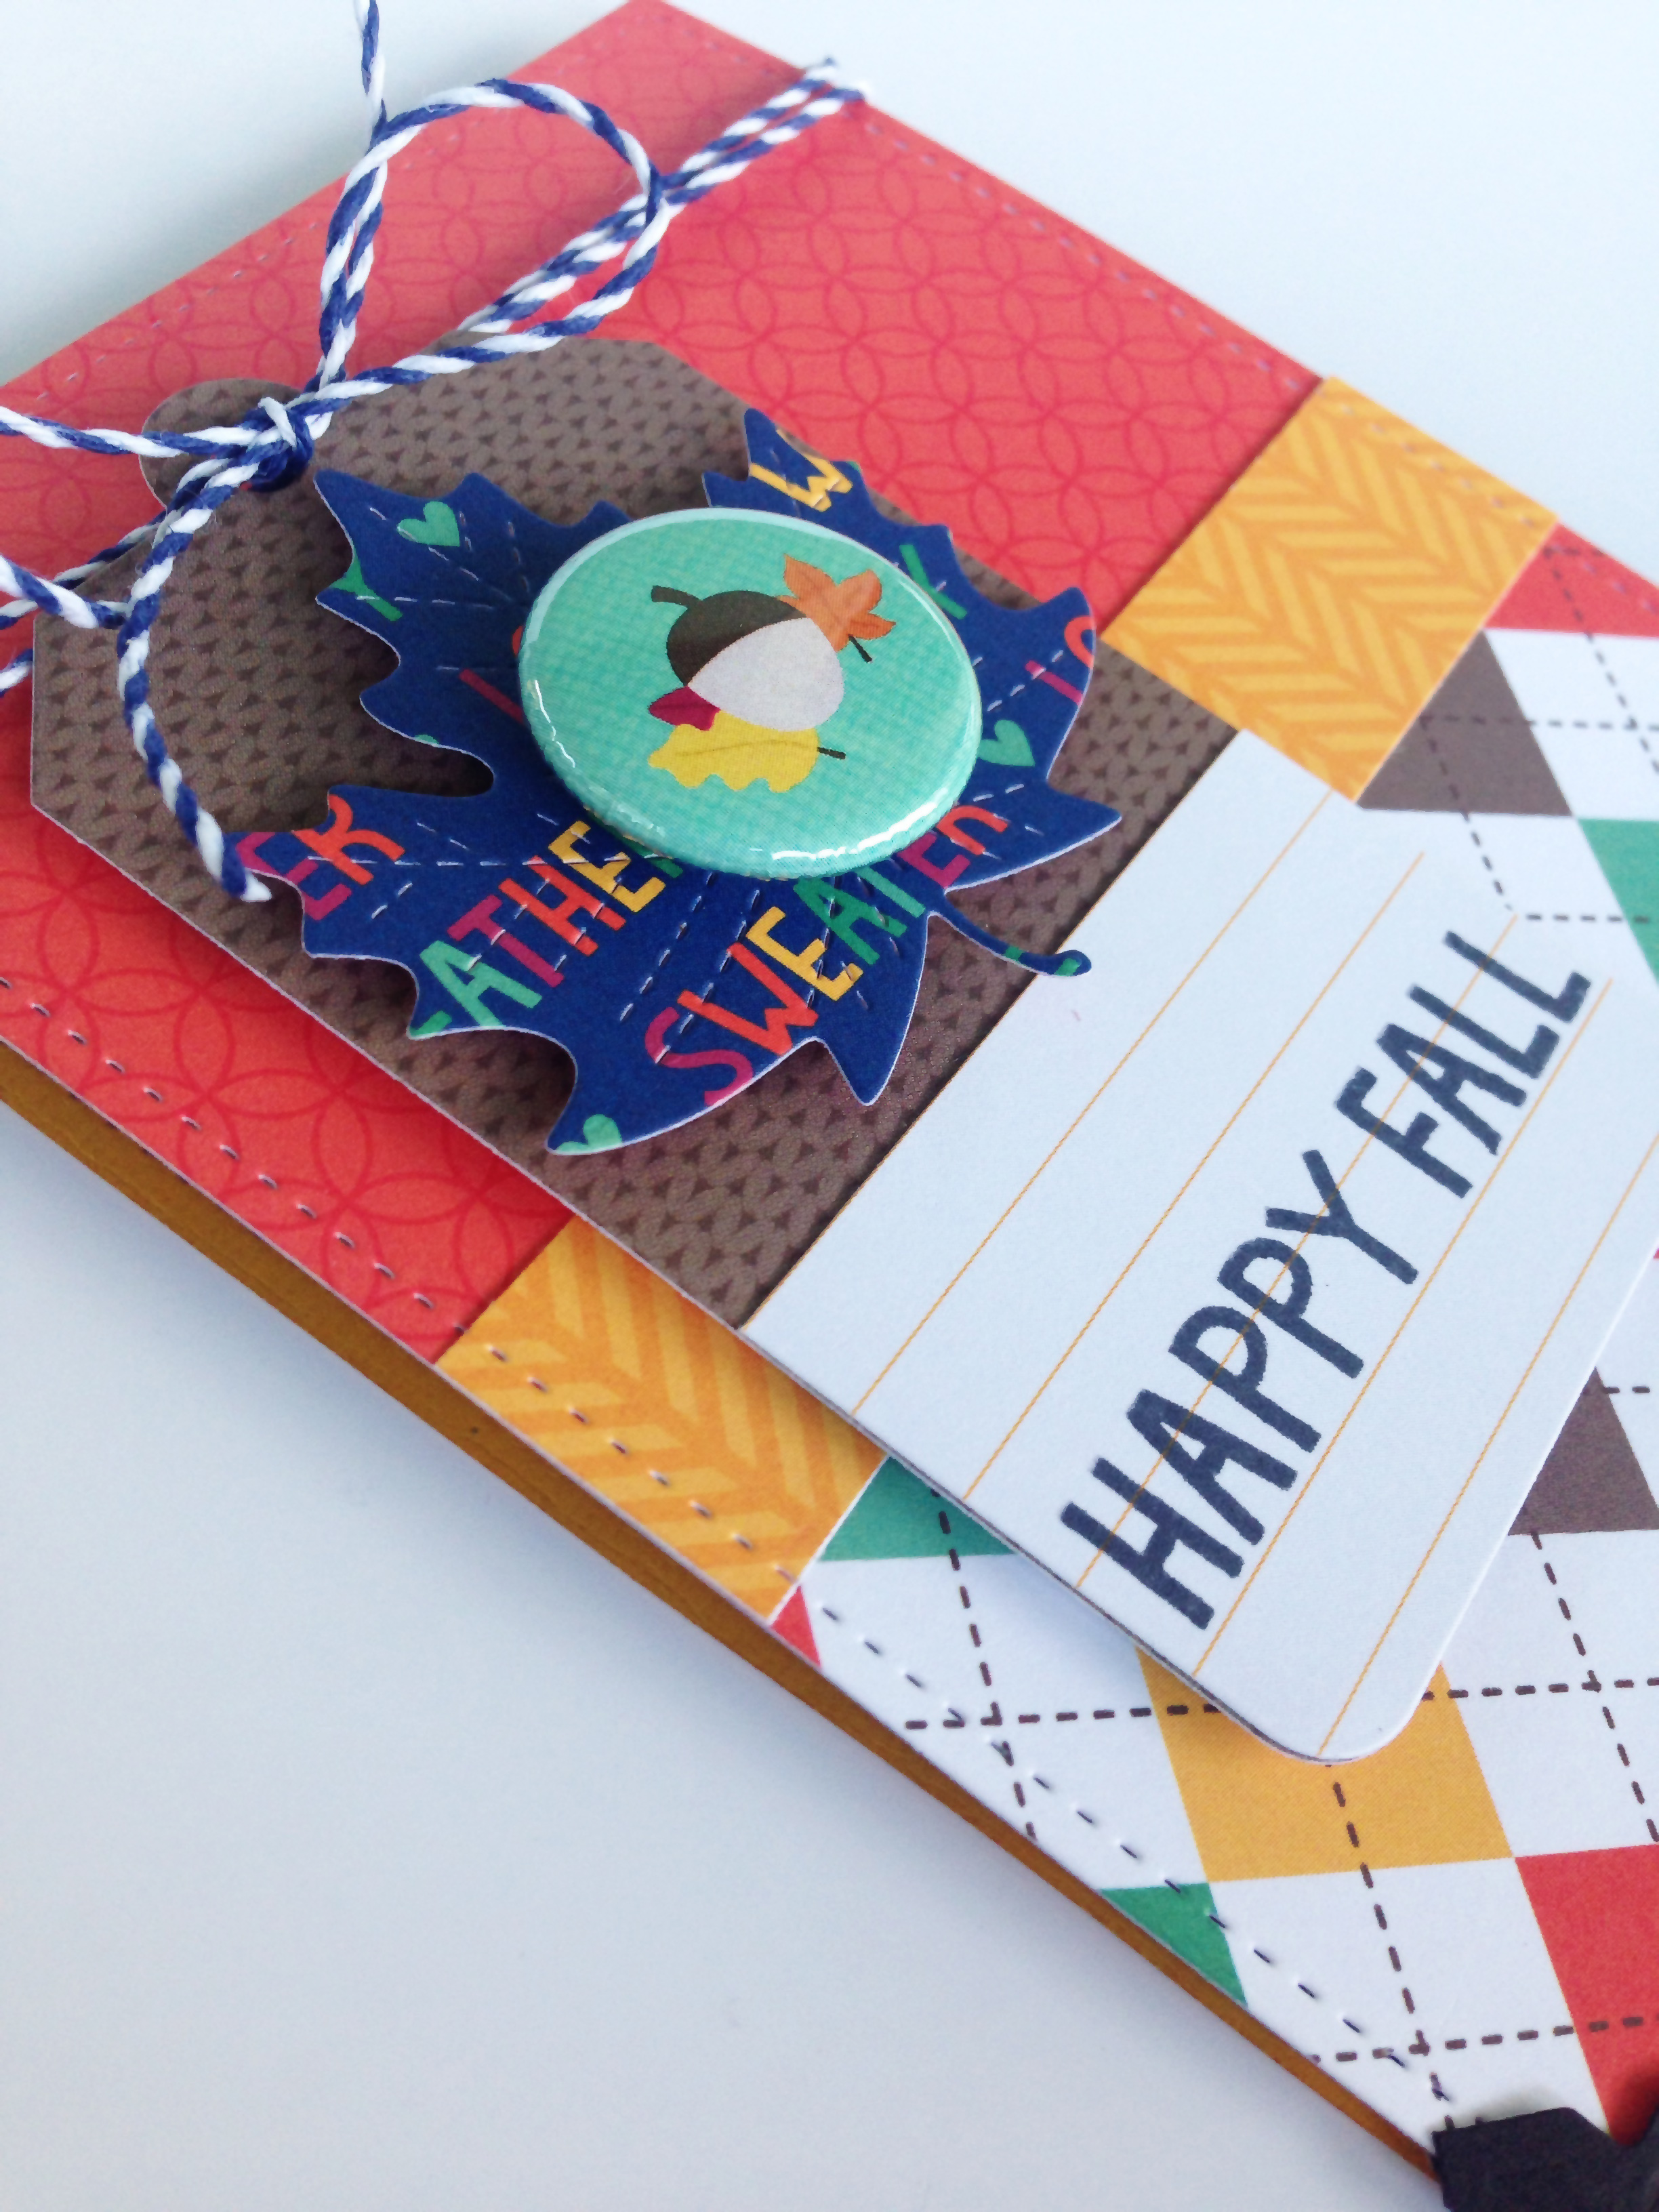
4. Die cut tag from pattern paper, stamp sentiment in black ink. Adhere to the card front using Scrapbook Adhesives by 3L 3D Foam Squares (white, regular).
5. Die cut leaf from pattern paper, adhere to tag using Scrapbook Adhesives by 3L 3D Foam Squares.
6. Adhere flair to the leaf, using Scrapbook Adhesives by 3L 3D Foam Squares.
7. Wrap twine around the card, and tie through the tag hole.
Just a little tip: 3D Foam Squares add dimension to projects
up close
Materials Used:
- Scrapbook Adhesives by 3L 3D Foam Squares (white, regular)
- Scrapbook Adhesives by 3L Creative Photo Corners black
- Scrapbook Adhesives by 3L E-Z Dots® Permanent
- Scrapbook Adhesives by 3L E-Z Runner® Permanent Strips
- Lawn Fawn Sweater Weather pattern paper
- Bazzill cardstock
- Lawn Fawn dies (leaf, stitched rectangles, tag)
- Lawn Fawn Sweater Weather stamp set
- Lawn Fawn navy blue twine
By Deborah S September 12, 2014 - 1:38 pm
I love the bright colors you used and the layering a very fun and happy Fall card