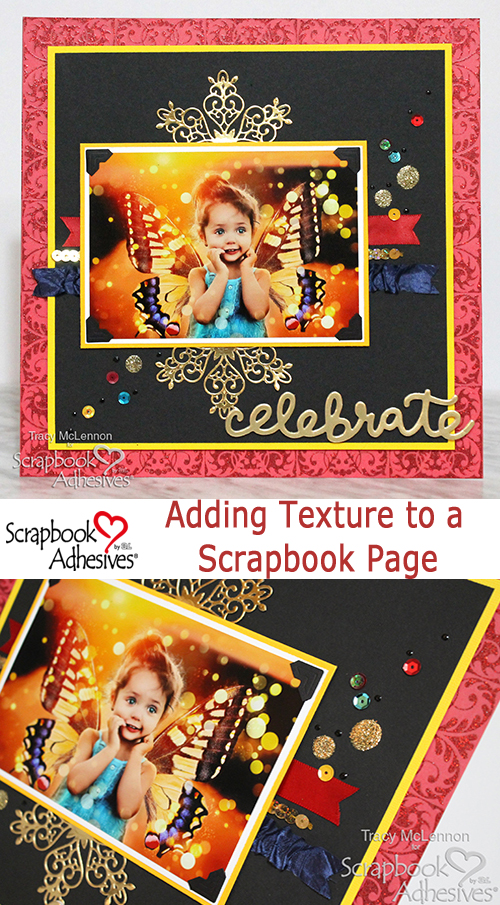
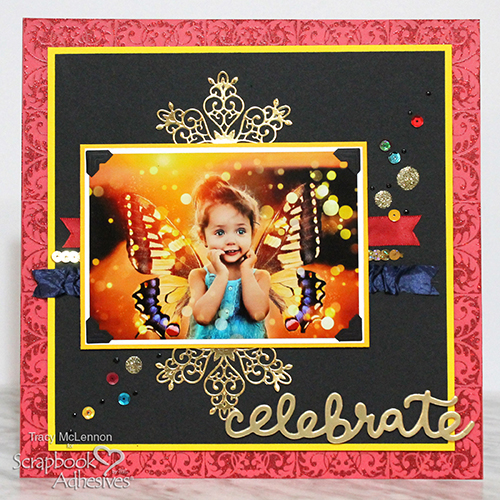
Hello crafty friends, and welcome back! Tracy here, and today I have a fun, texture-filled “Celebrate” scrapbook layout to show. Using my favourite adhesives, I’m sharing all of these different texture making ideas. So join me for all the details.
Layers Before Texture
First, start by creating a layered background. The red patterned paper has glittered accents so I opted for the E-Z Runner® Grand Refillable Dispenser with the E-Z Runner® Grand Ultra Strong Refill to make sure the layers stayed in place. It is so easy to change out the refill cartridges, see below for a quick How to Use and Refill E-Z Runner® Grand Dispensers video.
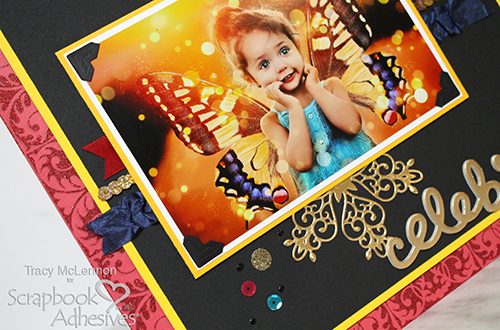
Second, I used this same adhesive for my matted photo and then added Creative Photo Corners Black on the photo itself. Set the matted photo aside.
Texture Details
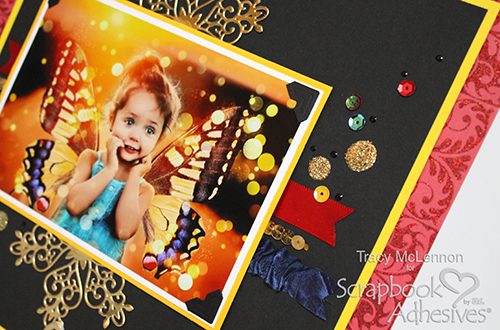
Using Extreme Double Sided Tape 1/8in I placed strips across the middle of the layout. Then using the blue silk ribbon, I ruffled it across the bottom strip of adhesive. The next strip I added sequins trim, and to the top strip, I added red satin ribbon.
Adhere the matted photo over top of the ribbon strips using Crafty Foam Tape Black.
Cut a piece of gold foil paper to 4×6 and adhere it to an Adhesive Sheets 4×6 inch. Next using the decorative die I ran the foiled paper with the adhesive through my die cutting machine. I snipped the decorative piece in half and adhered a half above and below the matted photo.
View this quick How to Use Adhesive Sheets for Die Cutting video below.
Next, using Adhesive Dots Large and Adhesive Dots Medium, I added a few dots diagonally across the layout, then added gold glitter to them. Using Adhesive Dots Mini I added sequins diagonally across the layout too. Then finally I added some Nuvo Dots to the same area.
Add the foam “celebrate” sticker in the bottom right-hand corner.
Thanks so much for stopping by!
Tracy
Creative Time: 1 Hour
Skill Level: Intermediate
Materials Needed
Scrapbook Adhesives by 3L®
E-Z Runner® Grand Ultra Strong Refill
E-Z Runner® Grand Refillable Dispenser
Adhesive Dots Large
Adhesive Dots Medium
Creative Photo Corners Black
Adhesive Dots Mini
Crafty Foam Tape Black
Adhesive Sheets 4×6 inch
HomeHobby by 3L®
Extreme Double Sided Tape 1/8in
Other
Cardstock (Gold, Black, White, Yellow), Blue Silk Ribbon, Red Satin Ribbon, Gold Sequin Trim, Nuvo Drops (Ebony Black), Sequins, Thickers Words, Gold Glitter, Heartfelt Creations Die, Glitter Patterned Cardstock
Pin It!