
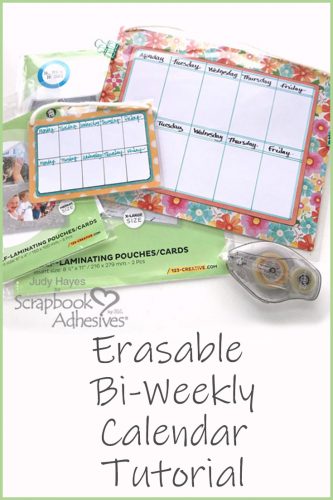
Hi everyone! Judy here today to share an easy to make Erasable Calendar using the Self-Laminating Pouches – Card X-Large. I found a fast and easy way to keep track of doctors’ appointments. This could also work as a meal planner! The solution lies in the Self-Laminating Pouches from HomeHobby by 3L®!
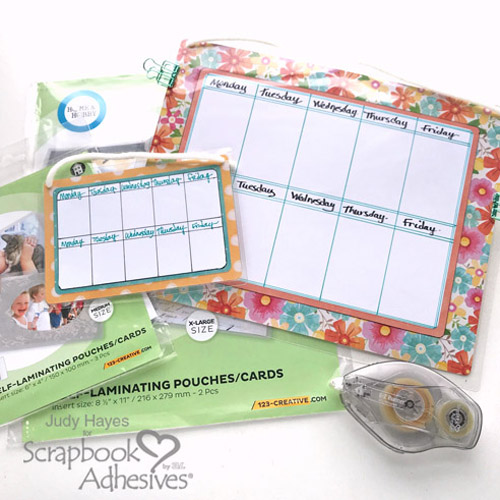
I’ve been helping my parents as my mom is recovering from a back injury. With all the therapy, doctor and other appointments, it’s been hard to keep track of it all. I made this erasable calendar to display on the refrigerator. Now we can see all the appointments in one place.
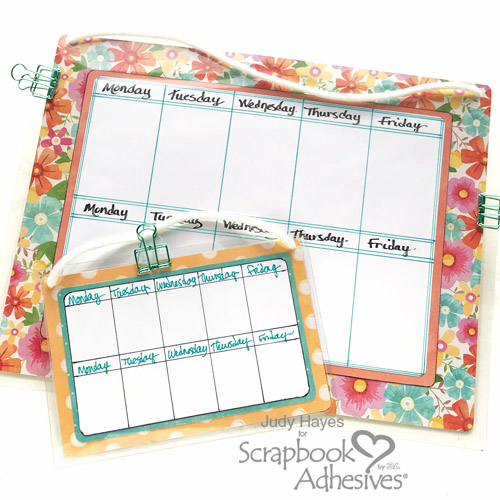
Self-Laminating Pouches are easy to write on with dry erase markers. I made it double-sided so we can see four weeks. I made smaller calendar for myself to keep at home as a reminder of each day. WIN WIN!
Making the Erasable Calendar
To start, choose a double-sided patterned paper for a background and cut it 8.5 x 11 inches to fit inside the X-Large Self-Laminating Pouches. Cut a 6.75 x 9 inch paper in a contrasting color for a mat, one for each side. For the days of the week, use a piece of white cardstock cut to 6.25 x 8.5 inches.
Next, draw the dividing lines and handwrite the days of the week. Round all the corners with a corner rounder punch. Alternately, you could design this part on the computer and print it. Secure the both sides’ layers back to back, with the E-Z Runner® Ultra Refillable Dispenser.
Using Self-Laminating Pouches
Place the calendar pages into one X-Large Self-Laminating Pouch. Remove the narrow strip of the liner near the hinge. Center the calendar in the pouch and press the top edge against exposed adhesive. Then gradually remove the remaining liner and press the adhesive side of pouch against the calendar. I use a bone folder to firmly press it along all the edges.
Watch this video to see how to use the Self-Laminating Pouches:
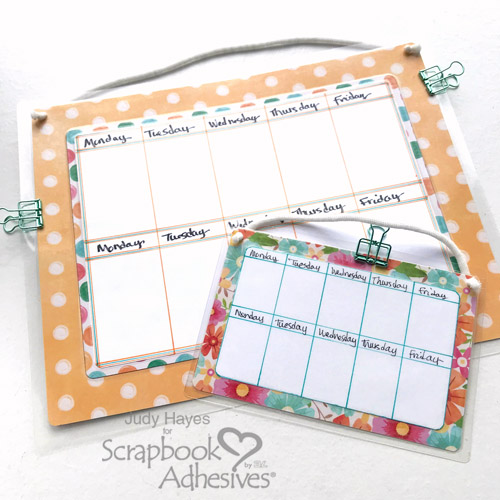
It’s so fun to see the calendar enclosed in Self-Laminating Pouches! To hang it on the refrigerator punch holes in top corners and add a cord for hanging. To complete the calendar, add a dry erase marker and clips. Now it’s ready to keep the family organized!
I made a smaller calendar in the same way, using the Medium Self-Laminating Pouches. The only other difference is that I didn’t use a mat to save space.
Thanks for visiting!
– Judy
Creative Time: 45 Minutes
Skill Level: Beginner
Materials Needed
Scrapbook Adhesives by 3L®
E-Z Runner® Ultra Refillable Dispenser
E-Z Runner® Ultra Refill
Home Hobby by 3L®
Self-Laminating Pouches – Cards X-Large
Self-Laminating Pouches – Cards Medium
Other
Jillibean Soup “Bowl of Dreams” Collection; White Cardstock; Cord; 1/4 Corner Punch
Pin It!
Visit our Website and Blog!
Sign up for our Newsletter so you never miss a contest or giveaway!


By Andre M. June 29, 2019 - 12:17 pm
This is such a useful tutorial. This will be a fab board for children to doodle, draw and write on.