
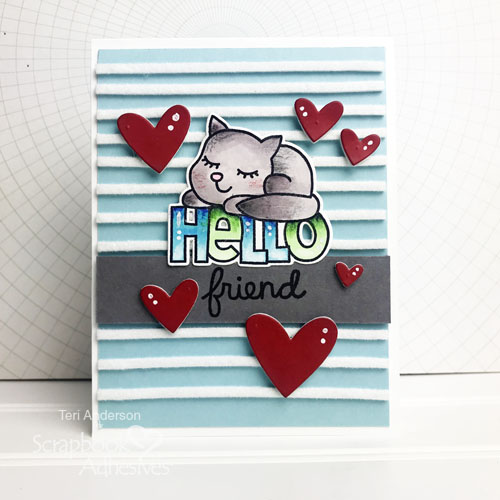
Hi, friends! Teri here to show you how to make a cool striped background for your next card with flock and 3D Foam Strips! Along the way, I’ll show you how to put together a card like my Hello Friend card with a sweet sleeping cat image! Let’s get started!
Making the Striped Background
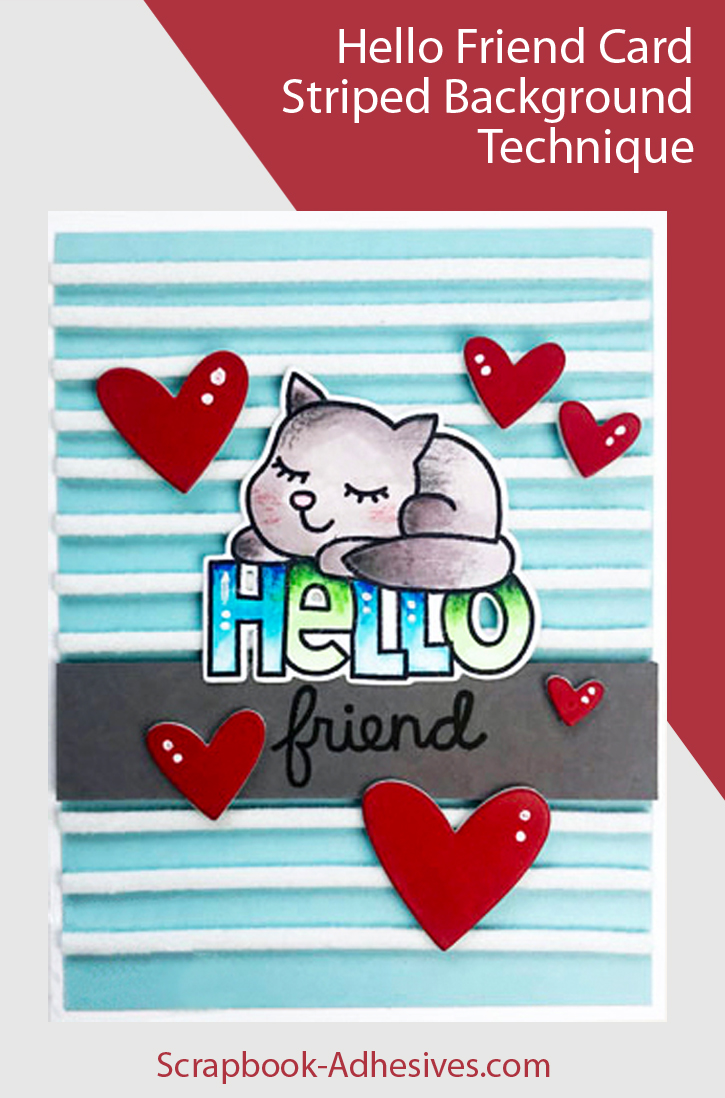
Start with a 4″ x 5 1/4″ panel of cardstock. Place several strips on it. If you want your striped background to be perfectly spaced out, use a pencil and ruler to draw lines along the panel before you adhere the strips to it. If you are OK with a more freestyle look, just wing it and eyeball your placement!
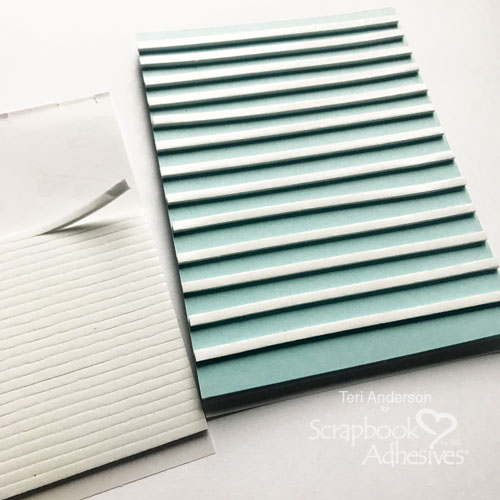
By the way, there’s no wrong or right amount of strips to use on your panel. You can use as many as you’d like! The more you use, the closer your stripes will be. The less you use, the more far out they will be.
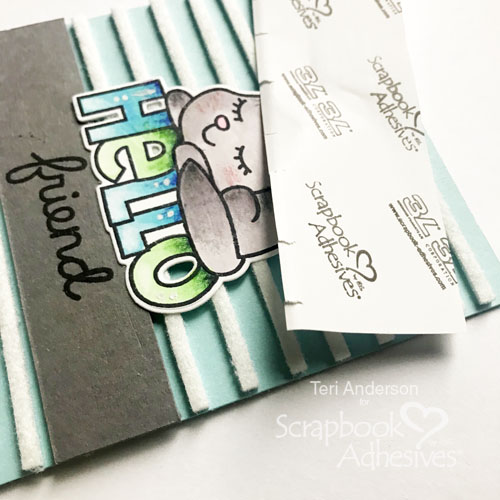
Remove the liners from each strip. Set the panel aside. Stamp a sentiment – I’m using “Friend” – on a 4″ strip of cardstock and mount it to one of the 3D Foam Strips.
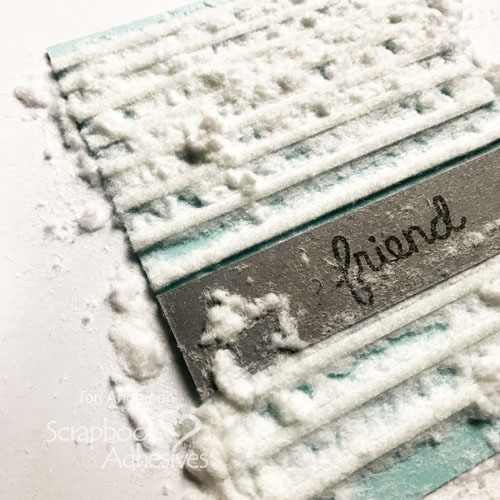
Dump flock all over the remaining strips. Remove the excess. Not a fan of flock? Try using Metallic Transfer Foil instead! Glitter is also a fun way to decorate them.
Adding Stamped Images
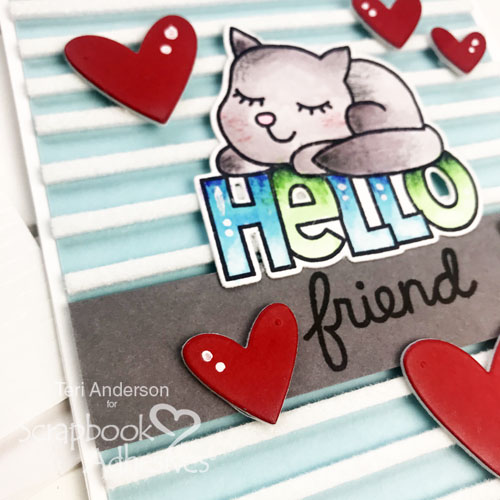
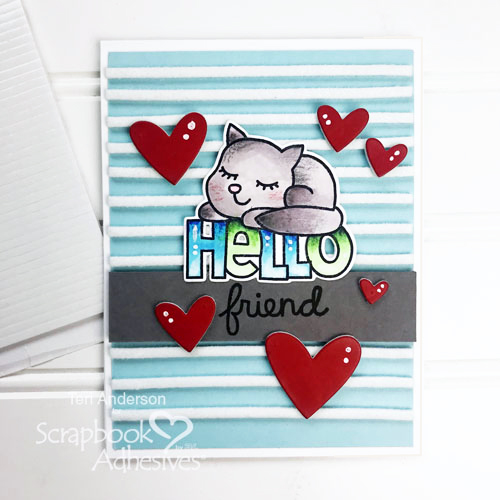
Now that you have your striped background done, you’ll continue making the card. Color the stamped and die-cut image in and add it to your card. I used an image of a cat but you could flowers, a different critter or some other cute icon to create an adorable scene.
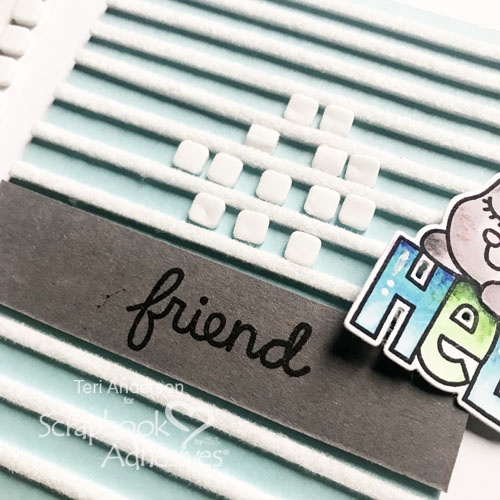
Place some small 3D Foam Squares in the open spaces between the 3D Foam Strips and mount your image on top.
Once you’ve added the image, it’s a good time to take a second look at the striped background to make sure the flock is firmly burnished onto the foam.
Designer Tip: I have a simple trick for doing that! Take a piece of backing paper from the strips and rub the shiny side along the flock. I find this works well with the flock, as well as glitter!
Finish with Hearts
Complete the panel by adding some hearts around your Hello image. Then adhere the panel to a card made from white cardstock!
By the way, I created the hearts for my card by placing a small piece of red cardstock on a 3D Foam Creative Sheet and then die-cutting several hearts from it.
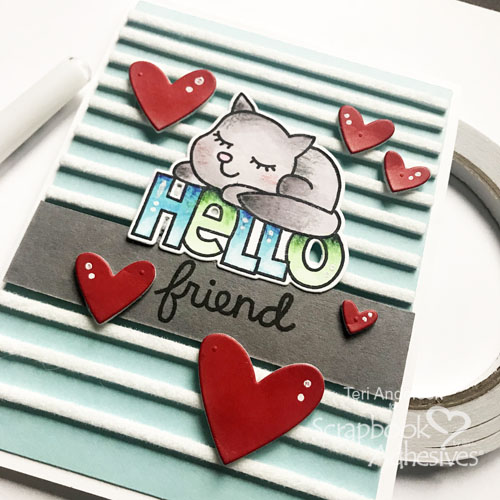
You can give your hearts a little extra personality by drawing dots or lines on them with a white gel pen! Using a pen not your thing? Try sponging a little ink onto them instead.
I hope you are inspired to make a striped background for your next project!
Happy creating,
Teri Anderson
Creative Time: 60 Minutes
Skill Level: Intermediate
Materials Needed
Scrapbook Adhesives by 3L®
- 3D Foam Squares White Small Size and 3D Foam Strips
- 3D Foam Creative Sheets Medium White
- E-Z Dots® Petite Permanent Refillable Dispenser
HomeHobby™ by 3L
Other
White Cardstock: Neenah Paper; Blue and Red Cardstock: My Favorite Things; Stamps: Paper Smooches (Happy Hellos and Delightful Greetings Stamp Sets); Dies: Lawn Fawn (Hearts); Black Ink Pad: Ranger Ink; Markers: Copic; Pencils: Prismacolor; White Gel Pen: Uni-ball; White Flock: Stampendous!
Love It! Save It to Pinterest!
Visit our Website and Blog!
Sign up for our Newsletter so you never miss a contest or giveaway!


