
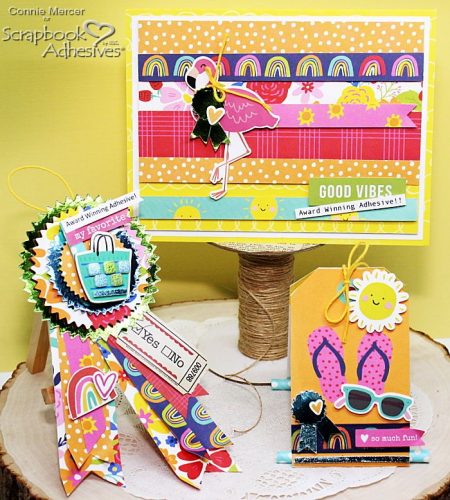
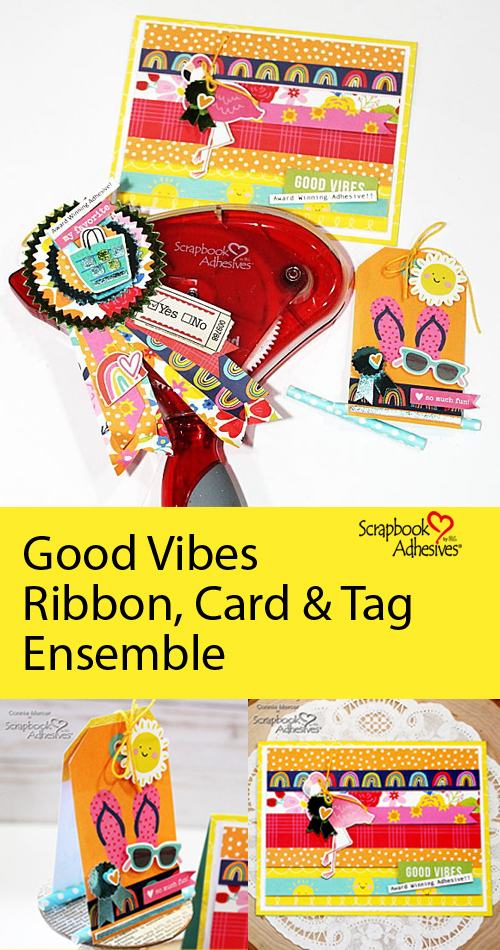
Hi, Connie here with a three-piece Good Vibes ensemble created for Scrapbook Adhesives by 3L’s booth at NAMTA/Creativation 2022 Trade Show. It is fun to get that thinking cap on and come up with a coordinating project set to be displayed at the show! I added “Award Winning Adhesives” in my ensemble and you’ll see the “why” in my projects.
Good Vibes Ensemble Instructions
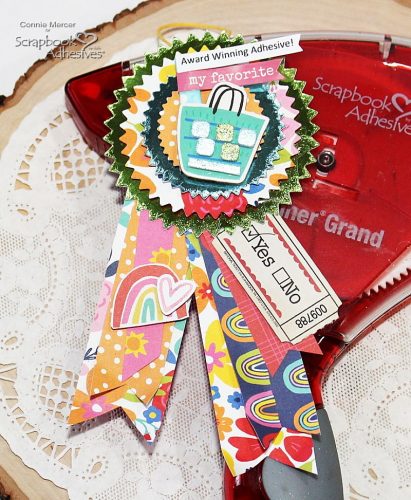
Creating the Ribbon Badge
A little prep work is needed to begin assembling this beauty in the Good Vibes Ensemble!
1. Apply the Adhesive Sheets 4×6 on the white cardstock by burnishing it well to transfer the adhesive on the cardstock. Next, place the Metallic Transfer Foil Sheet/Pastel Color, shiny side up on the cardstock. Gently rub with your finger to transfer the color. Peel it away to see the “magic!” Now it’s ready to run through a die-cutting machine.
2. Cut 1/2 (to 1/4) x 6″ strips of patterned paper. Depending on how full you want the tail, depends on how many to cut. I also pick out ephemera pieces.
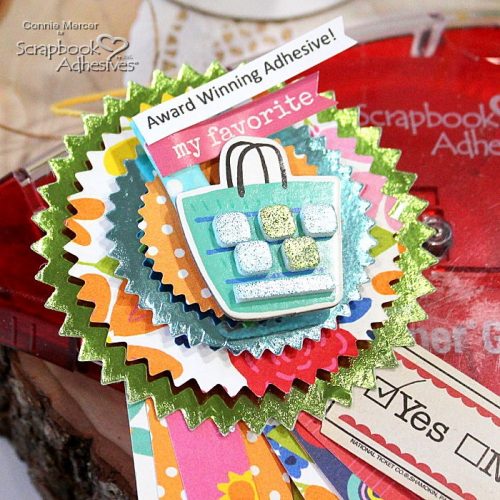
3. Add 3D Foam Squares White Small and a 3D Foam Strip to the purse shape. Then add foil to the foam adhesives by repeating the foiling steps.
Assemble the Ribbon Badge
- 1. Layer the strips of paper and staple them together so they can be attached to the back of the ribbon badge.
2. Stack the award circle shapes from the largest to the smallest. Add a 3D Foam Square between each layer for more dimension and interest. Alter between patterned papers and foiled papers to get a mix of colors.
3. Add the embellished purse with the 3D Foam Squares White Mix. Add word stickers, for flags, using Extreme Double-Sided Tape 1/2″.
4. Use Premium Double-Sided Tape 1″ to attach the adhere the strips to the back of the award badge.
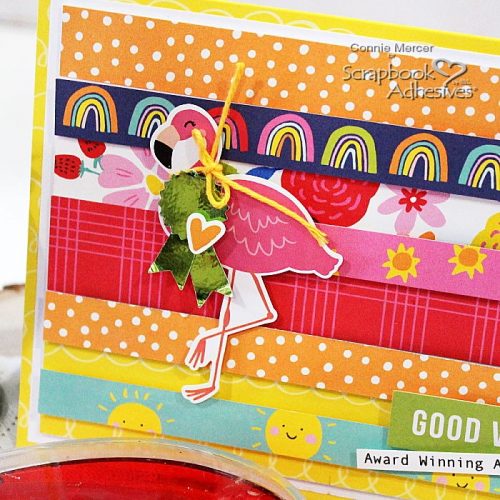
Create the Good Vibes Card
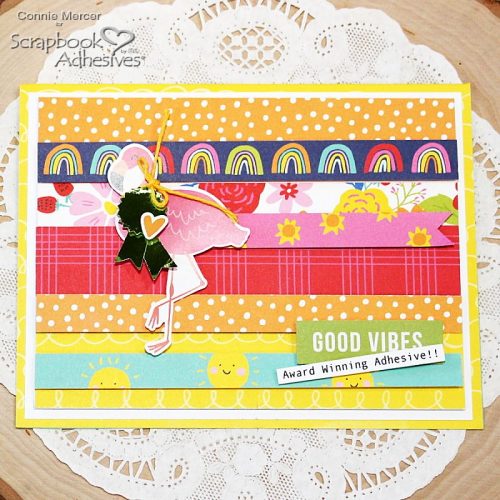
Now for the anchor to the Good Vibes Ensemble, prepping the card. It’s easy! Cut more strips of paper using the same pattern paper from the collection. These strips are 1″ to 1/2″ in size Length is 5″. I cut eight and then layered them. You will need two (one for the tent card up next) small award badges that are created using a punch. Stickers for the focal of the card.
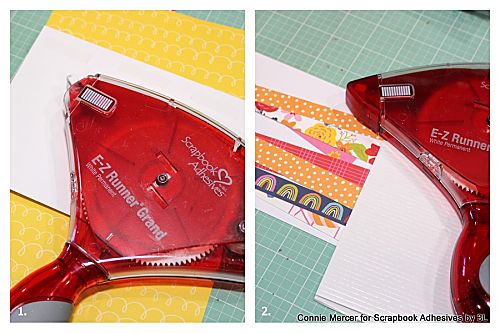
- 1. Use the EZ Runner Grand Refillable Dispenser to adhere the mat to a folded card base. created out of the same patterned paper collection.
2. Alternate the EZ Runner Grand Refillable Dispenser with the 3D Foam Strips to create dimension for the card front.
3. Add the focal sticker along with the small foiled award badge, created earlier using a punch.
4. Add twine around the Pelican’s neck.
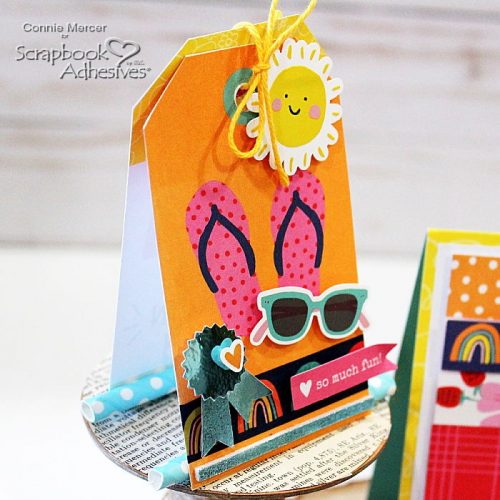
Set Up the Tag Tent
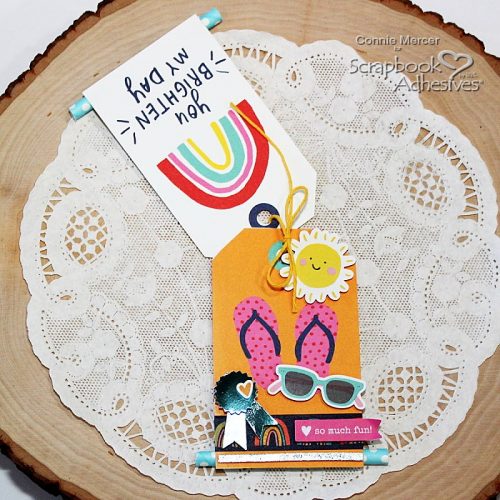
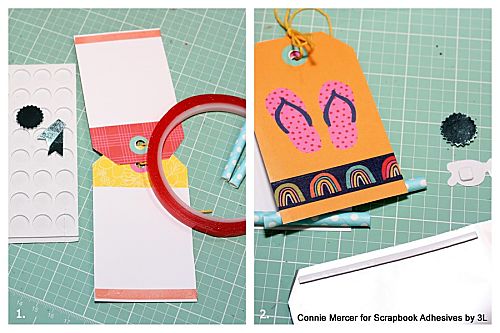
- 1. Select two tags from the pattern paper collection and tie them together using twine.
2. Add a decorative straw to each end, of the tags, with Extreme Double-Sided Tape 1/2″. Adding the straws helps the tag tent to stay upright.
3. Add stickers and the second award badge foiled, to the front of the tag, using 3D Foam Squares White Mix.
4 Add a foiled 3D Foam Strip to the bottom of each tag. I used Metallic Transfer Foil Sheets/Pastel Colors.
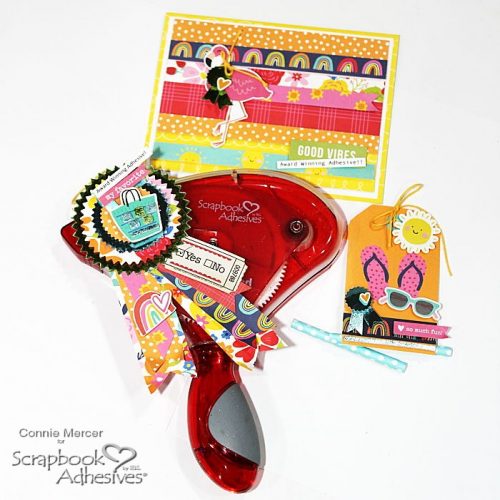
And the answer “to the why” is Scrapbook Adhesives by 3L truly has an adhesive for every detail of a project, including my Good Vibes Ensemble! Thanks for stopping by and checking out the NEW products!
Connie Mercer
Skill Level: Advanced
Creative Time: 90 minutes
Materials Needed:
Scrapbook Adhesives by 3L®
3D Foam Squares White Mix, 3D Foam Strips White, and 3D Foam Circles White Mix
Crafty Foam Tape 108′
EZ Runner Grand Refillable Dispenser
Metallic Transfer Foil Sheets / Pastel Colors
Adhesive Sheets 4×6
HomeHobby™ by 3L
Extreme Double-Sided Tape 1/2″
Premium Double-Sided Tape 1″ Permanent
Other: Patterned Paper and Ephemera: Simple Stories (Sun Kissed Collection); Spellbinders, Award Punch; Twine, Stapler
Save it to Pinterest!
Visit our Website and Blog!
Sign up for our Newsletter so you never miss a contest or giveaway!


