
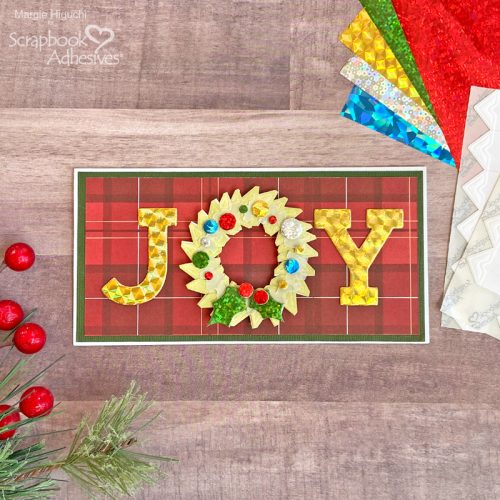
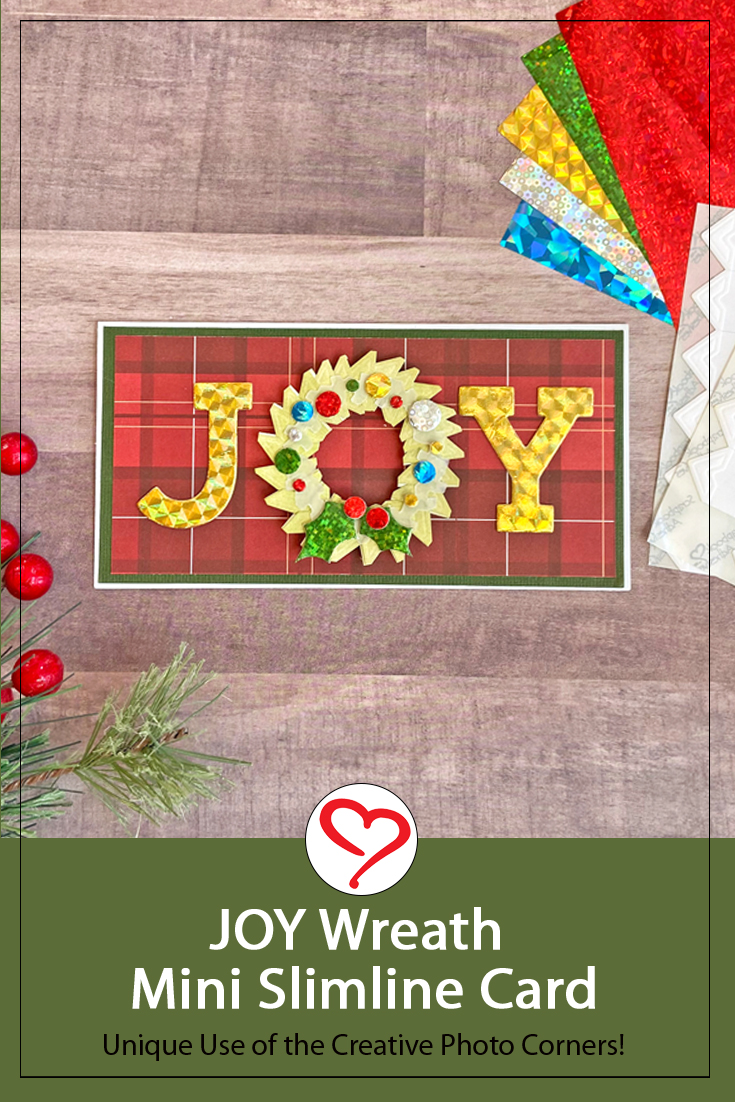
Are you familiar with the Creative Photo Corners? I love them because they’re classic in style with their embossed edges BUT I wanted to have fun with them by making a JOY Wreath mini slimline card. What do you think? Let me show you how!
Create the JOY Wreath
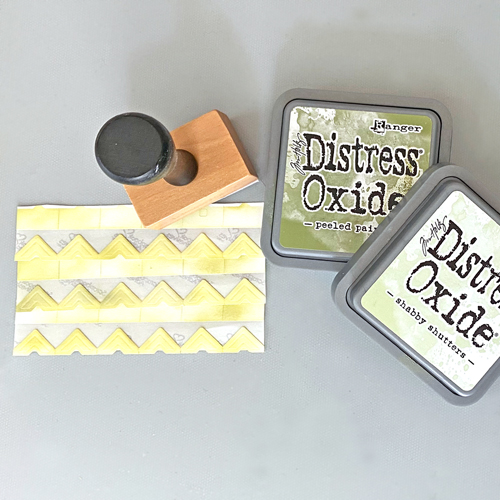
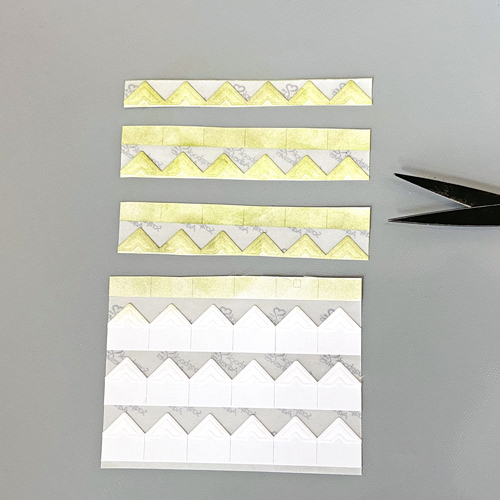
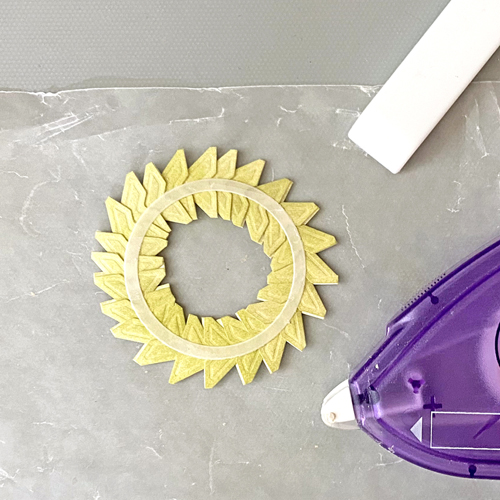
Grab a sheet of Creative Photo Corners in White and ink with a combination of Distress Oxide Ink in Shabby Shutters + Peeled Paint with an ink blending tool. When you get your desired look, cut off the bottom liner of the inked corners.
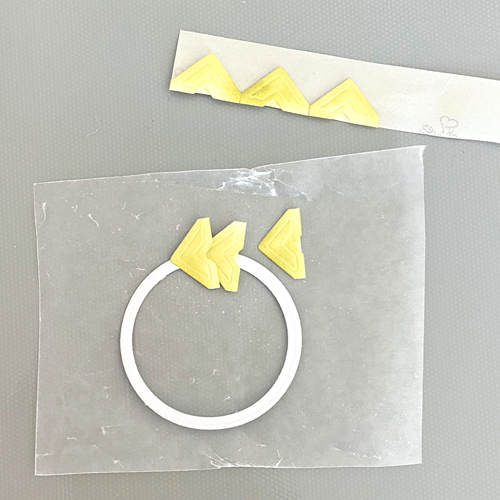
On a piece of 3.5 x 3-inch wax paper, place it on a 1.75-inch paper ring to use as a wreath guide. Start with two Creative Photo Corners in White by tucking one corner loosely into the other to create a circle chain around the paper ring as a guide. When the circle is complete, adjust and press the wreath down onto the ring to secure.

Embellish the Wreath
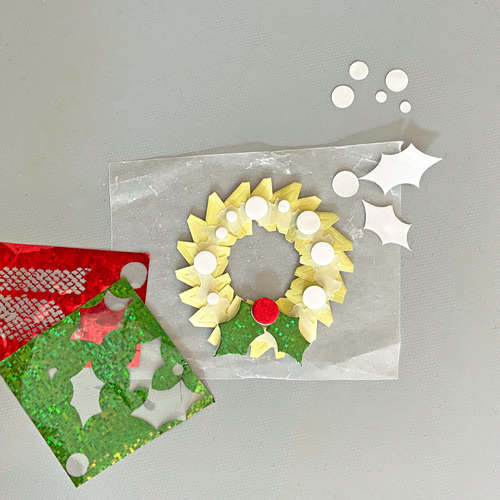
Adhere the vellum wreath die cut on top of the photo corner wreath with the E-Z Runner® Permanent Fine. The vellum photographed is different…this is to show placement. Carefully apply the adhesive to the vellum as it is delicate.
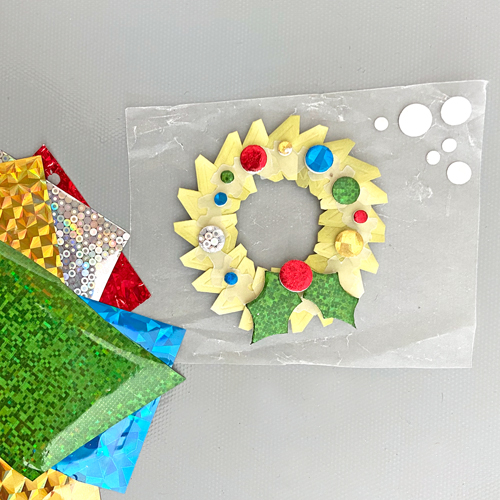
Add Holly Leaf and Berry Shapes from the 3D Foam Christmas Shapes on the wreath. Remove top liner from each holly leaf and apply green foil from the Metallic Transfer Foil Sheets in Celebrate Colors (color side up) by rubbing gently. Repeat the same process with the berries but in red foil as well as the foam circle shapes around the wreath.
Assemble the Card
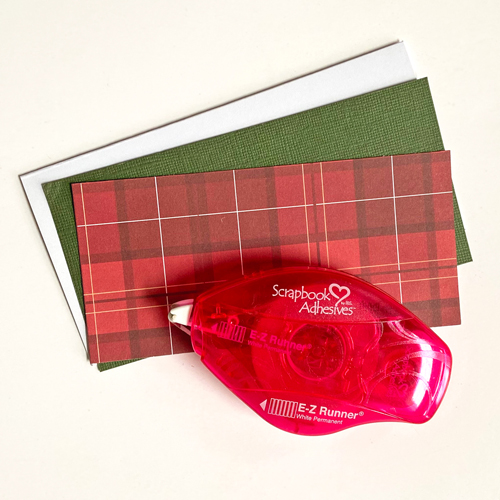
Fold a 6 x 6-inch square white cardstock in half to create a 6 x 3-inch top fold mini slimline card base. Cut a piece of 5 7/8 x 2 7/8-inch Aspen green cardstock layer and a piece of 5 5/8 x 2 5/8-inch patterned paper. Adhere all both layers to the card base with the E-Z Runner® Permanent Strips Refillable Dispenser.
Place the sixth-largest 3D Foam Circle Frame on the back of the embellished wreath and center it on the card front. Die-cut the letter J and Y with 3D Foam Creative Sheet and place them to spell out JOY. Remove the top liners of both and apply the gold foil from the Metallic Transfer Foil Sheets in Celebrate Colors using the foiling steps.

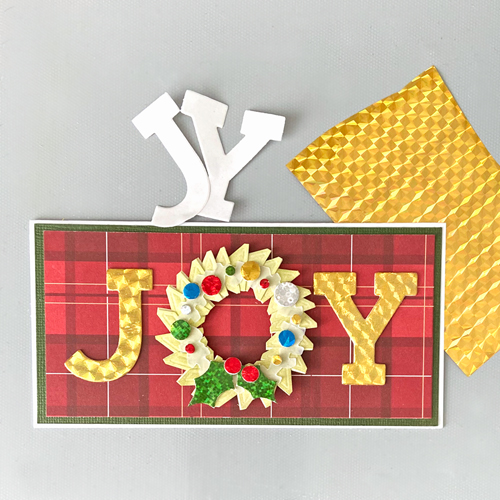
I hope my JOY Wreath Mini Slimline Card tutorial inspires you to look at our Creative Photo Corners in a different way! Thanks for stopping in and have a Crafty Day!
Creative Time: 35 minutes
Skill Level: Intermediate
Materials Needed:
Scrapbook Adhesives by 3L® Supplies:
E-Z Runner® Permanent Strips Refillable Dispenser
E-Z Runner® Permanent Fine
3D Foam Christmas Shapes, 3D Foam Circle Frames in White, and 3D Foam Creative Sheets Small in White
Creative Photo Corners in White
Metallic Transfer Foil Sheets in Celebrate Colors
Other:
Patterned Papers and Cutting Die: Photo Play Paper Co. (Santa’s Trading Company Collection and Joyful Snowman Etched Metal Die Set); Ink and Ink Blending Tool: Ranger Ink (Distress Oxide Ink in Shabby Shutters + Peeled Paint); Scoring Tool; White and Aspen Green Cardstock; Vellum Paper; Wax Paper
Click Preferred Retailers List
Save to Pinterest!
Visit our Website and Blog!
Sign up for our Newsletter so you never miss a contest or giveaway!


