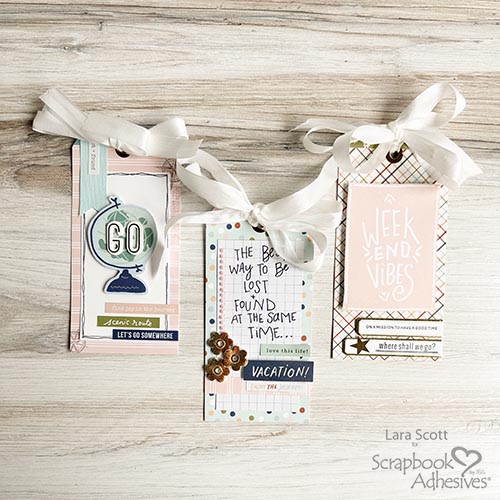
Hey Y’all, Lara here again with a great Travel Tag Trio set that was super easy to create! You can make these tags as simple or detailed as you want. Use up those scraps! Or any other odds and ends you might have around. Depending on your tags’ details, they can take 5-30 minutes each. They are also great for kids’ projects.
Travel Tag Backgrounds
All three tags are approximately 6.25 x 3.125″ but you can make your own by cutting out a tag shape or using a die-cut machine to create your own. The process for each tag started the same. Each was covered with patterned paper and secured with the E-Z Runner® Grand Ultra Strong Refillable Dispenser. Then I added a little coordinating extra 3/8″ wide strip on the top of the tag, punched a hole, and added gold foil hole reinforcers that I designed and cut out on my electronic cutting machine.
Travel Tag #1 – Lost and Found
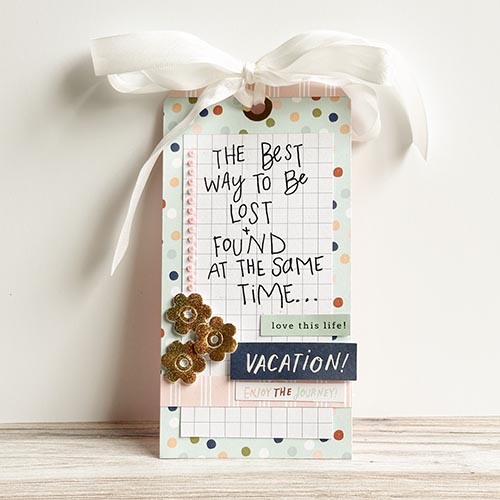
This was probably the most detailed tag since I hand-lettered and used the Wear Your Adhesive on the Outside technique with foil. On a piece of 2.5 x 5″grid paper, I hand-wrote the quote “The Best Way to be Lost and Found at the Same Time.” Then added another piece of striped paper across the bottom part of the grid paper. Designer’s Tip: Use this piece from the marketing strip on the bottom of the paper.
For the flowers, I used them from the 3D Foam Garden Shapes. After placing them on the tag, remove the top liner and place a piece of fine glitter gold foil from the Metallic Transfer Foil Sheets Holographic Colors over the exposed adhesive. Make sure the color side is facing you. Gently rub the foil to transfer the color to the flowers. Add a little bling, tie on a piece of ribbon, and add a few stickers and you have a great gift tag or embellishment for a travel scrapbook page or mini book.
Travel Tag #2 – Go
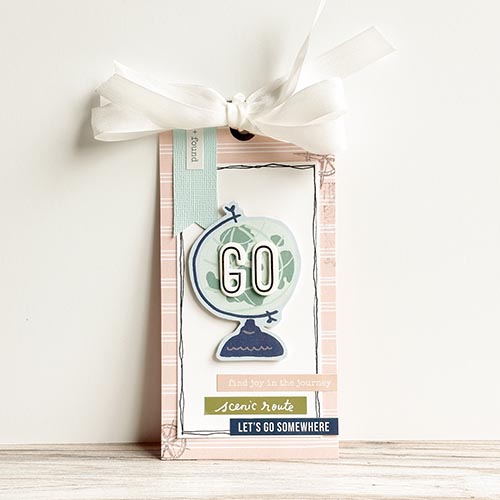
Travel Tag #2 includes simple stamping and layering of a piece of white cardstock cut to 2.5 x 4.75″ with a few hand-drawn lines. Cut out a small banner from light blue cardstock and add a sticker. Cut out the globe from one of the label papers, and add some dimension with 3D Foam Squares White Small. Then place the letter stickers to spell Go. After adding a few stickers and some ribbon, it is done!
Travel Tag #3 – Weekend Vibes
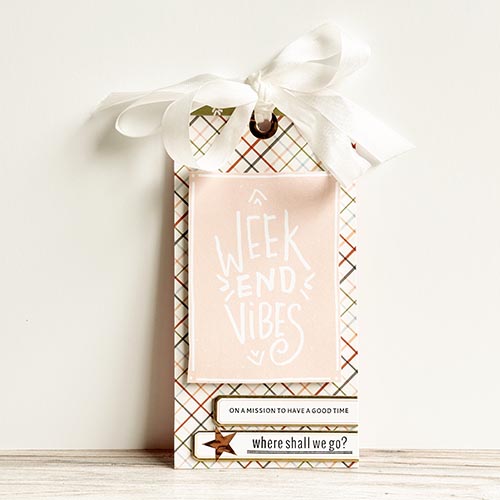
Tag #3 is probably the most simple. Cut out the Weekend Vibes from a label paper and add to the tag with Crafty Foam Tape White 13ft. Stamp on two gold foil chipboard labels, adhere to the tag, and trim off the excess. Add a gold star and some ribbon and you have a great little tag that takes about five minutes. I think it took me longer to decide what to put on the tags than to make them.
A Few More Views
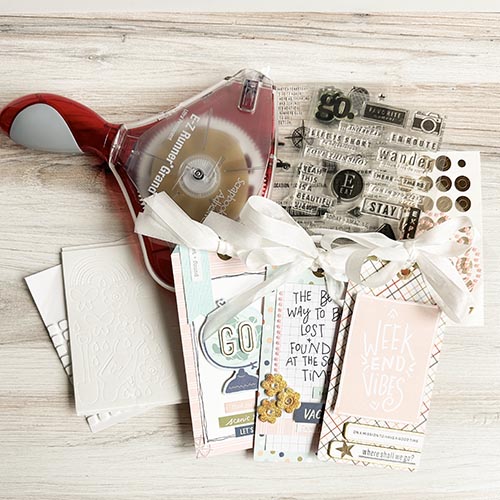
I had never done the Wear Your Adhesive on the Outside technique before with the 3D Foam Shapes and the Metallic Transfer Foil Sheets. It was fun and I will incorporate that concept in future projects. So be on the lookout!
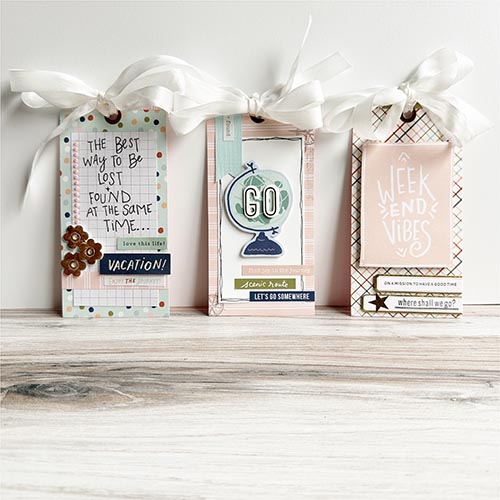
Thanks for visiting!
Lara Scott
Creative Time: 40 mins (for all three tags)
Skill Level: Beginner
Materials Needed:
Scrapbook Adhesives by 3L®
E-Z Runner® Grand Ultra Strong Refillable Dispenser
Metallic Transfer Foil Sheets Holographic Colors
Other: Papers and Stickers: Simple Stories (Safe Travels Collection); Stamp: Kerrie Bradford (Go and Found Stamp Set); Ink: Tsukineko (Versafine in Onyx Black); Craft Dies: Sizzix; Nestability Bling: Want2Scrap; Chipboard Letter Stickers; Blank Tags, Grid paper, Gold Edge Chipboard Labels (Ali Edwards) Chipboard Light Blue and White Cardstock; Gold Foil Vinyl (for electronic die cut machine use); Hole reinforcers (Lara Scott Designs); White Ribbon
Click Preferred Retailers List
Save to Pinterest!
Visit our Website and Blog!
Sign up for our Newsletter so you never miss a contest or giveaway!


