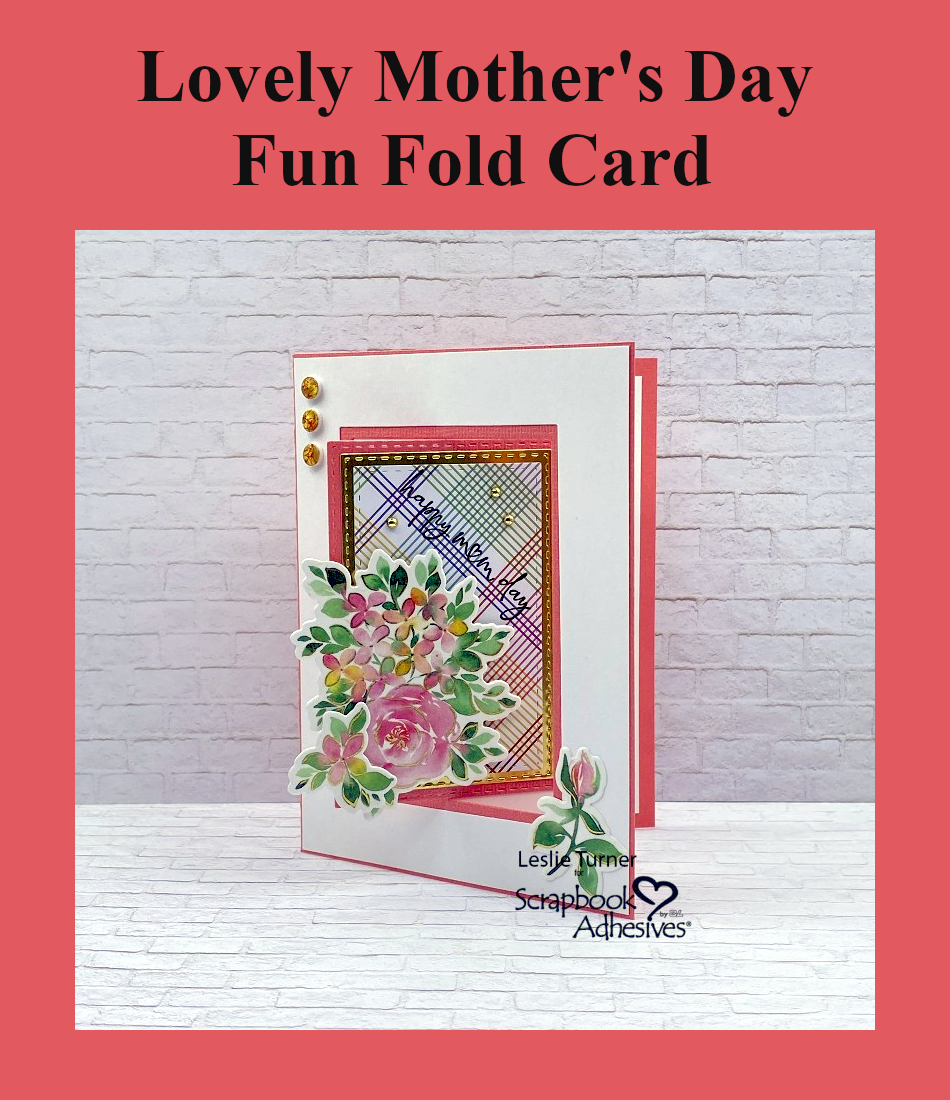
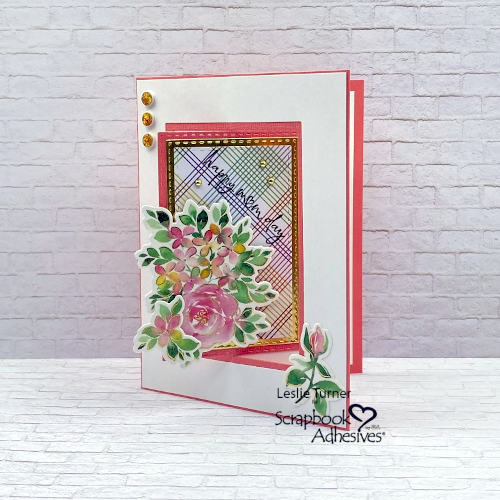
Hi everybody, happy Monday! Hope you had a good weekend and got to enjoy some nice Spring weather! Have you started on your Mother’s Day cards or crafts yet? It will be here soon! Leslie here with you today, and I have a pretty Mother’s Day fun fold to inspire you. For this anchored swing flap, I used some products in my stash that haven’t been loved in a while. Also used some pretty amazing adhesives and other complimentary products from Scrapbook Adhesives to put it together! So let me show you how I made this!
Cut the Card Base & Swing Flap
FLAMINGO CARDSTOCK:
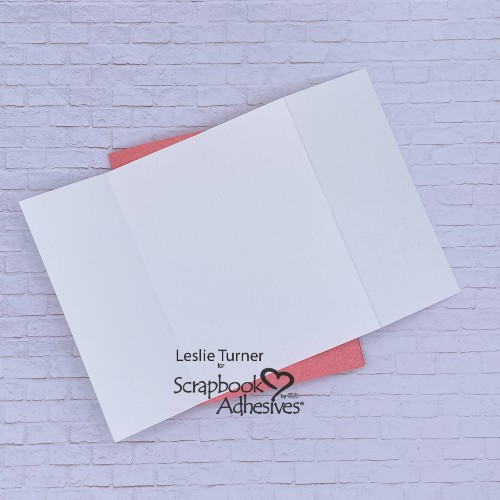
Card base: 5-1/2″ x 8-1/2″, scored at 4-1/4″.
WHITE CARDSTOCK:
Swing flap: 5-1/4″ x 7-7/8″, scored at 2″, 4″ and 6″ with the 7-7/8″ edge across the top of your trimmer. Fold on the score lines and burnish with a bone folder. I just noticed that the score line at the 4″ mark is not visible in my photo, but it’s there.
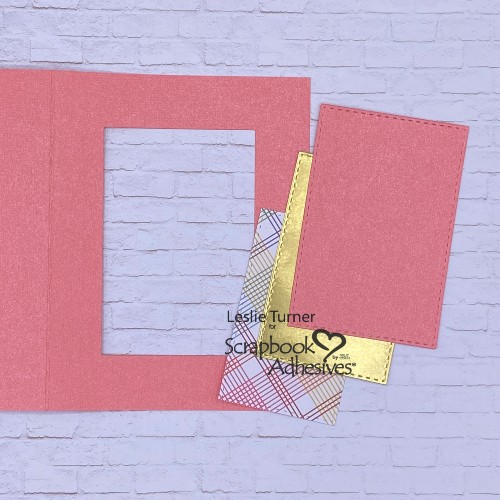
Die Cut the Aperture for Mother’s Day Fun Fold
Use a die approximately 2-1/4″ x 3-5/8″ to cut an aperture into the front flap. Save the die cut rectangle as it’ll be needed for the layered focal panel.
Now cut a slightly smaller rectangle from gold foil and another one just a bit smaller from patterned paper. Dies are not necessary for this step – these can all be cut with a knife or trimmer.
Adhere the Swing Flap
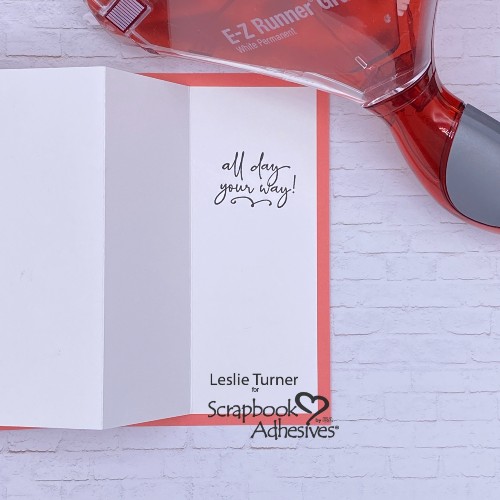
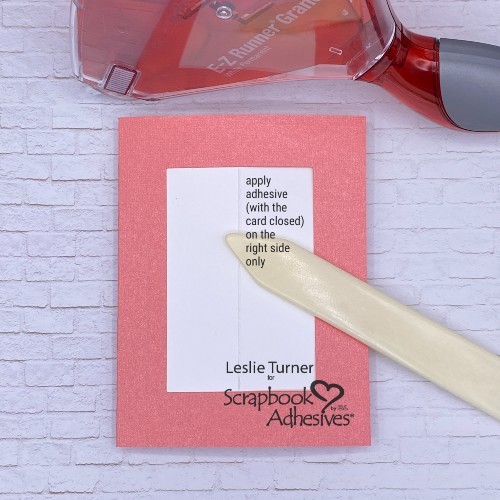
Firstly, let’s get the swing flap for this Mother’s Day fun fold in the correct position. Fold it in half. You’ll notice there is a 1/8″ difference in the size of the two outside sections. Be sure the 2″ section is on the right and the 1-7/8″ section is on the left. Stamp a sentiment on the right side and then adhere that section to the right side of the card base. The E-Z Runner® Grand Permanent Strips Refillable Dispenser is a wonderful tool for these steps.
Secondly, fold the two sections on the left over toward the right and apply adhesive to the left-most section. Apply the adhesive in a C-shaped fashion, avoiding the right side of this section with the score line.
Thirdly, simply close the card base and press the left side to secure the adhesive.
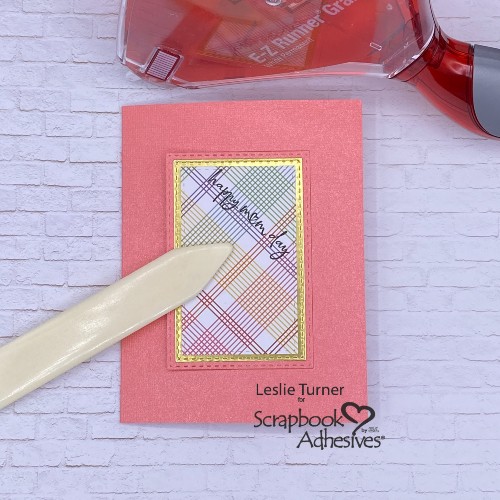
Create & Affix the Focal Panel
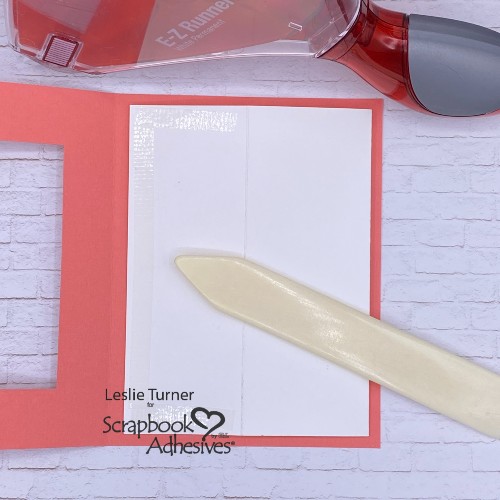
Once again using the E-Z Runner® Grand Permanent Strips Refillable Dispenser, adhere the three focal panel layers together. Add another sentiment if desired.
With the card closed, apply adhesive to the right side of the white cardstock visible through the aperture. Again, use the E-Z Runner® Grand Permanent Strips Refillable Dispenser.
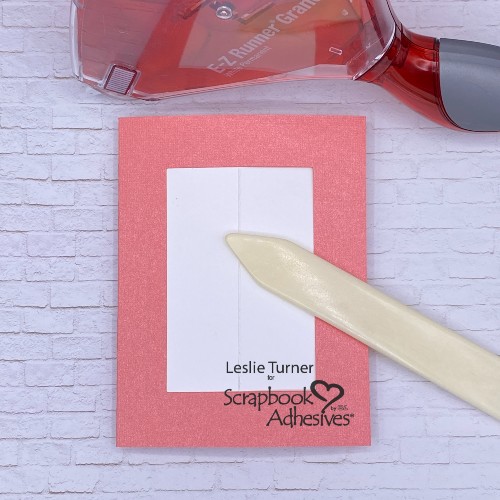
Place the layered focal panel into the negative space and press to secure the adhesive.
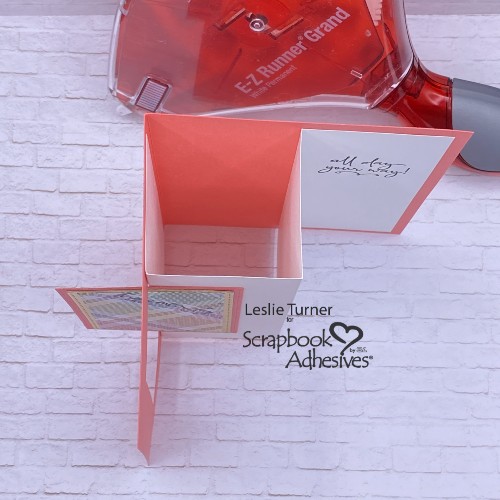
Open the card and stand it up. Looking down from the top, it should look like this so far.
Add Panel to the Mother’s Day Fun Fold
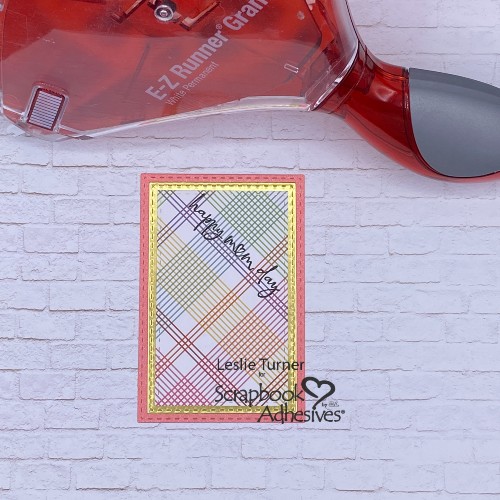
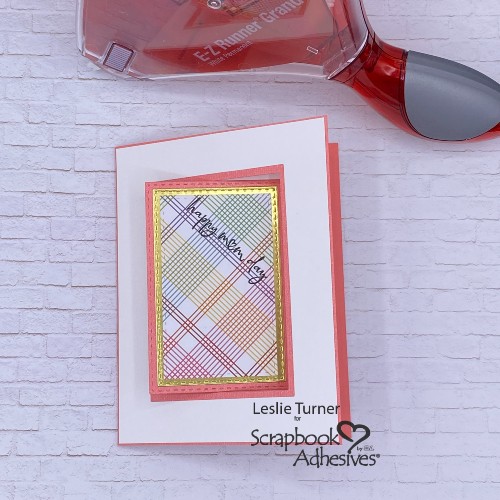
To give this Mother’s Day fun fold a fresh clean and simple look, I added a white panel to the card front. Simple process of using a die slightly larger than the one used for the original aperture, then trimming to fit.
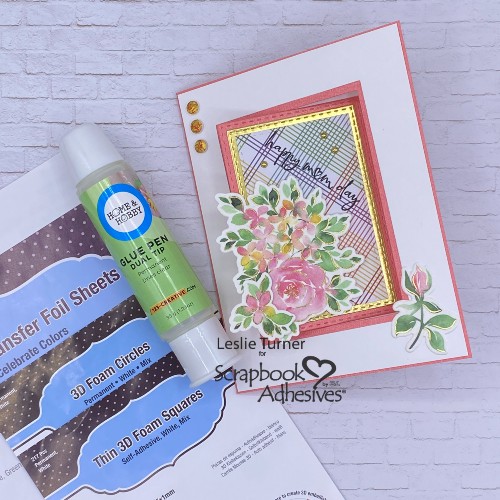
Wear Your Adhesive on the Outside!
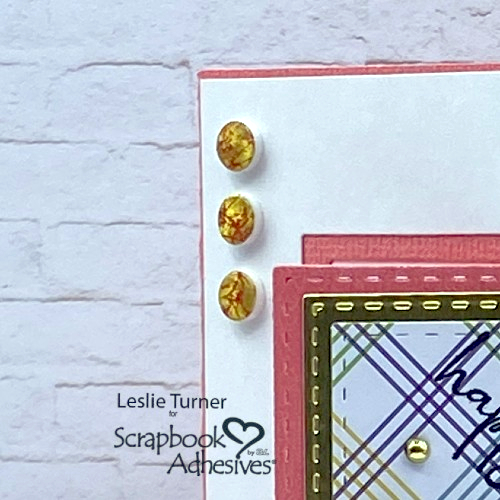
Additionally, I employed my new favorite Wear Your Adhesive on the Outside technique to create three pretty embellishments. Red and gold foil from the Metallic Transfer Foil Sheets Celebrate Colors complimented the Flamingo cardstock. Wrinkle the red foil and apply (color side up) to several 3D Foam Circles White Mix. Repeat the process with wrinkled gold foil to fill in the areas missed with the red foil. Worked like a charm! What card for Mother’s Day would be complete without pretty shiny embellishments?!
Complete the Mother’s Day Fun Fold
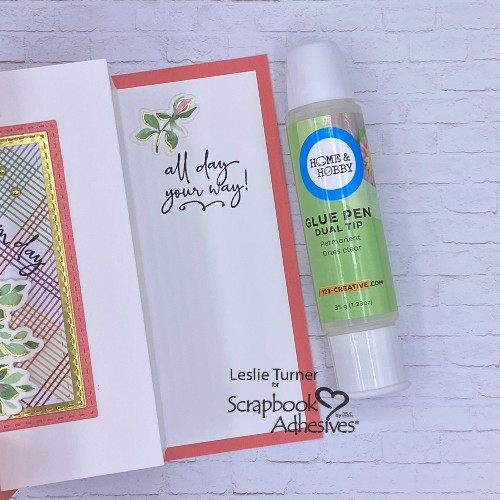
Finally, I added several die cut washi tape embellishments, adhered with Thin 3D Foam Squares White Mix. A few more small die cuts were adhered with Dual Tip Glue Pen. This Mother’s Day fun fold is now complete!
Thanks for visiting!
Leslie
Creative Time: 45 mins
Skill Level: Intermediate
Materials Needed:
Scrapbook Adhesives by 3L®
E-Z Runner® Grand Permanent Strips Refillable Dispenser
Metallic Transfer Foil Sheets Celebrate Colors
3D Foam Circles White Mix
Thin 3D Foam Squares White Mix
HomeHobby™ by 3L
Dual Tip Glue Pen
Other: Cardstock/Paper: CutCardStock Flamingo and Bright Gold Foil cardstock, Neenah Classic Crest 80# Solar White cardstock, Recollections Bold Basics Paper Pad
Stamps: Stampin’ Up Happy & Heartfelt Stamp Set
Ink: Versafine Onyx Black Ink
Dies/Punches: PinkFresh Studio Hydrangea & Rose Die, Love From Lizi Stitched Rectangle Nested Cutting Dies
Accessories: Fiskars 12″ ProCision Rotary Bypass Paper Trimmer, Big Shot, PinkFresh Studio Hydrangea & Rose Washi Tape, Mini MISTI, Kat Scrappiness Gold Pearl Mix
Click Preferred Retailers List
Save to Pinterest!