
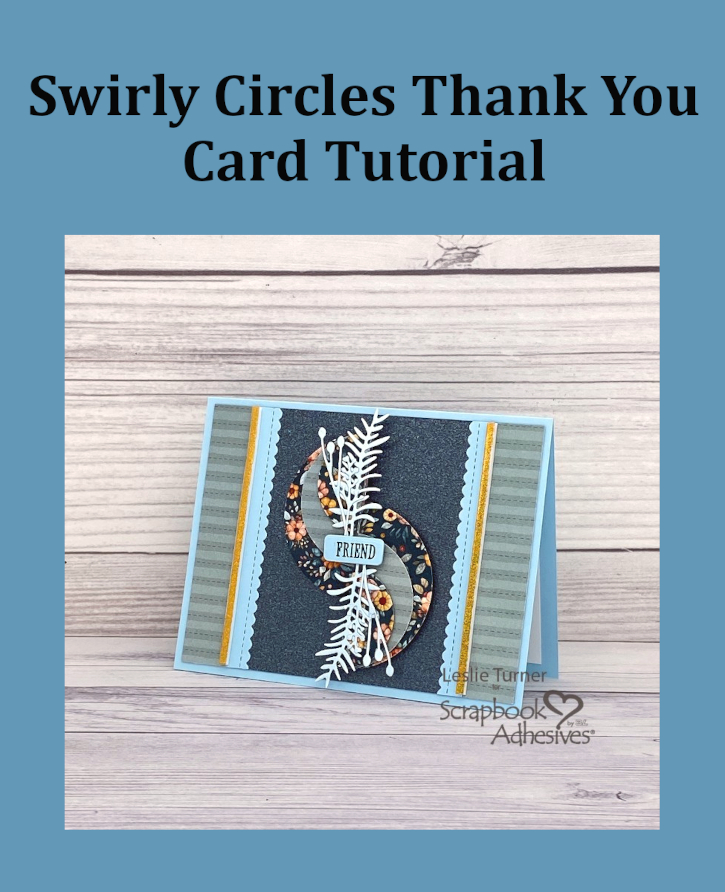
Happy Tuesday, friends! I hope your week has started off on a nice note! Have you ever heard of a swirly circles card element? It’s a fun one to make and gives the optical illusion of a spinning spiral! Leslie here, sharing a tutorial for making a Swirly Circles Thank You Card featuring a couple NEW Scrapbook Adhesives products – 3D Foam Squares 3mm White Mix and 3D Foam Strips 3mm White!
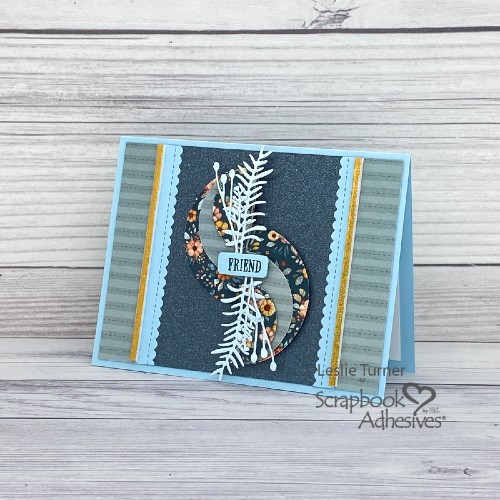
Yep, you read that right… we now carry 3mm thick foam squares and strips in white and black! Very excited to share this project using 1mm, 2mm and 3mm white foam squares, along with 3mm white foam strips and holographic transfer foil! You know I absolutely love the Wear Your Adhesive on the Outside technique! So let’s get started!
Create Swirly Circles Element
Punch 1-1/2″, 2″ and 2-1/2″ circles and cut each one in half. Circle dies can also be used. Die cut some garden stems. Wasn’t sure how many I would end up using, so I cut a variety to balance out the element.
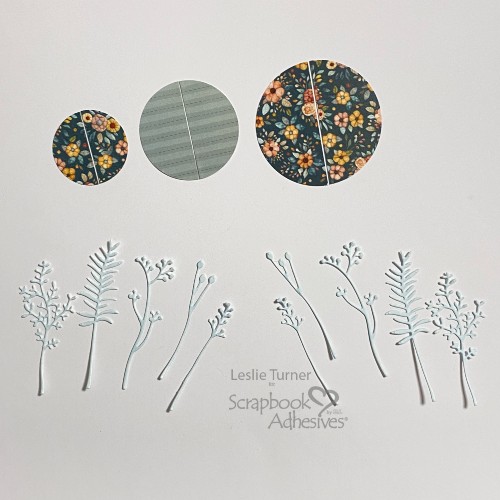
Use Thin 3D Foam Squares White Mix to adhere the halves of the circles together. Stack them with the smallest on top and line up the top corner and right straight edge. Do both sets the same way.
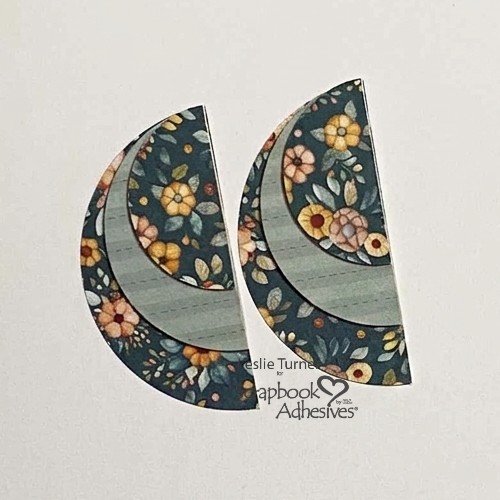
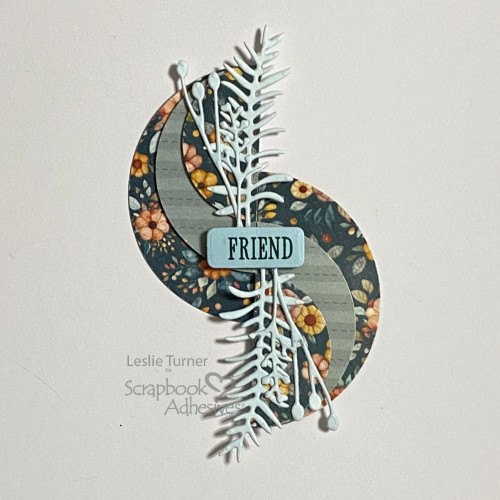
Rotate one set of halves 90 degrees and line up the center circles with the straight edges meeting in the middle. Apply a piece of washi tape to the back to hold them together. Add the garden stems with the Dual Tip Glue Pen. Affix the sentiment in the center with 3D Foam Squares White Mix (which are 2mm in height), and set the element aside.
Cut Card Base & Layers
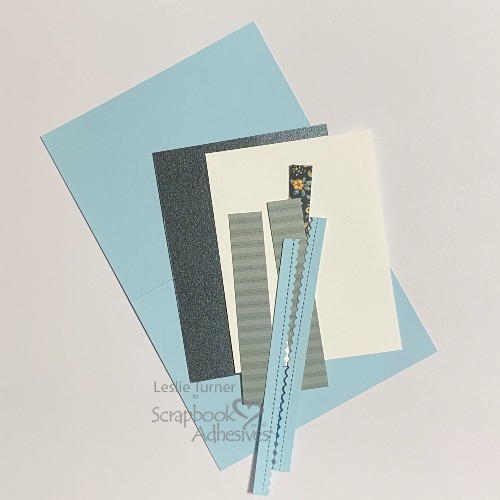
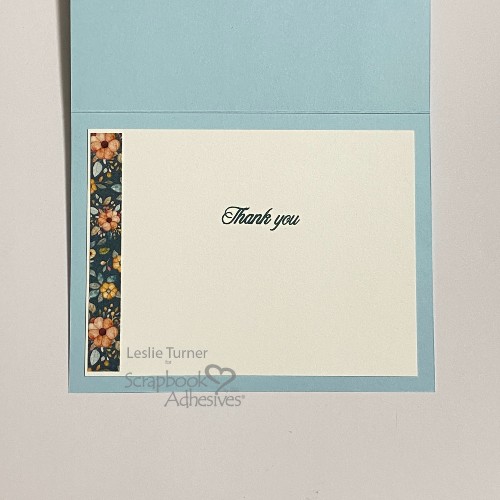
Now cut a 5-1/2″ x 8-1/2″ card base from light blue cardstock and score it at 4-1/4″ on the long side. Also, cut a 4″ x 5-1/4″ dark green layering panel and a 3-3/4″ x 5″ white sentiment panel (for the inside). Afterwards, cut two 3/4″ x 4″ striped strips and a 1/2″ x 3-5/8″ floral strip. Additionally, if you have stitched scallop dies (or a border punch), also cut two 4″ long light blue strips for the front.
Adhere Layers
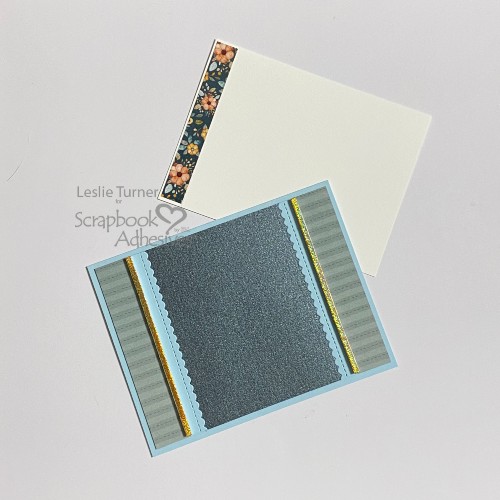
Grab the E-Z Runner® Ultra Strong Refillable Dispenser and adhere the dark green layering panel to the card base front. Similarly, adhere the striped strips and stitched scallop strips to this panel. Let’s employ the Wear Your Adhesive on the Outside technique… my favorite! Apply two 3D Foam Strips 3mm White vertically to the card front. Remove the liner, press gold glitter foil from the Metallic Transfer Foil Sheets Holographic Colors, and rub to secure. So easy and so beautiful! Don’t forget to adhere the floral strip to the white sentiment panel; this will be added to the inside of the card.
Affix Swirly Circles Element
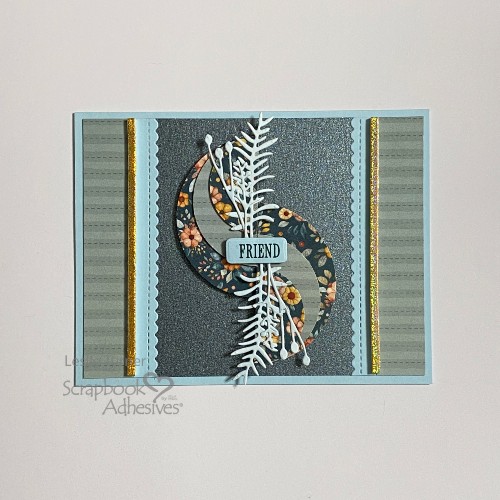
Get that package of 3D Foam Squares 3mm White Mix and affix the swirly circles element to the card front. Wow, look at the dimension!
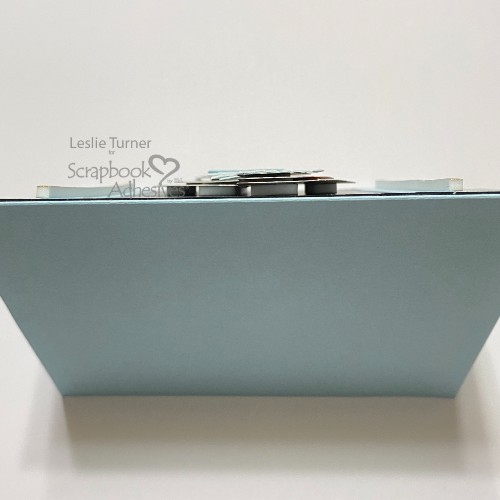
Looking down from the top of the card, check out the dimension using these new 3mm thick foam squares and strips! They are phenomenal!
Complete Swirly Circles Thank You Card
All that’s left to do is to stamp a sentiment on the white sentiment panel and adhere the panel with E-Z Runner® Ultra Strong Refillable Dispenser. This pretty swirly circles thank you card is complete!
Thanks for visiting!
Leslie
Creative Time: 35 mins
Skill Level: Intermediate
Materials Needed:
Scrapbook Adhesives by 3L®
E-Z Runner® Ultra Strong Refillable Dispenser
Thin 3D Foam Squares White Mix, 3D Foam Squares White Mix and 3D Foam Squares 3mm White Mix
3D Foam Strips 3mm White
Metallic Transfer Foil Sheets Holographic Colors
HomeHobby™ by 3L
Dual Tip Glue Pen
Other: Cardstock/Paper: CutCardStock Lessebo Arctic Blue and Stardream Metallic Neptune cardstock, Classic Crest 80# Solar White cardstock; Keep It Simple Cheerful Cottage 6×9 Papers
Stamps: Stampin’ Up! Perfectly Pears stamp set
Ink: Catherine Pooler Bay Breeze ink
Dies/Punches: Fiskars 1-1/2″ and 2-1/2″ circle punches, Stampin’ Up! 2″ circle punch; Cottage Cutz Garden Stems dies, My Favorite Things Stitched Scallop Basic Edges 2 dies, Stampin’ Up! Perfectly Pears dies
Accessories: Stampin’ Up! paper trimmer, Mini MISTI, Big Shot
Click Preferred Retailers List
Save to Pinterest!
Visit our Website and Blog!
Sign up for our Newsletter so you never miss a contest or giveaway!





