
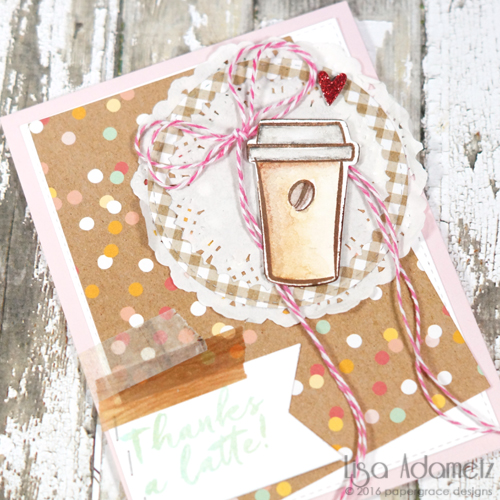
Hi crafty friends! Lisa on the blog to share a fun Thank You card. A Thank You card is always appropriate and when you make one that uses so many fun elements like this one does, it’s sure to bring a smile.
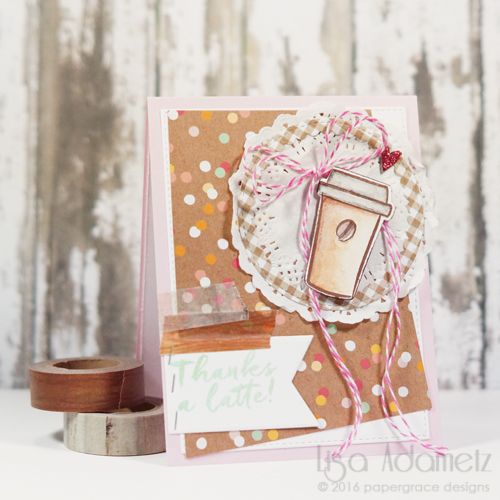
(sentiment reads: “Thanks a Latte” )
Most of my elements were pre-cut utilizing dies. I find that dies make card making a lot more fun and can really be unique IF you think outside the box a little.
I first stamped my coffee cup with an archival ink and water-colored it using water-color pencils. Then a die was used to cut it out. (Please note: All the other pieces were die cut in advance to make assembly easier.)
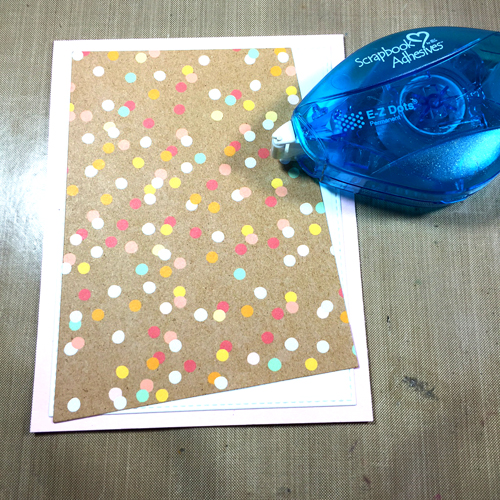
Since my paper was already die cut I’m ready to assemble:
Using the E-Z Dots® Permanent Refillable adhesive on the back of the white die-cut card stock and the patterned paper the layers are built up on the card base. I like this adhesive a lot because if I make a mistake I can move it right after adhering, but then it becomes permanent.
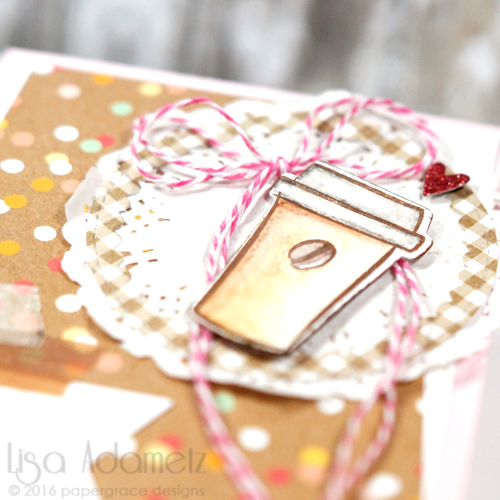
Next, I wanted to adhere this very thin die-cut ring to a paper doily. Well, Scrapbook Adhesives by 3L® has the perfect adhesive for that! The new E-Z Runner® Micro Refillable Dispenser. It’s soooooo thin! Only .08″ wide and perfect for circles.
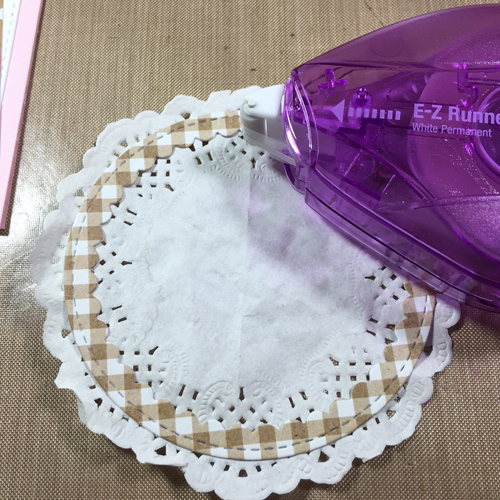
On the backside of the doily (where the ring of the die-cut paper shows from underneath) I laid down a thin bead of glue using the Dual Tip Glue Pen and adhered into place.
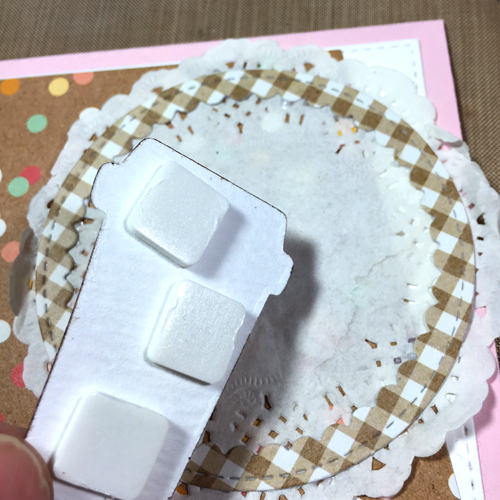
I knew I wanted to add dimension to the coffee cup, so I added 3D Foam Squares -White, Regular to the back of the cup.
Before taking off the liner paper and adhering the coffee cup, though, I wanted to add a little feminine bow.
Using the Twine in Pink I doubled up a length of twine and tied it in a bow, making sure the bows are relatively even and trimming the ends. Secure the bow to the doily using a Adhesive Dots Medium.
To give the bow some stability and to keep it from “flopping” my favorite trick is to dip my fingers in the Art Medium and run my fingers over the bows. It truly will help the bow stiffen up without making it look crazy. 😉 Just wash your hands as soon as possible.
Now is the PERFECT time to adhere that coffee cup, too! 🙂
Stamp the sentiment, find the placement, and add some of Tissue Tape as an embellishment.
I had a tiny cup of die-cut glitter hearts so I added one using a tiny piece of a 3D Foam Squares Black, Small. I love the extra added touch of bling.
Here are a few close-ups:
One more….
I hope you enjoyed today’s card. I’m going add a Starbucks gift card to this and give it to a very special friend of mine. I hope she likes it!
Have a wonderful weekend.
SUPPLIES by Scrapbook Adhesives by 3L®:
E-Z Dots® Permanent Refillable Dispenser
E-Z Runner® Micro Refillable Dispenser
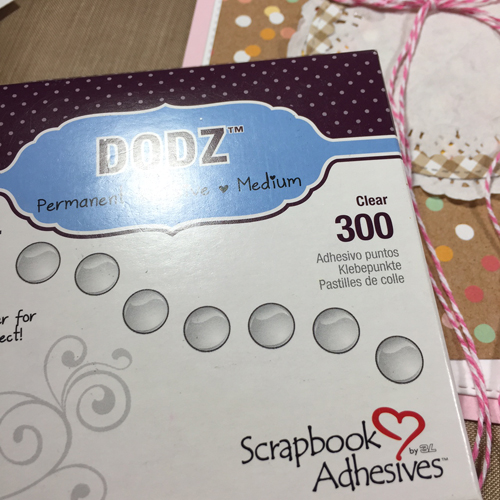
Adhesive Dots Medium
3D Foam Squares – White, Regular
3D Foam Squares – Small, Black
HomeHobby by 3L Dual Tip Glue Pen
Others:
Stamp, Sentiment, Die: Ellen Hutson, LLC
Dies: My Favorite Things Die-Namics, Papertrey Ink, Pretty Pink Posh
Patterned Paper: Pebbles
Cardstock: Neenah, My Favorite Things
Ink: Memento, Ranger. Watercolor Pencils: Faber-Castell
Embellishments: Wilton

Visit our Website and Blog!
Sign up for our Newsletter so you never miss a contest or giveaway!


By ~amy~ May 28, 2016 - 6:20 am
This is beautiful! I’ve shared it on the Coffee Loving Papercrafters FB page:)