
Hi friends! Dana Tatar here today sharing a dimensional album cover that I created using the 3D Foam Creative Embellishment Kit. I love stained glass and I was able to mimic that beautiful art form with die-cut 3D Foam Creative Sheet, Foil, and some colorful glittered flock.
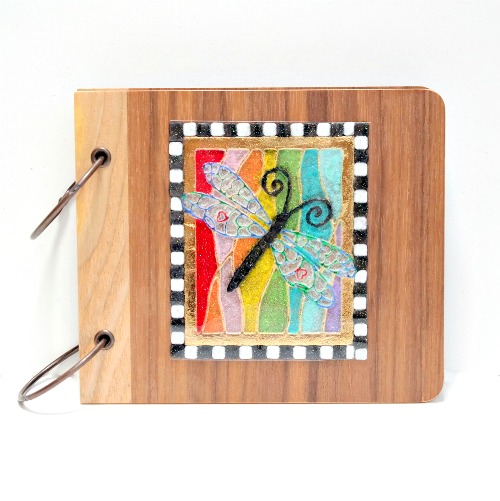
I am so excited to share this process today! The metallic foil and touch of glitter in the flock catches the light just like stained glass. The color really pops off the matte wood album cover. If you’re looking to create a special gift, this technique is sure to impress.
Create a Foiled 3D Dragonfly Embellishment
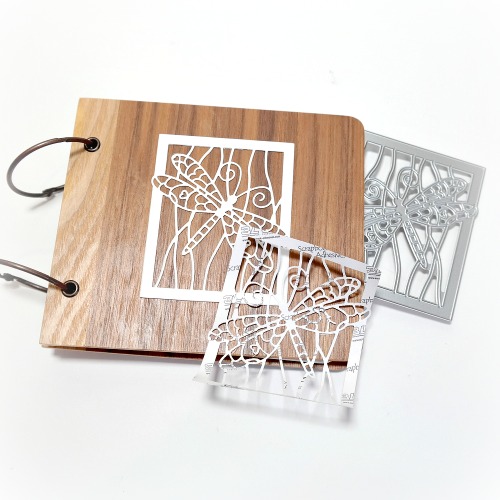
To begin, die-cut a piece of 3D Foam Creative Sheet with a decorative dragonfly metal die. Next, remove the liner and press the 3D die-cut onto the album cover. For now, leave the protective top liner on the die-cut. I selected an open design so that I could fill in the white space with a lot of color.
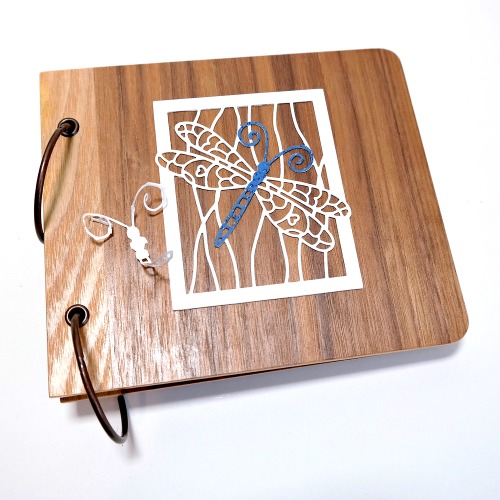
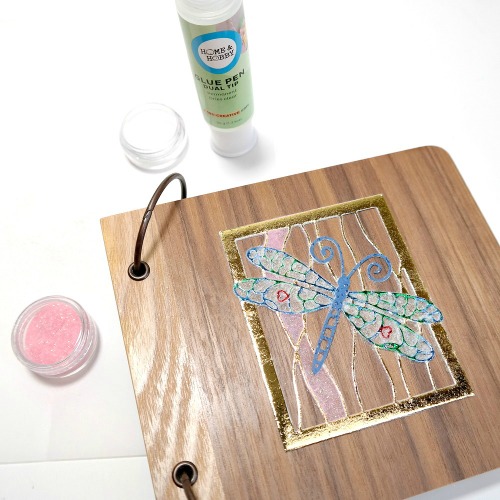
Use a pair of scissors to cut the liner around the dragonfly from the rest of the die-cut. Then, use the metal die to cut a dragonfly body from scrap paper. Carefully remove the liner from the dragonfly body and cover with the scrap paper. Any type of scrap paper with work for this step.
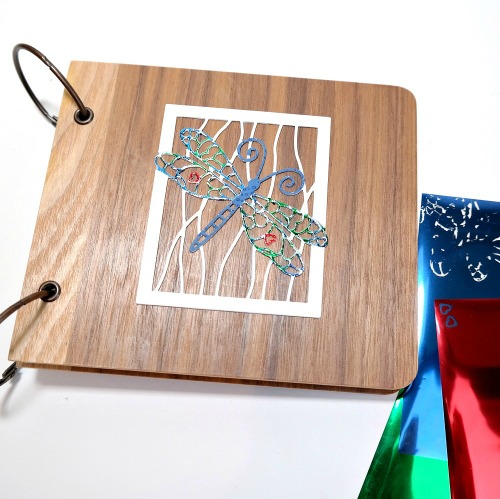
Cut and peel away the liner on the dragonfly wings. Place the foil, colored side up, over the adhesive and then gently rub to transfer the foil. I used a mix of green and blue foil for the wings. There were two small hearts on the lower wings that I covered with red foil.
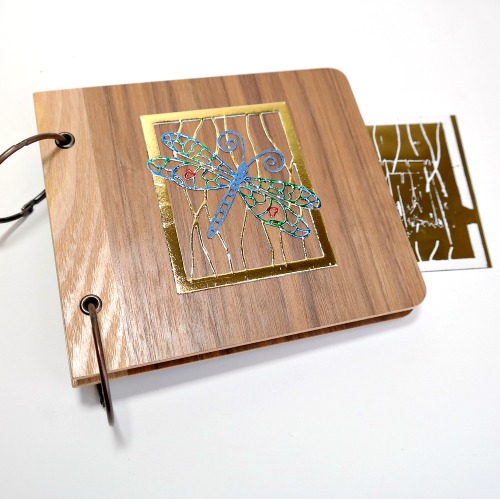
Peel away the remaining liner from the foam die-cut. Place the gold foil sheet over the adhesive and gently rub to transfer the foil to the die-cut.
How to Create a Stained Glass Effect
Apply Dual Tip Glue Pen to one vertical section of the die-cut around the dragonfly. Sprinkle on a layer of colored flock and let dry. Continue to fill in the background with different colors of flock. Apply white flock in the open space of the dragonfly wings. Fill in the open space on the dragonfly body with black flock.
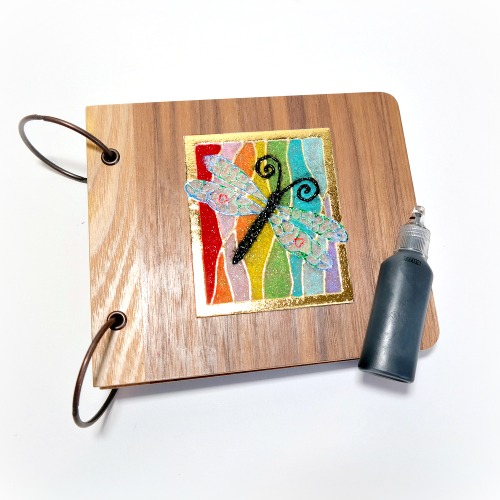
Outline the dragonfly body with black puffy paint. This step will cover the piece of scrap paper applied previously and also add more dimension to the design.
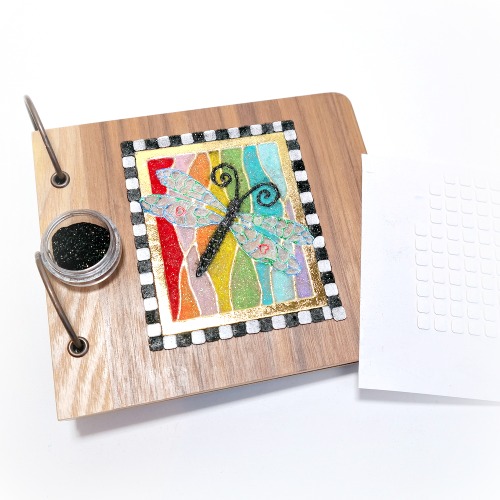
Apply a border of Thin 3D Foam Squares around the dragonfly die-cut. Peel off the liner from every other square and sprinkle black flock onto the adhesive. (The regular 3D Foam Squares are twice as thick.)
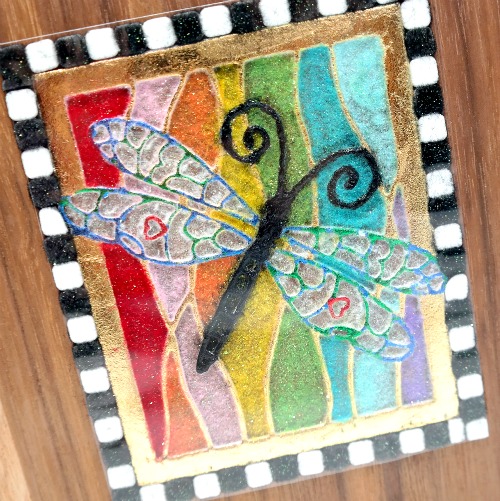
Peel the liners from the remaining white squares and place a sheet of window plastic onto the adhesive. The window plastic helps this embellishment to feel like glass and also acts as a protective layer.
Thanks for stopping by today!
~Dana Tatar
Scrapbook Adhesives by 3L Supplies:
3D Foam Creative Embellishment Kit
Thin 3D Foam Squares Self-Adhesive White Mix
HomeHobby by 3L®:
Dual Tip Glue Pen
Other Supplies:
Wood Cover Mini Album; Dragonfly Frame Creative Die (Penny Black); Window Plastic (JudiKins); Glittered Flock; Black Puffy Paint