
What is one thing you look to achieve as you are designing a scrapbook layout? Of course, there are the memories being captured and the photos shining, but when you go beyond that, what’s your design goal. For me, it’s always to add a unique touch to my layout, a clever twist that the audience perhaps hasn’t seen before! Today I am sharing how I used the Keepsake Envelopes to accomplish that goal. Check them out on this beach vacation layout where I turned Keepsake Envelopes into a Sunshine Shaker.
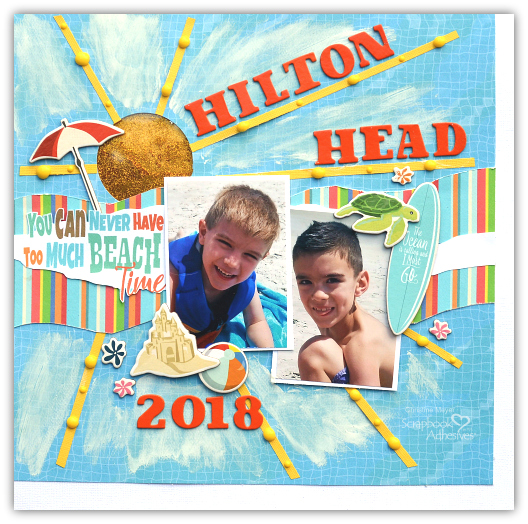
Shaker Elements can add a touch of whimsy to a layout. In this case, I created my photo block and the central focus of my layout but knew I needed something extra to really make my layout stand out. I used a circle cutter and just cut out a small circle.
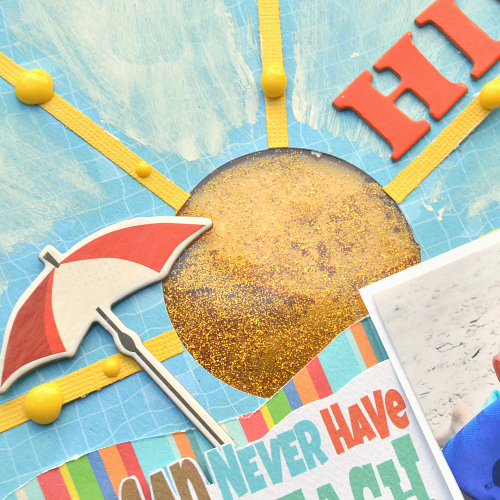
After I cut the circle I backed it with a Keepsake Envelope. I backed the Keepsake Envelope with Yellow Cardstock (the same one that I used for my sun rays) and filled it with golden glitter. I secured it to the back of my layout using my E-Z Runner Grand. It’s not as complicated as it sounds in writing! Check out my full process video for a quick walk thru of it:
Shaker Element Process Video
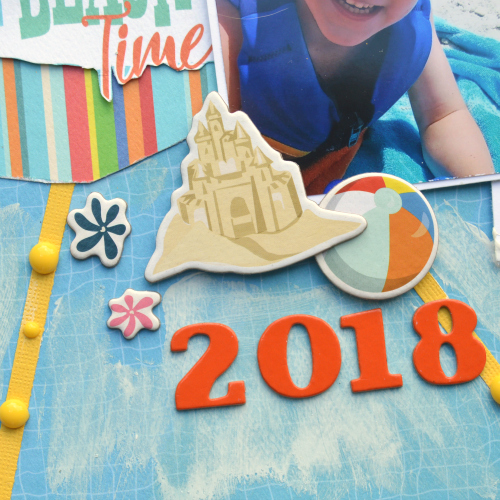
Beyond the Keepsake Envelopes, I used a couple additional adhesives to really pull this layout together. My Dual Tip Glue Pen secures all my sun rays. Additionally, I made my chipboard elements and my photos pop up a little bit more using Crafty Foam Tape and 3D Foam Squares. Of course, you’d be hard pressed to find me creating without my E-Z Runner Grand close at hand – that is my go-to piece most days!
Thanks so much for joining me today – be sure to share with us if you create a Shaker Element on your Scrapbook Layouts – we’d love to see your twist on it!
Creative Time: 45 minutes
Skill Level: Intermediate Level
Materials Needed:
Scrapbook Adhesives by 3L®:
E-Z Runner® Grand Refillable Dispenser
3D Foam Squares Mixed
Keepsake Envelopes
Crafty Foam Tape
HomeHobby by 3L®:
Dual Tip Glue Pen
Other Supplies: Flavors of the Month Kit from The ScrapRoom