
Hi, everyone! Rainbows are very popular these days when it comes to fashion and home decor. They grace everything from T-shirts to coffee cups to posters.
Teri here with a cool way to make your own trendy rainbow wall hanging. This project is easy to recreate and won’t break your bank.
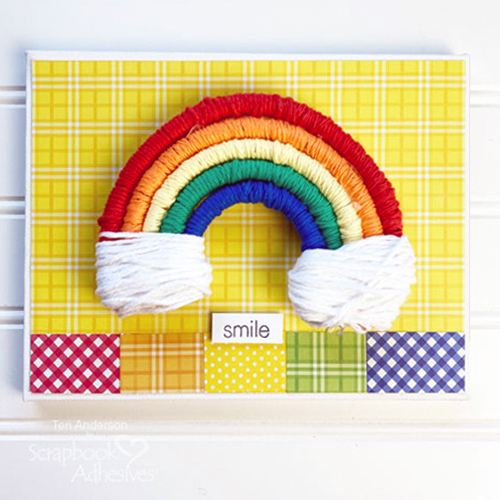
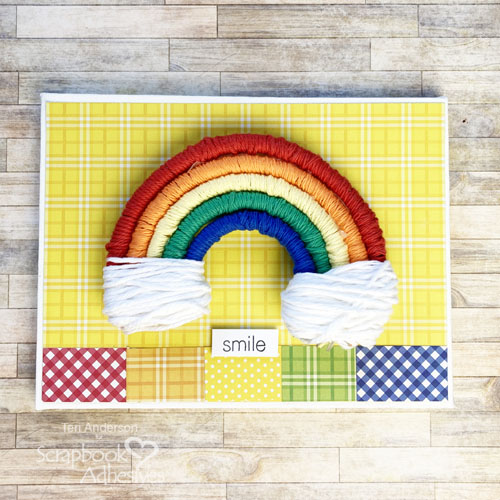
Rainbow with Yarn and Tubing
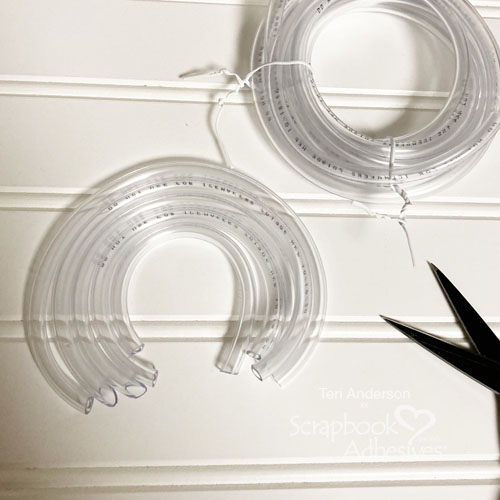
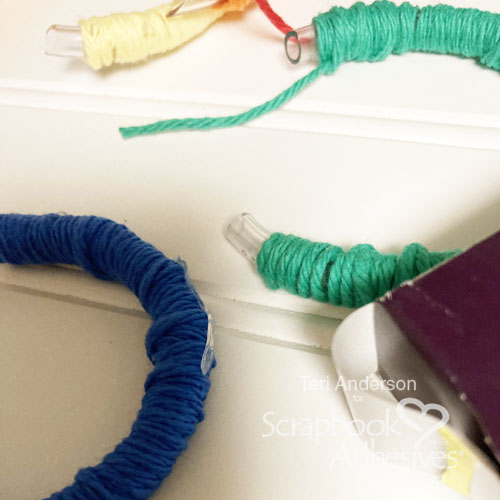
Start by cutting five rings for your rainbow from clear vinyl tubing. Where do you find tubing? Try your local hardware store in the plumbing department. I found a variety of sizes at my local store.
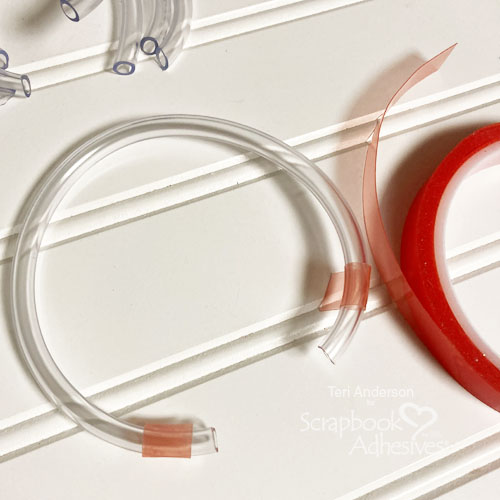
Take Extreme-Double Sided Tape and wrap a little on each end of your rainbow rings.
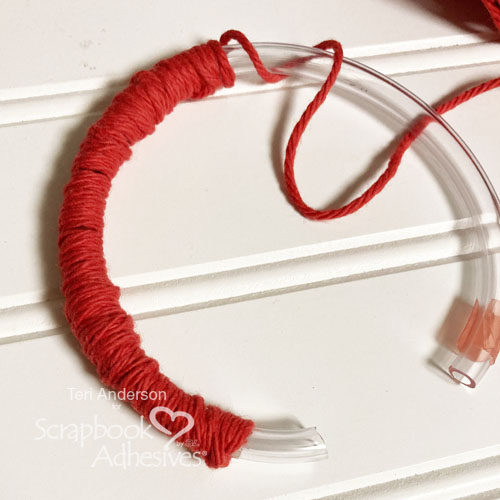
Take the yarn and wrap it around each of the rings. Be sure to knot the end of your yarn when you reach the end of each ring!
Use Adhesive Lines to bring together and connect your rings. Be sure to use your hands to reach squeeze the rings so they connect.
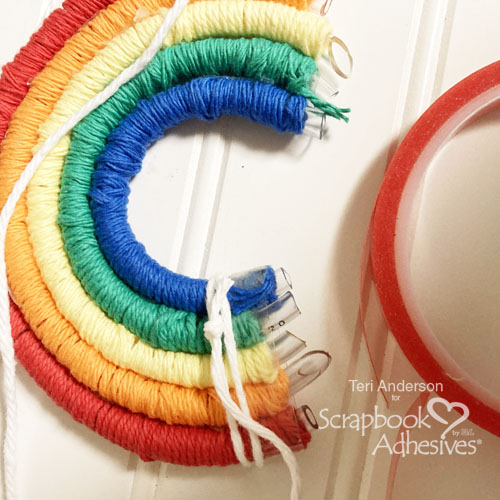
Take some additional Extreme-Double Sized Tape and wrap a little at the ends of your rainbow. Trim any excess tubing with your scissors. Then wrap white yarn around both ends of your rainbow to mimic the look of clouds.
Decorating the Base and Assembly
Once you have your rainbow, you are going to add it to a base. For my base, I’m using a canvas. A piece of wood would work too.
Cover your base with patterned paper. Use one piece or several.
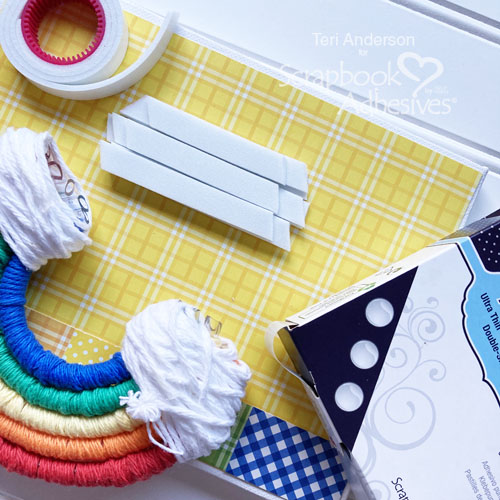
Stack three layers of Crafty Foam Tape on the base. Add several Adhesive Dots along the back of your rainbow.
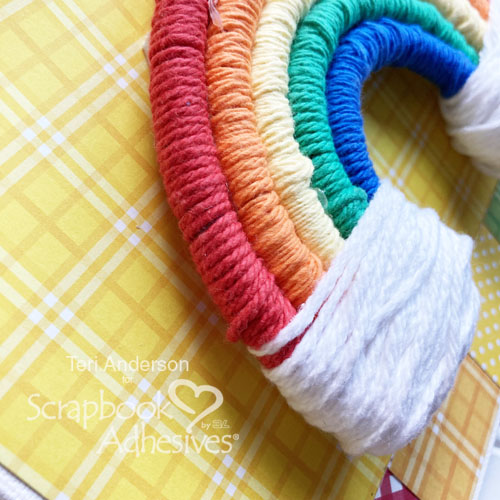
Adhere the rainbow to your base. Also, stamp a sentiment or inspirational word on a strip of cardstock and mount it on your base.
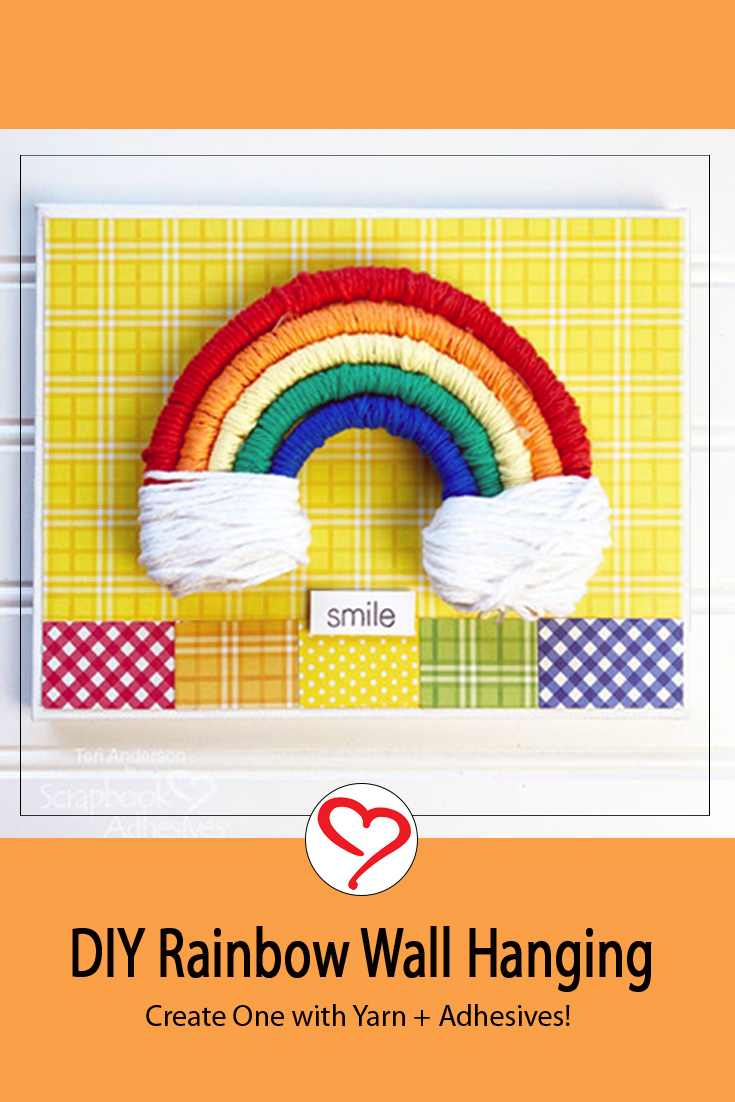
The end result is a fun wall hanging to put in your craft room or office or on the wall of a child’s room (or your own)!

If you are inspired to make your own rainbow wall hanging, I’d love to see it! Be sure to leave a link for me so I can take a look!
Happy creating!
Teri Anderson
Creative Time: 90 Minutes
Skill Level: Intermediate
Materials Needed
Scrapbook Adhesives by 3L®
- Adhesive Dots Medium Ultra Thin
- Adhesive Lines
- E-Z Runner® Permanent Strips Refillable Dispenser
- Crafty Foam Tape White
HomeHobby™ by 3L
Other
White Cardstock: Neenah Paper; Patterned Papers: Jillibean Soup (All about Dots Paper Pad, All About Plaid Paper Pad); Stamps: Lawn Fawn (So Much to Say Stamp Set); Clear Vinyl Tubing: Everbuilt; Black Ink Pad: Ranger Ink; Yarns: Spinrite; Canvas: Dollar Tree
Save to Pinterest!
Visit our Website and Blog!
Sign up for our Newsletter so you never miss a contest or giveaway!


By Joy Ott January 23, 2021 - 4:15 pm
This is awesome, Teri!