
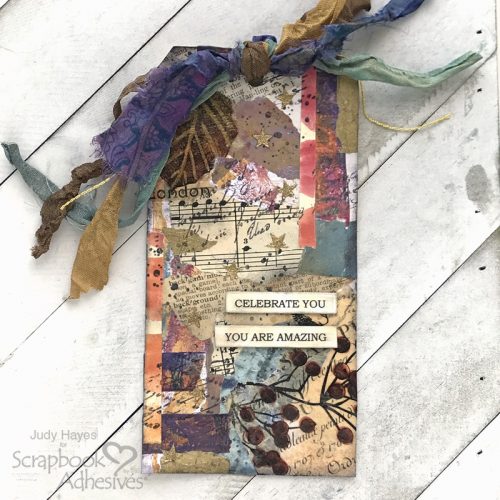
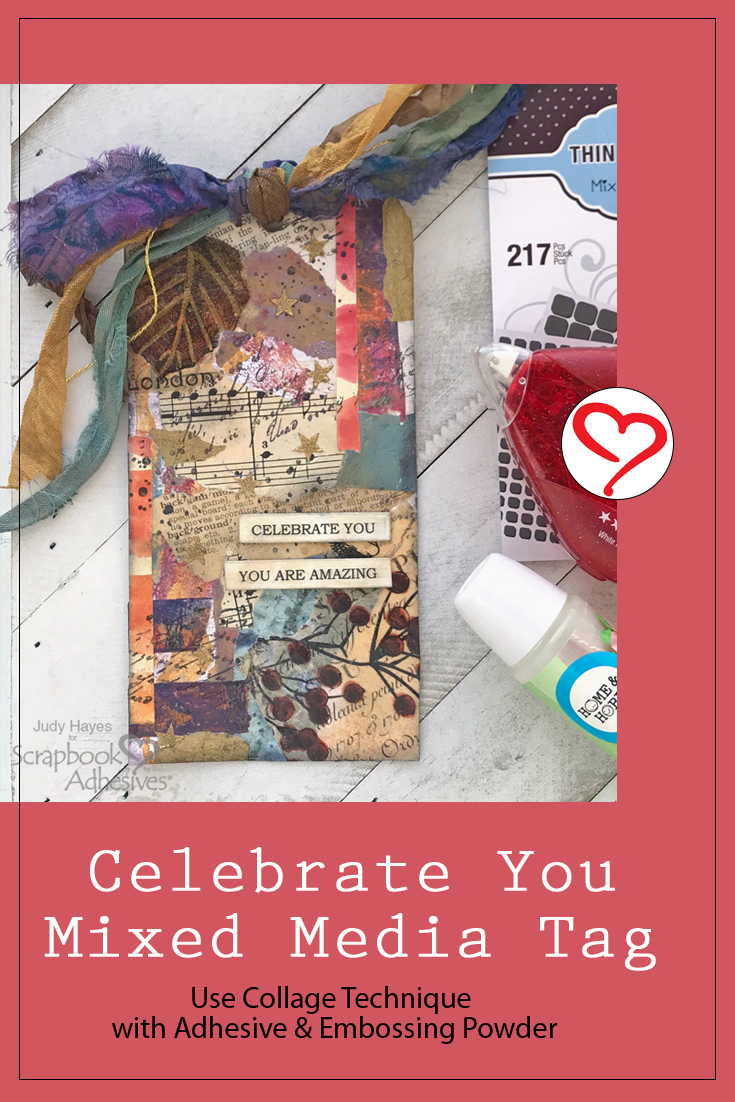
Hello friends! Have you tried collage? Today, I have a Mixed Media Collage Tag to show you. I admit I was intimidated by collage the first time I tried it. Now, I enjoy it. To start I choose a palette of papers and ephemera. Once the background is done, the fun starts with embellishing with stamping or adding embossed stars as I did on this tag. It’s often the little details that pull the collage together.
Collage Tag Prep
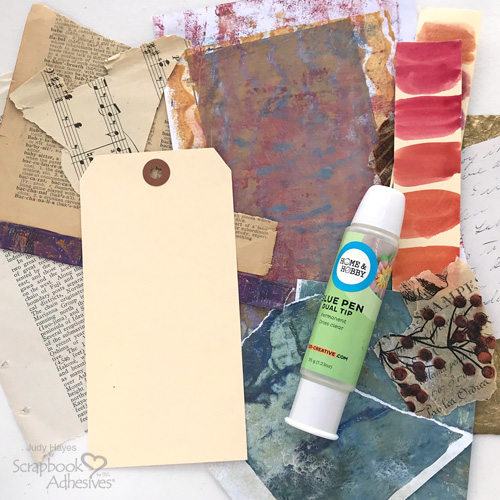
Start with a #8 tag or tag or your choice. Then choose an assortment of papers including gel press prints, old music, old book pages, tissue paper, painted color swatch, painted papers or patterned papers.
Assemble Background
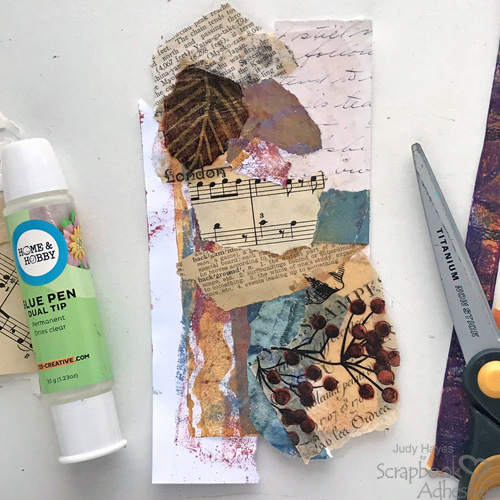
Start by tearing papers to the desired size and adhere to the tag with the Dual Tip Glue Pen. Continue to add torn bits of paper lapping and create layers until the tag is covered. As the photo shows, layers can extend beyond the tag edge. Turn over the tag and cut edges flush with the tag edge.
Designer’s Tip: I started glued the papers from the bottom left piece and then added a piece at the top right before filling in the rest.
Use hole paper punch to punch hole from backside through original tag hole. Allow collage to dry or dry with heat tool.
Stamp over Collage
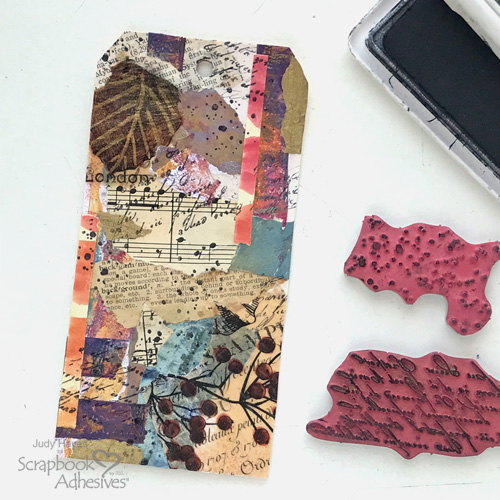
Stamp script and speckles images over collage using black permanent ink to give more interest to the tag.
Wear Your Adhesive on the Outside with Stars
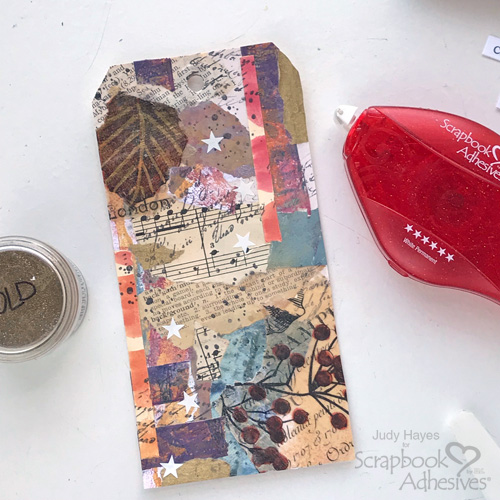
Randomly apply adhesive stars with E-Z Runner® Stars Refillable Dispenser on the tag. Then cover the stars with gold embossing powder, press to secure, and remove excess. Use a soft brush to take off the powder. Next, melt the powder with a heating tool. The stars do not loose their shapes – love it!
Sentiment Strips
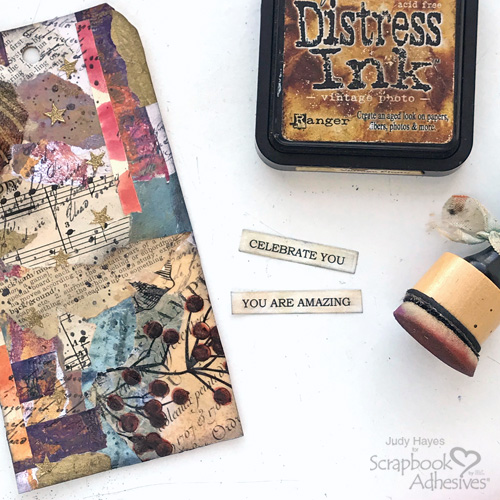
Use computer and printer to print verses in black on white cardstock. Cut into narrow strips. Use a foam applicator to sponge on Vintage Photo ink over verses and then sponge the edges with black ink.
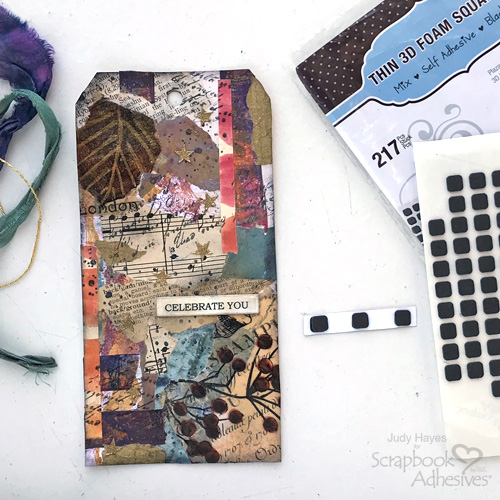
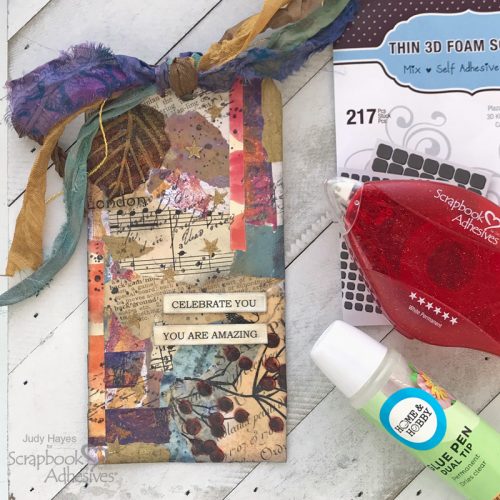
Place small Thin 3D Foam Squares Black Mix to the back of the verses, remove the liners and attach them to the tag. Thread several coordinating ribbons to the tag opening and tie.

By the way, I often use a tag in place of a card and write on the back. Something a little different but still has that personal touch! Hope you enjoyed this Celebrate You Collage Tag.
Thanks for Visiting!
Judy Hayes
Creative Time: 30 Minutes
Skill Level: Intermediate
Materials Needed
Scrapbook Adhesives by 3L®
HomeHobby™ by 3L
Other Supplies: Assorted Papers for Collage (gel printed, old book pages, tissue paper, old music, painted paper, etc); Ranger #8 Tag, Distress Ink(Vintage Photo), Archival Ink (Black Soot), Gold Embossing Powder; Stampers Anonymous Tim Holtz Stamp set (The Poinsettia); Tim Holtz Tissue Paper; Seam Binding, Sari Ribbon, Gold Cord; Computer Printed Verses
Save it to Pinterest!
Visit our Website and Blog!
Sign up for our Newsletter so you never miss a contest or giveaway!


