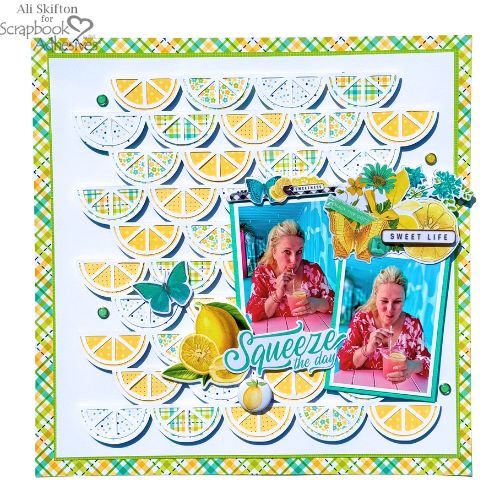
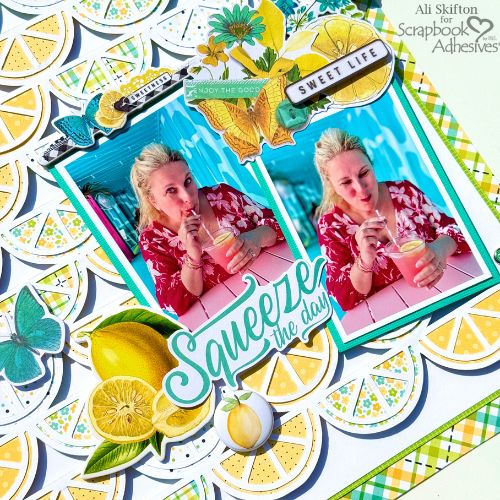
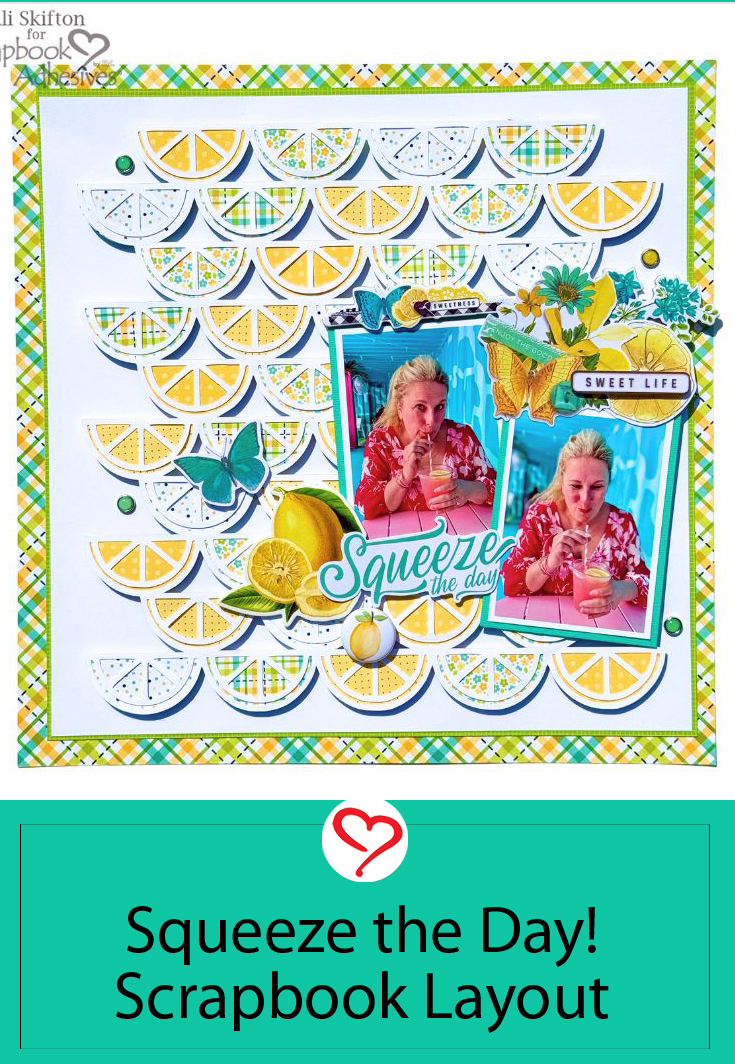
Cheers to Summer, Friends! ☀️🍋 Hey there! Ali here, and today I’m sharing a fun and fresh summer Squeeze the Day Layout inspired by my absolute favorite warm-weather drink—lemonade!
Back Story on the Squeeze the Day Layout
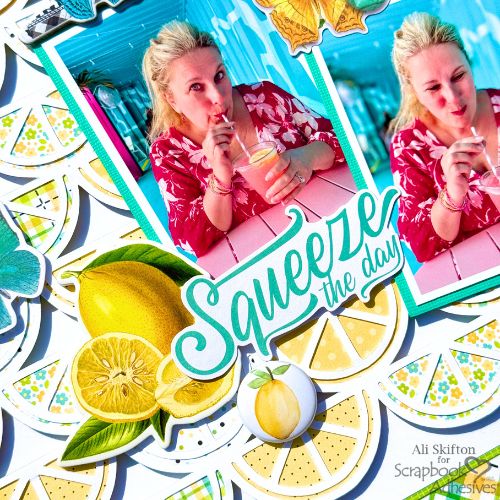
This layout is all about celebrating those sweet, zesty vibes, and it features a photo of the adorable pink lemonade I enjoyed at the Barbie Café in Chicago. It was too cute not to document!
Squeeze the Day Background
When it comes to working with intricate cut files—like these detailed lemon shapes—I always reach for my go-to adhesives:
These products made it easy to add depth and dimension to the layout without any fuss.
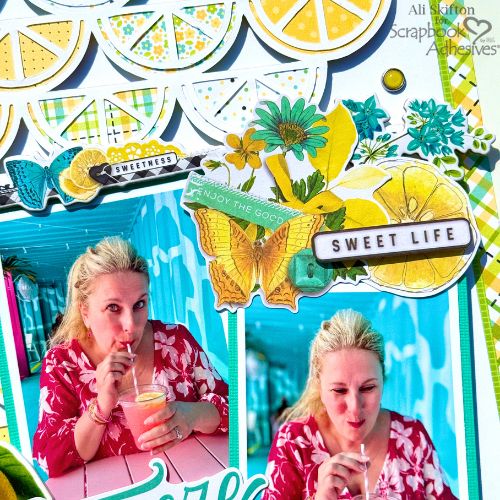
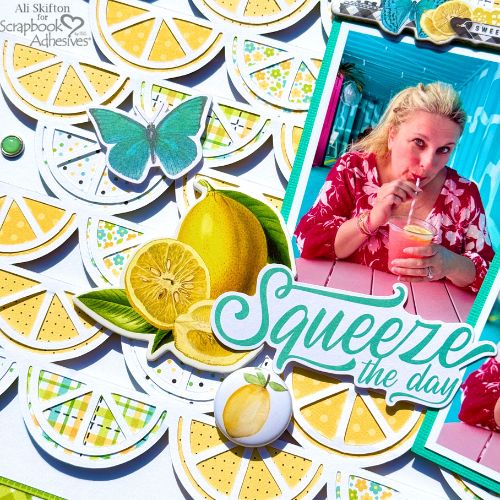
I backed the lemon cut file using the cheerful new Bee Happy collection from Doodlebug Design, and I paired it with embellishments from Simple Stories’ Simple Vintage Lemon Twist collection. The lemon foam stickers and ephemera were the perfect match for my summery photos!
Page Details
To give the cut file some lift and highlight the lemons, I used the Crafty Foam Tape White 108ft.. I also popped up a few lemon embellishments with the 3D Foam Squares White Mix, and even tucked a square behind the cute lemon flair from Scrappin Happy Studio for extra dimension. Don’t forget to make those butterflies pop off the page too!
Now tell me—who else could go for a refreshing lemonade on this hot summer day? I know I could!
Cheers to summer and sweet memories! 🍹🌞
Thanks for visiting! Ali Skifton (FunAdventuresWithAli)
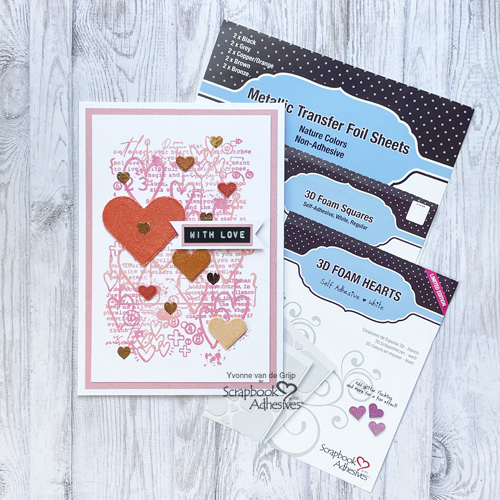
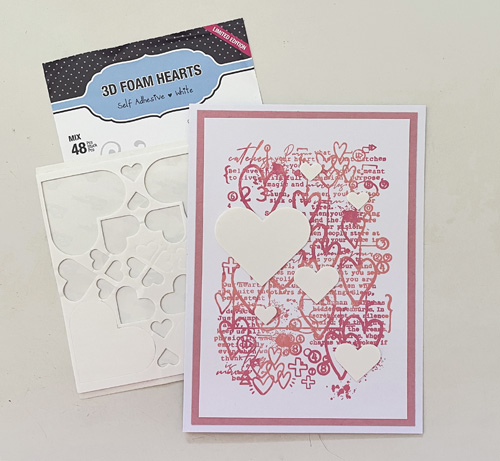
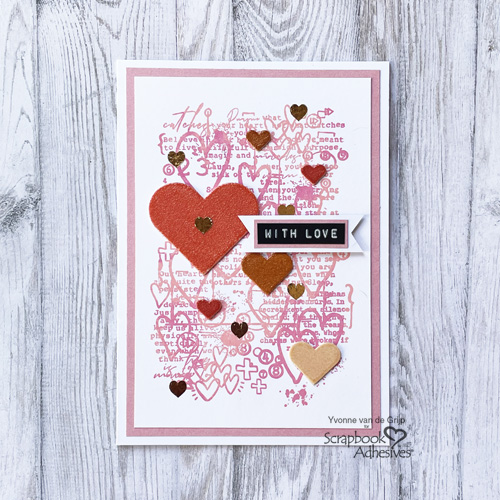
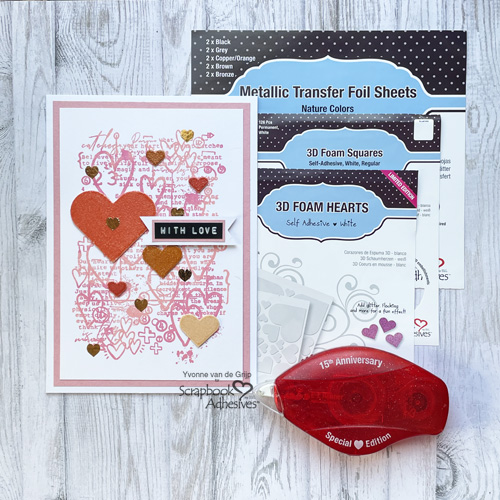
Hi everyone, Yvonne here with a tutorial for a Hearted With Love Card. This stamped, embossed and foiled card is fairly easy to make.
I would love to tell you all about how I created it. Wanna join me?
Hearted with Love Card Panel
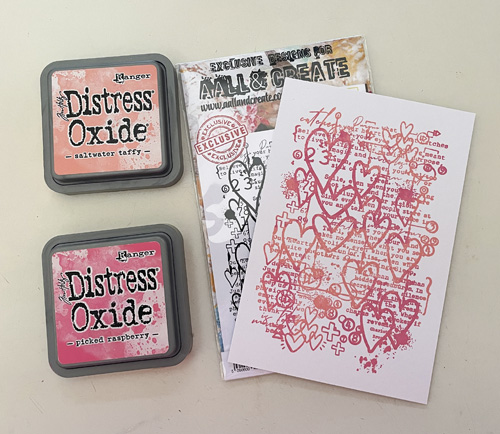
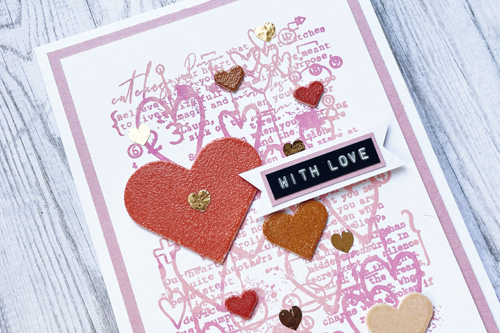
Start by inking the background stamp with two shades of ink colors on a white card panel. Trim the panel to the size you like. Mat it to a pink card panel and then to a white card base with the E-Z Runner® Permanent Strips Refillable Dispenser.
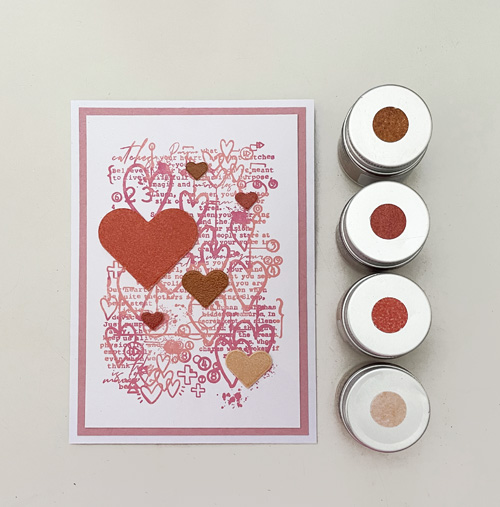
Heat Emboss the 3D Foam Hearts
Adhere some 3D Foam Hearts in different sizes on the card panel. Remove the top liners of the hearts and sprinkle several shades of embossing powder over the exposed adhesive. Rub the embossing powder to secure and tap off the excess. Use a heating tool to melt the powder. Yes, you can heat the 3D Foam Hearts! Creating embellishments with adhesives is called Wear Your Adhesive on the Outside technique.
Other: Stamp: AALL & Create (Lined Hearts); Ink & Embossing Powder: Ranger Ink (Distress® Oxide® in Old Paper and Hickory Smoke, and Distress Embossing Glaze in Crackling Campfire, Fired Brick, Rusty Hinge, and Tattered Rose); Pink and White Cardstock; Heat Tool; Dymo Label Maker; Paper Trimmer; Scissors
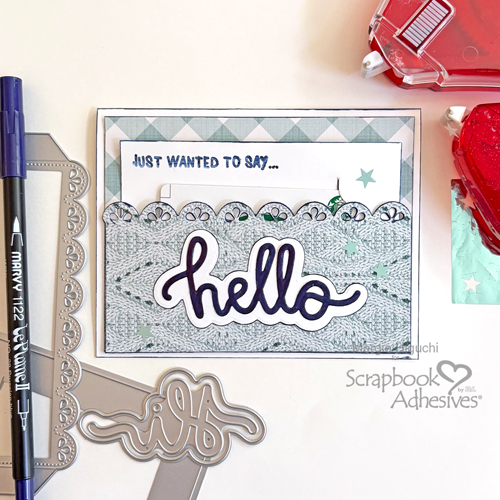
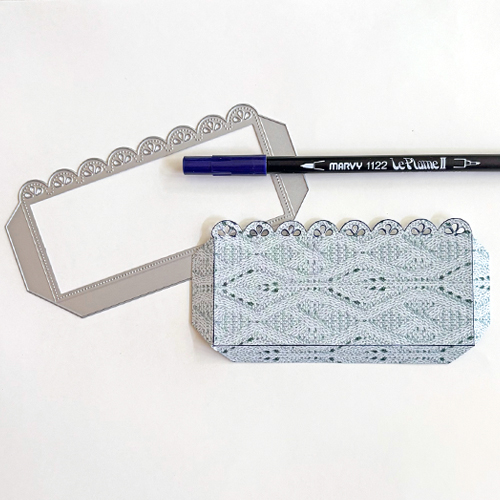
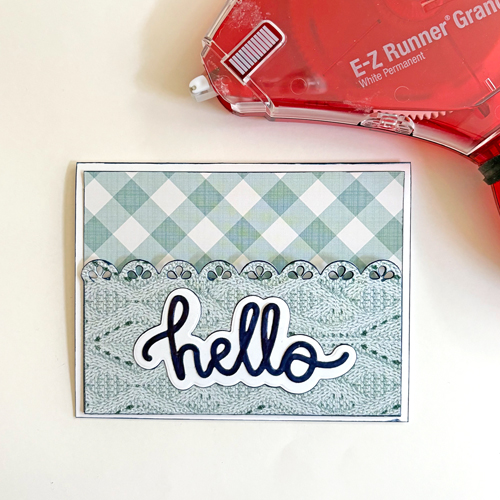
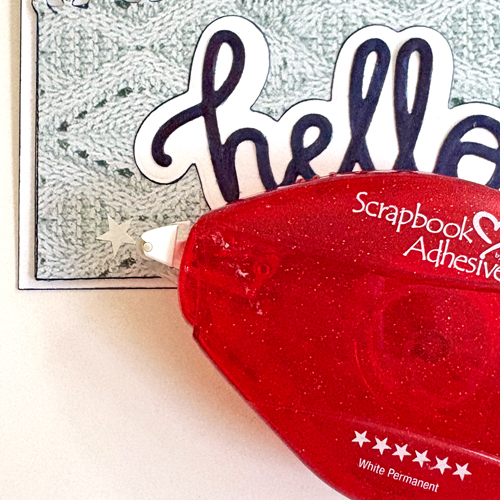
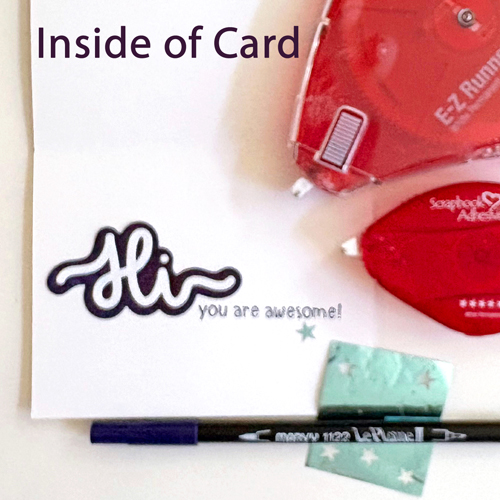
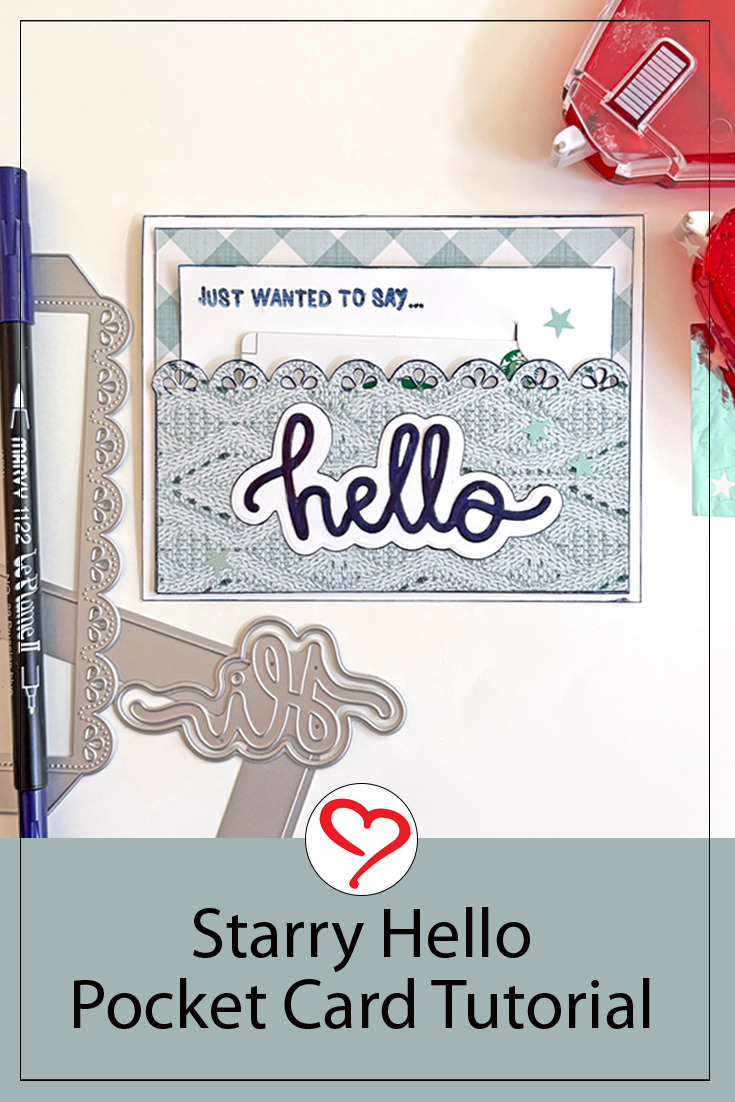
‘Tis the season for gift card giving with weddings, graduations, and showers. So I grabbed my pocket die and adhesives to see where it would take me. Hi, Margie here, and I’d like to share this sweet Starry Hello Pocket Card featuring the E-Z Runner® Stars Refillable Dispenser!
Starry Hello Card Front Pieces
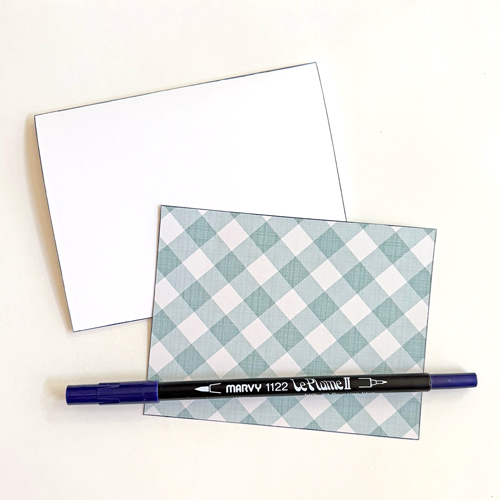
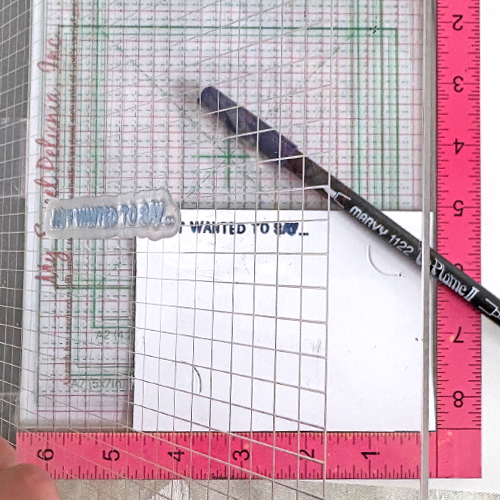
On an A2 top-fold card and a piece of 5.25 x 4-inch patterned paper, color the edges with a dark blue brush pen. Next, die-cut the horizontal pocket die with a patterned paper and repeat with coloring the edges.
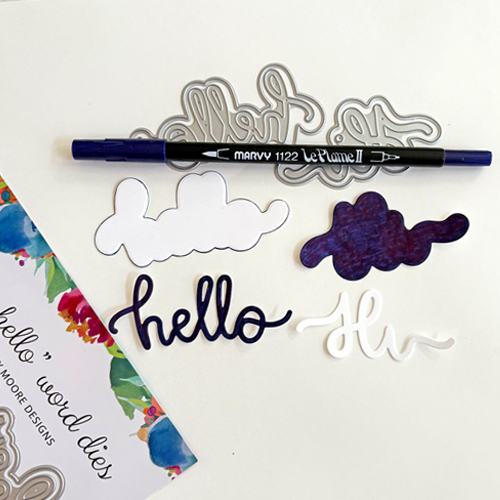
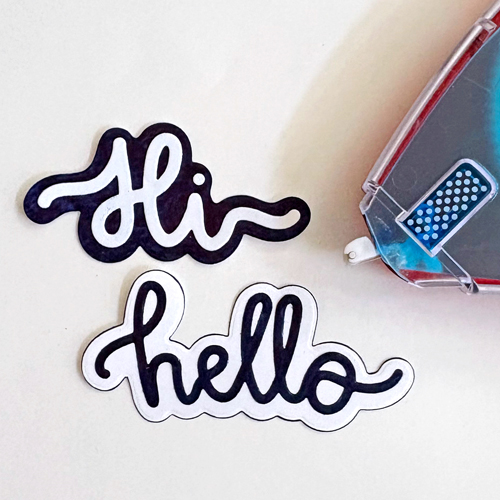
Layered Words
Not only do I want to use the Hello as a sentiment word but I also use the Hi from the same set for the inside of the card. I didn’t have a dark blue cardstock, so I decided to color white cardstock after die-cutting and color the edges of the Hello outline shape.
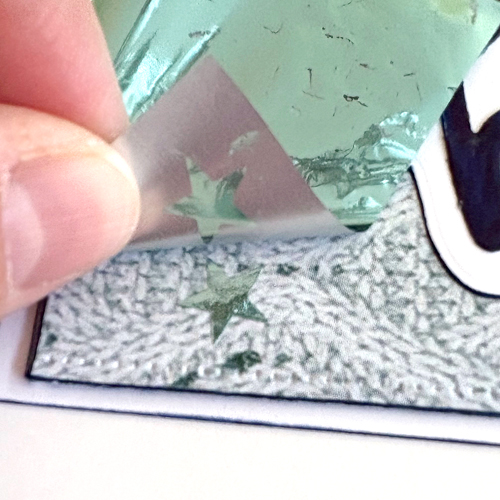
Wear Your Adhesive on the Outside with the E-Z Runner Stars
Make quick and easy star accents with this Wear Your Adhesive on the Outside technique. Randomly apply the stars from the E-Z Runner® Stars Refillable Dispenser on the card front and place the pastel blue from the Metallic Transfer Foil Sheets Pastel Colors on the stars. Make sure the foil color is facing you and rub to transfer the color to the stars. Done!
Gift Card Holder
To finish off the Starry Hello Card Front, I die-cut a gift card holder and colored the edges in the same dark blue brush pen. Then stamped a phrase with the pen. Just add the recipient’s favorite gift card and tuck it into the pocket.
Other: Papers: Memory Place (Gingham Love Collection); Craft Dies and Stamp: Emily Moore Designs (Horizontal Pocket Die, Hi, Hey, Hello Word Dies – Large Style, Gift Card Holder with a Bow Dies, and Just Wanted to Say Stamp Set); Marker: Marvy Uchida (Le Plume II in Prussian Blue); White Cardstock; Stamp Positioner, Sticky Mat and Stamp Press
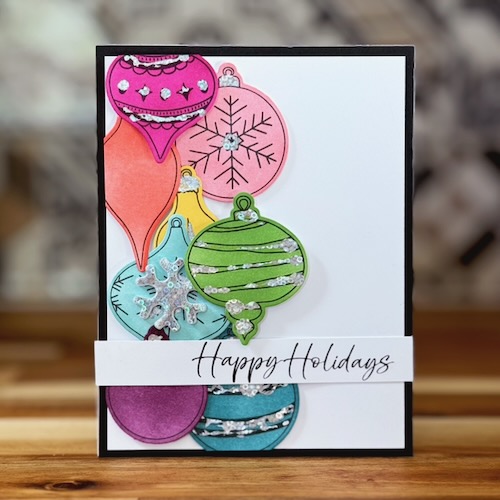
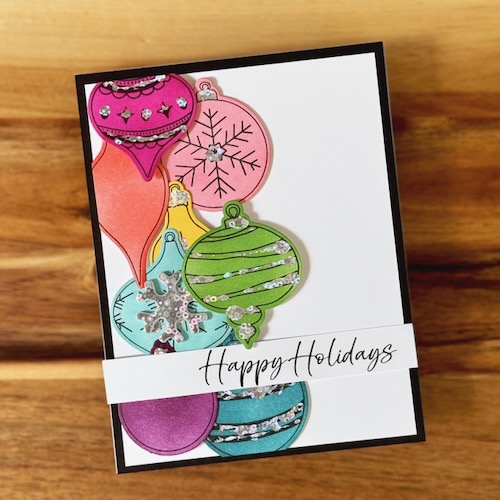
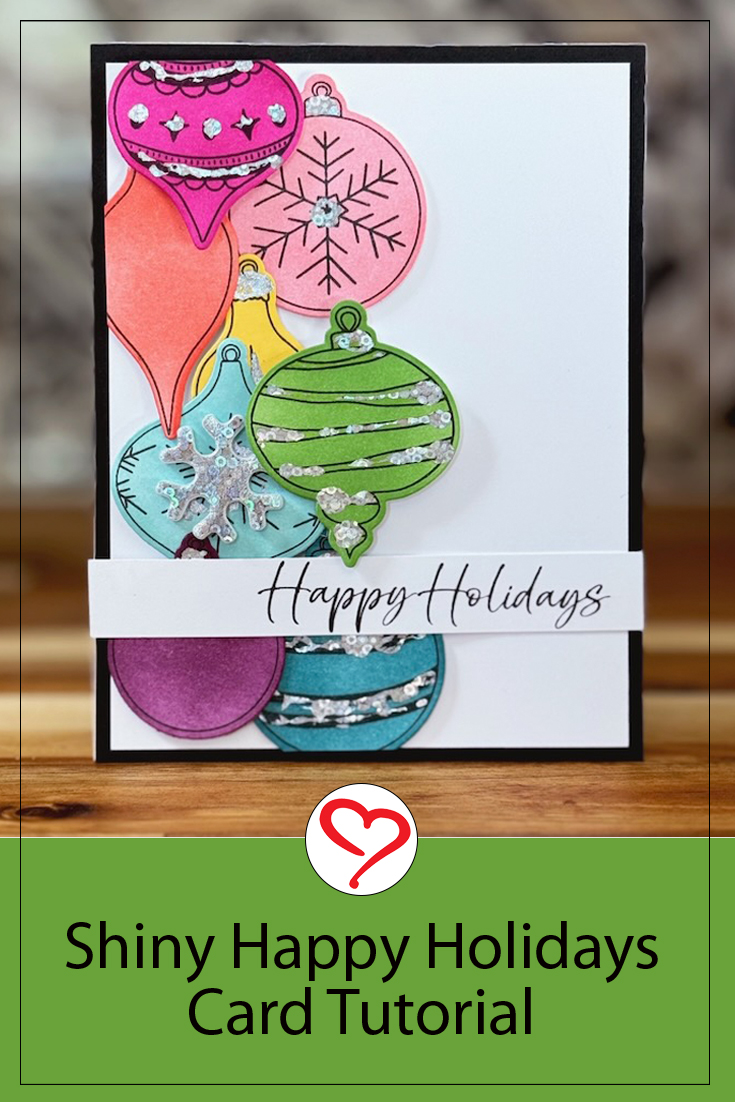
Happy Holidays in July! Hi, Jingle here today, and we are celebrating Christmas! Okay, to be honest, I don’t quite get the whole Christmas in July thing. I like Christmas in December. Call me crazy. But what I DO appreciate is having holiday cards ready to go once December rolls around. So, this is a great time to start working on that stash!
Today I have a fun technique to share with you to create dazzling Holiday Greetings using Scrapbook Adhesives by 3L Products. This design is loaded with both color and sparkle.
Elements for the Happy Holidays Card
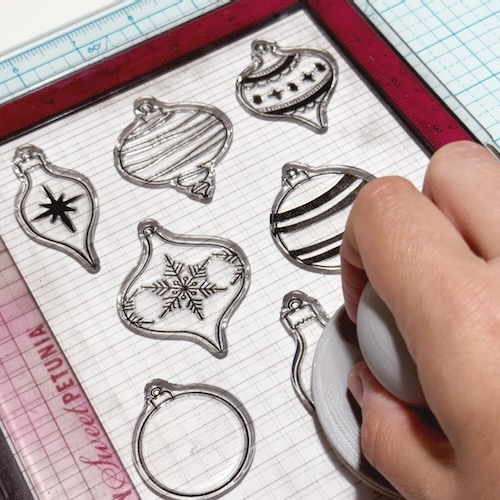
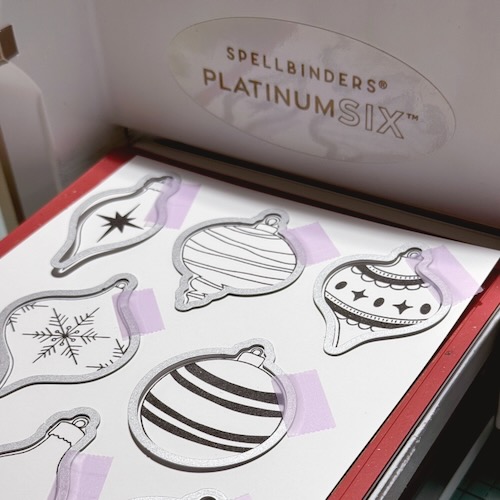
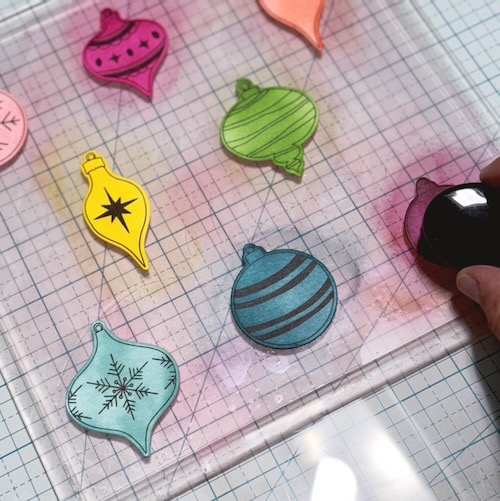
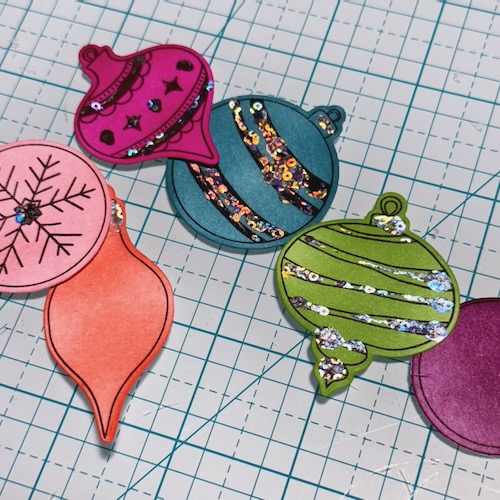
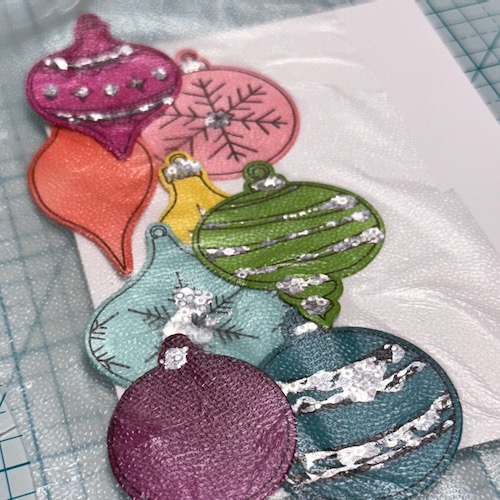
Begin by stamping with black ink and die-cutting your ornament images on white cardstock. Use a rainbow of colors to ink blend each ornament in the colors of your choosing.
Wear Your Adhesive on the Outside Technique with Dual Tip Glue Pen + Free Form Style
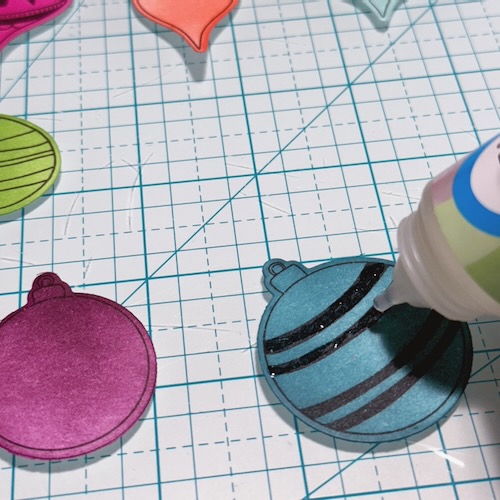
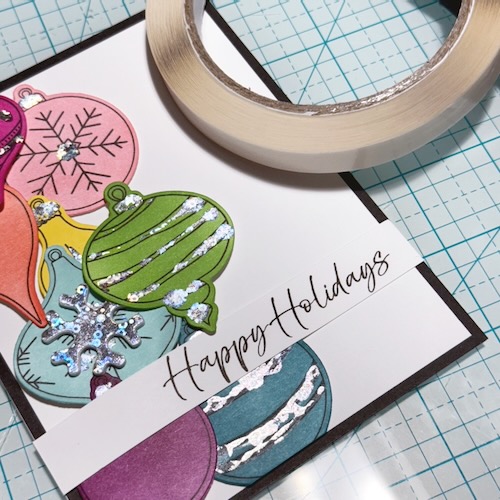
Now we get to the fun bits! Using the finer tip on the Dual Tip Glue Pen, apply it over the areas you would like to add foil accents. Do this on all of your ornaments at once. It will start to dry, but it stays nice and tacky for a bit and that is exactly what we need for this fun technique.
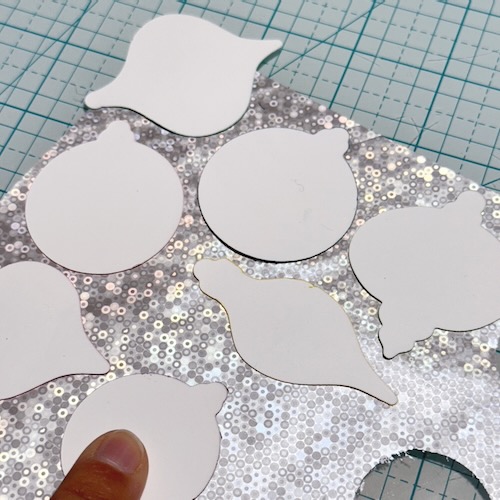
Once they are all ready, place them on the backside of your foil sheet. I used the Metallic Transfer Foil Sheets Celebrate Colors and chose a dancing silver pattern to use on my ornaments. Let the ornaments sit there for a bit and allow them to dry completely.
When they are done, you can gently remove them from the foil to see how gorgeous they look!
Assembling the Happy Holidays Card Ornaments
Arrange your ornaments in the desired placement on your card panel. Fun trick: Use Press and Seal (yup, straight from the kitchen) to hold your arrangement in place. Gently remove the full arrangement from the panel and flip over.
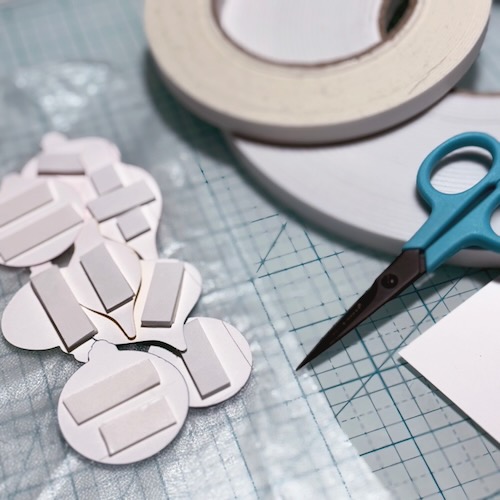
Another wonderful trick, we are going to add all kinds of dimension to our design by adding three different heights in this step. For the 2mm height, use the Crafty Foam Tape White 54ft on some ornaments. For a subtle 1mm height, add the Crafty Foam Tape White 108ft. on the others. Finally, stack another piece of the Crafty Foam Tape White 108ft. each with the Crafty Foam Tape White 54ft for your third level here for a height of 3mm! Take the backing off and, with the Press & Seal in place, adhere the ornaments to your card front.
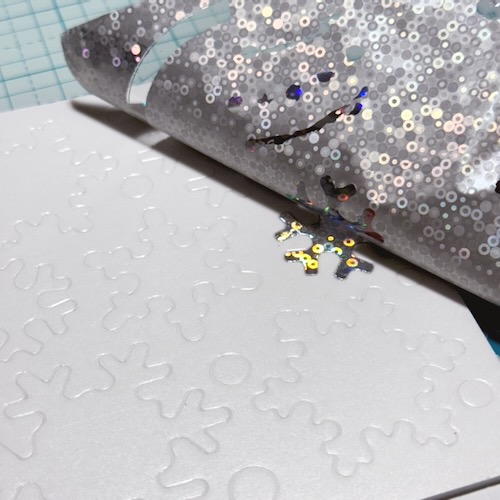
Wear Your Adhesive on the Outside with 3D Foam Snowflakes
One of my ornaments needed something, so I pulled out my packet of 3D Foam Snowflakes to add a dimensional and shiny accent. Using the same silver foil from the Metallic Transfer Foil Sheets Celebrate Colors, I removed the top liner and placed the foil (this time, color side facing you) over the exposed adhesive. Gently rub to transfer the color to the snowflake and peel it off to reveal a shiny flake! Then I adhered it right to the center of a single ornament.
Finishing Off the Card
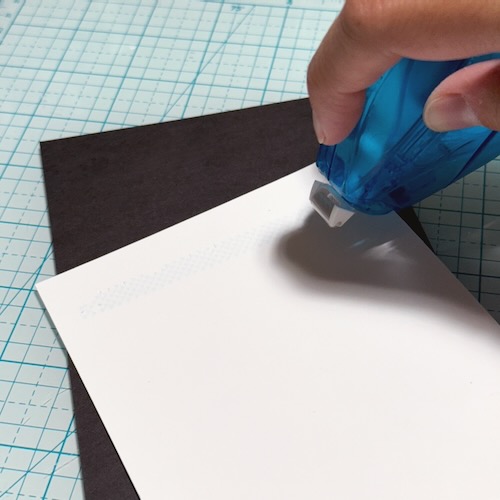
Finally, we need to assemble the panels and card base. Using my trusty E-Z Dots® Permanent Dispenser, I adhered the panel to a black panel and then added that to my card base.
Finally, I stamped the sentiment on a strip of white cardstock and used my Crafty Power Tape Polybag 81ft. (aka our tear tape) to adhere it over the full design, allowing it to move with the dimension of the raised portions and flat portions of the card.
This design is SO much fun to put together. I hope you have enjoyed this Happy Holidays Card in July tutorial, and give this technique a shot!
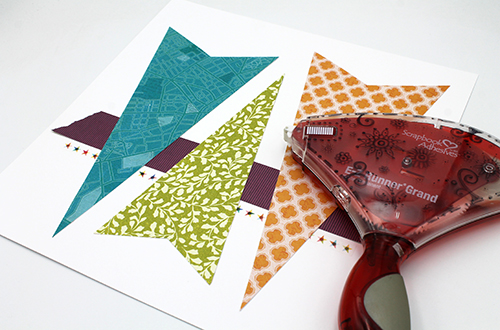
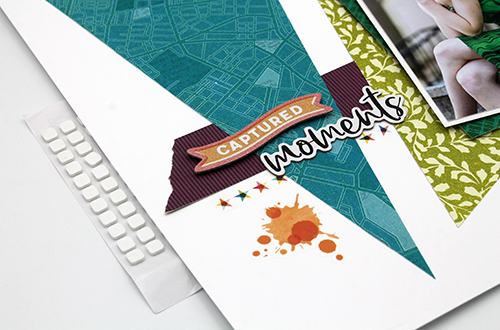
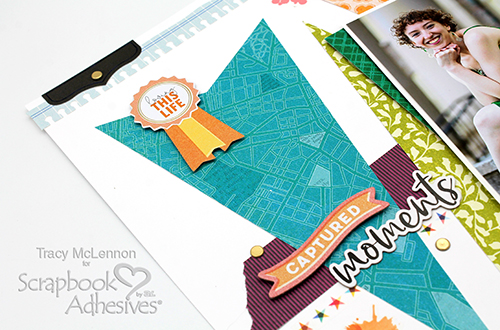
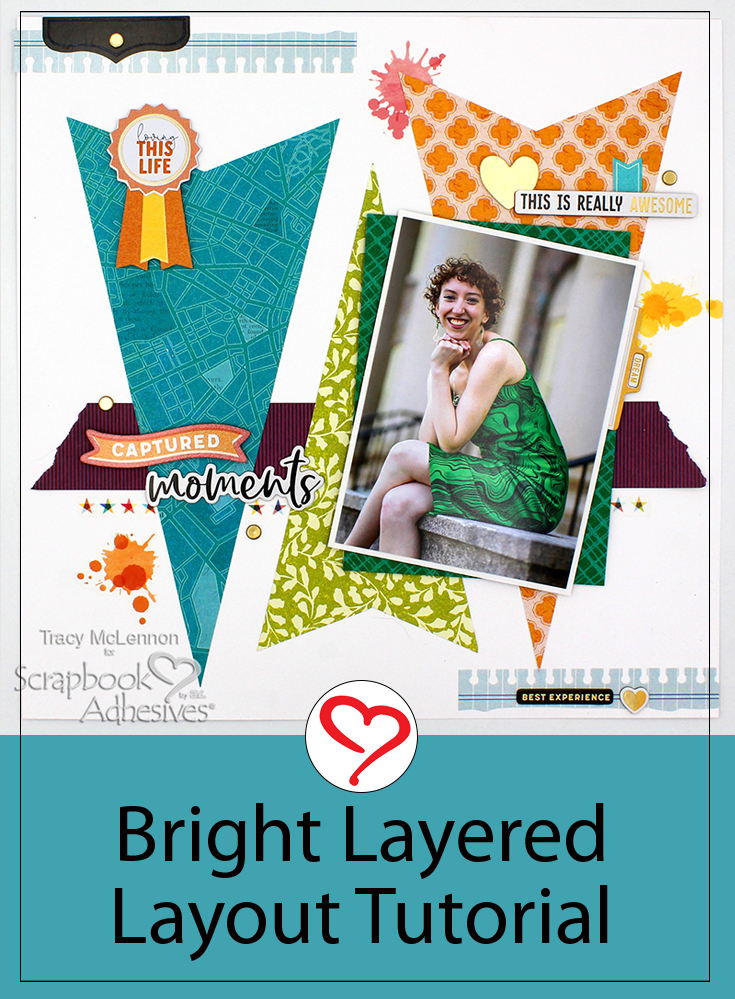
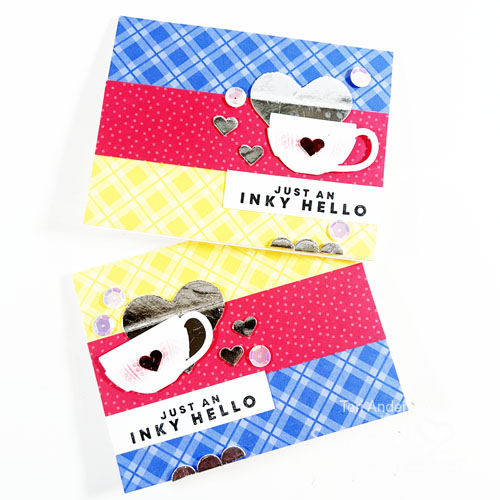
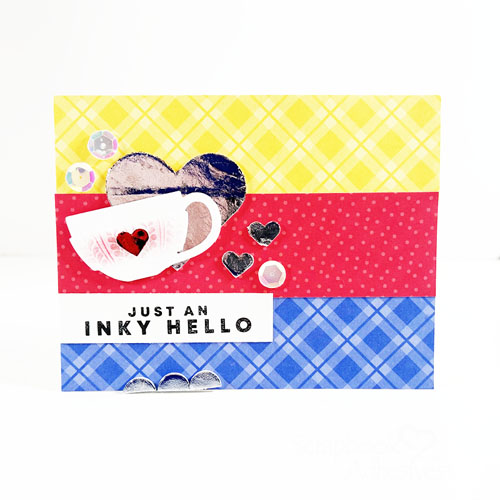
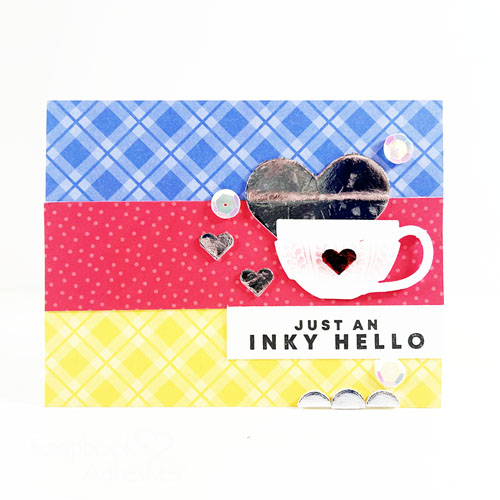
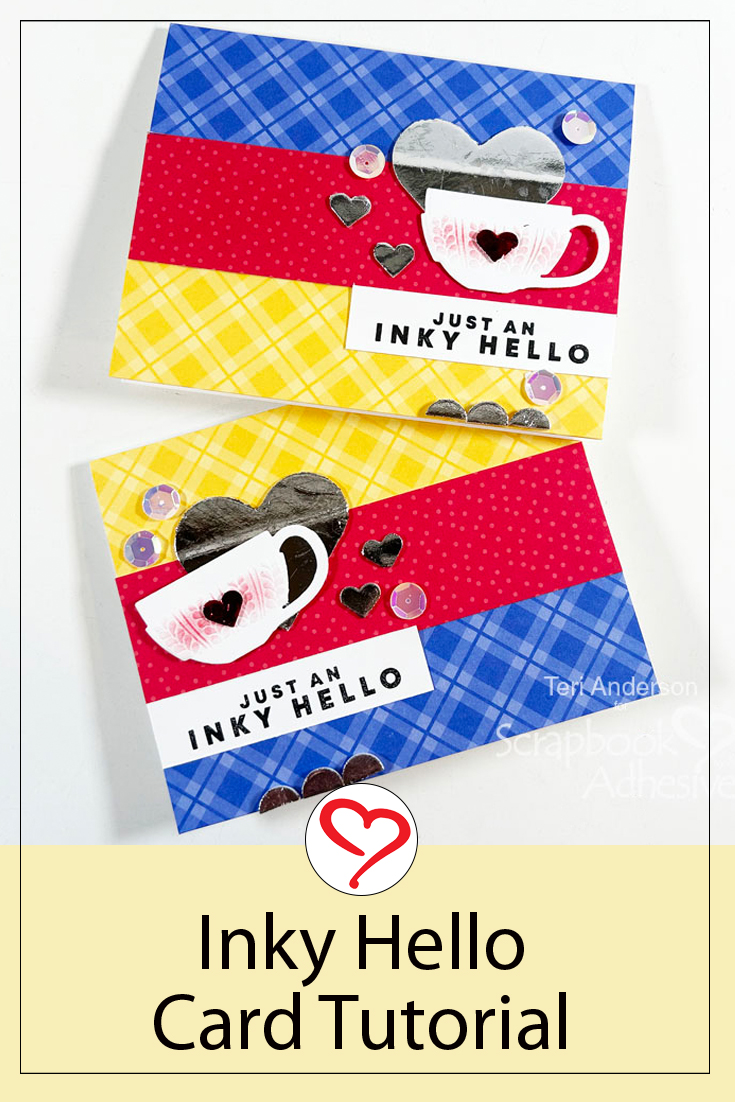
Hello scrappy friends! Tracy here, and today I have this bright layered layout to share. Here are all of the details on how I created it.
Let’s Get Started
I chose white cardstock as the background for my bright layered layout. Then I cut the large triangle pieces from patterned paper and a narrow strip with torn ends to go across the background. Adhere these pieces to the layout using E-Z Runner® Grand Refillable Dispenser.
Start choosing embellishments for your bright and layered layout. Add some straight to the layout and then add others using 3D Foam Squares White Mix for extra dimension to your bright layered layout.
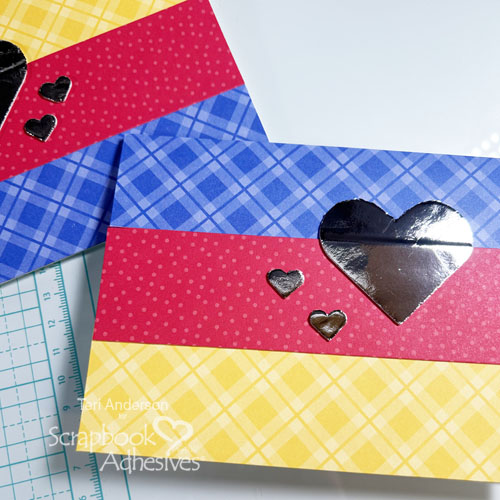
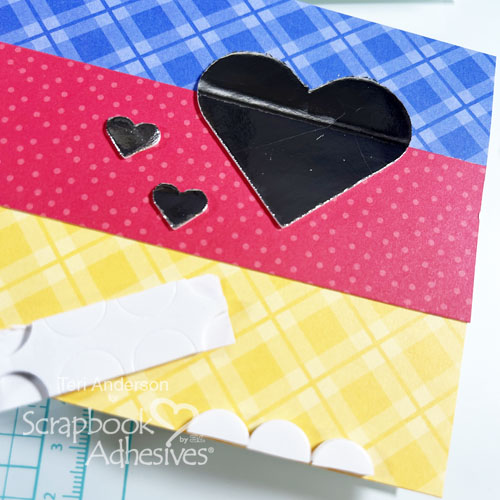
Apply foil to the hearts. Be sure to place the foil over the hearts with the pretty side up.
Create a Scalloped Border
Take some 3D Foam Circles. Cut them in half. Line them up to make a scallop on your card. Again, burnish the foil onto them.
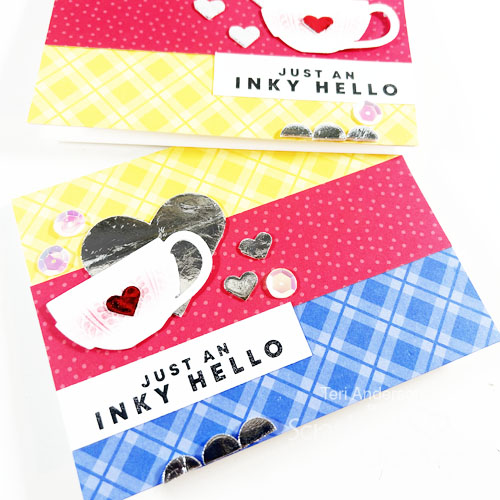
Stamp or computer generate a sentiment on a strip of cardstock and add it to your card.
Finish the Card
Take a stamped or die-cut coffee cup and mount it onto your card, partly over the largest heart. Add a 3D Foam Heart to the middle of the cup and remove its top liner. Take a piece of silver foil from the 3D Creative Embellishment Kit with Foil, and place the foil color side facing you over the exposed adhesive. Rub to transfer the color to the heart and peel off the foil to reveal the result!
Complete your card by adding a few sequins or gems to it. It’s ready to give away!
I hope you are inspired by today’s tutorial to make a few cards of your own. Remember, you do not have to use the products I did. Shop your supply stash for similar products that will work.
Hi everyone, Yvonne here with a Starry Art Journal Page. I used the Wear Your Adhesive on the Outside technique to add some sparkly accents to my page. I would love to share how I made it…it’s so easy!!
This page is so simple to make that it’s also suitable for beginner art journalers. Follow the steps of my tutorial.
Starry Art Journal Base Layer
For my Starry Art Journal Page, I used an A5 size art journal booklet. Cut a piece of patterned paper to a size slightly smaller than the journal page. Alter the edges with a paper distresser and then ink them with brown ink. Distress more if needed after inking.
Use the E-Z Squares® Refillable Dispenser to run some horizontal lines across the page. Then sprinkle red glitter on top and rub to secure. Tap off any excess to reveal a stunning shiny embellishment. This Wear Your Adhesive on the Outside technique brings adhesives from under layers to the top as embellishments.
Next, adhere some sticker elements and washi tape for more accents on the page. With the Extreme Double-Sided Tape 1/8in, adhere the ribbon trim.
Other: Patterned Paper and Stickers: PhotoPlay Paper (Midnight Garden); Dark Red Cardstock; Ink: Ranger Ink (Distress Ink in Vintage Photo); A5 Art Journal; Ribbon; Red and Gold Glitter; Paper Trimmer; Scissors; Tweezers
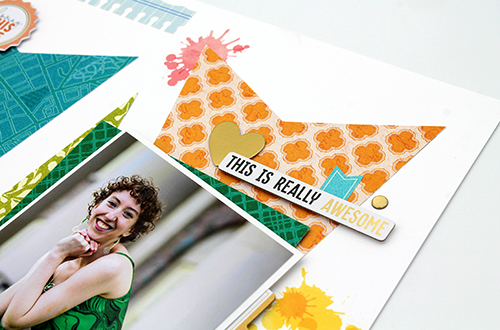
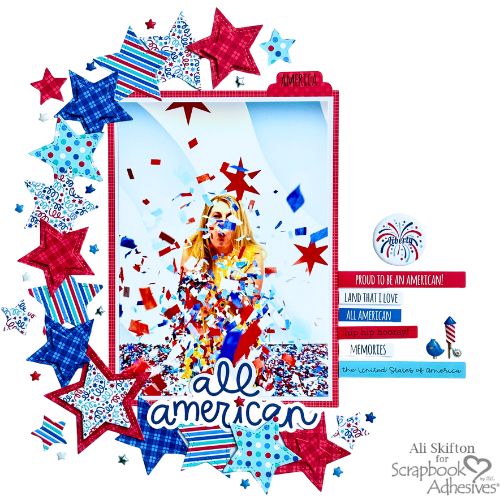
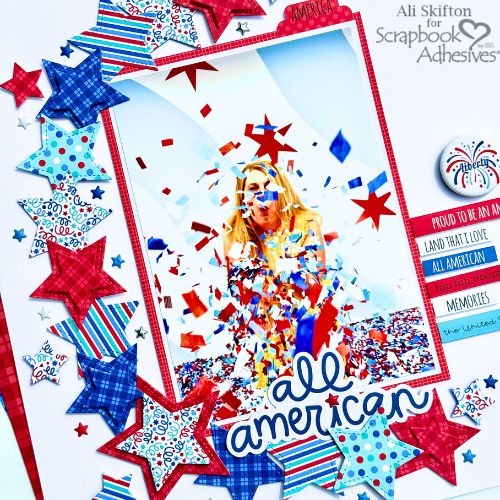
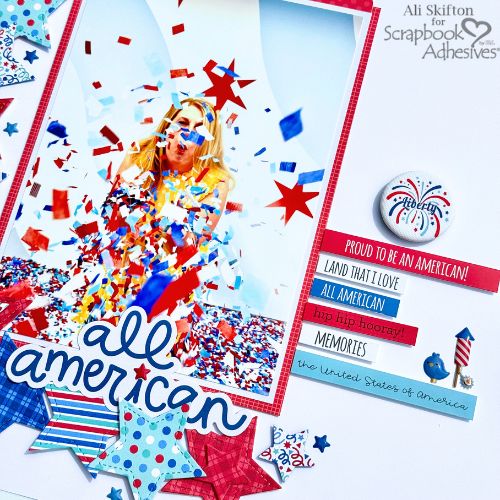
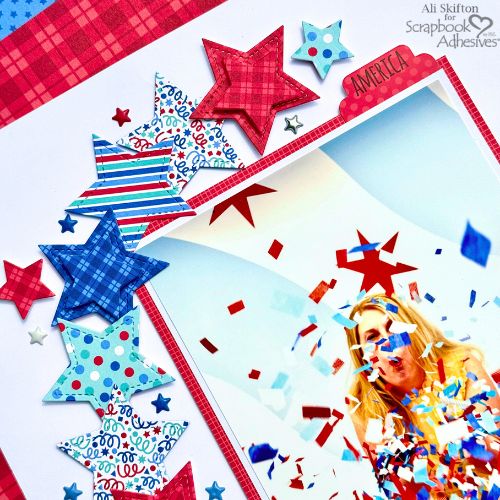
For this layout, I used a Fourth of July collection from Doodlebug. The bright colors were a perfect match for the confetti in one of my favorite photos—me blowing a handful of it at the Color Factory in Chicago! I had such a great time there and knew I wanted to make that 5×7 photo the star of the show, using a new sketch by Allison Davis.
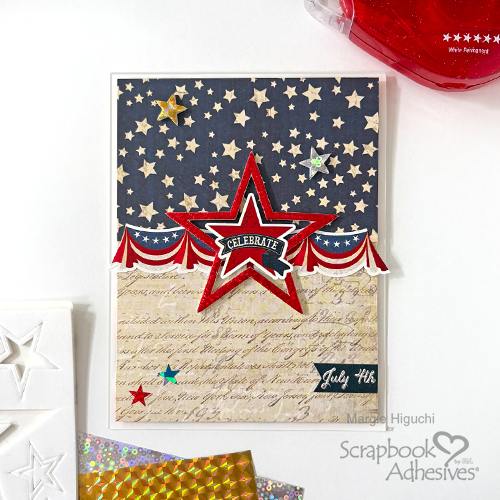
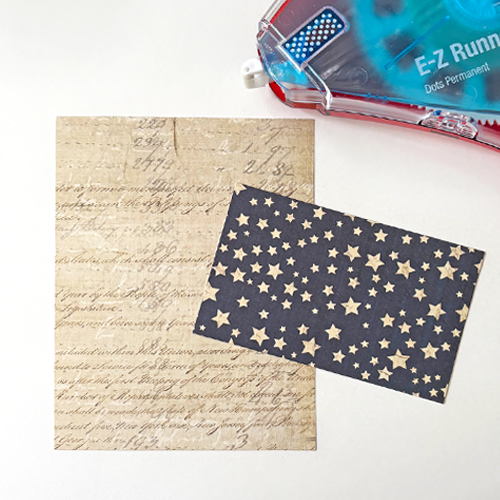
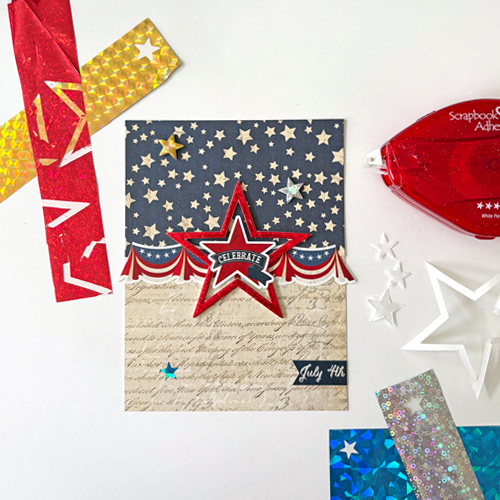
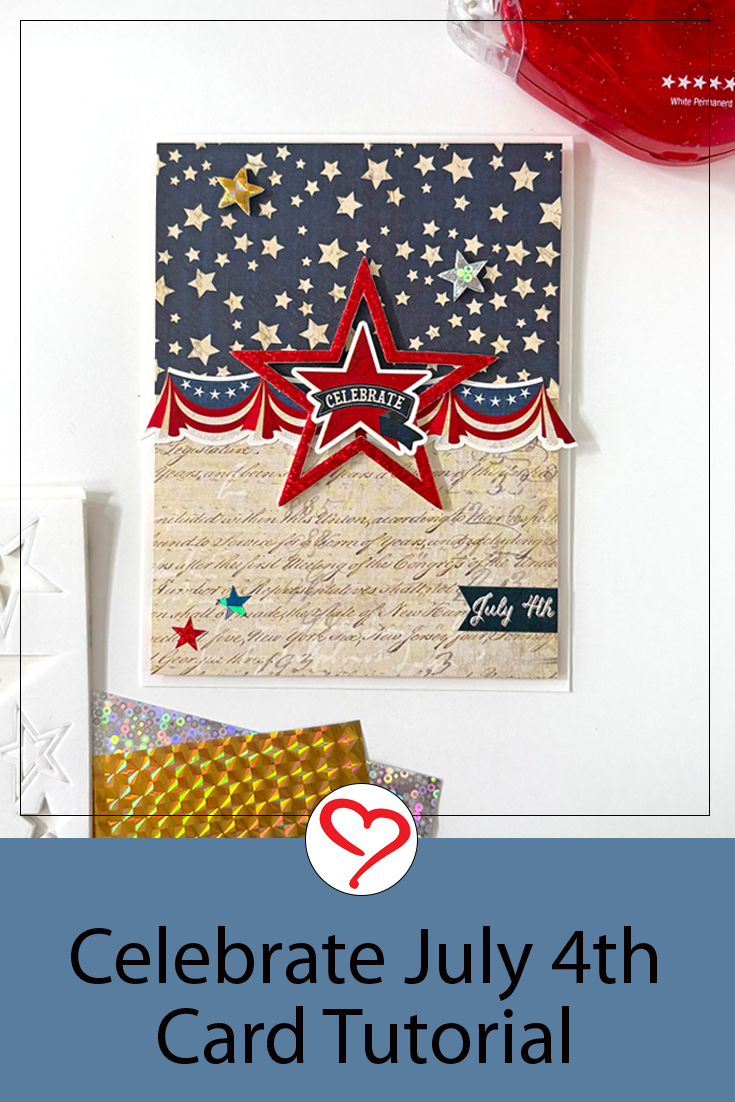
Happy July!! I have a paper collection sitting in my stash and with the 4th of July around the corner, I am making a quick Celebrate 4th of July Card. Hi, Margie here today to share my process.
Celebrate 4th of July Card Panel
Start with cutting a piece of 4 x 5.25-inch beige patterned paper and a piece of 4 x 2.25-inch star patterned paper. Adhere the star piece on top of the beige paper with the E-Z Runner® Grand Permanent Dots Refillable Dispenser. This will be our card panel for an A2-size (4.25 x 5.5-inch) card base.
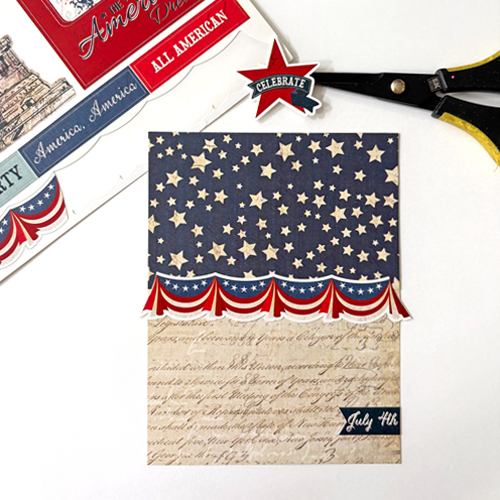
Embellish the Card Panel
Taking advantage of the matching sticker sheet, I trimmed one of the border stickers to fit the panel. Then added a sentiment banner toward the bottom of the panel.
I chose the Celebrate Star sticker as the focal point of the panel.
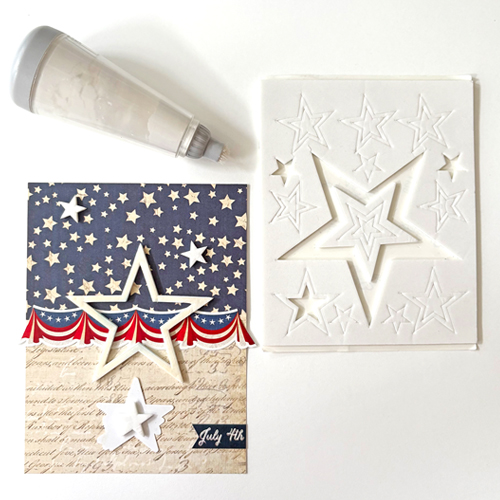
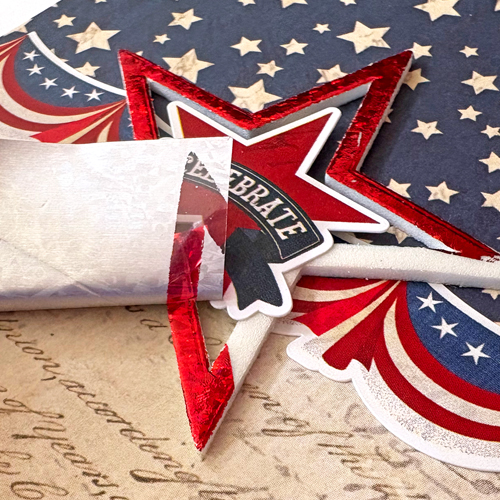
Wear Your Adhesive on the Outside with 3D Foam Stars
Going with the theme, I am using the 3D Foam Stars to embellish and pop up my Celebrate Star sticker sentiment. The second largest star was centered on the panel and the top liner was removed. Next, place a small foam star behind the sentiment sticker and apply static powder on the exposed adhesive to alleviate the stickiness. Remove the liner and center the sentiment sticker on the large foam star.
Working around the exposed adhesive, place a piece of red foil from the Metallic Transfer Foil Sheets Celebrate Colors (color side up facing you) over the adhesive and tap/rub the foil into the star to transfer the color. Remove to reveal! For any missed areas, simply reapply the foil. Repeat the foiling steps with the other smaller foam stars and a couple of stars from the E-Z Runner® Stars Refillable Dispenser in different colors.
Assemble the Celebrate 4th of July Card
Add strips of 3D Foam Strips Large White on the back of the panel and center on a cream cardstock A2-size card base.
Wishing you a safe and Happy 4th of July! I hope my Celebrate 4th of July Card tutorial inspired you to pull out your patriotic papers and stickers to make a super easy card.
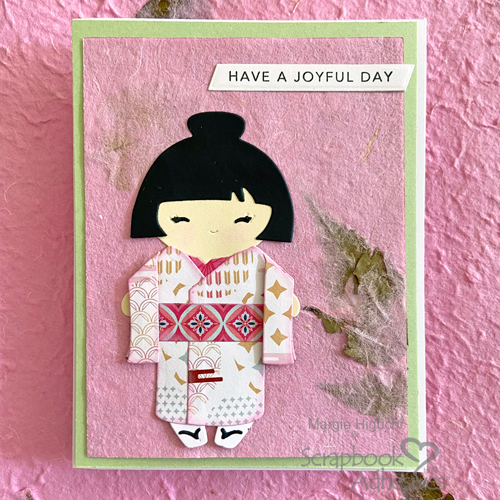
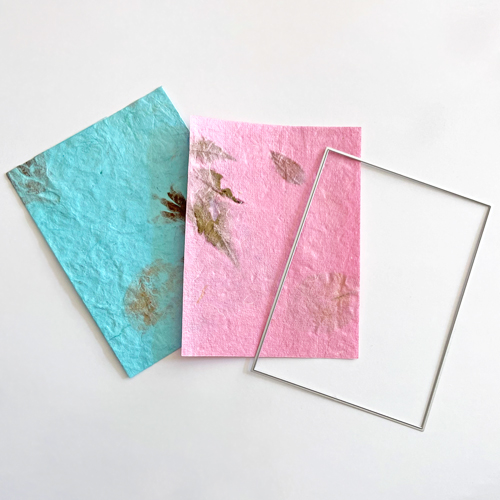
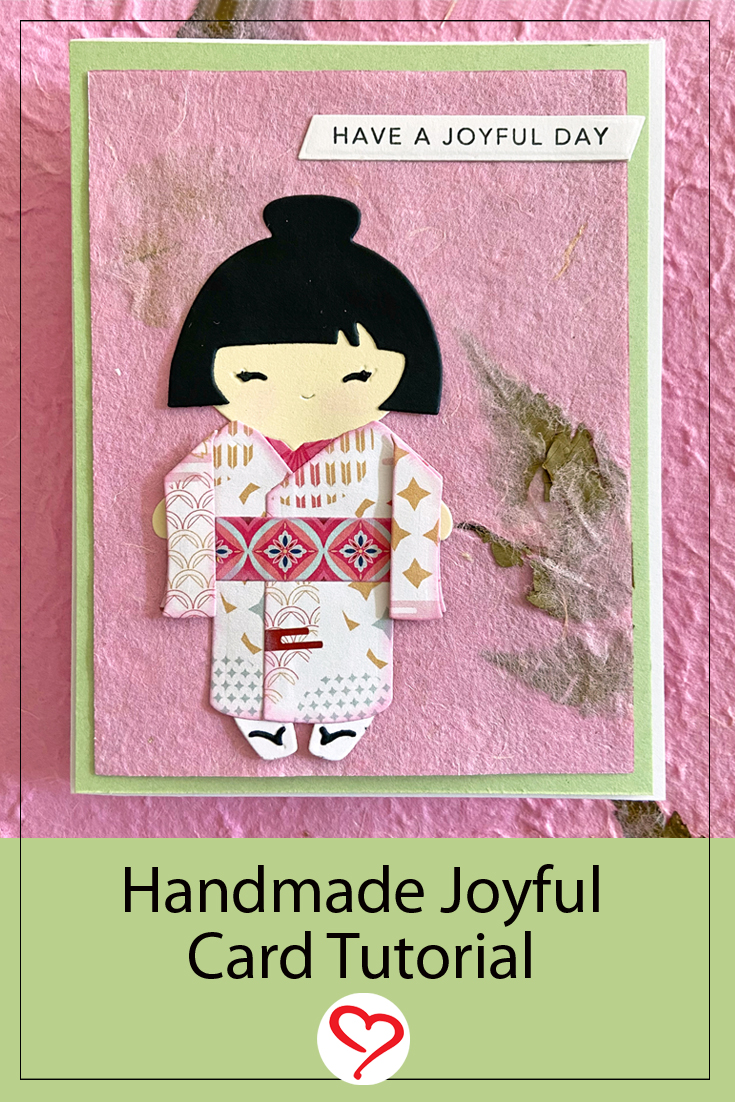
Several rolls of handmade papers were gifted to me by my brother and his wife when they went to Sir Lanka on vacation. Hi, Margie here today, and I want to share what I created with it. Also, what adhesives I used to make it work!
Joyful Panels
The pattern had natural elements in it so I wanted it to make a background. Die-cut a rectangle panel for a top panel.
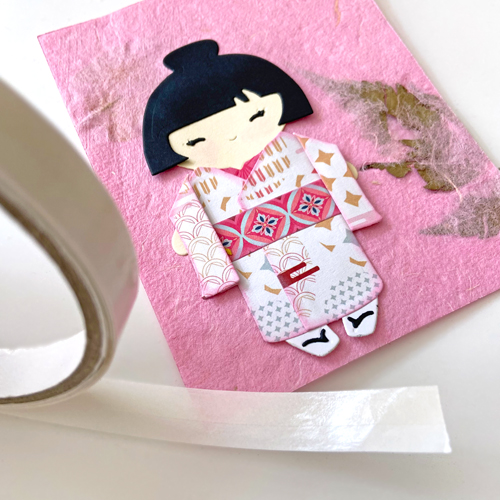
Joyful Paper Doll
Using the Dual Tip Glue Pen, I die-cut and paper-pieced a kimono girl with a combination of patterned paper and white, cream, and black cardstock. With the Crafty Power Tape Polybag 81ft., I secured the paper doll on the panel.
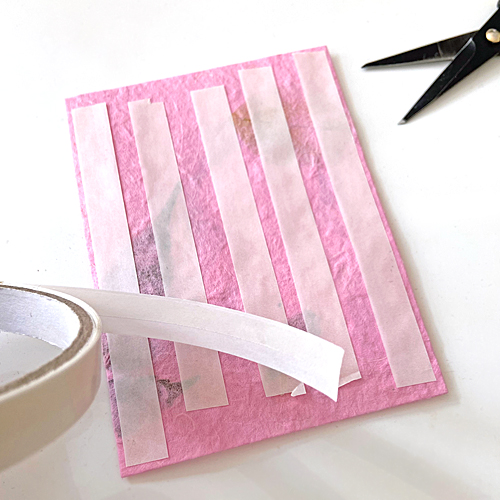
Using the same Crafty Power Tape Polybag 81ft., I covered the back of the panel and matted it on a larger citrus green panel before adding to a white cardstock card base.
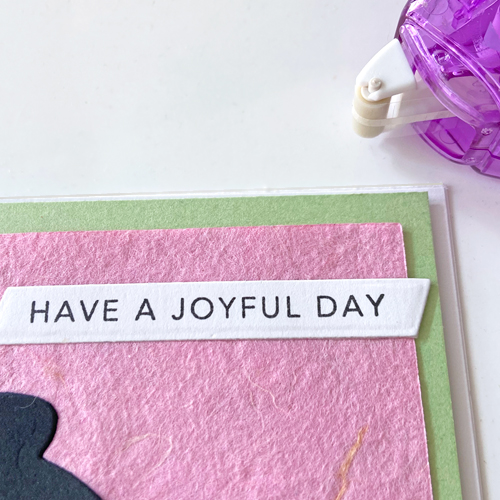
Add Joyful Sentiment
Stamp the sentiment with black ink on a piece of white cardstock and die-cut it with a strip die. For interest, I cut the ends in a diagonal. Secure it to the upper right corner using the E-Z Runner® Micro Refillable Dispenser.
Designer’s Note: Use the rounded end of a bone folder to burnish the paper doll into the panel for strong adhesion.
I love the combination of cardstock and handmade paper for a unique texture and dimension. If you have specialty papers, use them to create something similar to my Handmade Joyful Card!