You are in our US store • Switch to Europe store

Little Boy Layout featuring E-Z Runner Grand & 3D Foam Squares

One of my favorite things about scrapbooking is that it allows me to capture the “little” memories – special everyday moments like cute habits or sayings from your kids. Christine joining you today to capture the cute little things my son currently says.
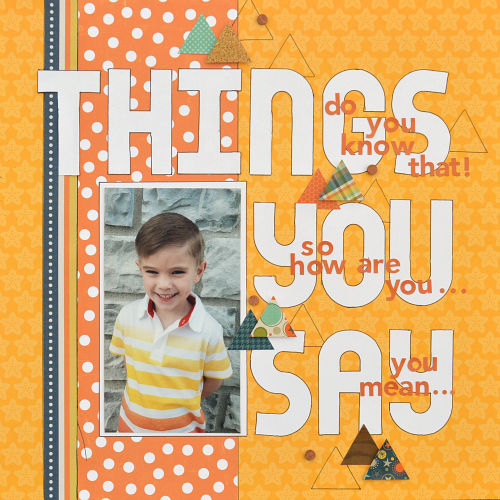
Little Boy Scrapbook Layout for Scrapbook Adhesives by 3L using E-Z Runner Grand and 3D Foam Squares

I created a big bold title using an alphabet punch board. The title tells what the layout is about. Then I used tiny letter stickers to highlight some of his quotes. Going for a big and bold title requires a good adhesive to make sure it goes down and stays down! The E-Z Runner® Grand Refillable Dispenser got the job done perfectly!
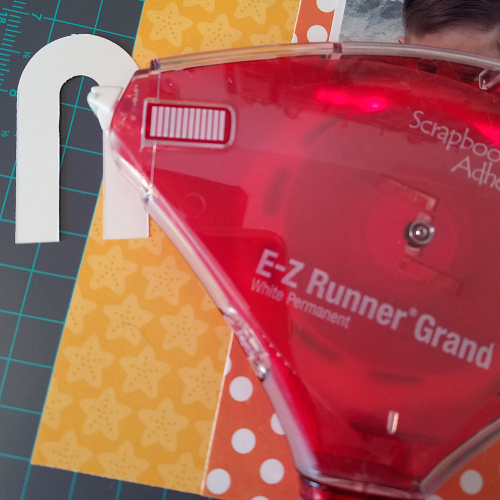
ChristineMeyer-ThingsYouSayLayout-4Let’s just review how easy it is to load the cartridges into this E-Z Runner Grand.  I love that it’s easy and foolproof!
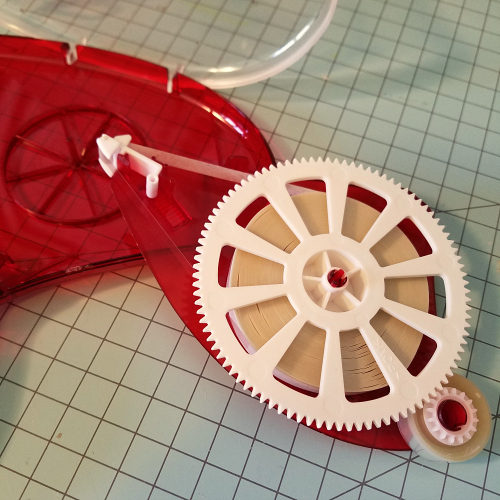
ChristineMeyer-ThingsYouSay-5

Here’s a quick video on How to Use and Refill the E-Z Runner Grand Dispenser, click below to view…

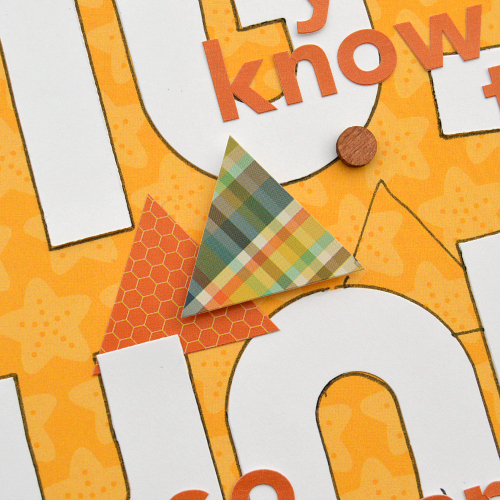
I can’t do a scrapbook layout without adding dimension and the 3D Foam Squares help make that happen.
ChristineMeyer-ThingsYouSay-2

I didn’t add tons of dimension but I did use them on several triangles!
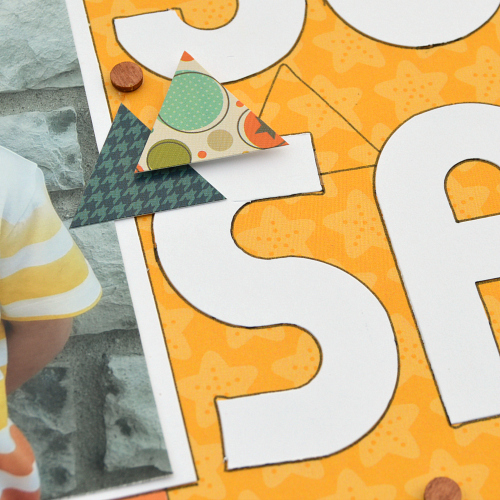
ChristineMeyer-ThingsYouSay-3

Sometimes removing the backing from foam adhesives can be cumbersome, but with these ones that is not the case, which makes that part of creation easier.
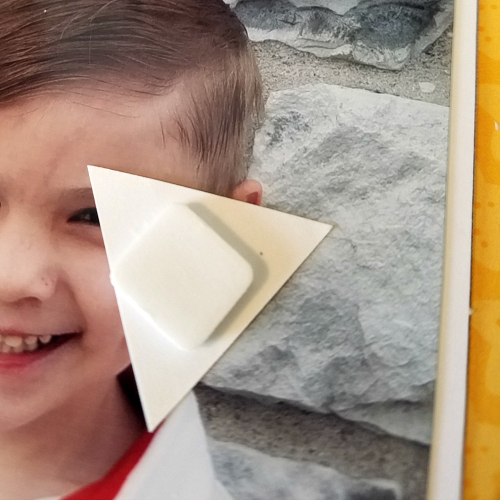
ChristineMeyer-ThingsYouSay-6

Supplies:
Scrapbook Adhesives by 3L®:

E-Z Runner® Grand Refillable Dispenser
3D Foam Squares White Regular
Other:
Patterned Papers: Simple Stories, Doodlebug Design, & Echo Park Paper; Stickers: Simple Stories; Wood Dots: Jillibean Soup Designs
Create Puffy Sticker with 3D Foam Creative Sheets and Die Cutting

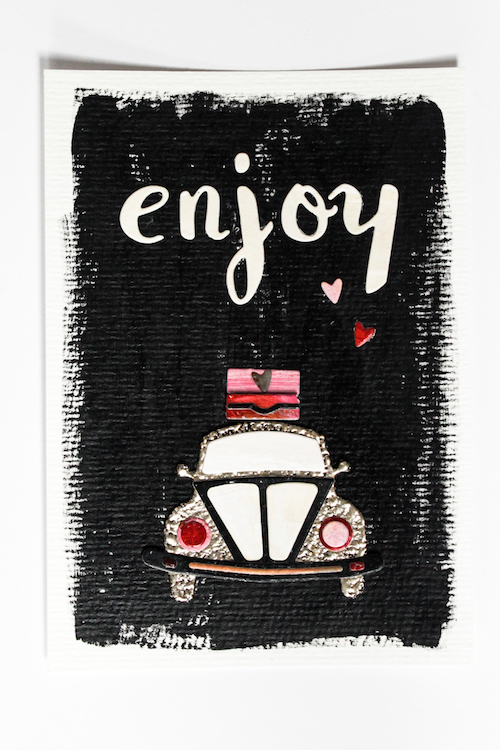
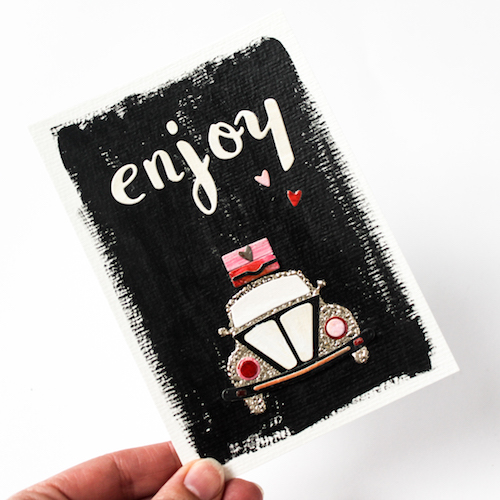
Hi there, it’s Stephanie here today to show you a card featuring 3D Foam Creative Sheets from Scrapbook Adhesives by 3L®  and a lovely die set from Sizzix.

Stephanie_karte_enjoy_1

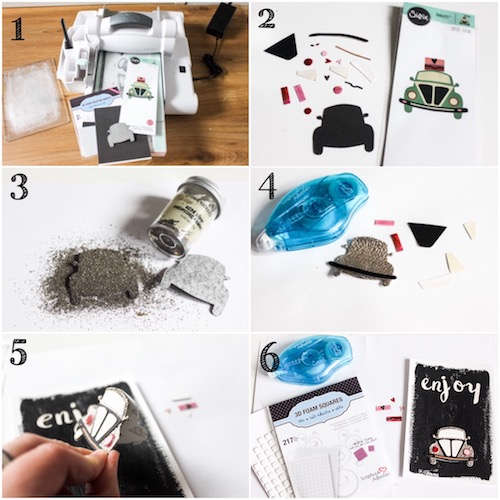
And here is how I created it:

Stephanie_card enjoy_2

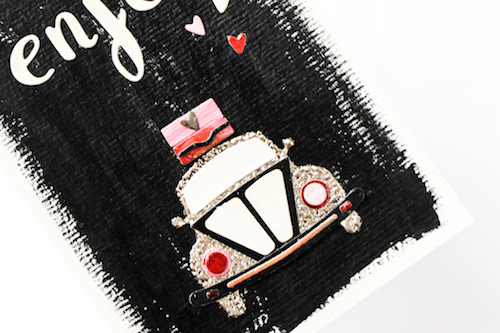
1. I used my Big Shot to cut out the elements. For the basic shape of the car I used the black 3D Foam Creative Sheets. I love the idea to create a puffy sticker look with this 3D Foam Sheet.

2. I played with different papers and acrylic paint for the die cuts.

3. For the basic shape of the car I used metallic embossing powder and my heater.

4. I put together the elements and adhered them by using the E-Z Dots® Permanent Refillable Dispenser

5. I prepared a watercolor postcard with black acrylic paint and I also cut out some alphas for my title. I adhered the car onto my card.

6. I created dimension with the 3D Foam Squares – White Mix for the little suitcases.

Stephanie_karte_enjoy_3

Stephanie_karte_enjoy_2

What a fun way to use 3D Foam Sheets with die cutting to create your motif with 3D effect and a dimensional sticker look.

Thanks for visiting us today!
Stephanie 🙂

Supplies from Scrapbook Adhesives by 3L®:
3D Foam Squares – White Mix
3D Foam Creative Sheets
E-Z Dots® Permanent Refillable Dispenser

Polka Dot Flower Gift Box with Adhesive Dots and Adhesive Sheets

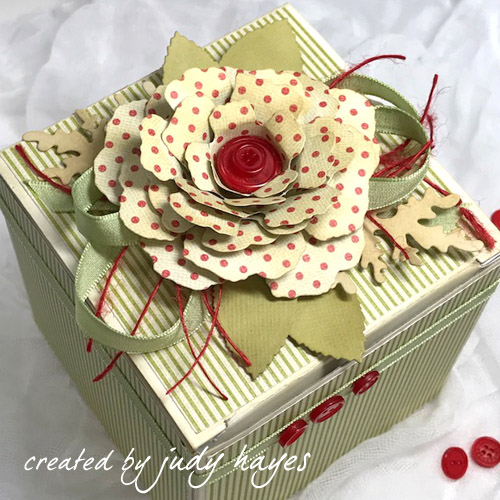
Hello everyone! Judy here today with a Polka Dot Flower Gift Box for that special someone! Mother’s Day is just around the corner. Decorate a plain white gift box with a pretty polka dot flower, using Dodz Adhesives Dots and Adhesive Sheets!

judyhayes_PolkaDotFlowerGiftBox_Main1

To decorate this plain white box, I first inked all the corners to blend with my paper colors. Then I applied Adhesive Sheets 12 x 12ʺ to patterned paper and cut squares to fit the box sides. I fastened them to each side and top. So easy with Adhesive Sheets! I applied Home Hobby Premium Double-Sided Tape ¼ʺ to a piece of ribbon and wrapped it around the box. Three red buttons are fastened with Adhesive Dots Mini and Adhesive Dots Small.

judyhayes_PolkaDotFLowerGiftBox Main2_edited-1

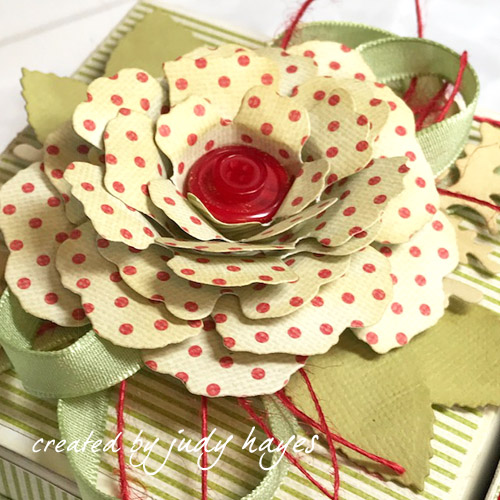
The Polka Dot Flower was made with pieces cut with 2 different Spellbinders dies. The center flower was cut with Big Blossom and assembled with Adhesive Dots. Two buttons are stacked together with Adhesive Dots Small for the center. Beneath it are 2 layers of Rose Creations largest flower. One flower is used as it was die cut. The other one was cut apart so the petals could be spread out and fastened behind with Adhesive Dots Medium. It looks a bit bigger that way.  All petals were inked along edges. I used a Adhesive Dots under the flower to fasten it to ribbons and another one under that to fasten it to the box.  Adhesive Dots Medium hold the leaves in place.

This is a fun way to decorate a gift box, maybe even cover up something on a recycled box!

Thanks for stopping!
Judy

Scrapbook Adhesives by 3L®:
Adhesive Sheets 12 x 12ʺ
Adhesive Dots Mini
Adhesive Dots Small
Adhesive Dots Medium
Adhesive Dots 3D

HomeHobby by 3L®
Premium Double-Sided Tape ¼ʺ

Other: Authentique Paper (Classic Christmas Collection – Classic Ten paper); May Arts Ribbon (Ribbon and Twine); Red Buttons; Ranger Ink (Distress Antique Linen Ink); Spellbinders Paper Arts (Rose Creations, I’ll Never Leaf You and Big Blossom Dies); Green and Cream Cardstock; White Gift Box

Mixed Media Layout | Wear Your Adhesives on the Outside with Adhesive Dots

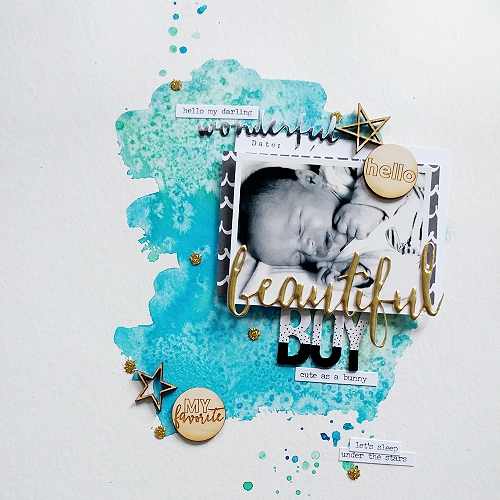
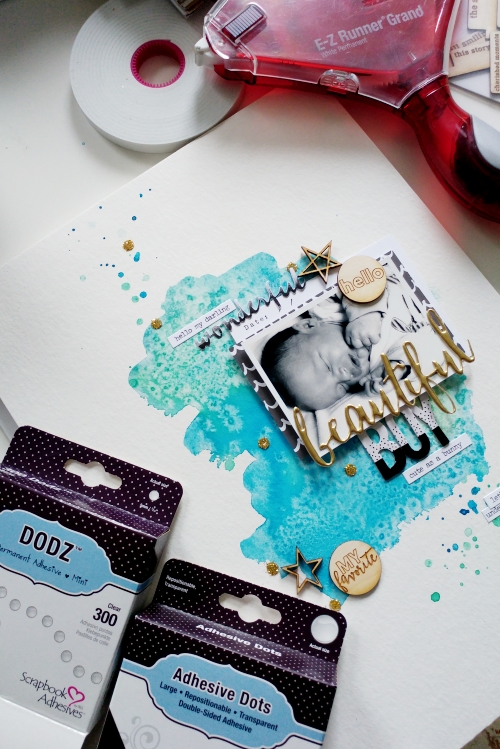
Hello everyone, Jana here with a new Layout! I love to “Wear Your Adhesives on the Outside” with glitter and DODZ Adhesive Dots Mini.

beautifulboy-janamccarthy-1

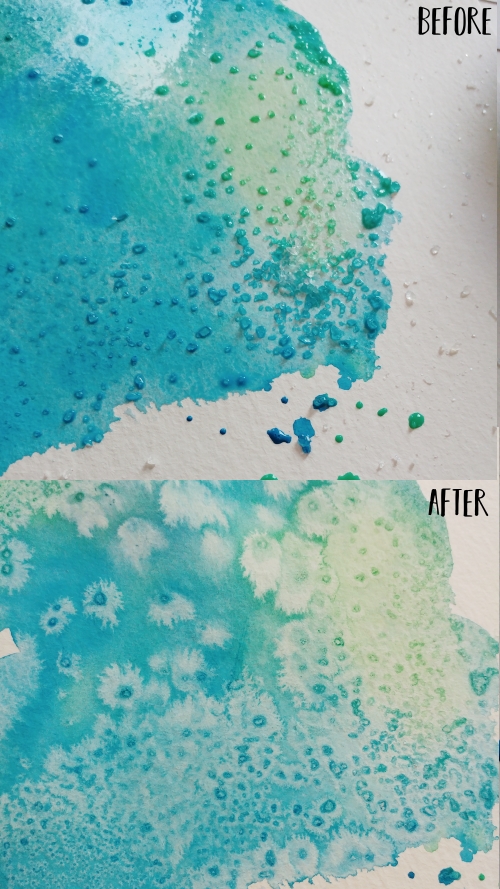
I wanted to have a lot of color on my Project, so i started with heavy Aquarelle Paper. Added some Salt to the wet color and let it dry… here you can see how it turned out! Really like the effect of the Salt!

beautifulboy-janamccarthy-3

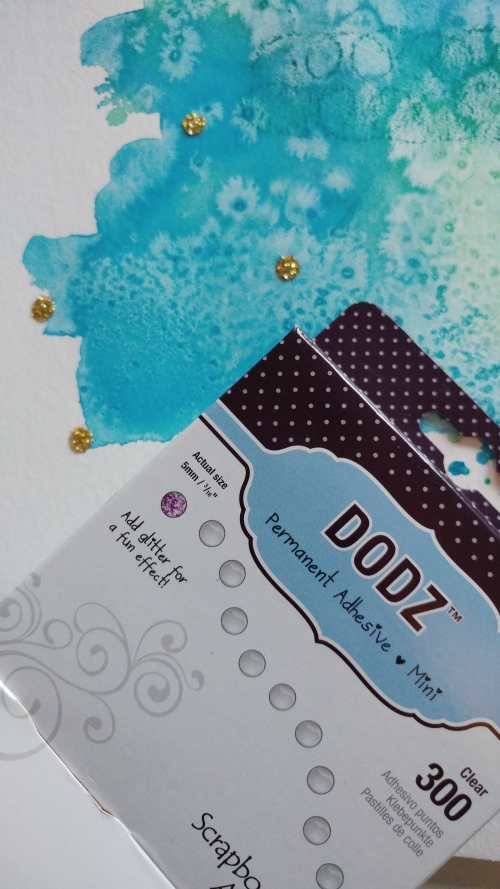
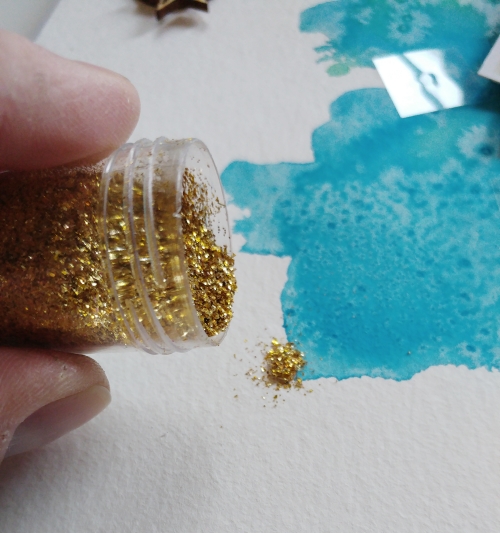
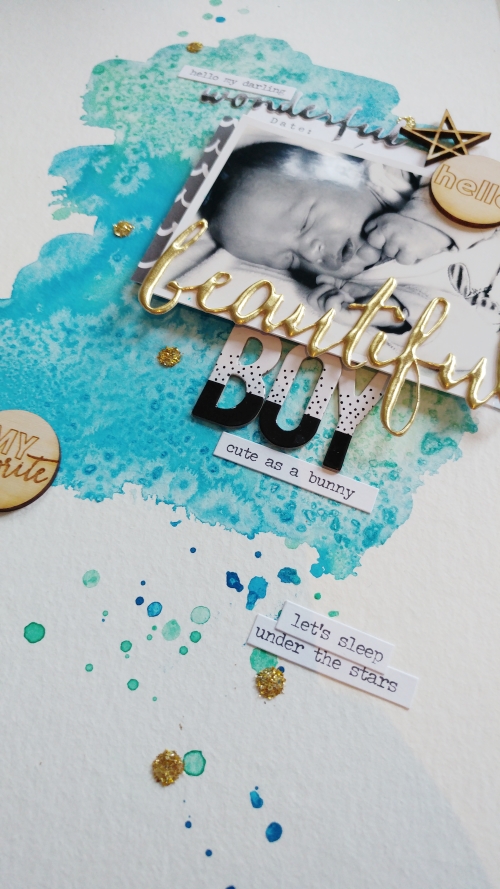
I grabbed some Glitter in gold and my favorite little DODZ Adhesive Dots Mini to add another texture and some sparkle to my color here!

beautifulboy-janamccarthy-5

beautifulboy-janamccarthy-4

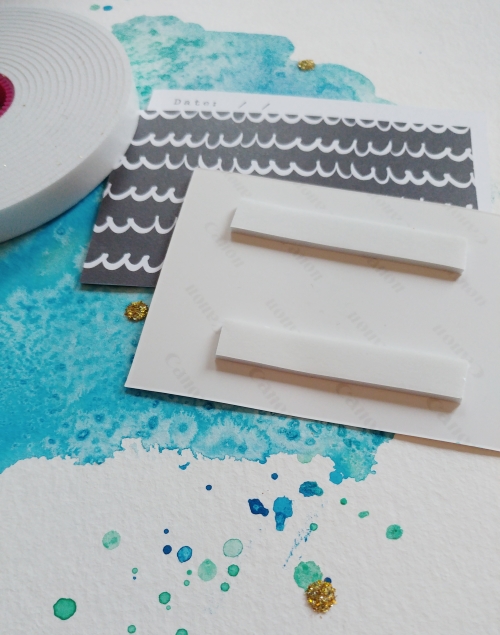
I also used Crafty Foam Tape White to get more dimension on the photo (my little one 7 days old!) I love that tape with its wonderful height! LOL!

beautifulboy-janamccarthy-6

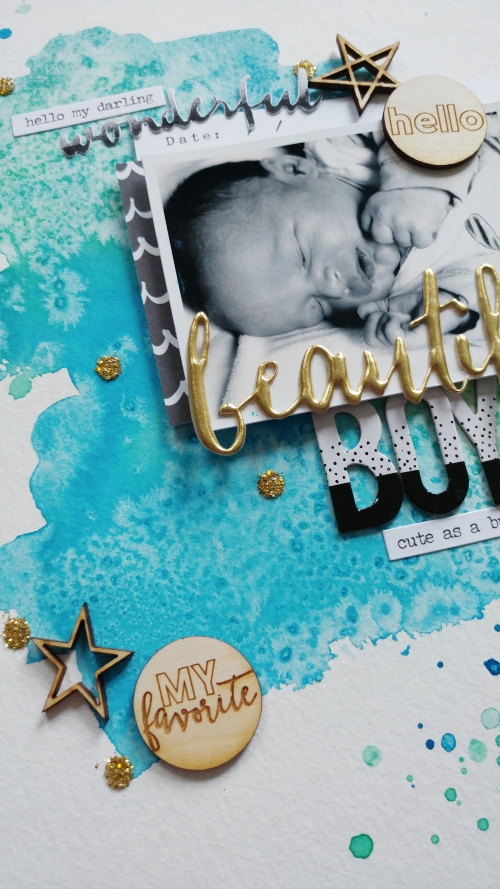
The E-Z Runner® Grand Dispenser worked great for everything else but I did used the NEW Adhesives Dots Large for the Wood Veneer Circles…

beautifulboy-janamccarthy-8

beautifulboy-janamccarthy-9

beautifulboy-janamccarthy-10

Do you have some big plans for the Weekend?! It’s (inter)National Scrapbooking Day! YAY! I can’t wait to stay in my PJs and scrap aaaaaall day long!

Thanks for stopping by today
janasig

Scrapbook Adhesives by 3L®:
E-Z Runner® Grand Dispenser
Adhesive Dots Large
DODZ Adhesive Dots Mini
Crafty Foam Tape White
Other:
WoodVeneer from ColorCastDesigns
Wordstickers from TimHoltz
Thickers from DearLizzy
Gold Sticker Word CratePaper
“wonderful” Sticker Vickie Boutin/AmericanCrafts


Wedding Cards with Creative Photo Corners

It’s a happy season for wedding events! Erica here today to share two wedding themed cards featuring a combination of Creative Photo CornersE-Z Runner® Permanent Fine Adhesive Dispenser and Extreme Double-Sided Tape 1/2″ to put them all together.

Wedding Cards with Creative Photo Corners by Erica Houghton for Scrapbook Adhesives by 3L

Wedding Card Details

I started by cutting a 4.5 x 5.25″ rectangle and adhered it to my card base. I then cut a 4.25 x 5″ vellum rectangle, centered and adhered it using the E-Z Runner® Permanent Fine Adhesive Dispenser.

Wedding Cards with Creative Photo Corners by Erica Houghton for Scrapbook Adhesives by 3L

Next, I adhered my sentiments and paper bow using Extreme Double-Sided Tape 1/2″.

Wedding Cards with Creative Photo Corners by Erica Houghton for Scrapbook Adhesives by 3L

Finally, I added Creative Photo Corners Gold and Silver  to both cards as a decorative accent. I actually cut most of the black backing off, leaving a bit around the corner in order to adhere them to my cards.

Find more wedding inspiration on Top Wedding Ideas!

Scrapbook Adhesives by 3L®:
E-Z Runner® Permanent Fine Adhesive Dispenser
Extreme Double-Sided Tape 1/2″
Creative Photo Corners
Other:
Paper & Stickers: Moxxie
Buttons: Tim Holtz and Sewology
Bow Die Cut: My Favorite Things

Thanks for joining me today!
Erica HoughtonSave

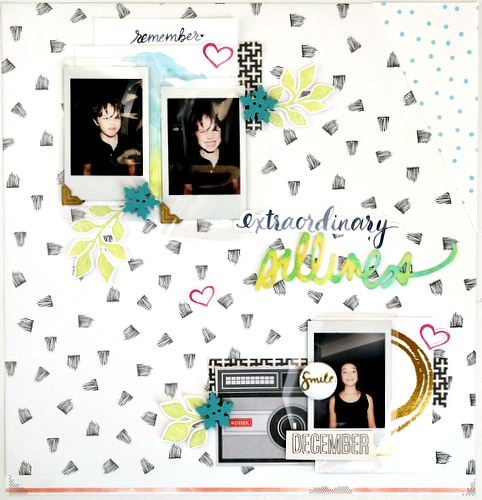
Extraordinary Silliness Layout Featuring Keepsake Envelopes

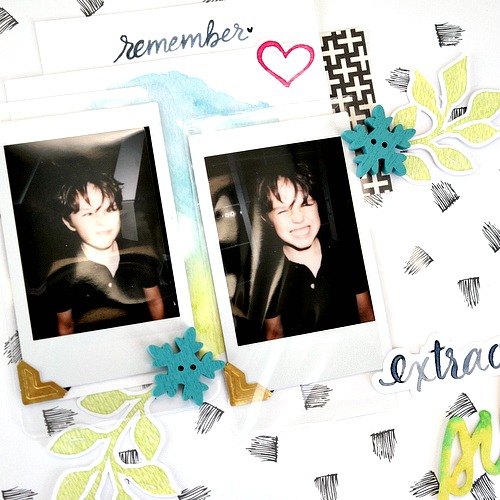
Hello everyone! Dana Tatar here today sharing the first project I have created as part of the Guest Design Team. I created a fun layout featuring Keepsake Envelopes and photos that my daughter and nephew took themselves with an Instax camera over Christmas vacation. The 4.1 x 2.1” clear self-adhesive envelopes were a fun way to attach photographs to my layout.

Extraordinary Silliness Layout by Dana Tatar for Scrapbook Adhesives by 3L


I always enjoy looking at the world through my children’s eyes. When you give a kid a camera, you never know what you’re going to get! My daughter and her cousin certainly captured the joy of the season and the silliness that ensues during the time they spend together.

SAMSUNG CSC


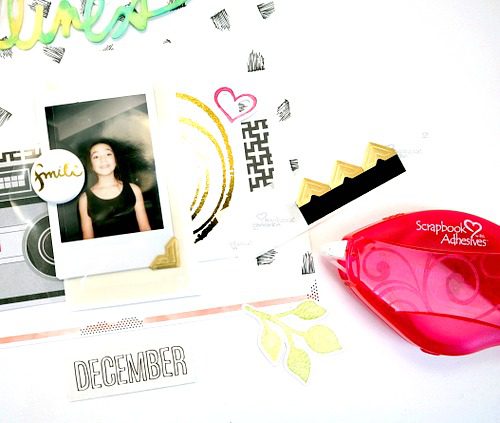
I used the E-Z Runner® Permanent to secure patterned papers and journaling cards to the base of my layout. Next, I used Creative Photo Corners Mix in Gold to hold the photos in place inside the clear Keepsake Envelopes.

In addition to helping to keep the pictures in place, the photo corners added a fun pop of gold to the page. It coordinates with the other gold accents I added in my design, and also helps play up the overall festive feel of the layout. The Keepsake Envelopes are a great way to easily secure objects to projects without covering up the elements below.

SAMSUNG CSC


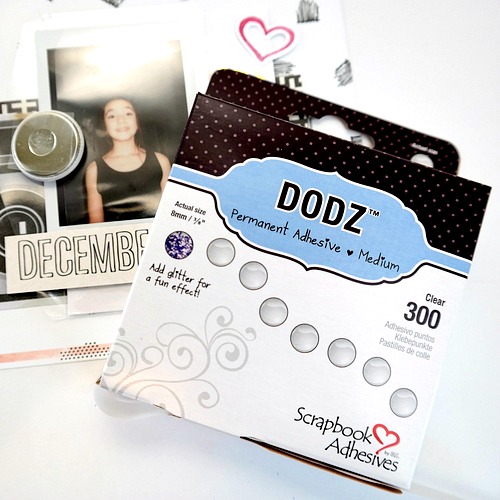
I used one Dodz Adhesive Dot Medium to secure a metal flair button to the outside of the Keepsake Envelope. Note: Keepsake Envelope comes with a re-sealable flap. Because I left the envelopes open on this project, I  removed the adhesive from the front of each envelope.

SAMSUNG CSC


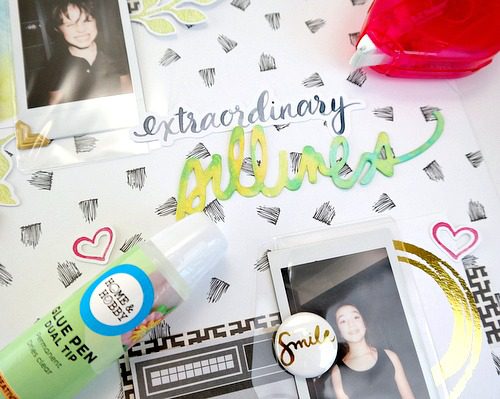
The E-Z Runner® Permanent Strips attach several die-cut embellishments to my page. A narrow script die cut title easily attaches with the Dual Tip Glue Pen.

SAMSUNG CSC


Finally, I embellished the layout with wooden snowflake buttons that I secured with Dodz Adhesive Dot Medium. The strong bond is perfect to hold heavier embellishments to the page.
Thanks so much for stopping by today! I’ll be back in a couple weeks sharing a fun off-the-page-project.
Dana

Supplies:
Scrapbook Adhesives by 3L

Dodz Adhesive Dots Medium
E-Z Runner® Permanent
Creative Photo Corners Mix (Gold)
Keepsake Envelopes Mix
Home and Hobby Dual Tip Glue Pen
Other:
Patterned Papers (America Crafts, Crate Paper, Pretty Little Studio and Studio Calico); Die-Cuts (Heidi Swapp and Pretty Little Studio); Journaling Cards (Pretty Little Studio); Wood Snowflake Buttons (Maya Road); Flair Buttons (Pretty Little Studio); WaterColor (Tattered Angels Shimmers Water Color: Blue/Green, Goldenrod and Yellow/Green)

Save

Save

Save

Watercolor Inspired Dimensional Happy Birthday Card

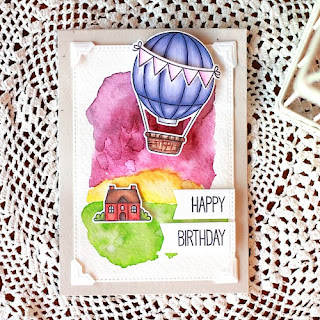
Hi all!  Angel here again with a colorful birthday card! Using the 3D Foam Creative Embellishment Kit and 3D Foam Squares – White, Small with my watercolor background, I was able to create interest and dimension to my card.

First I created my background with Distress Inks and some water.  I colored the house and hot air balloon with my Copic markers.

I adhered the banner to the balloon using the Home & Hobby Dual Tip Glue Pen on the ends, plus a small piece of the 3D Foam Creative Embellishment Kit adhesive in the middle for dimension.

I thought the Creative Photo Corners Mix Pack would be a fun touch so I used them to adhere the watercolored layer onto the card base.  I used some 3D Foam Squares – White, Small for the back of the hot air balloon.

I also used the 3D Foam Creative Embellishment Kit adhesive on the house.  I love the thickness of this adhesive!

Thanks for stopping by!

Hugs,
Angel

Supplies:
Scrapbook Adhesives by 3L®:
3D Foam Creative Embellishment Kit
3D Foam Squares – White, Small
Creative Photo Corners Mix Pack
Home & Hobby Dual Tip Glue Pen
Others:
My Favorite Things: Cardstock; Stamp Set with Matching Dies
Ranger Distress Inks
Copic Markers

Save

Aperture Card with Self Laminating Pouches

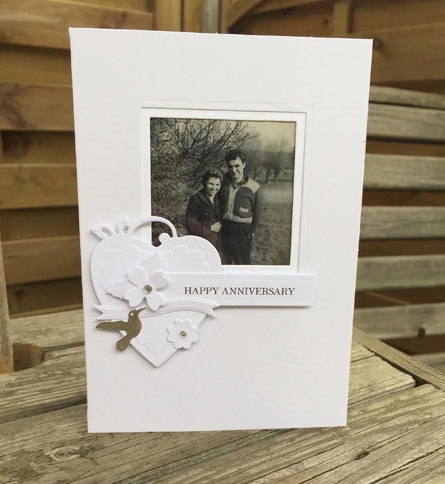
Hi everyone, Christine here today.  Recently my parents celebrated their wedding anniversary and they both definitely deserved a handmade card. I am featuring the Self-Laminating Pouches – Card Small to give the card an interesting twist.

CEmberson - Aperture card 1

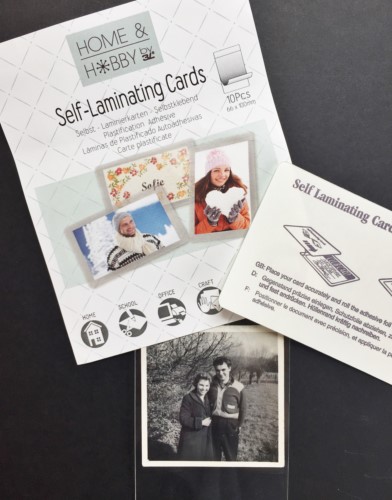
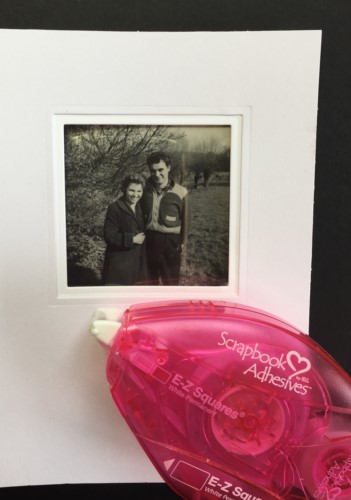
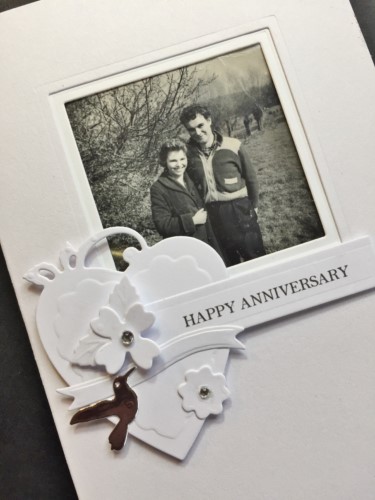
I went through some old photographs and found one when they were in their teens together in the 1950’s.  To preserve the photo I decided one of the Self-Laminating Pouches – Card Small would be perfect and also use it as an aperture for my window card.

CEmberson - Aperture card 2

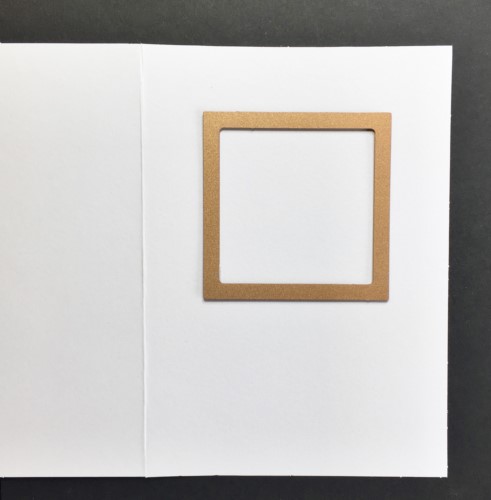
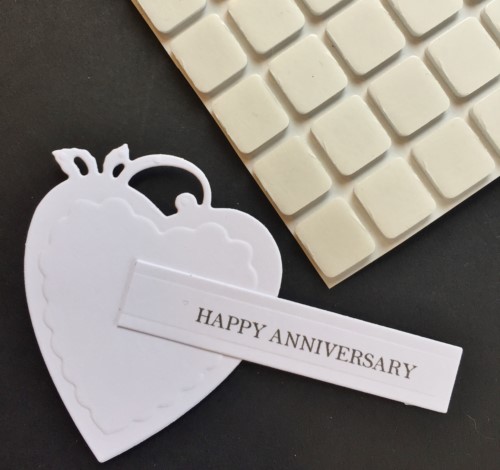
To create the aperture I die cut a square ensuring my Self-Laminating Pouches – Card Small would fit neatly behind. It is possible to cut an additional piece of card to create a double mount.

CEmberson - Aperture card 3

To affix the laminating pouch I selected E-Z Squares Refillable Dispenser.  NOTE: dispenser is refillable to match ANY of the other E-Z adhesive refills  – they are all interchangeable. LOVE!  To conceal the reverse of the laminating pouch inside your card affix into place another piece of card.

CEmberson - Aperture card 4

I gathered together some additional die cuts to decorate the card front and affixed the heart with 3D Foam Squares, White – Regular.

CEmberson - Aperture card 6

I kept the color scheme white with just a touch of silver.

CEmberson - Aperture card 8

Thank you for joining me today and please remember to check out the brilliant products listed below with their links.Christine

Products used:
Scrapbook Adhesives by 3L®:
E-Z Squares Refillable
3D Foam Squares, White – Regular
Home Hobby
Self-Laminating Pouches – Card Small
Other:
Spellbinders® Paper Arts: Swallow and Heart Etched Dies
White Cardstock; Silver Foil Card; Gemstones

Tip on E-Z Dots Repositionable to Create a Family Photo Layout

As scrapbookers, we always feel like we’re behind or not caught up. Am I right? I’ve learned not to stress about it. I really love to scrapbook my family pages from six months or more. Want to know why? Because I can relive those special moments.

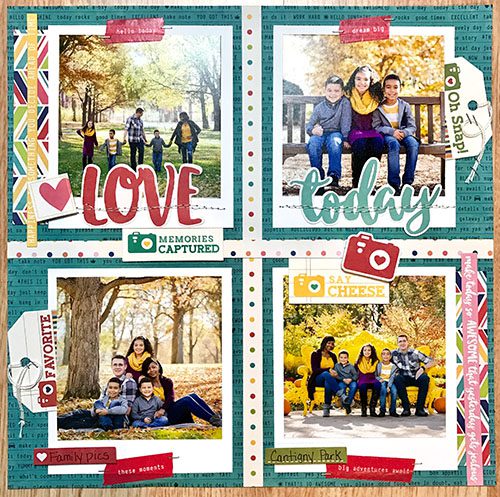
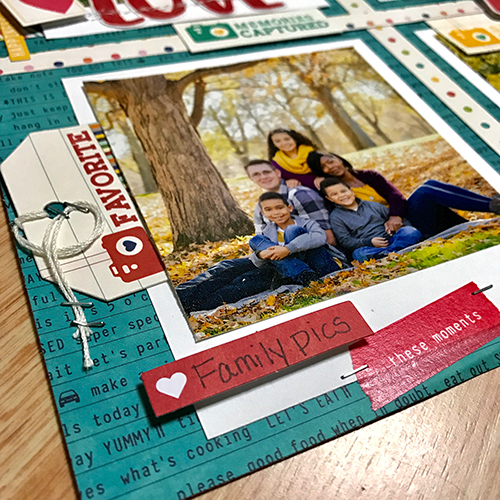
Today I’m sharing our family photos – I like to use multiple photos on layouts like this. There’s a tip I want to share about adhering those photos with E-Z Dots® Repositionable Refillable Dispenser so let’s get started!

Scrapbooking with E-Z Dots® Repositionable

Scrapbook Family Photos by Latrice Murphy with E-Z Dots Repositionable  Adhesive

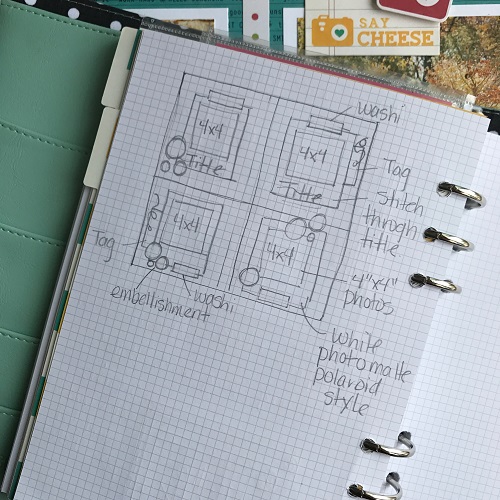
First up here is my sketch I used to create this page.

LatriceMurphy LoveToday

I print my photos to a 4 x 4″ size to create a Polaroid type of photo matte.

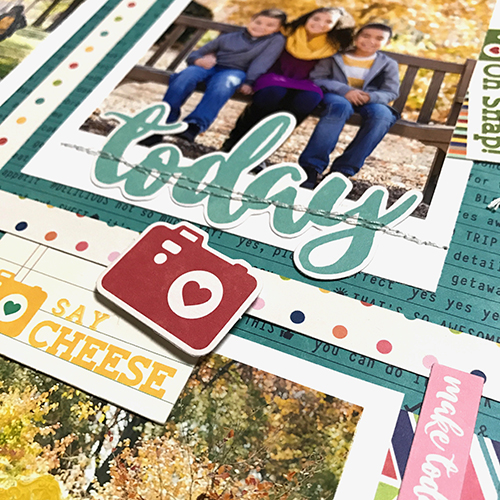
TIP: Any pieces that I knew would be sewn down later were placed on the layout using the E-Z Dots® Repositionable Refillable Dispenser. I use it because it’s easier to sew through without leaving residue on my machine needle. So try this tip when you stitch your photos, die cuts or any elements in your page!

LatriceMurphy LoveToday 1 (3)

I then stuck with a collection from Jillibean Soup and used all the bit and pieces from it including the tags, washi tape and cardstock stickers. Cardstock stickers were raised up with the Crafty Foam Tape White. Tags were trimmed down since only a little peeked out and added under photos with the E-Z Dots® Permanent Refillable Dispenser. Washi tape sometimes likes to come undone so I always add a couple staples to keep it in place perfectly.

LatriceMurphy LoveToday 1 (2)

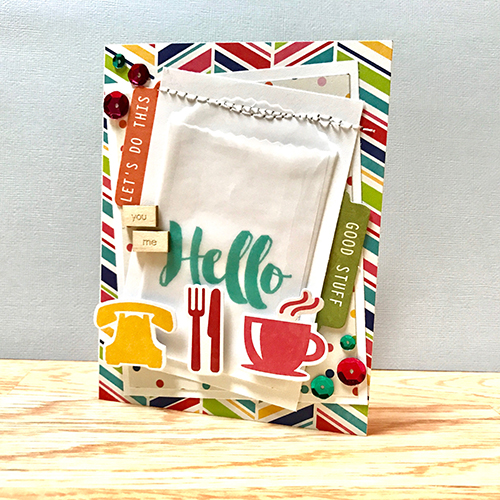
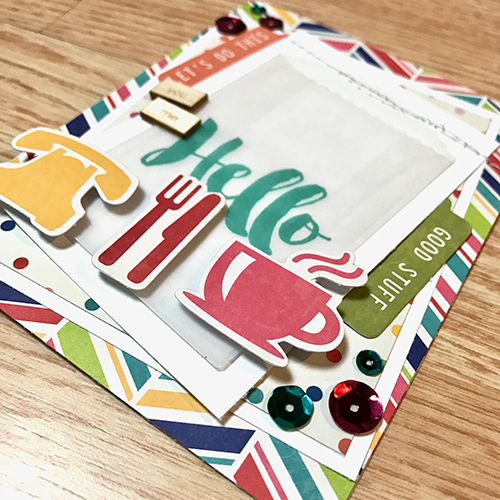
Bonus Card! I created a quick card with my left over paper pieces as I usually do. Today’s card is the perfect one to send to a friend who you’d like to get together with over coffee or lunch. Just slip a gift card in the front and say hello to someone special.

LatriceMurphy LoveToday 1 (5)

I used the Home and Hobby Dual Tip Glue Pen to adhere the sequins on this card.

LatriceMurphy LoveToday 1 (4)

I hope this inspires you to maybe pull out some older photos from last year and realize some past moments.

Supplies:
E-Z Dots ® Repositionable Refillable Dispenser
E-Z Dots ® Permanent Refillable Dispenser
Crafty Foam Tape White
Home Hobby Dual Tip Glue Pen
Other:
Patterned Papers, Washi Tape, Stickers, Wood Veneer Tags and Sequins (Jillibean Soup Designs); Cardstock (American Crafts and Recollections)

Happy crafting!
Latrice

Emoji Scrapbook Layout using E-Z Runner Micro Refillable Dispenser

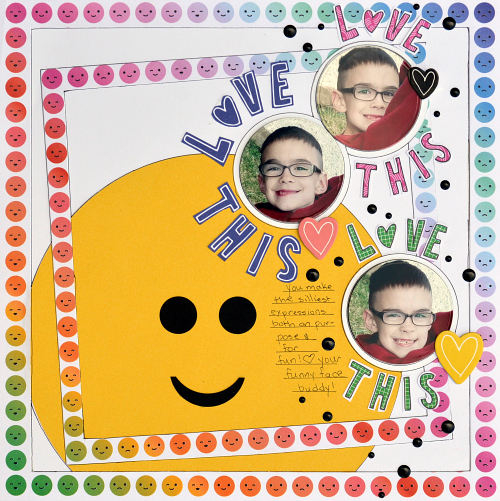
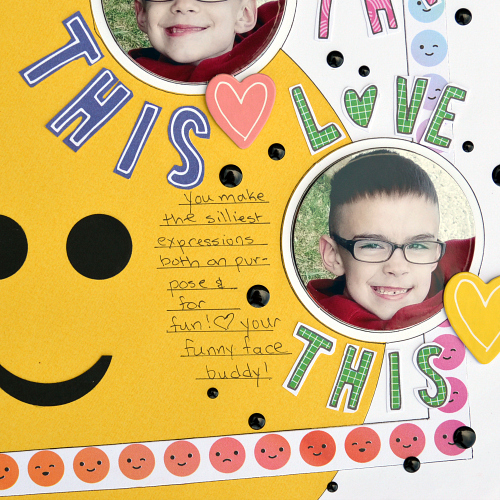
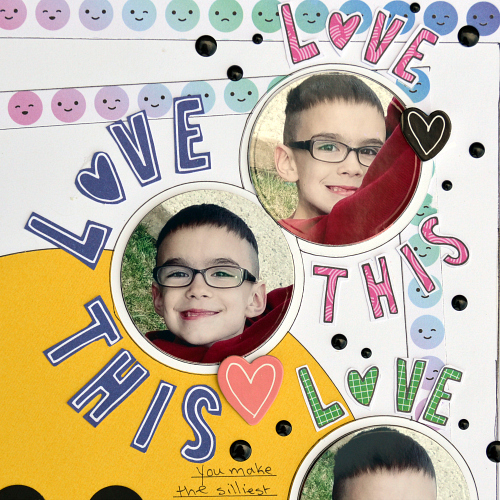
Greetings on this beautiful spring Sunday!  Christine joining you with a layout that is sure to make you smile!  Anybody else out there get frustrated with trying to attach small words and cut file pieces to projects?  Today I am going to highlight how you can make this job easier with the E-Z Runner® Micro Refillable Dispenser.

Emoji Scrapbook Layout using E-Z Runner Micro Refillable Dispenser from Scrapbook Adhesives by 3L

I didn’t add a lot of dimension to this layout but stuck with a lot of flat elements.
ChristineMeyer-EmojiScrapbookLayout-2

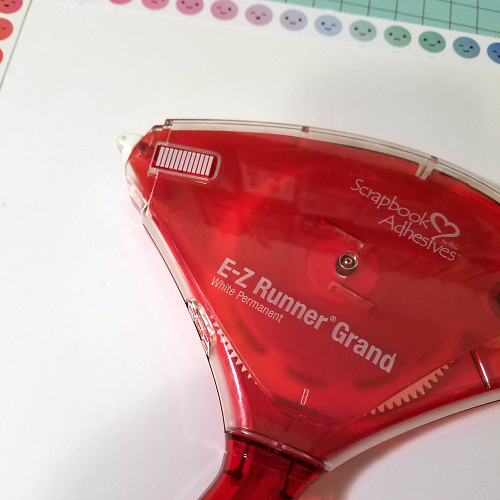
I’m a busy mom so when I have time to scrap I want my adhesive to make the job quick and easy. The E-Z Runner® Grand Refillable Dispenser helped get the job done efficiently.  It was the perfect width for my emoji borders and of course worked just great on the other bigger pieces.
ChristineMeyer-EmojiScrapbookLayout-3

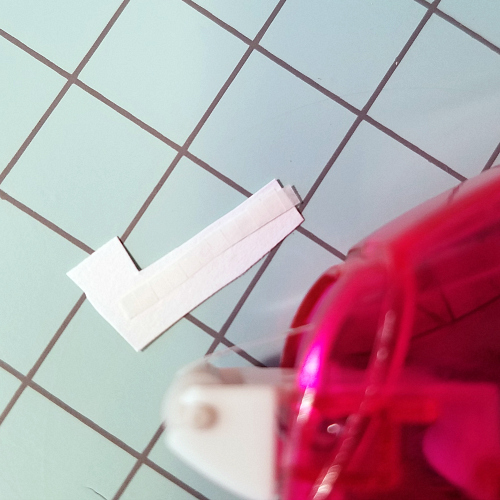
In addition to using cut files, I also LOVE to fussy cut.  But as I mentioned earlier that can be a total pain to add to a layout!  This is where the E-Z Runner® Micro Refillable Dispenser comes into play.
ChristineMeyer-EmojiScrapbookLayout-4

I used this runner to add the tiniest of strips (just 1/8 of an inch) to the back of all my letters.  It was even easy to use on the curvy S!  I’m not gonna lie, I may have squealed when I saw how great this worked.  Such a time saver!
ChristineMeyer-EmojiScrapbookLayout-5

If you don’t already own it, you definitely want to grab one of these handy refills for your E-Z Runner before you dive into your next project with tiny pieces!

Supplies List
Scrapbook Adhesives by 3L®:
E-Z Runner® Micro Refillable Dispenser
 E-Z Runner® Grand Refillable Dispenser
Other:
Patterned Papers and Chipboard: American Crafts
Enamel Dots: Doodlebug Design
Pen: SRM Stickers