You are in our US store • Switch to Europe store

How to Embellish a Father’s Day Home Decor Gift with Scrapbook Adhesives by 3L

I purchased this metal letter “H” and thought it would be fun to embellish it for my husband in honor of Father’s Day! Using a combination of different Scrapbook Adhesives by 3L® products, I ended up with this piece for his office 🙂
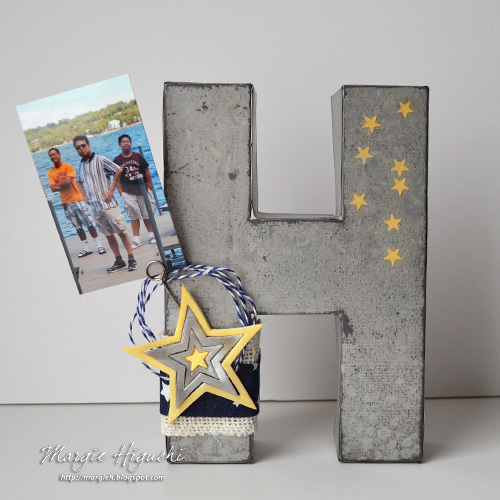
 

Embellished Fathers Day Metal Letter Home Decor by Margie Higuchi


Starting with an element that needs time to dry, I looped navy twine three times. To keep its shape, I covered it with Art Medium on a Teflon® non-stick craft sheet. Not only can it adhere but it can seal and stiffen materials. Truly one of my “Go To” mediums!

While the twine dries, I rolled some stars on the metal letter “H”.  Then I pressed and rubbed Pigment Powder Gold into them. Use a small piece of baby wipe to clean the excess powder.

On the lower left side of the letter, I added two layers of ribbon for texture. Using Extreme Double-Sided Tape 1/2″ Permanent, I adhered White Burlap Ribbon to the metal and then Dark Denim Ribbon with white stars on top.
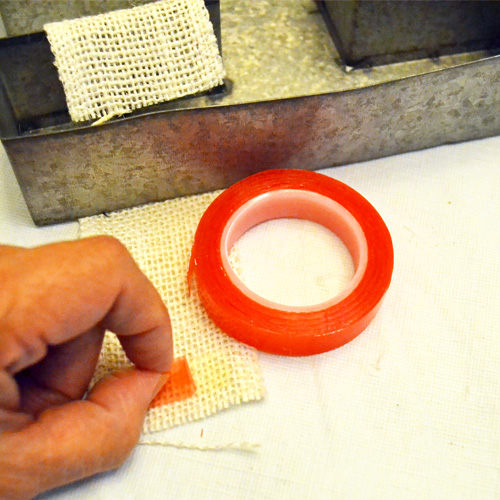
 

MargieHiguchi 500 EmbellishedFathersDayHomeDecor Jun1716 Step3


For the star embellishment, I used gold pigment powder and silver pigment powder to color the 3D Foam Stars. Set aside to add later.

Now to adhere my looped twine embellishment. Again, I used  Art Medium by dipping the twine into the jar. Place on top of the layered ribbon and press down to secure. The medium will dry clear.
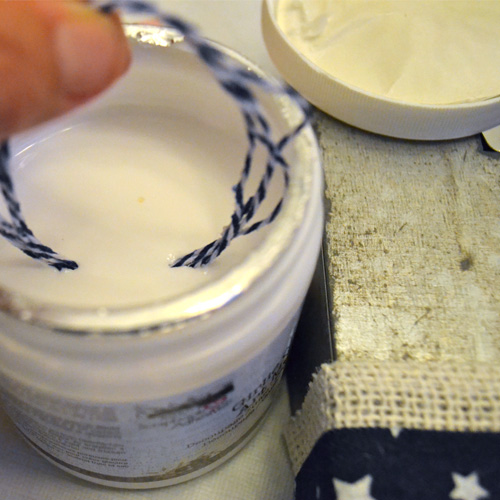
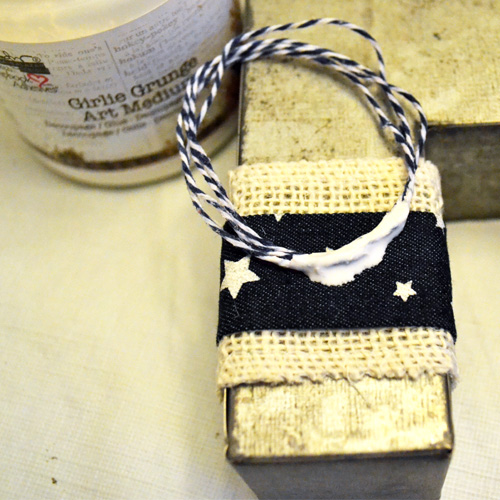
 

MargieHiguchi 500 EmbellishedFathersDayHomeDecor Jun1716 Step5
MargieHiguchi 500 EmbellishedFathersDayHomeDecor Jun1716 Step6


After the twine dries, I placed the embellished 3D Foam Star on top but at the top, I added a 3D Foam Square White, Regular to keep the star leveled, It was also a good place to push my memo pin in.
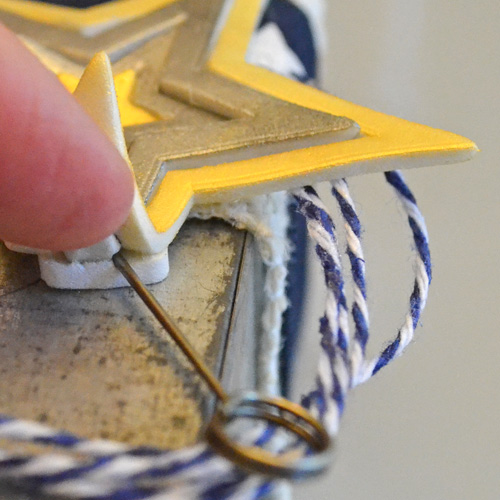
 

MargieHiguchi 500 EmbellishedFathersDayHomeDecor Jun1716 Step7


I trimmed a photo of my “boys” and slid in the memo pin. He can change out the picture and use magnets to hold small notes on the metal surface. Now it’s ready to give on Father’s Day 🙂


Embellished Fathers Day Metal Letter Home Decor by Margie Higuchi


For more ideas on Father’s Day, please visit: Father’s Day Inspiration from Scrapbook Adhesives by 3L®.

Thanks for stopping by!
Margie Higuchi

Supplies:
Scrapbook Adhesives by 3L®: 3D Foam Stars and 3D Foam Squares – White, Regular
Home & Hobby: Extreme Double-Sided Tape 1/2″ Permanent
Memo Pin: Advantus (Tim Holtz Collection)
Other: Metal Letter, Photo and Teflon® Non-Stick Craft Sheet
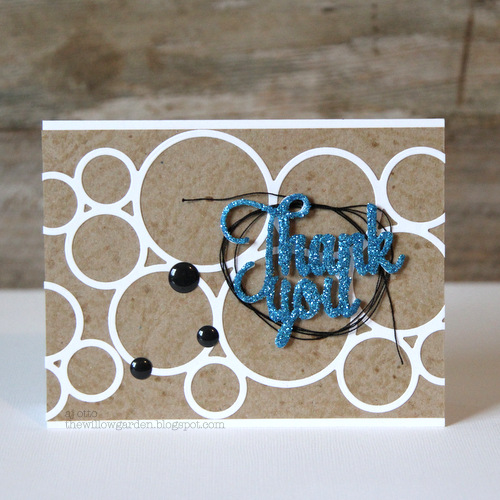
Glittered Thank You Card using Adhesive Sheets

Hiya!  AJ here today to show one of my favorite ways to quickly add glitter to your die cuts.  It’s wedding season, grad season, dad season; etc.  With all those gifts going around, sometimes a thank you card is in need.
AJOtto-TY-002

Sometimes you just need to add glitter to a die cut.  These things happen in our hobby.  😉

AJOtto-TY-2

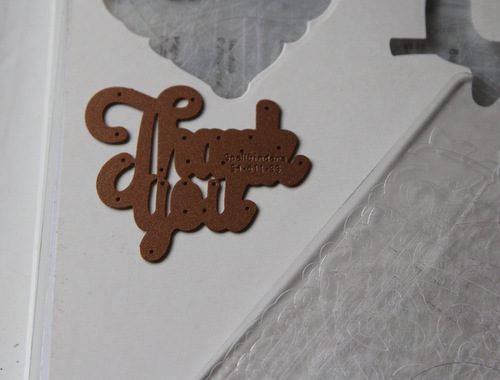
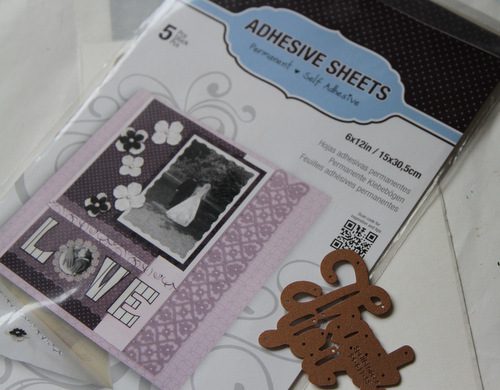
The EASIEST way to make this happen is to use your Adhesives Sheets with your dies!  Pull the yellow liner backing away and press your card stock in to place.  I often will burnish it with a bone folder to smooth it all out, not necessary, but out of habit it’s what I do. 😉
AJOtto-TY-3

Lay your die, cutting side into the white side of the adhesive sheet and run through your die cutting machine.

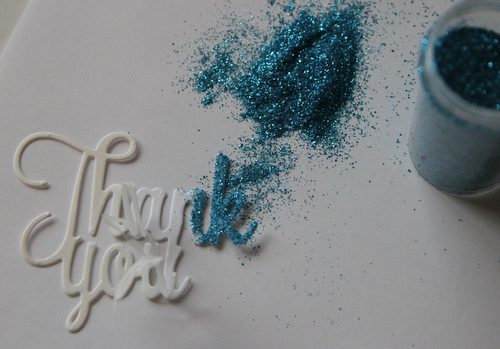
AJOtto-TY-4 Gently peel back the white lining and you can start sprinkling glitter all over the exposed area.  I usually try and leave a piece to hold onto, pulling it off section by section. Once covered set aside.
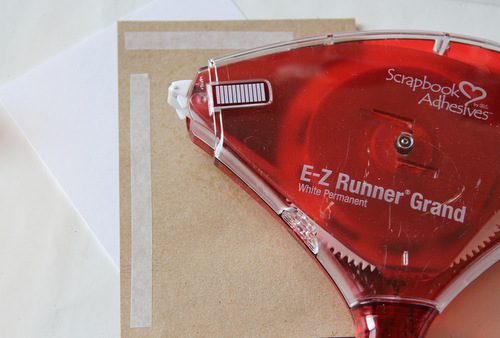
AJOtto-TY-5To adhere my kraft colored layer, I used the E-Z Runner® Grand.  To adhere the white die cut, I added small dots from the Dual Tip Glue Pen all around then placed onto the card.
Perfect to say thanks to Dad on Father’s Day!

enjoy! 🙂 AJ

Scrapbook Adhesives by 3L® products used: Dual Tip Glue PenE-Z Runner® GrandAdhesives Sheets

other- dies: Spellbinders; Stamps: Spellbinders; enamel dots, thread, glitter, card stock

Save

Save

Hello Friend

Hey, it’s Amy and I’m here to share a card with a bit of texture:

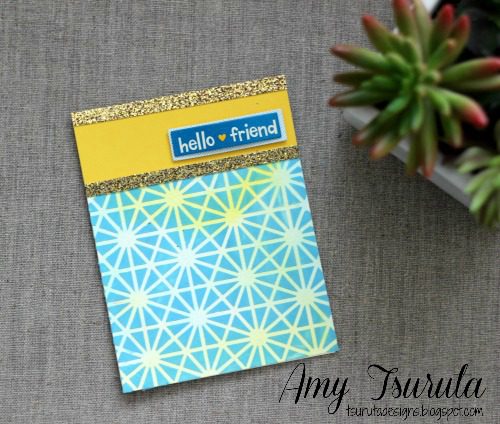
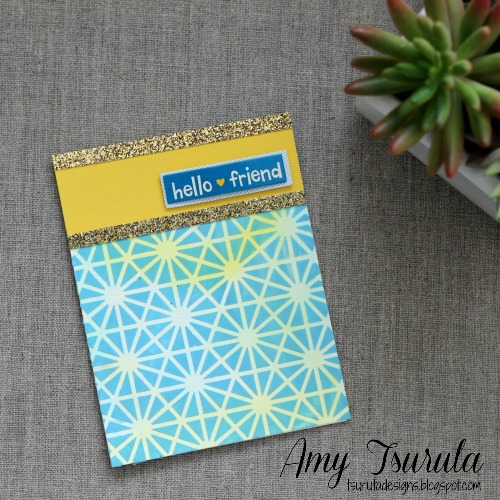
Amy Tsuruta Hello Friend

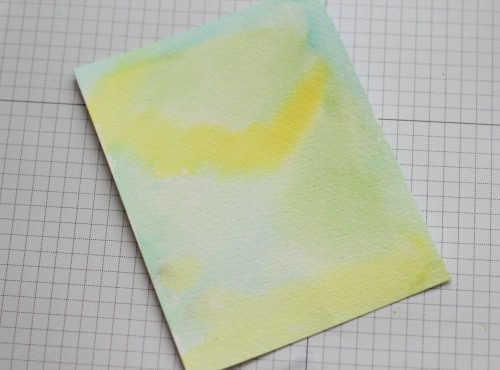
I’ve haven’t used modeling paste with a stencil in awhile so I decided to feature that on my card for today.  I first started with a quickly watercolored panel.  It has been trimmed to an A2 card size.

Amy Tsuruta Hello Friend 1

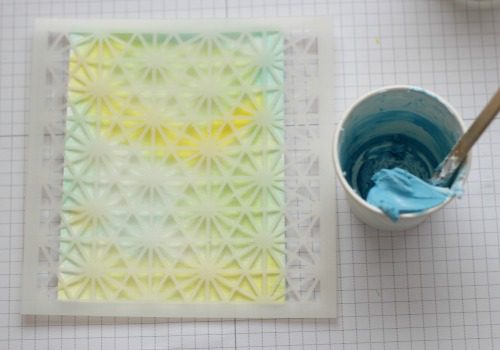
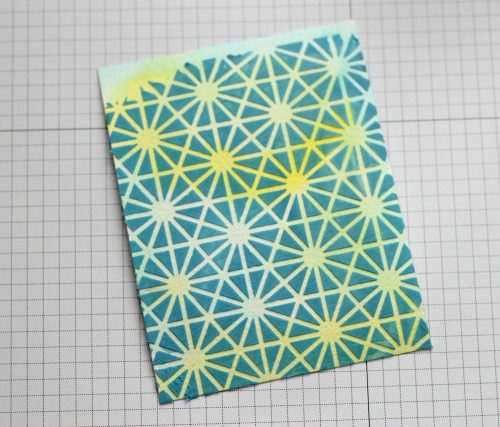
I mixed up some modeling paste and combined it with Pigment Powder Blue.  I added enough of the powder to get the shade of blue that I wanted for my card.

I placed my stencil on top of the watercolored panel and frosted the paste on top of it.

Amy Tsuruta Hello Friend 3

Here’s what it looked like after I was finished:

Amy Tsuruta Hello Friend 4

I set it aside to dry while I finished up the rest of my card.  I love using premade embellishments on my projects.  What I like to do is use more 3D Foam Squares White, Regular to even out the layers.  The arrow is pointing to the area that came with adhesive, I added the additional foam squares.


All the panels were adhered using the E-Z Runner® Grand Dispenser!


I love the contrast in colors and all of the texture in this card.  I’ve been smitten with gold glitter cardstock and seem to include it in all of my projects lately.

Amy Tsuruta Hello Friend 7

Thanks so much for stopping by!  I hope you have a super week!

SUPPLIES by Scrapbook Adhesives by 3L®:
E-Z Runner® Grand Dispenser
3D Foam Squares – White, Regular

Other products:
Cardstock: My Favorite Things, Recollections
Stencil:  Neat & Tangled
Sticker:  American Crafts


Save

Father’s Day Gift Bag

IMG_3011

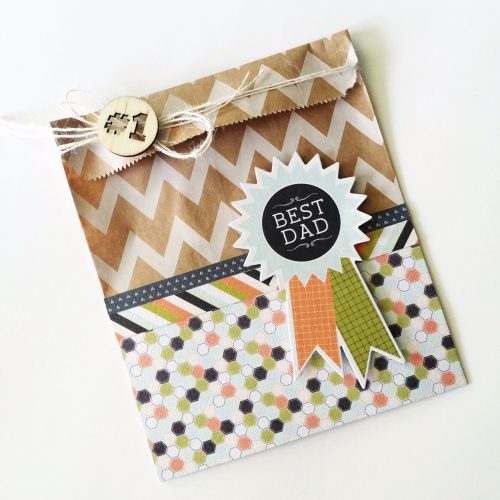
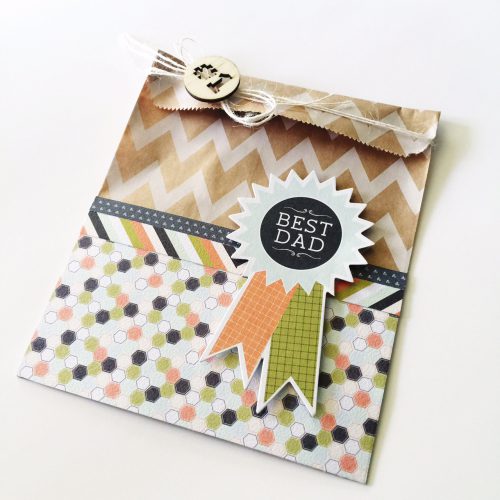
Hello there, Latisha here with you today, sharing a fun way to give a gift card by simply decorating a flat bag.


IMG_3005


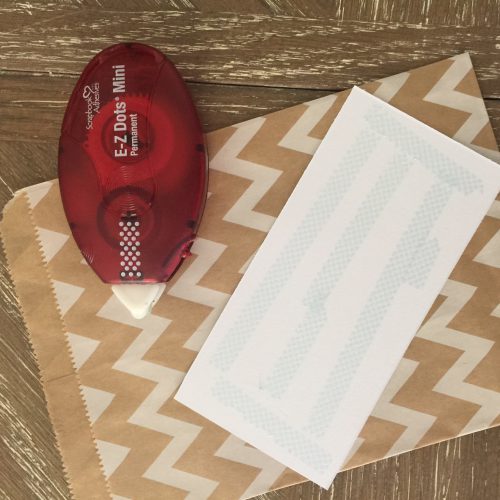
Start by trimming the pattern paper to fit the front of the bag, then adhering it.


IMG_3006


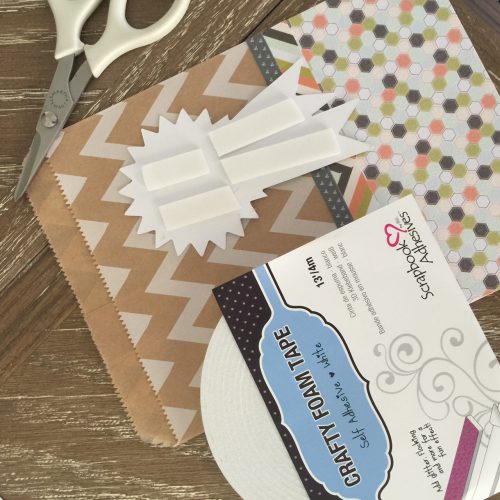
Next apply the die cut using Scrapbook Adhesives by 3L® Crafty Foam Tape.


IMG_3007


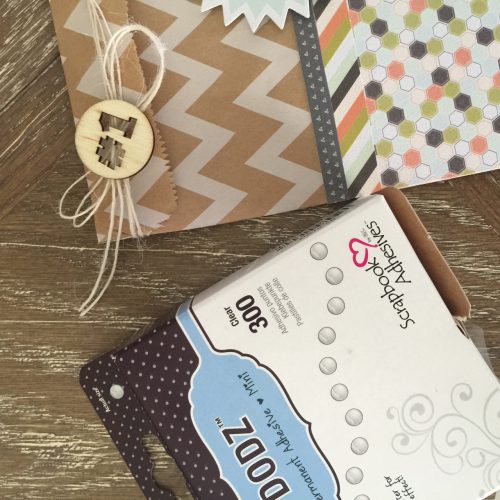
Add twine then adhere the wooden veneer using Scrapbook Adhesives by 3L® Dodz Adhesive Dots Mini.


IMG_3010


Materials Used:

Scrapbook Adhesives by 3L® Crafty Foam Tape

Scrapbook Adhesives by 3L® Dodz Adhesive Dots Mini

Fancy Pants Designs: Good Fellows patterned paper, diecut & veneer

Twine

3D Foam Creative Sheets + Die Cuts on a Wedding Card

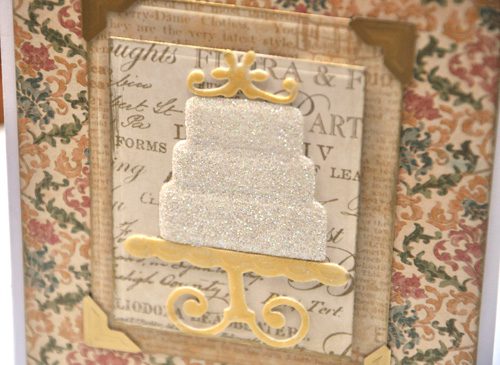
Customizing your wedding embellishments is made easy when you use 3D Foam Creative Sheets. Hi it’s Beth, ’tis the season for weddings! I have a sweet and sparkly card perfect for the big day or a bridal shower.

Beth Pingry Wedding Card 1

Customizing Wedding Embellishments

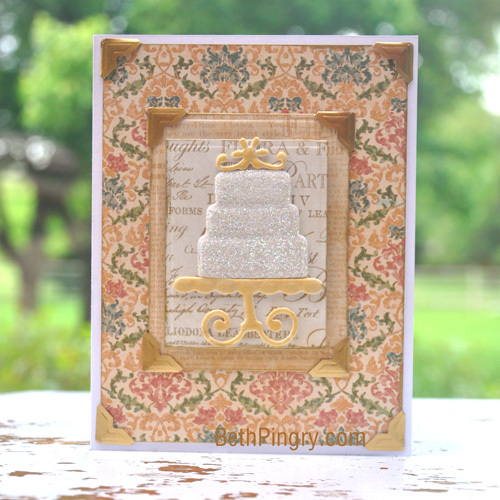
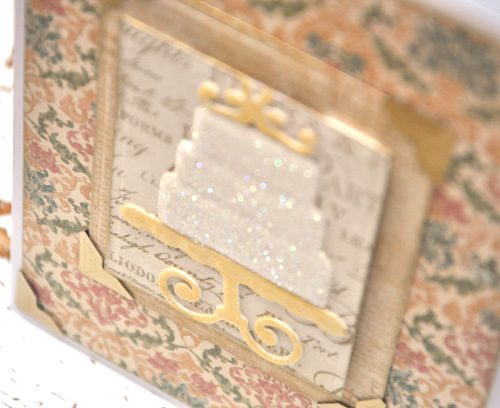
I made this card, using dies from Spellbinders and 3D Foam Creative Sheets. See how the die embosses the 3D Foam? It even shows the dimension through the glitter!

Beth Pingry Wedding Card 2

The cake plate and topper are also from 3D Foam Creative Sheets, and I rubbed Gold Pigment Powder into them.

Beth Pingry Wedding Card 3


Next I layered with patterned papers using 3D Foam Squares, Click ‘n Stick Squares, and Gold Creative Photo Corners. Then I stamped a message for the happy couple inside.

Really, it was a quick and easy card, and I’m so happy with the result!

Find more wedding inspiration on Top Wedding Ideas!

Thanks for visiting,
Beth Pingry

Supplies:

Fourth of July Card Tutorial

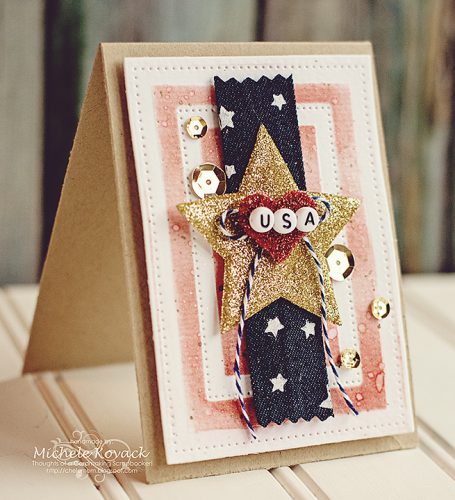
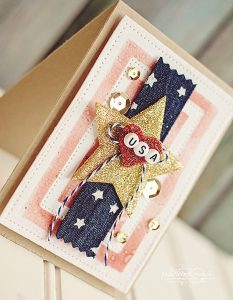
Howdy! Michele here with a patriotic card to celebrate the Fourth of July, which is right around the corner!

Fourth of July Card Tutorial

I cut the frames and left the dies in place.  I sponged ink around the dies and spritzed it with water.  I also flicked a bit of gold water color paint. I adhered a strip of Denim Ribbon down the center with Crafty Foam Tape in white. 

Fourth of July Card Tutorial by Michele Kovack for Scrapbook Adhesives by 3L

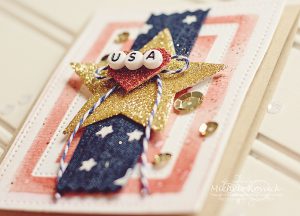
I used the 3D Foam Creative Sheets to die cut a star.  Then I sprinkled it with gold glitter and set it aside.  I then used the 3D Foam Heart and sprinkled that with a reddish/gold glitter.  Next I tied the twine into a bow and adhered everything, including the letter beads, with Dodz Adhesive Dots Medium and Dodz Adhesive Dots Mini.
fourth of july3

For a finishing touch I scattered a few gold sequins around the star.  Those were also attached with Dodz Adhesive Dots Mini.
fourth of july2

Patritotic cards, scrapbook pages, banners & projects

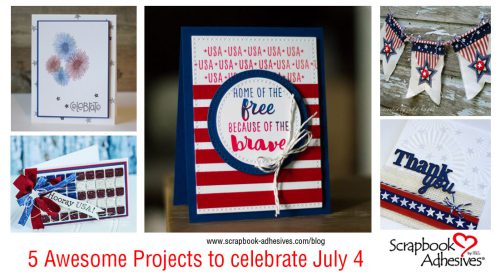
Click to see more patriotic projects!

I am so glad you stopped by today!!

Michele

Supplies: Dodz Adhesive Dots – Mini, Dodz Adhesive Dots – Medium, 3D Foam Creative Sheets, 3D Foam Hearts, Crafty Foam Tape-White, sequins, dies, card stock, alphabet beads, twine


Save

Save

Save

Save

Girls Birthday Card with Die Cuts and a 3D Effect with 3D Foam Squares

Hi there,

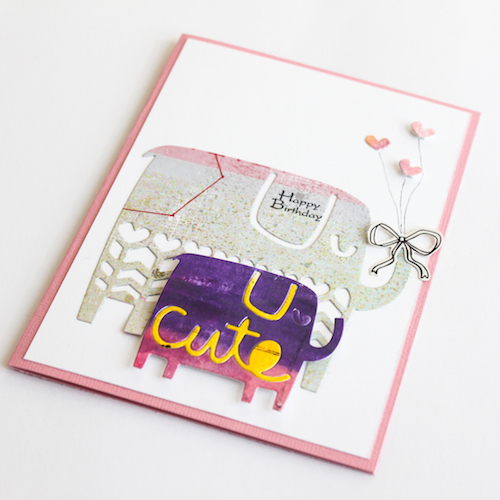
it’s Stephanie here today and I want to show you a Girls Birthday Card made with Sizzix dies and the fabulous E-Z Dots® Permanent – Refillable and 3D Foam Squares Mix – white.
Stephanie_Birthdaycard_1

With the 3D Foam Squares it’s so easy to create a 3D effect.
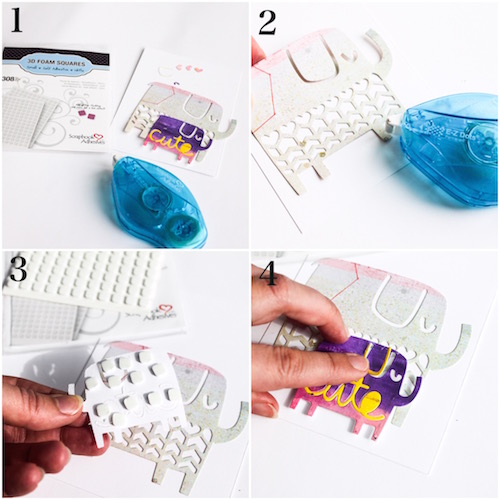
Here is my little tutorial for you.

Stephanie_Birthdaycard_2

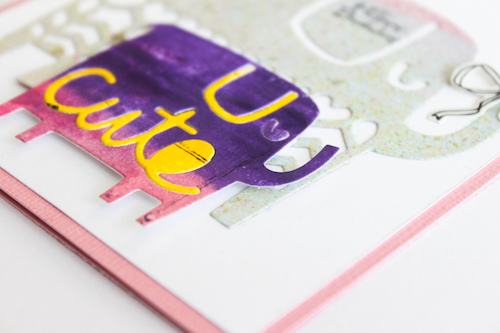
1 – Use your die cutting machine and the Sizzix Thinlits Die Set – Elephant Duo to cut out two Elephants. The paper of the Baby Elephant is selfmade with Gelatos this gives a special look.
2 – Use the E-Z Dots® Permanent – Refillable to adhere the Mama Elephant on your white beackground.

3 – Then use the 3D Foam Squares Mix – white to create a 3 dimensional look.

4 – Put the little Elephant in front of the Mama Elephant.

Stephanie_Birthdaycard_3

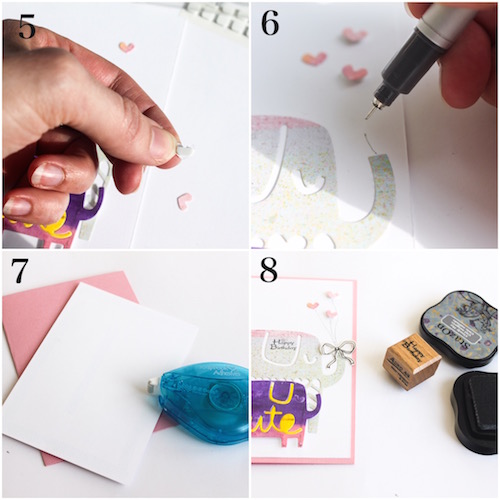
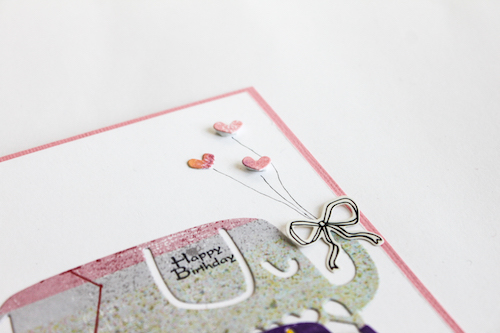
5 – With the dies there are also some inlays you can use. For instance these little hearts. Cut a little 3D Foam Square (from the 3D Foam Squares Mix – white) in a half and put it onto your card.

6 –  With a black pen you can draw some simple lines for the little heart balloons.

7 – Use the E-Z Dots® Permanent – Refillable to put your background card on a double card.

8 – Then add some finishing touches, like a Birthday stamp and a bow sticker or something else.

Stephanie_Birthdaycard_4 Stepahnie_Birthdaycard_5

Stephanie_Birthdaycard_1

Thanks for visiting us today!

I wish you a nice creative day!

Stephanie 🙂

Supplies from Scrapbook Adhesives by 3L®

E-Z Dots® Permanent – Refillable

3D Foam Squares Mix – white

Other supplies:

Sizzix Thinlits Die Set – Elephant Duo

Big Shot Machine

Honor Tag Tutorial

It’s Erica and today I’m sharing a tag I created.

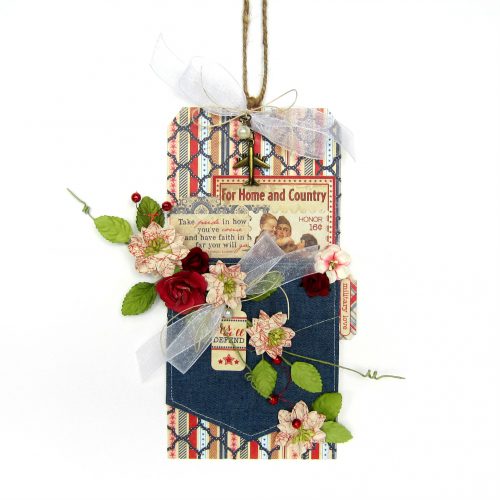
Honor Tag Tutorial

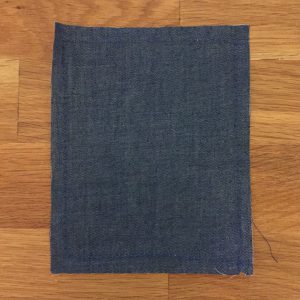
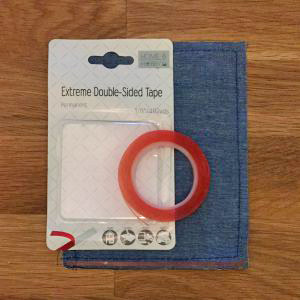
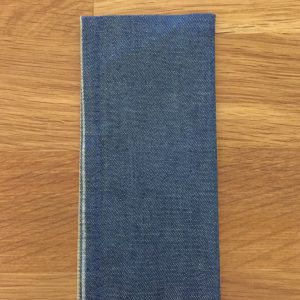
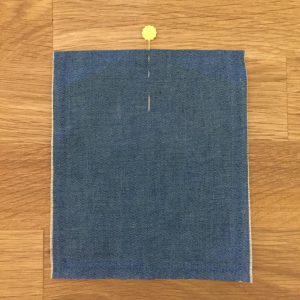
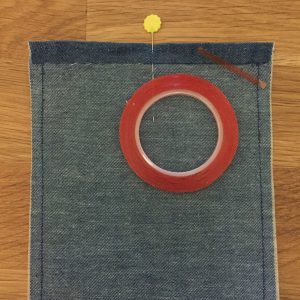
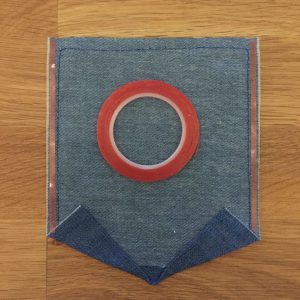
I started with a denim-colored panel. Then I placed Extreme Double-Sided Tape 1/8″ along the bottom of the pennant and folded the bottom up 1/4″. Next, I folded the pennant in half and marked the center with a pin.

Honor Tag Tutorial Honor Tag Tutorial Honor Tag Tutorial Honor Tag Tutorial

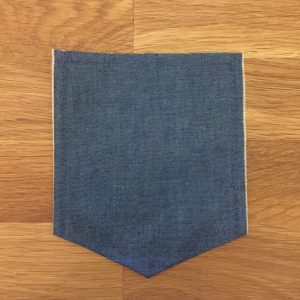
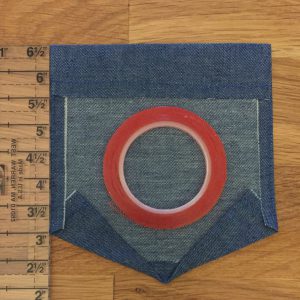
After I marked the center I unfolded the pennant, placed Extreme Double-Sided Tape 1/8″ diagonally in both corners, and folded each corner towards the pin creating a pocket. I then placed Extreme Double-Sided Tape 1/8″ along both sides as well as the top and folded the sides in 1/4″ and the top down 1″.

Honor Tag Tutorial Honor Tag TutorialHonor Tag Tutorial Honor Tag Tutorial

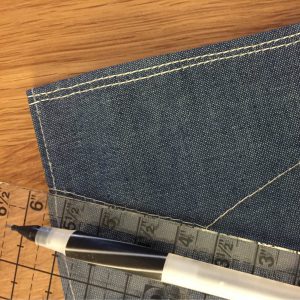
Finally, I added machine stitching to my pocket to make it look similar to a denim pocket (I used a pencil and ruler to create my pattern and then stitched along the lines).

Honor Tag Tutorial

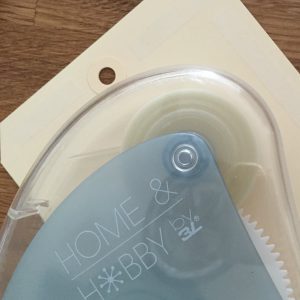
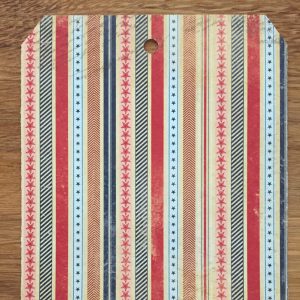
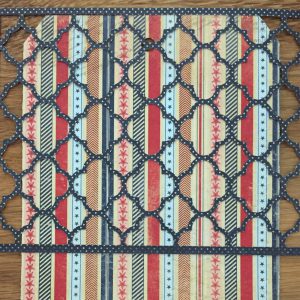
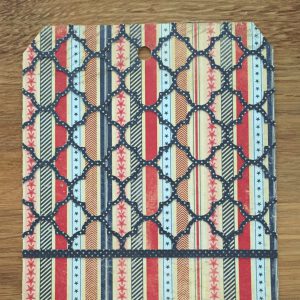
Once my pocket was ready I began creating my tag. I started by placing adhesive along the edges of a tag using the HomeHobby by 3L Double Sided Tape Runner and covered the tag with pattern paper. I then used a quatrefoil die cut to create a design to add to the background of my tag. Next, I adhered my die cut to my tag using Adhesive Sheets 4×6″.

Honor Tag Tutorial Honor Tag Tutorial

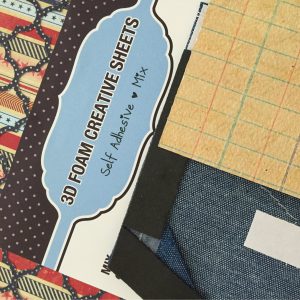
I actually cut two die cuts and placed one at the top and bottom of the tag and trimmed the excess off. I covered the gap between the two die cut pieces with the denim-colored pocket I created. To give it dimension I adhered the pocket to my tag using a 3D Foam Creative Sheets Mix.

Honor Tag Tutorial Honor Tag Tutorial Honor Tag Tutorial

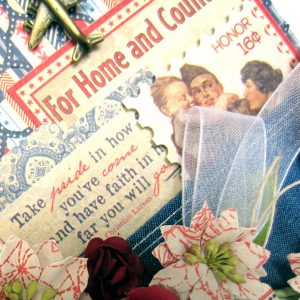
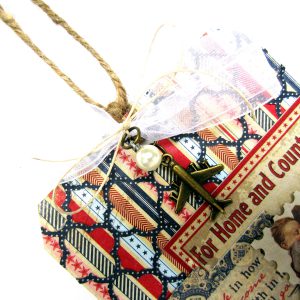
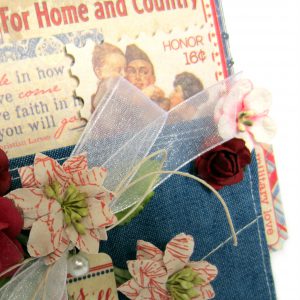
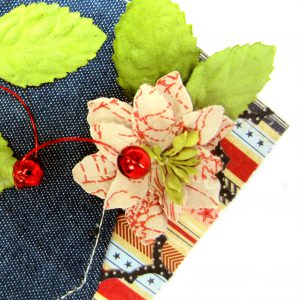
I embellished my tag with a journaling card, stickers, flowers, ribbon, twine and metal accents. Here are a few close-ups:

Honor Tag Tutorial Honor Tag Tutorial Honor Tag Tutorial Honor Tag Tutorial

Honor Tag Tutorial

Scrapbook Adhesives by 3L

Paper

  • Authentique Paper, Honor

Embellishments

  • Authentique Paper, Honor – details
  • Petaloo & Prima Marketing – flowers
  • Celebrate It – ribbon
  • Tim Holtz – jump rings, baubles
  • Fun Stampers Journey – twine
  • May Arts – wired beads
  • Misc. – airplane metal accent

Products

  • Taylor Expressions – diecut
  • Ranger Ink –Distress ink
  • 13 Arts – matte white paint

Thanks for joining me today!

Erica Houghton

Dimensional Mixed Media Background All Occasion Card Tutorial

Hello! Today I am sharing an all occasion card with a little bit of mixed media This is something easy to do – all you need is modeling paste. I will show you two different techniques for an easy and fast background!

Dimensional Mixed Media Background All Occasion Card Tutorial by Margie Higuchi

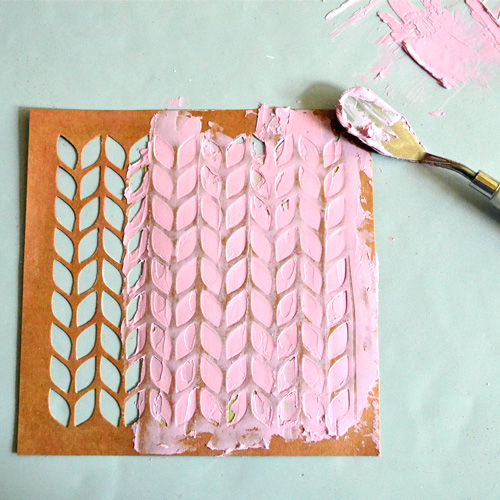
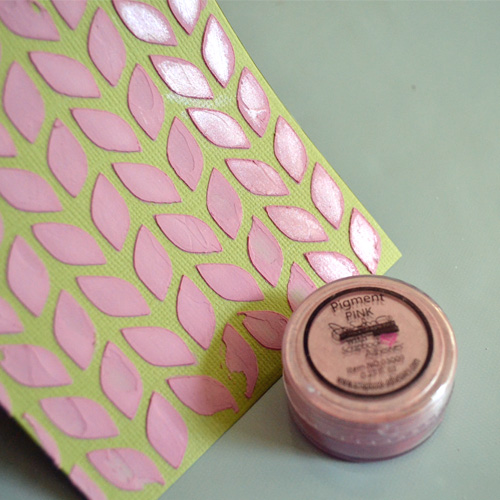
With a palette knife (or even a plastic toothless knife/spoon would do), scoop out about 1/2 Tablespoon of modeling paste. Add color, I used about 1/4 teaspoon of Pigment Powder – Pink on top of the paste. Fold in until you get the desired color (you can add more powder if you wish).

Grab a piece of 3.875 x 5.0″ green cardstock cut from Matting Basics B die set  and a favorite stencil. Let the fun begin! Start spreading the tinted paste with the back of your palette knife and cover the entire surface.

MargieHiguchi 500 MMBGAllOccasionCd Jun0416 Step2

Let dry – I used sunlight by the window but you can use a heating tool. Be careful not to bubble the paste. Once dried – a second background technique. I lightly rub more Pigment Powder on top of the stenciled design for a subtle shimmery effect (see the first two rows of leaves).

MargieHiguchi 500 MMBGAllOccasionCd Jun0416 Step3

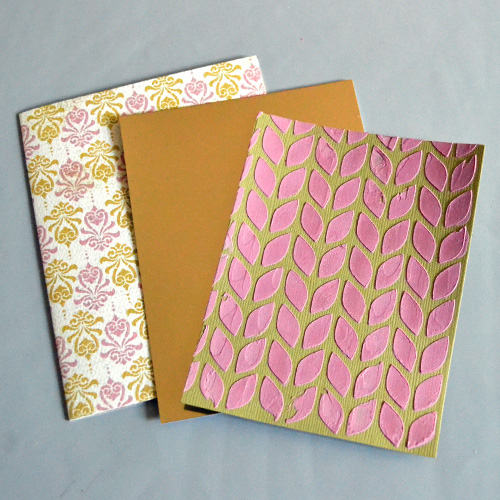
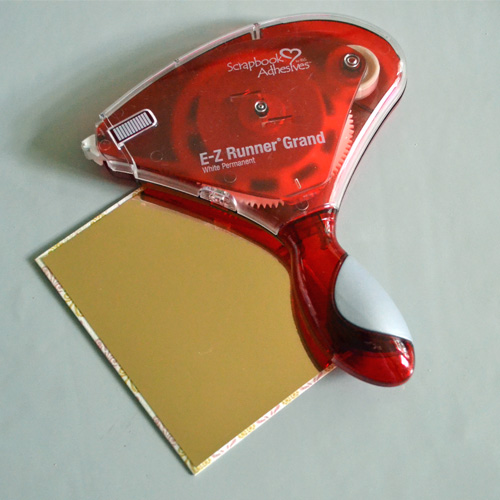
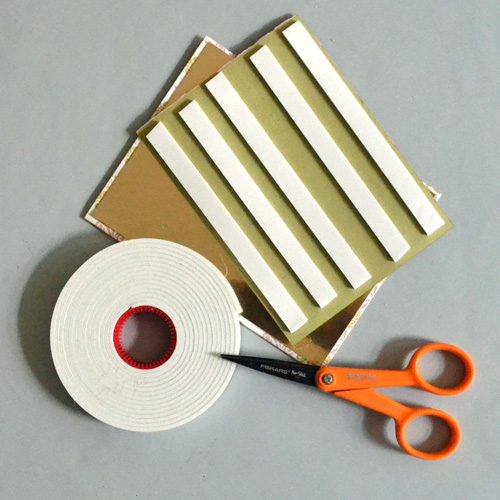
I folded in half a piece of 8.5 x 5.5″ patterned paper for a card base and cut a 4.0 x 5.25″ piece of gold mirror cardstock as a mat. Adhered the mat with E-Z Runner® Grand Refillable Dispenser and for the stenciled panel, Crafty Foam Tape – White for more dimension.

MargieHiguchi 500 MMBGAllOccasionCd Jun0416 Step4

MargieHiguchi 500 MMBGAllOccasionCd Jun0416 Step5

MargieHiguchi 500 MMBGAllOccasionCd Jun0416 Step6

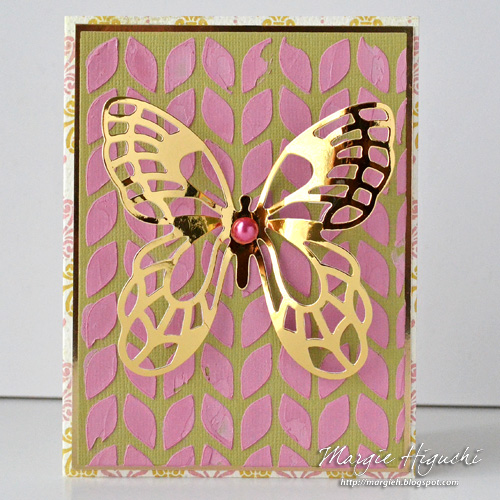
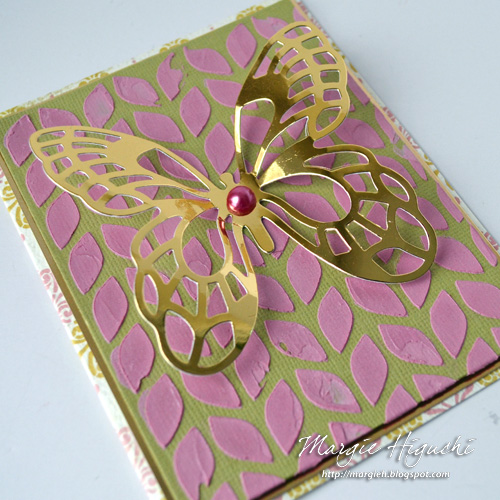
For the finishing touch add the butterfly die cut (in gold mirror cardstock) with a Dodz Adhesive Dots Medium and place a pink pearl in its center. Here is another look at the card…it’s hard to capture the shimmer on camera but it’s there!

MargieHiguchi 500 MMBGAllOccasionCd CloseUp Jun0416

Dimensional Mixed Media Background All Occasion Card Tutorial by Margie Higuchi

Hope you enjoyed this tutorial! Don’t be afraid to add a little mixed media in your next project 🙂

Thanks for stopping by!
Margie Higuchi

Supplies:
Scrapbook Adhesives by 3L®: E-Z Runner® Grand Refillable Dispenser, Crafty Foam Tape – White, and Dodz™ Medium
Pigment Powder
Patterned Paper: Carta Bella
Green Cardstock Cardstock: Core’dinations ColorCore Cardstock®
Gold Mirror Cardstock: WorldWin Papers
Stencil, Palette Knife and Modeling Paste/Whipped Spackle: Faber-Castell® Design Memory Craft®
Dies and Machine: Spellbinders® Paper Arts (Fanciful Flight – Butterfly and Matting Basics B) and Spellbinders® Platinum™ Die Cutting and Embossing Machine
Pink Pearl: Want2Scrap©

A Card of Courage

Hi everyone, Christine here today with a card of courage.  A thoughtful card for anyone you know who may be encountering a bump in the road of life.

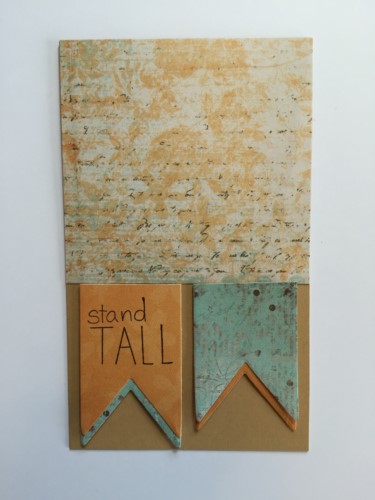
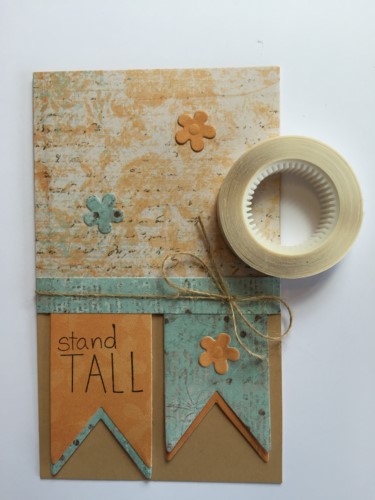
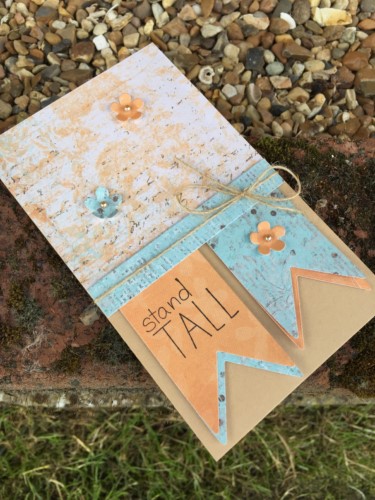
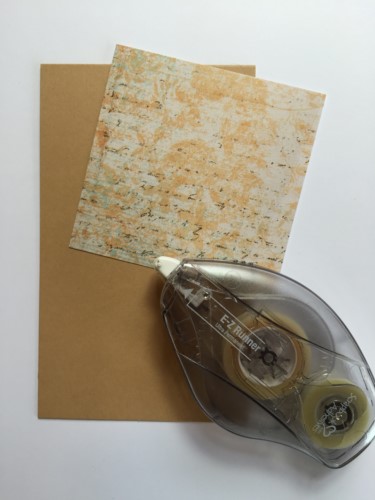
Stand Tall Card by Christine EmbersonI affixed patterned paper to a kraft card base using E-Z Runner® Ultra – this is an ultra strong, permanent, double-sided adhesive in a refillable dispenser.  It dispenses a clear line of adhesive and is immediately tacky.
CEmberson - Stand Tall 2

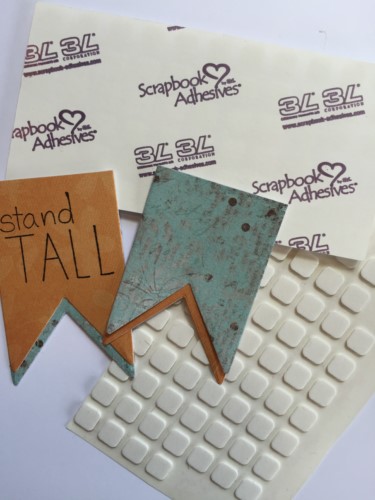
My die cuts needed to be raised up but just a little, Thin 3D Foam Squares are perfect.

CEmberson - Stand Tall 3

CEmberson - Stand Tall 4

Twine is secured in place with Crafty Power Tape.

CEmberson - Stand Tall 5

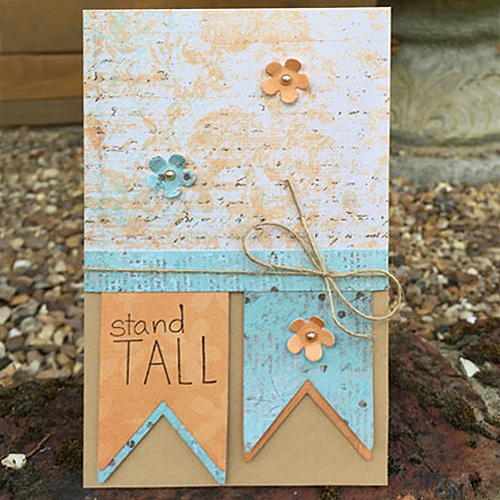
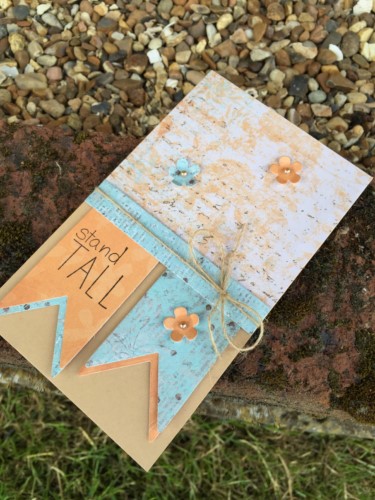
The finished card.

CEmberson - Stand Tall 7 CEmberson - Stand Tall 8

Thanks for stopping by today and don’t forget to check out all the great products on the website.

Christine

Products used:
Scrapbook Adhesives by 3L®: Thin 3D Foam Squares, Mix – WhiteE-Z Runner® Ultra Refillable Dispenser and Crafty Power Tape
Stamp and Die Set: Spellbinders® Paper Arts (Fearless Set)
Paper: Studio Light
Other: Twine; Pearls.