You are in our US store • Switch to Europe store

Feminine Sympathy Card Using New Adhesive Products

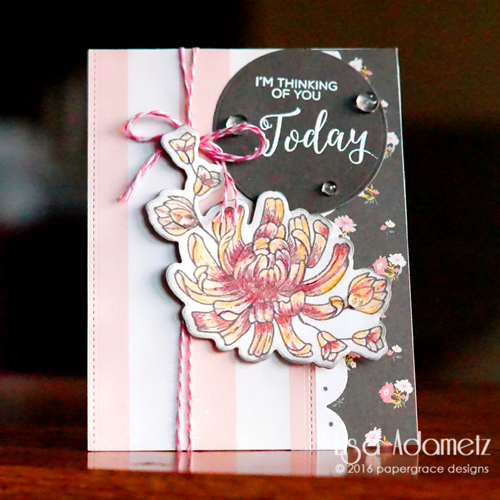
Hi everyone! It’s Lisa on the blog today sharing a sympathy card I made. These are super tough for me to make (are they for you, too). I always want to convey the right emotion and really want it to be from the heart and not generic. I guess that’s why they are the hardest card for me to make.
LisaAdametz-ThinkingofYou-02272015-1

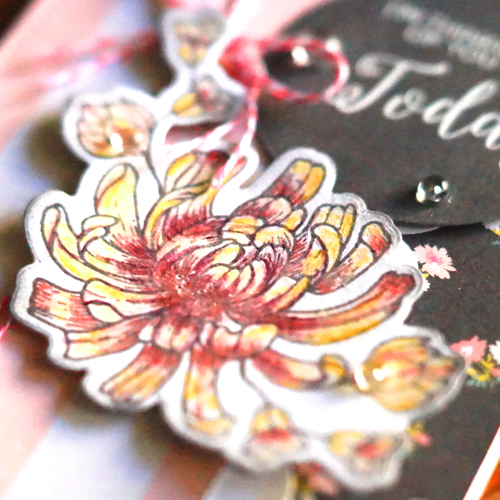
I stamped the flower onto watercolor paper and heat embossed it, then used watercolor pencils to color it in. Using the Pigment Powder in Wine , mix a tiny amount of pigment and water together. Then you’re able paint with it. I added mine to the center and darker areas simply with a very small, fine-tipped paintbrush.

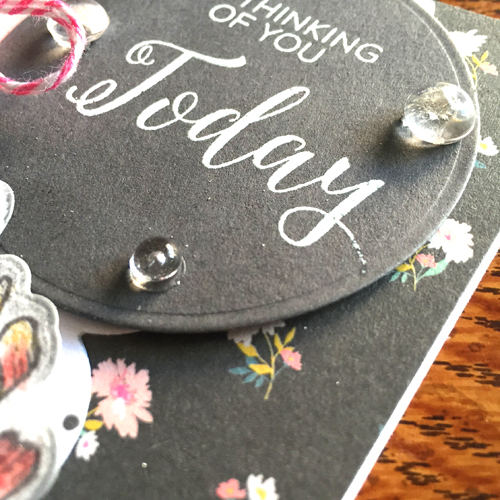
Using the brand new Adhesive Dots Mini on the back of small embellishments is a breeze! I love these!! You can’t tell they’re even there and they won’t budge. (Ask me how I know. 😉 )
LisaAdametz-ThinkingofYou-02272015-3

All pieces were adhered using the brand-new E-Z Runner® Ultra Refillable Dispenser. This adhesive is super strong and just glides across your paper.  I also die-cut and popped up my floral piece using  3D Foam Squares – Black Mix.
LisaAdametz-ThinkingofYou-02272015-2

Making a Sympathy Card is never fun, but it should reflect you and your personality and your love for the person you made it for.  I hope my dear friend, Holly, knows how much I love her and how sorry I am for her loss.

LisaAdametz-sig


SUPPLIES by Scrapbook Adhesives by 3L®:
E-Z Runner Ultra Refillable Dispenser
Adhesive Dots Mini
3D Foam Squares – Black Mix

Other products:
Matching Stamps & Die: Technique Tuesday
Other Dies: My Favorite Things Die-Namics
Embossing Powder: Wow!
Patterned Paper: Crate paper
Cardstock: Neenah
Embellishments: Pretty Pink Posh
Medium: Faber-Castell Watercolor Pencils, Ink: Tsukineko
Pigment Powder – Wine

Visit our Website and Blog!
Sign up for our Newsletter so you never miss a contest or giveaway!

instagram purple icon facebook icon purple pinterest purple icon twitter purple icon YouTube icon blog subscription purple icon

Thank You Gift Bag

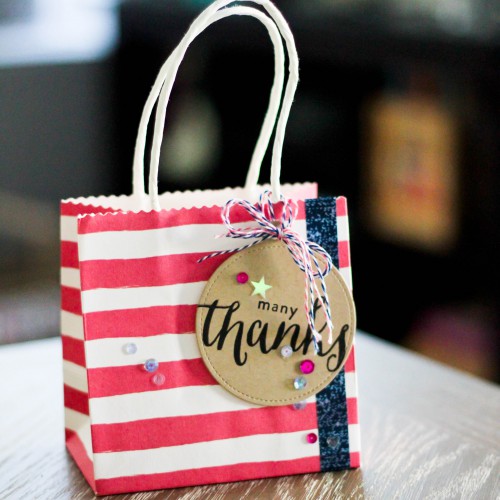
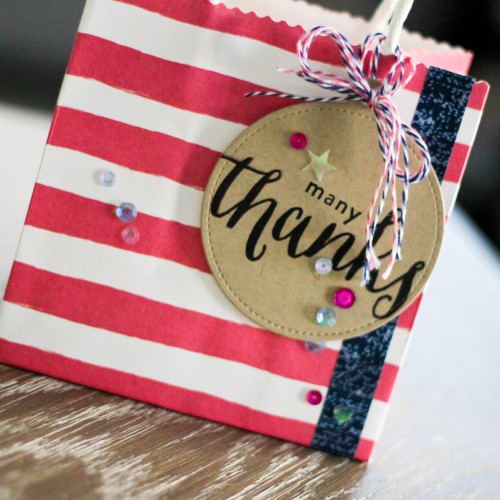
Hello Latisha with you today. I have decorated a gift bag to personalize it a little bit using some of the newest Scrapbook Adhesive by 3L® product!

Many Thanks Gift bag by Latisha Yoast for Scrapbook Adhesives by 3L

IMG_1819


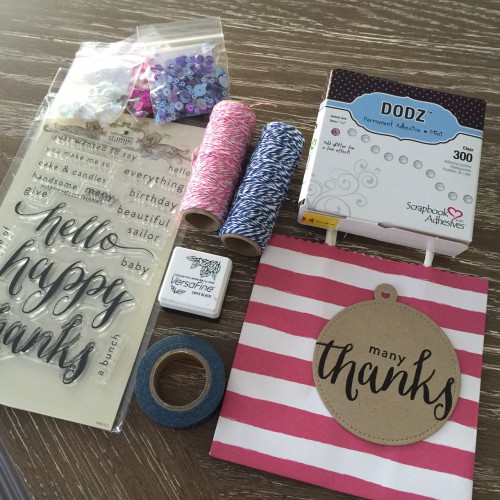
First I gathered some of my supplies, and die cut my tag from kraft card stock, then stamped onto the tag with black ink.


IMG_1820


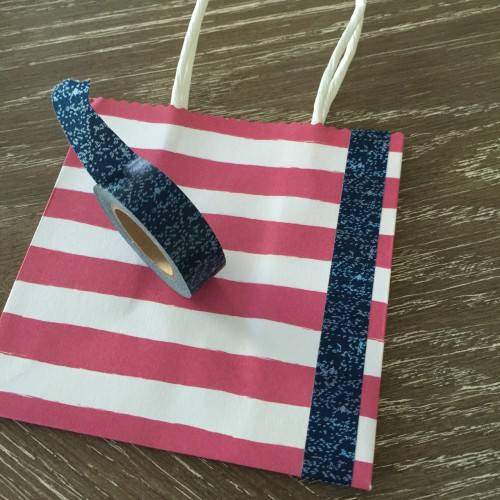
I added some denim washi tape.


IMG_1821


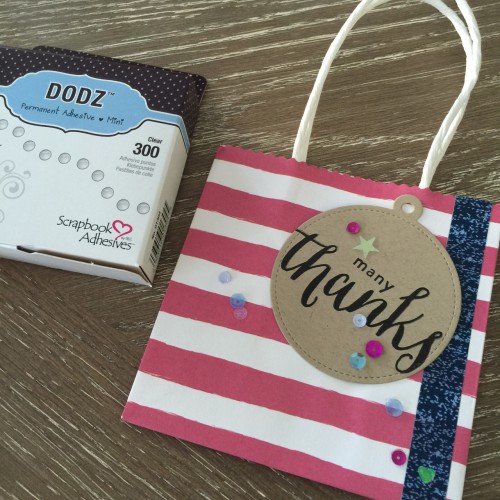
Using the  Dodz Adhesive Dots Mini, I adhered sequins onto the bag as well as the tag. Next I attached the tag using the pink and navy twine.


0215LYthanksbag2


I have a few “thank you” gifts to give away, so this is the perfect way to give it.


Materials Used:

Warm Wishes Layered Card Using E-Z Runner Products

It’s Erica and today I’m sharing two cards I created using the E-Z Runner® Grand Permanent Strips Dispenser, DODZ Adhesive Dots Small and the new E-Z Runner® Ultra Refillable Dispenser .

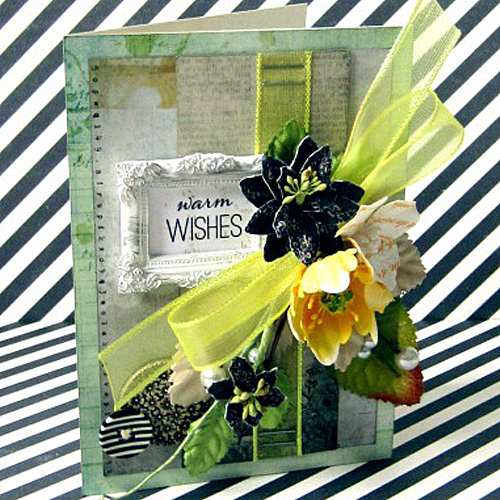
I started by layering several sheets of patterned paper together using the E-Z Runner® Grand Permanent Strips Dispenser.

Warm Wishes Layered Card by Erica Houghton

Next, I stapled my ribbon in place. Then using the E-Z Runner® Ultra Refillable Dispenser, I adhered my resin frame and warm wishes sentiment. Note: Ultra is PERFECT for adhering larger, heavier embellishments onto any project!

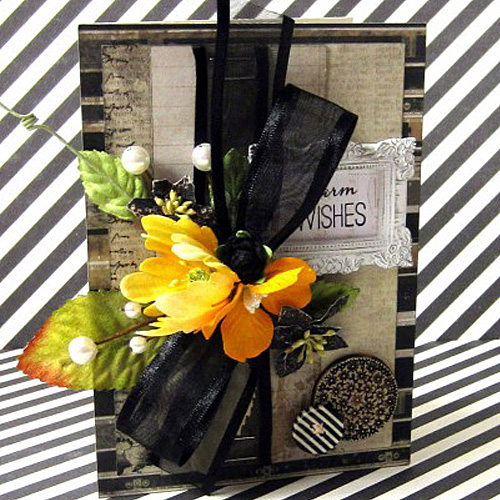
Warm Wishes Layered Card Brown by Erica Houghton

Finally, using DODZ, I adhered my larger and smaller buttons, respectively.

Scrapbook Adhesives by 3L®

Paper

  • 7 Dots Studio, Lost & Found

Embellishments

  • Petaloo & Prima Marketing – flowers
  • Celebrate It – ribbon
  • Petaloo & Sewology – buttons

Products

  • Ranger Ink – Tim Holtz – Distress Ink

Thanks for joining me today!
Erica Houghton

Bloom and Grow Oval Shaped Card

Good morning! Michele here with a spring post for you today.  (Which is fairly ironic considering our area could potentially get 10 inches of snow!)  But we will pretend that we have none of that white fluffy stuff!

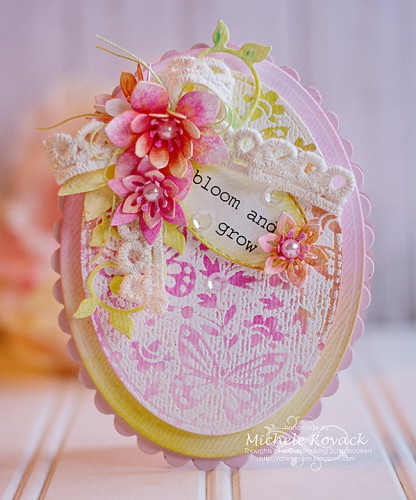
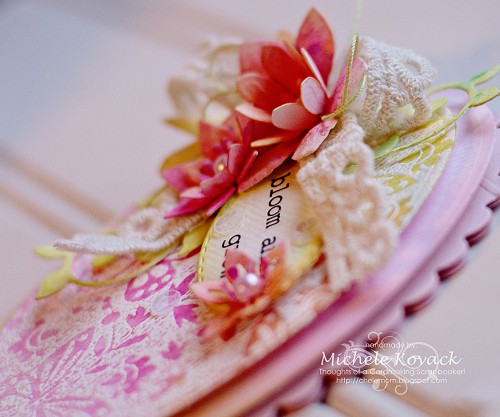
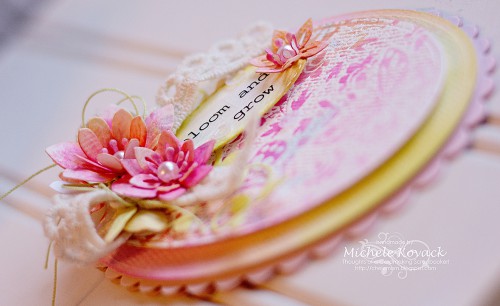
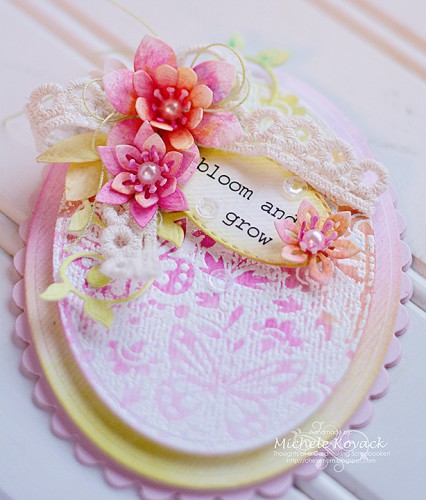
I cut various ovals and scalloped ovals to make my shaped card.  I stamped the background image with Versamark and embossed it in white.  I gave it and the panel underneath color with inks in shades of pink, green, and orange.

bloom and grow

I adhered each layer with Crafty Foam Tape White.  I use this stuff all the time to give my cards added depth and dimension!  I water colored a variety of flowers and attached each layer using Dodz Adhesive Dots Small.

bloom and grow close

bloom and grow 2

I adore Lace Ribbon and thought it would be a perfect finishing touch for my flowers to rest on.  I simply tied it into a bow using green string.  I used the Dodz Adhesive Dots Medium to attach the bow and flowers.

bloom and grow3

Thank you so much for stopping by today! Have a wonderful day!
Michele Kovack

Supplies: Crafty Foam Tape White, Dodz Adhesive Dots Medium, Dodz Adhesive Dots Small  Others: Sticker, Stamps, Versamark, White Embossing Powder, Pearls, Inks and Green String, Lace Ribbon

Save

Ready for Spring Card Trio

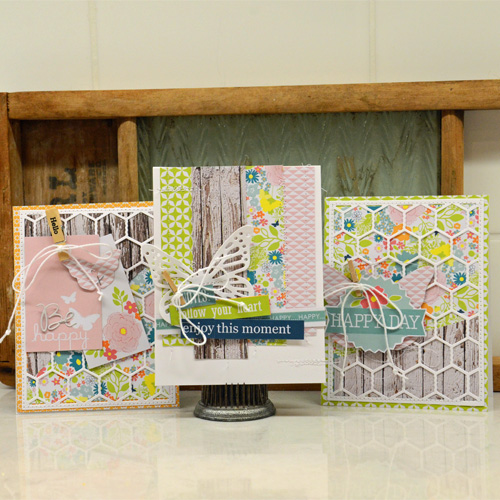
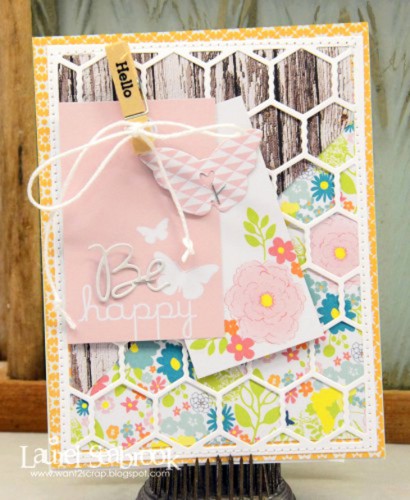
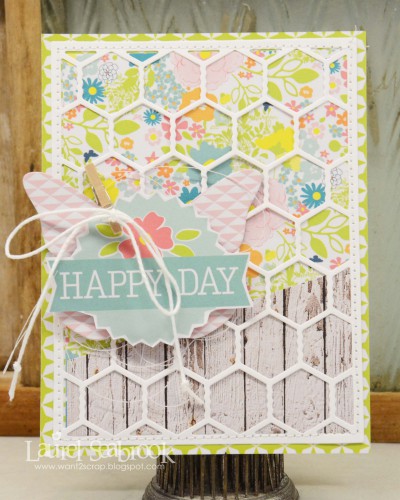
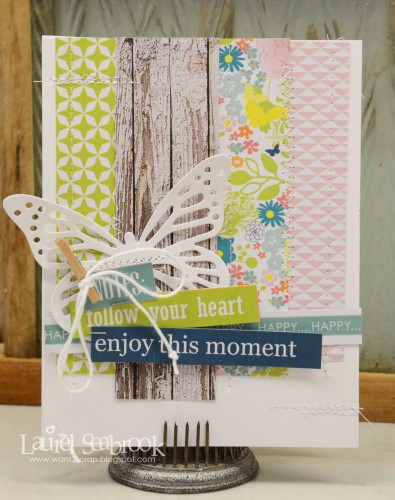
Hi everyone, Laurel here.  I don’t know about you, but I am ready for spring and today I am sharing a spring themed card trio with you. When making cards, I try to create a few in one sitting since for me they go together fairly quickly and lately I have needed quite a few of them!

Spring Trio Cards by Laurel Seabrook

As always I create a card front before adhering to a card base. That way any stapling, stitching or anything does not show through to the inside. The E-Z Runner® Grand of course makes it so easy to adhere the card to the base.

I like to include something of my cards on 3D Foam Squares for Dimension and whenever I add a clip or clothespin, I put a Adhesive Dots Medium on the back just to hold it in place.

For these first two cards I used the same basic sketch but just flipped it.

2016-02-22_2494-410x500


2016 02 22_2493

I then couldn’t let my scraps go to waste so I created one last card.  Funny thing is, this one turned out to be my favorite 🙂 I think it is because of the messy stitching…

2016 02 22_2492

Products Used:

Other supplies:

  • Paper: Chickaniddy Crafts
  • Hello Clothespin: Pebbles
  • Dies: My Favorite Things

Mixed Media Card with Pigment Powder and Scrapbook Adhesives by 3l

Hi there,

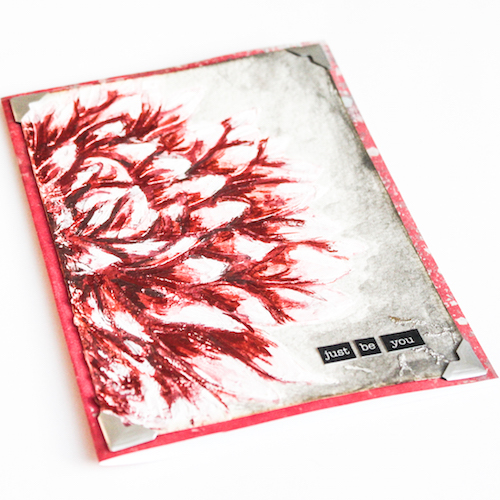
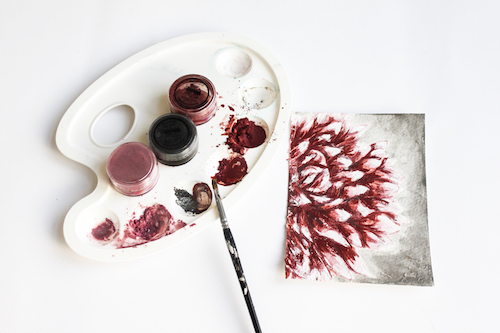
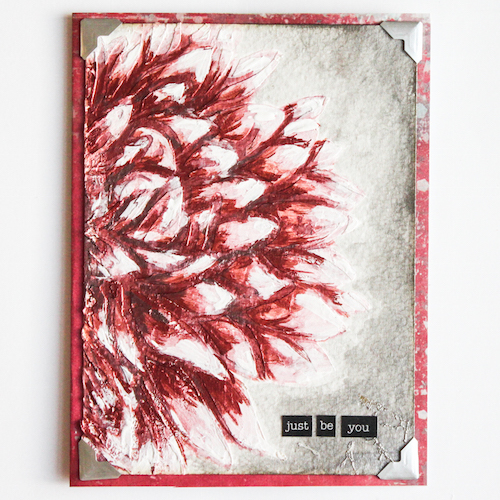
It’s Stephanie here today. I want to show you a mixed media card “Just Be You” with  pigment powders and adhesives.Stephanie_pigmentcard_1

I applied the flower with a stencil and Modelling Paste on a piece of watercolor paper. Then I used Pigment Powders in Pink, Wine and Silver to breathe life into the flower.

Stephanie_Pigmentcard_2

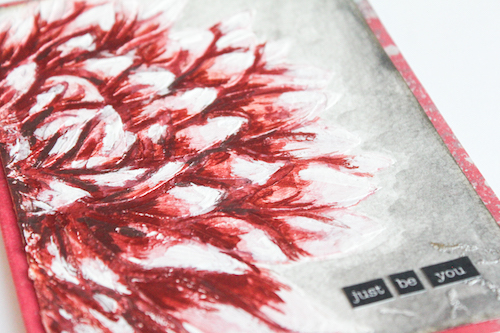
I mixed the Pigments with a little bit of water and with a little brush, I created a 3 dimensional look. I also mixed the Pigment Powder Wine with Pigment Powder Silver to get a darker red for my shadows. For the white highlights I used white Gesso. Take a look at this beautiful color wine, it’s awesome.

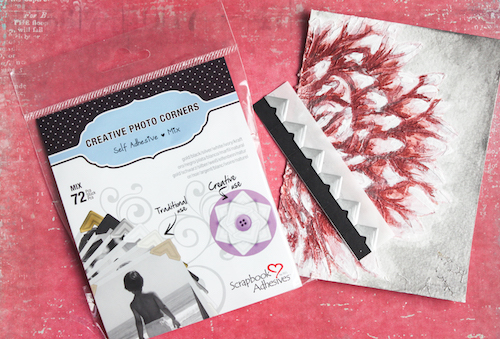
After I finished my card with a matching background, it was adhered with the Crafty Power Tape – 81′. Then I framed it with silver photo corners from the Creative Photo Corners Mix Pack.

Stephanie_Pigmentcard_4

With added word sticker my card was finished.

Stephanie_pigmentcard_5 Stephanie_pigmentcard_6

Pigment Powders are so versatile!

I wish you a nice creative day and thanks for visiting me today!
Stephanie 🙂

Supplies from Scrapbook Adhesives by 3L®:
Crafty Power Tape – 81′
Creative Photo Corners Mix Pack.


With Thanks Watercolor and Pigment Powder Gold Card

Hi Everyone!

I’m so excited to be joining Scrapbook Adhesives by 3L® as their guest designer for the next three months! With the wide range of adhesives I’m eager to dive right in with you today and get started.

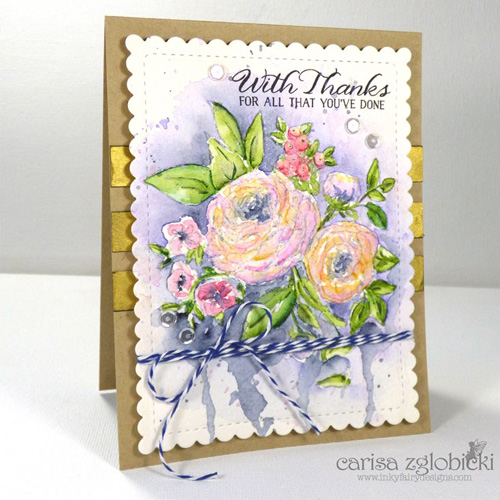
With Thanks Watercolor and Pigment Powder Gold Card by Carisa Zglobicki

Today I wanted to give my watercolor panel something unique for a backdrop so I placed adhesives on my black cardstock strips, using Premium Double-Sided Tape 1/2″. After I removed the backing, I sprinkled Pigment Powder Gold on top. I love the subtle shimmer! It burnishes easily with my fingers and no residue falls off. To adhere the shimmery strips to my card base, I used E-Z Runner® Ultra Permanent – perfect size!

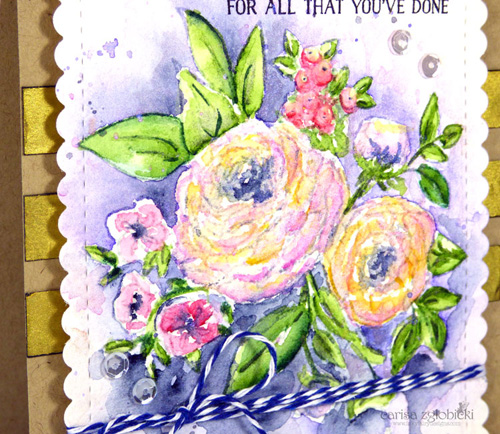
CarsiaZglobicki GDT WithThanksWaterColorAndPigmentPowderGoldCard Feb212016 CloseUp

I love this close up because you can see the shimmer so clearly behind my focal panel. I used 3D Foam Squares which are great for popping up my watercolor panel and hides any slight warping from all the water used to paint the image! I also used Dodz Adhesive Dots Small to adhere my sequins and Twine because they are perfect size for the smaller embellishments!

I hope you enjoyed my first post and thank you so much for stopping by! I look forward to creating more with these fabulous products and sharing with you over the next three months.

Until next time, Happy Crafting!
Carisa Zglobicki

Supplies:

Save

Can’t Thank You Enough! Card Tutorial

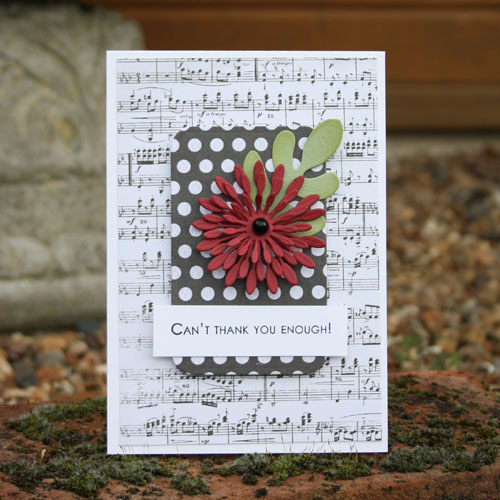
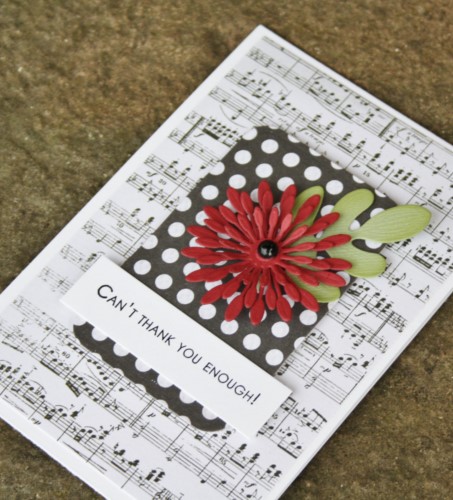
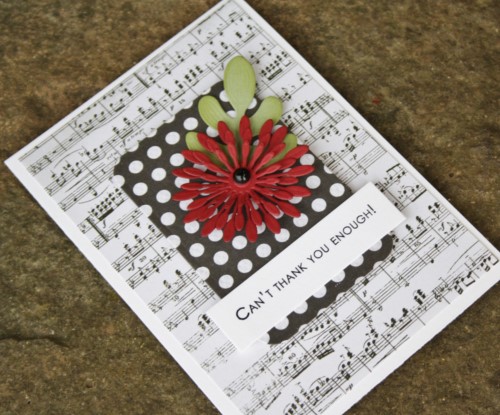
Hi everyone, Christine here today with a thank you card, predominantly black and white with a shot of colour.

CEmberson - Thank You Enough 1

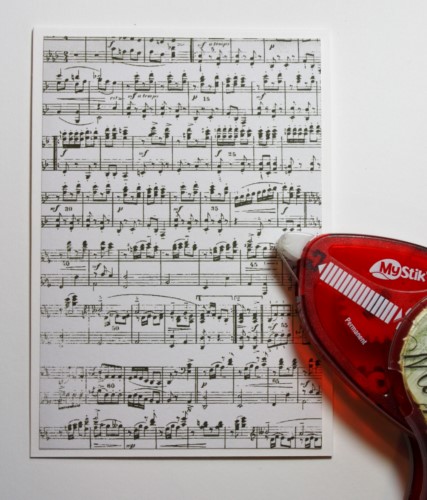
I created my card base from white card, selected patterned paper and affixed with MyStik® Permanent Strips.

CEmberson - Thank You Enough 2

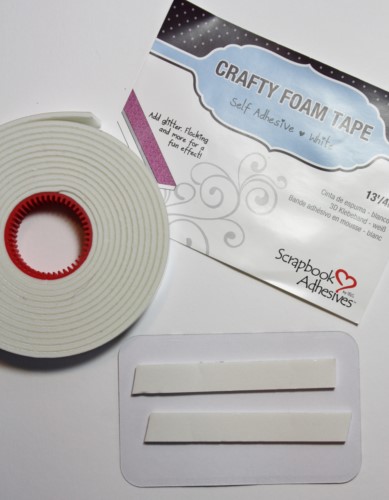
I die cut a curved rectangle and to add dimension attached Crafty Foam Tape to the reverse.CEmberson - Thank You Enough 3

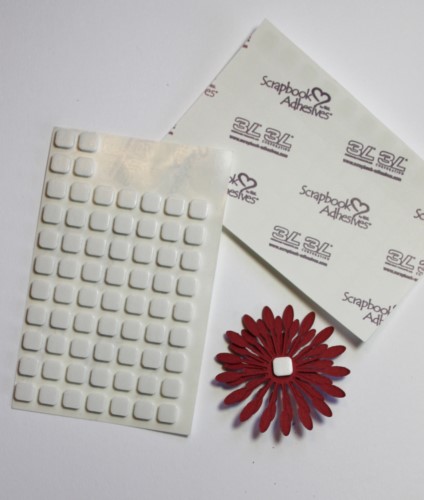
For the die cut flower, a 3D Foam Squares White Small fits perfectly on the back and will hold it in place securely.

CEmberson - Thank You Enough 4

I stamped the sentiment on a strip of white card and positioned in place with Crafty Power Tape.

CEmberson - Thank You Enough 6

A leaf for extra colour has been added and a black pearl for the flower middle.

CEmberson - Thank You Enough 5

Thanks for stopping by today and don’t forget to check out all the great products on the website.

Christine

Products used:

Crafty Foam TapeMyStik® Permanent StripsCrafty Power Tape3D Foam Squares White Small.

  • Spellbinders dies: Blooms One, A2 Curved Matting Basics
  • Stamp – Altenew, Many Thanks
  • White card, red and green card, patterned paper – Kaisercraft – Black and White Timeless, black pearl.

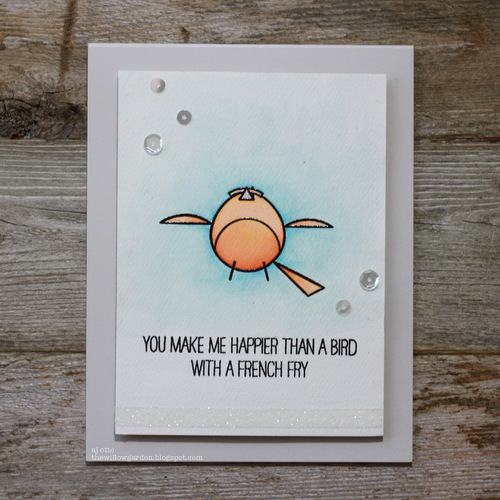
You Make me Happier Card

Hello! Happy Presidents day! AJ here from the marvels of blog scheduling because I am most certain I am sleeping in today sine the kids are home from school! 😉

AJOtto-FrenchFry-1

I just recently got some adorable new stamps and thought I would break them in for todays post.

AJOtto-FrenchFry-2

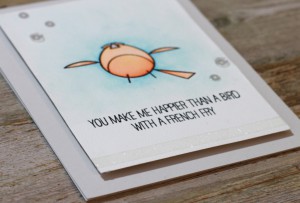
I started by stamping and coloring my main panel in, (still trying to perfect my watercolor technique) and I adhered a strip of the Premium Double-Sided Tape on the bottom and trimmed the excess off the edge.  Remove the backing and cover with glitter.

AJOtto-FrenchFry-3My watercolor paper always warps a bit, so I end up placing a piece of cereal box or something similar to the backside of the panel.  For this I use the Extreme Double-Sided Tape to make sure it lays flat to my card board piece.
AJOtto-FrenchFry-4

I also pop it up, so a few pieces of Crafty Foam Tape to use to adhere it to my card base are also in order.

AJOtto-FrenchFry-6

And I just love how the little strip of happy glittery-ness looks with out taking too much away from the main image. Is that bird not the cutest?!

AJOtto-FrenchFry-5

And my finished card for the giving! 🙂 enjoy!!  –AJ

Scrapbook Adhesives by 3L® Products used:  Premium Double-Sided TapeCrafty Foam TapeExtreme Double-Sided Tape
Stamps- WPlus9; Spectrum Aqua Markers; Glitter; Seqiuns; Watercolor paper;  Embossing ink; Black Embossing Powder


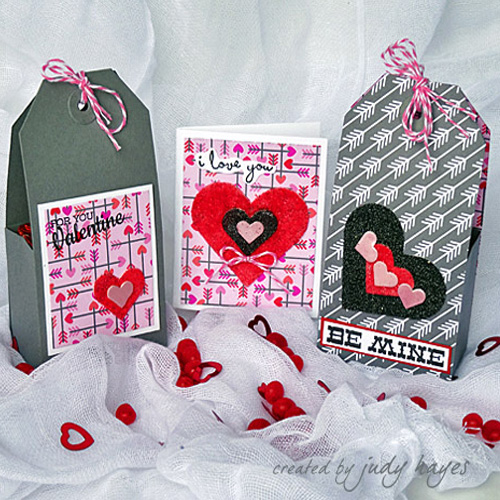
3D Foam Hearts Valentine’s Treat Box Ensemble

Happy Valentine’s Day!!! Wishing you a day of love and treats!

3D Foam Hearts Valentines Treat Box Ensemble by Judy Hayes

Judy here today with some quick treats boxes, tiny card included. A little something to make at the last minute to say “I love you!” for someone special!

Boxes are made with tags with a handmade base.  Ready-made tags can be used to cut time!  My tags are 2¼ x 4½ʺ. The hearts are super easy to do – a little Pigment Powder, glitter and sparkle flock applied to 3D Foam Hearts. Let me show you how…

Directions:

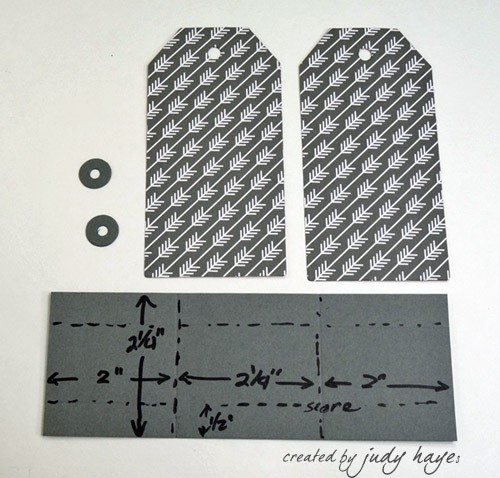
  1. Cut 2 tags from patterned paper; cut 2 reinforcement circles from gray cardstock. Use Adhesive Sheets – 4 x 6″ to apply adhesive to reinforcement circles. Fasten to tags.
    JudyHayes-ValentineTagBox2
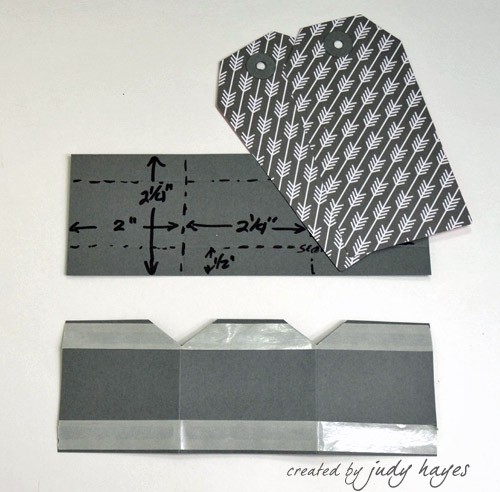
  2. Cut 2¼ x 6¼ʺ piece of gray cardstock. Score ½ʺ from long edges. Score 2ʺ from each end. Fold on score lines.  Apply strip of Crafty Power Tape along each long edge.  Cut “V” notches where score lines intersect.
    JudyHayes-ValentineTagBox3
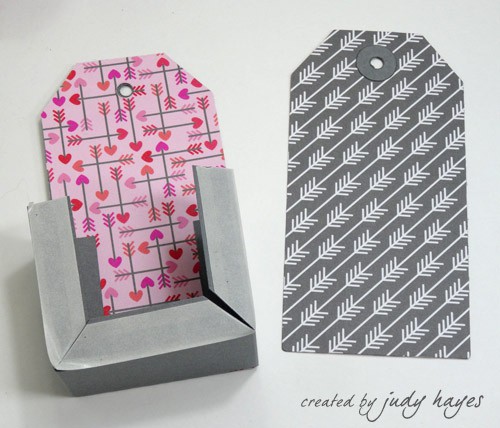
  3. Fasten tag to gray cardstock strip along bottom and sides of tag. Fasten 2nd tag to other side.
    JudyHayes-ValentineTagBox4
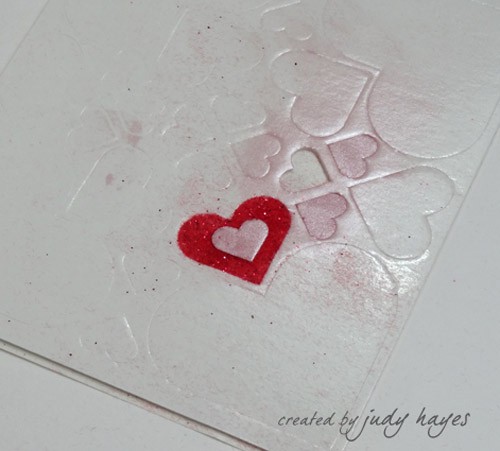
  4. Remove liner paper from 3 small 3D Foam Hearts. Apply Pigment Powder Pink to hearts with brush. Press pigment onto heart with finger.  Remove excess.
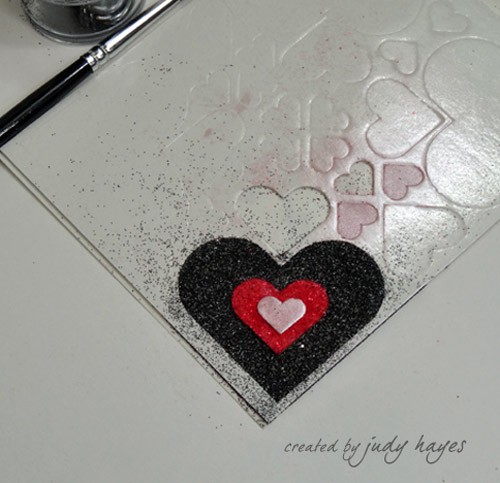
  5. Remove liner paper from medium 3D Foam Hearts. Place one small pink heart on it. Sprinkle with flock and press into adhesive. Remove excess.
    JudyHayes-ValentineTagBox6
  6. Remove liner paper from large 3D Foam Hearts. Place medium heart on large heart. Sprinkle glitter over it.  Press glitter onto heart.
    JudyHayes-ValentineTagBox7
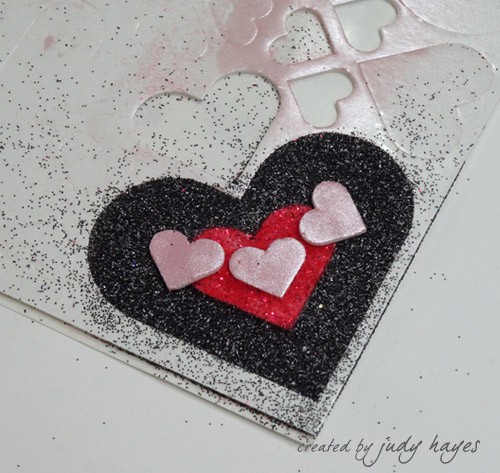
  7. Place other 2 small pink hearts on red and black heart.
    JudyHayes-ValentineTagBox8
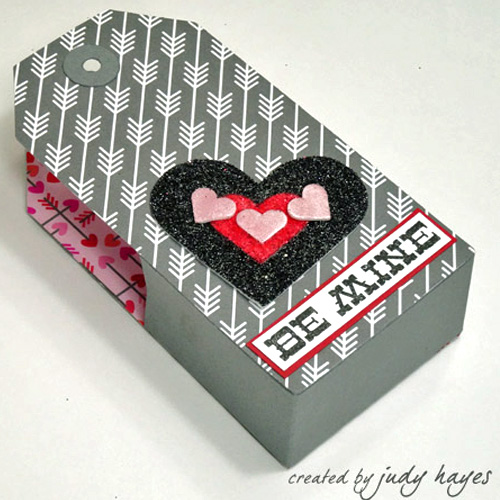
  8. Place hearts on tag treat box.
    JudyHayes 3DFoameHeartsValentinesTreatBx9 Feb1416
  9. Stamp verse with black ink on white card stock. Fasten to red cardstock with Crafty Power Tape. Fasten to tag treat box with Crafty Power Tape
  10. Fill with treats! Tie tags together with  Twine.


Tiny Valentine Card

JudyHayes-ValentineTagBox10

  1. Form 2½ x 3ʺ card from white cardstock.
  2. Fasten patterned paper to card with Crafty Power Tape.
  3. Apply Pigment Powder Pink to small 3D Foam Hearts.
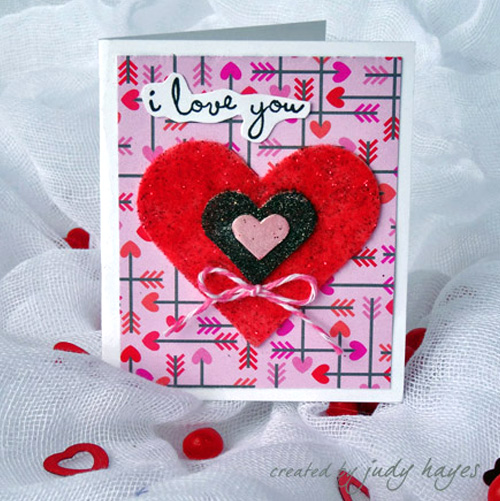
  4. Fasten small heart to medium heart and apply flock.
  5. Fasten heart to card.
  6. Stamp verse with black ink on white cardstock. Cut around verse.
  7. Apply Adhesive Sheets – 4 x 6″ to back of verse. Fasten to card.
  8. Tie twine in bow. Glue to heart with Dual Tip Glue Pen.

Have a crafty Valentine’s Day!
Hugs,
Judy Hayes


Other Supplies:

  • Contour Steel Rule Die:  Spellbinders® Tag, You’re It
  • Patterned Paper: Doodle Bug Designs, Inc™ – Lovebugs™
  • Cardstock: Red, White, Gray
  • Stamps: Lots of Love © Avery Elle
  • Ink: Tsukineko Versafine Onyx Black
  • Glitter and Flock: Sparkle & Sprinkle® Black Ice Glitter and Cherry Sparkle Flock