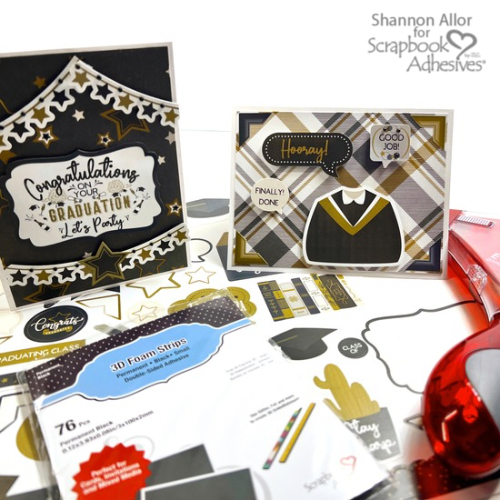
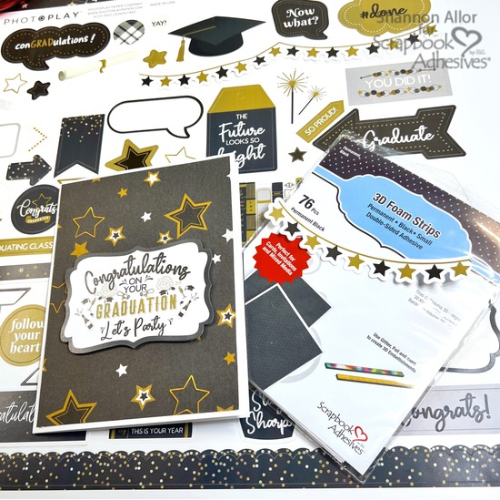
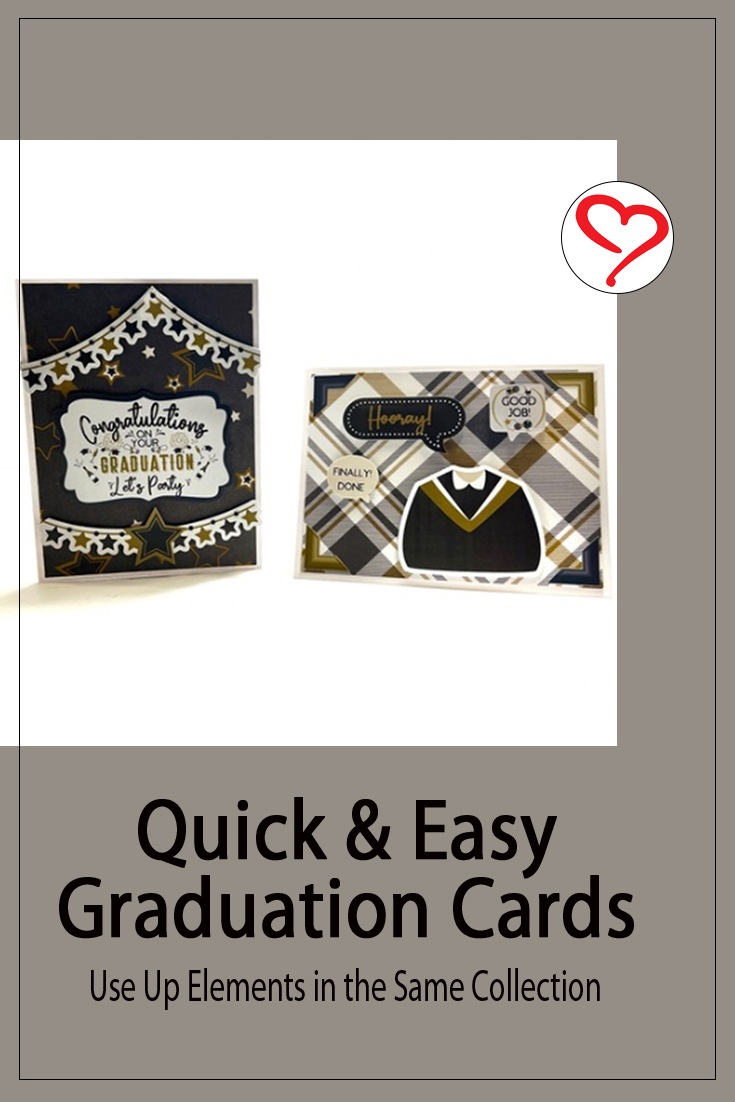
Who has a graduate in the house?! Hi, Shannon here today! I needed a couple of Quick Graduation Cards for high school graduation celebrations. I grabbed the cutest collection from Photo Play and my trusty Scrapbook Adhesives By 3L products and got right to work!
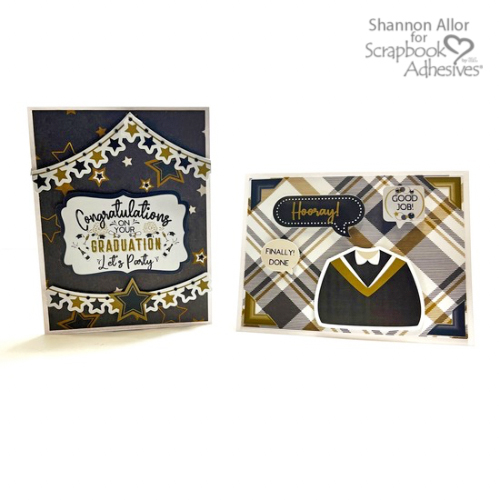
Quick Graduation Cards Design – Plaid Graduate
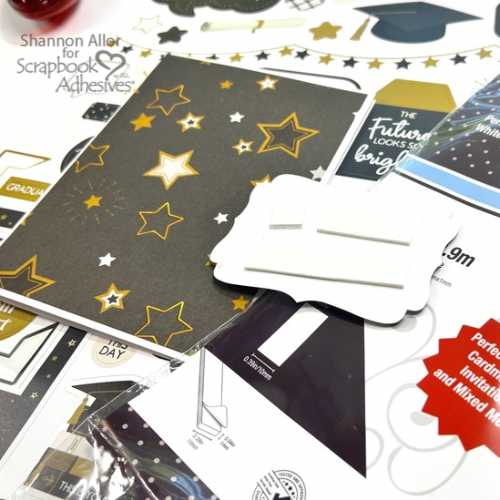
Start with premade card bases in a nice bright white. I cut my patterned papers to 4.25″ x 5.25″. I love the bold patterns against the white. My favorite E-Z Runner® Grand Permanent Strips Refillable Dispenser came in handy to attach my papers.
Use the sticker sheet in the collection as your sentiments or elements to accent the card. For the plaid card front graduation card, I used Crafty Foam Tape White 108ft to pop up my corner accents. Then did the same with the graduate shape and speech bubbles. So FUN!
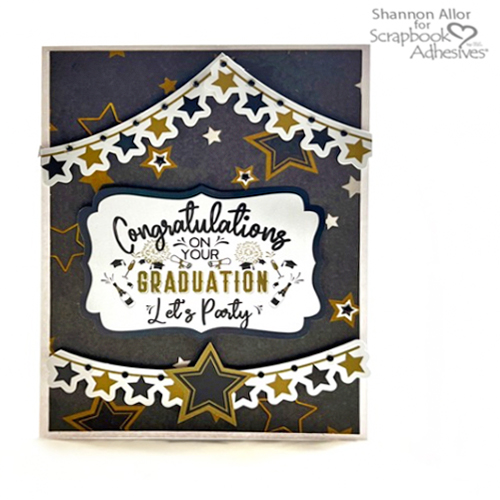
Quick Graduation Cards Design – Let’s Party
For this Quick Graduation Card, I wanted to make sure that the sentiment sticker had some over the top dimension. My solution was to stack two layers of the Crafty Foam Tape White 108ft.
For the banner embellishments, I used 3D Foam Strips Black. The black foam is perfect against the black background. You cannot see it at all! To finish it off I used some cute little black gems!
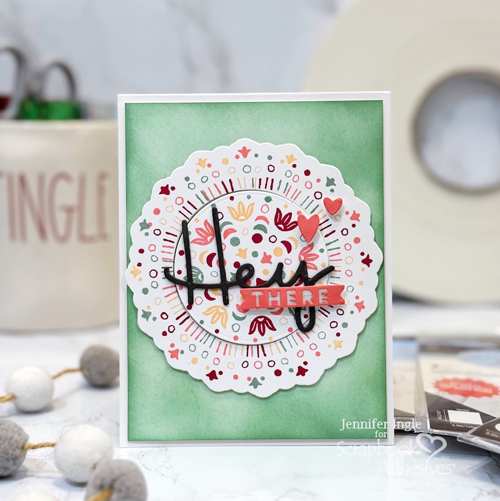
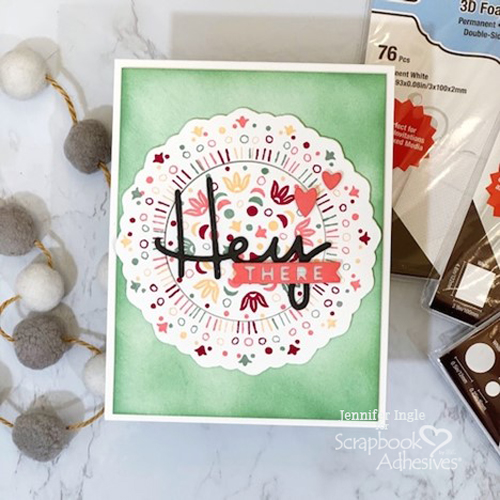
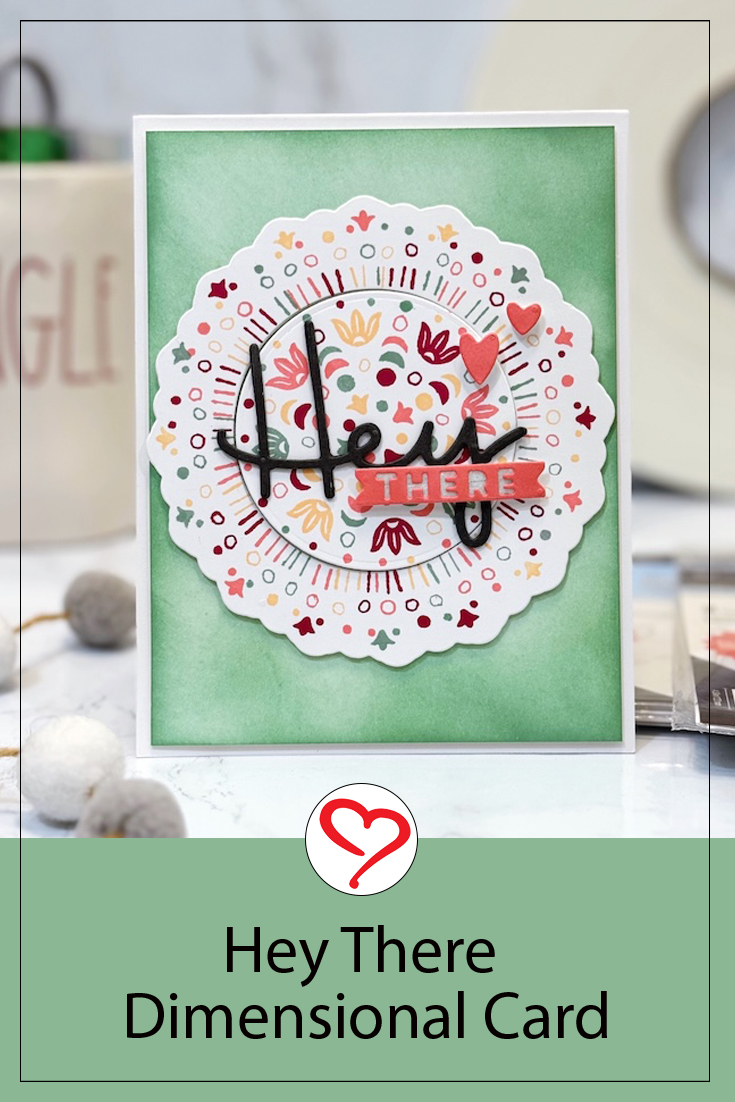
Bring on the Foam Adhesives! Hello, friends, this is Jingle here with you today with a brand new card that celebrates foam adhesives! Let me show you my Hey There Dimensional Card.
Hey There Dimensional Card Design
I started with the Concord and 9th Kaleidoscope stamps and dies and then pulled out a bunch of my favorite Scrapbook Adhesives by 3L foam adhesive options to use on this super fun card.
First, I did some ink blending to create the background and then mounted that on my card base using Crafty Foam Tape White 108ft.. I also used this same foam tape for the outside stamped frame, as it is a thinner foam and I wanted to graduate the thickness as it went in.
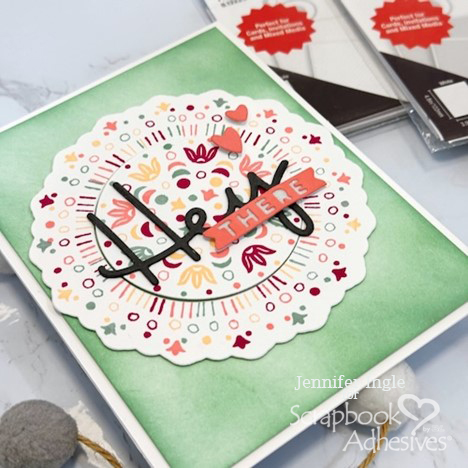
Then I used Crafty Foam Tape White 54ft., which is a bit thicker, for the smaller circle in the center. The “Hey” is cut from cardstock that was mounted on the 3D Foam Creative Sheets Small Black. This makes it so easy to adhere a narrow font to your cards! I die cut the ‘there’ strip and added two of the 3D Foam Strips in white. I applied the glitter right onto those strips, too, because the adhesive showed through each letter! Perfect!
Heart Embellishments
Finally, I used the smaller size of the 3D Foam Circles White Mix to adhere the two small hearts. These pop up so nicely! I love how the foam circles allow them to really stand out over the stamped pattern.
This was such a fun card to create and it has so much dimension! And the best part is, because the foam is flexible, this will slide into an envelope and mail easily even WITH all of that fabulous depth to it!
Thank you so much for stopping by today! I hope you are inspired! Jennifer Ingle (aka Jingle)
Other: Stamps, Dies, and Inks: Concord & 9th (Kaleidoscope Stamps & Dies and Inks in Eucalyptus, Watermelon, Wildberry, and Creamsicle); White + Dark Grey Cardstock
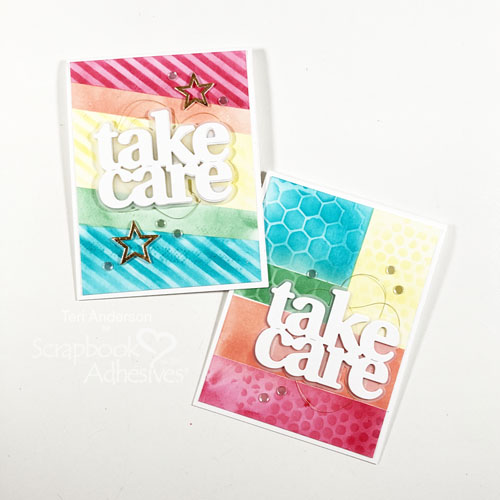
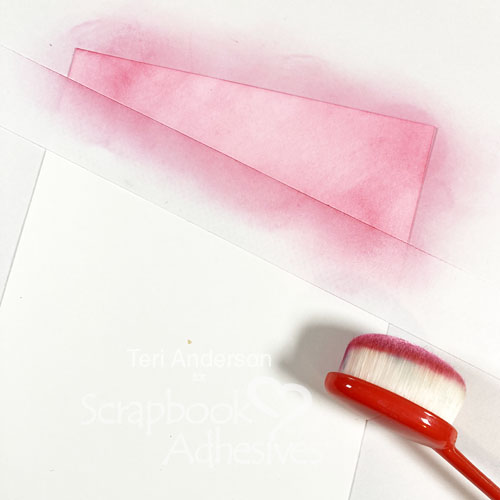
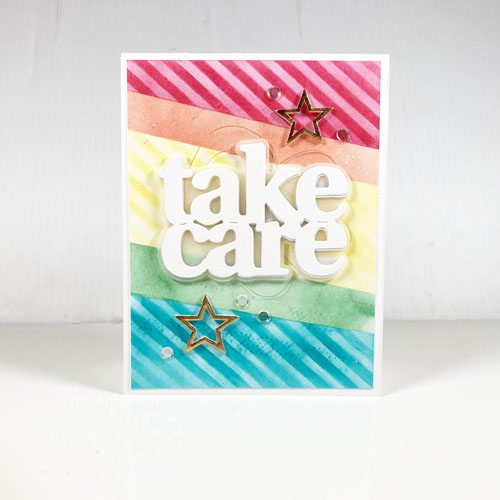
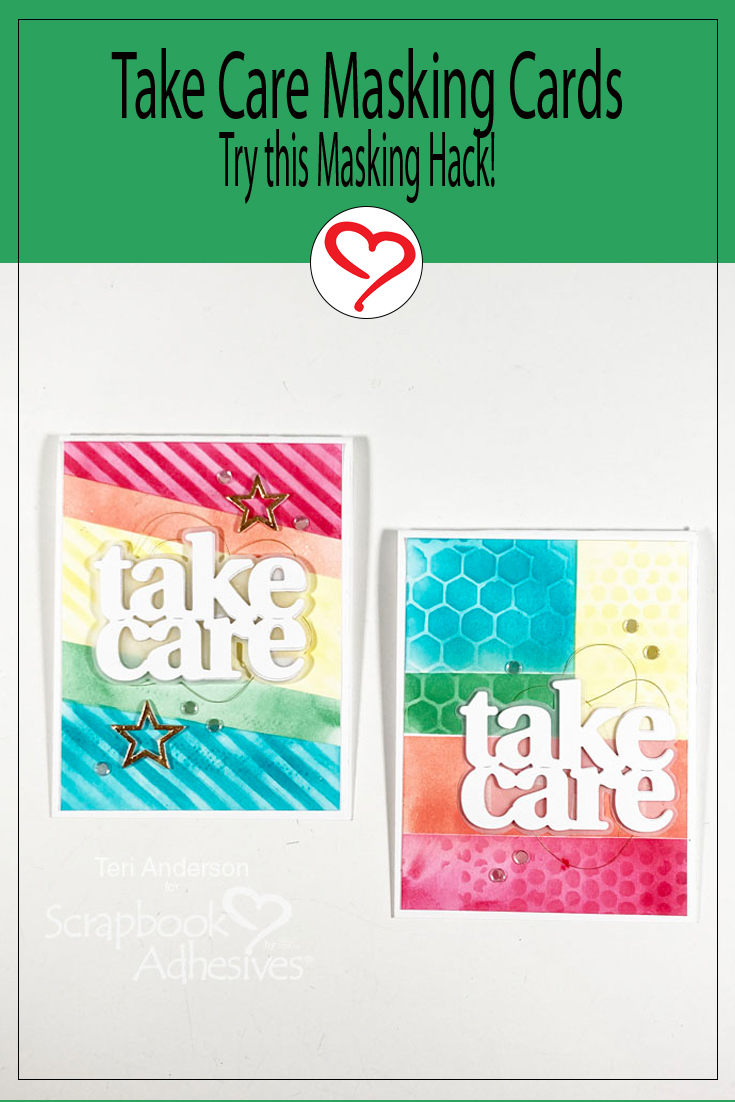
Hi, friends! Do you love using ink to add color to your handmade cards? Teri here to show you how with these Take Care Masked Cards. She uses inks and an easy masking hack! Give this a try.
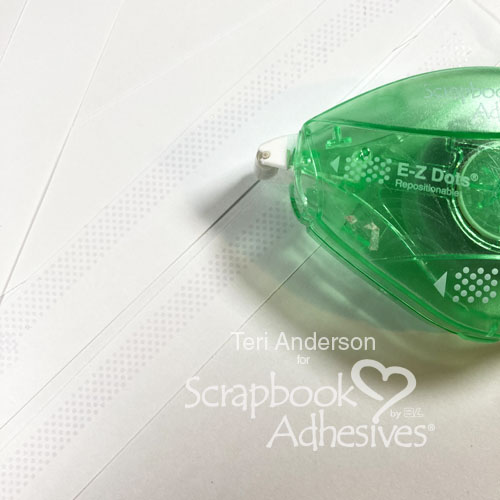
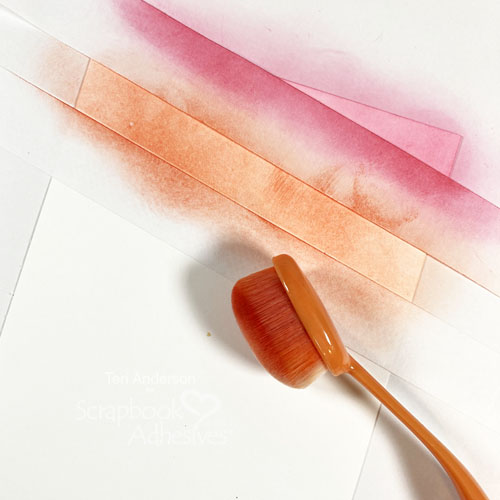
Take one of your strips and place it across a panel of cardstock. Apply ink onto the panel. Use the strip to cover up your inking and add another strip to your panel. Add more ink. Repeat the process over and over until your panel is covered with ink.
Use your strips to mask off parts of your paper panel. Set a stencil on it and apply some additional ink. You may need to reposition your masking strips on the panel multiple time to add additional colors of ink! Also, if you are worried about your stencil moving around, use one of your masking strips to hold it in place.
Use Your Panel to Make a Card with Die-cuts and Embellishments
Once you’ve completed your panel, trim it down and adhere it onto a card.
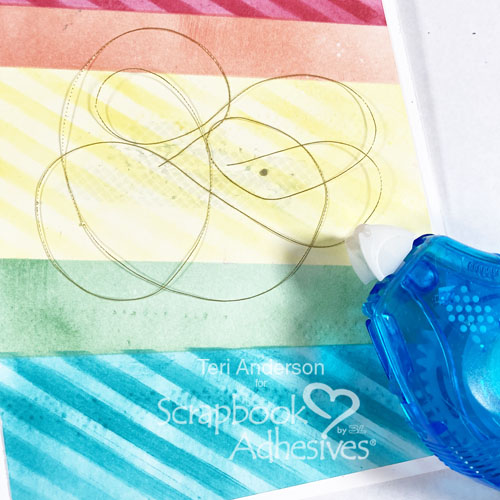
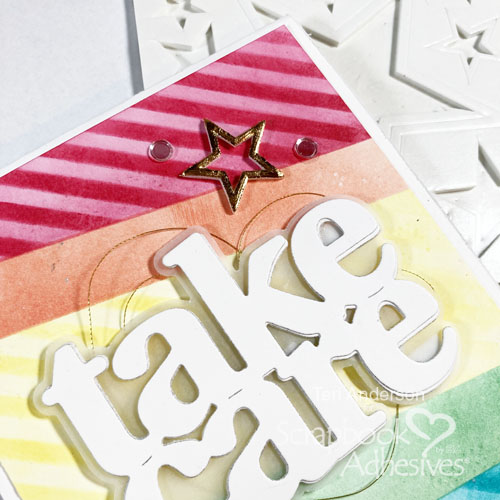
Create a sentiment from cardstock and vellum. Apply adhesive onto the card with the E-Z Runner® Petite Permanent Dots Refillable Dispenser. Randomly arrange some thread on it. Use 3D Foam Strips to add the sentiment to the card. I cut up my strips and placed them right behind the cardstock words so they could not be seen through the vellum.
Add a couple of 3D Foam Stars to your card. Burnish Metallic Transfer Foil Sheets in Nature onto them. Make sure the foil color is facing you. Complete the card by adding some sequins or other small embellishments.
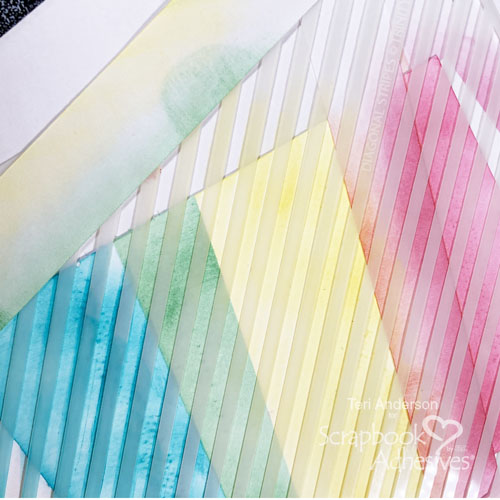
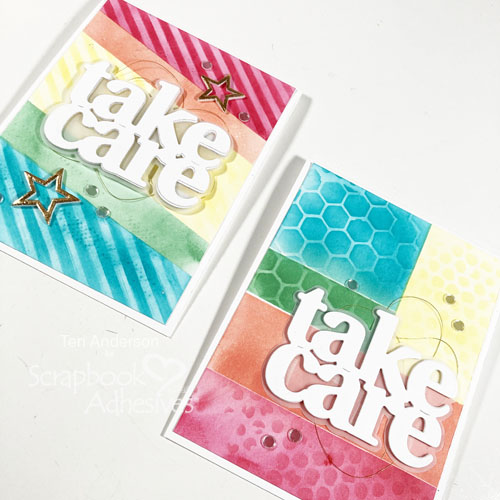
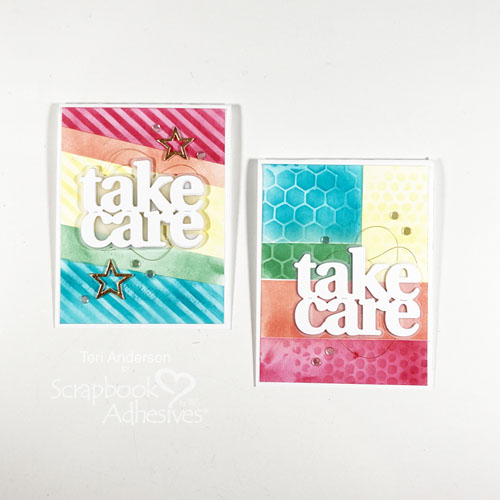
Change Out the Look with Color Blocks
You can change up the look of your masking by creating blocks on your panel, rather than just stripes. I used my masking hack to add blocks and stripes to this card.
Instead of using the same stencil to add extra color to the inking, I used different ones.
I hope you are inspired to try today’s masking hack next time you create a card! Thanks, as always, for stopping by!
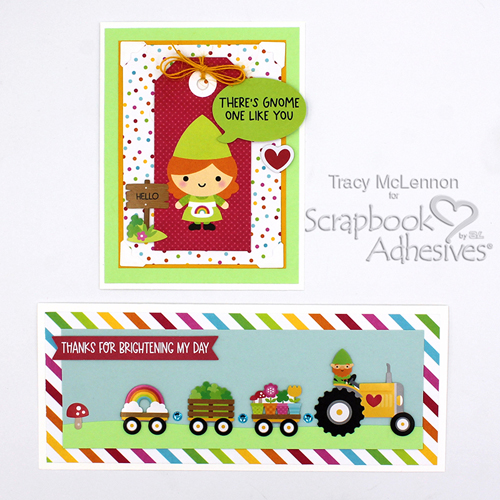
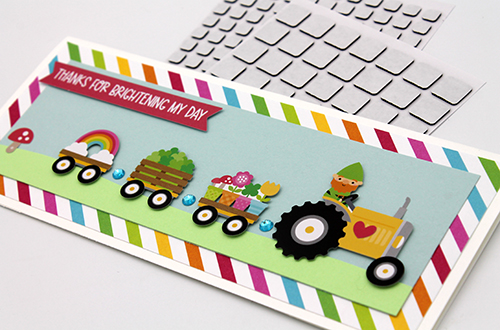
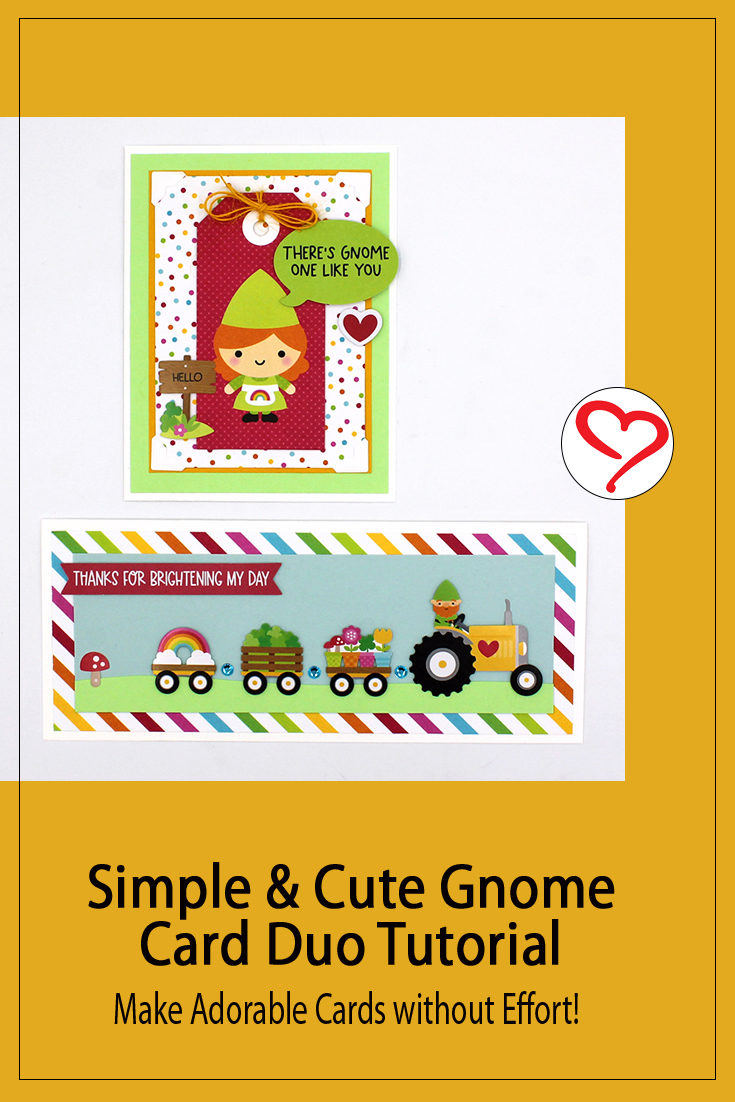
Hello crafty friends! Tracy here. Today, I have a pair of sweet and Simple Gnome Cards to share. Let me share all of the details on how I created this simple card duo.
Simple Gnome Slimline Card
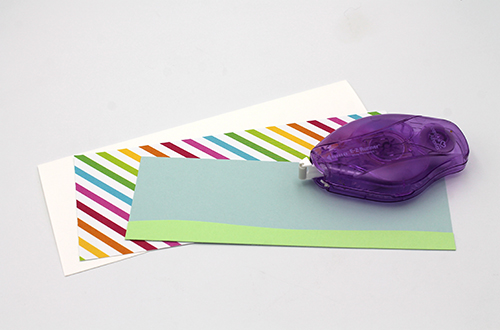
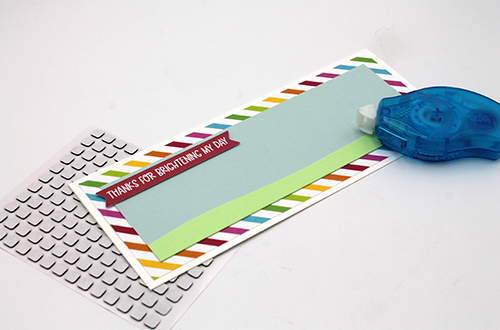
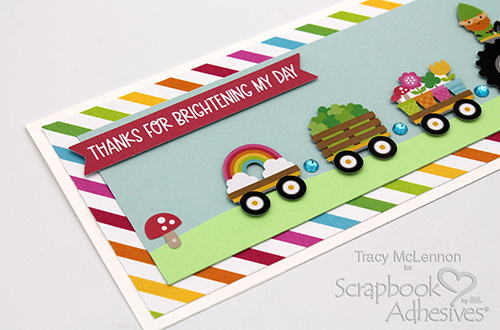
The first step is to cut the card front layers. Cut the slimline card base from white cardstock, next a layer of patterned paper, and then the layer of light blue cardstock. Adhere the green cardstock strip to this simple card using the E-Z Runner® Micro Refillable Dispenser.
I decided to add the sticker embellishments using Thin 3D Foam Squares Black Mix, for that extra little bit of dimension. I added gems between the carts. This completes the first of the Simple Gnome Card Duo.
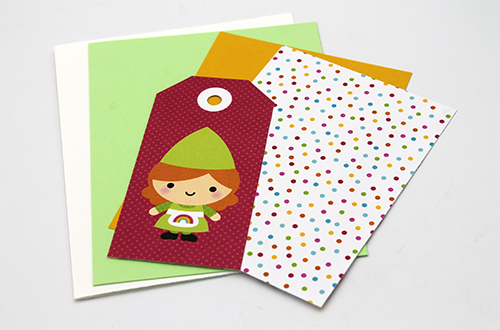
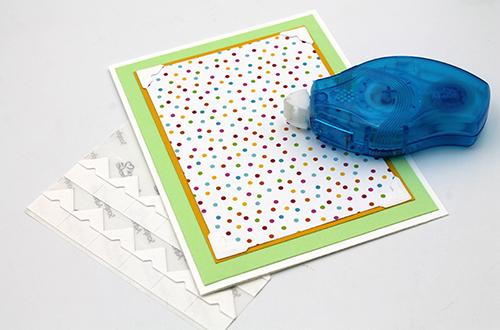
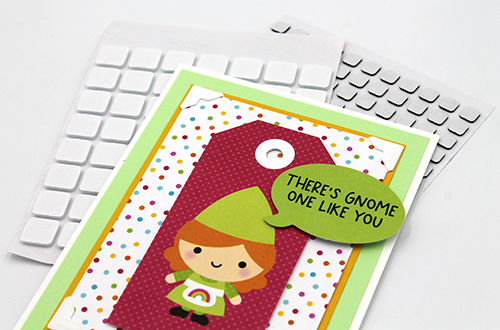
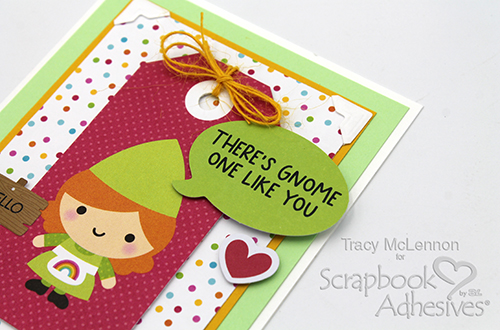
Simple Gnome Tag Card
Cut out the layers for the second card. These include a white cardstock base, green and yellow cardstock layers, and the top layer is patterned paper.
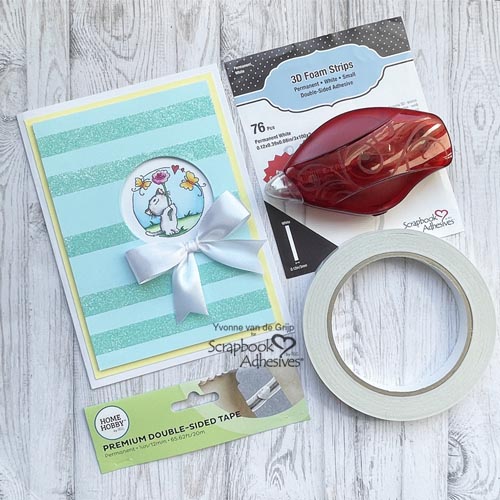
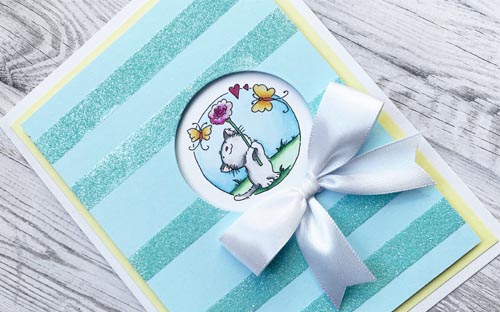
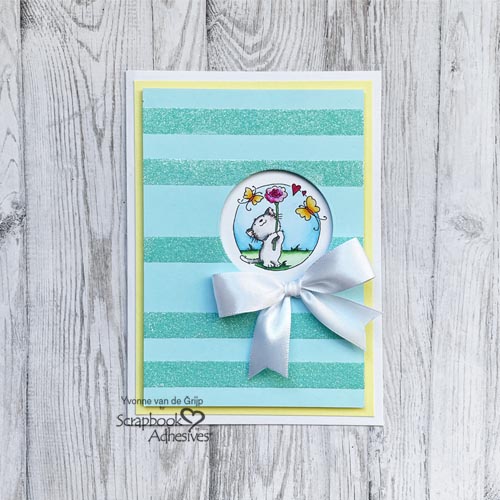
Hi everyone, Yvonne here with a super cute and fairly easy-to-create Glittered Kitten Card. I created a lovely tone-on-tone striped background with the Wear Your Adhesive on the Outside technique. I would love to share how I made my card. Will you join me?
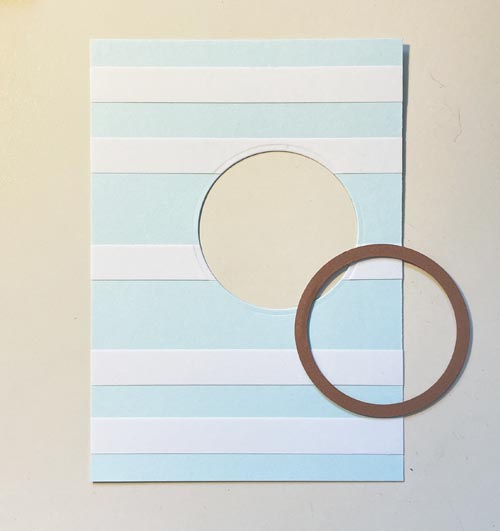
Die-cut a circle on the card panel, slightly offset from the center. Make sure the circle is slightly larger than the image you want to adhere behind it later.
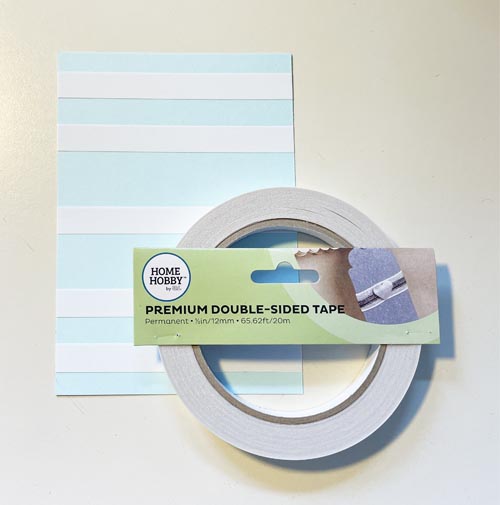
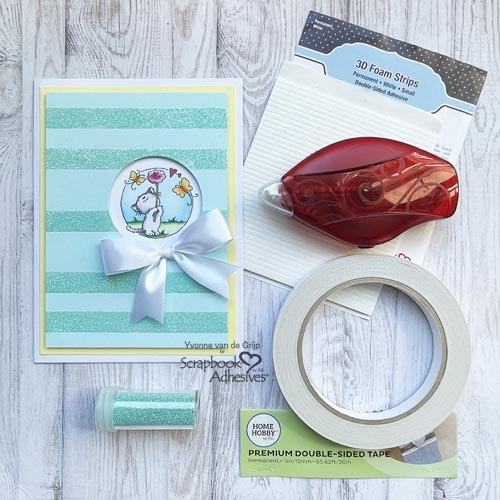
Wear Your Adhesive on the Outside with Premium Double-Sided Tape
Remove the liner from the Premium Double-Sided Tape 1/2in and cover with soft blue glitter. Rub the glitter to secure and tap off the excess. Making your background with this technique is easy – no special tools are needed.
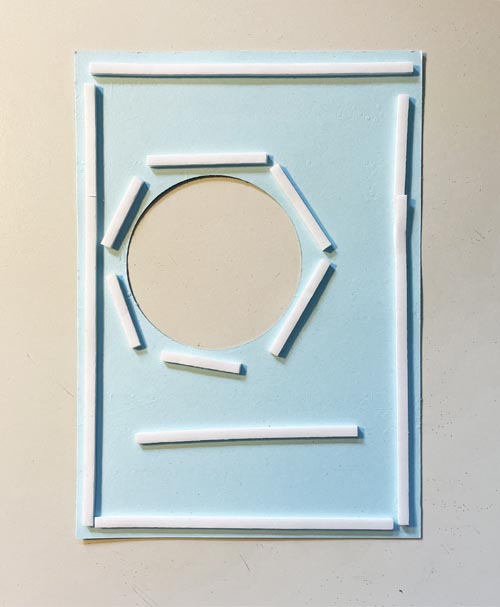
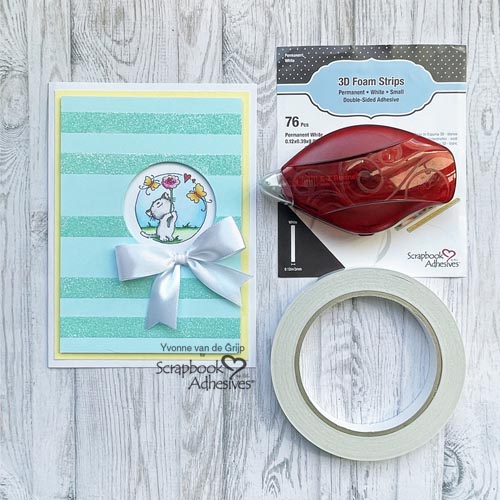
Dimension and Card Panel Layers
To give dimension and interest, I adhered 3D Foam Strips to the back of the top card panel and around the circle opening with smaller pieces of 3D Foam Strips. Another option is the 3D Foam Circle Frames because of their ring shapes.
Remove the liner only around the circle opening. Place the digital image, ensuring it fits behind the opening. Mat the top panel to the yellow card panel by removing the remaining liners. Then adhere to a white card base using the E-Z Runner® Permanent Strips Refillable Dispenser.
Finishing Touch
Lastly, adhere a satin bow with a small piece of Premium Double-Sided Tape 1/2in. And voilá your Glittered Kitten Card is ready.
I hope you enjoyed this tutorial and wish you happy crafting! Yvonne van de Grijp
Other: Digital Image: Lili of the Valley (Trio Kitten Posy); Dies & Machine: Spellbinders® Paper Arts (Standard Circles Small and Platinum 6 Machine); Alcoholic Markers: Copic Markers; White, Yellow, Green-Blue Cardstock; Soft Blue Glitter; Satin Bow; Scissors; Paper Trimmer
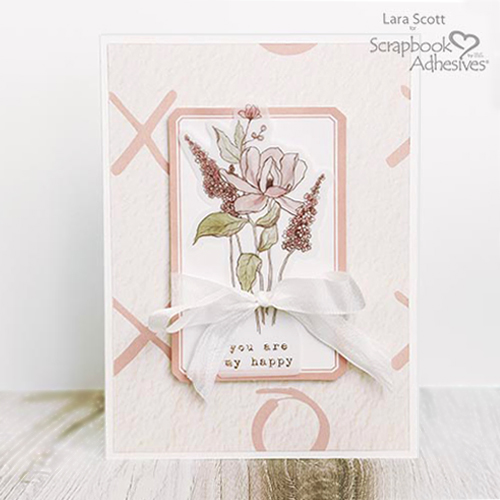
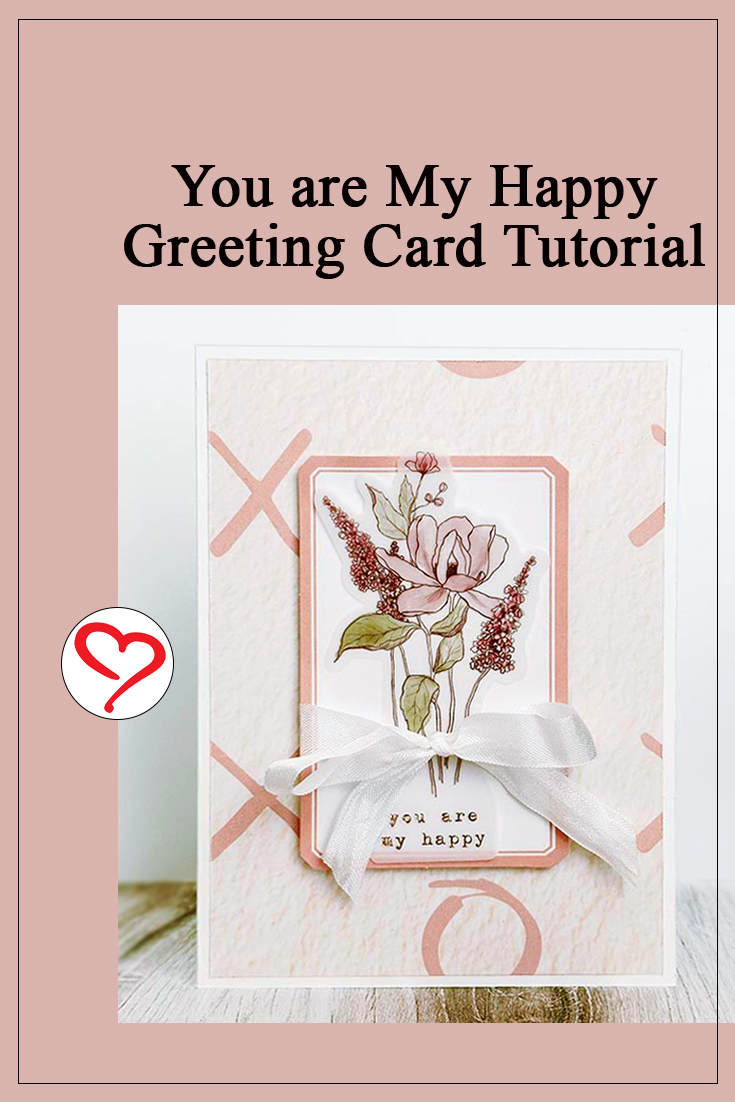
Hi, Lara here today! I usually try and stay away from making cards since they generally look like they were made by my 4-year-old niece (actually hers probably looks better than mine). But I finally created a You are My Happy Greeting Card that I liked (big surprise)! It is a pretty simple card to create but I really liked how it turned out
My Happy Greeting Card Elements
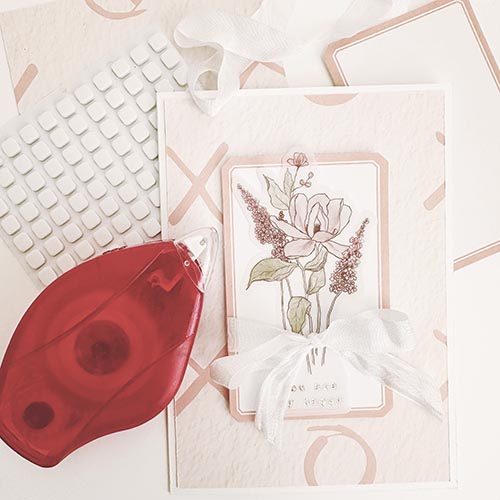
Here is a picture of all the elements I used to create this card.
Card Base Prep
Create the card base with a piece of 6.25 x 9″ white cardstock and fold it in half to make a 4.5 x 6.25″ card (an A6 size). Cut a piece of patterned paper about 1/4″ smaller than the card base and adhere with the E-Z Runner® Permanent Strips Refillable Dispenser.
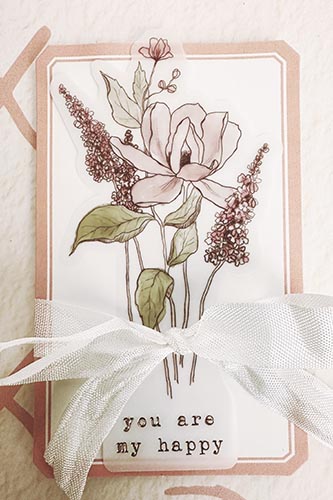
Wrap the seam binding ribbon around the tag and tie a bow. Then place the 3D Foam Squares White Small on the back of the tag and add it to the card for extra dimension. Now I have a great little greeting card to send and to cheer up someone’s day.
Have a Great Day or as they say in Texas “Have a Blessed Day” and Happy Creating!
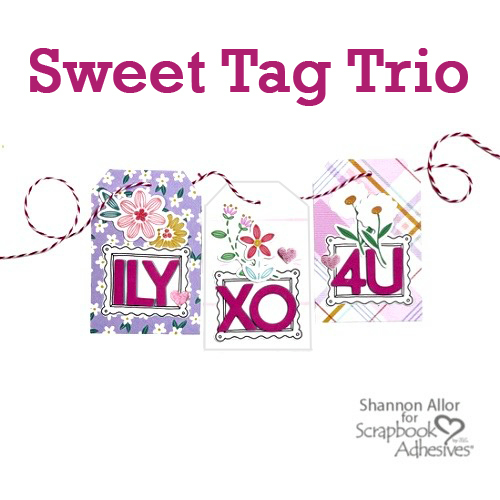
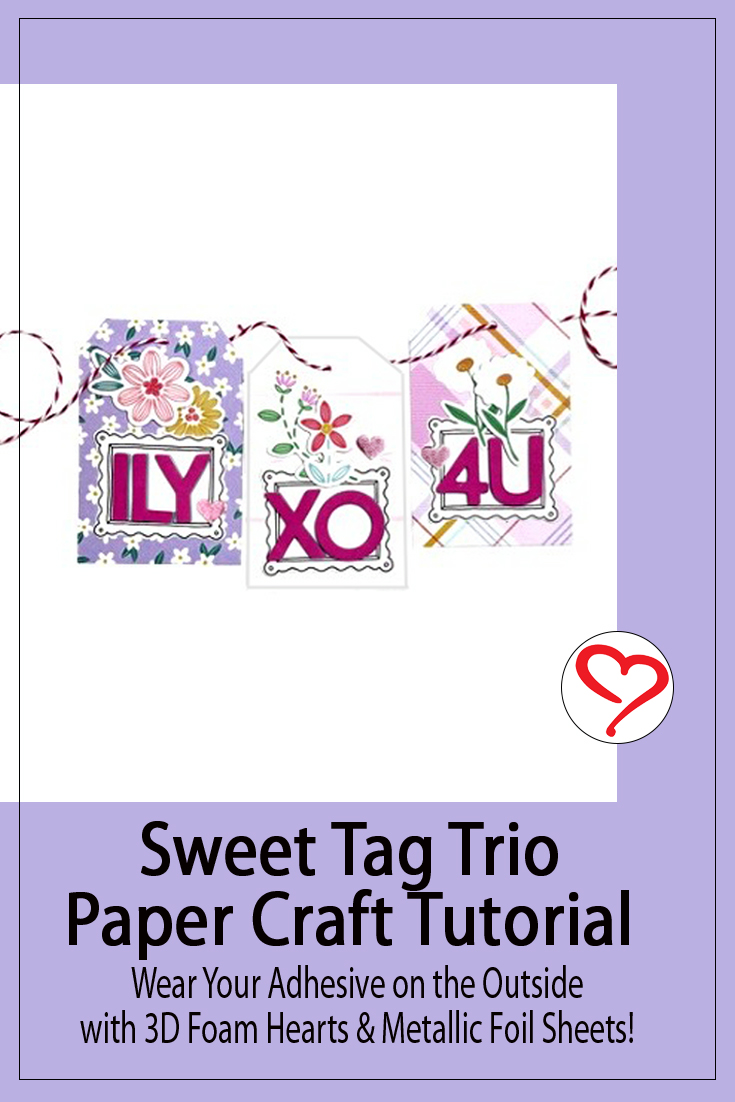
Hi, Shannon here today! I love having gift tags on hand. They are perfect for attaching to gifts! I created this Sweet Tag Trio using the gorgeous Poppy & Pear Collection from American Crafts!
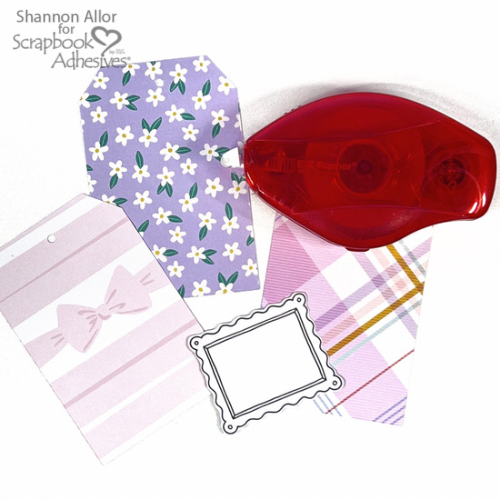
Sweet Tag Trio Bases
I grabbed a few scraps from this collection and created simple bases. The patterned papers have been trimmed down to 2 1/2″ x 3 3/4″ and then I cut a little notch off of each side to create a tag look. A little hint is to cut a notch off of one side and use it on the other side as a guide.
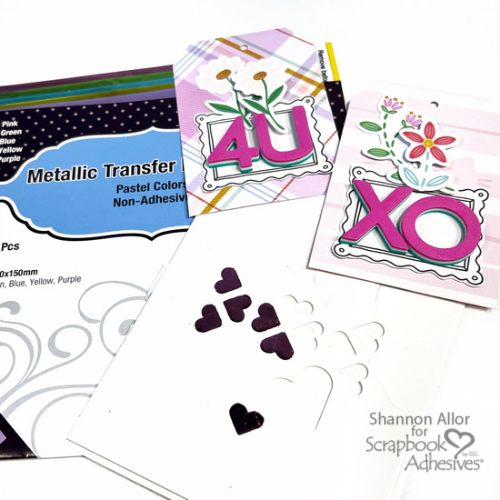
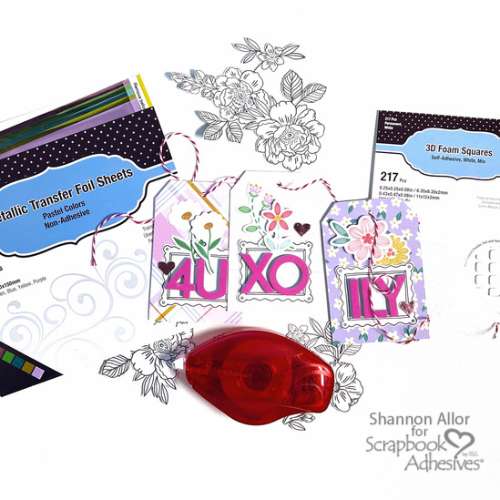
I kept my decorating super simple for my little tags. I grabbed some Thicker stickers and some sweet floral ephemera pieces.
Using the Wear Your Adhesive on the Outside technique, I used the 3D Foam Hearts with the Metallic Transfer Foil Sheets Pastel to add accents on the Sweet Tag Trio. Remove the top liner of the foam hearts and place the foil (color side facing you) over the exposed adhesive. Then rub gently to transfer the color to the heart. I love how a simple technique can pack such a big punch!
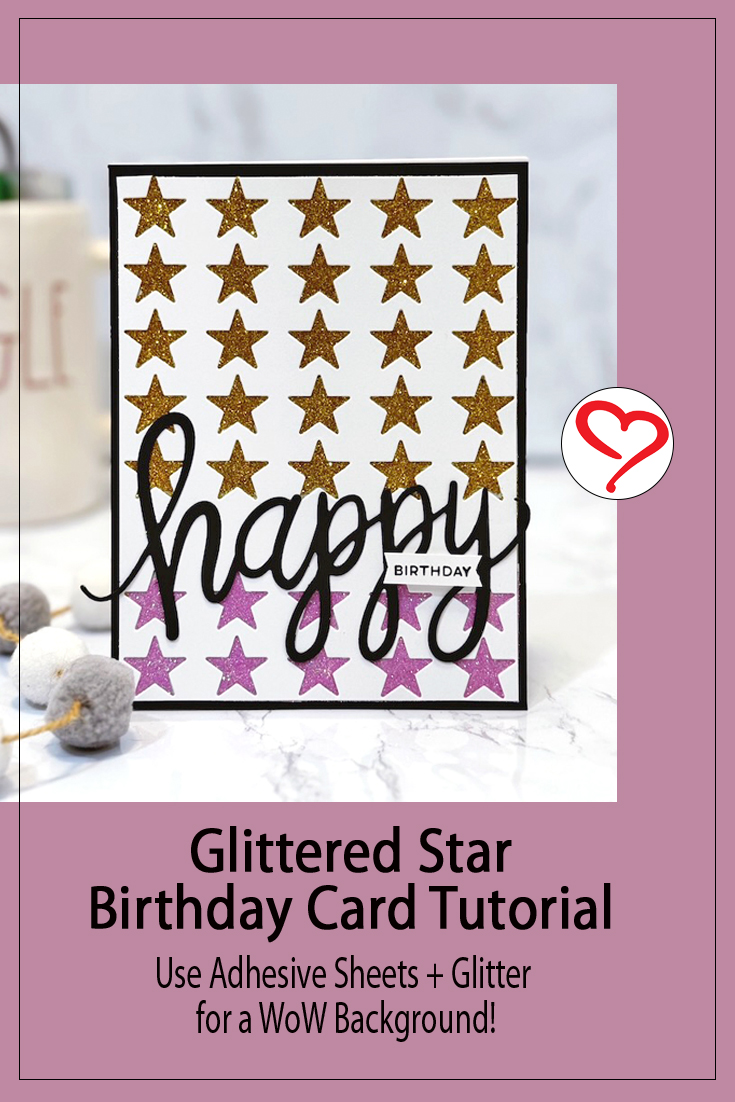
Hello, friends! This is Jingle Jennifer Ingle with you here today to share a super fun card that really let’s your adhesives shine! (No, like, literally….)
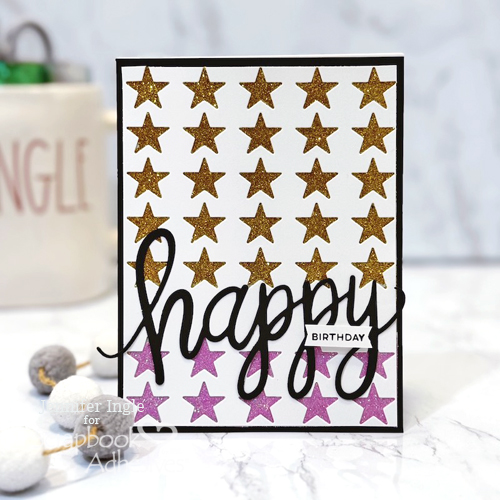
Glittered Star Card Panel
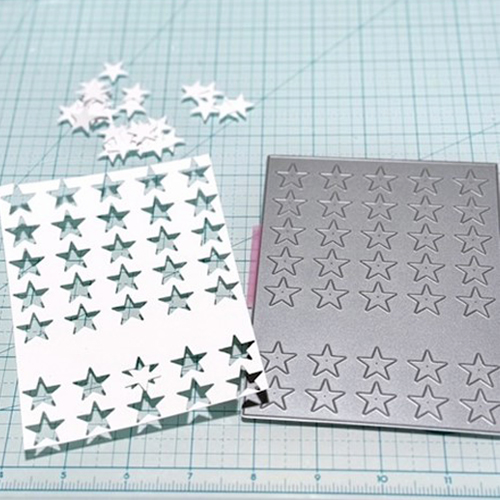
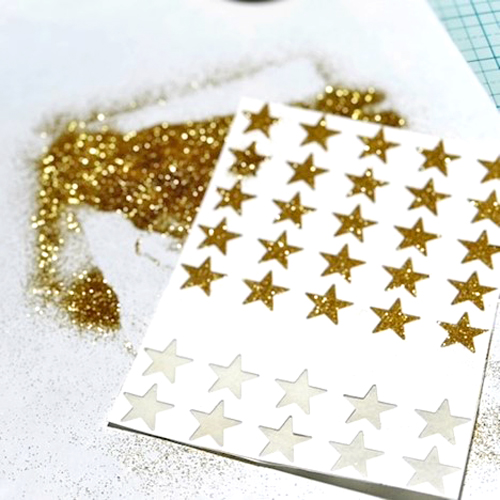
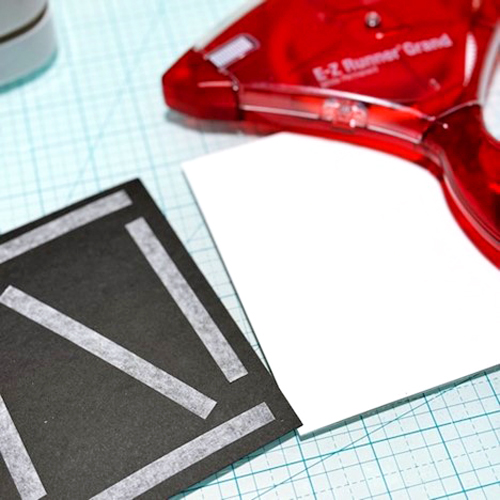
This card sparkles with all of that fabulous glitter. It all starts with a simple die-cut star background. Cut the stars from a white cardstock panel.
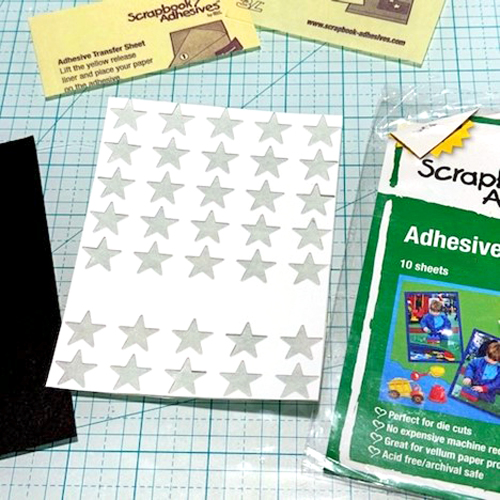
Once you have that cut, layer a sheet of Adhesive Sheets 4 x 6in. behind the card panel specifically where the open stars are located.
Now, I actually didn’t do this, but I do recommend it… BEFORE you glitter your stars, I suggest removing the paper backing and adhering to the black panel. This will make your life a bit easier. Our next step is to add GLITTER!
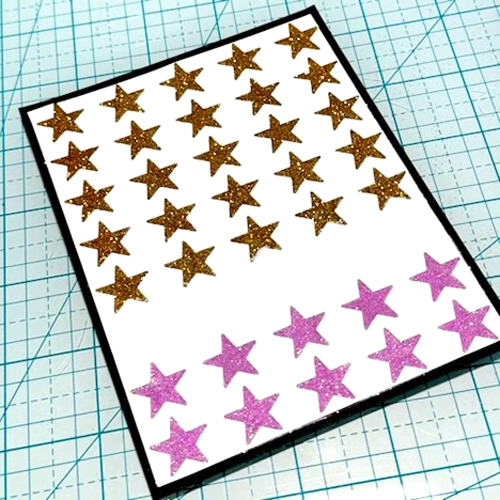
Wear Your Adhesive on the Outside with Glitter + Adhesive Sheet
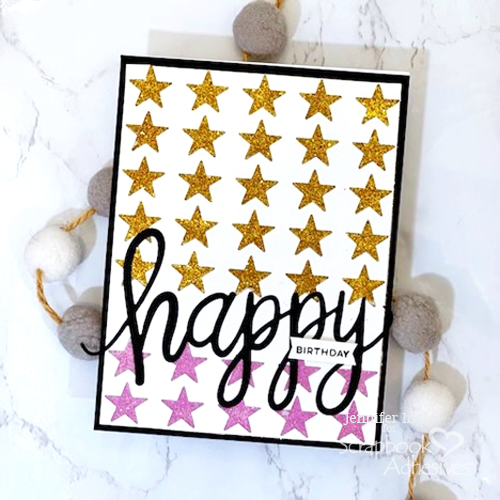
Over the open stars, sprinkle gold glitter at the top portion of the panel and pink at the bottom. You can cover the area you aren’t working on, but honestly, it is pretty simple to keep it where it belongs. Use your finger to gently rub over the glittered areas to ensure that the glitter adheres to the sheet.
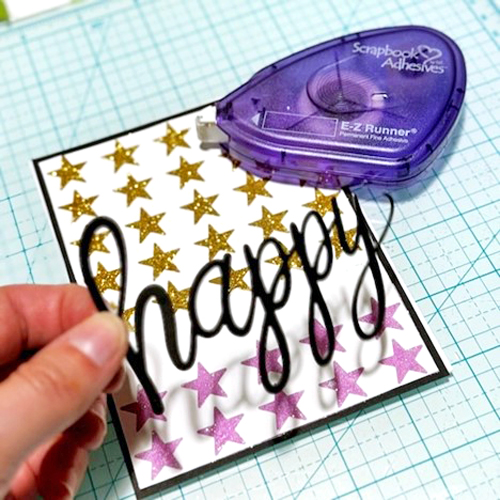
Adding the Sentiment
Just look at how amazing that looks! Next, we are going to add our sentiment. Die cut the word “Happy” from black cardstock and adhere with the E-Z Runner® Permanent Fine Adhesive Dispenser. This is my favorite choice for words, as it sticks only to the cardstock and won’t show over the edges.
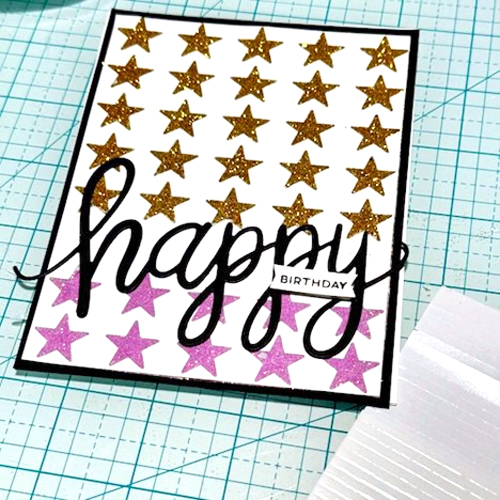
Using the 3D Foam Strips, adhere the word ‘birthday’ stamped on white cardstock, layered over the Happy.
This is such a fun way to incorporate so much sparkle on a cheerful birthday card! You could easily change it up with school colors for a graduation card, as well! There are so many options!
Thank you so much for stopping by today! I hope you give this technique a try and show us what you have made!
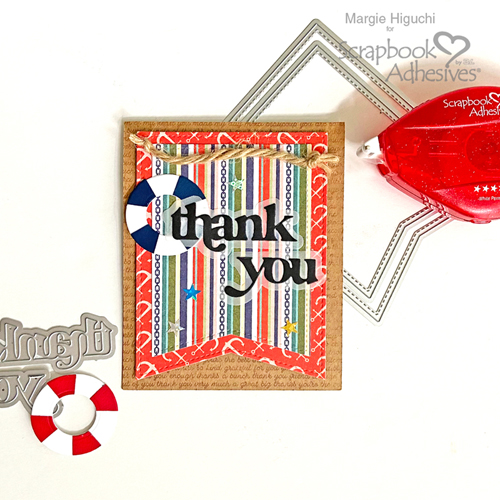
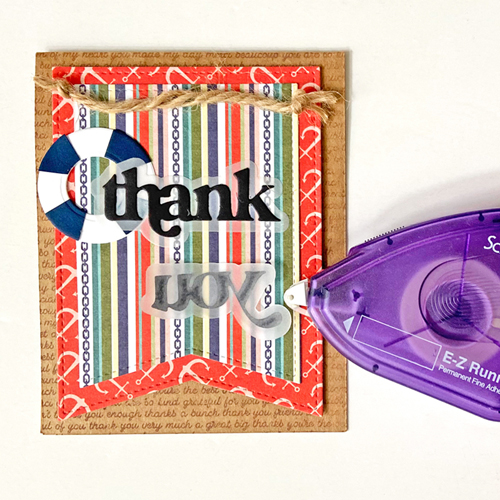
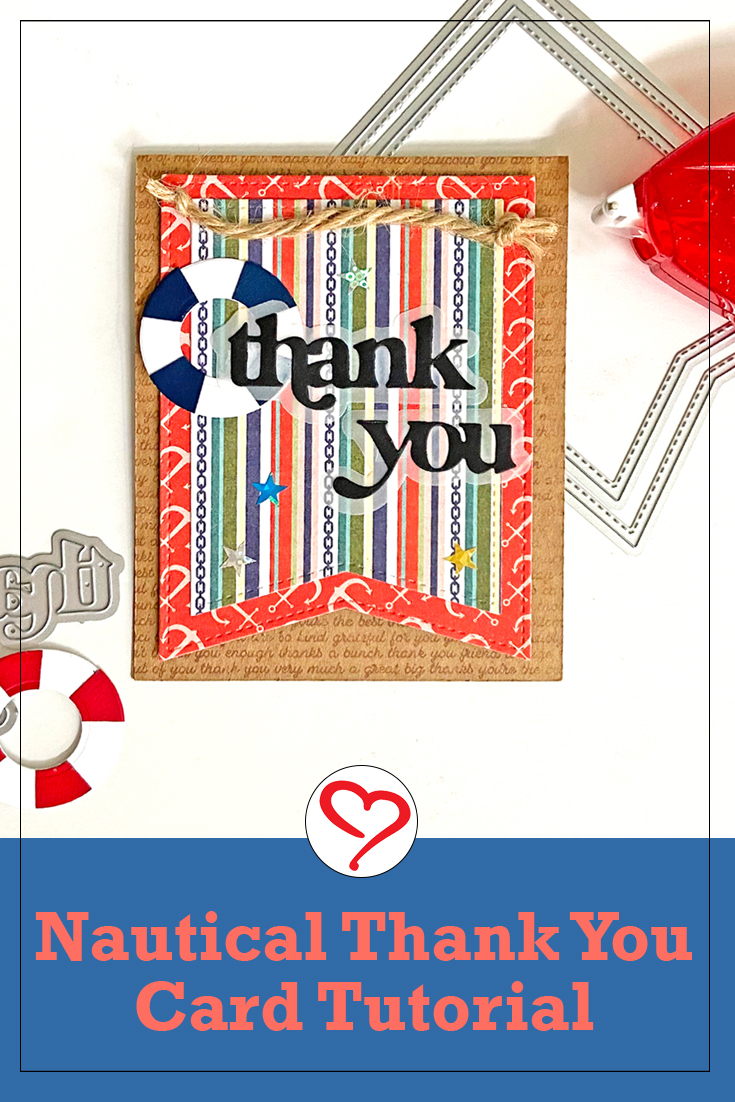
Last summer, I had the pleasure of going on an Alaskan Cruise hosted by PhotoPlay Paper Co. Hi, Margie here today, and I am sharing the make ‘n take project I created on behalf of Scrapbook Adhesive by 3L. What an appropriate way to thank the crew on the ship with this Nautical Thank You Card. It was so fun to make! Let me share with you my process.
The Nautical Thank You Card Background
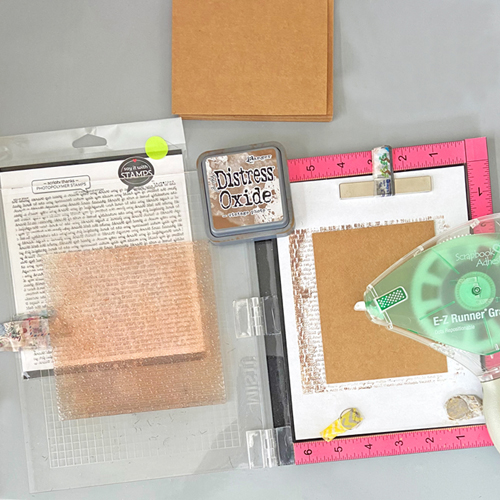
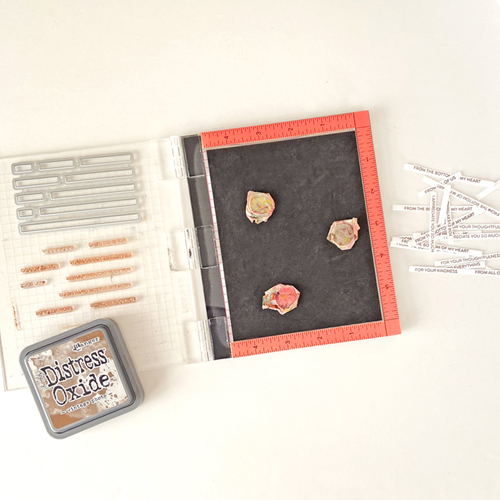
Stamp the Scripty Thanks Background Stamp in Distress Oxide Ink in Frayed Burlap on the front of a top-fold 4 x 5-inch Kraft card base. I used a stamp positioning tool and the E-Z Runner® Grand Repositionable Dots to hold my card base in place. Simply apply the adhesive on the back of the card and place it on the tool’s surface. Stamp and when you’re done, just rub off the dots. That’s it. Now let the ink dry or use a heating tool if you’re in a hurry.
Card Front Layers
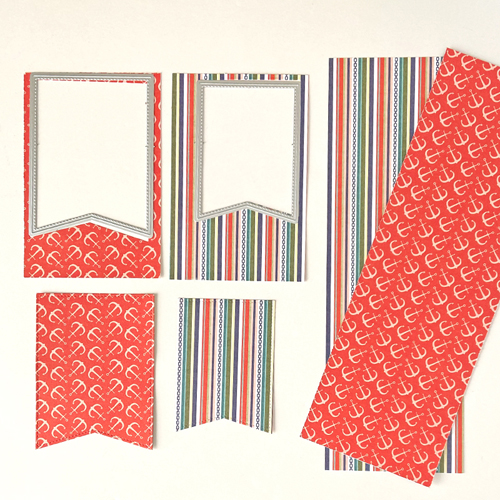
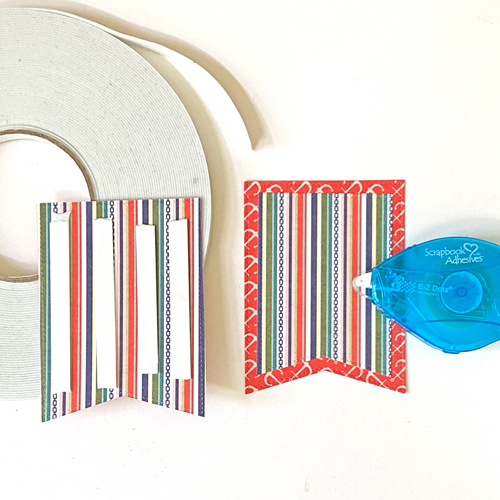
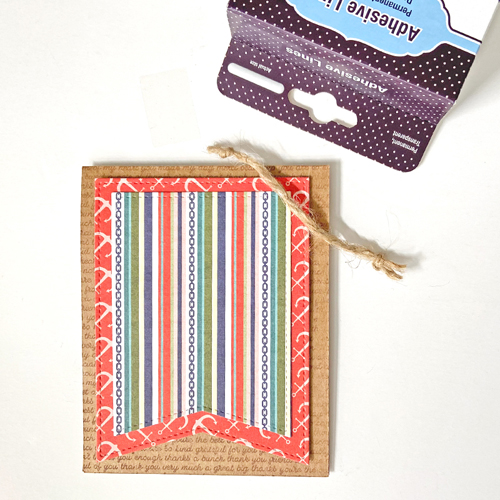
With a 4 x 12-inch strip of patterned paper, die-cut the second largest A2 Nested Pennant Die on the anchor patterned side. Use the remaining patterned paper to die-cut the fifth largest A2 Nested Pennant Die on the striped patterned side. Adhere the two pennants together with E-Z Dots® Permanent Dispenser and then add four strips of Crafty Foam Tape White 108ft. on the back of the layered pennant. Center it on the card front.
Sentiments
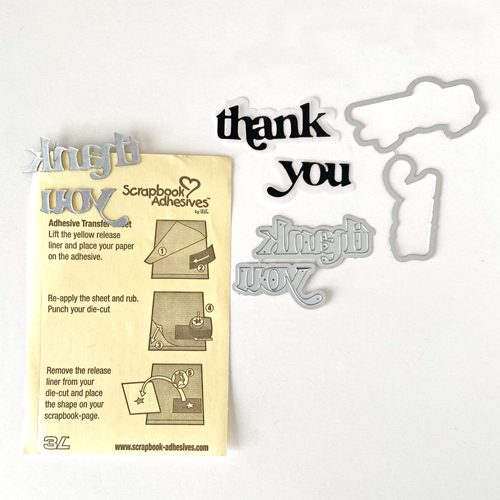
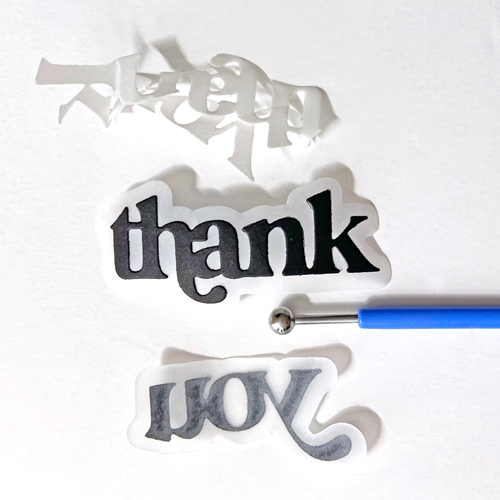
Apply an Adhesive Sheet from the Adhesives Sheets 4 x 6in. to the back of the black cardstock and then die-cut the thank you word dies. Use vellum to die-cut the word outlines. Peel the liner from the words and place them on their corresponding outline. Designer’s Note: I use the round end of a bone folder or round tip stylist to rub the words into the vellum to secure them.
Stamp your choice of sentiment from the Say It with Stamps Thank set onto white cardstock with brown ink. Die-cut the strip with the Sentiment Strips Die.
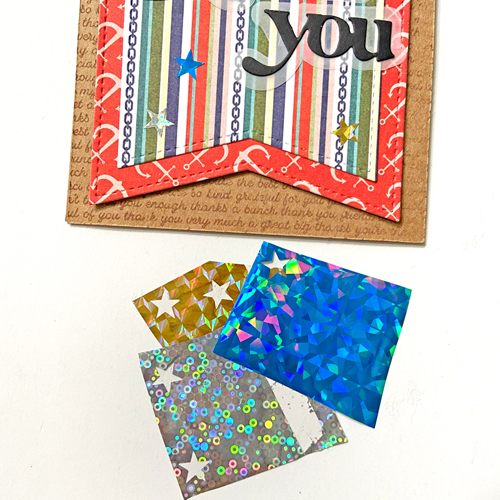
The Element Details
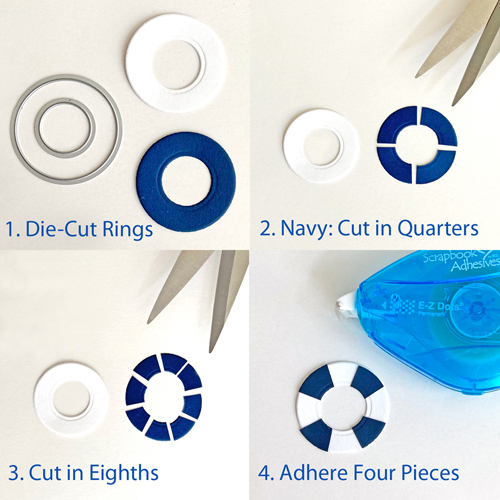
Nest two circle dies together to create a 1.50-inch ring and secure with washi tape. Die-cut one in white cardstock and the second one in navy cardstock. Cut the navy ring into quarters and then into eighths. Apply E-Z Dots® Permanent Dispenser on the back of four pieces and place them on the white cardstock ring to create a life preserver ring. Tie a knot on each end of a 6-inch rope twine.
Assemble the Nautical Thank You Card Front
Secure the twine on the top of the pennant with Adhesive Lines. Designer’s Tip: If there are some sticky areas, alleviate them with the anti-static powder.
For the inside of the card, I stamped a phrase from the Inside Out Thinking of You set in black ink on a white cardstock panel. Adhere to the panel with the E-Z Dots® Permanent Dispenser and done!
Other: Patterned Papers, Navy Cardstock, Craft Dies + Stamps: Photo Play Paper Company (Excursion Paper from Ship to Shore Collection, Navy Cardstock by My Colors Cardstock, Scripty Thanks Background Stamp, Say It with Stamps Thank Set, Thank You Etched Metal Dies, Inside Out: Thank You Stamps, Sentiment Strips Die Set, and A2 Nested Pennant Dies Set); Ink: Ranger Ink (Distress Oxide in Frayed Burlap) and Hero Arts (Intense Black Ink); Stamp Positioning Tool: My Sweet Petunia (MISTI); Circle Craft Dies; Twine Rope; Vellum; White, Black + Kraft Cardstock
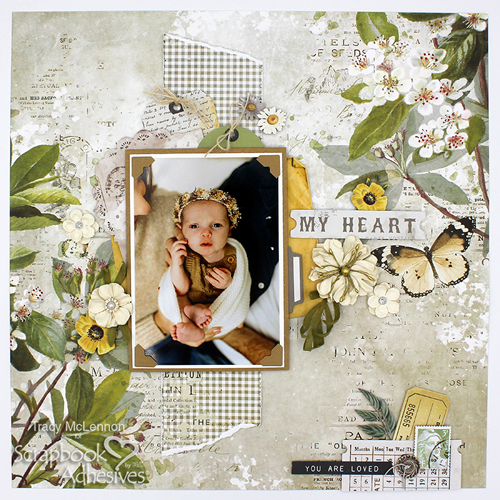
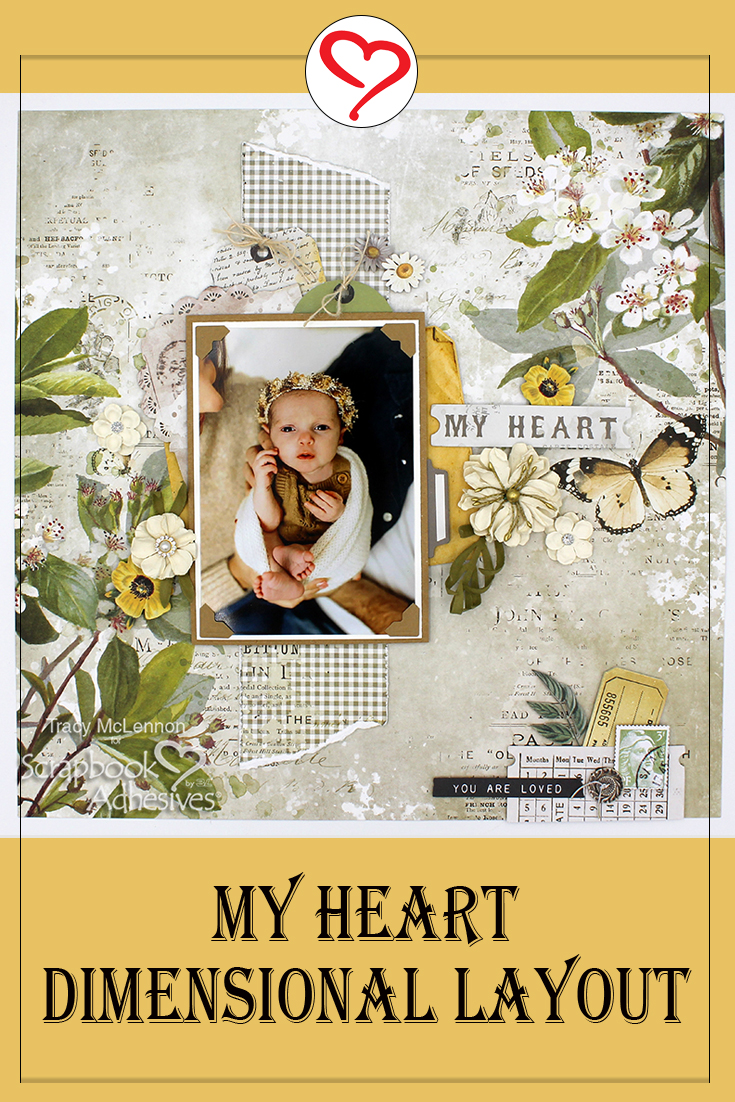
Hello crafty friends! Tracy here, and today I have a pretty little My Heart Dimensional Layout to share with tips and tricks on how to adhere all things dimensional. Here are all of the details.
Let’s Get Crafty!
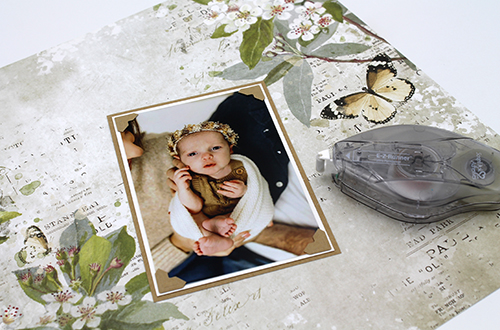
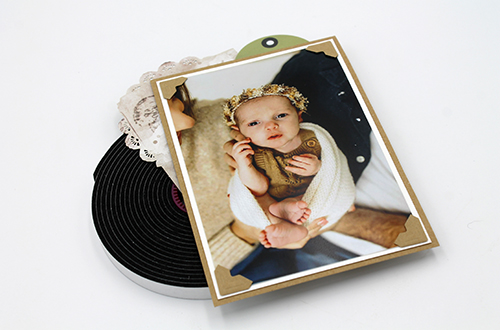
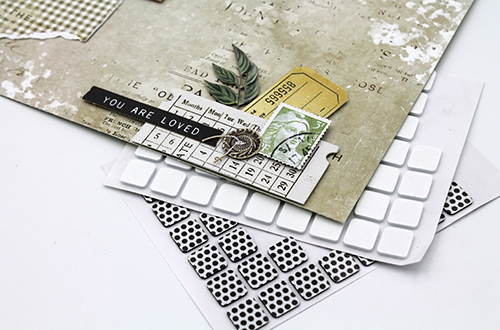
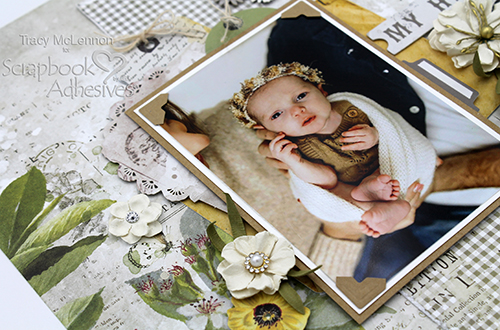
The first step was to chose the patterned paper background from this stunning 49 & Market collection and to pick the photo mats accordingly. I matted this cropped 4×6 photo in white and kraft cardstock. Add Creative Photo Corners Kraft to the photo and adhere the layers together using the E-Z Runner® Ultra Strong Refillable Dispenser.
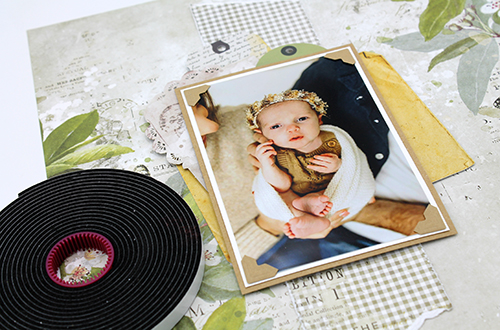
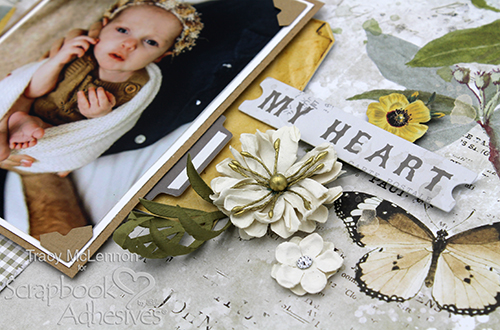
The final touch was to add the dimensional flowers around the matted photo and title piece. Attach these flowers using Adhesive Dots 3D. These squishy sticky Adhesive Dots 3D are perfect for adhering pieces such as this. Making this dimensional floral layout complete.