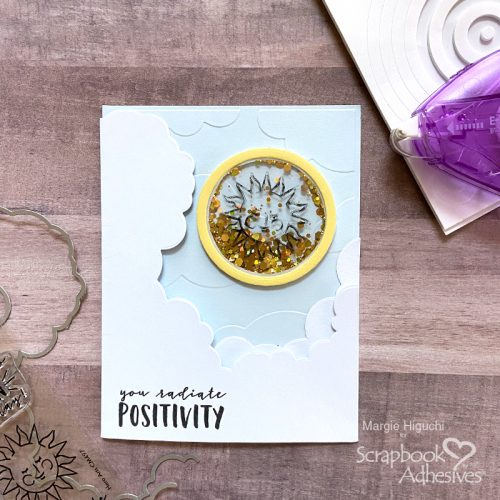
Hello, Margie here with a unique interactive card called Radiate Positivity Shaker Card. It’s a shaped one-sided flap that opens. I love how it turned out and it was easy thanks to the 3D Foam Circle Frame to shape the shaker feature.
***ETA: Congratulations to Joanne from Canada!!!
Thanks to all who participated in the giveaway. Hope to host another one real soon!***
Right now we have a New & Noteworthy Giveaway with our friends at Scrapbook and Cards Today Magazine. Be sure to read all the way through the end to find out how to enter. Better Hurry! It ends next Wednesday (June 29, 2022) at midnight Eastern.
Radiate Positivity Card Instructions
Let me show you how, along with a video tutorial. This project was first shared with our retailer friends at a virtual trade show and we thought you would enjoy it too! I’ll share the written steps first on how I created the card so that you can print it out. Then I’ll go through the process visually with the video.
Card Flap, Greeting and Message Cloud
- With a piece of 4.75 x 5.50-inch white cardstock, score 0.25-inch on the left side and crease. Position one of the cloud border dies from top left to the bottom right of scored + folded piece and cut. Stamp sentiment in the lower-left corner in black ink. Set aside.
- Using the leftover cardstock + making sure the corner is facing down on the right side, cut a shape out of the other cloud border die. This is where you can write a short note.
Card Base
- Using a cloud design embossing folder, emboss a piece of 4.25 x 5.50-inch Icy Mint cardstock. Tip: Mist lightly with water to get a crispier impression.
- Cut a piece of 4.25 x 5.50-inch out of white cardstock. Use this card panel to cover the back of the card to hide the flap as the last step.
Shaker Pieces
- Nest together the 2.00-inch circle into the 2.25-inch circle die to create a ring. Secure with washi tape to prevent shifting and cut with Sour Lemon cardstock.
- Using the larger 2.25-inch circle only, die-cut out of clear acetate and stamp with the sun image using permanent black ink.
Card Assembly
- Apply Crafty Power Tape to the scored flap area and secure it to the left-side of the embossed card panel (the flap part is on the backside). Then adhere the other white cloud piece to the lower right-side corner.
- Adhere the 4.25 x 5.50-inch white card panel to the back of the embossed card panel with Crafty Power Tape. Trim edges if necessary.
Shaker Assembly
- Apply E-Z Runner® Micro Strips around the backside of the ring and place a clear acetate circle over it.
- Next, add the 3D Foam Circle Frames White #6 (#1 being the smallest circle) on top of the acetate. Designer’s Note: the size of the ring and the 3D Foam Circle Frame are not the exact size, so gently pull the foam circle frame to fit the ring.
- Determine placement of the shaker element on the embossed card panel. Add shaker elements on the panel, remove the circle frame liner and secure on top of the shaker elements to finish.
View Radiate Positivity Shaker Card Video
I hope you enjoyed my Radiate Positivity Shaker Card. It’s a unique card so give it a try and send someone positive vibes! Don’t forget to scroll down for a chance to win an adhesive package!
Thanks for stopping in!
Margie Higuchi
Creative Time: 30 minutes
Skill Level: Intermediate
Materials Needed:
Scrapbook Adhesives by 3L®
Crafty Power Tape 81ft Polybag
E-Z Runner® Micro Strips
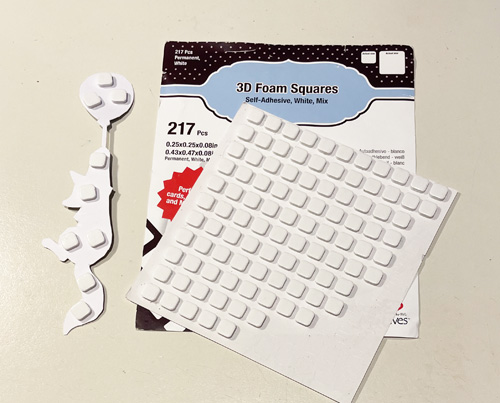
3D Foam Circle Frames White
Other:
Hero Arts: Cloudy Sky Scene Die Set, You Shine Stamp Set and Intens-ified Black Ink Pad
Embossing Folder and Die-Cutting Machine: Spellbinders® Paper Arts (Above the Clouds Embossing Folder, and Platinum 6 Die-Cutting and Embossing Machine); Cardstock: Bazzill Basic Paper (Icy Mint and Sour Lemon Cardstock); Clear Acetate; White Cardstock (65lb for flaps/110lb for back); Scoreboard; Gold Chunky Glitter
Save to Pinterest!
Enter to Win an Adhesive Giveaway
Now that you’ve seen our shaker card highlighting the 3D Foam Circles. Want to give it a try? There is an adhesives giveaway that can help recreate a shaker card of your own! Ends next Wednesday (June 29th at Midnite Eastern)!!
👇 Click the image below to take you there! 👇
Visit our Website and Blog!
Sign up for our Newsletter so you never miss a contest or giveaway!