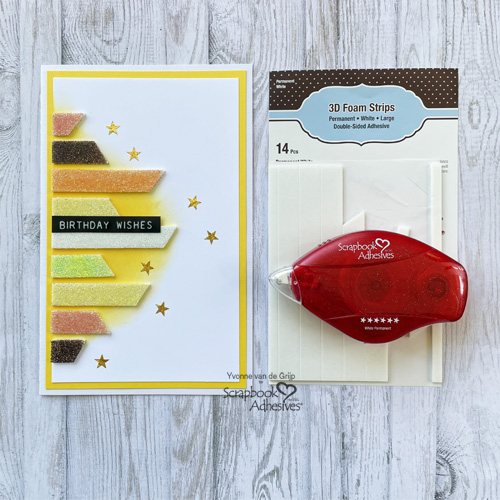
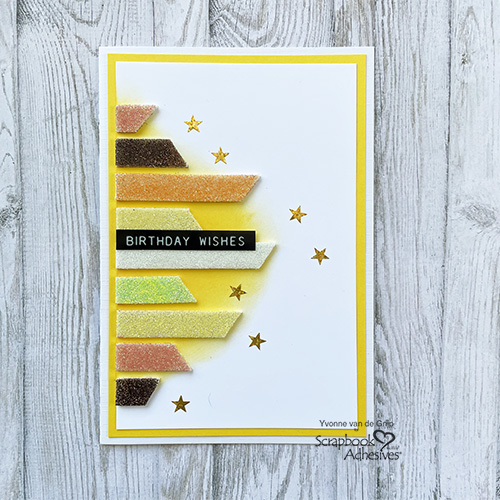
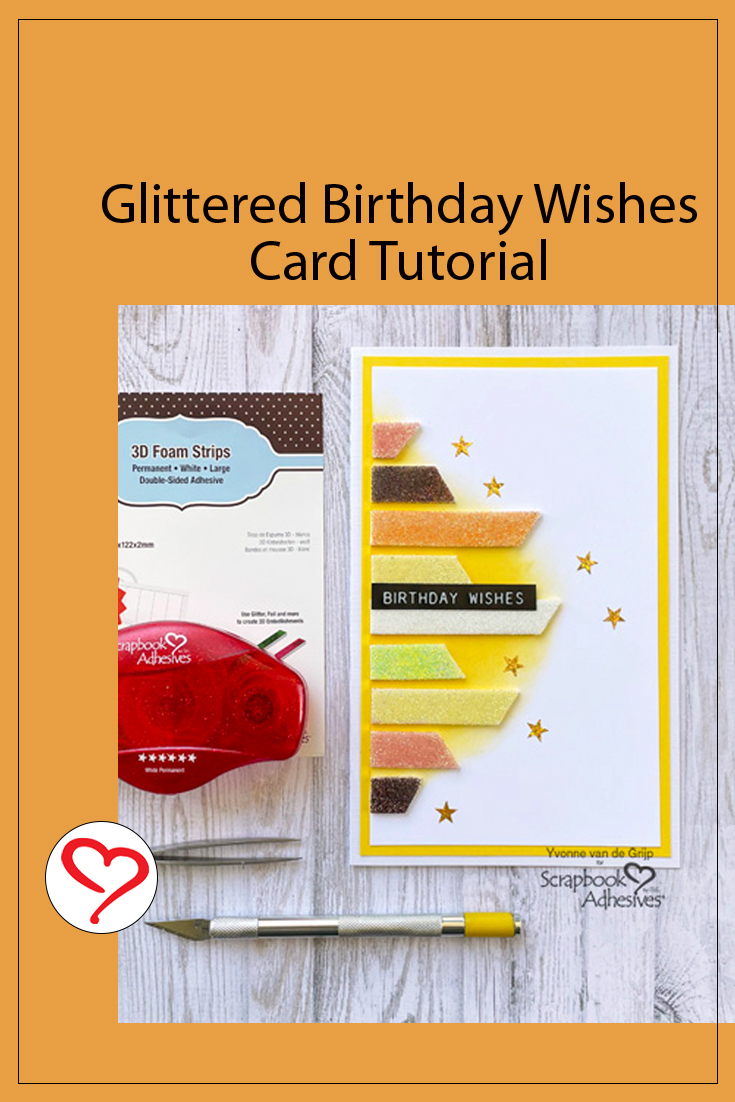
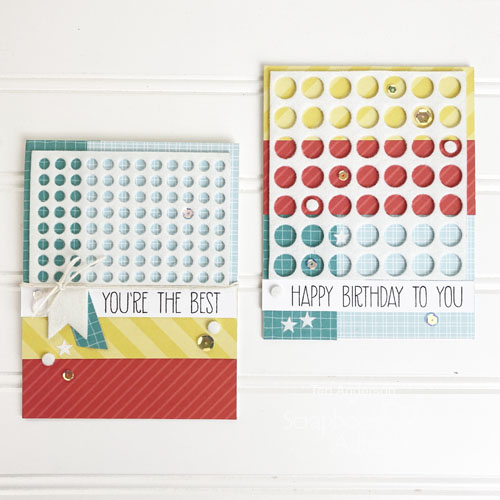
Hi everyone, Yvonne here a super easy to create a birthday card. Make glittered accents with the brand new 3D Foam Strips Large White and create your own Glittered Birthday Wishes card. This project is so simple to create that it’s also suitable for beginning card makers.
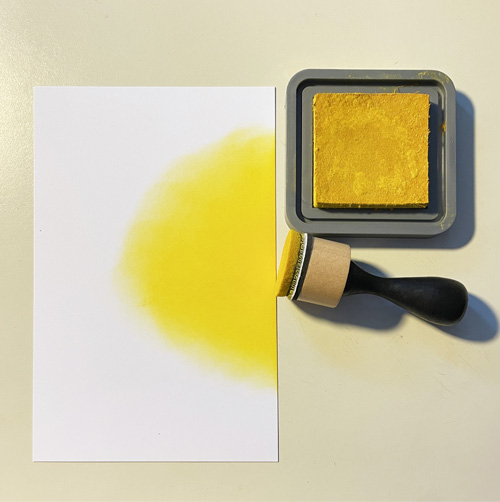
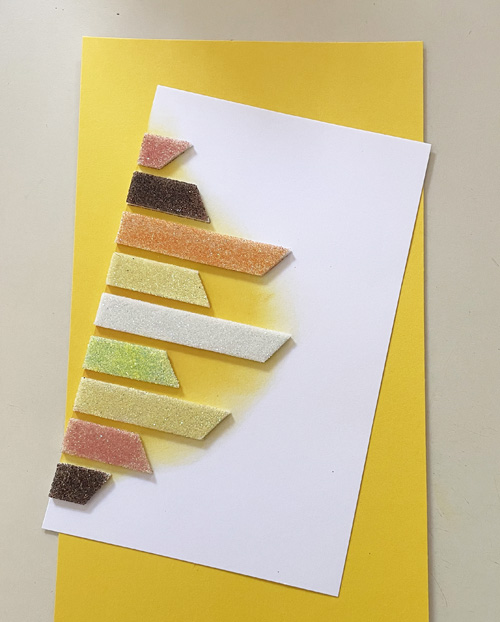
First trim a piece of white cardstock to a rectangular size. Then use yellow ink and an ink blending tool to create a yellow circle on the card panel.
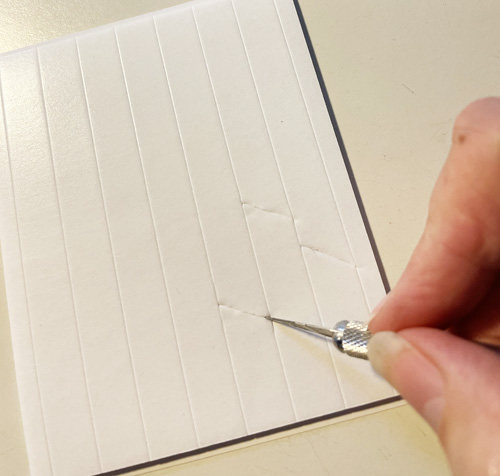
Prep the Glittered Stripes
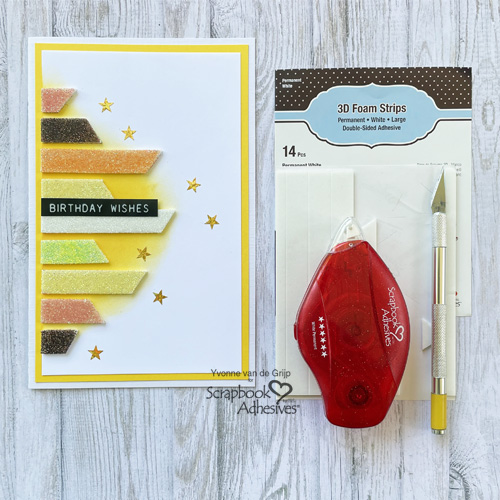
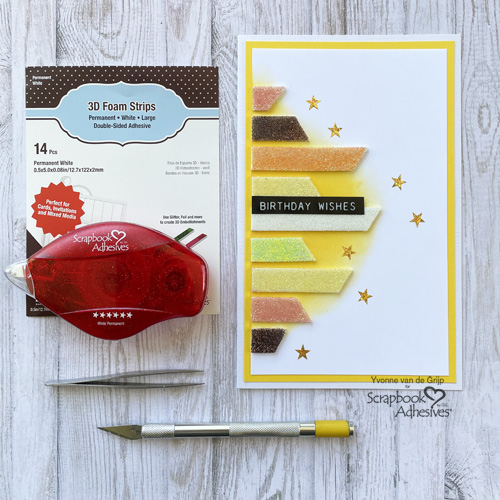
To make the glittered stripes I used 3D Foam Strips Large White. The strips are pre-cut so the only thing you need to do is cut the strips into pieces using a craft knife.
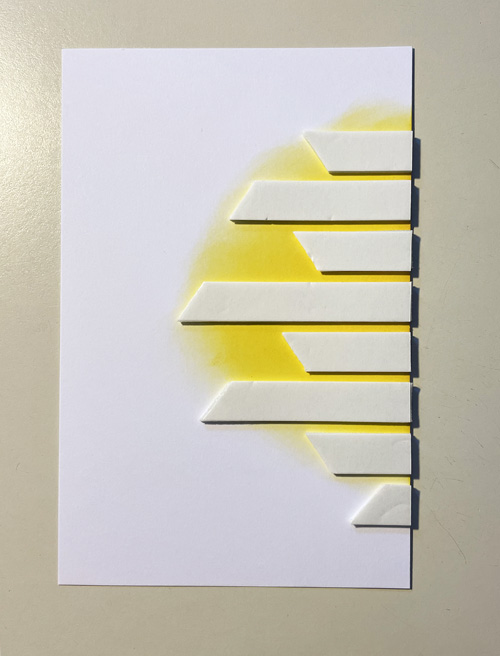
Then adhere the strips onto the colored cardpanel.
Next remove the liner of one 3D Foam Strips Large White and sprinkle glitter upon. Gently rub the glitter over the adhesive strip to secure the glitter. Then tap off any excess glitter. Repeat using different colors of glitter for the other strips.
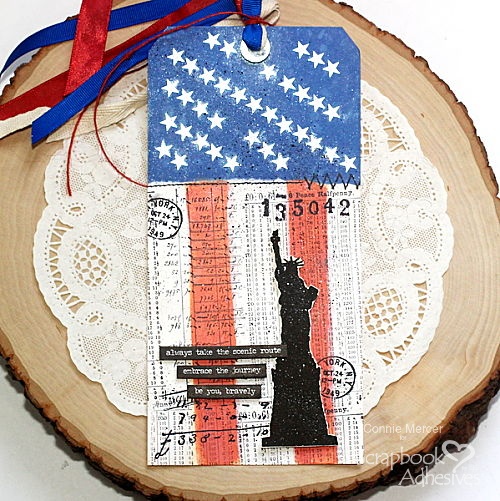
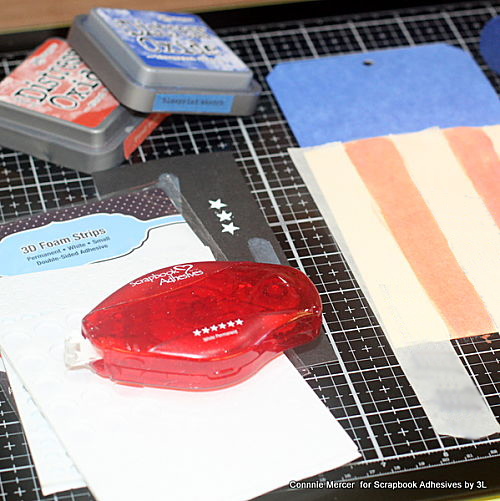
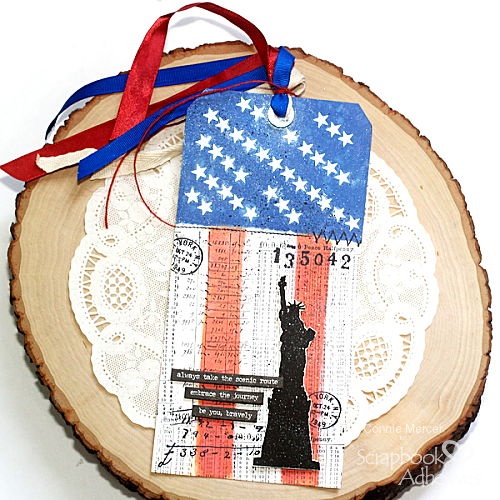
Hi, Connie here with a Mixed Media Stars & Stripes Tag using the new E-Z Runner Stars Refillable Dispenser to add stars on the tag. Could not have been easier!! Such a clever product by Scrapbook Adhesives by 3L. I hear they have hearts too!!! Check out the steps for this project below and follow along. Enjoy!
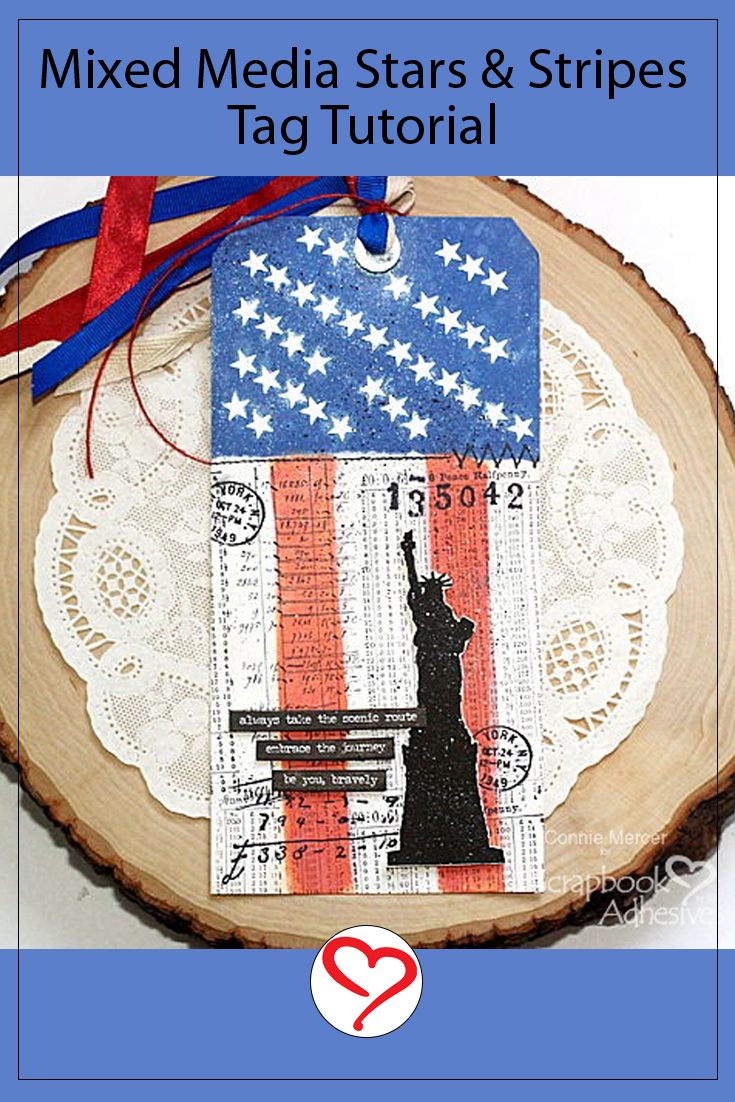
Mixed Media Stars & Stripes Tag Steps
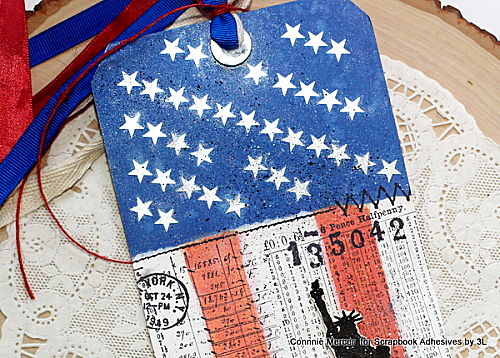
I did a little background preparations to start the tag. Using Distress Oxide ink or the medium of your choice, I painted a flag design. Mask off a grid and just add color. Stamp out a focal image which was a Lady Liberty silhouette and trim out.
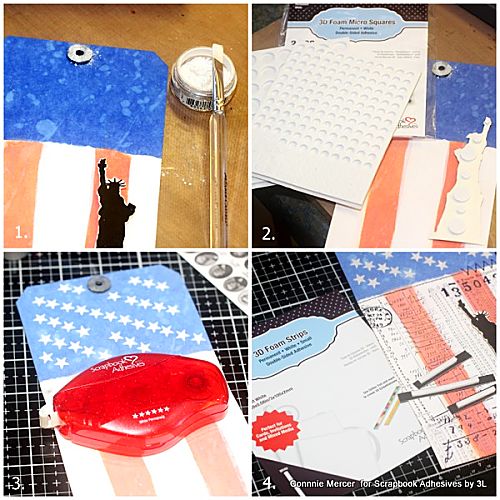
Assembly Details
1. Add the small reinforcement from the 3D Foam Circle Frames Black and brush on Perfect Pearls in off-white. 2. Add 3D Foam Circles White Mix and the 3D Foam Squares Micro White to the Lady Liberty silhouette shape. Tip: I used the Micro Squares for the very tip of the torch. – perfect size to keep the tip secured. 3. Now the fun part! Roll on those stars. Yes, it is that easy. I rolled at an angle for interest. The E-Z Runner Stars Refillable Dispenser skipped a few times but no worries, this is mixed media at its finest!! Next, brush on Perfect Pearls and dust off the excess. 4. Stamp some mixed media-themed stamps to the tag background for interest. The 3D Foam Strips (my new favorite product) were used to adhere to the word strips. Add twine and ribbons to finish the Mixed Media Stars & Stripes Tag.
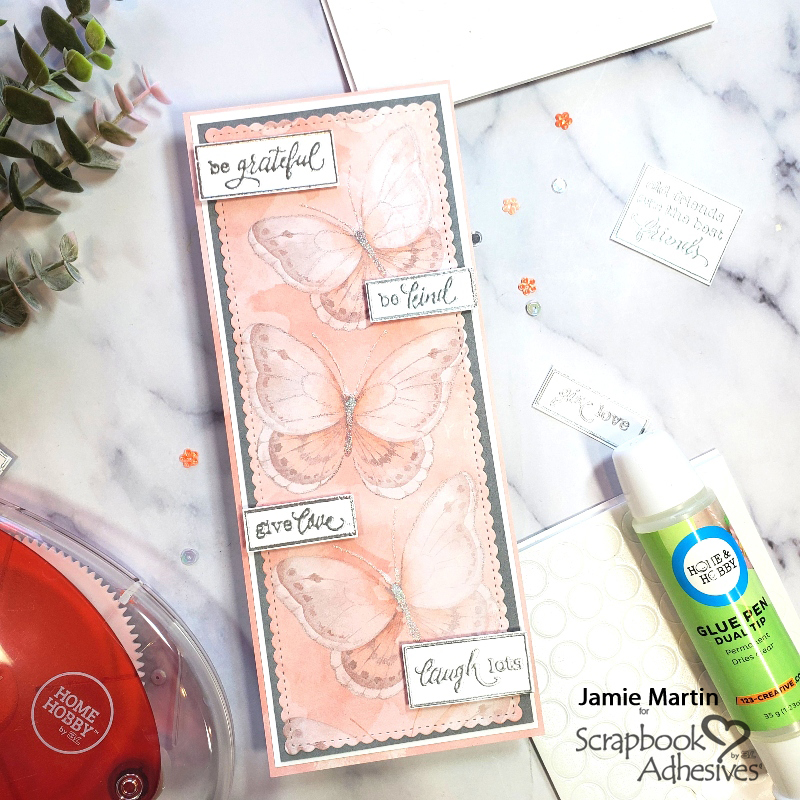
Hi, Jamie here with you today with a quick & easy card – perfect for the paper crafter and/or paper hoarder. Also, for those who like to make pretty cards but don’t want to color them. I fall into the paper hoarder category and have quite a bit of 12″ x 12″ decorative paper.
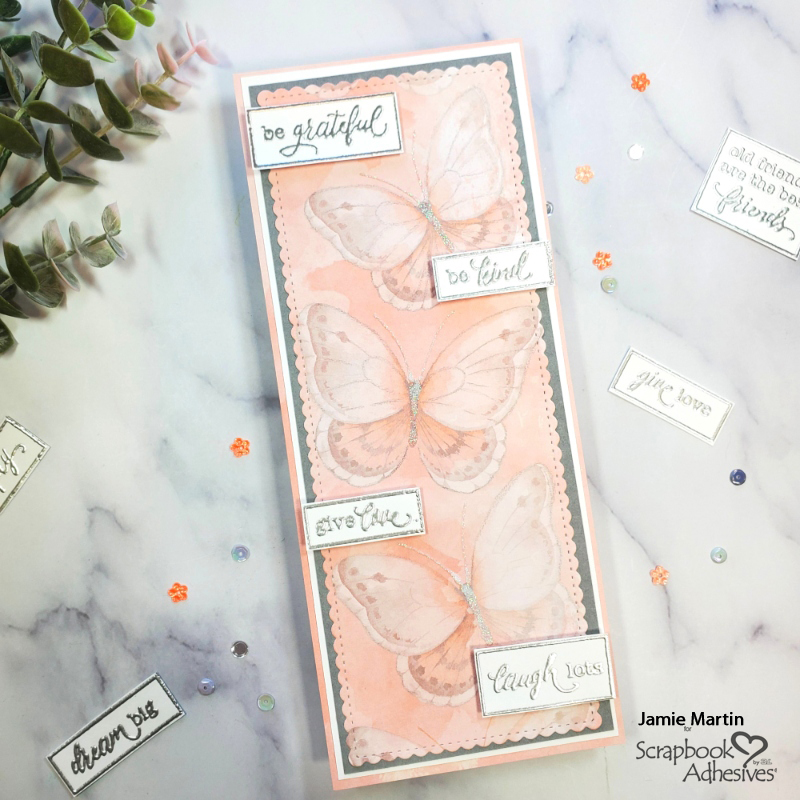
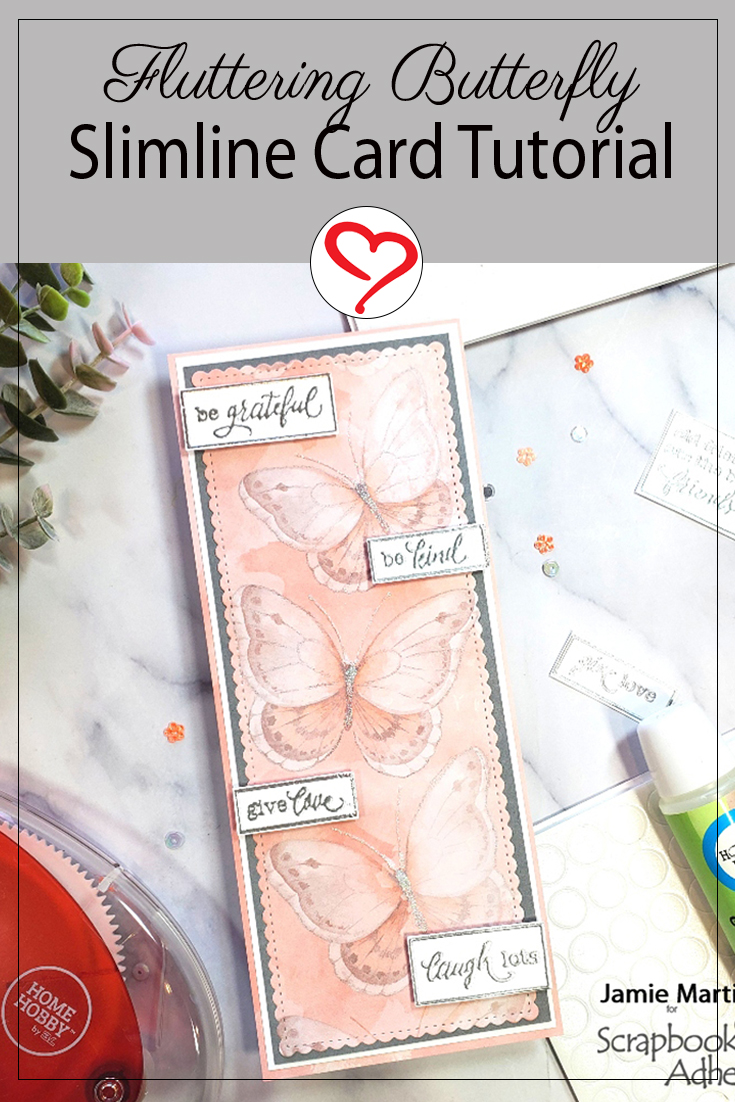
Usually, I use the small patterns on cards but never used the large patterns until now! Come see how I created this lovely Fluttering Butterfly Slimline Card.
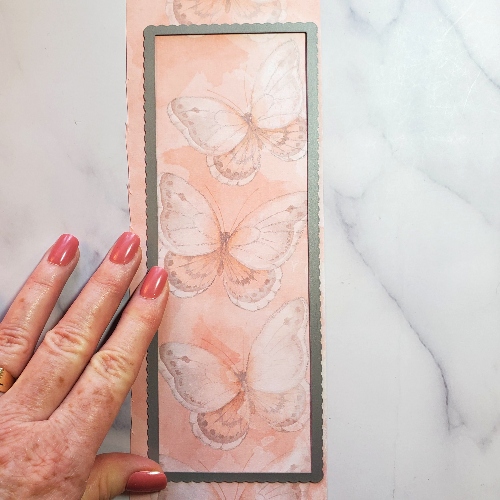
Fluttering Butterfly Card Panel
Pick out some pretty decorative paper with big images and die-cut it using a slimline die.
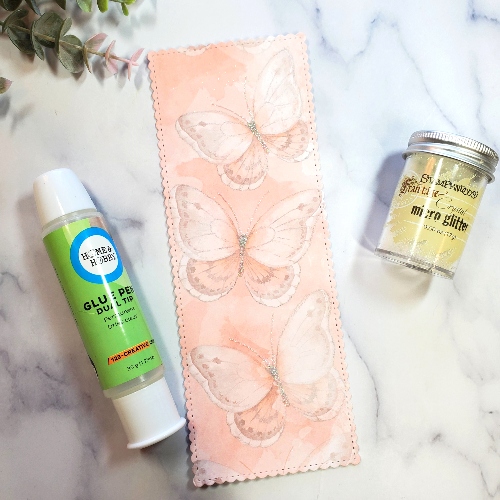
Embellishing the Card Panel
Use the Dual Tip Glue Pen to apply glue onto the body and antennas of the fluttering butterfly designs, then sprinkle Crystal Micro Glitter over the wet glue and let it dry.
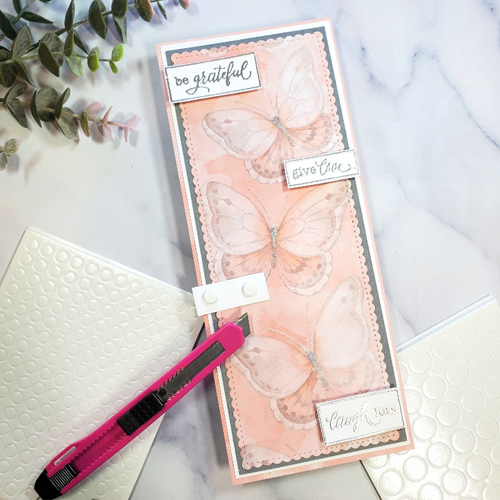
Fluttering Butterfly Card Base
While this is drying, cut gray cardstock slightly larger than your slimline panel and use the E-Z Runner® Grand Refillable Dispenser to adhere it to a slightly larger white cardstock panel then glue it to a peach slimline card.
Adding More Details
Stamp Slim Cling Boxed Words on white cardstock with VersaMark Ink and emboss with Sterling Silver Embossing Powder.
There you have it a lovely Fluttering Butterfly Slimline Card to send to someone special. Find some pretty patterned paper in your stash and create one!
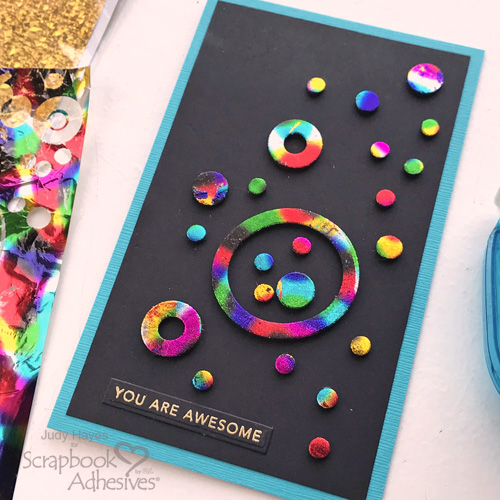
Continue to remove liners and apply foil to cover all circles and circle frames.
Reapply foil to any missed spots.
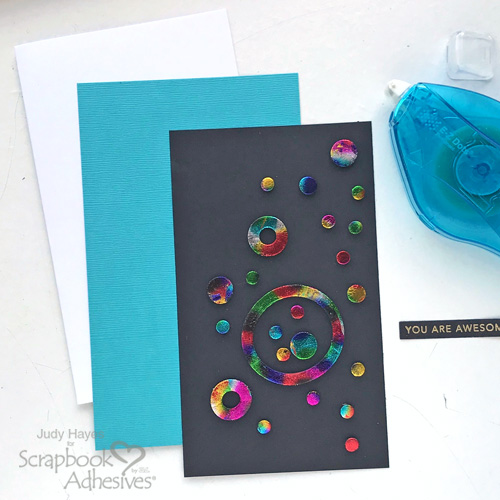
Assemble the Card
Form a 4 x 6.5 inch card base from white cardstock.
Cut turquoise mat to 4 x 6.5 inches. Use E-Z Dots® Permanent Refillable Dispenser to apply adhesive to it and fasten to the card front.
Also use E-Z Dots® Permanent Refillable Dispenser to fasten holographic circles piece over turquoise mat. Applying adhesive to card front rather than back of holographic circles piece may be easier.
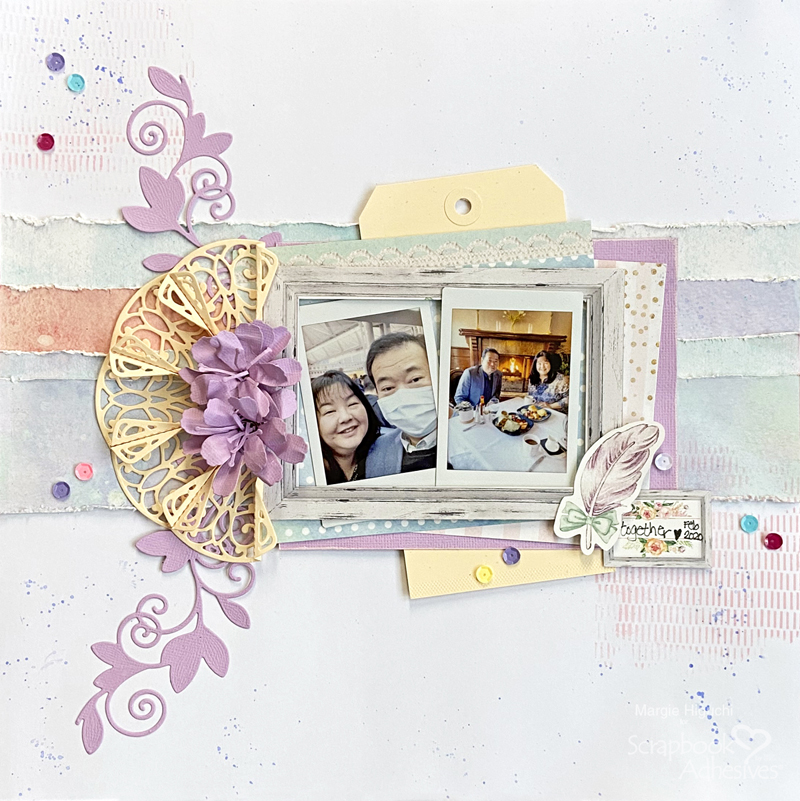
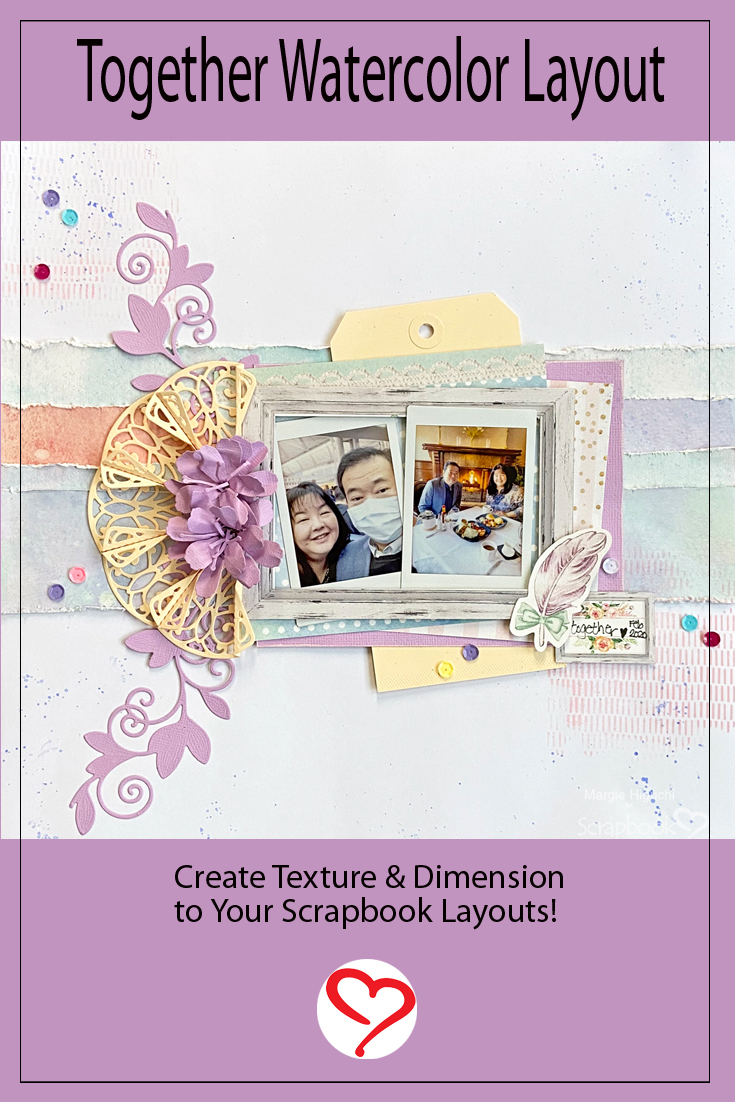
Hello friends! I am sharing my Together Watercolor Layout that documents my travel before the Pandemic. My husband took me on a last-minute trip to California for an early Valentine’s present. Grab a cup of coffee and pull up a chair…let’s go!
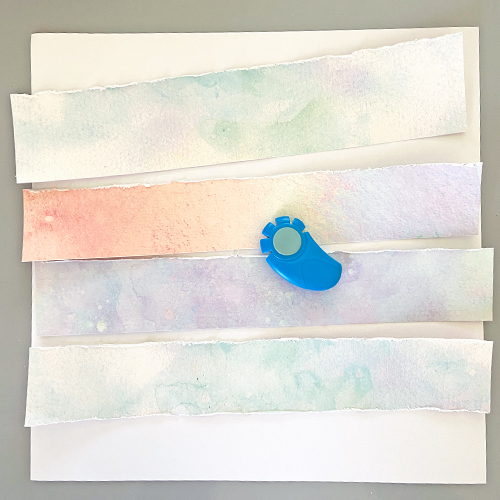
Together Watercolor Layout Background
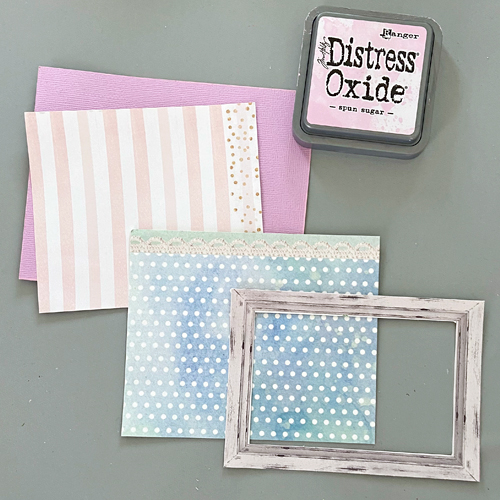
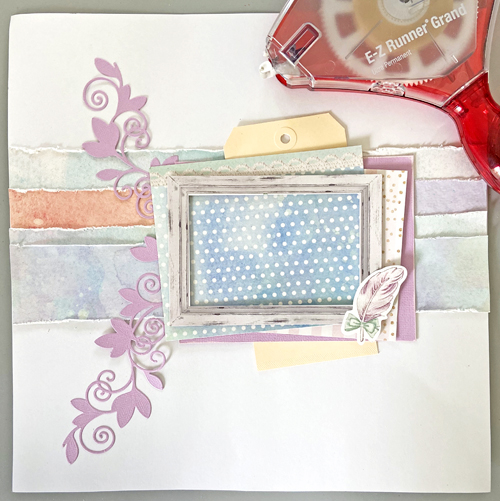
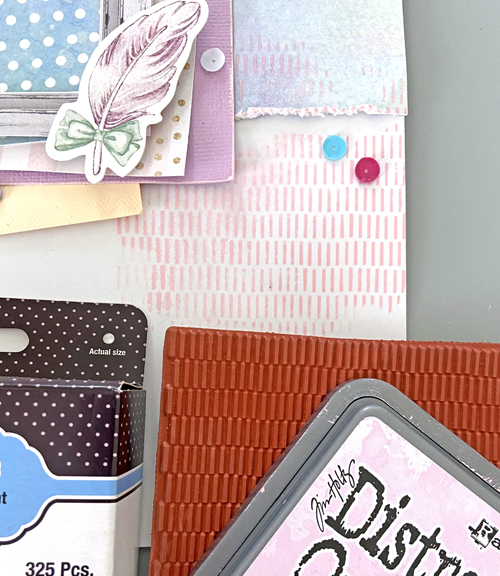
For the background, I cut four approx. 2 x 12-inch strips and then I distressed the edges by tearing and using a distressing tool. I was going for a textured background with the watercolor patterned papers.
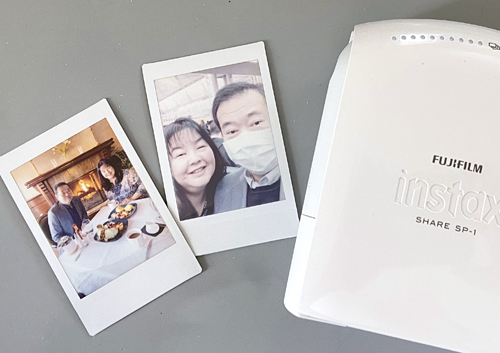
I picked out a couple of images from my phone and printed them on through my Instax printer. Yes, hubby is wearing a mask – we were at the airport. It’s part of our travel kit. I wore mine on the plane. We’ve been doing this for years…before the Pandemic.
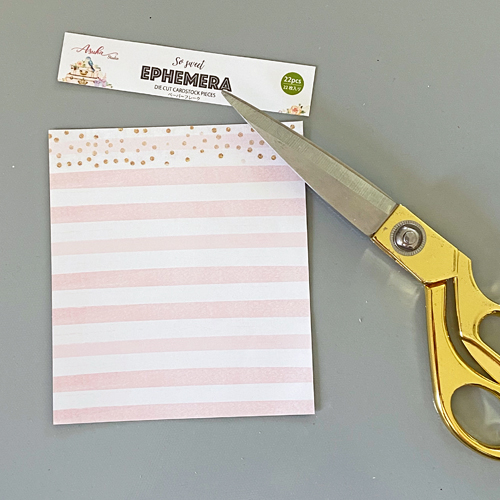
Now the fun part! Making layers of patterned papers I had on my work surface. The packaging was so cute that I had to use it. Just cut off the top.
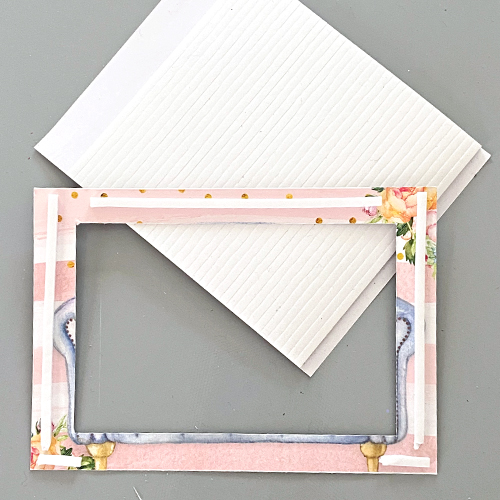
I also found and cut a 6 x 4.5-inch lavender cardstock, 5.25 x 4.5-inch white dotted patterned paper, and a frame patterned paper that was fussed cut out. Distress the cardstock by inking the edges with pink ink and a small blending brush. Designer’s Note: I also edged with pink ink on all four sides of the white cardstock base. Later, I added a shipping tag to anchor the layer behind it.
Once I got my desired look in the layers, I applied the E-Z Runner® Grand Permanent Strips in between the layers to secure and set it aside to work on the die cuts.
Die Cut Power
Creative friends who know me well know how much I LOVE DIE-CUTTING!! I’ve been die-cutting since 2000. So using the Adhesive Sheets is a no-brainer!
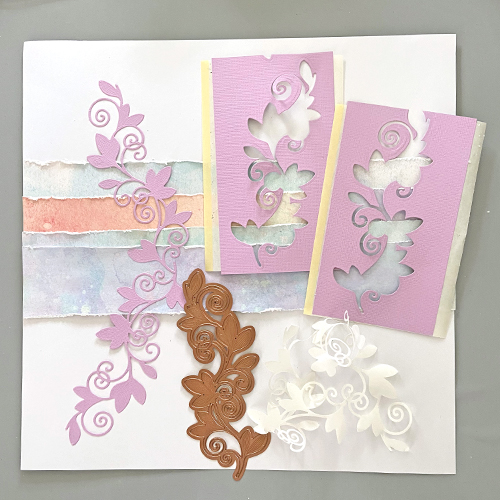
Apply an Adhesive Sheet 4×6-inch on the back of each lavender cardstock. Then die-cut two leafy vines from the Flower Bundle Die Set. Now they are die-cut stickers! Take off the backing and place them on the left side of the scrapbook layout. It’s that easy!
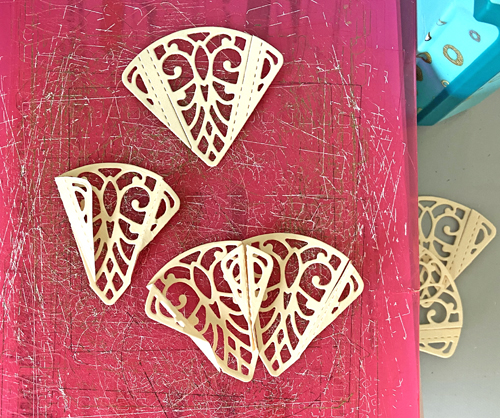
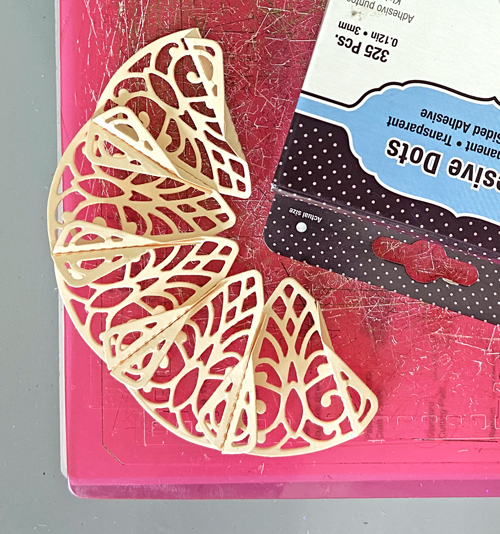
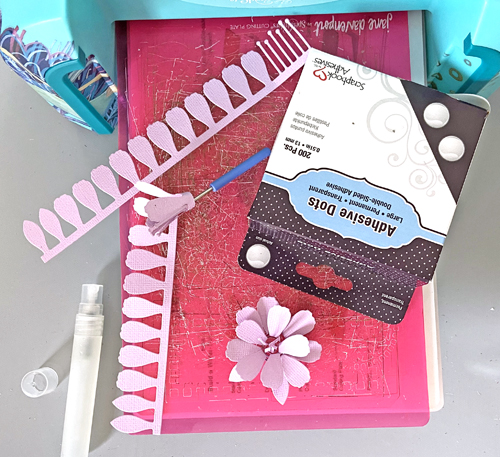
Using another shipping tag that I used for the layer, I die-cut Timeless Grace Doily Die to get five petals that form a half-circle shape. On each petal die cut, valley-fold on the inner perforated line with the slit, and mountain-fold the outer perforated line. Take two die cuts and interlock the ends to start.
Once done, I tucked a couple of Adhesive Dots Micro between each petal for extra hold but they interlock tightly so this part is up to you.
For the flowers, I die-cut twice the largest flower from the Rolled Flowers Die Set. This is a clever set. Everything is included from the stamen to the blossom to the leaves. All you have to do is roll it. Secure the end with a couple of Adhesive Dots Micro and sits on an Adhesive Dot Large. When I’m ready to adhere, I simply take off the liner and place it on the page.
Assemble the Together Watercolor Layout
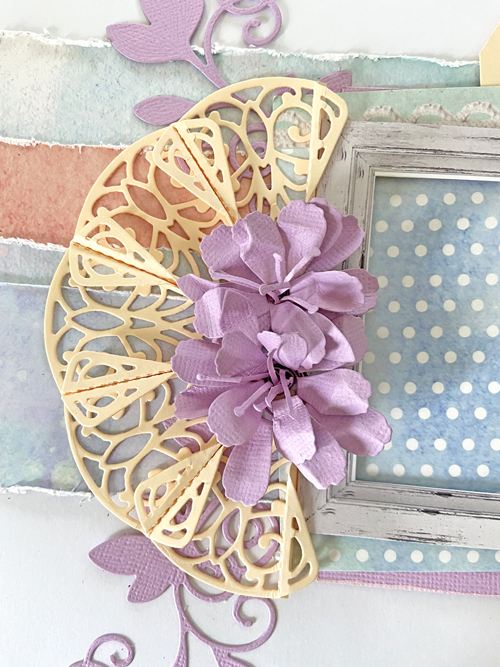
Using the half-circle doily as a guide, I adhered the layered papers with the E-Z Runner® Grand Ultra Strong. Then lift and adhere the frame with 3D Foam Strips (leave the bottom open) on top of the layers. I found a feather die cut on my table and thought it was cute so I added that in the lower right corner with an Adhesive Dot Large. LOL!
Then add the doily on the left of the frame with Adhesive Dots Micro. Adhere the flowers in the center opening of the doily.
Randomly stamp with pink ink on the white cardstock base. Add water to the lavender ink and splatter the base with a watercolor brush. Add sequins with Adhesive Dots Micro.
Lastly, tuck in the two images with a combination of the E-Z Runner® Grand Ultra Strong, and 3D Foam Strips. Add the little journal box in the lower right corner of the frame. That’s it!
Thank you for sticking with me this far! LOL! I’m thrilled about how it came out. Hope that the Together Watercolor Layout tutorial inspired you or remind you of a design idea.
Other Patterned Papers: Kawaii Paper Goods (Watercolor and Forest Friends Collections, and Feather Die Cut Ephemera Pack); Craft Dies; Spellbinders Paper Art (Timeless Grace Doily Die, Rolled Flowers Etched Dies Set by Marisa Job (retired), Flower Bundle Etched Dies Set (retired), Tool ‘n One with Quill Tip, and Deep Sea Die-Cutting and Embossing Machine); Inks: Ranger Ink (Distress Oxide Ink in Spun Sugar + Distress Ink in Shaded Lilac); Distress Tool: Creative Memories; Background Stamp: Impression Obsession; Sequins: MultiCraft (Baby Cup Sequins); White and Lavender Cardstock; Shipping Tags; Water Mister; WaterColor Brush
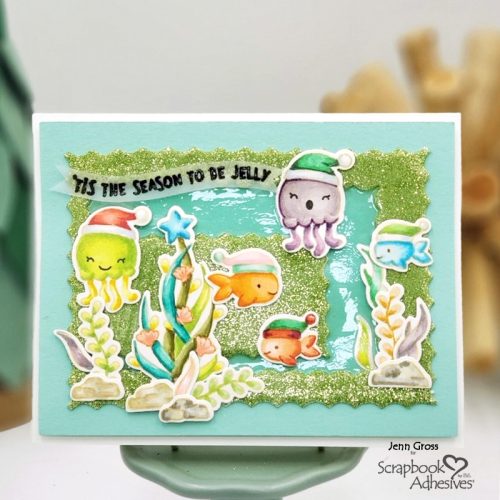
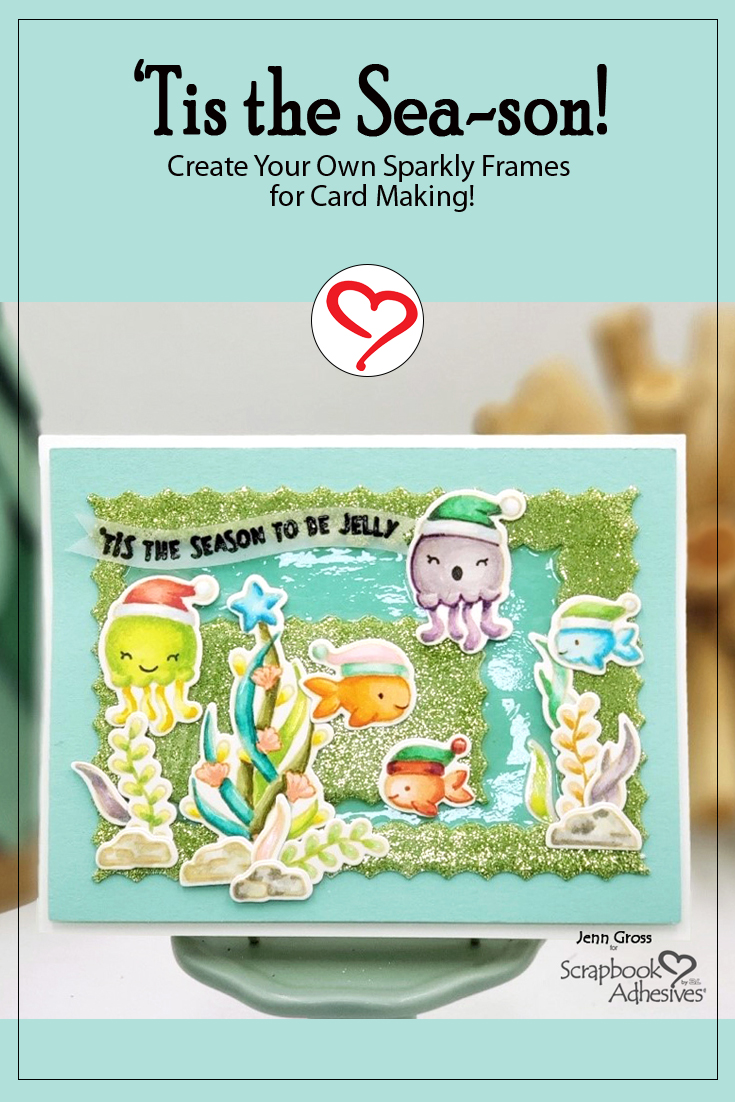
Hello my crafty friends and welcome to today’s blog. Although it’s early, I thought I would get a jump on a holiday card like this fun and adorable Tis the Sea-son Card. Using the Wear Your Adhesive on the Outside technique, I will show you how I used the 3D Foam Creative Sheet and glitter to make this sparkle!
Tis the Sea-son Card Step Outs
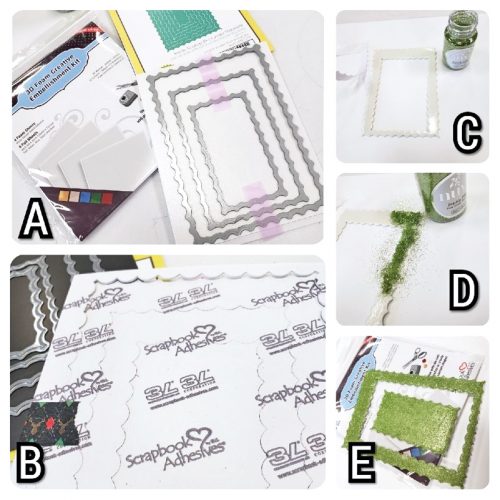
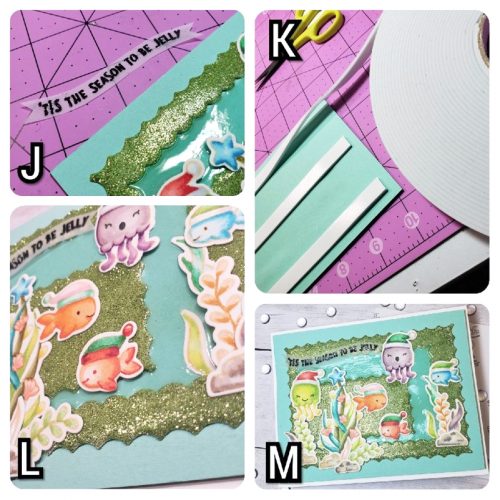
A and B: Die-cut three of the Inside Scallop Rectangle Stacklet dies with a sheet of 3D Foam Creative Sheet in White from the 3D Foam Creative Embellishment Kit. This creates a solid foam rectangle and two foam frames (set aside the smaller foam frame for another day).
C and D: Peel off the liner of one side of the large foam frame and sprinkle the green micro-fine glitter over the exposed foam adhesive. Tap off the excess glitter and set the frame aside.
E: Repeat the process with the solid rectangular foam die cut as above.
Building Details
F: Stamped out the images onto the Premium Marker Paper with Cream ink. Color them with Copic alcohol markers to create a no-line coloring look. Then die-cut each image from its coordinating die.
G and H: Peel off the backing from the large foam rectangle frame and center it to a 4 x 5 1/4-inch piece of Cool Pool cardstock. Note to keep the narrow side of the frame on the left side. Peel off the backing from the solid foam rectangle and position it toward the lower left side by that narrow side of the frame. Fill in the open space between the frame and the solid rectangle with glaze and set it aside to dry.
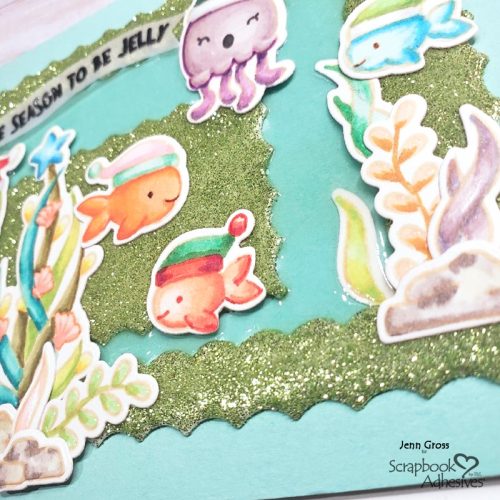
I: Position the seaweed Christmas Tree first and then add the rest of the seaweed, rocks, fish, and jellyfish to the card front. Make sure to leave the top left clear for the sentiment.
Assembling the Sea-son Card Front
J: Stamp the ’tis the season to be jelly sentiment on to vellum with watermark in, and heat set it with black embossing powder. Fussy cut the banner and attached it to the upper left of the card panel.
K, L, and M: Apply three strips of the Crafty Foam Tape White 54ft to the back of the card panel, and center it on a white A2-size (5.5 x 4.25-inch) card base to complete the card.
I think these fun glittered frames add just the right amount of Christmas bling. As I continued to handle the card, I notice there was NO glitter rubbing off. Yay! No glitter except where you want it!!
With this Tis the Sea-son Card, I hope to inspire you to start your holiday cards EARLY! Thank you for stopping by. I hope you enjoyed learning an easy way to add some bling to your cards and creations!
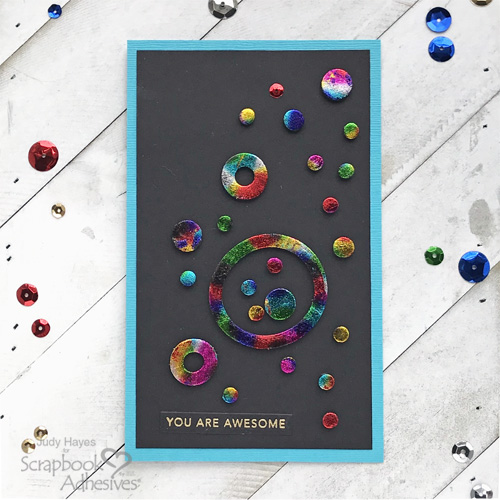
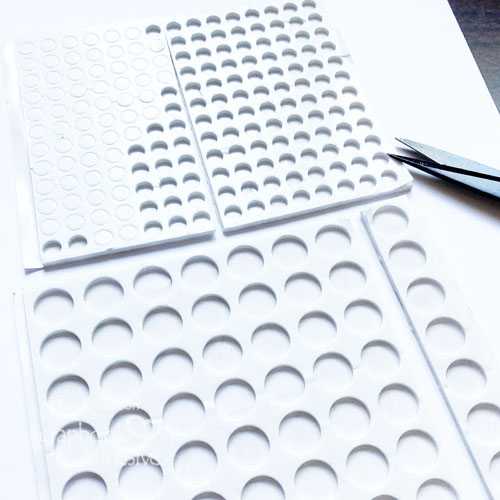
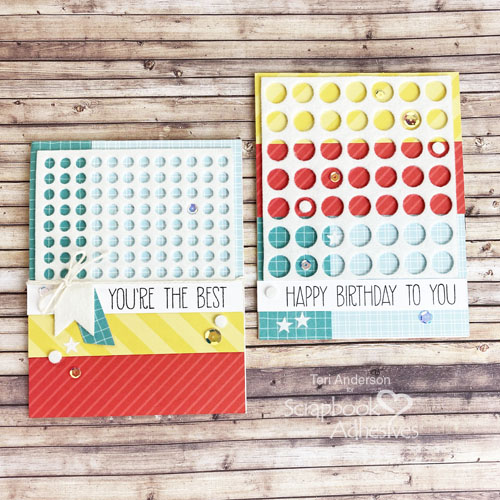
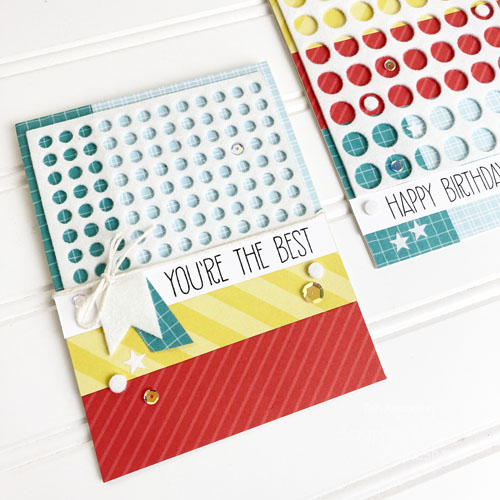
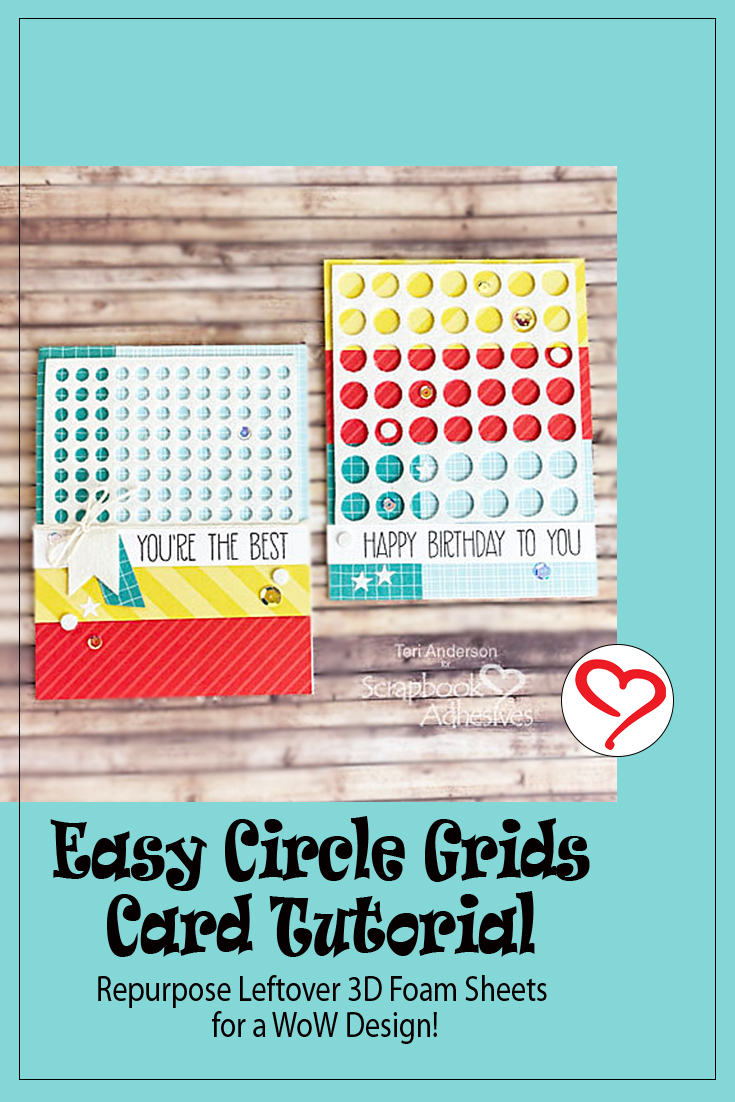
Hi, everyone! Teri here with a fun way to use up the leftover negative pieces of 3D Foam Circles: Create cards with circle grids! These cards are easy to recreate!
Creating the Circles Grids
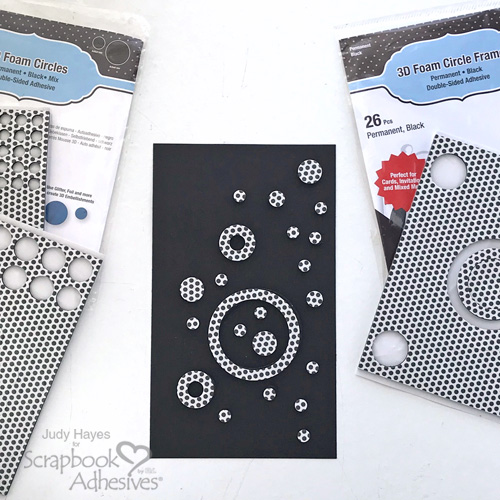
Start by taking the negative pieces of a couple 3D Foam Circles sheets and trimming them down so you have a couple grids. You can use a paper trimmer or scissors to do this. You might need take a few passes at cutting the foam, due to the height of it!
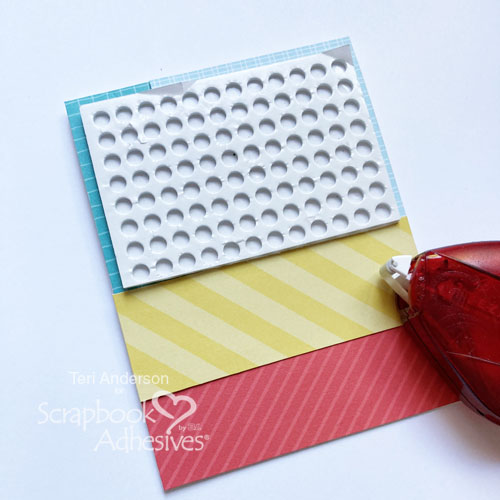
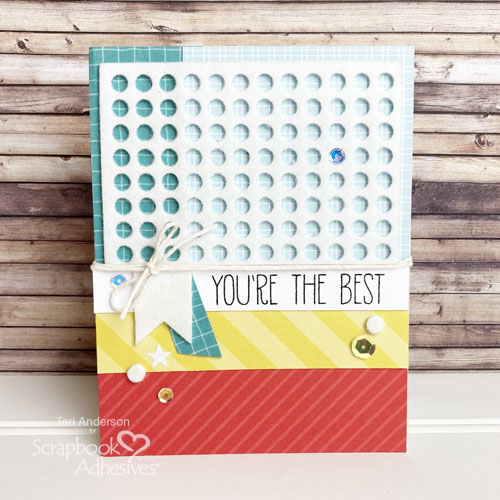
Cover a card with patterned paper. Place one of your “grids” on the card.
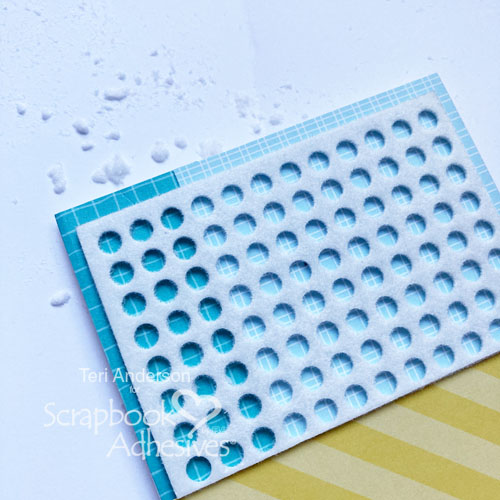
Wear Your Adhesive on the Outside Technique
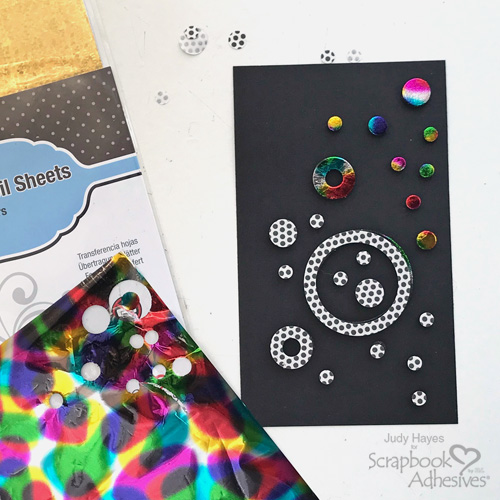
Apply flock or glitter to the grid. Make sure the foam is completely covered. I suggest running your finger over it to make sure there are no sticky spots exposed! If there is, dump a little extra flock (or glitter) onto the grid. Tap off the excess and DONE!
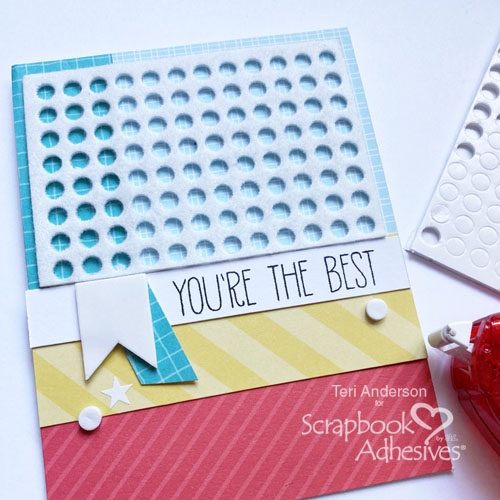
Final Details
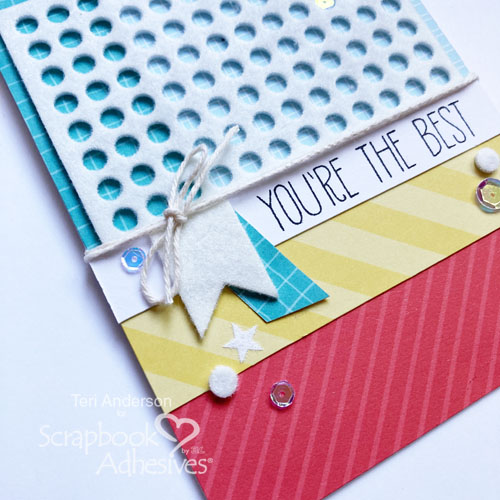
Add to your card’s design by placing a sentiment on it, as well as a few embellishments. Use additional 3D Foam Shapes, I used the 3D Foam Pennants, and E-Z Runner® Stars with flock to round out the design. Don’t forget the sequins too for extra sparkle.
Finish your card with a piece of twine or floss! Adhesive Dots work great for holding bows in place so they don’t move around!
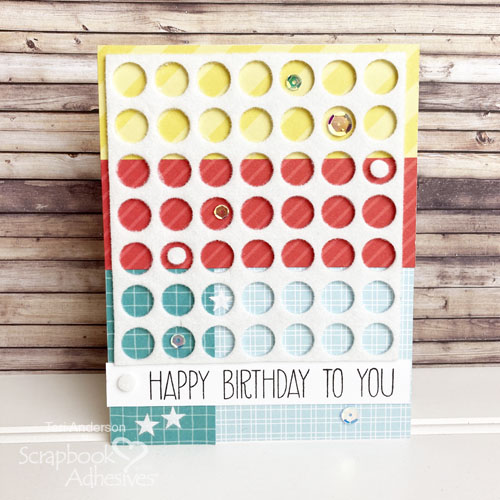
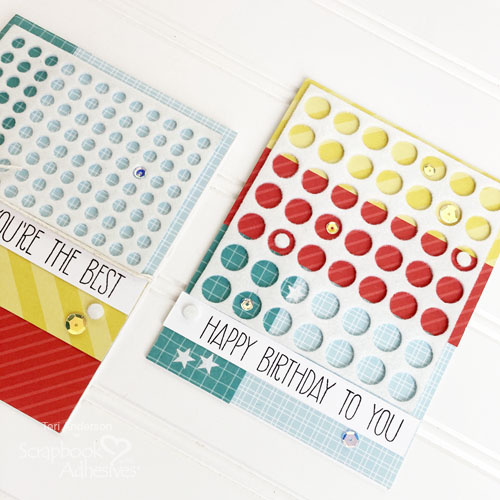
Go BIG with a Bigger Circles Grid
Here’s a second card created with a “grid” from another leftover negative!
The grid for this card is much larger than on my first card so I decorated some of the grid by embellishing the insides with stars, sequins and smaller circles. I also didn’t feel like using twine on this card so I went without! It would have looked great with twine though if I had decided to do so!
I hope you are inspired to give this “grid” technique a try next time you have a leftover negative piece of 3D Foam Circles! It’s a great way to get the most bang for your creative buck and let nothing to waste!
Other White Cardstock: Neenah Paper; Patterned Papers: Sunny Studio Stamps, Photo Play Paper Co. ; Stamps: Avery Elle (Handwritten Notes Stamp Set); Ink Pad: Ranger Ink; Sequins: Pretty Pink Posh; White Flock: Stampendous; Twine: The Twinery
Hello crafty friends! Tracy here, and today I have a fun little Chevron Background layout to share. Here are all of the details.
Mix & Match Patterns
This Chevron Background is a great way to mix and match patterned papers. The background is plain white cardstock. Then start with the largest chevron. I used a paper collection that I had mostly scraps left of, so start with the largest piece. I varied the pieces in widths as well. The first is 1″ wide, next is 0.75″ wide and the third is 0.5″. Switch up as you wish. Between some of the pieces I added strips of Extreme Double Sided Tape 1/8in, continuing with the same pattern. Add the paper pieces using the E-Z Runner® Permanent Strips Dispenser.
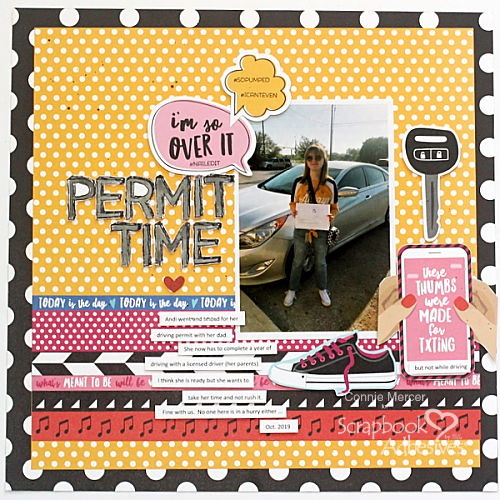
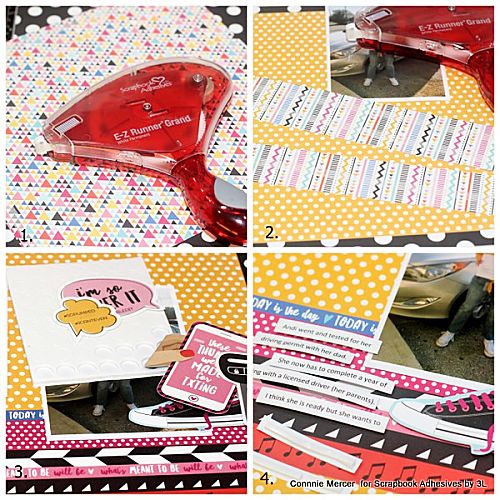
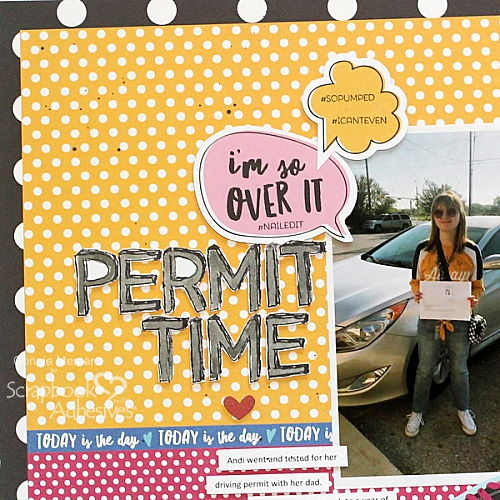
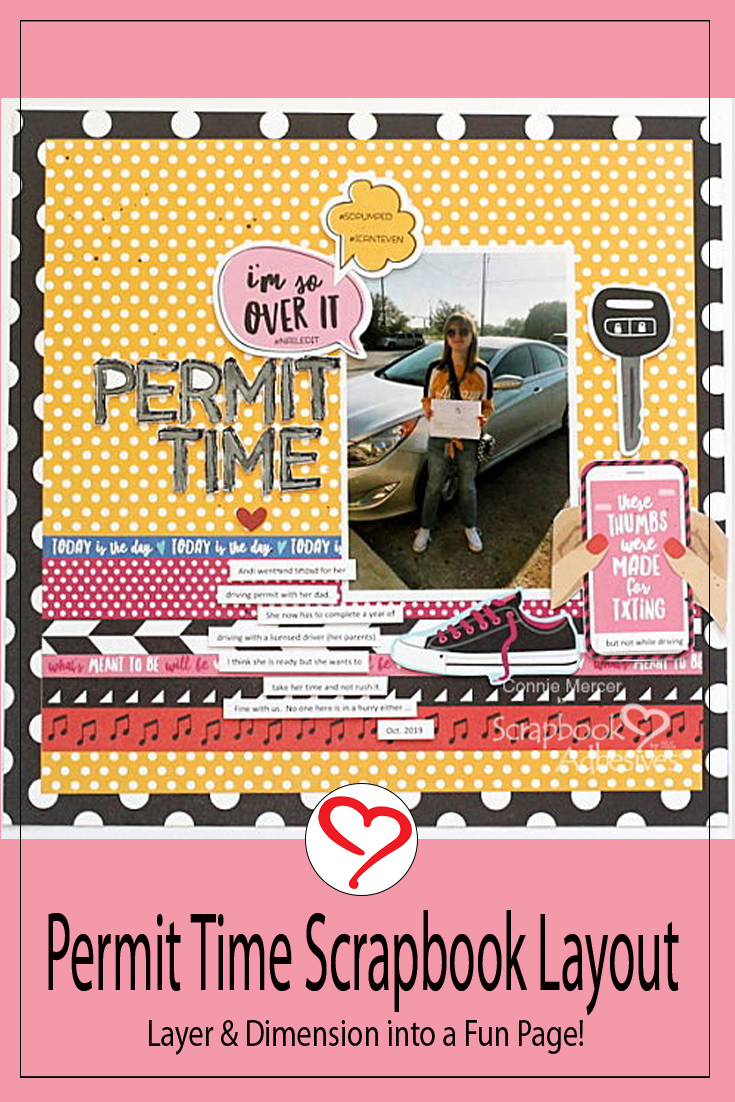
Hi, Connie here with a fun scrapbook page using 3D Foam Adhesives to adhere letters and embellishments to this special page. I haven’t created a scrapbook page in over a year and even though my pattern paper is not the latest and greatest, I had fun putting this Permit Time page together and that is what counts!
The 3D Foam Adhesive makes the embellishments pop off the page and I love the look!! Besides the obvious, the embellishments will stay where they are placed which is what we (as scrapbookers) want.
Permit Time Scrapbook Page Step by Step
1. Adhere the two sheets of pattern paper together after trimming 1″ off of both sides of one of the pattern papers. I took 1″ off the orange polka dot paper and then adhered over the black polka dot paper using the E-Z Runner Grand Refillable Dispenser . 2. The border strips and photo were adhered using the E-Z Runner Grand Refillable Dispenser to the page front. 3. The 3D Foam Circles White Mix were used to adhere and give dimension to the die cuts. 4. The 3D Foam Strips were used to adhere the journal strips to the front of the page. Side note: these have quickly become a favorite product of mine. The are perfect for the journal strip sentiment for cards too.
Other Page Details
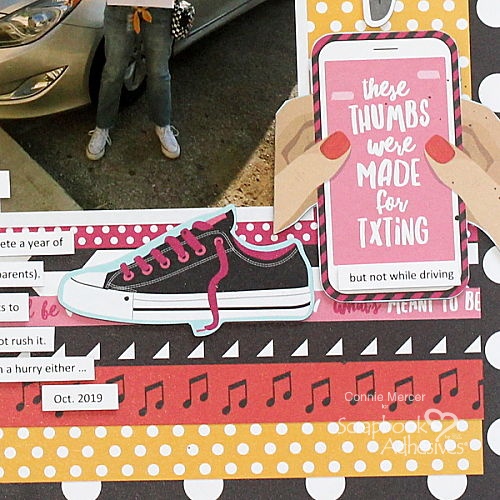
I adhered the 3D Foam Circles White on the edge of the die cut so the adhesive did not touch the photo. Love that there are two sizes in the package. Very handy!! I also used the NEW product 3D Foam Micro Squares White to adhere the letters along with 3D Foam Strips.
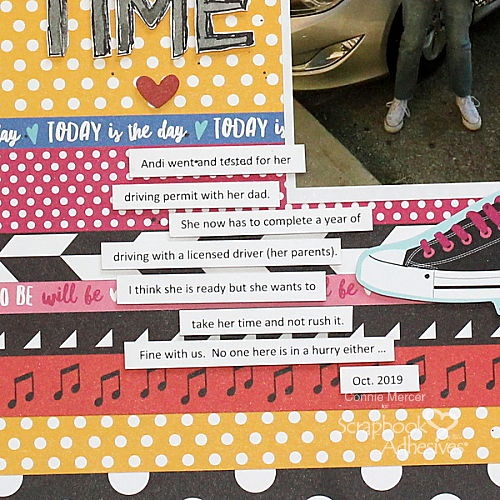
The 3D Foam strips were perfect to adhere the journal strips. The 3D Foam Strips are a great tool. They help with keeping the journal strips lined up…and easy. I love easy!!
I hope you try some of the 3D Foam Adhesives on your projects like my Permit Time Scrapbook Page.
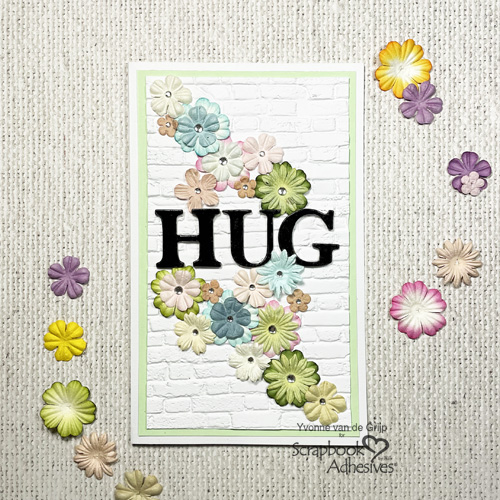
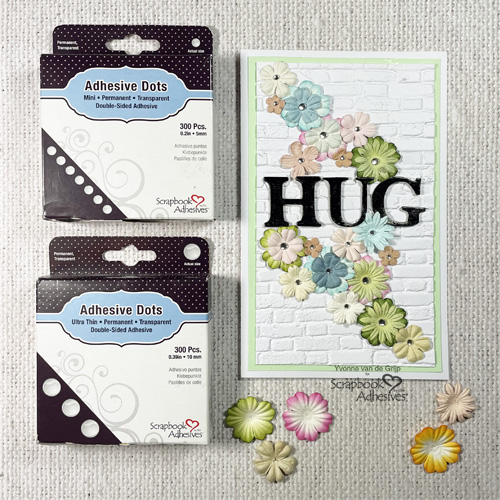
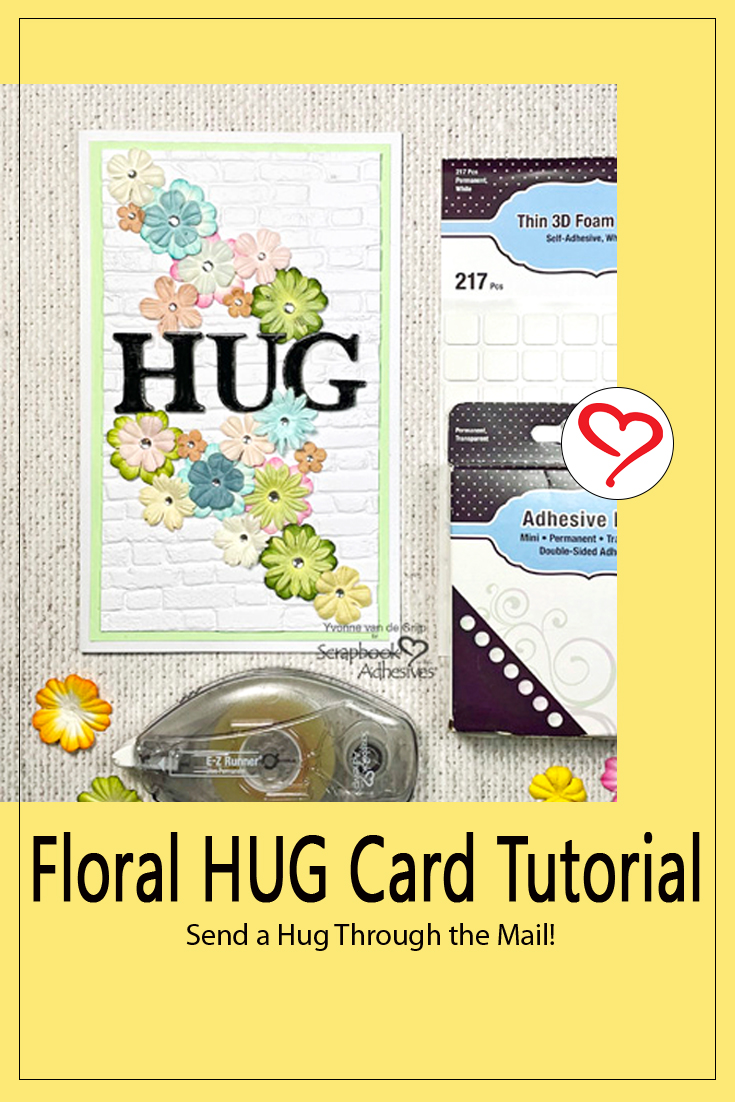
Hi everyone, Yvonne here with an easy Floral Hug Card. I love flowers and always have some flower cards for several occasions. Adhesive Dots Medium Ultra Thin are simply the best when it comes to the invisible adherence of mulberry flowers.
The card I made is very simple to make so it’s also suitable for beginner cardmakers. Who wouldn’t like to recieve a hug like this per post! Let me show you how I made my card.
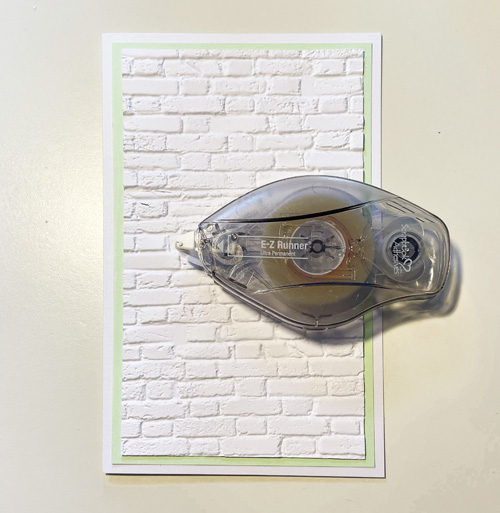
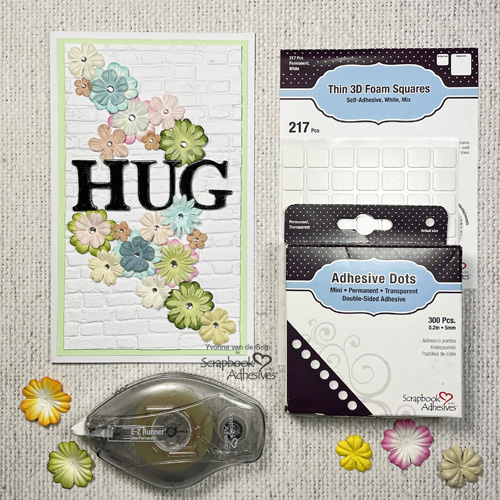
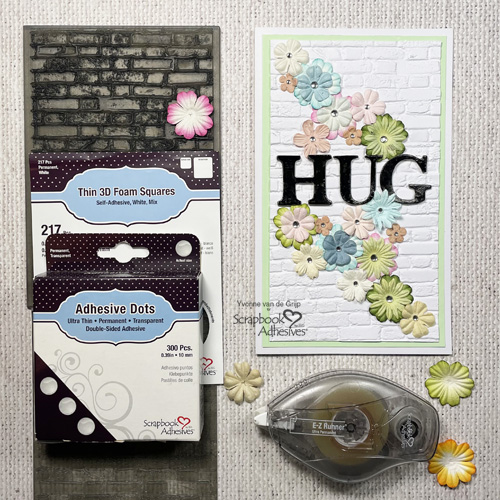
For the HUG sentiment on the flower card, I used black chipboard letters. Then I cut (using a craft knife) some Thin 3D Foam into small stripes and adhered them to the back of the letters. Remove the liner of the 3D Foam and then adhere onto the card base.
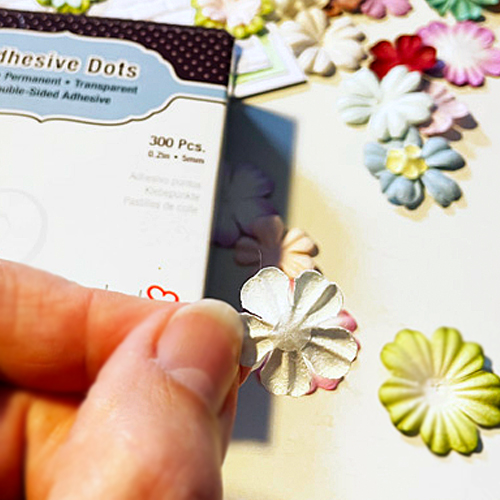
Flower Embellishing
To embellish the card I used small mulberry flowers. Start by picking the flower colors you like for your card. Then put Adhesive Dots Medium Ultra Thin onto the back of the mulberry flowers. Now take of the liner and affix the flowers onto the card.
For the smallest mulberry flowers, I used Adhesive Dots Mini. Finally, for a finishing touch, I adhered some rhinestones to the flowers representing the stamens. Designer’s Tip: If your rhinestones are not self-adhesive: simply use Adhesive Dots!
And voila…your Floral Hug Card is ready to send! Wishing you happy crafting, Yvonne van de Grijp