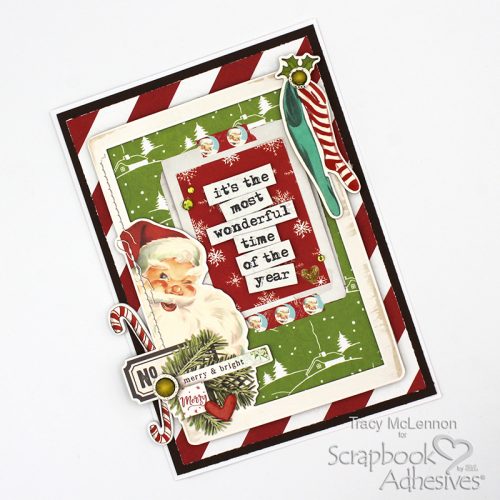
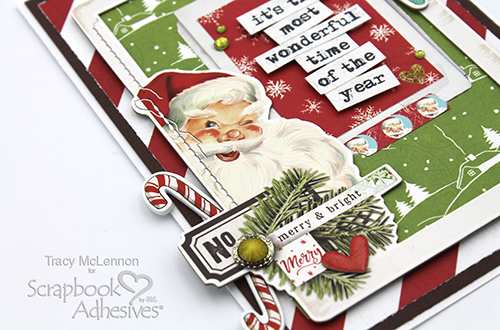
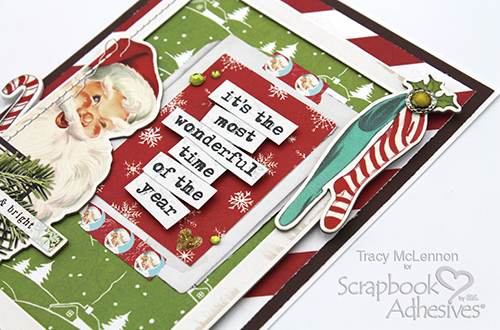
Hello crafty friends! Tracy here and today I have a fun and festive little Christmas card to share that is just SO easy to create but packed with dimension. Here are the details for this Wonderful Christmas Time Card.
Wonderful Christmas Time Layers
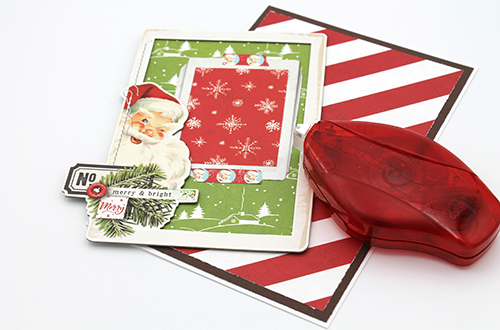
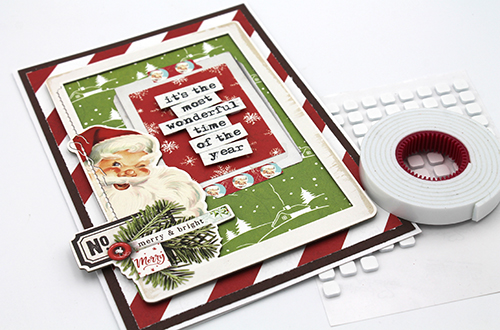
The dimensional Christmas card base is a 5×7 card. I cut the next 2 layers from brown cardstock and the striped patterned paper. Next cut a piece of green patterned paper to fit behind the chipboard frame. I adhered these pieces together using the E-Z Runner® Permanent Strips Refillable Dispenser.
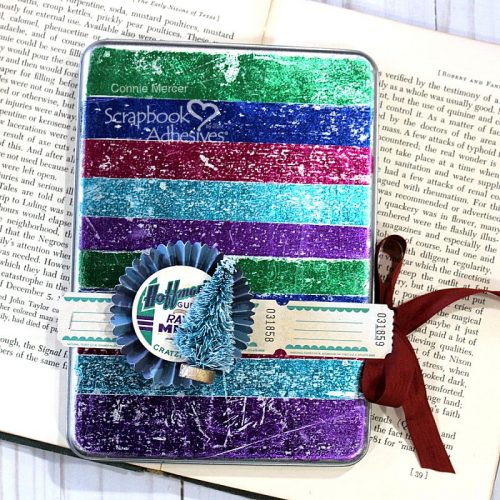
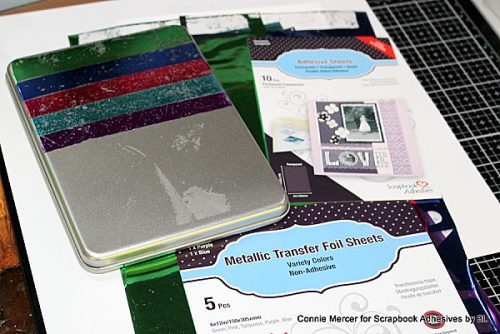
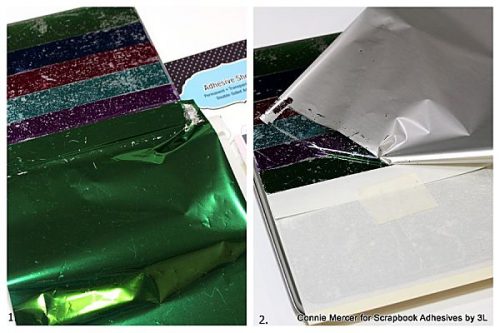
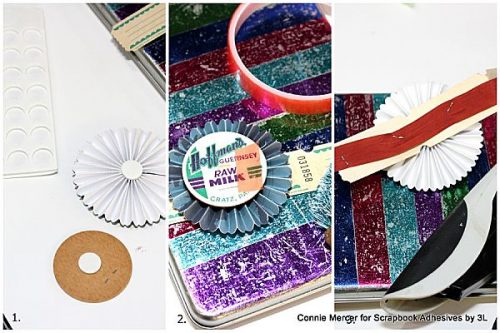
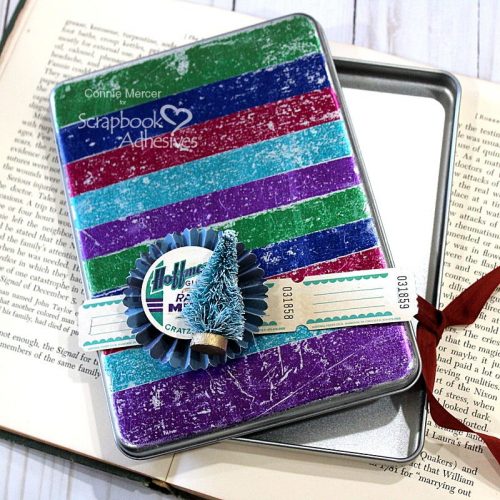
Hi, Connie here with a Metallic Foil Gift Tin project using one set from the Metallic Transfer Foil Sheets to cover a tin box. Using it with the Adhesive Sheets 4 x 6 in., makes this project easier to do! I had this tin in my craft stash so it was perfect for a makeover. Grab what you have and let’s get started.
Wear Your Adhesive on the Outside with the Gift Tin
1. The first thing to do is cut your foil sheets in half. They will be easier to handle when laying on the adhesive sheets. Add the 4×6 adhesive sheet to the tin. Rub it on and then pull up. Take the release sheet and cover all but about an inch (so foil doesn’t stick until you are ready). 2. Add the foil over the adhesive and rub. Pull up and repeat until the front of the tin is covered. Tip: Keep folding the release sheet down so you are covering only an inch strip at a time. I really loved the distressed look when the foil was all on.
Creating a Embellishment Cluster
1. I took a rosette embellishment and added a vintage milk cap to the center using the 3D Foam White Circles Mix. 2. Then using the 3D Foam White Circles Mix adhered the rosette to a strip of vintage tags. Extreme Double-Sided 1/2″ Tape was used to secure the tiny tree to the milk cap. 3. The embellishment strip was stapled to ribbon and then tied around the tin. Tip: Making a ribbon tie around will keep the foil in place. Adhesive will pull up the foil if you ever decide to remove the embellishment.
Thanks for stopping by and have a wonderful Holiday!! Connie Mercer
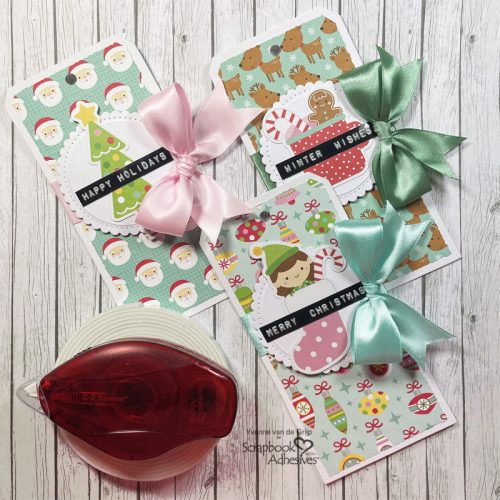
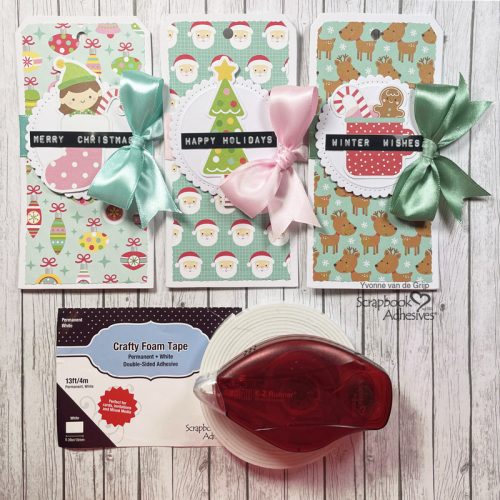
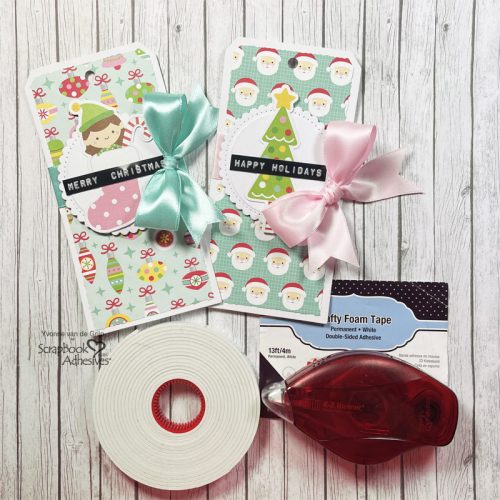
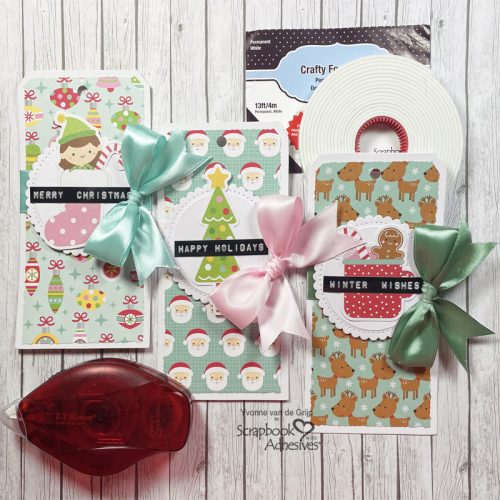
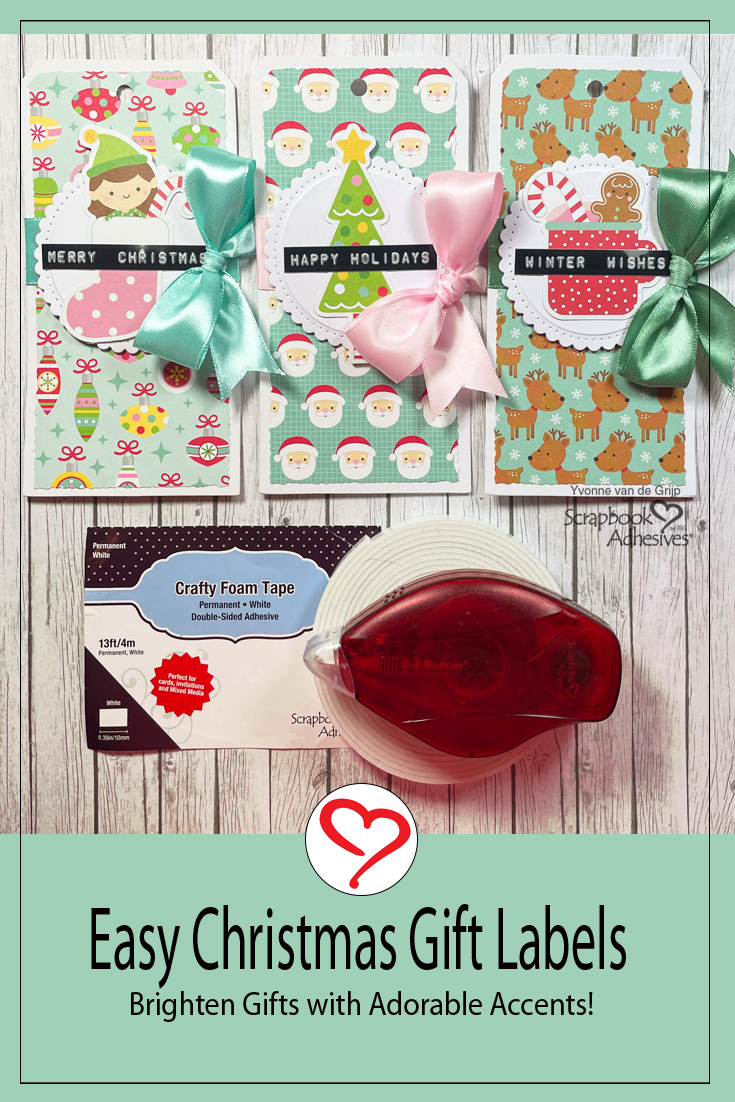
Hi everyone, Yvonne here with some last-minute, quick, and easy-to-make gift labels for your Christmas presents. Lol…I always calculate how many gift labels I need for Christmas, but somehow I always end up not having made enough gift labels.
So, I would like to share how I made my last-minute Easy Christmas gift labels for this Christmas. Using Scrapbook Adhesives by 3L® Adhesives made my labels really easy and very quick to make! Shall we get started?
Making the Christmas Gift Label Base
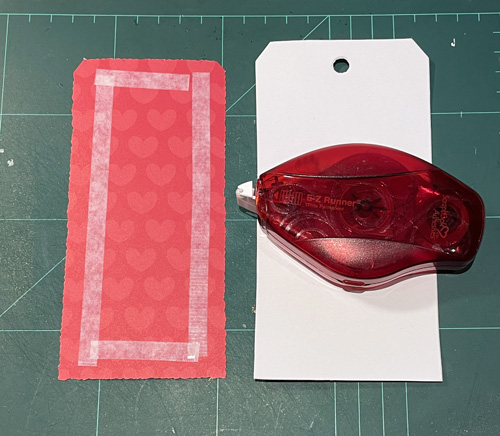
For the base, I used a white cardstock tag. Now trim a piece of patterned cardstock to a size slightly smaller than the white tag. I used a Torn Edge Trimmer to create the torn edges, but you could also use some torn edge scissors. Then adhere the patterned label upon the white label using the E-Z Runner® Permanent Strips Refillable Dispenser.
And next punch a hole for fastening the label to a gift.
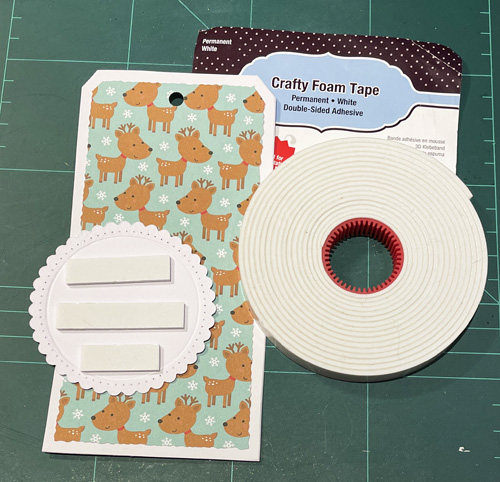
Adding Dimension to the Tag
First, fold a piece of satin ribbon around the tag and adhere the ends to the back of the label using the E-Z Runner® Permanent Strips Refillable Dispenser. Next die-cut and emboss a scalloped circle from white cardstock. Then adhere the circle onto the tag using Crafty Foam Tape White.
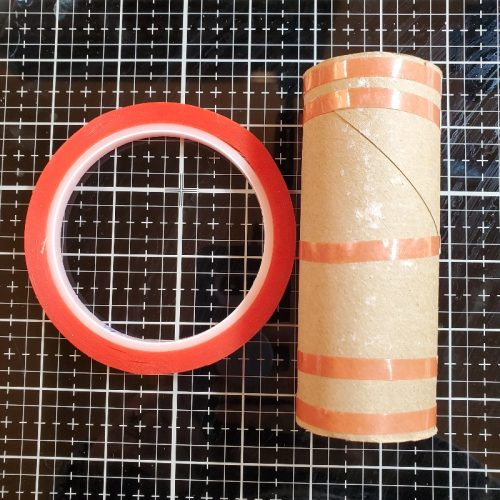
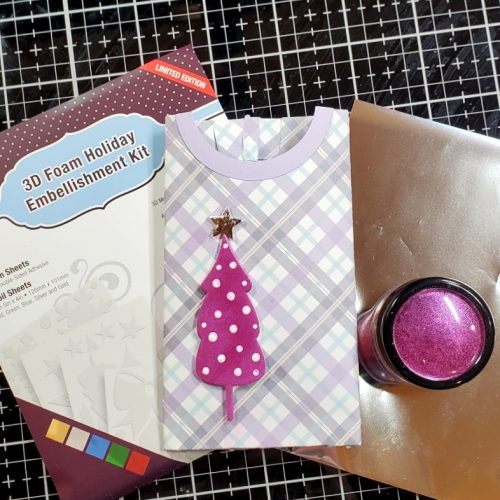
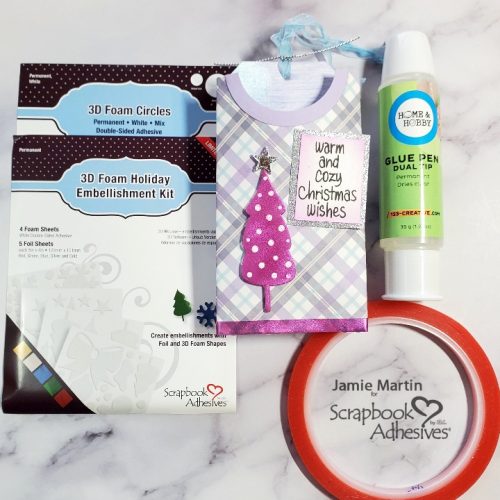
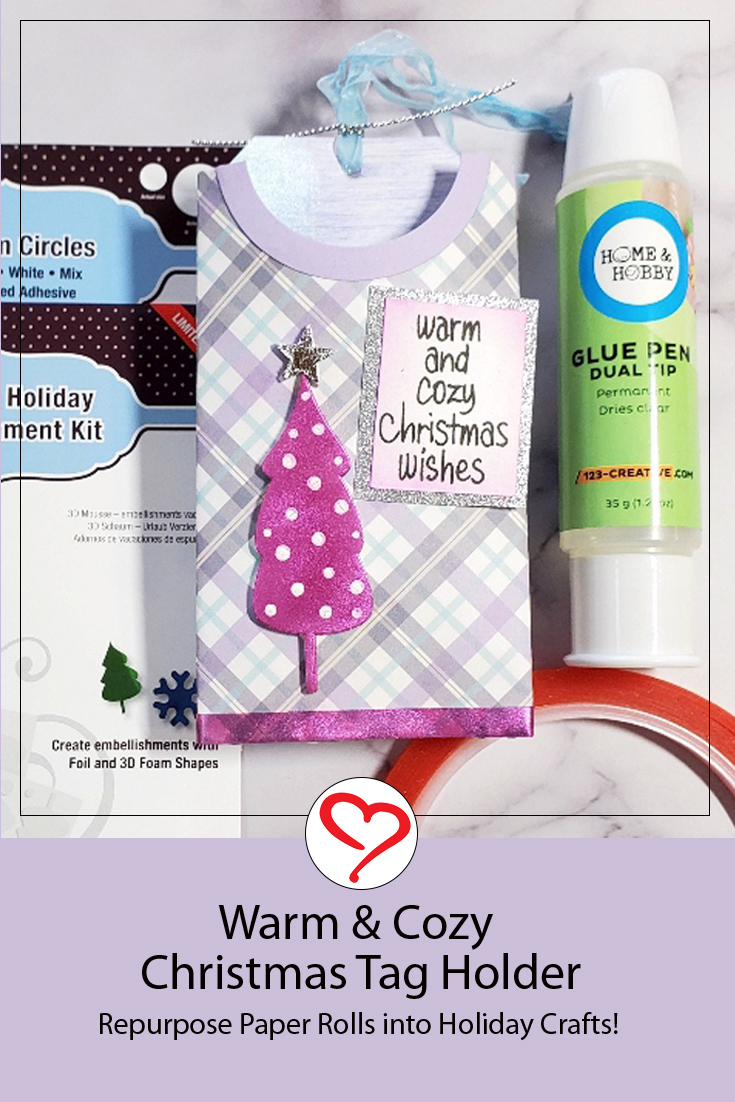
Hi there, Jamie here with you today with a question, were you one of the toilet paper hoarders at the beginning of the pandemic? Well if you were, keep those empty paper rolls and craft with them!! I made Christmas tag holders for holiday tags, read on to find out how easy it is to make.
Tag Holder Base
To start, wrap the paper roll with Extreme Double-Sided Tape 1/4″. First, wrap two rows of tape at the top and bottom. To secure even more, add one row in the center.
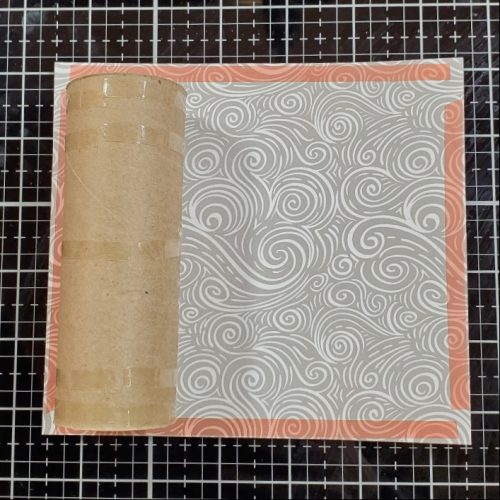
Covering the Tag Holder Base
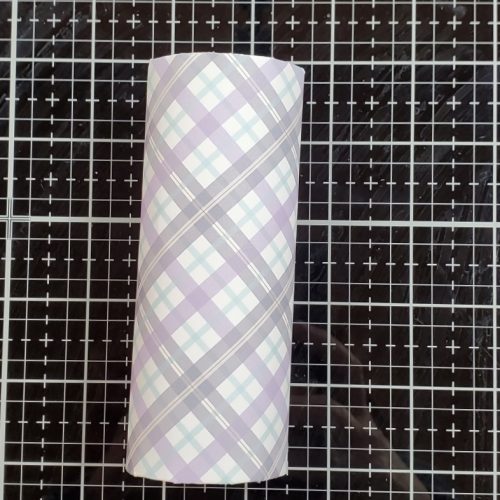
Wrap the paper roll with patterned paper. Make sure to cut the paper so that it would slightly overlap. Each paper roll is different so this is my measuring method.
Place a strip of Extreme Double-Sided Tape 1/4″ along all four sides/edges of the paper. Then roll it from one edge to the other to finishing wrapping.
Tuck the paper in from top and bottom by cutting the overhang approximately every 1/4″ and folded down. Since there’s tape at the edge just give it a little rub so that it will adhere.
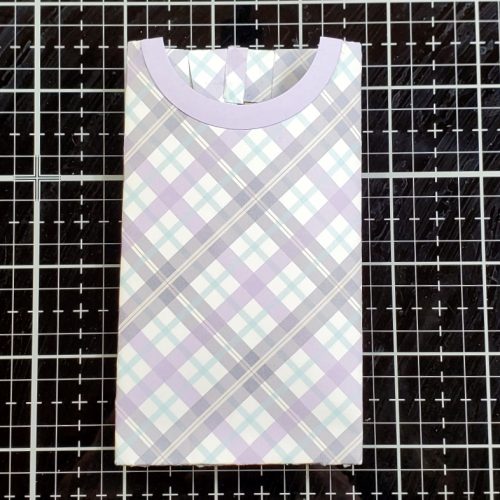
Create a Notch
Next, flatten the roll with the seam in the back. To create a notch, place half of a circle die inside the top edge of the roll with the cutting blade facing up, and die-cut it with my CrossOver ll Diecutting Machine.
To make a finished edge around the notch, I nested the die with a larger size die to die-cut with a purple cardstock and adhered it with the Dual Tip Glue Pen. You can see in the picture below, the cut marks of the paper. If this bothers you, you can cut a piece of the same decorative paper and glue a piece inside. But for me, I’m not that picky.
Wear Your Adhesive on the Outside with a Tree + Star
Now it’s time to embellish! Use the taller 3D Foam Tree shape from the 3D Foam Holiday Embellishment Kit and add it to the right side of the holder. Remove the top liner and add pink mica powder by rubbing it into the tree to secure. Accent the tree with white Enamel Accents.
Once it dries, place the smallest 3D Foam Star shape from the 3D Foam Holiday Embellishment Kit and foil with silver foil also from the kit. How? Simply remove the top liner, put the foil color/shiny side UP, and rub to transfer the color.
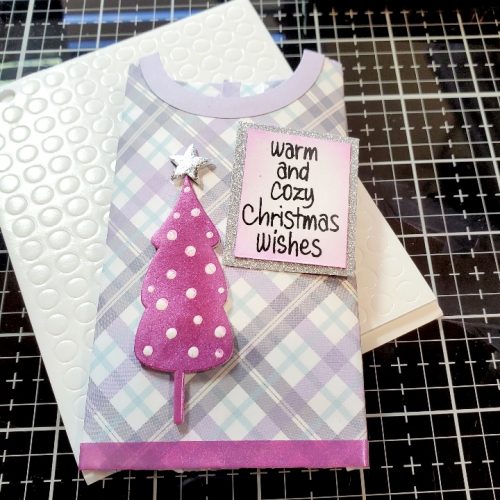
Tag Holder Sentiment
Stamp the sentiment on white cardstock with black ink and ink the edges with Cactus Flower ink. Using a slightly large sliver glitter paper, mat the sentiment with a strip of Extreme Double-Sided Tape 1/4″.
To attach this to the slightly curved holder, turn it over and place a small amount of the Dual Tip Glue Pen on the right with two 3D Foam Circles White Mix on the left side. This combination should help secure it down.
For accent, place a strip of Extreme Double-Sided Tape 1/4″ at the bottom. Remove the liner, cover with the pink mica powder and rubbed to secure.
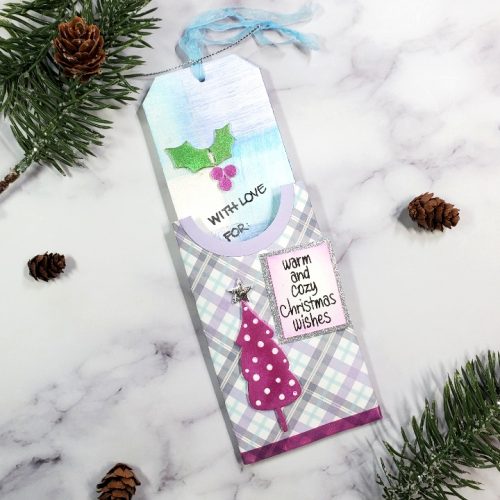
Add a Sweet Holiday Tag
Die-cut a tag out of white cardstock and is big enough to fit inside the holder. Add color to the tag background by rubbing blue, lavender, and silver inks until you get the desired look.
Place the 3D Foam Holly Leaves shapes from the 3D Foam Holiday Embellishment Kit on the tag. Rub green mica powder for the leaves and pink mica powder for the berries. Next, stamp the sentiment with black ink and thread a ribbon on top.
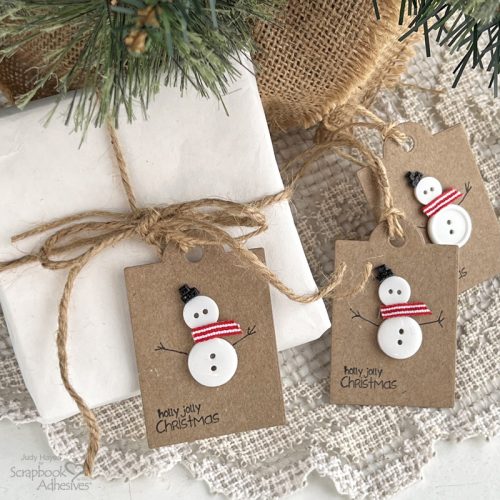
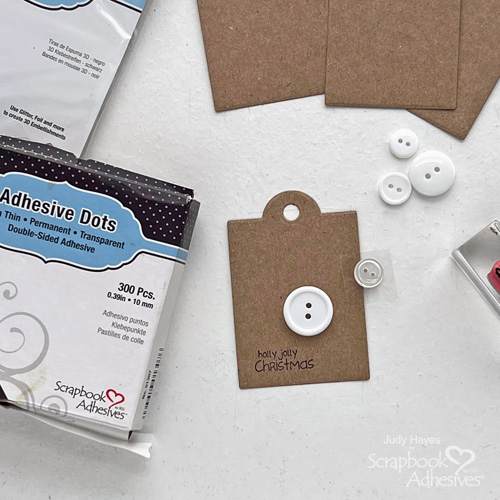
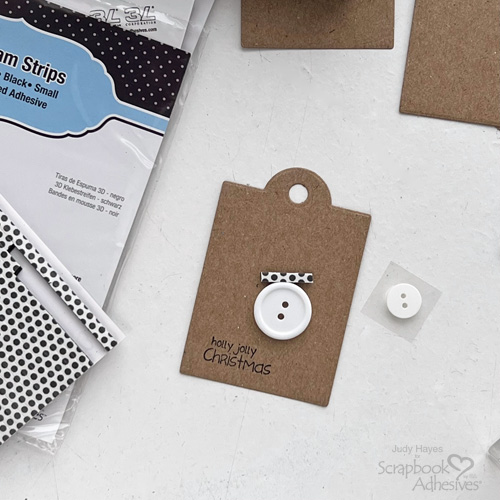
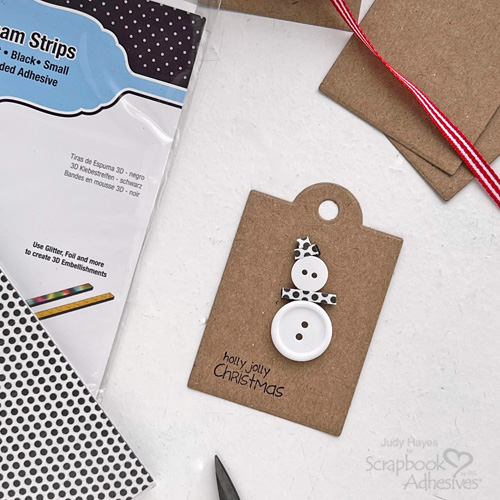
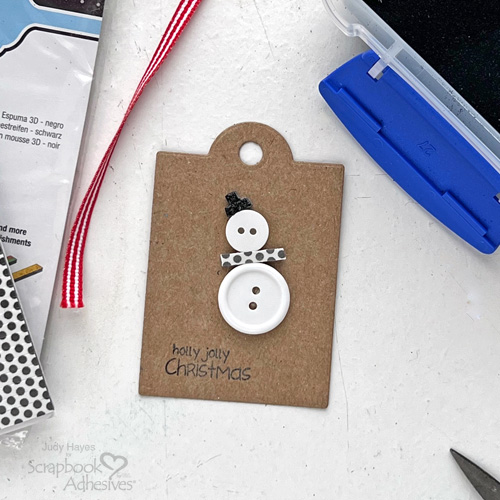
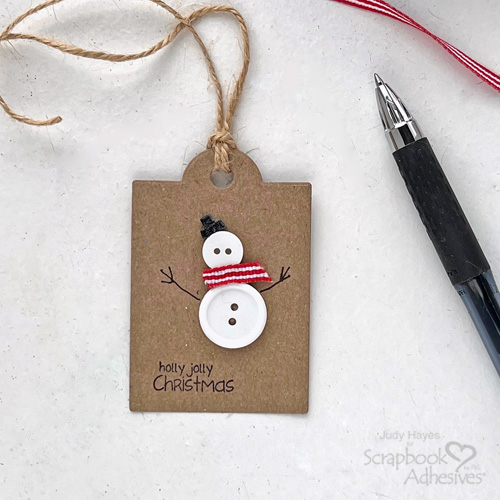
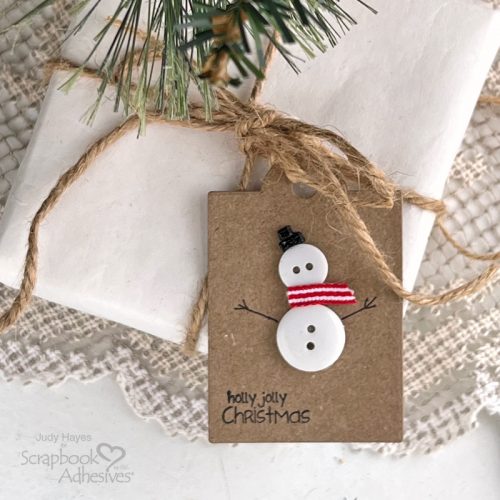
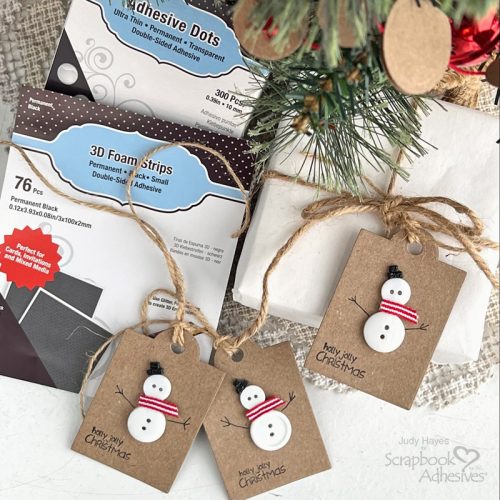
Cut a 0.25-inch piece of 3D Foam Strips Black to place at the top of the snowman’s head to make a hat base. Also, cut a 0.125-inch piece of 3D Foam Strips Black and place it above the 0.25 piece to form the hat top.
Remove liners from “hat” 3D Foam pieces, cover with black embossing powder and tap off the excess before heat embossing with a heat tool. Don’t worry, the foam does not melt. It’s heat resistant! Love that.
Pull liner from “scarf” 3D Foam piece, fasten a small piece of ribbon over it and press well to secure it. Use a black pen to draw stick arms for the snowman. Thread a loop piece of twine through the hole of the tag. Repeat to make multiple tags.
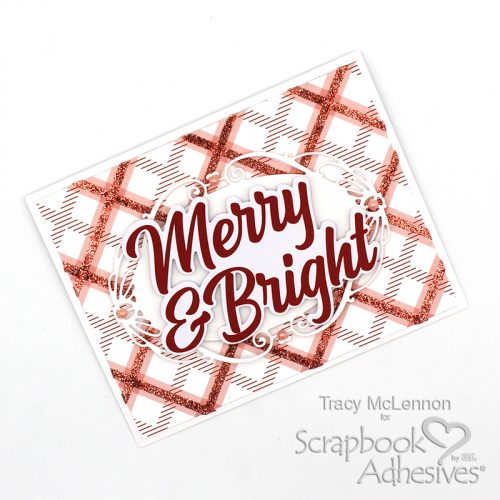
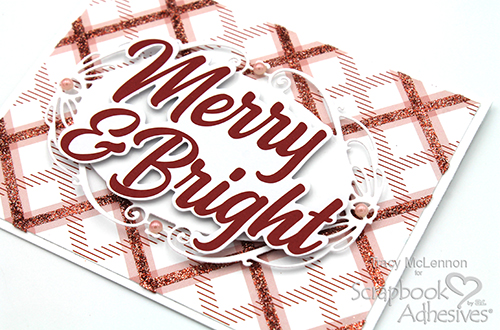
Hello crafty friends! Tracy here, and today I have a fun and easy glitter plaid background tutorial to share. Here are all of the details.
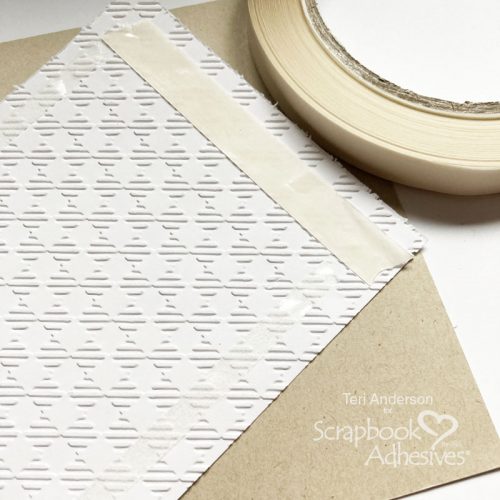
Get the Glitter Out!
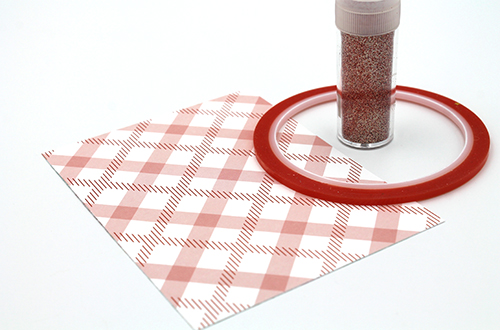
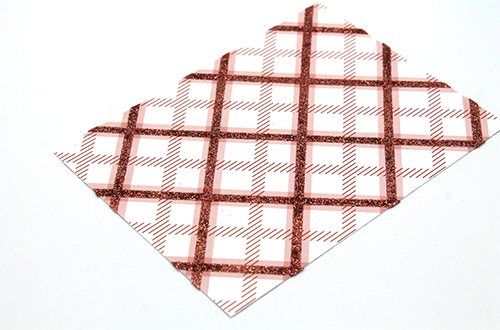
This is a quick and easy way to add some sparkle to the patterned paper you already have on hand. First I cut the card front from patterned paper to 4 x 5.25-inch. Grab coordinating glitter, and Extreme Double-Sided Tape 1/8in.
Add the Extreme Double-Sided Tape 1/8 in to the existing plaid pattern. First, in one direction, remove the backing and then the other direction. Remove the remaining backing and then rub on the coordinating glitter to complete the easy glitter plaid background. Tap or wipe off the excess glitter and set it aside for now.
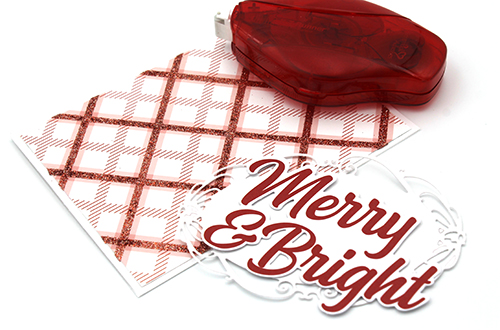
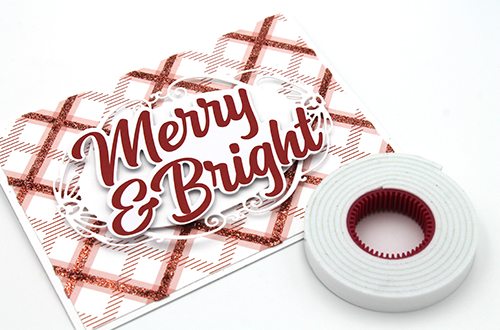
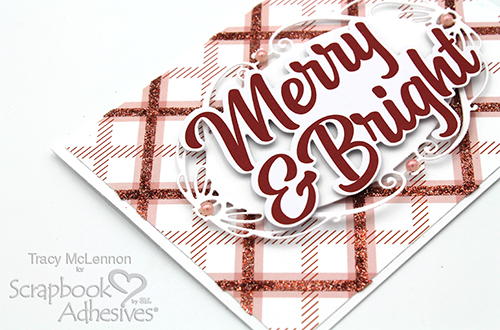
Adhere the glitter plaid background to a white cardstock card base using the E-Z Runner® Permanent Strips Refillable Dispenser. Die-cut the decorative oval from white cardstock and find a fitting die cut sentiment.
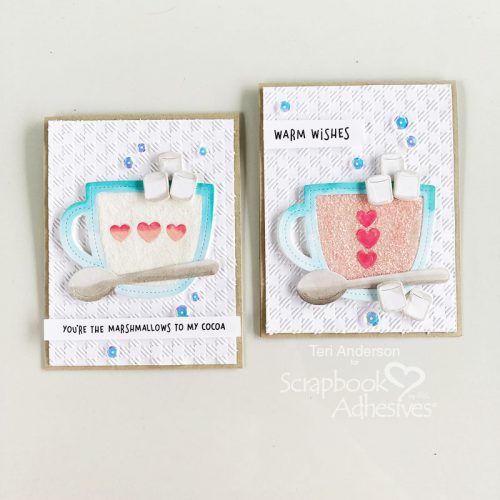
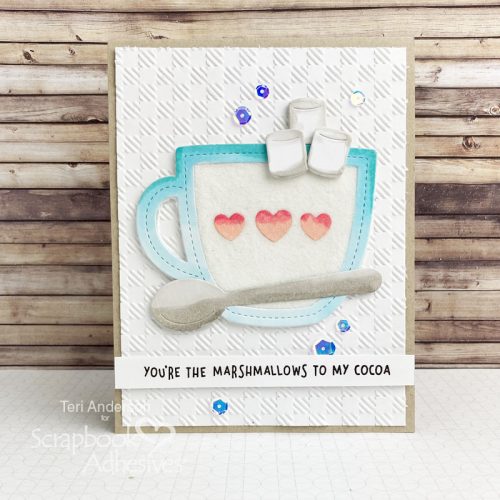
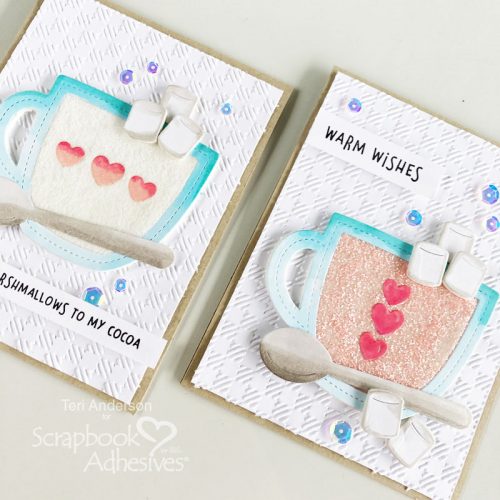
Hi, everyone! Winter’s here and it’s getting cold outside. Teri here with a fun way to warm things up by making some cute cards to send warm cocoa wishes to your loved ones.
These cards also work well for post-holiday cards when you don’t get Christmas cards sent out in time.
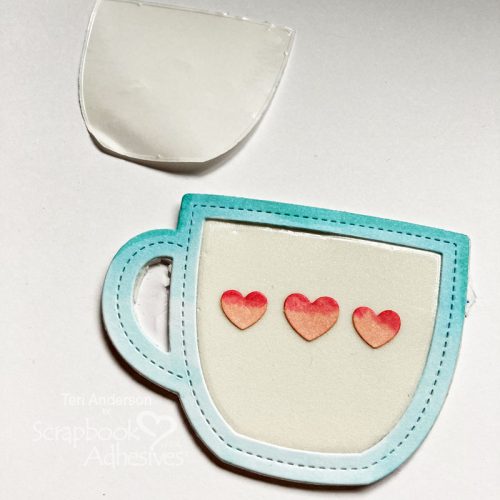
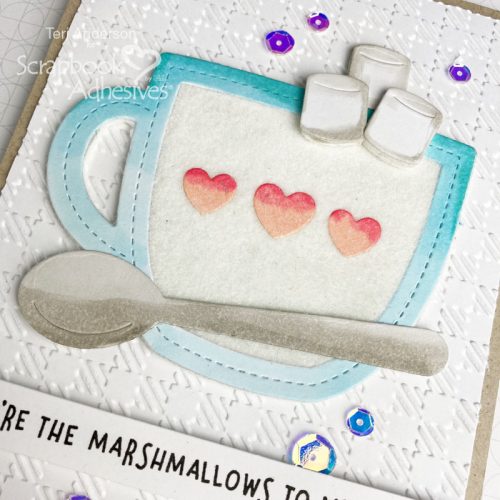
Creating Warm Cocoa Wishes Cup
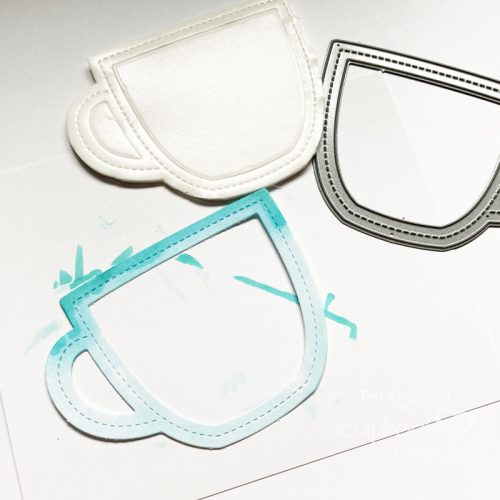
Start by die-cutting two cocoa cups, one from cardstock and one from the 3D Foam Creative Sheet Medium. From the cardstock cup, remove its middle.
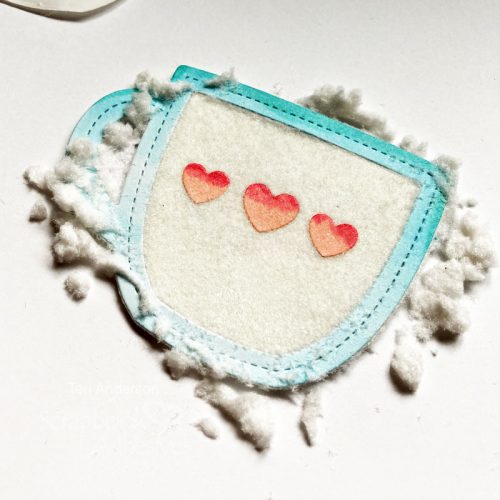
Color the cardstock cup frame with markers and place it on the foam cup. Remove the liner from the middle of the cup to add a couple of die cut hearts.
Cover the exposed adhesive in the cup’s middle with white flock. Be sure to fully burnish the flock onto the foam and take off the excess.
Adding Fun Elements
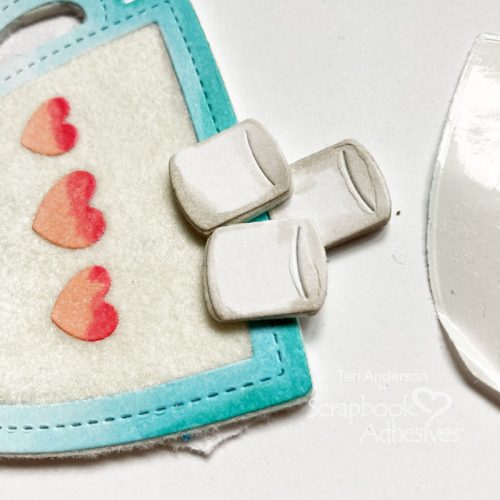
Die-cut a couple of marshmallows from white cardstock and 3D Foam Creative Sheet Medium. Stack to adhere them together before using a pen to add shading to their edges. Die-cut a spoon from white cardstock and add color to it with markers. Set it aside.
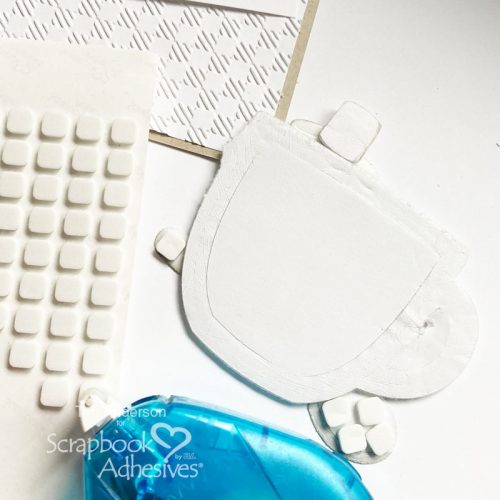
Place the marshmallows on the cup and around it. Add the spoon as well. Flip the cup over and add some additional 3D Foam Squares in White wherever there is none.
Assembling the Warm Cocoa Wishes Card 1
Dry-emboss a piece of cardstock panel. Add to a top-folded card. Crafty Power Tape Polybag 81ft is great for adhering embossed paper to cards because you can press it down securely to it.
Add your cocoa cup and a sentiment stamped on a strip of cardstock to your card. Complete your card with a few sequins or gems.
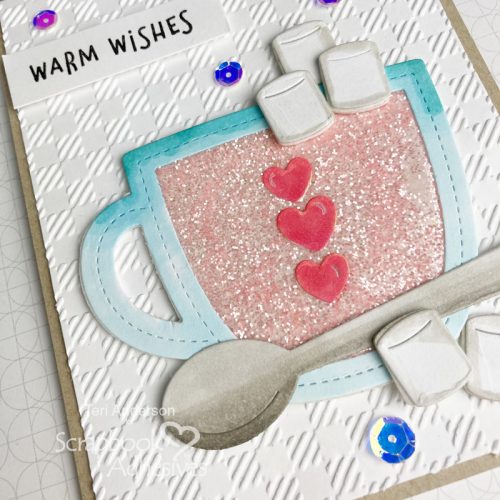
Change It Up With Glitter
You can easily change up your card. Rather than using flock on your cocoa cup, try using glitter instead! Foil is also a great option!
You can also use a much shorter sentiment strip as I did.
Thank you so much for stopping by today! I hope you are inspired to try making a few Warm Cocoa Wishes Cards of your own!
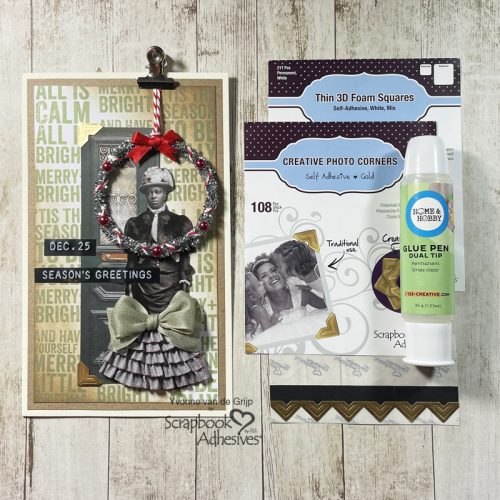
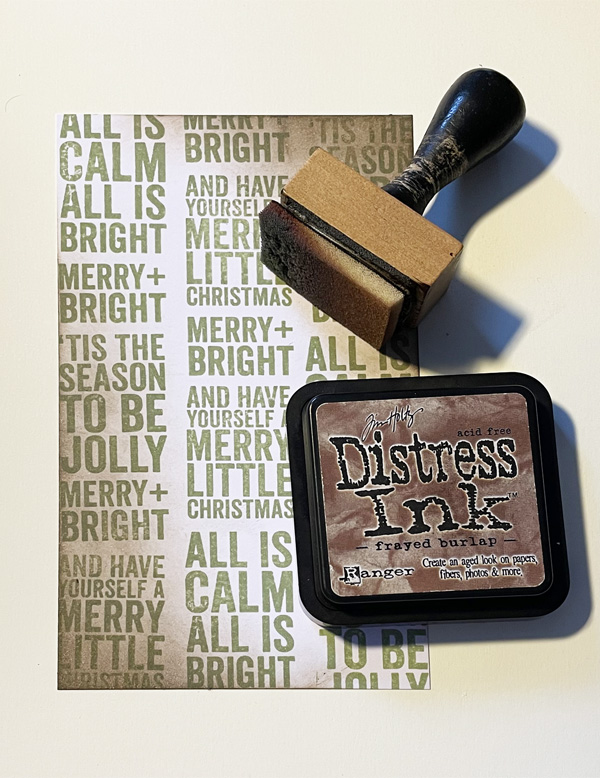
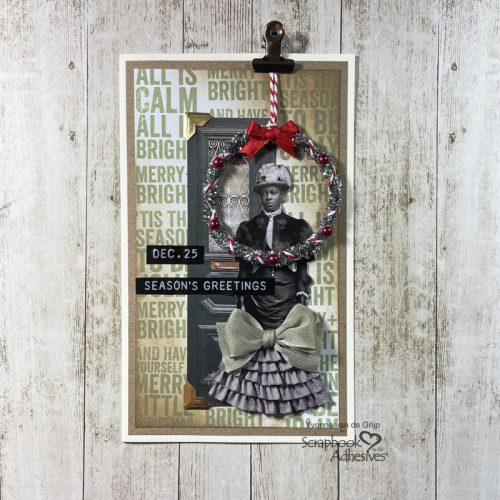
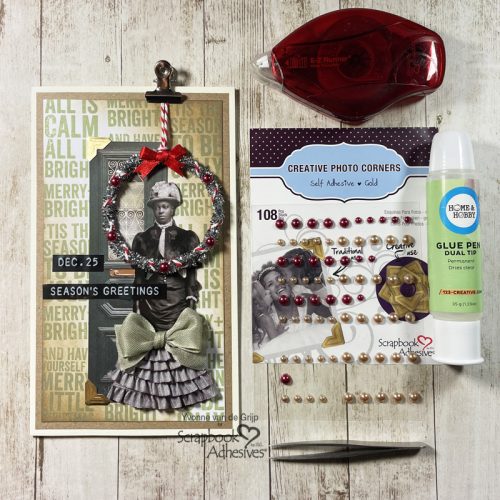
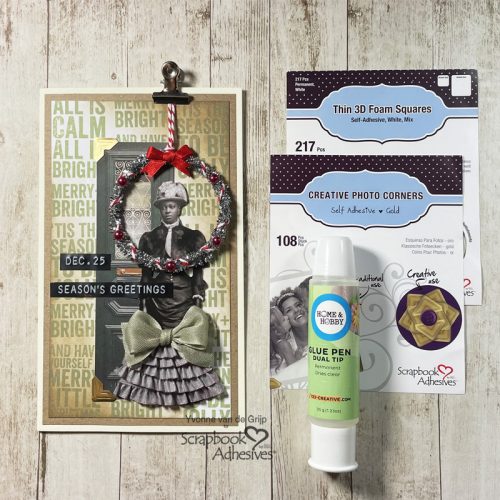
Hi everyone, Yvonne here with a nostalgic Christmas wreath card. I’m always trying to make my cards a little different to make them unique and I love a nostalgic look.
If you are using different materials for your card, a great reliable adhesive is a must. With the wide range of quality products of Scrapbook Adhesives® by 3L adhering is a piece of cake! Wanna join me in creating this nostalgic wreath card? Let’s get started!
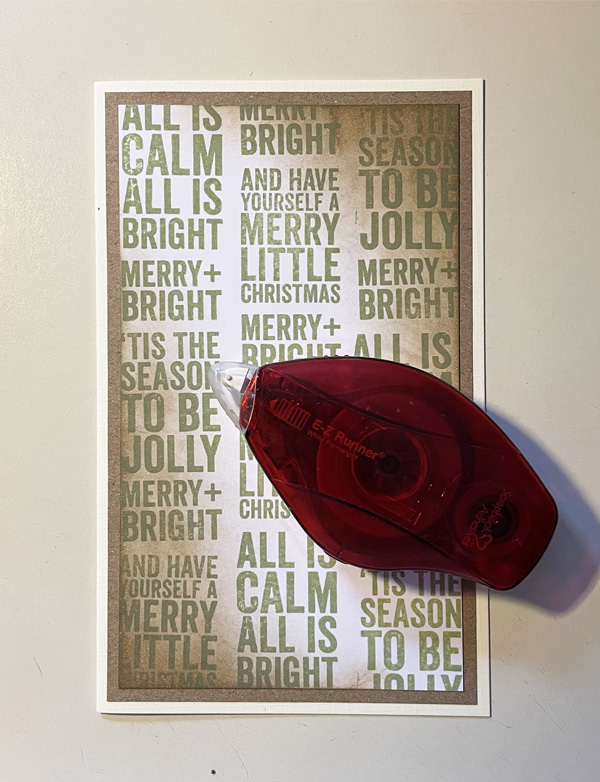
Top Card Panel of the Nostalgic Christmas Wreath Card
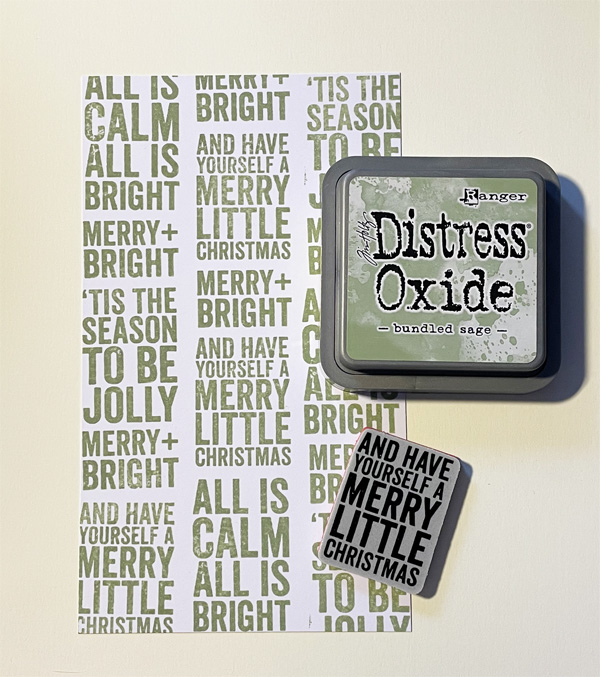
Start by stamping the Christmas texts onto white cardstock using green ink.
Then trim to a rectangular size. Next use brown ink and an ink blending tool to alter the panel to give it that old, nostalgic look.
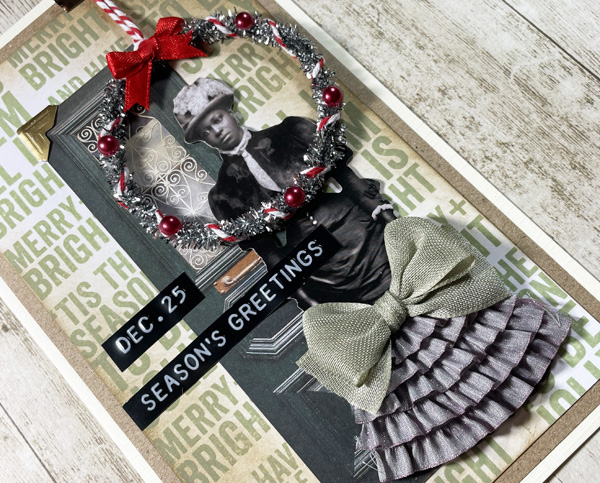
Start by cutting out a door image and put Creative Photo Corners Gold onto the left corners. Then adhere to the card base using the EZ Runner. Next, adhere the nostalgic female image to the card base using Thin 3D Foam Squares White Mix.
Embellishing the Skirt
Start by adding a nostalgic touch to the dress of the lady. To dress her up I used ruffled ribbon which I cut in strips and adhered to the bottom of the dress using Premium Double-Sided Tape 1/4in for stainless adhering. Then make a bow from ribbon and adhere to the dress using Premium Double-Sided Tape 1/4in.
Create the Wreath
Next, make a bow from silver chenille thread and wrap it around some red/white baker’s twine. Now knot a cord to “hang” the wreath. Adhere the wreath onto the card using the Dual Tip Glue Pen for adhering. Tip: for extra secure adhering I like to add something heavy like an acrylic block and book on top of the wreath while the glue dries.
When the wreath is securely affixed, adhere a small red satin bow onto the wreath using Premium Double-Sided Tape 1/4in. For a finishing touch, I also added some red pearls. A clip is used to hold the bakery twine into place. Finally, adhere the sentiment to the card and your nostalgic Christmas wreath card is ready!
I hope you enjoyed this tutorial and wish you happy crafting. Yvonne van de Grijp
Other Stamps: Stampers Anonymous (Bold Tidings Mini by Tim Holtz); Cardstock Images and Sentiment Stickers: Ideology (Paper Dolls Christmas by Tim Holtz and Label Stickers Christmas by Tim Holtz); Door: Mintay Papers; Ink: Ranger Ink (Distress Oxide Ink in Bundled Sage and Distress Ink in Frayed Burlap); Ink Blending Tool; White, Cream and Kraft Cardstock; Silver Chenille Thread; Bakery Twine; Ribbon (Lilac Ruffled, Sand, Red Satin); Red Pearls; Clip; Paper Trimmer; Scissors
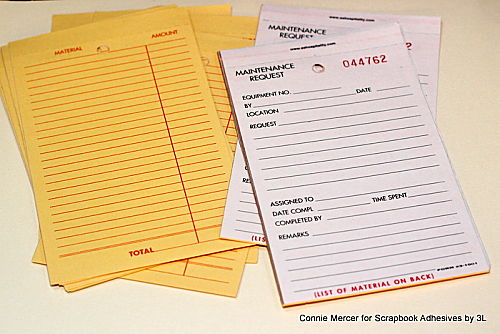
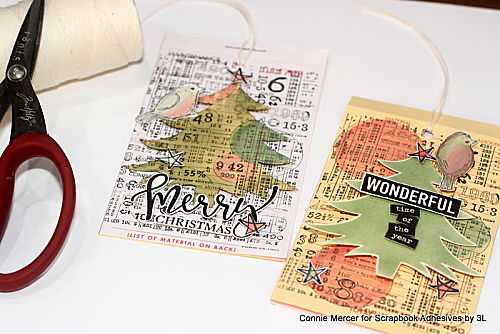
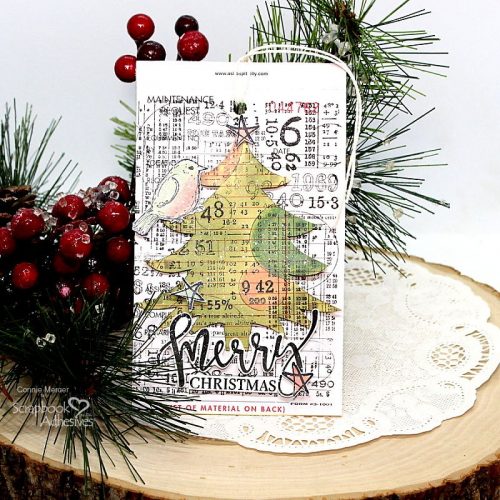
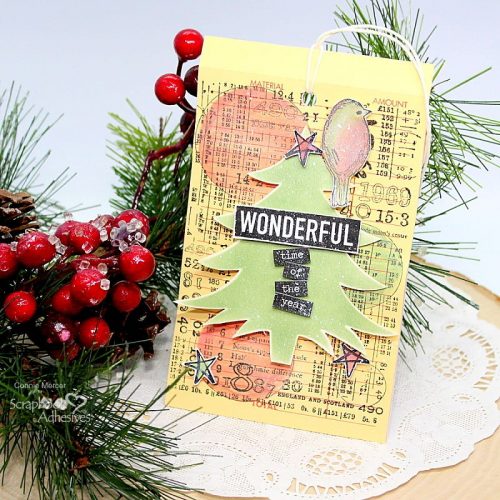
Hi, Connie here with a fun repurposing project using vintage merchant tags. They make great vintage-inspired tags for Christmas gift-giving and home decorations.
Vintage Inspired Tags Prep
The tags that I used, to create with, are actually 3 ply maintenance request tags. The inside of the grouping would make a great place to stamp a sentiment or a handwritten message.
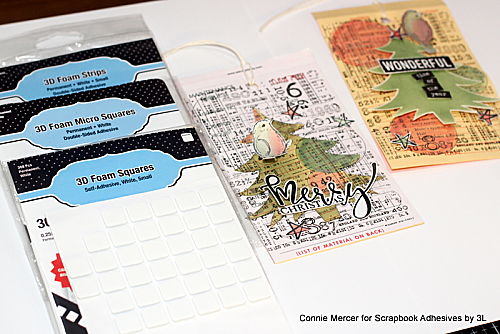
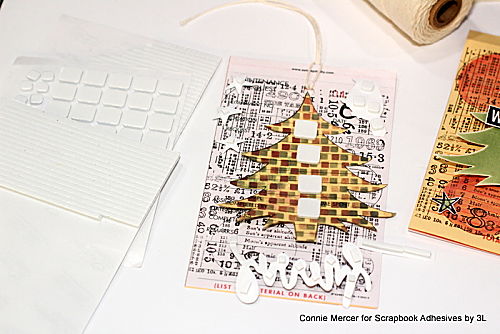
Embellish the Surface
Use stamps and stencils to create a fun mixed media background along with the embellishment shapes for the front of the tags. Then I stamped directly on the tags using Archival Jet Black ink. It would be fun to create on both sides, showing the different looks. Once you have the embellishments created and cut out you are ready to design the tags. Distress Oxide inks were used to add color to my images.
I selected these products to aid me in adhering the embellishments to the front (and back ) of the tags. I used all 3D Foam products of all sizes. I’ll list them below 🙂 and I might add, they were perfect!!!
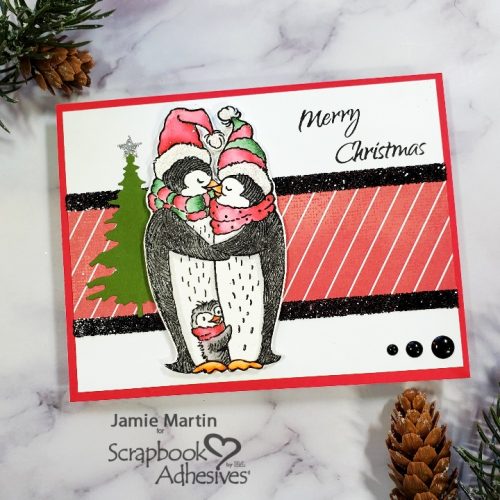
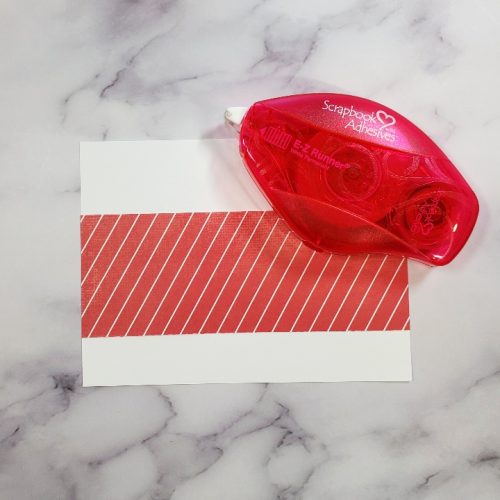
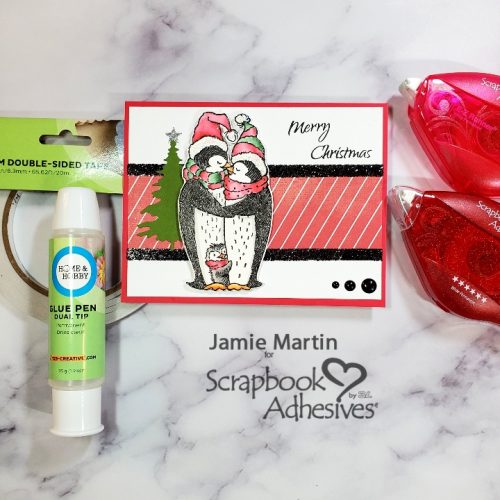
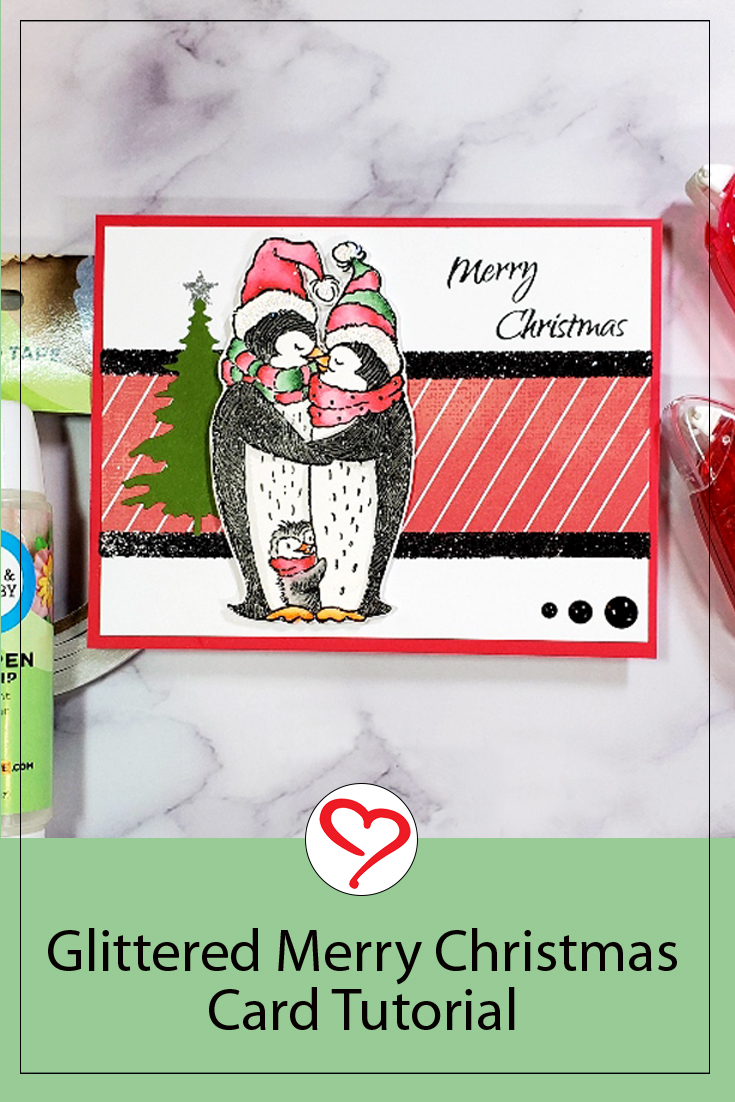
Hi and happy December 1st! Jamie here with you today and if you haven’t started those Christmas cards, it’s time to get on it! I am sharing this sweet penguin-themed Glittered Merry Christmas Card. Let me show you how to make this sparkle!
Glittered Merry Christmas Card Base
To make my card, I cut white cardstock to make a 4″ x 5 1/4″ panel and then a strip of 2″ x 5 1/4″ decorative paper. Use the E-Z Runner® Permanent Strips Refillable Dispenser to attach the strip to the card panel.
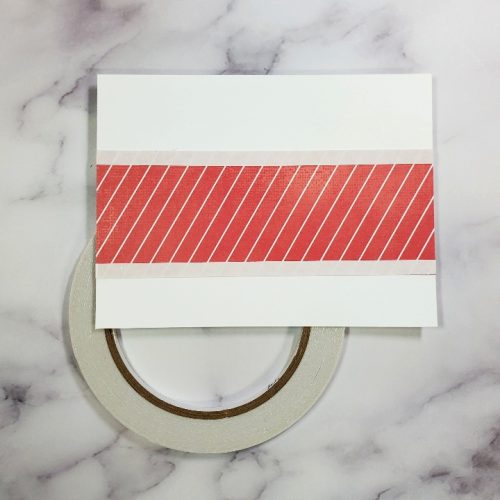
Wear Your Adhesive on the Outside
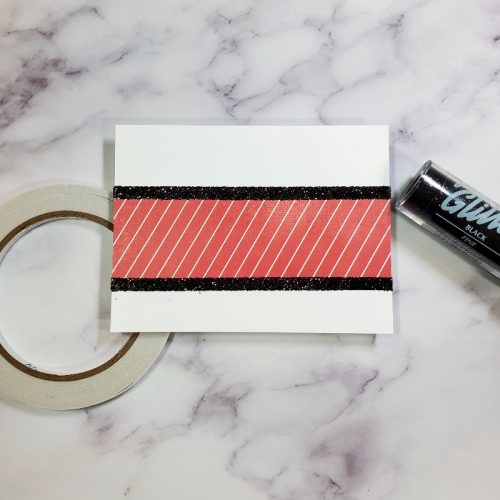
Next, I wanted to add a strip of glitter to the top and bottom of the decorative paper, to do this I placed Premium Double-Sided Tape 1/4″ to the top and bottom.
Cover the glitter over the Premium Double-Sided Tape 1/4″ and rub it with my finger to secure it before tapping off the excess.
Adding the Penguin Family
Stamp the penguin image on watercolor paper with Onyx Black VersaFine Ink and heat emboss with clear embossing powder. Next, color with Clean Color Real Brush Pens and cut out. Add 3D Foam Circles White Mix on the back of the image and place it on the left side of the card for dimension.
A Christmas tree was die-cut from green paper and glued behind the penguins using the Dual Tip Glue Pen. Apply a star from the E-Z Runner Stars to the top of the tree. Stamp the sentiment at the top right of the card and lastly, add three enamel dots along the bottom right side.