You are in our US store • Switch to Europe store

Foiled Stars Scrapbook Layout

Of all the available 3D Foam Shapes, the 3D Foam Stars are my favorite. Not only do I love them for my boy layouts, but they are also great for so many seasonal layouts. Christine joining you today with a Foiled Stars Scrapbook Layout that is my monthly layout for July of 2020.

Foiled Stars Scrapbook Layout by Christine Meyer for Scrapbook Adhesives by 3L

Foiled Stars Scrapbook Layout Details

For a July layout, you absolutely can’t go wrong with these stars! Foiled them, emboss them, cover them in glitter; the options are endless when you Wear Your Adhesive on the Outside. I am always amazed at how many different ways you can use adhesive besides just adhering products!

Foiled Stars Scrapbook Layout by Christine Meyer for Scrapbook Adhesives by 3L

I used silver foil from the 3D Foam Creative Embellishment Kit with Foil to foil my stars.

Foiled Stars Scrapbook Layout by Christine Meyer for Scrapbook Adhesives by 3L

To foil the stars all you have to do is unveil the top layer of adhesive and rub your foil on it. If that sounds complicated, check out my process video down below!

Foiled Stars Scrapbook Layout by Christine Meyer for Scrapbook Adhesive by 3L

Embellishing the Stars More

For the stars that had an open center, I filled them in with Nuvo Drops. This was a little tricky and didn’t come out perfect. But I think with practice, I could make them nice and smooth. It was fun to try a new technique out on this Foiled Stars Scrapbook Layout.

Foiled Stars Scrapbook Layout by Christine Meyer using Scrapbook Adhesives by 3L

I adhered my title using the 4 X 6 Adhesive Sheets. I added it to the back of my patterned paper and then fussy cut “July” out. It was then sticker ready, this is just one of many ways that I use to easily add detailed layouts like this!

Foiled Stars Scrapbook Layout Process Video

Check out how this layout came together in this process video.

Thanks so much for joining me today!
-Christine

Creative Time: 60 minutes
Skill Level: Beginner

Materials Needed:
Scrapbook Adhesives by 3L®
3D Foam Stars
3D Foam Creative Embellishment Kit with Foil
Adhesive Sheets 4 x 6-inch
E-Z Runner® Grand Refillable Dispenser

Other Supplies: Patterned Papers from Simple Stories, Nuvo Drops.

Love It? Save It!

Foiled Stars Scrapbook Layout by Christine Meyer using Scrapbook Adhesives by 3L Pinterest

Visit our Website and Blog!
Sign up for our Newsletter so you never miss a contest or giveaway!

instagram purple icon facebook icon purple pinterest purple icon twitter purple icon YouTube icon blog subscription purple icon

Live to Travel Luggage Tags

Hi Crafty Friends! It’s goodbye 2020! I think the one thing we are all looking forward to in 2021 is to TRAVEL again! Until that day comes, I decided I better be prepared by creating these Live to Travel Luggage Tags!

With the Self-Laminating Tags with Loops set which makes four of them, I made two! One for me and one for my twin sister. We turn 40 this summer so I’m hoping we can take a trip together and use them!

Live to Travel Luggage Tags by Meghan Kennihan for Scrapbook Adhesives by 3L

Live to Travel Luggage Tags Steps

First, I used the “Life is A Journey” stamp set from Kraftin’ Kimmie to stamp my image on both white cardstock and pattern paper because I wanted to do some paper piecing on my feature image.

Live to Travel Luggage Tags by Meghan Kennihan for Scrapbook Adhesives by 3L

Fussy cut out the pattern paper pieces. Then I paper pieced the image using the Dual Tip Glue Pen to add color to my images.

Live to Travel Luggage Tags by Meghan Kennihan for Scrapbook Adhesives by 3L

I used the dimensions listed in the Self-Laminating Tags packaging for the insert size and die cut my background pieces to fit.

Live to Travel Luggage Tags by Meghan Kennihan for Scrapbook Adhesives by 3L

Using my favorite adhesive tape, E-Z Runner Grand Permanent Refillable Dispenser, I adhered the stamped images onto the backgrounds. Next, place them to the base.

Live to Travel Luggage Tags by Meghan Kennihan for Scrapbook Adhesives by 3L

Peel off the liner on the luggage tags. Then press to seal my inserts inside. Thread the loop through the top opening and my Live to Travel Luggage Tags are ready to add to our luggage!

Live to Travel Luggage Tags by Meghan Kennihan for Scrapbook Adhesives by 3L

So where will you travel to? I think I will go to Pennsylvania to see my family!

Happy Trails!
Meghan Kennihan

Creative Time: 45 minutes
Skill Level: Intermediate

Materials Needed:
Scrapbook Adhesives by 3L®
E-Z Runner Grand Refillable Dispenser

HomeHobby™ by 3L
Dual Tip Glue Pen
Self-Lamenting Tags with Loops

Other
Stamps: Kraftin’ Kimmie (Life is A Journey Stamp Set)

Save to Pinterest!

Live to Travel Luggage Tags by Meghan Kennihan for Scrapbook Adhesives by 3L Pinterest

Visit our Website and Blog!
Sign up for our Newsletter so you never miss a contest or giveaway!

instagram purple icon facebook icon purple pinterest purple icon twitter purple icon YouTube icon blog subscription purple icon

Flower Window Cards

Hi, all! Looking to send a little cheer in the mail? Teri here to show you how to make some adorable window cards.

Flower Window Cards by Teri Anderson for Scrapbook Adhesives by 3L

These cards are sure to make your loved ones smile! And they are easy to make and a great way to use up any paper scraps you have laying around!

Creating the Flower Window Card Panels

Start by cutting two rectangle panels of cardstock to fit on the front of card. Cut a rectangle out of one of them to make a window.

Flower Window Cards by Teri Anderson for Scrapbook Adhesives by 3L

Take the solid rectangle and adhere several strips of patterned paper onto it. Trim away any excess with your scissors. Set the panel aside.

Flower Window Cards by Teri Anderson for Scrapbook Adhesives by 3L

Take your window panel. Stamp a sentiment onto it. Flip it over and adhere strips of Crafty Foam Tape all over it. The more tape you apply, the firmer your panel will be.

Flower Window Cards by Teri Anderson for Scrapbook Adhesives by 3L

Embellishing the Panels

Take your patterned paper panel and add three strips of Extreme Double-Sided Tape to it.

Flower Window Cards by Teri Anderson for Scrapbook Adhesives by 3L

Dump glitter onto the tape strips. Be sure to tape the panel a few times to remove any excess glitter.

Flower Window Cards by Teri Anderson for Scrapbook Adhesives by 3L

Adding Flowers

Die-cut a flower from cardstock a couple times and mount it onto the panel. To ensure the flower is fully affixed to the panel, place a stamping block on it for a few minutes while the glue dries.

Flower Window Cards by Teri Anderson for Scrapbook Adhesives by 3L

Place the window panel on top of the patterned paper panel. Then adhere the panels to a top-folded card.

Flower Window Cards by Teri Anderson for Scrapbook Adhesives by 3L

Complete your Flower Window Card by adding a couple sequins or gems to it.

A Simple Flower Placement Change

You can easily change up your window card. Rather than mounting your flowers inside the window, adhere them on the outside.

Flower Window Cards by Teri Anderson for Scrapbook Adhesives by 3L

You can use just one flower or you can stack two, slightly offsetting them as you affix them to the card.

Flower Window Cards by Teri Anderson for Scrapbook Adhesives by 3L

The end result is a nice layered look!

Flower Window Cards by Teri Anderson for Scrapbook Adhesives by 3L

I hope you are inspired by today’s Flower Window Card tutorial! If you are, please share your projects with me! I’d love to take a look!

Happy creating!
Teri Anderson

Creative Time: 60 Minutes
Skill Level: Intermediate

Materials Needed
Scrapbook Adhesives by 3L®

HomeHobby™ by 3L

Other
White Cardstock: Neenah Paper; Patterned Papers: Sunny Studio Stamps (Very Merry 6×6 Collection); Stamps: Pretty Pink Posh (Encouraging Greetings Stamp Set); Dies: My Favorite Things (Stitched Square), Simon Says Stamp! (Tall Flowers, Fresh Daisies) Sequins: Pretty Pink Posh; Black Ink Pad: Ranger Ink; Glitter: A Muse Studio

Love It? Save It!

Flower Window Cards by Teri Anderson for Scrapbook Adhesives by 3L Pinterest

Visit our Website and Blog!
Sign up for our Newsletter so you never miss a contest or giveaway!

instagram purple icon facebook icon purple pinterest purple icon twitter purple icon YouTube icon blog subscription purple icon

Sparkle & Bright Hello 2021 Card

Hi everyone, Yvonne here. What a year 2020 was…. So I think it’s time for some sparkle & bright start to the new year with a Hello 2021 card. Using the Wear Your Adhesive on the Outside technique, let’s make festive and glittery stripes on the card. Shall we get started?

Sparkle & Bright Hello 2021 Card by Yvonne van de Grijp for Scrapbook Adhesives by 3L

Let’s Get the Sparkle & Bright On

On a piece of rectangle pink cardstock panel, run the E-Z Runner® Micro Refillable Dispenser gently several times in soft curvey vertical lines. I did different colors so I started with four lines.

Sparkle & Bright Hello 2021 Card by Yvonne van de Grijp for Scrapbook Adhesives by 3L

With a piece of Metallic Transfer Foil Sheets Holographic Colors, we will make the vertical lines sparkly and bright! How? Simply press the foil sheet (with the color side UP) over the adhesive, and rub over with your fingers to transfer the foil. Peel off the foil and done! If there are missed areas, reapply the foil until the adhesive lines are fully covered.

Sparkle & Bright Hello 2021 Card by Yvonne van de Grijp for Scrapbook Adhesives by 3L

Going for the Gold

For my second set of colors, I ran the E-Z Runner® Micro Refillable Dispenser in different areas of the card panel with the same soft curvey vertical lines.

Sparkle & Bright Hello 2021 Card by Yvonne van de Grijp for Scrapbook Adhesives by 3L

This time I used fine gold glitter to cover the adhesive lines to achieve a different kind of texture and sparkle. Just sprinkle the glitter over the adhesive lines, press it with your fingertips, and tap off the excess.

Three Times the Charm

Then run the E-Z Runner® Micro Refillable Dispenser for the third time again in vertical lines. The final color is white glitter. Repeat the same steps as the gold glitter.

This easy and fun technique is called Wear Your Adhesive on the Outside. I encourage you to use this concept to make the most of adhesives from behind the layers to out front as an embellishment!

Sparkle & Bright Hello 2021 Card by Yvonne van de Grijp for Scrapbook Adhesives by 3L

Lastly, adhere the pink card panel to a gold panel using the E-Z Runner® Grand Refillable Dispenser. Then adhere onto a white card base also using the E-Z Runner® Grand Refillable Dispenser.

Adding the Sentiment

First die-cut and emboss the numbers 2021 and the Hello sentiment from gold cardstock. Next, using 3D Foam Strips cut into small pieces to fit the tiny die cut shapes, adhere all to the card front.

Sparkle & Bright Hello 2021 Card by Yvonne van de Grijp for Scrapbook Adhesives by 3L

Finally, randomly place rhinestones and pearls onto the card using Adhesive Dots Micro.

Sparkle & Bright Hello 2021 Card by Yvonne van de Grijp for Scrapbook Adhesives by 3L

Designer’s Tip: Use tweezers for precise placement of the pearls and rhinestones.

And voila….your Sparkle & Bright Hello 2021 Card is ready to be sent!

Wishing you a Happy (Sparkle & Bright) 2021 with lots and lots of creative fun!
Yvonne van de Grijp

Sparkle & Bright Hello 2021 Card by Yvonne van de Grijp for Scrapbook Adhesives by 3L

Creative Time: 30 minutes
Skill Level: Intermediate

Materials needed:
Scrapbook Adhesives by 3L®
E-Z Runner® Grand Refillable Dispenser
Metallic Transfer Foil Sheets Holographic Colors
E-Z Runner® Micro Refillable Dispenser
3D Foam Strips
Adhesive Dots Micro

Other:
Etched Dies and Die Cutting Machine Spellbinders® Paper Arts (Simply Said, Simply Said Phrase set, Platinum 6 Machine); White, Gold, and Pink Cardstock; Gold and White Glitter; Rhinestones and Pearls; Tweezers; Paper Trimmer

Love It? Save It!

Sparkle & Bright Hello 2021 Card by Yvonne van de Grijp for Scrapbook Adhesives by 3L Pinterest

Visit our Website and Blog!
Sign up for our Newsletter so you never miss a contest or giveaway!

instagram purple icon facebook icon purple pinterest purple icon twitter purple icon YouTube icon blog subscription purple icon

A Pair of Coffee Mug Gift Cards

Hi, Connie here with a gift card idea using a coffee mug die to create coordinating pair of His and Hers Coffee Mug Gift Cards. Something like the Extreme Double-Sided Tape 1/8″ will work great because you need a strong, narrow tape.

A Pair of Coffee Mug Gift Cards by Connie Mercer for Scrapbook Adhesives by 3L

Coffee Mug Gift Cards Supply List

A Pair of Coffee Mug Gift Cards by Connie Mercer for Scrapbook Adhesives by 3L

I gathered some pattern paper from my stash, along with a mug die, a gift card and a hot cocoa mix. The idea is the gal gets the gift card and the guy gets the hot cocoa mix. Would work for me! Shopping fun!

Steps on Creating the Gift Cards

A Pair of Coffee Mug Gift Cards by Connie Mercer for Scrapbook Adhesives by 3L
  1. Cut out the coffee mug die, two times. One for Him and one for Her.
  2. Stamp out images that are needed for the front of the cups.
  3. Cut them out and set aside.
  4. Stamp #hashtag words on labels for each gift card.
A Pair of Coffee Mug Gift Cards by Connie Mercer for Scrapbook Adhesives by 3L
  1. Using the Extreme Double-Sided Tape 1/8″ adhere to the cup handle, side and bottom (His). Then fold over creating the pocket that will hold the cocoa mix. On the second card (Her) adhere the Extreme Double-Sided Tape 1/8″ to the back of the insert, that holds the gift card, and attach to the inside of the cup card.
  2. Using the Dual Tip Glue Pen add the oval (shadowing for inside of cup) to each gift card.
  3. Arrange stamped images and adhere with E-Z Squares Refillable Dispenser.
  4. The images that you want to be dimensional adhere with 3D Foam Circles White Mix.
A Pair of Coffee Mug Gift Cards by Connie Mercer for Scrapbook Adhesives by 3L

Designer Tip: Fold the edges over on both sides of the cocoa mix, it will fit better and look better in the (His) coffee mug.

A Pair of Coffee Mug Gift Cards by Connie Mercer for Scrapbook Adhesives by 3L

I opened the card to reveal the shopping gift card. I wonder how much is on it? LOL!

Thanks for stopping by and I hope you enjoyed this project.
Connie Mercer

Creative Time: 60 minutes
Skill Level: Intermediate

Materials Needed
Scrapbook Adhesives by 3L®

3D Foam Circles White Mix
E-Z Squares Refillable Dispenser

HomeHobby™ by 3L
Extreme Double-Sided Tape 1/8″
Dual Tip Glue Pen

Other
Coffee Mug Die Set by Trinity Stamps, Patterned Papers: Authentique Paper, Stamps: Darkroom Door and Stampers Anonymous (Hash Tags), and Ink: Ranger Ink (Archival Ink)

Pin It!

A Pair of Coffee Mug Gift Cards by Connie Mercer for Scrapbook Adhesives by 3L Pinterest

Visit our Website and Blog!
Sign up for our Newsletter so you never miss a contest or giveaway!

instagram purple icon facebook icon purple pinterest purple icon twitter purple icon YouTube icon blog subscription purple icon

Origami 2021 New Year Card

Happy New Year friends! Dana here today sharing a slimline card. I folded up some origami numbers for the front of this card. I’m excited to say goodbye to 2020 and hello to new possibilities in 2021! I chose to use metallic origami paper, glittered cardstock, and foiled chipboard stars to capture a celebratory feeling on this card.

Origami 2021 Folding

Origami 2021 New Year Card by Dana Tatar for Scrapbook Adhesives by 3L

To begin, I folded the origami numbers from 5 7/8-inch square paper. This starting size made these designs easy to fold. Next, I mounted the numbers onto a piece of glittered cardstock using Crafty Foam Tape. Then, I cut the glittered cardstock down to fit onto a white card base and used an E-Z Runner Ultra Strong Refillable Dispenser to attach the card front to the base.

Please stop by my blog for a link to the video tutorial I used to fold these numbers.

Embellishing the Card

Origami 2021 New Year Card by Dana Tatar for Scrapbook Adhesives by 3L

To finish the card, I attached foiled chipboard stars in various sizes to each origami number using Adhesive Dots Micro and Adhesive Dots Small.

Origami 2021 New Year Card by Dana Tatar for Scrapbook Adhesives by 3L

This glittered cardstock, metallic paper, and foiled star embellishments really catch the light for a fantastic shimmer for a perfect Origami 2021 card!

More New Year Card Inspiration

The Scrapbook Adhesives by 3L team has created some fantastic cards to celebrate the new year. Click on the following links for more card design ideas!

DIY Stamp Wheel New Year Card
3D Foam Star New Year Card
Inked and Embossed New Year Card
New Year Shaker Card
Glittered New Year Card

Thanks for stopping by today! I wish you a happy and healthy year.
~Dana Tatar

Creative Time: 30 minutes
Skill Level: Intermediate

Materials Needed
Scrapbook Adhesives by 3L®

Crafty Foam Tape White
E-Z Runner Ultra Strong Refillable Dispenser
Adhesive Dots Micro
Adhesive Dots Small

Other
White Cardstock; Gold Glitter Cardstock: American Crafts; Metallic Origami Paper: Aitoh; Copper Foil Chipboard Stars: Studio Calico

Pin It!

Origami 2021 New Year Card by Dana Tatar for Scrapbook Adhesives by 3L Pinterest

Visit our Website and Blog!
Sign up for our Newsletter so you never miss a contest or giveaway!

instagram purple icon facebook icon purple pinterest purple icon twitter purple icon YouTube icon blog subscription purple icon

Winter Wonders Shaker Card

Hello crafty friends! Last week winter officially arrived. Where I live that usually means snow and cold. That inspired me to make this Winter Wonders Shaker card.

Winter Wonders Shaker Card by Judy Hayes for Scrapbook Adhesives by 3L

Lately, I’ve been using watercolors with my stamping. I really like that I can mix colors to my liking! Plus I like the softness of watercolors.

Winter Wonders Watercolor Panel

To make this card, stamp the image with pale gray ink on 5 x 7-inch watercolor paper.

Winter Wonders Shaker Card by Judy Hayes for Scrapbook Adhesives by 3L

I used a stamp positioning tool to get a good image. Sometimes the texture of watercolor paper requires stamping 2 or 3 times to get a clear image. Watercolor over the stamped image using it as a guide.

Winter Wonders Shaker Card by Judy Hayes for Scrapbook Adhesives by 3L

Layering the Panel

Trim the stamped image panel to 4.5 x 6.25 inches. Then layer behind it with a 4.75 x 6.5-inch white cardstock mat. Next, form a 5 x 7-inch card base from a Kraft cardstock.

Winter Wonders Shaker Card by Judy Hayes for Scrapbook Adhesives by 3L

Secure the layered panel to the card base using E-Z Runner® Ultra Strong Refillable Dispenser. I like this adhesive for watercolor paper because of its strong hold. Watercolor paper is heavy and often curls a little bit so the E-Z Runner® Ultra Strong Refillable Dispenser is the perfect solution.

Building the Shaker Feature

To make the shaker part, use a die-cutting machine and circle dies to cut the ring from watercolor paper. The outer edge is 3.75-inch in diameter.

Winter Wonders Shaker Card by Judy Hayes for Scrapbook Adhesives by 3L

Use same circle dies and die-cutting machine to cut the circle from 3D Foam Creative Sheets Medium White. Carefully remove dies. Try to keep the liner in place to prevent stretching the foam circle shape.

Winter Wonders Shaker Card by Judy Hayes for Scrapbook Adhesives by 3L

Remove acetate layer from one Self-Laminating Pouches – Cards Medium. Use a die-cutting machine and the largest circle die to cut acetate. Pass it through the die cutting machine 2-3 times to completely cut through Self-Laminating Pouches – Cards Medium cover.

Winter Wonders Shaker Card by Judy Hayes for Scrapbook Adhesives by 3L

Remove liner from one side of the 3D Foam circle. Place the acetate circle to the foam circle. Make sure the foam circle fits the acetate. If it has stretched and extended beyond the acetate, trim to be flush with it.

Place the watercolor circle over the image on the card front as desired. Using the watercolor image as a guide, fill in the design onto the circle.

Winter Wonders Shaker Card by Judy Hayes for Scrapbook Adhesives by 3L

Apply the E-Z Runner® Micro Refillable Dispenser to the back of the watercolored circle. Adhere on top of the acetate.

Winter Wonders Shaker Card by Judy Hayes for Scrapbook Adhesives by 3L

Partially remove liner bottom half of 3D Foam circle. Leave liner on top edge. Position on card front matching painted image and press in place.

Slightly pull the top edge of the shaker away from the card. Pour a small amount of snow glitter into the shaker. Adjust amount as desired. Remove the remaining liner and press the shaker circle to the card front.

Winter Wonders Shaker Card by Judy Hayes for Scrapbook Adhesives by 3L

More Cardmaking Details

Stamp the sentiment with gray ink at the top right corner of the card. Then use Dual Tip Glue Pen to add small dots around the shaker. Cover with glitter. Remove excess. Repeat as needed.

Winter Wonders Shaker Card by Judy Hayes for Scrapbook Adhesives by 3L

Now it’s ready to be sent! I hope you try my Winter Wonders Shaker Card idea.

Winter Wonders Shaker Card by Judy Hayes for Scrapbook Adhesives by 3L

Thanks for Visiting!
Judy Hayes

Creative Time: 45 Minutes
Skill Level: Advanced

Materials Needed
Scrapbook Adhesives by 3L®

HomeHobby™ by 3L

Other:
Stamps: Penny Black; Glitter: Martha Stewart (Snow Glitter); Inks: Ranger Ink (Cool Graphite) and Taylored Expressions (Sea Salt Ink); Craft Dies: Spellbinders Paper Arts (Standard Circle Dies); Other: Watercolor Paper, Watercolors, and Kraft and White Cardstock

Pin It!

Winter Wonders Shaker Card by Judy Hayes for Scrapbook Adhesives by 3L Pinterest

Visit our Website and Blog!
Sign up for our Newsletter so you never miss a contest or giveaway!
instagram purple icon facebook icon purple pinterest purple icon twitter purple icon YouTube icon blog subscription purple icon

Christmas Tree Scrapbook Layout

Christmas is over and it’s time to scrapbook those photos! Christine joining you today with a fresh idea using the Creative Photo Corners. I’m going to walk you through a layout that showcases the Creative Photo Corners to create a Christmas Tree Scrapbook Layout.

Christmas Tree Scrapbook Layout using Creative Photo Corners by Christine Meyer for Scrapbook Adhesives by 3L

Creative Photo Corner Christmas Trees

Creating these Christmas trees using Creative Photo Corners was pretty easy to do, once I worked out how big to make them!

Christmas Tree Scrapbook Layout using Creative Photo Corners by Christine Meyer for Scrapbook Adhesives by 3L

For each tree on this Christmas Tree Scrapbook Layout, I created three triangles that got smaller going up. I created the triangles on cardstock and then cut them out to add to the layout. This ensured no mistakes on my patterned paper.

Christmas Tree Scrapbook Layout by Christine Meyer for Scrapbook Adhesives by 3L

I originally thought about doing one large tree BUT as I began to create my first triangle, I knew that wouldn’t be possible. It would end up being a very wide but also very short tree!

My bigger tree starts with a row of 12 Creative Photo Corners across. The smaller tree starts with a row of 7 Creative Photo Corners across. Each row after is just one shorter until you get to the top.

Christmas Tree Scrapbook Layout by Christine Meyer for Scrapbook Adhesives by 3L

One of the things I love about using the Creative Photo Corners to create a background is that they add really neat texture to the project. While adding texture, they don’t take away anything from the layout because they aren’t distracting. You can still clearly see the title and the pictures!

Other Adhesives Used

Christmas Tree Scrapbook Layout by Christine Meyer for Scrapbook Adhesives by 3L

While the Creative Photo Corners are certainly the stars of the layout, I still had to actually assemble the layout! I added most of the elements on this layout using my E-Z Runner Grand! But I needed the photos to have some dimension, so I added those using Crafty Foam Tape.

Scrapbook Layout Process Video

Check out all of the details on this layout in this process video!

Thanks for stopping by today – have some fun with those adhesives!
Christine Meyer

Creative Time: 60 minutes
Skill Level: Intermediate

Materials Needed:
Scrapbook Adhesives by 3L®
Crafty Foam Tape 108ft
E-Z Runner Grand Refillable Dispenser
Creative Photo Corners – White

Other
Patterned Paper and Stickers from Simple Stories, Nuvo Drops

Save It!

Christmas Tree Scrapbook Layout by Christine Meyer for Scrapbook Adhesives by 3L Pinterest

Visit our Website and Blog!
Sign up for our Newsletter so you never miss a contest or giveaway!

instagram purple icon facebook icon purple pinterest purple icon twitter purple icon YouTube icon blog subscription purple icon

Snowy Birthday Wishes Card

Hi Crafty Friends, Meghan here and I am back again! It’s almost the NEW YEAR which means I’m guessing your Birthday Card stash is depleted. I created a Snowy Birthday Wishes card using a variety of Scrapbook Adhesives products to inspire you to start stocking up that birthday stash again.

Snowy Birthday Wishes Card by Meghan Kennihan for Scrapbook Adhesives by 3L

Snowy Birthday Wishes Layers

Step #1: To build my card layers, I adhered my scalloped panel to the blue card base with the E-Z Runner® Grand Refillable Dispenser (my FAVORITE tape runner). Next, layer the snowman panel to a red mat. Don’t forget to round the corners on the red layer.

Snowy Birthday Wishes Card by Meghan Kennihan for Scrapbook Adhesives by 3L

Birthday Sentiment

Step #2: On another piece of red cardstock, apply an Adhesive Sheets 4 x 6-inch on the back. Then die-cut the word BIRTHDAY and set them aside. After assembling the other pieces I will know how to place the sentiment.

Snowy Birthday Wishes Card by Meghan Kennihan for Scrapbook Adhesives by 3L

Step #3: To adhere the sheet ribbon on the edge of the card front, I used Extreme Double-Sided Tape 1/8-inch. I love this tape because it’s clear and is so strong for holding onto any ribbon even silky material.

Snowy Birthday Wishes Card by Meghan Kennihan for Scrapbook Adhesives by 3L

Card Making Details

Step #4: Die-cut two circle mats in red and white cardstock. Then I used the smaller size of the 3D Foam Circles White Mix on the back of my darling stamped and colored snowman just to make him stand out from the card to place on top of the layered circles.

Snowy Birthday Wishes Card by Meghan Kennihan for Scrapbook Adhesives by 3L

Step #5: I peeled off the yellow paper from my BIRTHDAY letters and adhered them to my card. It’s so convenient to use adhesive sheets for this because the letters are SO SMALL and this way you don’t have to deal with messy glue. Plus the adhesive covers edge-to-edge on the letters (think secured)!

Snowy Birthday Wishes Card by Meghan Kennihan for Scrapbook Adhesives by 3L

Hope you enjoyed this Snowy Birthday Wishes tutorial! I will be back next month so stay tuned!
Meghan Kennihan

Snowy Birthday Wishes Card by Meghan Kennihan for Scrapbook Adhesives by 3L

Creative Time: 45 minutes
Skill Level: Intermediate

Materials Needed:
Scrapbook Adhesives by 3L®
Adhesive Sheets 4 x 6-inch
E-Z Runner® Grand Refillable Dispenser
3D Foam Circles White Mix

HomeHobby™ by 3L
Extreme Double-Sided Tape 1/8-inch

Other
Stamps: C.C Designs Snow Peeps Stamp Set; Craft Dies: My Creative Time Frame Collage Dies

Save It!

Snowy Birthday Wishes Card by Meghan Kennihan for Scrapbook Adhesives by 3L Pinterest

Visit our Website and Blog!
Sign up for our Newsletter so you never miss a contest or giveaway!
instagram purple icon facebook icon purple pinterest purple icon twitter purple icon YouTube icon blog subscription purple icon

Easy Flocked Card Tutorial

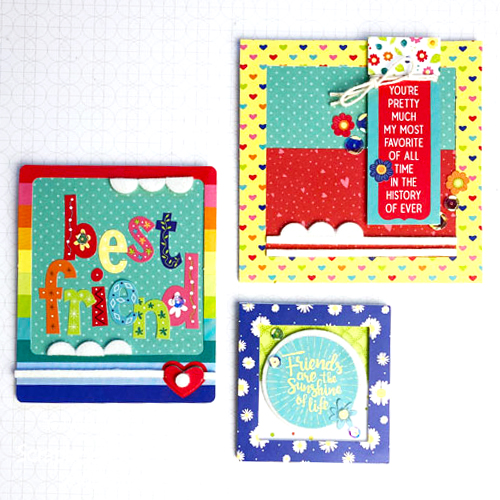
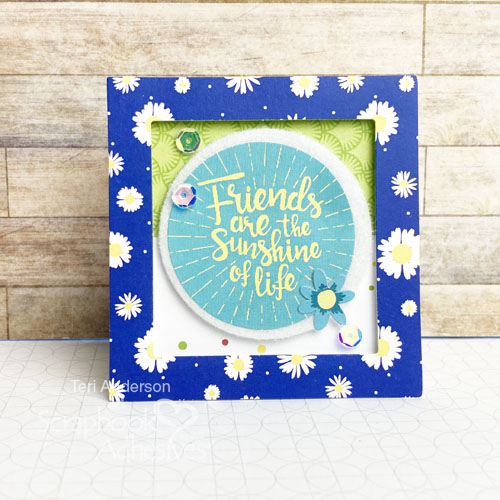
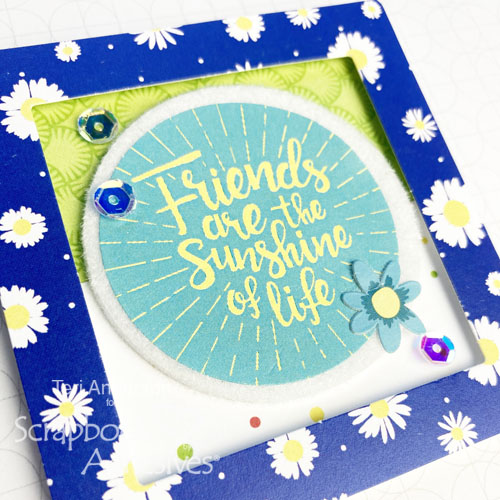
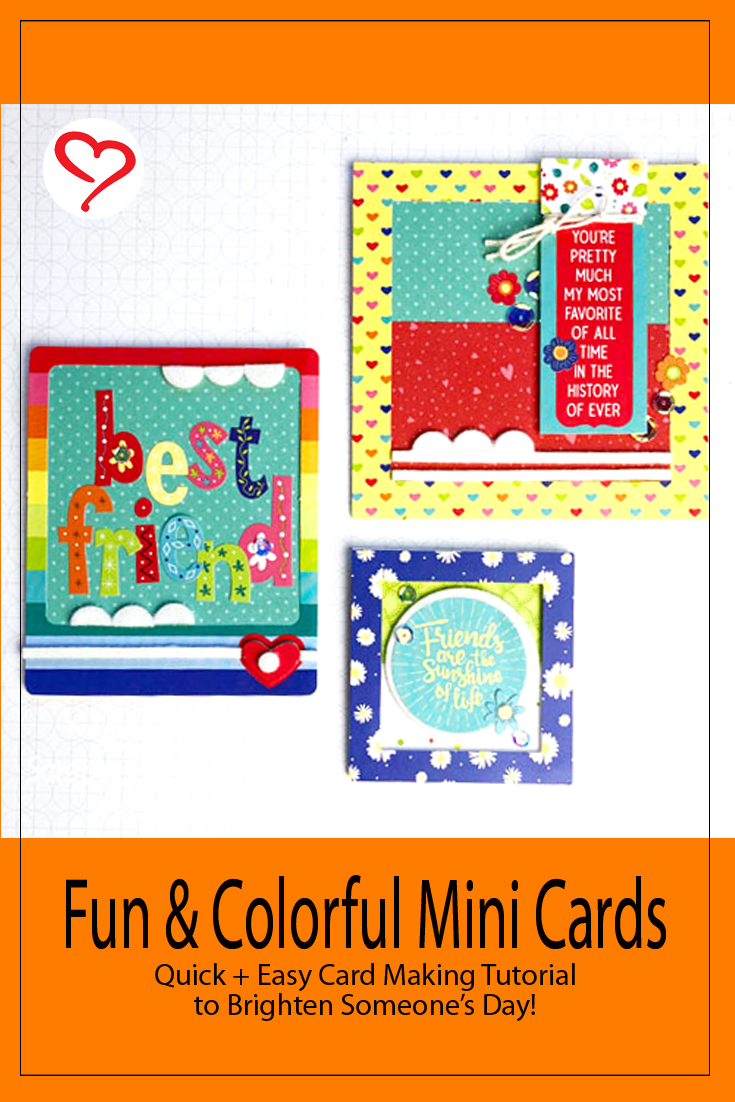
Hi, friends! Like to add texture to your handmade cards? Teri here with an easy way to create cards with the flock like these Flocked Cards!

Easy Flocked Card Tutorial by Teri Anderson for Scrapbook Adhesives by 3L

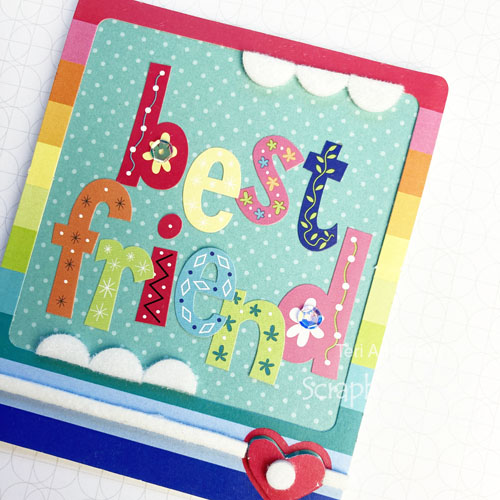
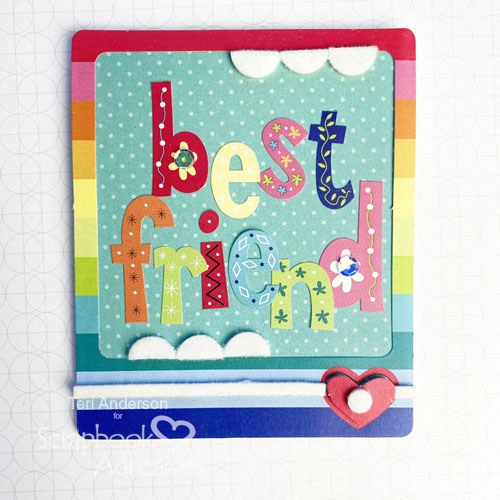
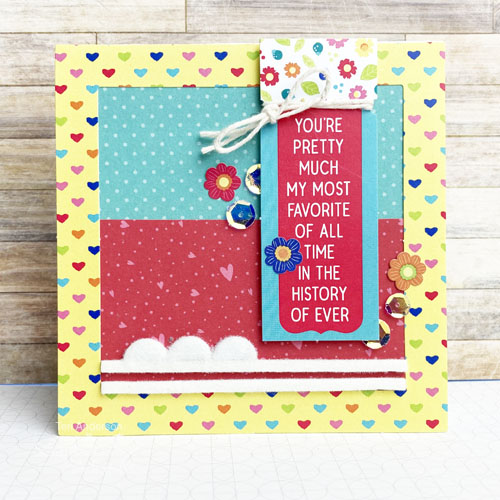
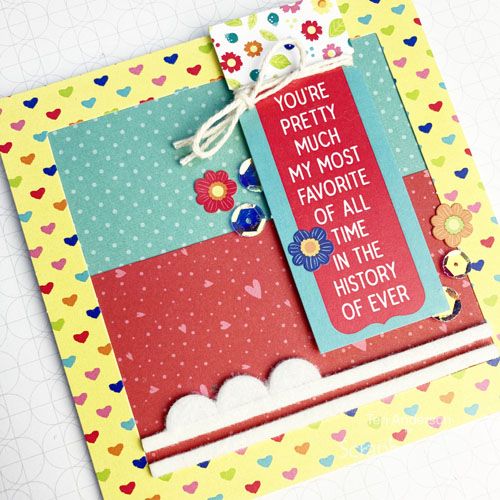
All you need to make them are the leftover negative pieces from 3D Foam Shapes, some flock, patterned papers, and a few basic craft supplies. So keep those leftover sheets!

Making Flocked Card Panels

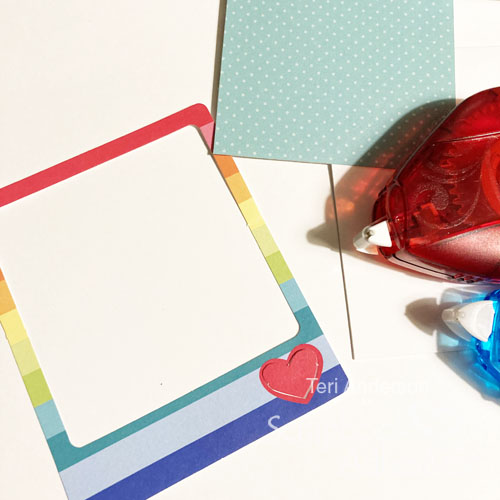
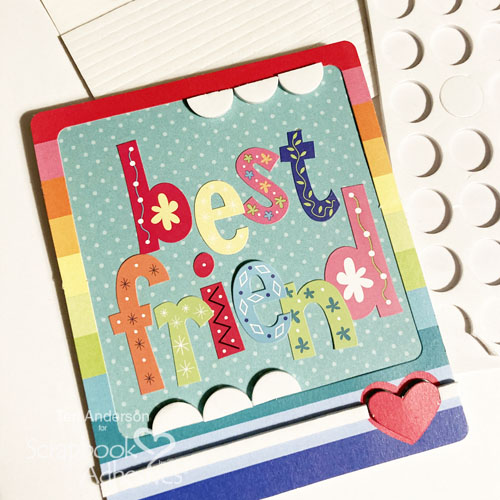
Make the background by applying several strips of patterned paper onto a larger rectangle of patterned paper (the base). Then place the negative sheet from a 3D Foam Shapes on top. I’m using a leftover panel from the 3D Foam Circles but there are lots of other shapes that will work!

Easy Flocked Card Tutorial by Teri Anderson for Scrapbook Adhesives by 3L

Use your scissors to trim any excess patterned paper off the panel. Then mount the foam panel to a card.

Easy Flocked Card Tutorial by Teri Anderson for Scrapbook Adhesives by 3L

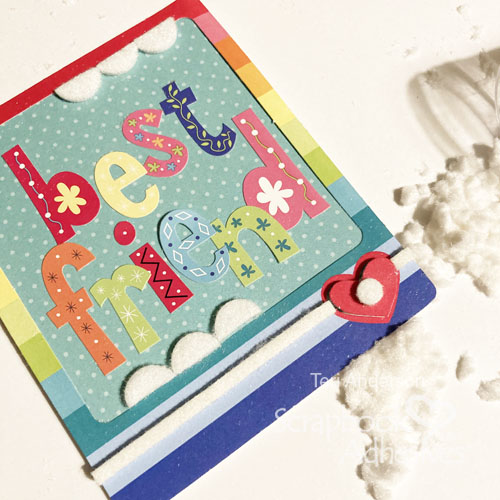
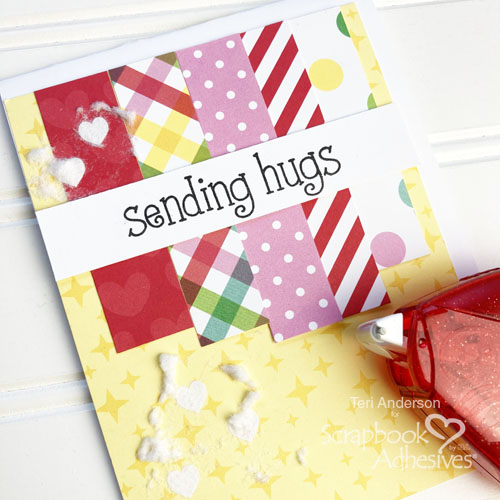
Remove the liner paper and apply flock to the panel.

Easy Flocked Card Tutorial by Teri Anderson for Scrapbook Adhesives by 3L

Designer’s Tip: use the slick side of the liner paper to burnish the flock to the foam. Another option that works too is wax paper!

Easy Flocked Card Tutorial by Teri Anderson for Scrapbook Adhesives by 3L

Adding Details

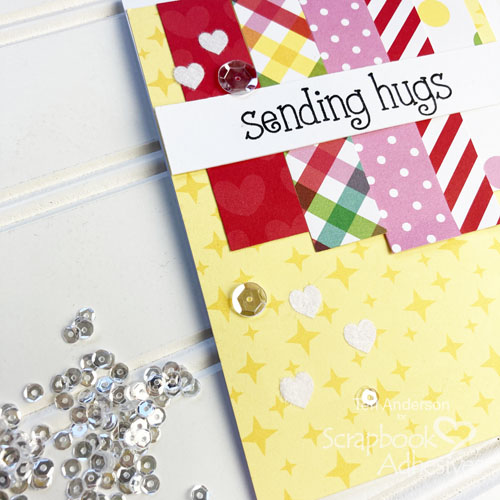
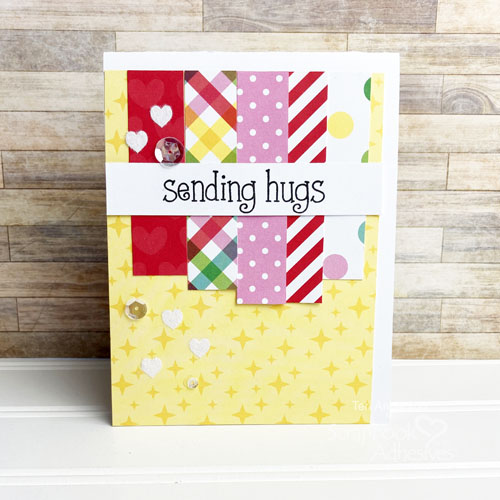
Stamp a sentiment on a strip of cardstock and affixing it to the card. Add a few sequins or gems for a hint of bling to complete the card! I think the end result is pretty fun! What do you think?

Easy Flocked Card Tutorial by Teri Anderson for Scrapbook Adhesives by 3L

Other 3D Shapes For Flocked Cards

You are not limited to creating cards with the negatives from 3D Foam Circles. There are many other 3D Foam Creative Shapes with interesting designs.

Easy Flocked Card Tutorial by Teri Anderson for Scrapbook Adhesives by 3L

I created a flocked background for this card with the negative from the 3D Foam Hearts!

Easy Flocked Card Tutorial by Teri Anderson for Scrapbook Adhesives by 3L

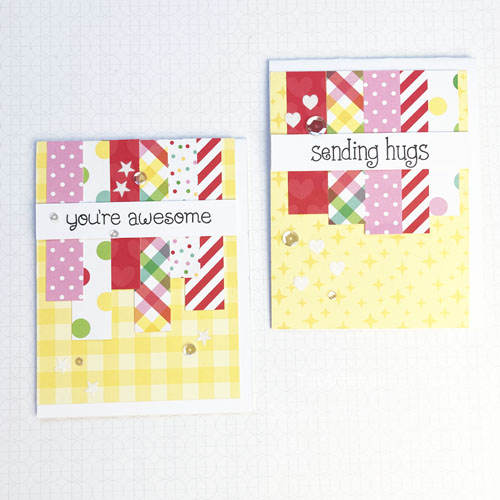
What about these two birthday cards? They came together quick and easy with the negative panels from the 3D Foam Stars!

Easy Flocked Card Tutorial by Teri Anderson for Scrapbook Adhesives by 3L

Just change them up by arranging the patterned papers and sequins differently for each one!

Easy Flocked Card Tutorial by Teri Anderson for Scrapbook Adhesives by 3L

I hope you are inspired to make a few easy flocked cards of your own! If flock isn’t your thing, consider using glitter instead. Want to try something really out of the box? Try decorating your negative panels with sand!

Happy card making!
Teri Anderson

Creative Time: 60 Minutes
Skill Level: Beginner

Materials Needed
Scrapbook Adhesives by 3L®

HomeHobby™ by 3L

Other
White Cardstock: Neenah Paper; Patterned Papers: Photo Play Paper (We Can Just Stay Home Collection); Stamps: Hero Arts (Essential Messages Stamp Set); Sequins: Pretty Pink Posh; Black Ink Pad: Ranger Ink; Flock: Stampendous!

Save It!

Easy Flocked Card Tutorial by Teri Anderson for Scrapbook Adhesives by 3L Pinterest

Visit our Website and Blog!
Sign up for our Newsletter so you never miss a contest or giveaway!
instagram purple icon facebook icon purple pinterest purple icon twitter purple icon YouTube icon blog subscription purple icon