
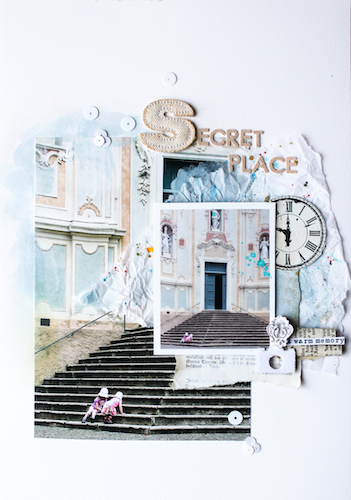
Hi there, it’s Stephanie here today with a layout made with a memory from our holiday in Italy.
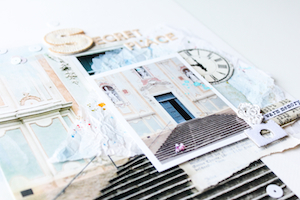
I was inspired by the old church on the photo an added a little bit of mixed media techniques.
I made a step by step tutorial for this, you can follow the process.
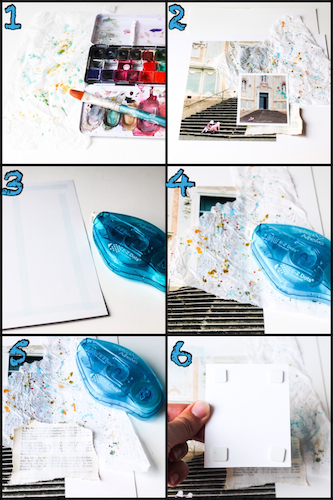
1 – My first step was to sprinkle with watercolor paint on tissue paper. I have always wanted to try this for a layout.
2 – Preparing my photos and paper. I decided to use two photos with the same motif but in different sizes.
3 – Adhering the bigger photo with the E-Z Dots Permanent refillable dispenser.
4 – Sticking on the tissue paper with the E-Z Dots Permanent refillable dispenser.
5 – Sticking on a piece of book page with the E-Z Dots Permanent refillable dispenser.
6 – Fixing the photo with 3D Foam Squares.

7 – Blending with the Chalk Edgers from Ingvild Bolme.
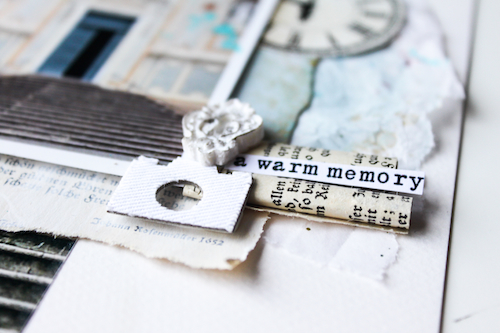
8 – Adhering some Sequins by using the DODZ ADhesive Dots Small
9 – Sticking on a little embellishment with the 3D Foam Squares Small White
10 – Under the sticker of the camera (Studio Calico) is a 3D Foam Squares Small White added to push it in the front. Paper rolls, sticker and a little quote are adhering with the E-Z Dots Permanent Refillable dispenser
11 – Sticking on a Prima clock (from the back of a packing) with the E-Z Dots Permanent refillable dispenser
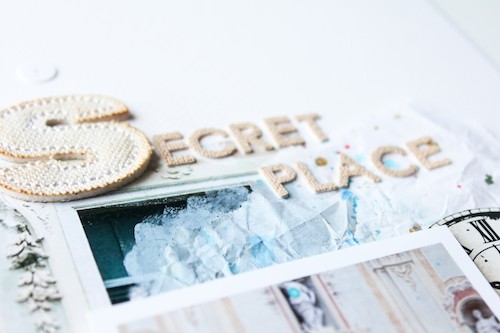
12 – Finishing the layout with my title by using some alpha stickers and a alpha “S” from Donna Downey by adhering it with the E-Z Dots Permanent refillable dispenser.
Thanks for visiting! I wish you a nice day!
By Kelly Klapstein August 22, 2013 - 9:46 am
Love how you layered the photos! Stunning work!