
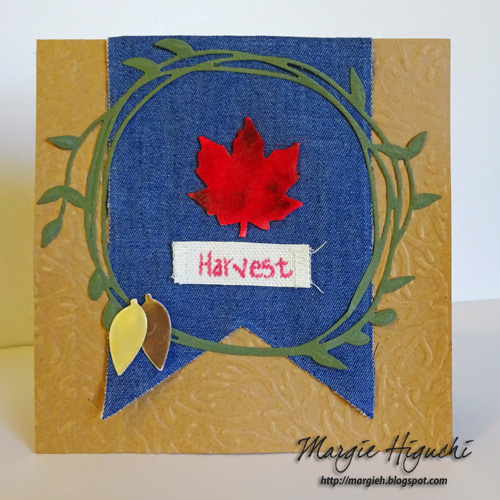
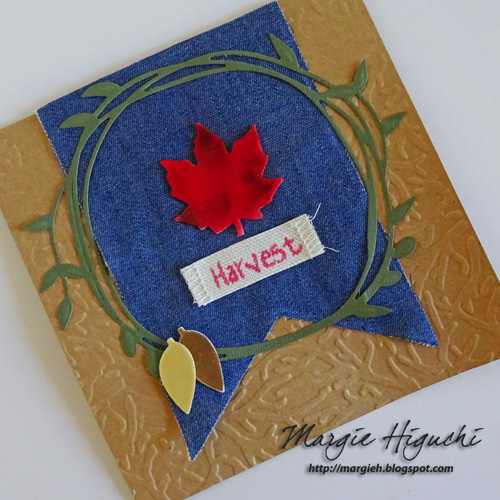
Happy November~!! Just for the occasion, I created a “Harvest” card using our 3D Designer Foam Shapes, 3D Foam Leaves with Foil.
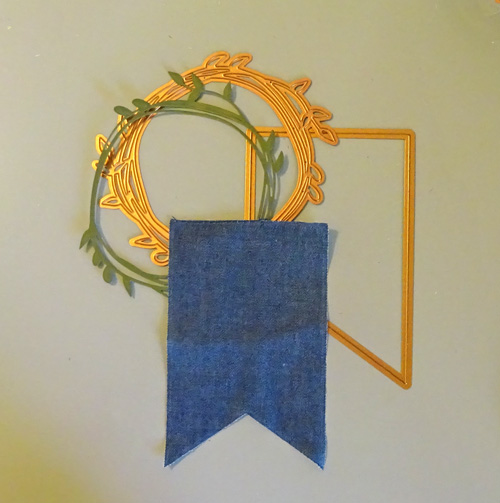
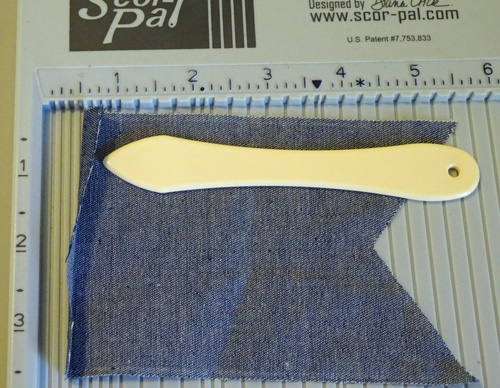
I started off by cutting these die cuts (went through the machine twice) – the pennant was cut with a sheet of copy paper in between the die cut and denim to prevent shifting. Use scissors to cut away the stubborn uncut areas.
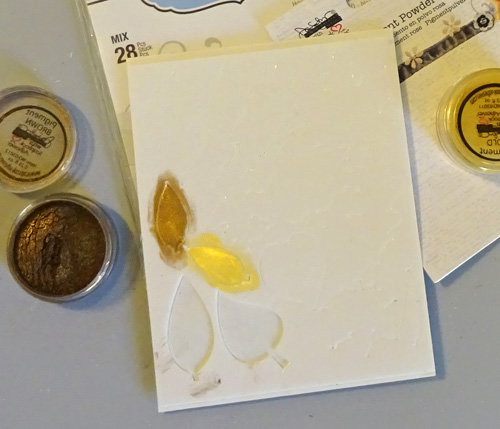
Now to the 3D Designer Foam Shapes! I used gold and brown Pigment Powders to color each of the leaves in the 3D Foam Leaves set. You only need a little bit of the powder to cover.
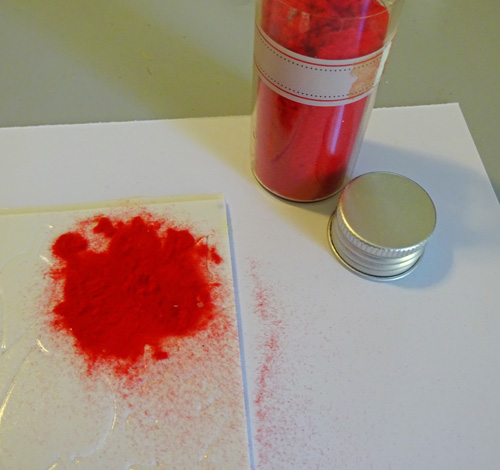
Tip: Use the powder stuck on the back of the lid. The maple leaf is the focal point so I covered it with red flock and then highlighted it with brown pigment powder. 🙂
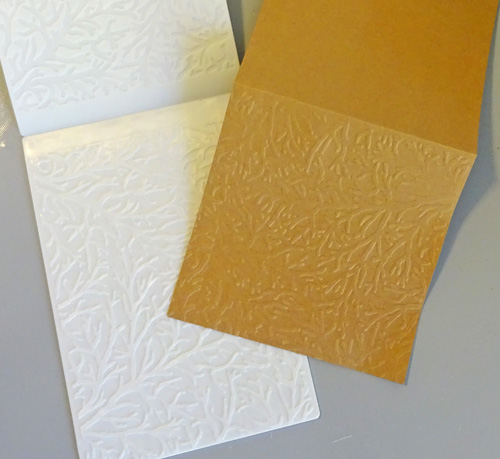
The 6 x 6″ card base was embossed for more texture = LOVE!
Tip: Lghtly mist the card base with water to soften the fibers for a crisper embossed design.
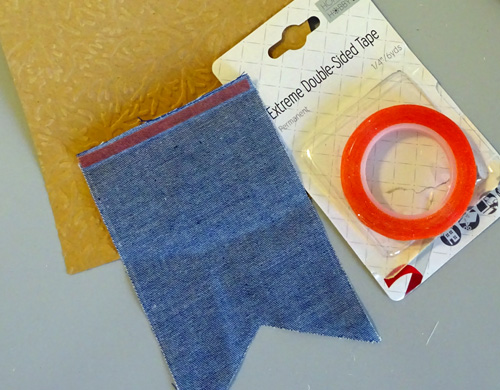
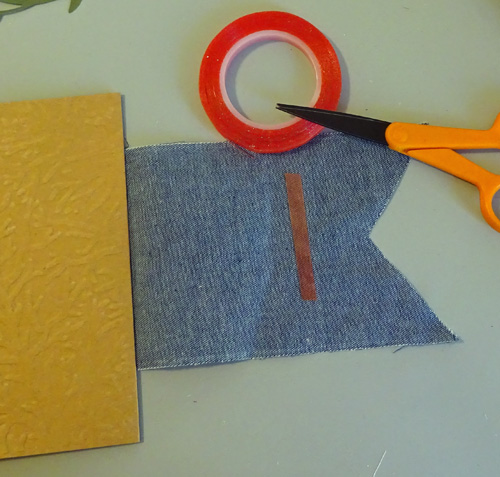
I scored the top of the pennant (instead of ironing the edge – lol!) and added the Extreme Double-Sided Tape – ¼” in the scored area. Adhere on the back of the card. I added a small piece in the back of the pennant to keep in place on the card front.
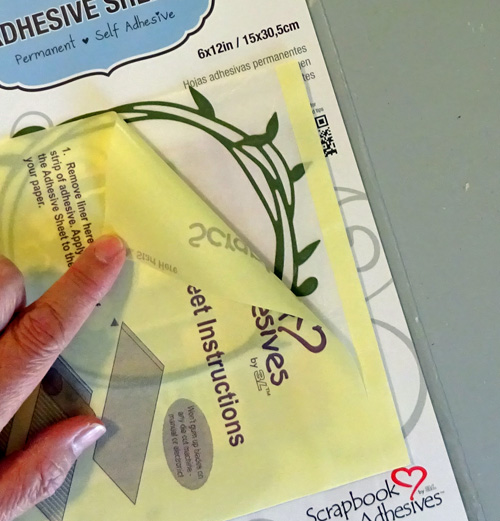
For the wreath die cut, I placed adhesive on the back using Adhesive Sheets 6 x 12″. Then centered it on top of the pennant and add the embellished 3D Foam Leaves as pictured in the finished card.
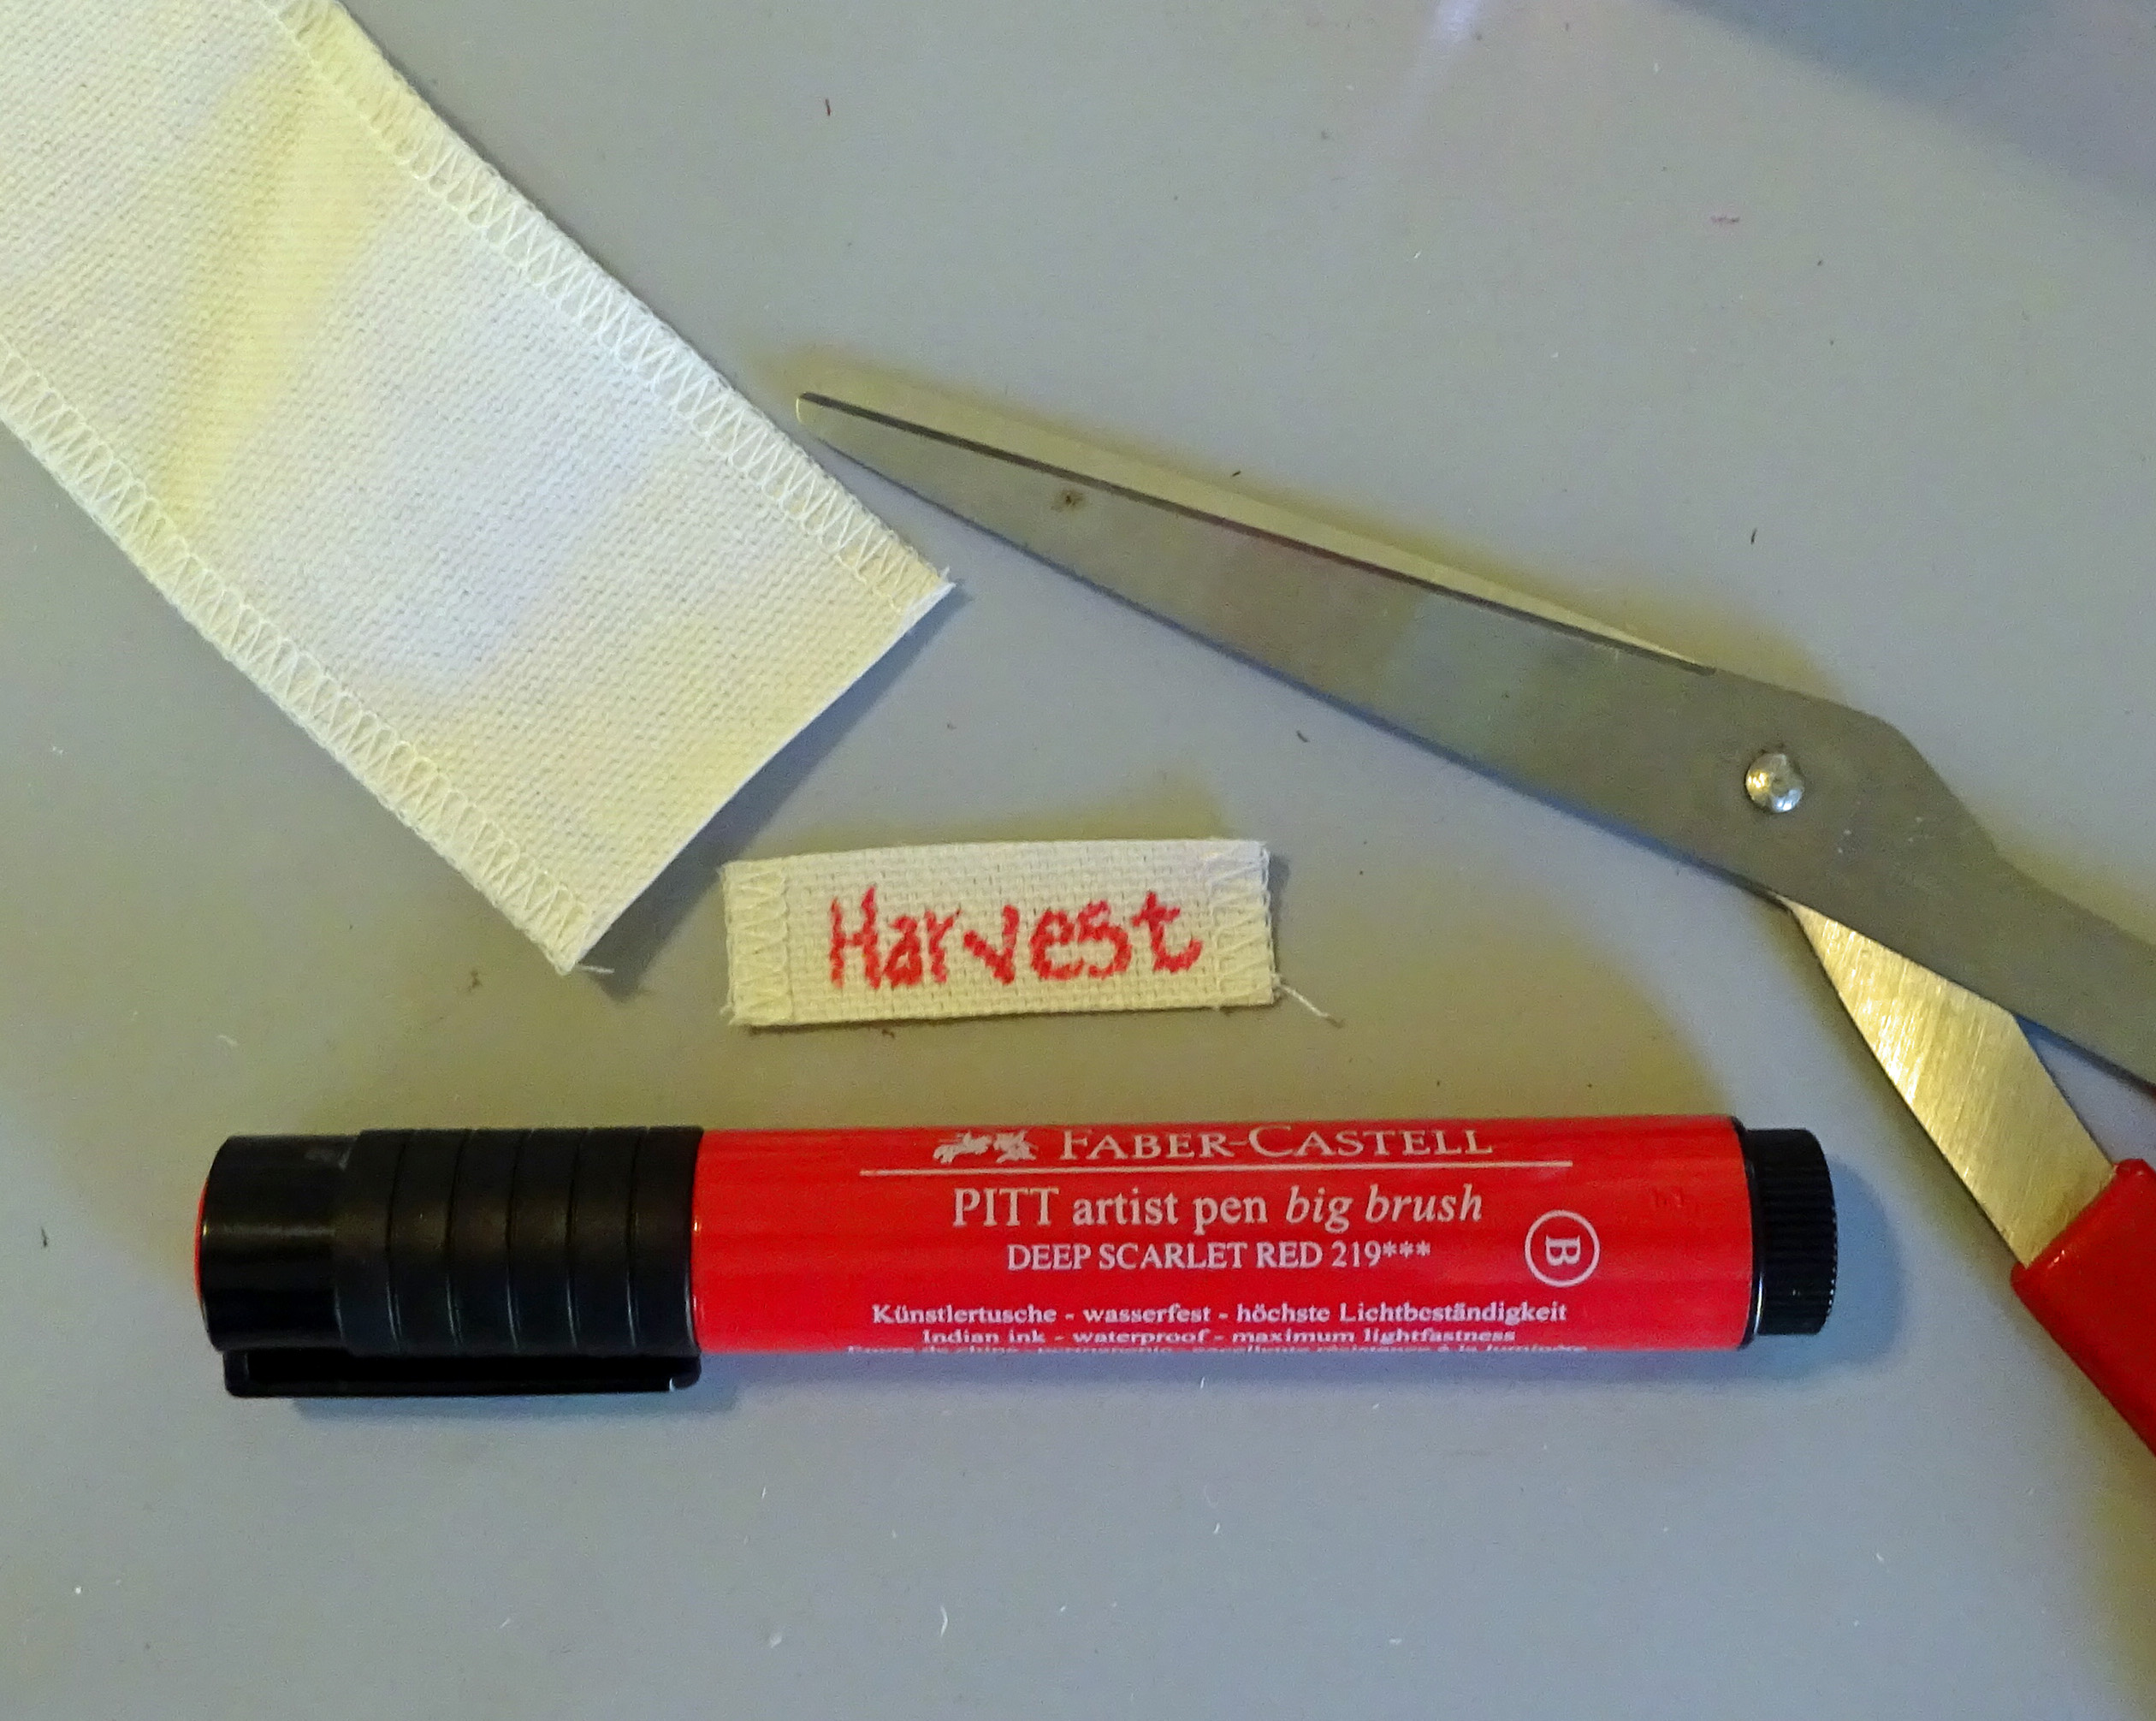
Using a white canvas ribbon, I wrote “Harvest” and trimmed it to fit under the maple leaf which I adhere with Extreme Double-Sided Tape – ¼”.
Here’s another look at the card…
Supplies List:
Scrapbook Adhesives by 3L®: 3D Foam Leaves, Extreme Double-Sided Tape – ¼” Permanent, Adhesive Sheets 6×12, 3D Foam Creative Embellishment Kit with Foil
Dies and Embossing Folder: Spellbinders® Paper Arts (Baby Bunting, Wreath and Tweets & Twigs Folder); Cardstock: Core’dinations ColorCore Cardstock®; Scoring Tool: Scor-Pal; Red Flock: DoodleBug Designs; Marker: Faber-Castell® Design Memory Craft® Stamper’s Big Brush Pen (Scarlet Red); Other: Water Mister
Hope you are enjoying the fall season and all that it brings. We offer more through our art, click Fall Projects to see more ideas!
Thanks for joining me!
Margie Higuchi
By Irish Eyes November 4, 2015 - 7:59 pm
This is such a cute card. Thanks for showing all the steps.
http://buildinglifelongreaders.blogspot.com
By Margie Higuchi November 6, 2015 - 4:25 pm
Thanks for stopping by and for the sweet comment, Catherine!