
Hi There,
today it’s Stephanie here and I want to show you a christmas frame I made with Die Cuts, Paper and the fabulous E-Z Dots® Permanent – Refillable and 3D Foam Squares – White Mix.
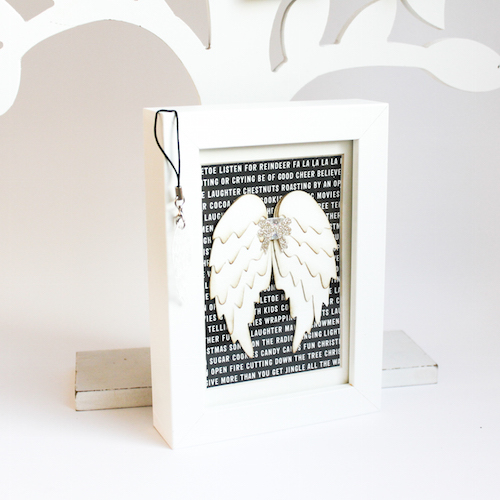
I use this little frame as wall decoration. It’ a quick and easy project and here is my little tutorial for you.
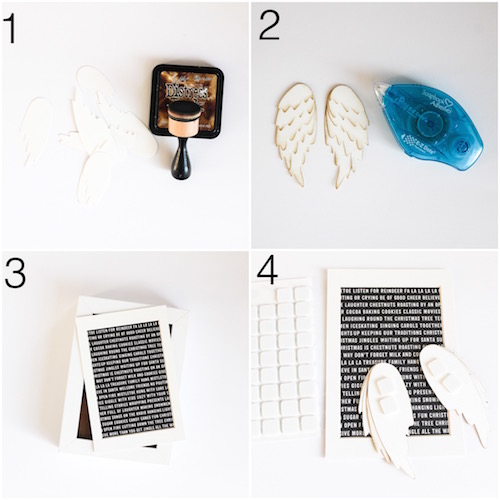
1) Cut out the Sizzix Feathered Wings with your Big Shot and distress the edges of every wings.
2) Adhere the different sizes of wings with the E-Z Dots® Permanent – Refillable.
3) Prepare your Background with pattern paper. I used a dark aper with christmas words on it.
4) Adhere the wings onto the background by using the 3D Foam Squares – White Mix to let them pop up.
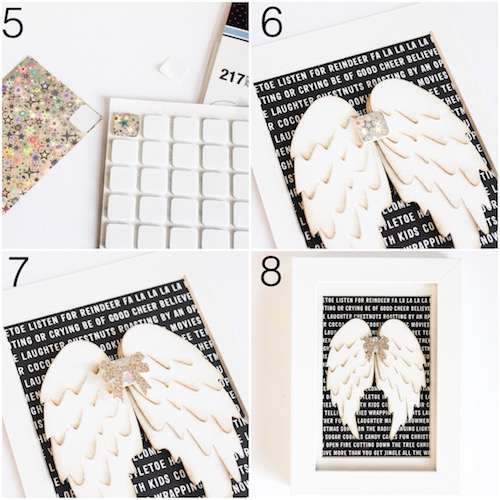
5) Use a big 3D Foam Squares and foil by pressing down the foil onto the 3D Foam Square.
6) Adhere the square over the wings.
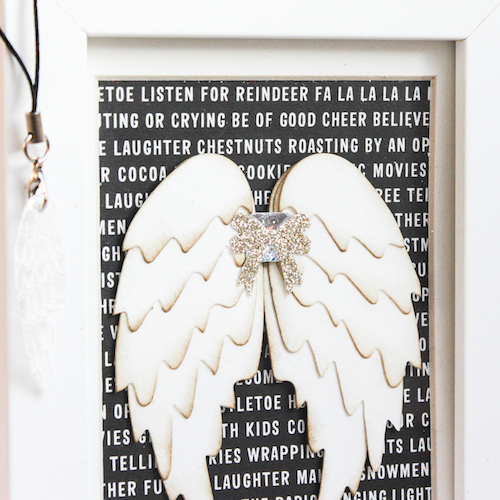
7) Now you can add more embellishments. I used a little bow I made with a paper punch from Tim Holtz.
8) Frame it and ready to give it away or do give your christmas decoration another highlight.

Thanks for visiting us today!
Have a nice day!
Stephanie 🙂
Supplies from Scrapbook Adhesives by 3L®
Sizzix Big Shot Plus
Sizzix Bigz Die – Feathered Wings
Sizzix Paper Punch – Bow
Distress Ink – Tim Holtz
Frame – IKEA
By Margie Higuchi December 8, 2015 - 12:08 pm
This project is so COOL! Love how it came together 🙂