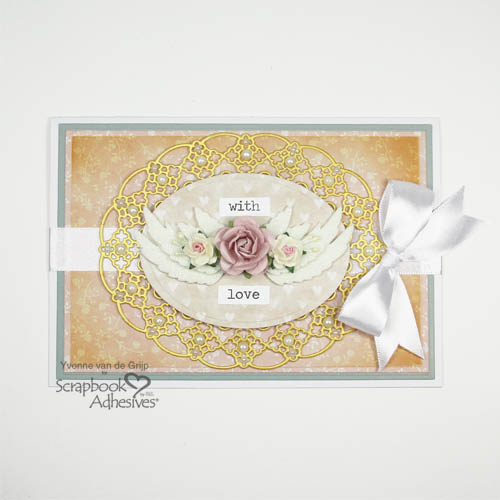
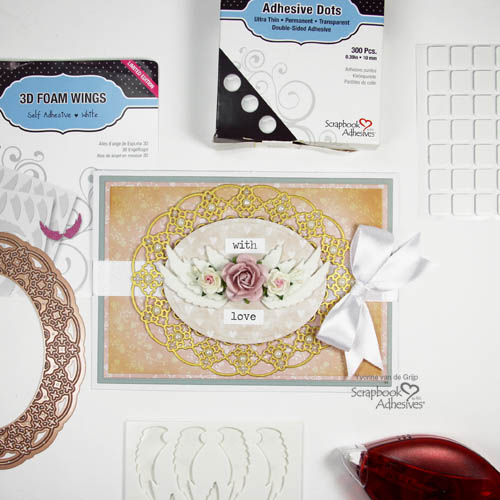
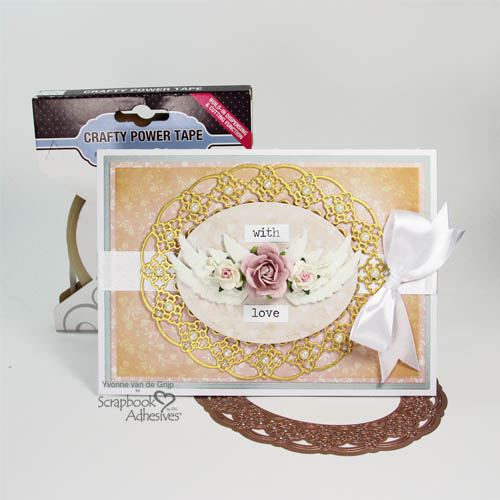
Hi everyone, Yvonne here with a love card, made with the 3D Foam Wings. This gorgeous and intricate Winged Love Card is full of elegance with a vintage touch. I would like to share how I made this romantic card. Please enjoy my tutorial!
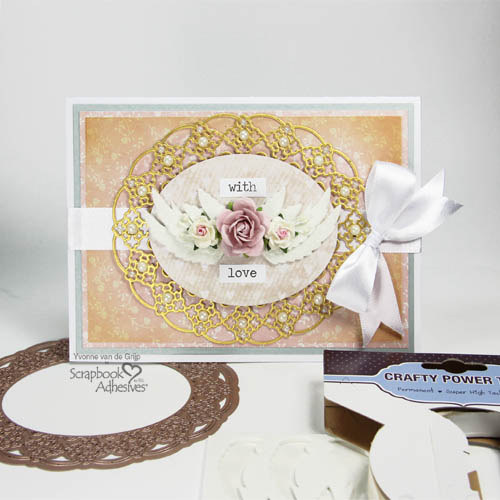
Winged Love Card Center Piece
Start by die-cutting and embossing an oval patterned panel. With the 3D Foam Wings, to make sure I adhere them on straight and centered on the panel, I drew a line onto the oval with a pencil and a ruler.
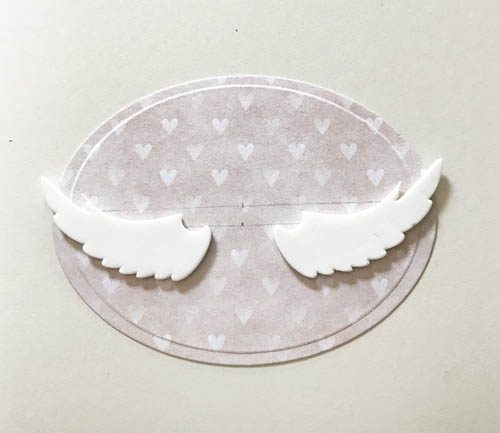
Now adhere the 3D Foam Wings in stacked layers onto the panel: first two sets of large wings and then two sets of smaller wings. With each additional layer, remove the liner from the wing below it.
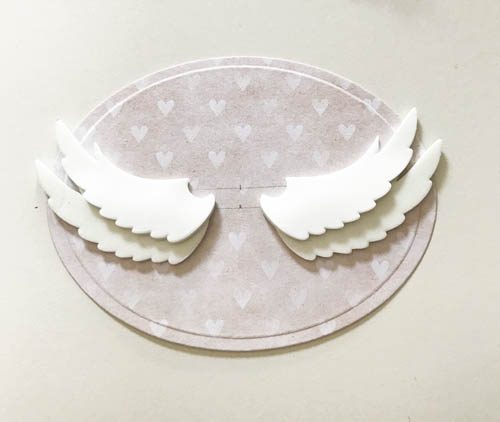
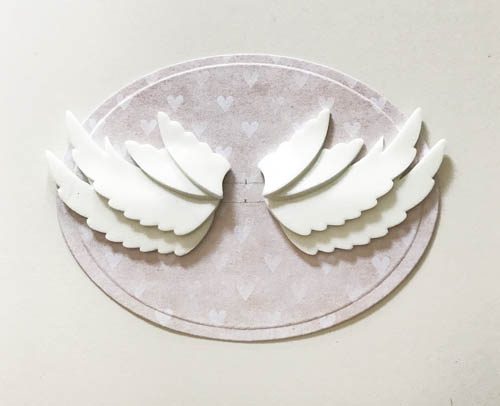
To create an angle in the wings I softly pushed all the ends of the layered wings to adhere to the oval panel. Remove the top layer’s liner and you are ready to embellish the wings with sparkle.
Now sprinkle a lot of white glitter onto 3D Foam Wings and softly rub it into the adhesive on the wings. Remove the excess. A concept called “Wear Your Adhesive on the Outside” – bringing your adhesives from between layers of a project to the outside and create unique embellishments like these wings!
Making the Card Base
Start by making a white rectangle shaped card base with a top fold, and adhere upon a slightly smaller die-cut grey panel using Crafty Power Tape Dispenser 81ft.
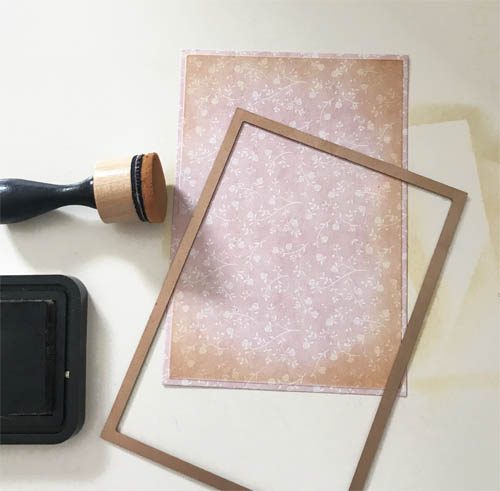
Then die-cut/emboss a slightly smaller patterned rectangle panel and leave the die-cut in die-template. Next ink the edges with brown ink and an ink blending tool and then remove the die-template. Now adhere the panel to the card base using the Crafty Power Tape Dispenser 81ft.
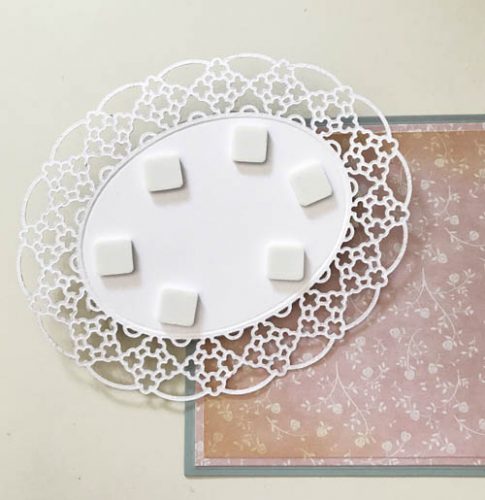
Then die-cut a golden intricate oval shape from gold cardstock and adhere to the card base using 3D Foam Squares White Mix and adhere the winged panel on top, also using 3D Foam Squares White Mix to give it a little lift.
Embellishing the Card
I decided to add ribbon after having put together all the layers. Add Crafty Power Tape onto the back of two pieces of white satin ribbon. Then remove the liner and carefully tuck a piece of ribbon under the intricate die-cut on each side, and then fold the ends around the card.
To adhere the flowers onto the wings use Adhesive Dots Medium Ultra Thin.
To adhere the stamens use the HomeHobby™ by 3L Dual Tip Glue Pen.
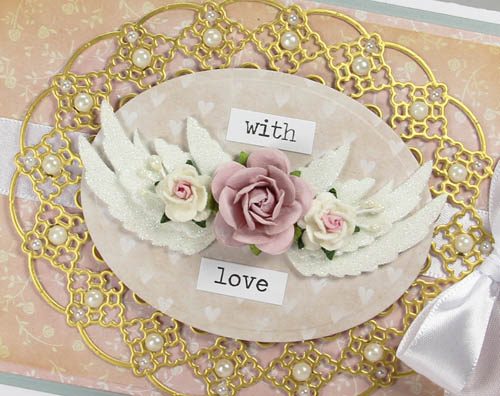
Adhere the satin bow with Crafty Power Tape. To finish, add some self-adhesive pearls and word stickers. And…voila…your Winged Love card is ready.
I hope you enjoyed the tutorial and wish you happy crafting!
Thanks for Visiting!
Yvonne van de Grijp
Creative Time: 45 minutes
Skill Level: Intermediate
Materials Needed
Scrapbook Adhesives by 3L®
- 3D Foam Wings
- Adhesive Dots Medium Ultra Thin
- 3D Foam Squares White Mix
- Crafty Power Tape Dispenser 81ft
HomeHobby by 3L®
Other
Etched Dies: Spellbinders® Paper Arts (Oval Regalia Etched Dies, Classic Ovals LG Etched Dies, 5×7 Matting Basics A and B Card Creator Etched Dies, Platinum 6 Die Cutting and Embossing Machine), Cardstock (White, Grey, Patterned), Ink Pad (Brown), Ink Blending Tool, Mulberry Flowers, Stamens, Self-adhesive Pearls, White Satin Ribbon
Pin It!
Visit our Website and Blog!
Sign up for our Newsletter so you never miss a contest or giveaway!


