
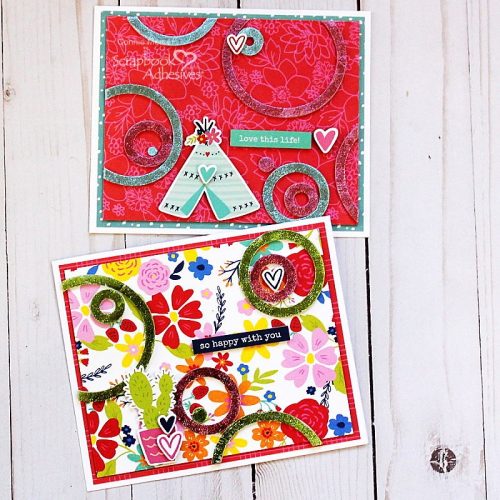
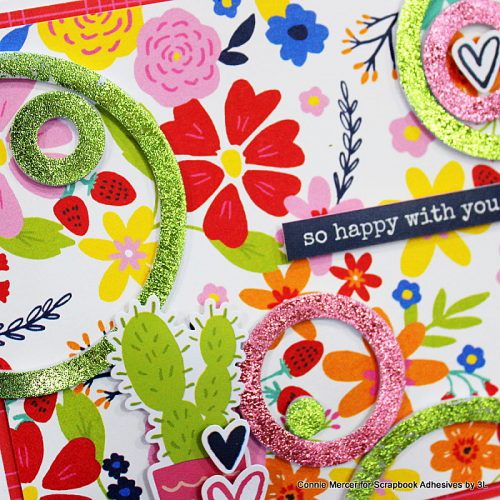
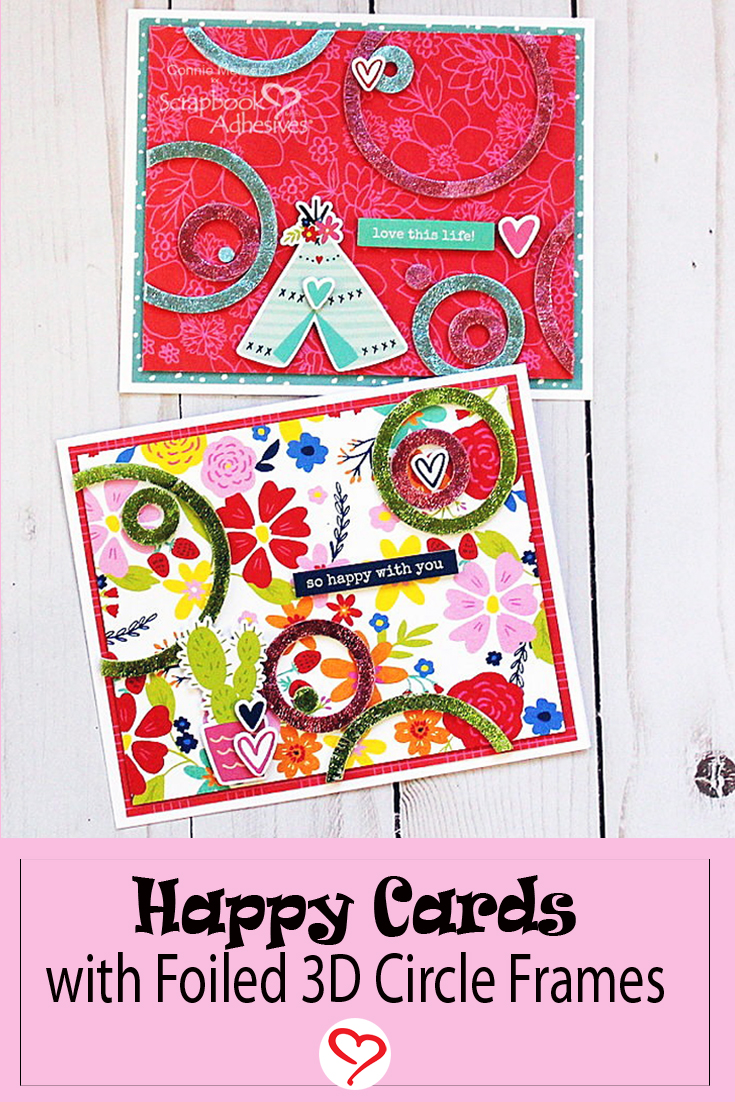
Hi, Connie here with a couple of bright and fun happy cards using the 3D Foam Circle Frames. I am showcasing the Metallic Transfer Sheets Pastel Colors on the foam frames which were released recently. These Circle Frames add a kind of retro vibe. Gather your supplies and let’s get started!
Happy Cards Prep
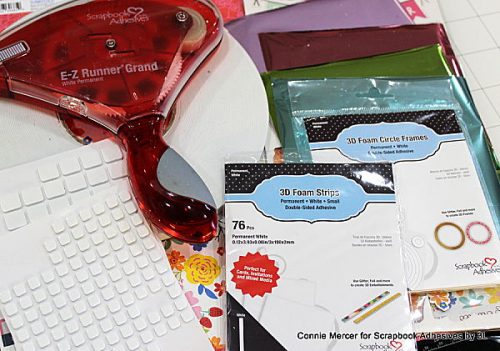
I’m using Simple Stories pattern paper along with several styles of 3D Foam adhesives. The 3D Foam Squares White Mix fit the stickers that I want to embellish the Happy Cards with, so I went with those.
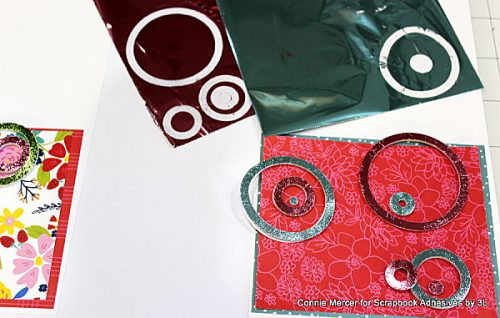
Foiling Process
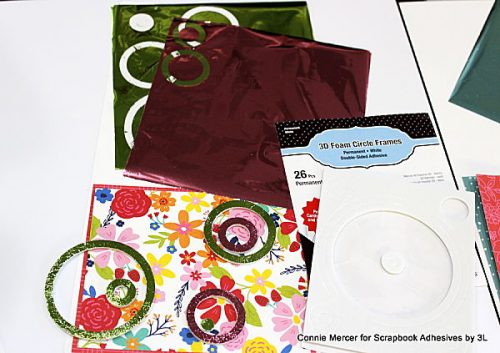
Lay the 3D Circle Frame White (peel off release sheet) face down on the shiny side and gently rub with your finger and then pull apart. If you have a spot that did not adhere foil repeat again. Peel the backing off and adhere to your card front.
Assembling the Card
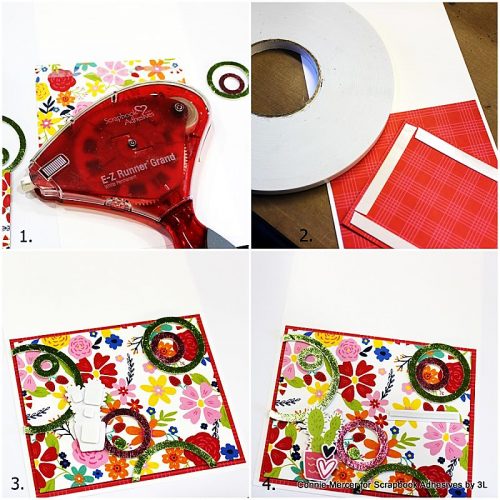
- 1. Roll the E-Z Runner® Grand Refillable Dispenser on the back of the card mat and adhere to the card base.
2. Use the Crafty Foam Tape 108′ to adhere the card front to the card mat.
3. Lift the small stickers with the 3D Foam Squares White Mix to the card front.
4. Place the sticker words to the card front with the 3D Foam Strips White.
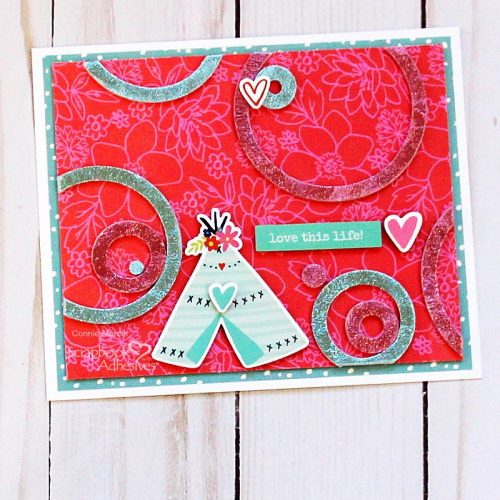
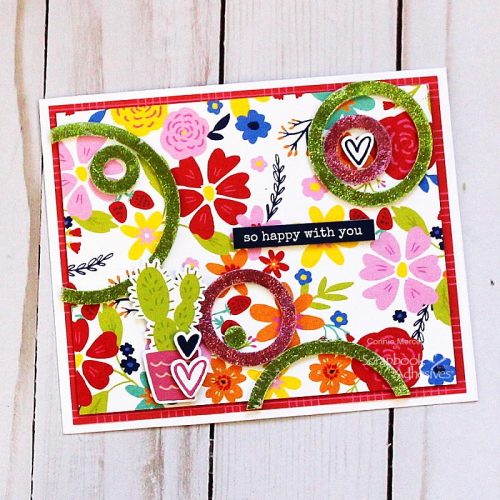
Thanks for stopping by and I hope you will create with the newly released Metallic Transfer Foil Sheets Pastel Colors on the 3D Foam Circle Frames White. Fun products for my Happy Cards! Check out the other new colors of foil!!!
Connie Mercer
Creative Time: 60 Minutes
Skill Level: intermediate
Materials Needed:
Scrapbook Adhesives by 3L®
Crafty Foam Tape 108
3D Foam Squares White Mix, 3D Foam Strips White and 3D Foam Circle Frames White
Metallic Transfer Foil Sheets Pastel Colors
E-Z Runner® Grand Refillable Dispenser
Other: Patterned Papers: Simple Stories (Safe Travels and Sun Kissed Collections); White Cardstock
Save to Pinterest!
Visit our Website and Blog!
Sign up for our Newsletter so you never miss a contest or giveaway!


