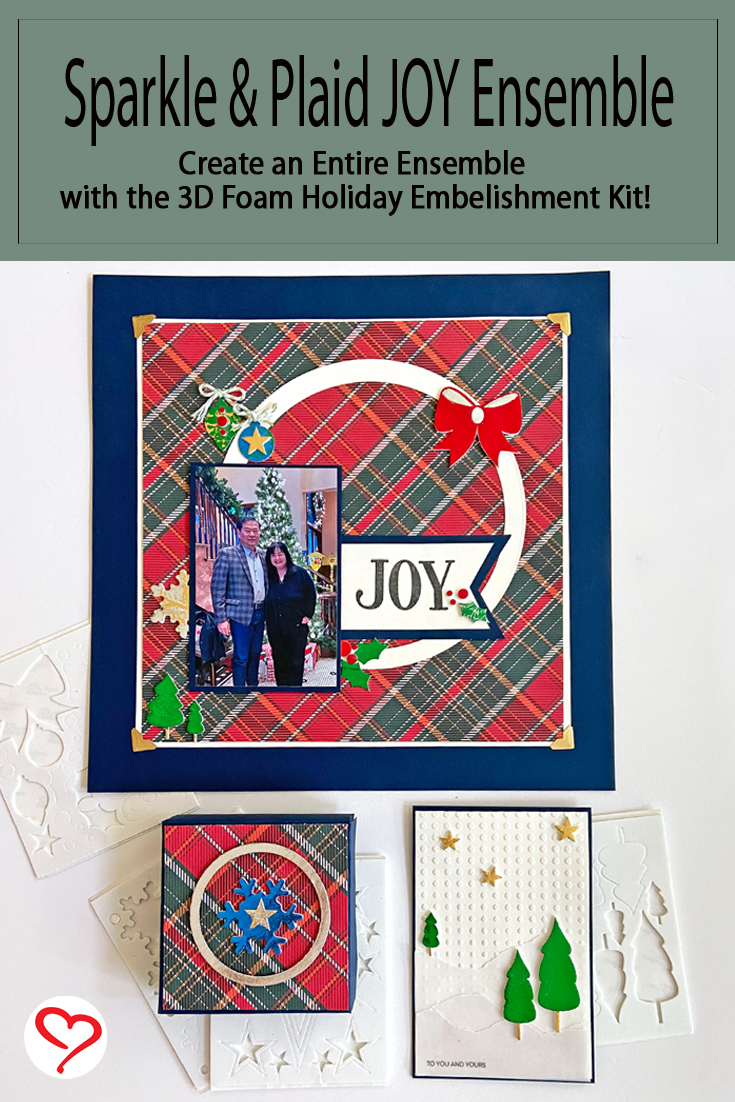
Did you know we have a kit that contains pre-cut holiday-themed foam shapes and a combination of colored foils? Hi, Margie here today and I like to showcase the 3D Foam Holiday Embellishment Kit with Foils. Inspired by the items in the kit, I’ve created a three-piece ensemble, Sparkle & Plaid JOY Ensemble.
ETA (8/28/23): Giveaway Closed. We have a Winner!! Congratulations to Eva W. from Louisiana!! Thanks to all who entered and left such lovely comments. ❤
We have a Partner’s Celebration Giveaway with Scrapbook & Card Today going on until Sunday, August 27th, 2023 at 10 PM Eastern Time. Scroll all the way to the end for details and a link! 👇👇👇
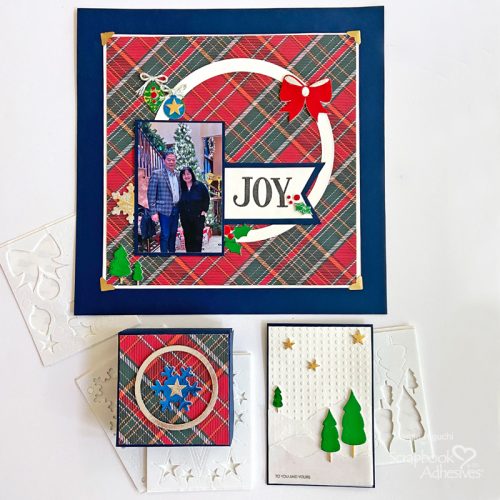
Sparkle & Plaid Scrapbook Page
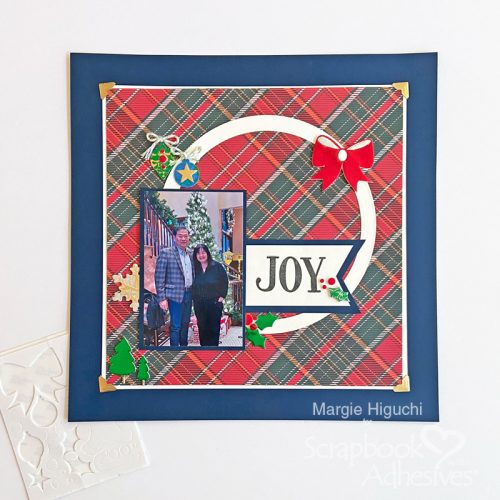
Cut the Following:
- 10-inch square from cream cardstock
- 9 5/8-inch square from plaid patterned paper
- 7-inch ring from cream cardstock
- 3.5 x 5.25-inch rectangle from navy cardstock
- 4 x 2-inch rectangle from cream cardstock
- 5.5 x 2 3/8-inch rectangle from navy cardstock
The Scrapbook Layout Base
Place an Adhesive Dots Large Repositionable in the center (back side) of the 9 5/8-inch square plaid patterned paper and mat it on top of the 10-inch square cream cardstock.
Designer’s Tip: If you are like me, I do not always center correctly the first time! LOL! This adhesive dot is forgiving!!! Simply pull off the cream mat and try again.
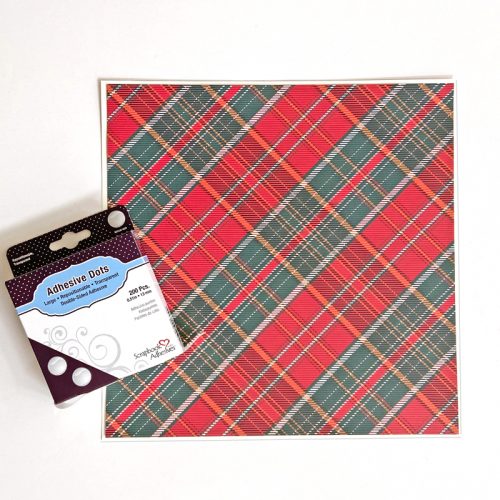
You can apply a permanent adhesive like the E-Z Squares® Refillable Dispenser but I used the Adhesive Dots Large Repositionable on the four corners and other areas to secure it. The page will not move until you peel or pull it off.
View How to Use Adhesive Dots & Lines Video
Embellish the Layout
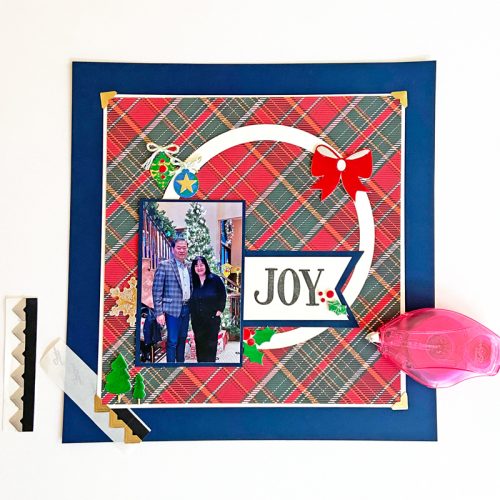
With a circle cutter, cut a 7-inch ring from cream cardstock and center it to the page with Adhesive Lines. Mat the 3.5 x 5.25-inch rectangle from navy cardstock with the photo with the E-Z Squares® Refillable Dispenser. Place it on the lower left side of the cream 7-inch ring with the Crafty Foam Tape Black 108ft. (leave space on the sides to tuck in the embellishments).
Stamp JOY in black ink on the 4 x 2-inch rectangle from cream cardstock and cut a fishtail on the right end. Adhere it to the 5.5 x 2 3/8-inch rectangle from navy cardstock. Leave enough room on the right end to cut a fishtail.
Wear Your Adhesive on the Outside with Foils
Pick out your desired shapes and foil colors from the 3D Foam Holiday Embellishment Kit with Foils and place them on the layout. One by one, lift the top liner and apply the foil (color side up) over the exposed adhesive. Rub gently with fingertips to transfer the color to the shape. Peel off the foil. If there are missed areas, simply reapply the foil. Please view the video below, I started where the crafter started foiling her shape…
View How to Use a 3D Foam Shape Video
Make it 12 x 12-inch Layout
To make my 10-inch square scrapbook page into a 12 x 12-inch layout, simply add a navy cardstock to the back with the E-Z Squares® Refillable Dispenser and add Creative Photo Corners to each corner for a festive accent. I used the Creative Photo Corners Gold.
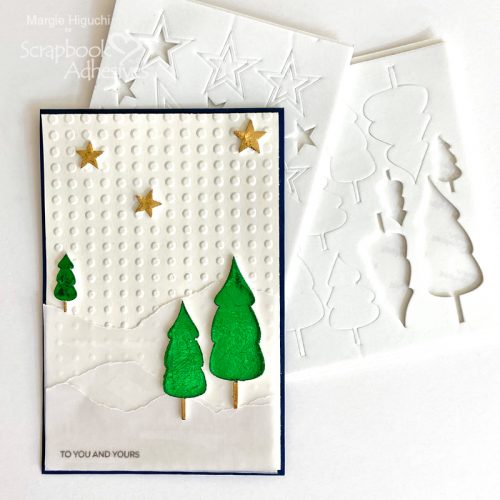
To You and Yours Holiday Card
Let’s start the second piece of the Sparkle & Plaid JOY Ensemble. Fold in half a piece of 4 x 12-inch navy cardstock to make a top-fold card base. Cut and emboss a 3.75 x 5.75-inch cream cardstock panel. Hand tear a piece of 3.75 x 5.5-inch vellum to form three slopes and secure to the bottom half of the panel with the E-Z Runner® Permanent Fine Adhesive Dispenser (aka Vellum Runner).
Sparkle & Plaid Snowflake Box
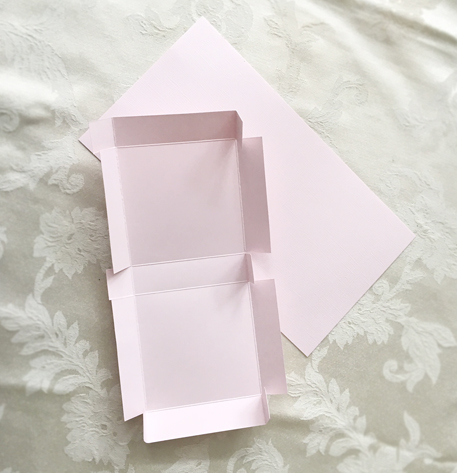
On a piece of 6 x 11-inch navy cardstock, score with the 6-inch side up at 1 and 5 inches. Flip to the 11-inch side to score at 1, 5, 6, and 10 inches. On the same side, cut the scored lines up into intersecting lines to create tabs. Here’s an image from a past project to give you an idea.
Decorate the Box Top
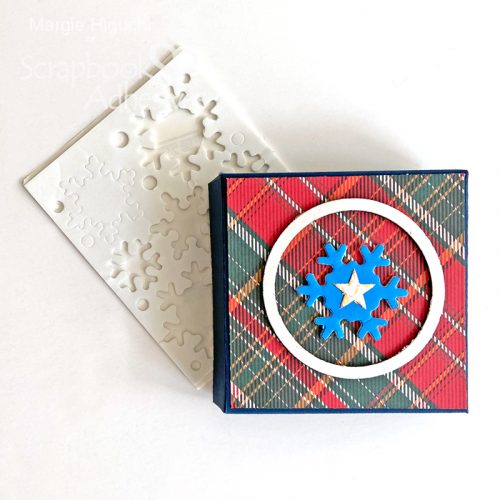
Let’s decorate the top with a 4-inch square patterned paper, center the largest 3D Foam Snowflake, and foil it with the blue foil (both from the 3D Foam Holiday Embellishment Kit with Foils). Next, layer a 3D Foam Star in the center of the snowflake and apply silver foil on the star (again, from the same kit). Frame the layered snowflake with the second largest 3D Foam Circle Frames White and foil it with silver.
Secure the layered box front with E-Z Squares® Refillable Dispenser on the box. Next, with the same adhesive, adhere the outer tabs inside the box to form your hinged box to finish.
I hope you enjoyed all three pieces of this Sparkle & Plaid JOY Ensemble. Change out the theme by choosing several pre-cut foam shapes from our 3D Foam Designer Shapes offerings.
Thanks for Visiting!
Margie Higuchi
Creative Time: 90 mins
Skill Level: Intermediate
Materials Needed:
Scrapbook Adhesives by 3L®
E-Z Squares® Refillable Dispenser
E-Z Runner® Permanent Fine Adhesive Dispenser (aka Vellum Runner)
Crafty Foam Tape White 108ft. or Crafty Foam Tape Black 108ft.
3D Foam Circle Frames White or 3D Foam Circle Frames Black
3D Foam Holiday Embellishment Kit with Foils
Adhesive Dots Large Repositionable
Creative Photo Corners Gold or Creative Photo Corners Silver
Other: Patterned Paper and Cardstock: Photo Play Paper (Christmas Boughs of Holly Paper – It’s a Wonderful Christmas Collection + Navy Cardstock); Stamp: Photo Play Paper PEACE/JOY 4 x 6″ Word Stamp Set); Black Ink; Cream Cardstock; Vellum; Embossing Folder; Baker’s Twine
Click Preferred Retailers List
Save to Pinterest!
Scrapbook & Cards Today Partner Celebration Giveaway
We are excited to sponsor the Partner’s Celebration Giveaway with Scrapbook & Card Today!
Click Partner Celebration with SCT to take you there to enter.
Don’t wait too long! It is going on until Sunday, August 27th, 2023 at 10 PM Eastern Time. The winner will be announced on their blog will be announced on Monday, August 28th, 2023. Good luck!
Visit our Website and Blog!
Sign up for our Newsletter so you never miss a contest or giveaway!



By Elaine McDonald August 24, 2023 - 2:03 pm
Great inspiration. Love your adhesive. Use it all the time
By Margie Higuchi August 24, 2023 - 2:37 pm
Hi, Elaine! Thanks for taking time to comment and for your support! Have a great weekend 🙂