
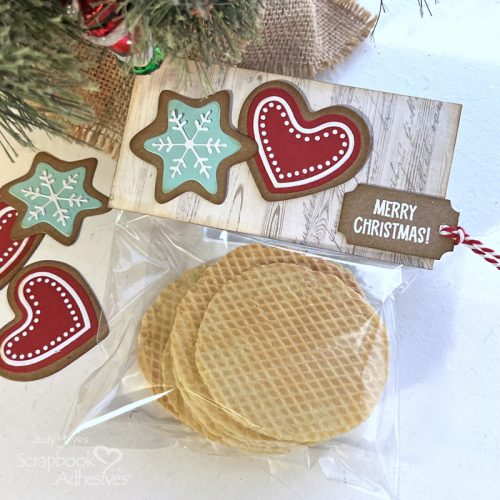
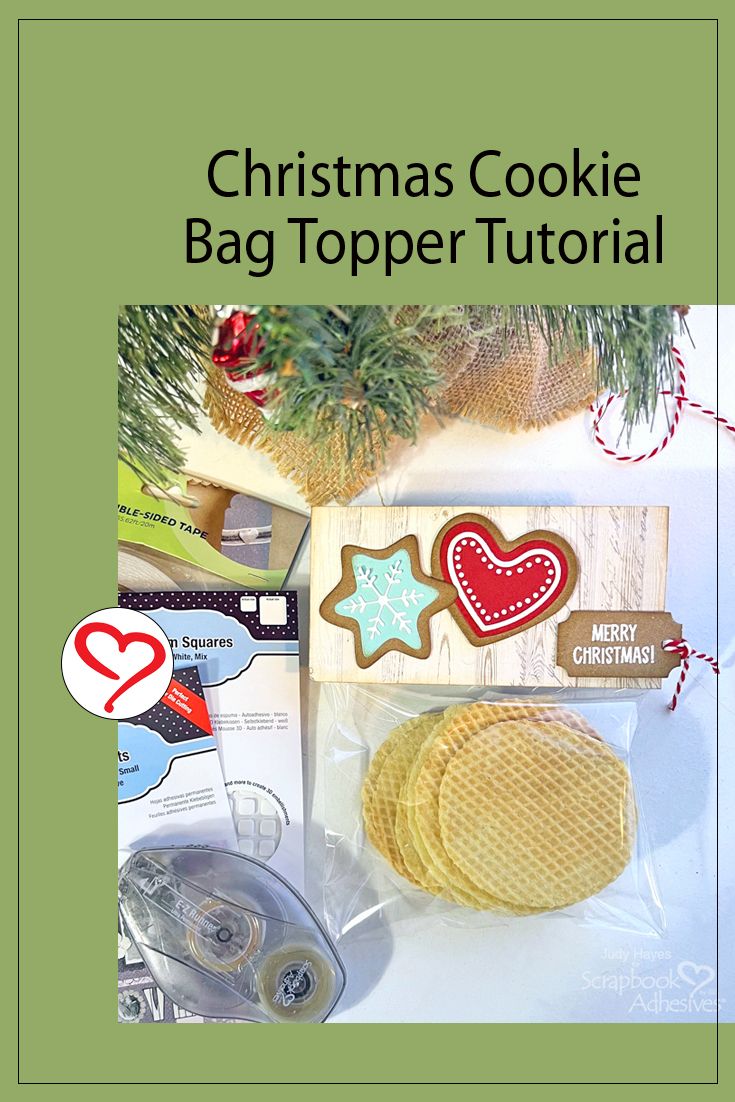
Hi, Judy here today! As I often give homemade cookies to friends and family around the holidays, I decided to make some festive Christmas Cookie Bag Toppers. It’s an easy project and can be done in steps to fit a busy schedule.
Apply Adhesive Sheets
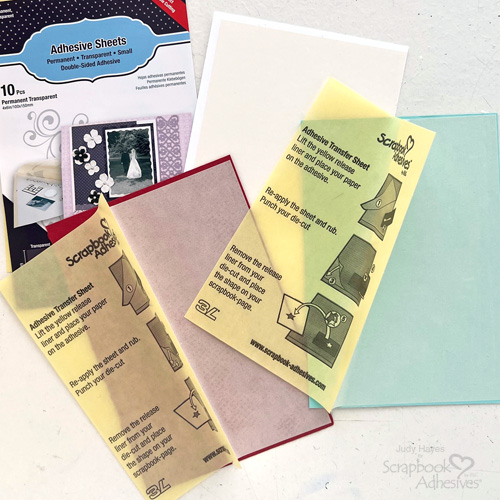
Cut approximately 4 x 6-inch pieces of white, red, and aqua cardstock. Apply Adhesive Sheets 4 x 6in. to the back of each one.
Die Cut Cookies
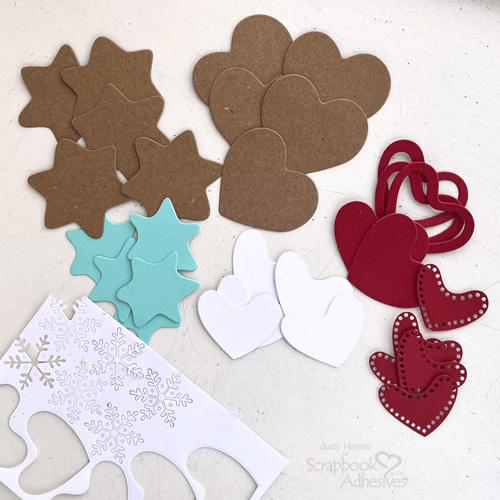
Use cookie dies and die cutting machine to cut cookie base shapes from Kraft heavy cardstock.
From aqua cardstock with adhesive on the back, cut star frosting pieces. Also, cut snowflakes from white cardstock with adhesive on the back. When I cut those, the back liner didn’t cut through so I left them in place and simply peeled them off the liner for assembly.
Use red cardstock with adhesive backing to cut a large red frosting heart and a small red one for each cookie. From white cardstock cut white frosting heart (medium size). To save paper, I cut a small red heart from the center of some of the larger red hearts. When assembled the white heart covers the opening.
Assemble Cookies

To decorate star cookies, peel the liner from the aqua piece and fasten it to the Kraft star. Then lift a snowflake from the liner and attach it to the aqua shape. Press firmly to get good adhesion.
For heart cookies, peel the liner from the large red heart and place it on the Kraft cookie base. Next, take the liner off the white heart and place it over the red heart. Lastly, remove the liner from the small red heart and place it on top.
Rub Ink on Cookie Edges
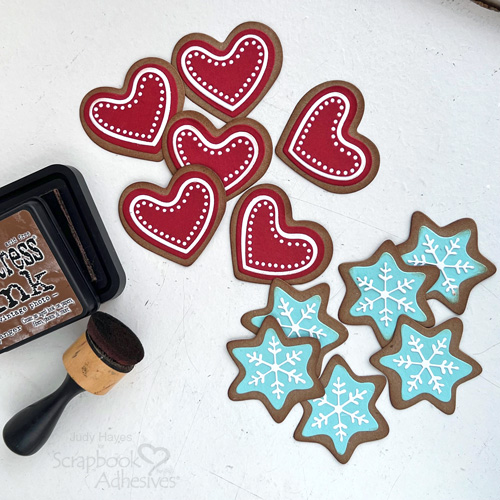
Use an ink applicator and Distress Vintage Photo to add light color around the edges of cookies.
Greeting Tag
Use tag die and die cutting machine to cut Kraft tag.
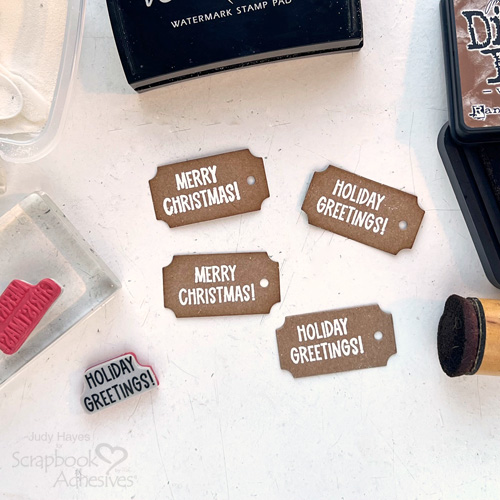
Stamp greeting with Versamark ink, cover with white embossing powder, remove excess and heat emboss. Apply Distress Vintage Photo ink to the edges.
Form Topper
Cut a 5.5 x 5.5 inch piece of Kraft cardstock, score, and fold it in half.
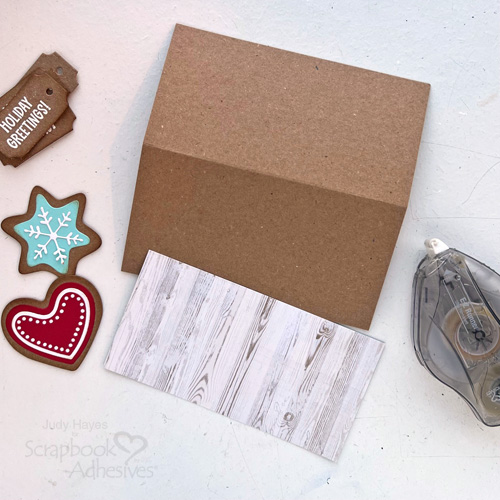
Cut 2.75 x 5.5 inch piece of wood grain patterned paper. Apply adhesive to the back with E-Z Runner® Ultra Strong Refillable Dispenser and attach to the Kraft topper. Rub Distress Vintage Photo ink along the edges.
Finish Topper
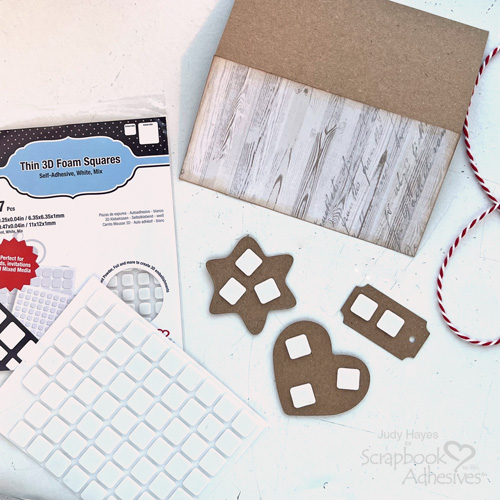
Place Thin 3D Foam Squares White Mix on the back of the snowflake and heart cookies and also on the back of the tag. Arrange on the topper, remove liners, and press in place. Loop a piece of red and white bakers twine through the hole of the tag.
Assemble the Topper to the Cookie Bag
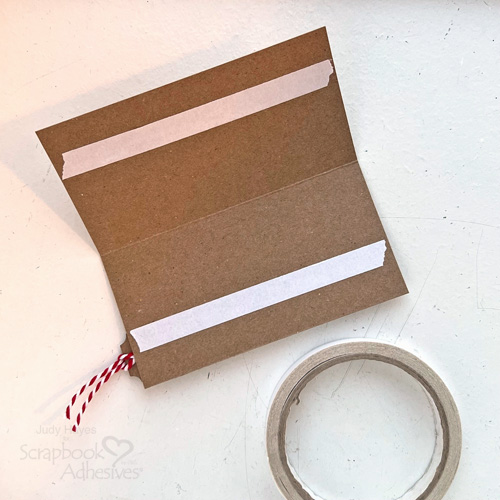
Apply Premium Double-Sided Tape 1/2in. inside topper on each side.
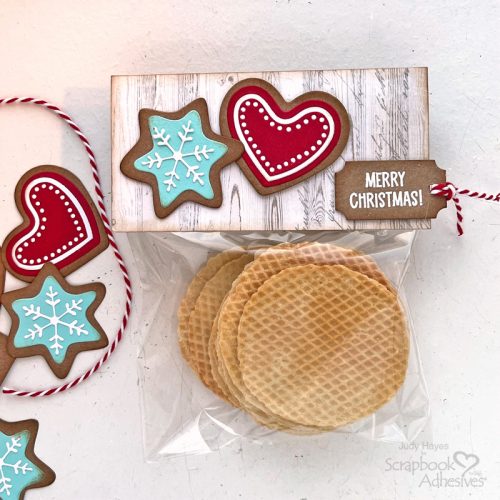
Fill the bag with cookies and seal. Peel the liners from the Premium Double-Sided Tape 1/2in. and place the Cookie Topper over the top of the bag.
Share with someone to make their day!
Thanks for Visiting!
Judy Hayes
Creative Time: 20 mins
Skill Level: Intermediate
Materials Needed:
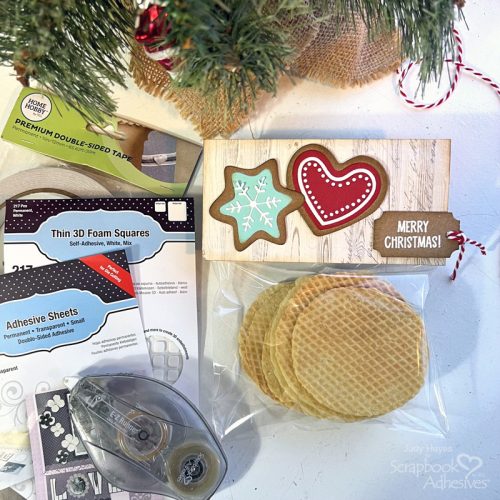
Scrapbook Adhesives by 3L®
E-Z Runner® Ultra Strong Refillable Dispenser
Thin 3D Foam Squares White Mix
HomeHobby™ by 3L
Premium Double-Sided Tape 1/2in.
Other: Papers, Stickers + Ephemera: Photo Play Paper Co (For the Joy of Winter – Through the Woods); Stamp: Stampers Anonymous (Tim Holtz Christmas Cartoons); Ink: Tsukineko (Versamark), Ranger Ink (Distress Vintage Photo); Embossing Powder: Ranger White Embossing Powder; Craft Dies: Sizzix (Tim Holtz Fresh Baked #1, Gift Tags); Kraft, Red, Aqua + White Cardstock; Red and White Bakers Twine; Clear Treat Bag
Click Preferred Retailers List
Save to Pinterest!
Visit our Website and Blog!
Sign up for our Newsletter so you never miss a contest or giveaway!


