
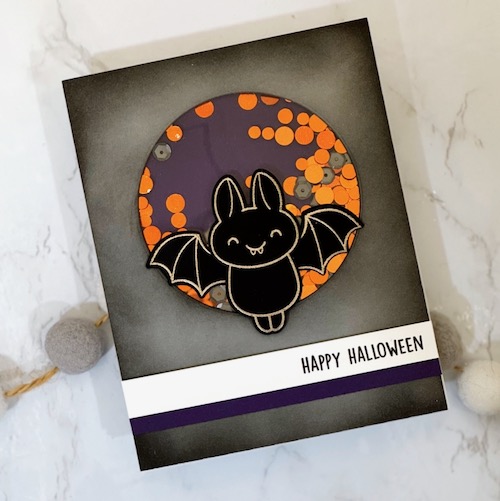
Hello, it’s Jingle here today and I am super excited to share this fun shaker card design with you! I am a big fan of bats and Halloween gives us the perfect excuse to create this Batty Halloween Shaker Card!

I have a step-by-step tutorial for you to help you create this absolutely adorable interactive card!
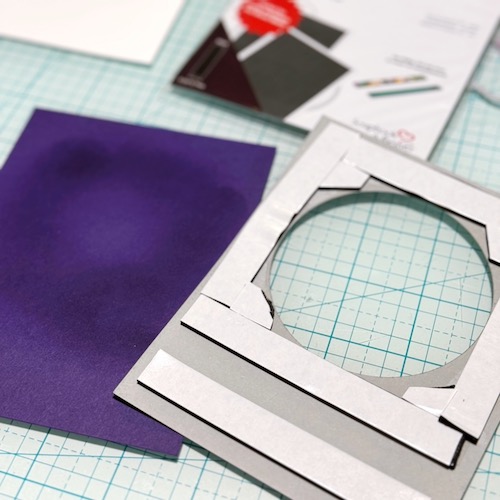
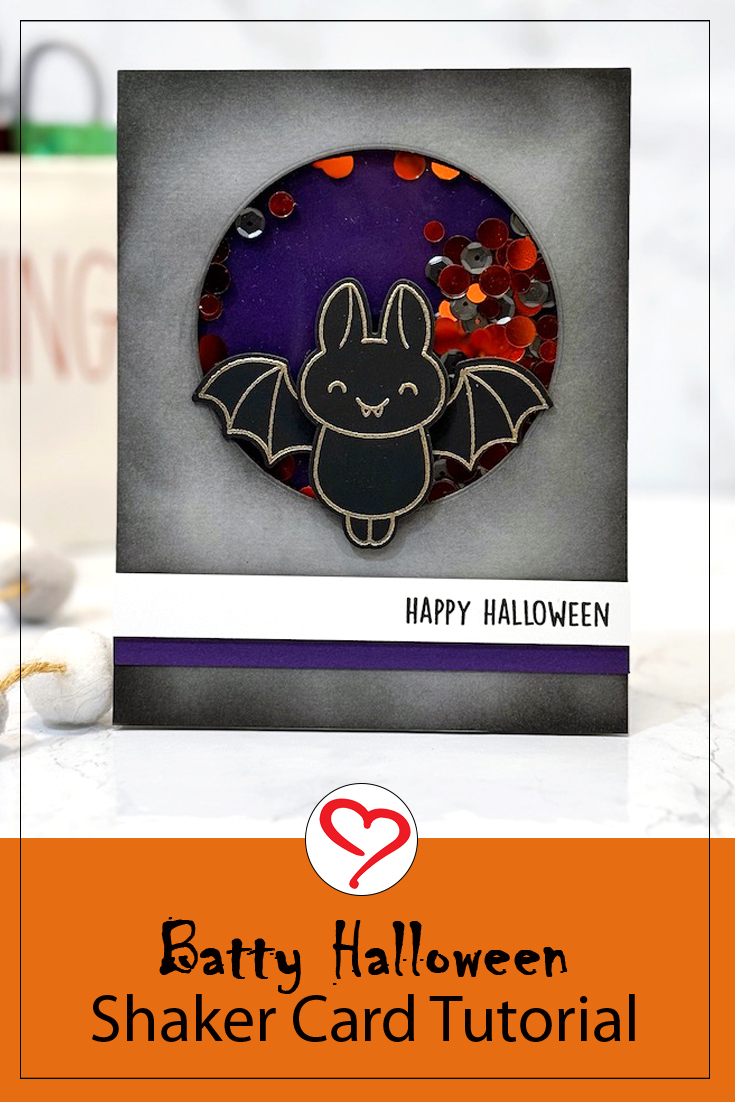
Shaky Batty Window Panel
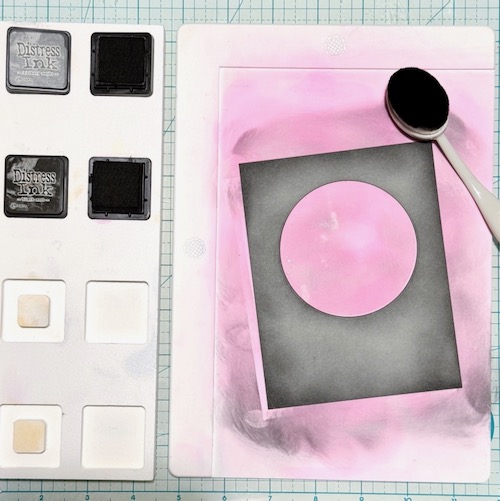
The first step is nice and simple, die-cut a circle from a sheet of 4 1/4 x 5 1/2 grey cardstock. To add an eery look, ink up the edges with dark inks. Be sure to add some ink around the edges of your circle where the bat will sit! Once you get your desired eery look, set it aside.
Create the Bats
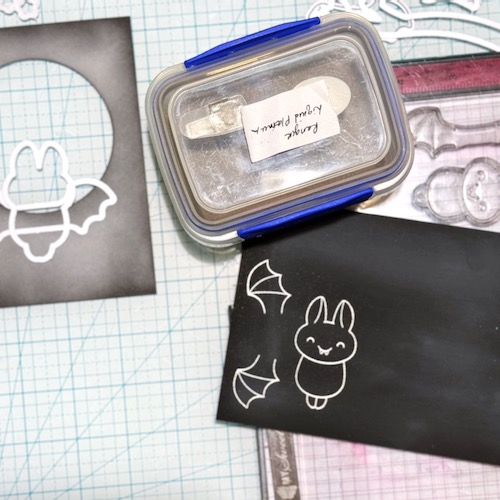
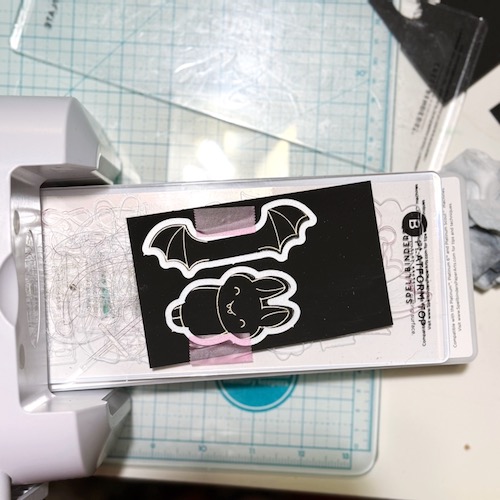
Stamp and heat emboss (I used Ranger Liquid Platinum on a smooth black yardstick) your bat image. Next, you will want to die-cut your bat from the cardstock. I recommend using a low tack tape to secure your dies while die cutting, to avoid shifting. Once your bat is cut, set it aside.
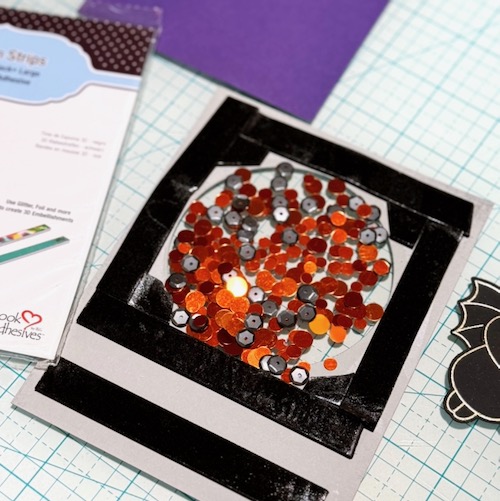
Let’s Shake It Up
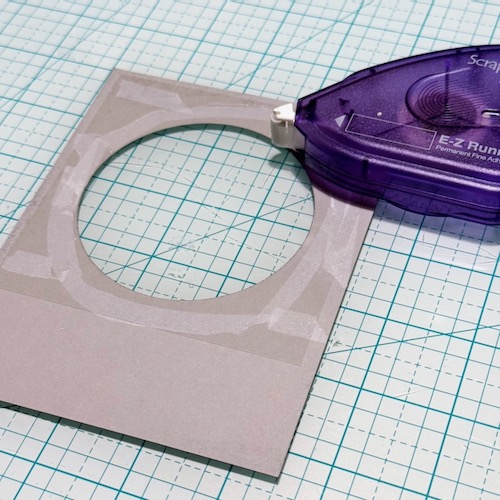
Let’s build the shaker feature! To begin, adhere a sheet of acetate using the E-Z Runner® Permanent Fine Adhesive Dispenser to the backside of the circle. I love the flexibility of this runner and how securely it holds acetate.
Next, create a foam frame around the circle using Crafty Foam Tape Black 54ft. I like this one because it has a great depth to leave room for the shaker bits! I also chose the black tape because it will keep the darker color tone feel even along the inside edges of the shaker window.
Add Shaker Bits
Next, we get to fill the shaker with fun, shiny shaker bits! I used a combination of beautiful orange no-hole sequins and some tiny black sequins, as well.
Once you have your pieces in, gently remove the backing from the foam tape and adhere the purple cardstock back panel. I choose to use a panel and then adhere the entire shaker to a card base to make the process a bit easier to manage.
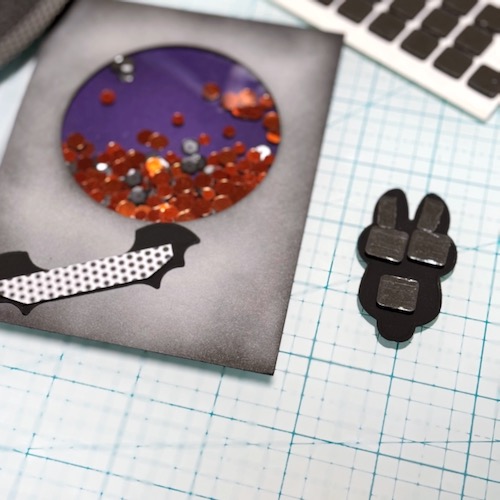
Adding the Finishing Touches
Once the shaker is completed, you can adhere your bat body and bat wings using the 3D Foam Squares Black Regular and the Crafty Foam Tape Black 108ft. This foam tape is a bit thinner, so your wings are a bit closer to the shaker and the foam squares really make the bat pop!

Finally, stamp Happy Halloween on a white strip of cardstock and adhere that, along with a purple strip of cardstock for a bit of accent color, to the bottom of the card.
Thanks for stopping by today. I hope you shake things up a bit and create a fun Halloween Shaker, soon! Be sure to tag us on social so we can see your amazing work!
Thank you,
Jennifer Ingle (aka Jingle)
Creative Time: 30 mins
Skill Level: Intermediate
Materials Needed:
Scrapbook Adhesives by 3L®
E-Z Runner® Permanent Fine Adhesive Dispenser (aka Vellum Runner), E-Z Runner® Grand Permanent Dots Refillable Dispenser, E-Z Runner® Grand Repositionable Dots Refillable Dispenser, 3D Foam Squares Black Regular, Crafty Foam Tape Black 54ft., Crafty Foam Tape Black 108ft., Adhesive Sheets 4 x 6in.
Other: Stamps and Dies: Lawn Fawn (Batty for You); Ink: Ranger Ink (Distress Oxide in Black Soot, Hickory Smoke); Embossing Powder: Ranger Embossing Powder (Liquid Platinum); Craft Dies: Waffle Flower Crafts (Nested Circles); Grey, Purple, and White Cardstock
Click Preferred Retailers List
Save to Pinterest!
Visit our Website and Blog!
Sign up for our Newsletter so you never miss a contest or giveaway!


