
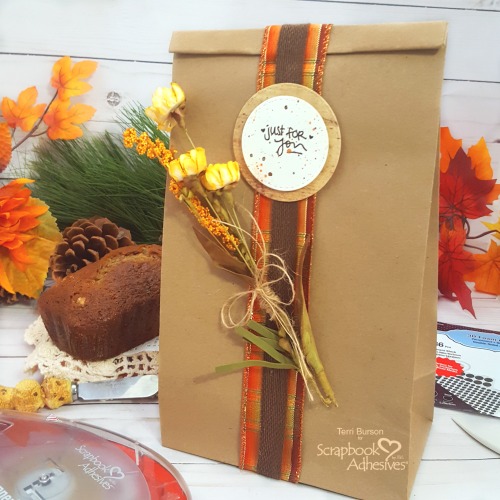
Hello crafters! Terri here, and yes indeed, it’s National Date Nut Bread Day. Of course, I’ll use any excuse to dust off the old loaf pan and mix it up in the kitchen. With cooler temperatures just around the corner, this is the perfect time to get nutty and crafty. This festive, decorative gift bag is the perfect compliment for your baked goods and sharing handmade kindness. Let’s get started!
Gather Your Decorative Supplies
For this project, you will need a few key ingredients to make this gift bag. I found a 12-pack set of kraft solid gift sacks for $2.99 in the party supply section of a craft store. With a coupon you can slash that price almost in half. These are fairly large and will perfectly accommodate a mini loaf. Or, two or three, when stacked! See the supply list below:
- Kraft gift bag 3.5L x 5W x 10H inch
- Wide ribbon and trim ribbon 26-inch each
- E-Z Runner® Grand Refillable Dispenser
- E-Z Runner® Grand Ultra Strong Refill
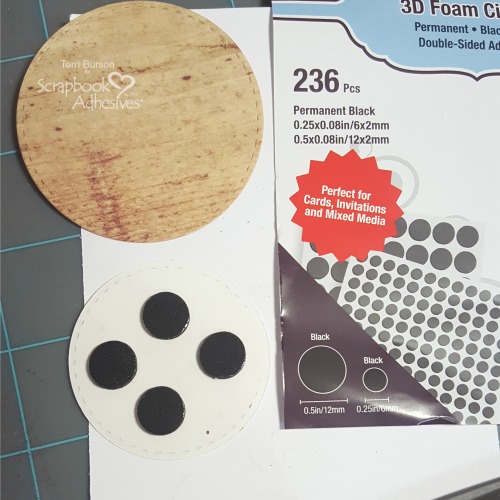
- 3D Foam Circles Black Mix (or white)
- Extreme Double-Sided Tape 1/2in
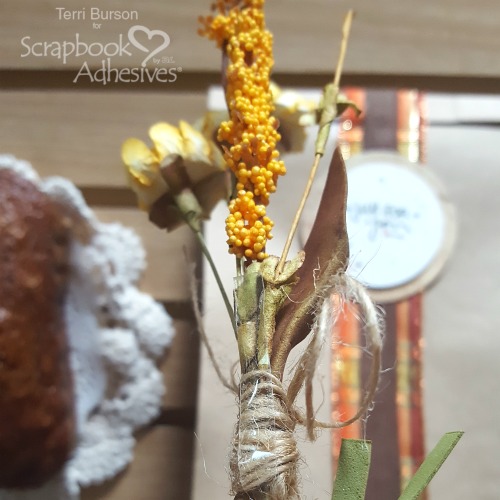
- Seasonal Sprigs
- Gift Label (circle punch or die cuts)
- scoring tool/board
- twine or string *optional
- scissors
Add Dimension With 3D Foam Circles
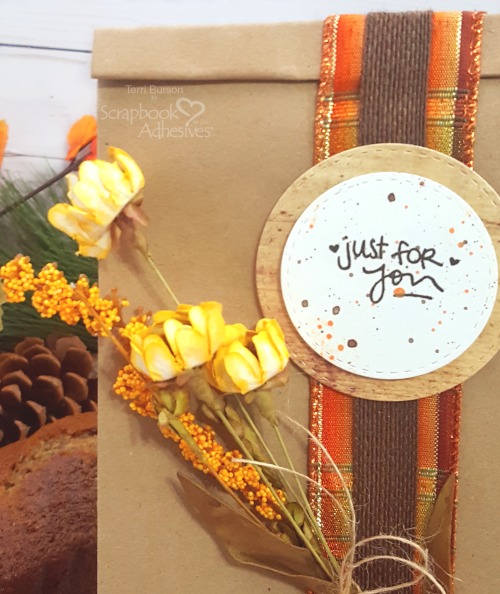
For my label, I chose to stack my die cut circles, adding the 3D Foam Circles Black Mix to the back of my top, stamped layer. This gives popped up dimension and adds that extra level of interest to your project. Set this aside and get ready for the next step.
Create A Professional Fold-Over Closure
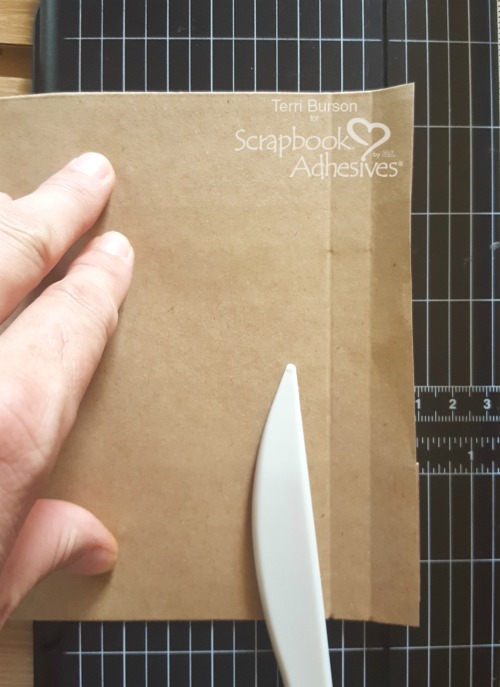
If you’re going to go the extra mile to create a special gift bag for your baked goods, you want to make sure and have a polished look. Attention to details can really make your gift giving shine! I love to use a scored fold-over technique; such a simple detail that looks so professional. Simply score the top of your gift bag at 1 inch from the top, then at the 1/2 inch mark. Fold over and use your scoring tool to smooth out the fold as much as possible. Do not seal yet. This will be done later.
Tips For Adhering Ribbon
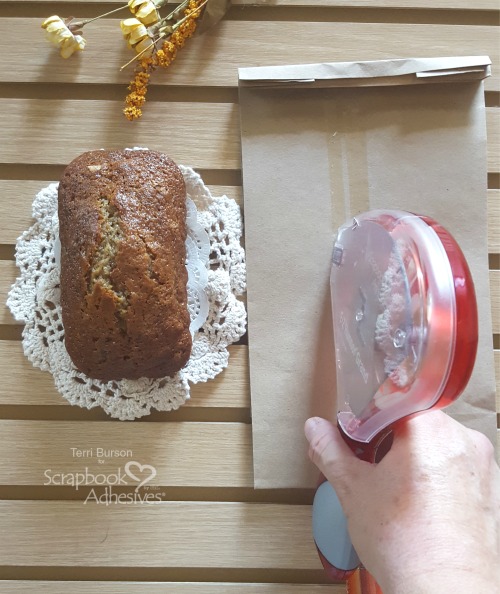
When working with ribbon or fabric, I prefer to use the E-Z Runner® Grand Ultra Strong Refill in my E-Z Runner® Grand Refillable Dispenser. This ensures that the ribbon will stay put! Run strips of the adhesive down one side of your gift bag. Apply your ribbon, placing the end at the base of your bag.
It will be easier if you go ahead and have your stacked ribbon already adhered together. For ease in adhering ribbon together, I prefer to use strips from my Extreme Double-Sided Tape 1/2in.
Once you’ve lined up your ribbon on the front of the bag, go ahead and tuck your treats inside the bag and fold over the top of your bag and adhere. Now, finish running your ribbon down the other side of the bag and seal at the base of your bag.
To place those finishing touches, you can now add your label and your decorative elements. I’ve placed a strip of Extreme Double-Sided Tape 1/2in to the back of my sprig and add to my gift bag.
And…that’s a wrap!
Since it’s National Date Nut Bread Day, I’m sharing my recipe over on my blog. It is so good! You will love it! Plus, there’s a special ingredient that will surprise you. Stop by Waving My Wand for all the goods, along with product links.
Thanks so much and have a great day! Terri
Creative Time: 15 minutes
Skill Level: Beginner
Materials Needed:
Scrapbook Adhesives by 3L®
E-Z Runner® Grand Refillable Dispenser
E-Z Runner® Grand Ultra Strong Refill
3D Foam Circles Black Mix
HomeHobby by 3L®:
Extreme Double-Sided Tape 1/2in
Other Supplies:
Paper House Productions paper, ink, stamps, ribbon, burlap string, sprigs, kraft gift bags, scoring tool, stamp positioner, fine-tip paintbrush, mixed media paper, stitched circle dies