
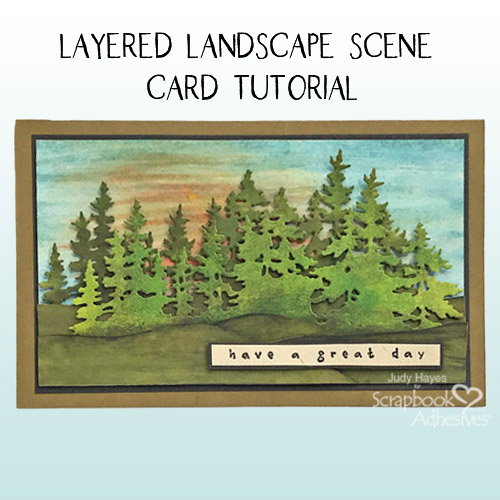
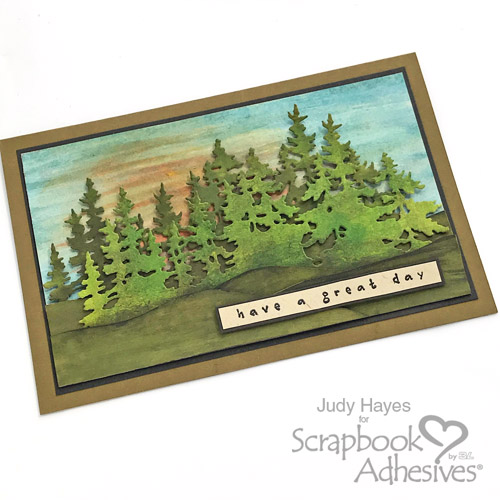
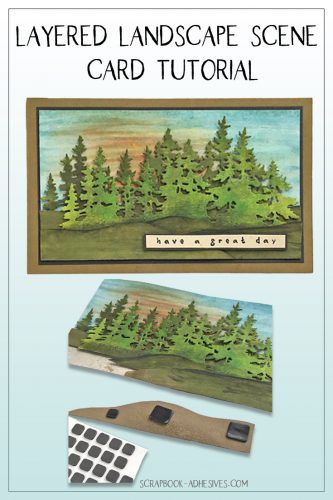
Hello everyone! It’s Judy here today to share Layered Landscape Scene Card. This card tutorial has Thin 3D Foam Squares between the layers to create depth between the tree die cuts. Follow along to see how to make this card.
Inking the Background
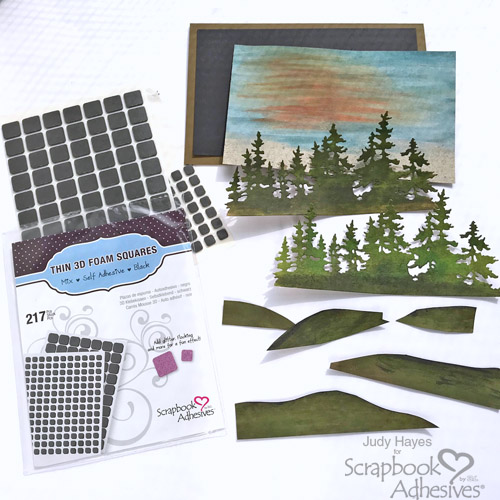
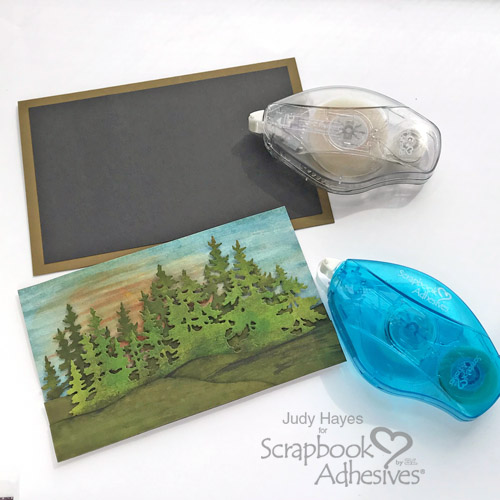
Apply various green Distress Stains on two pieces of kraft cardstock. Make one darker and one lighter. Next die cut a tree line from each. Apply blue Distress Stains to kraft cardstock and add a touch of white stain. When dry, blend in touches of orange and yellow inks for sunset/sunrise. Cut the cardstock to 3.5 x 5.75 inches. Cut pieces of light brown card stock to make hills. Apply Distress Stains to each, and make some darker. Apply small amount of black along top edges for shadows.
Assemble the Layered Landscape Scene
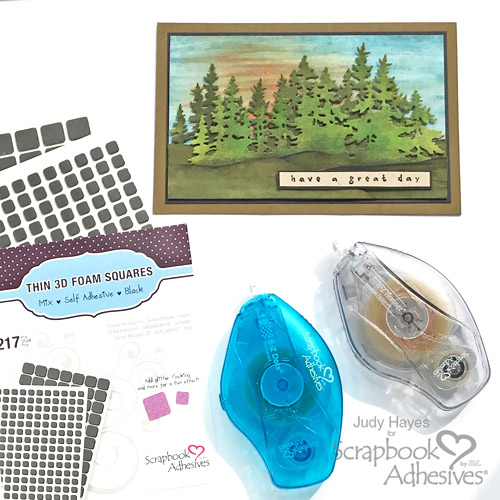
These are the pieces ready to be assembled. Tip: Lay out your scene for placement of pieces. Use E-Z Dots® Repositionable Refillable Dispenser to temporarily hold the pieces in place. It’s easy to lift and move without damaging the papers.
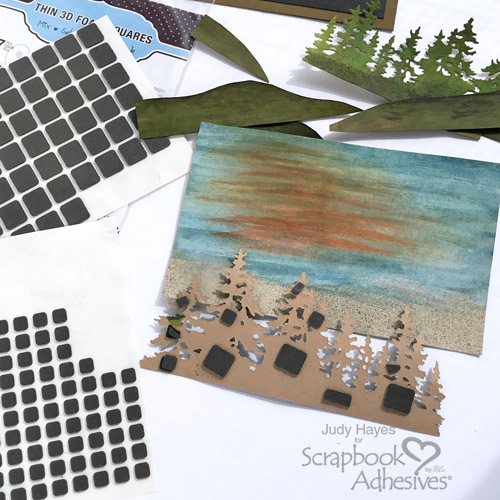
Place Thin 3D Foam Squares Black on the back of the darker treeline. Cut Foam Squares in smaller pieces to fit on trees. Adhere the trees over the sky background, towards the left edge of the background paper. Add small hill pieces over each edge of treeline using Thin 3D Foam Squares. Use more Thin 3D Foam Squares on the other tree line so its below and to right of the first tree line.
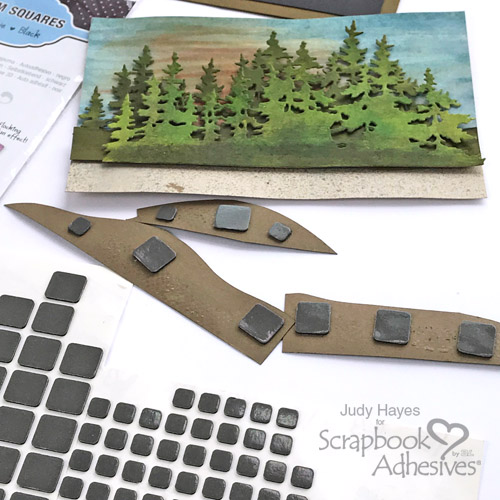
Add Thin 3D Foam Squares Black to the backside of some of the landscape pieces and attach them across the base of trees. Stack two layers of Thin 3D Foam Squares at the lower edges to create more dimension.
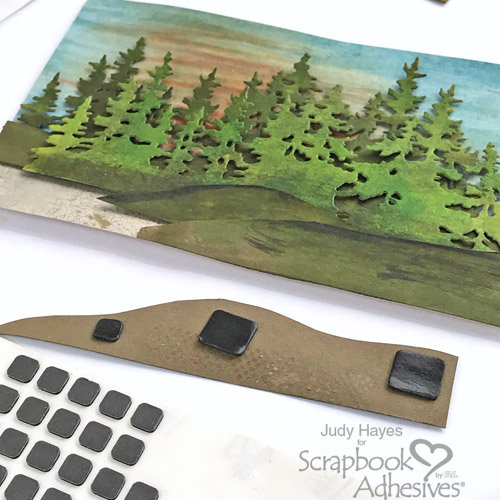
Apply the final landscape piece in place. Use more Thin 3D Foam Squares Black along the bottom edge than I have shown in the photo.
Fasten 3.75 x 6-inch black cardstock to the front of the 4.25 x 6.5-inch olive card using E-Z Dots® Permanent Refillable Dispenser and E-Z Runner® Ultra Strong Refillable Dispenser. Use Ultra Strong on corners and Dots Permanent along sides and center. Next use E-Z Runner® Ultra Refillable Dispenser to apply adhesive to the back of the scene. It’s immediately tacky and strong and especially good to hold paper inked paper flat. Attach the scene over black cardstock.
Finishing Details
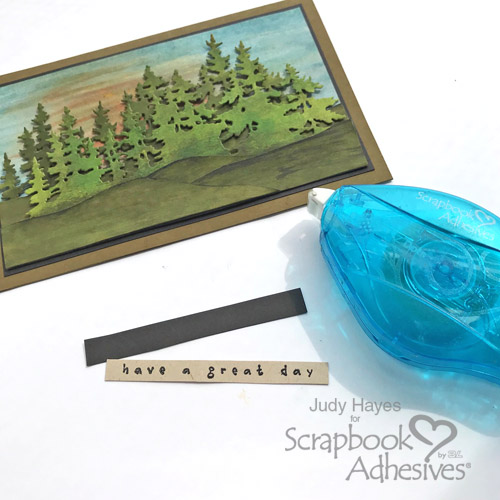
Stamp “Have a Great Day” verse with black ink on kraft card stock and trim to size. Cut a slightly larger piece of black card stock for a mat and adhere the layers together using E-Z Dots® Permanent Refillable Dispenser.
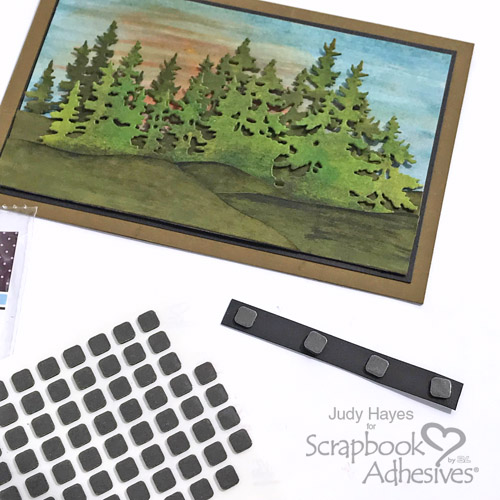
Place Thin 3D Foam Squares Black on back of verse. Stack two Thin 3D Foam Squares as needed to compensate for different levels of the landscape. Fasten verse in place.

Now you have a finished Layered Landscape Scene Card!
Thanks for Visiting!
Judy Hayes
Creative Time: 45 Minutes
Skill Level: Intermediate
Materials Needed
Scrapbook Adhesives by 3L®
- E-Z Dots® Permanent Refillable Dispenser
- Thin 3D Foam Squares Black
- E-Z Runner® Ultra Strong Refillable Dispenser
- E-Z Dots® Repositionable Refillable Dispenser
Other
Etched Dies: Sizzix Tim Holtz Tree Line; Distress Stains: Peeled Paint, Forest Moss, Black Soot, Broken China, Faded Denim, Picket Fence; Distress Inks: Mustard Seed, Carved Pumpkin, Dried Marigold; Card Stock: Kraft, Light Brown, Black; WorldWin Cardstock: Olive; Verse Stamp; Ink: Imagine Crafts/Tsukineko Versafine Onyx Black
Love it! Pin it!
Visit our Website and Blog!
Sign up for our Newsletter so you never miss a contest or giveaway!


