You are in our US store • Switch to Europe store

Dimensional Valentine Card…with Love!

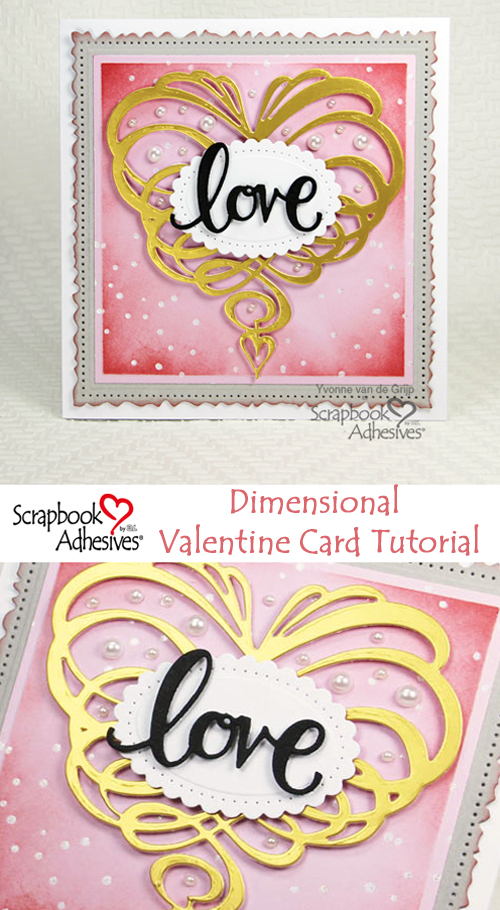
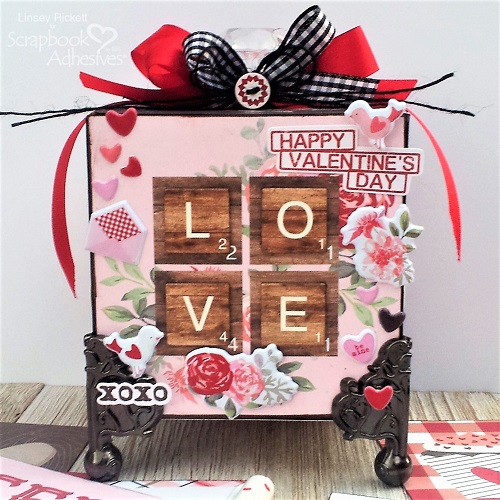
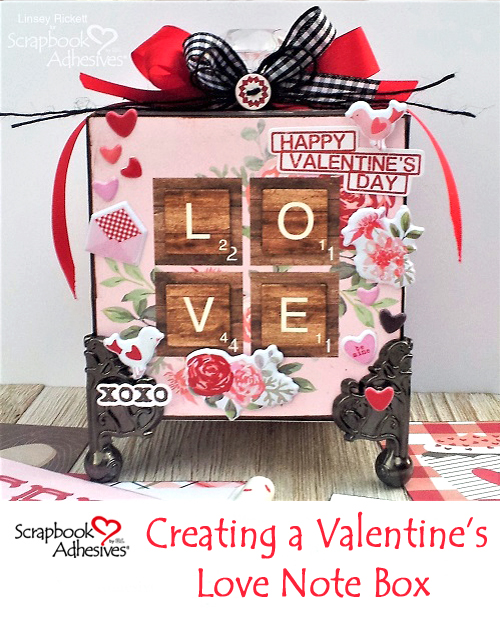
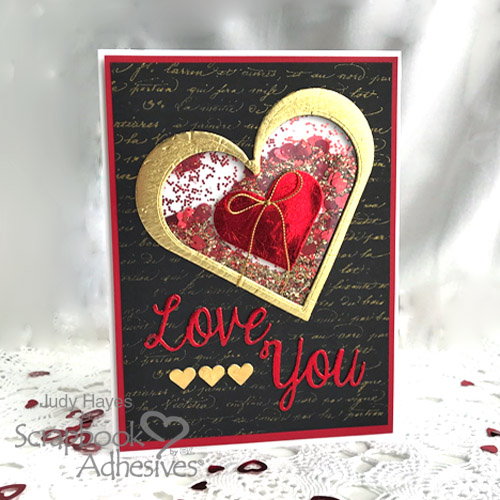
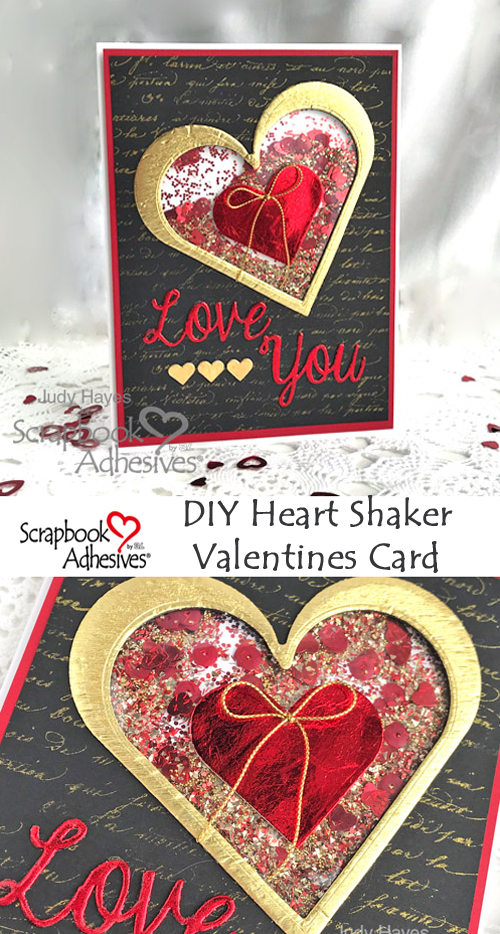
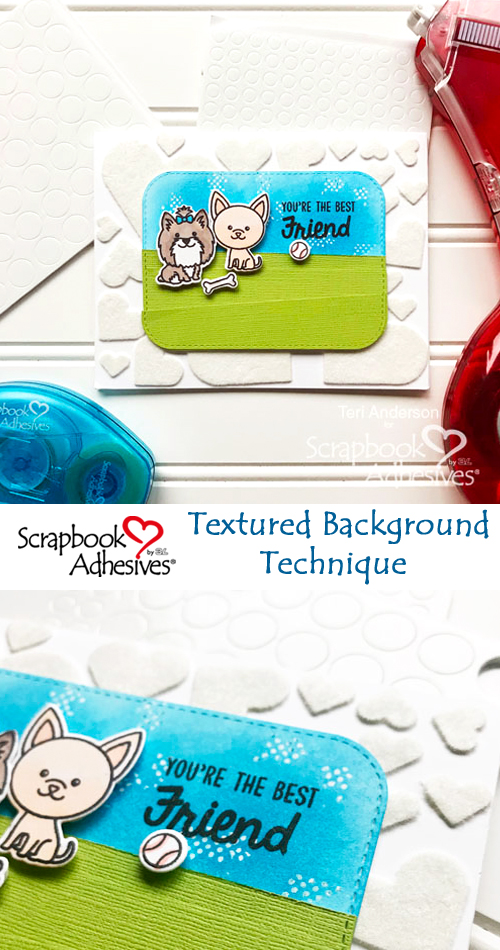
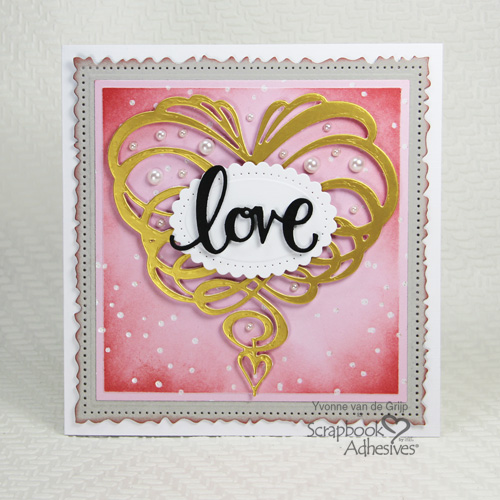
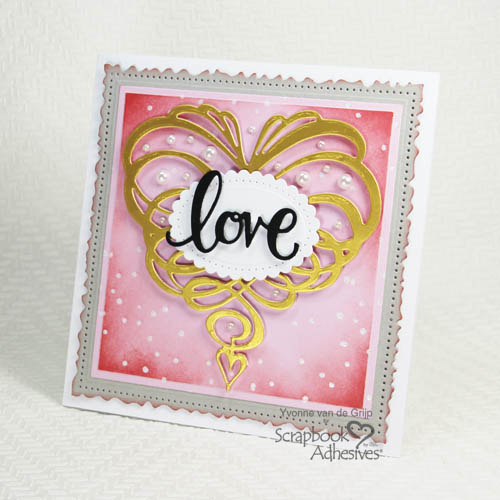
Hi everyone, Yvonne here to share an easy to make dimensional Valentine card with of course, the word “love” that is front and center! Only one week until it’s Valentine’s Day so it’s time to get crafty and make a gorgeous card for a special loved one!

Dimensional Valentine Card…with Love! by Yvonne van de Grijp for Scrapbook Adhesives by 3L

Creating a Dimensional Valentine Card

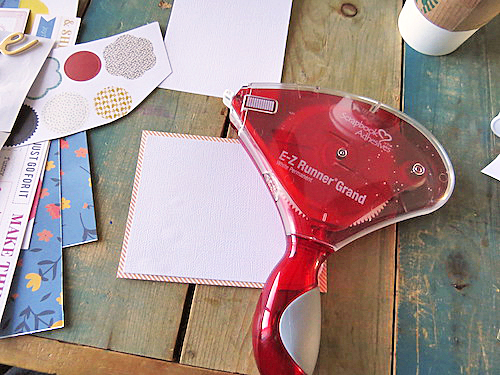
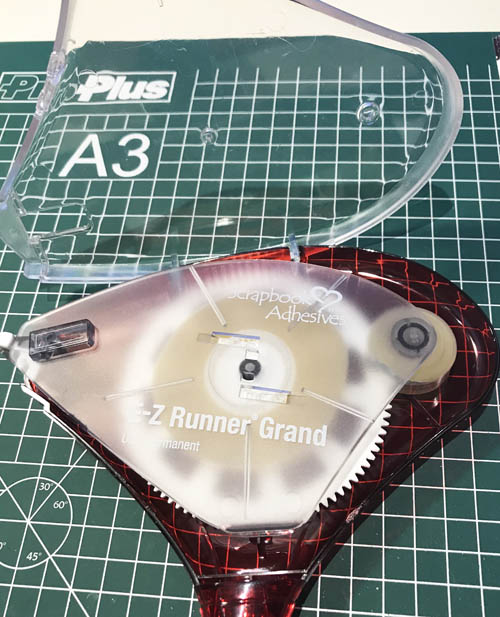
For extra, ULTRA strong adhering I filled my E-Z Runner® Grand Refillable Dispenser with the E-Z Runner® Grand Ultra Strong Refill. So let me share with your a quick video on How to Use and Refill the E-Z Runner Grand Dispensers below:

First, take off the cap of the E-Z Runner® Grand Refillable Dispenser. Using the finger grip on the side, open the hinged lid. Lift the cartridge to remove. If empty, simply drop in recycle bin.

Dimensional Valentine Card…with Love! by Yvonne van de Grijp for Scrapbook Adhesives by 3L

Align E-Z Runner® Grand Ultra Strong Refill and drop into place. Close the lid and you’re ready to go!

Dimensional Valentine Card…with Love! by Yvonne van de Grijp for Scrapbook Adhesives by 3L

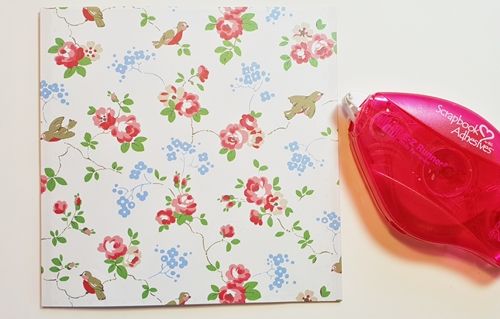
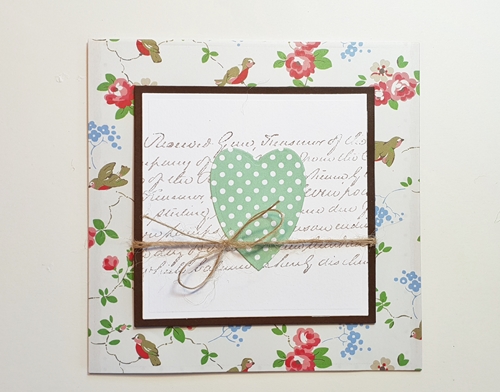
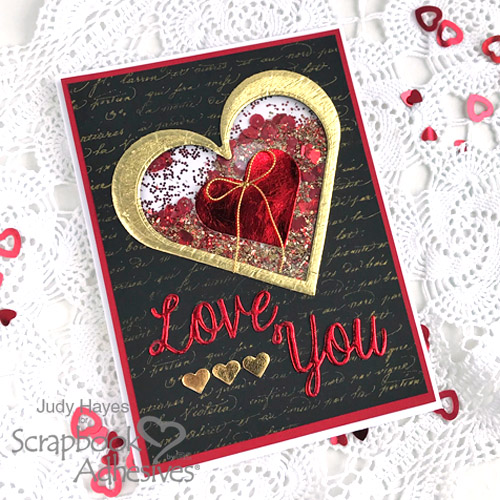
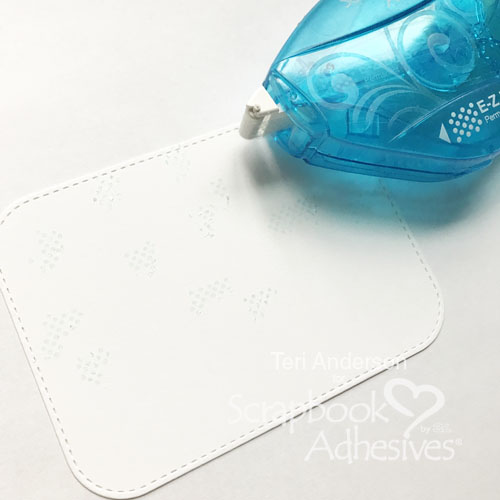
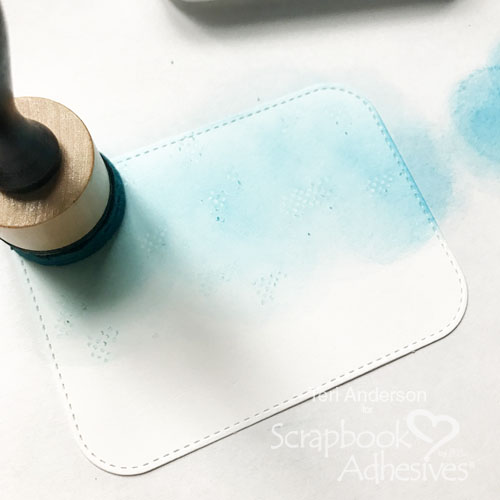
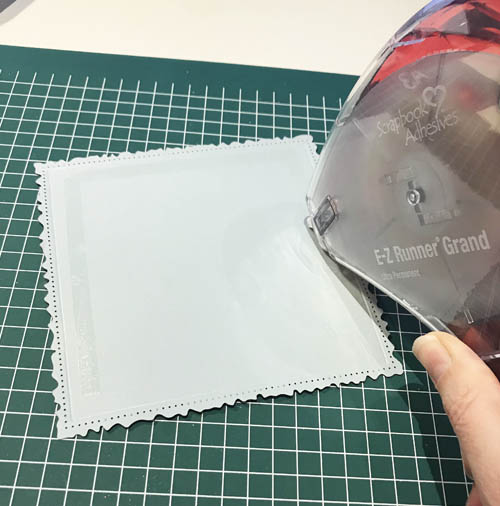
Now to make the card base. Die-cut and emboss a pierced square from grey cardstock. Ink the edges with bright pink ink and an ink blending tool. Adhere to a white square card base using the E-Z Runner® Grand Refillable Dispenser with E-Z Runner® Grand Ultra Strong Refill.

Dimensional Valentine Card…with Love! by Yvonne van de Grijp for Scrapbook Adhesives by 3L

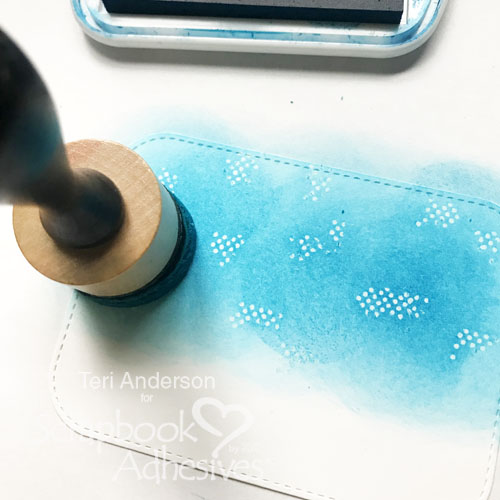
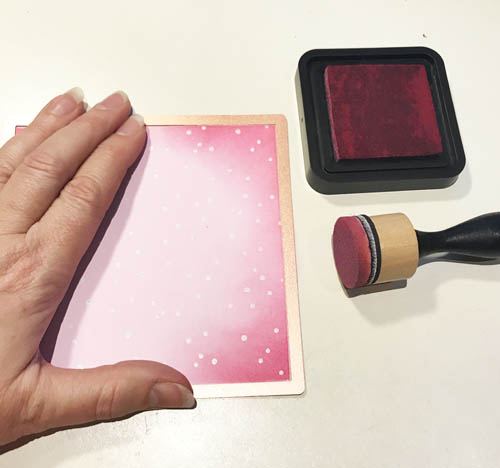
For the second card panel layer, die-cut and emboss a square from pink cardstock. Leaving the cardstock in the die, ink the inside edges using pink in and an ink blending tool. Then adhere the layer to the card base with the E-Z Runner® Grand Refillable Dispenser and E-Z Runner® Grand Ultra Strong Refill.

Dimensional Valentine Card…with Love! by Yvonne van de Grijp for Scrapbook Adhesives by 3L

Embellishing the Card Front

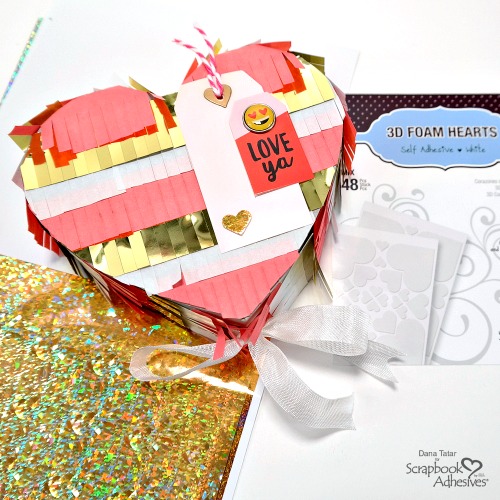
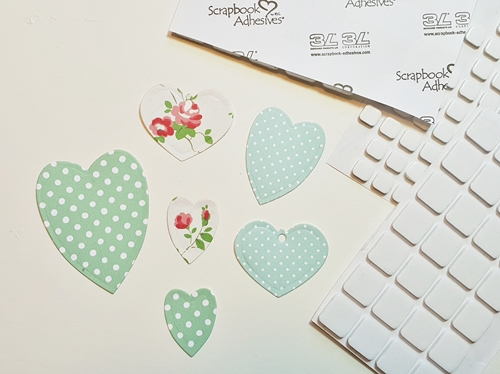
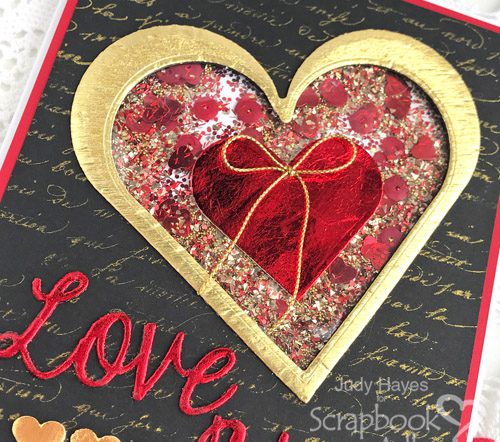
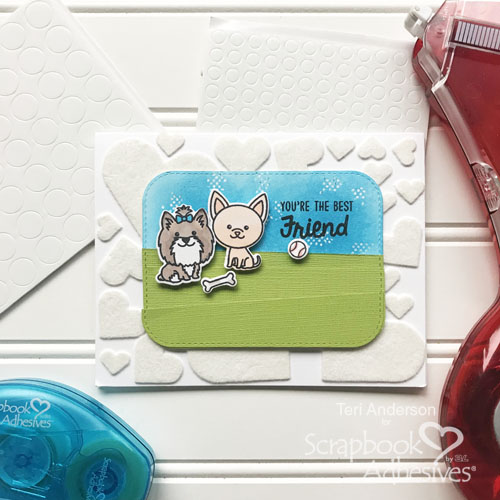
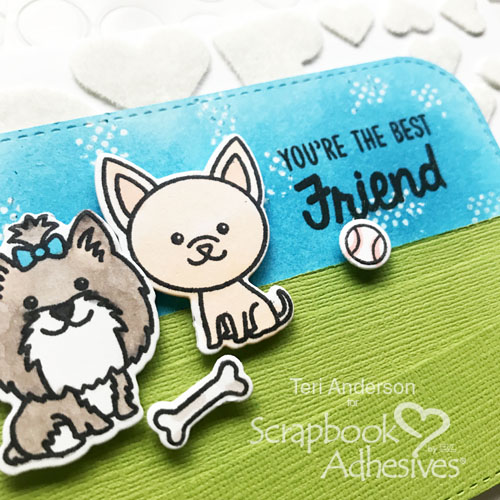
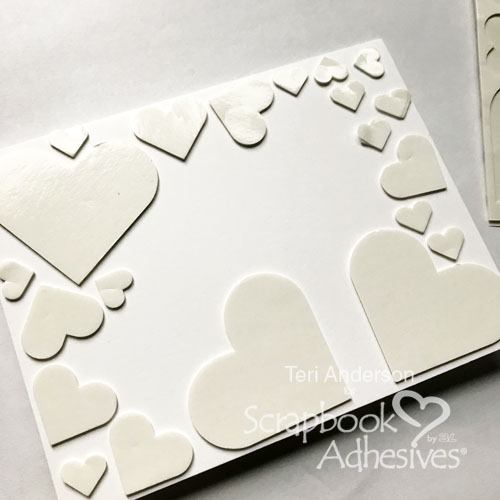
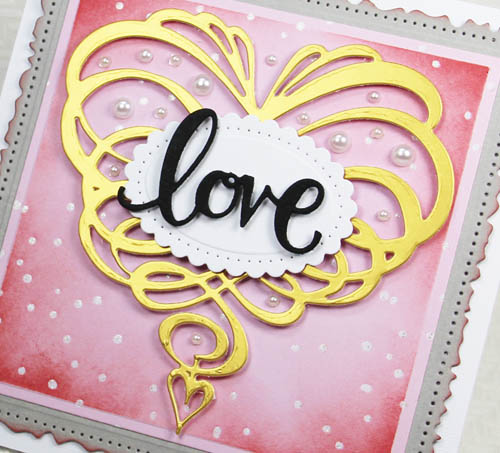
Now the fun part – embellishing! 3D Foam Squares White Small Size is the perfect way to add dimension to your project. Let’s first die-cut a heart shape from gold cardstock and adhere with several 3D Foam Squares White Small Size.

Dimensional Valentine Card…with Love! by Yvonne van de Grijp for Scrapbook Adhesives by 3L

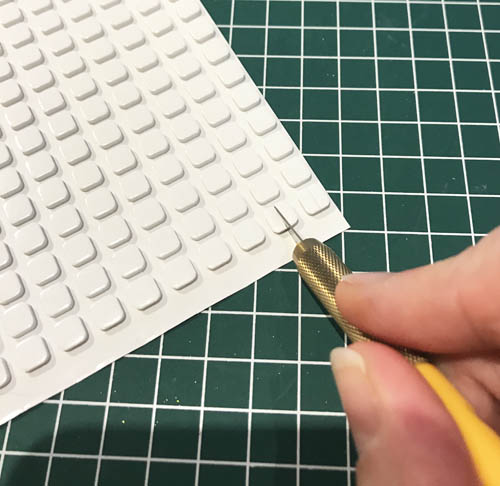
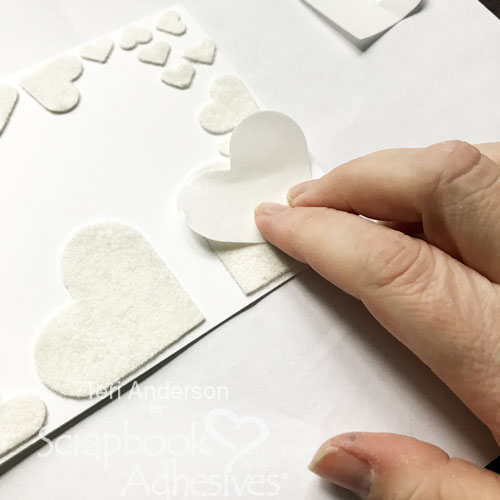
Since this is an intricate design, I cut some 3D Foam Squares White Small Size into smaller stripes and squares with a craft knife to tuck behind the intricate design so it doesn’t show. Remove all the liners and affix to card base.

Tip: by using a very sharp craft knife, all you have to do is press the knife onto the 3D foam square and it will cut right through.

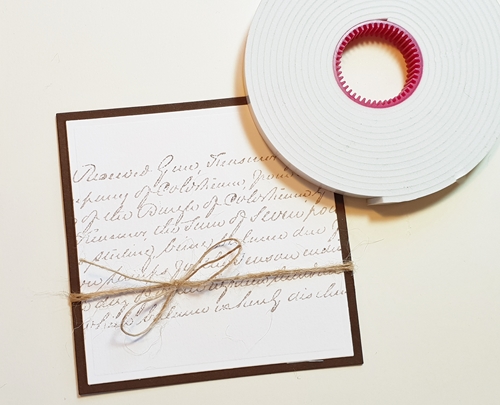
Die-cut and emboss an oval shape from white cardstock. Die-cut the word “Love” sentiment from black cardstock. Adhere both to the card base using 3D Foam Squares White Small Size.

To finish the card, I added lots of pearls on the card front with Adhesive Dots Micro for an extra luxurious touch!

Tip: For precise placement of the pearls, I find tweezers work the best.

Dimensional Valentine Card…with Love! by Yvonne van de Grijp for Scrapbook Adhesives by 3L

And voila…your Valentine Day card with lots of love is ready to be sent to your loved one!

Dimensional Valentine Card…with Love! by Yvonne van de Grijp for Scrapbook Adhesives by 3L

Wishing you happy crafting,
Yvonne

Creative Time: 45 minutes
Skill Level: Intermediate

Materials Needed
Scrapbook Adhesives by 3L®

E-Z Runner® Grand Refillable Dispenser
E-Z Runner® Grand Ultra Strong Refill
3D Foam Squares White Small Size
Adhesive Dots Micro

Other
Etched Dies: Spellbinders® Paper Arts (Vintage Stitched Squares, 6×6 Matting Basics B, Swirl Heart, Fancy Edged Ovals, Sew Sweet Sentiments , Platinum 6 Die Cutting and Embossing Machine), Cardstock (White, Grey, Gold, Black, Patterned), Ink Blending tool, Distress inkpad (Seedless Preserves), Scissors, Paper Trimmer, Tweezers


Pin It!

Dimensional Valentine Card…with Love! by Yvonne van de Grijp for Scrapbook Adhesives by 3L

Heart Pinatas for Valentine’s Day

Hi friends! Dana Tatar here today sharing a trio of heart piñatas that I assembled for my sweethearts for the upcoming Valentine’s Day holiday. I applied the NEW Metallic Transfer Foil Sheets Holographic to 3D Foam Hearts for extra sparkle and shine.

Heart Pinatas for Valentine's Day by Dana Tatar for Scrapbook Adhesives by 3L

How to Assemble Heart Piñatas for Valentine’s Day

Heart Pinatas for Valentine's Day by Dana Tatar for Scrapbook Adhesives by 3L

To begin, fill a heart piñata with candy. Next, secure a length of ribbon, that will help break open the box, to the bottom. Then, apply Adhesive Dots and Adhesive Lines to the box flaps and tabs and press to seal.

Heart Pinatas for Valentine's Day by Dana Tatar for Scrapbook Adhesives by 3L

Decorate the outside of the piñatas with fringed paper in a variety of festive colors. Use Extreme Double-Sided Tape to firmly hold the paper to the box.

Heart Pinatas for Valentine's Day by Dana Tatar for Scrapbook Adhesives by 3L

Finally, apply Metallic Transfer Foil Sheets to 3D Foam Hearts. To gild, touch the underside of the foil sheet to an adhesive surface and gently rub. Then, carefully peel away the sheet to reveal the foiled element. Add the foiled hearts to embellished die-cuts and tags and secure them to the front of the heart piñatas.

Designer Note: I used the Gold Holographic Foil from the Metallic Transfer Foil Sheets Holographic on the red and pink piñatas. I used Magenta and Purple Metallic Foil from the Metallic Transfer Foil Sheets Variety on the purple piñata. The jewel tones in this package are gorgeous! These new foil transfer sheets measure 6×12 inches.

Thanks so much for stopping by today! Stop by my blog for the full tutorial.
~Dana

Creative Time: 1 Hour
Skill Level: Beginner

Materials Needed
Scrapbook Adhesives by 3L®

Adhesive Dots Small
Adhesives Lines
Metallic Transfer Foil Sheets Holographic
Metallic Transfer Foil Sheets Variety
3D Foam Hearts

HomeHobby® by 3L
Extreme Double-Sided Tape 1/8in

Other: Heart Pinatas (WRMK); Fringe Paper (WRMK); Tag (Simple Stories); Die-Cuts (Simple Stories); Brads (Simple Stories); Seam Binding Ribbon, Candy

Pin It!

Heart Pinatas for Valentine's Day by Dana Tatar for Scrapbook Adhesives by 3L Pinterest

Visit our Website and Blog!
Sign up for our Newsletter so you never miss a contest or giveaway!

instagram purple icon facebook icon purple pinterest purple icon twitter purple icon YouTube icon blog subscription purple icon

Gift Wrap Valentine’s Day Card

Hi everyone, Christine here today. It’s the beginning of February, the month of Love! There is still plenty of time to create a heart-themed card for that special someone in your life. I’ve up-cycled pretty gift wrap scraps to create this gift wrap Valentine’s Day card, all easily made with the help of 3D Foam products from Scrapbook Adhesives by 3L.

Gift Wrap Valentine's Day Card by Christine Emberson for Scrapbook Adhesives by 3L

Gift Wrap Valentine’s Card Step Outs

Using E-Z Runner® Permanent Strips Refillable Dispenser, I affixed a piece of the pretty gift wrap onto a 5 x 5 card base.

Using matting dies I die cut a square from brown and white cardstock. Stamped across with a script stamp and tied twine. This is held in place on the reverse with Crafty Foam Tape and also when placed onto my card base adds a wonderful dimension.

From pieces of the gift wrap and some scrap patterned paper I die cut various shaped hearts.  These will be held in place with 3D Foam Squares Regular and 3D Foam Squares Small.  If you purchase a mix pack you’ve got both sizes to hand, perfect!

Beginning to position the hearts.

Gift Wrap Valentine's Day Card by Christine Emberson for Scrapbook Adhesives by 3L

The finished card, it’s a Valentine Spring-like card!

Gift Wrap Valentine's Day Card by Christine Emberson for Scrapbook Adhesives by 3L

Thanks for stopping by and wishing you a wonderful Valentine’s Day.
Christine

Creative Time: 30 Minutes
Skill Level: Intermediate

Materials Needed
Scrapbook Adhesives by 3L®

3D Foam Squares White Regular
3D Foam Squares White Small
Crafty Foam Tape
E-Z Runner® Permanent Strips Refillable Dispenser

Other
Craft Dies: Spellbinders® Paper Arts (6 x 6 Matting Basics, Prim Hearts, Classic Hearts); White Card Base; Brown and White Cardstock; Gift Wrap; Scrap Patterned Paper; Twine

Save It to Pinterest!

Gift Wrap Valentine's Day Card by Christine Emberson for Scrapbook Adhesives by 3L Pinterest

Visit our Website and Blog!
Sign up for our Newsletter so you never miss a contest or giveaway!

instagram purple icon facebook icon purple pinterest purple icon twitter purple icon YouTube icon blog subscription purple icon

Valentine’s Love Note Box

Valentine’s Day is right around the corner and my Love Note Box is sure to give you all the heart eyes! Hi friends, Linsey here today sharing this fun and family-friendly Valentine’s project that will have everyone in the house spreading the L.O.V.E.

Valentine's Love Note Box by Linsey Rickett for Scrapbook Adhesives by 3L

Love Note Box Details

Start with a 4 x 4 x 4″ square cardboard box and cover all sides with Valentine’s themed patterned paper using E-Z Runner® Ultra Strong Refillable Dispenser. This adhesive is the best for paper construction like this project. I always use it on my altered and home décor creations and have never been disappointed!

Valentine's Love Note Box by Linsey Rickett for Scrapbook Adhesives by 3L

Decorate the sides with chipboard and puffy stickers. Note that I used 3D Foam Circles White Mix on the back of a few stickers for added dimension and interest.

Valentine's Love Note Box by Linsey Rickett for Scrapbook Adhesives by 3L

For the metal feet and crystalline knob were added with Dual Tip Glue Pen and it held beautifully! Make sure to allow full dry time. Mine dried for 24 hours before continuing, and you’ll be impressed at how well this liquid glue works! The feet are super steady and the knob is holding strong, even with it being used daily to open and close the top of the box.

Valentine's Love Note Box by Linsey Rickett for Scrapbook Adhesives by 3L

Ideas for the Love Note Box

Place the Love Note Box in the family room so everyone can share a sweet thought or two, an encouraging word of support or just a note to say “I love you” through notes! Add a set of note cards inside the box with a pen and brighten a loved one’s day with words. All good stuff. Bring the Love Note Box out year after year and make it a new Valentine’s tradition. Better yet, leave it out for year-round 🙂

Valentine's Love Note Box by Linsey Rickett for Scrapbook Adhesives by 3L

And that’s all for me! Thanks so much for stopping by. I hope you’ve been inspired to make one for your home. Happy crafting!

Creative Time: 60 minutes
Skill Level: Intermediate

Materials Needed
Scrapbook Adhesives by 3L®

E-Z Runner® Ultra Strong Refillable Dispenser
E-Z Runner® Ultra Refill
3D Foam Circles White Mix

HomeHobby by 3L®
Dual Tip Glue Pen

Other
4 x 4 x 4″ Square Cardboard Box; Metal Feet (Graphic 45); Crystal Knob; Satin and Gingham Ribbons; Twine; Decorative Button; Valentine-themed Patterned Papers and Stickers

Love It! Save It to Pinterest!

Valentine's Love Note Box by Linsey Rickett for Scrapbook Adhesives by 3L Pinterest

Visit our Website and Blog!
Sign up for our Newsletter so you never miss a contest or giveaway!

instagram purple icon facebook icon purple pinterest purple icon twitter purple icon YouTube icon blog subscription purple icon

Creative Photo Corner Background

A time for old and a time for new. That’s the theme for today’s post – featuring some older classic products as well as some of our newest products! Christine Meyer joining you today to show you how I made the class Creative Photo Corners pair perfectly with our new foils for a one of a kind Scrapbook Layout! But what really stands out is that this scrapbook layout has a Creative Photo Corner Background.

Creative Photo Corner Background by Christine Meyer for Scrapbook Adhesives by 3L

This is a clean style layout but the background is anything but simple!

Creative Photo Corner Background Details

Creative Photo Corner Background by Christine Meyer for Scrapbook Adhesives by 3L

The entire black and white background that you see is made up of Creative Photo Corners.  This was somewhat tedious but definitely not difficult! It just required me to take my time to line things up! All you really need to make it happen though is a ruler and a lot of the Creative Photo Corners!

Close-ups of the 3D Foam Shapes and Foil Accents

Creative Photo Corner Background by Christine Meyer for Scrapbook Adhesives by 3L

Because of the complexity of the background, it was very important that I keep the embellishing simple so that the picture still stood out! I opted for just some letter stickers, one sheet of patterned paper, and some 3D Foam Products. I created the word smile with my metal die cut machine, a “smile” die, and the 3D Foam Creative Sheets!

Creative Photo Corner Background by Christine Meyer for Scrapbook Adhesives by 3L

Finally, let’s take a look at those stars and all the gorgeous Metallic Transfer Foils Variety and Metallic Transfer Foils Holographic packs! With so many new foils to choose from, you can really make your layouts shine!

I decorated all the 3D Foam Stars with foils and it couldn’t have been easier.  Simply add the 3D Foam Stars, then peel off the top and set the foil on (the pretty side facing up).  You just rub the foil a little and it sticks right to the 3D Foam Products. No extra machines needed!

Thanks for joining me today, I hope I’ve challenged you to think outside the box on things to do on a Scrapbook Layout with Creative Photo Corners!

Creative Time: 90 minutes
Skill Level: Intermediate

Materials Needed
Scrapbook Adhesives by 3L®

E-Z Runner® Grand Refillable Dispenser
3D Foam Creative Sheets White
3D Foam Stars
Metallic Transfer Foils Variety
Metallic Transfer Foils Holographic
Creative Photo Corners Black
Creative Photo Corners White
Crafty Foam Tape White

Other
Patterned Paper & Letter Stickers from Paper House Productions

Love It and Save It to Pinterest!

Creative Photo Corner Background by Christine Meyer for Scrapbook Adhesives by 3L Pinterest

Visit our Website and Blog!
Sign up for our Newsletter so you never miss a contest or giveaway!

instagram purple icon facebook icon purple pinterest purple icon twitter purple icon YouTube icon blog subscription purple icon

Thank You Friends Tutorial

Today I want to share a Thank You Friends card as a thank you from me to you! It’s been quite the experience for me to share my creativity with you all this past year. I appreciate all of your kind comments and checking out my posts on the blog. I hope it inspires you to create and send out those some handmade notes to your friends and family!

Thank You Friends Tutorial by Shannon Morgan for Scrapbook Adhesives by 3L

Thank You Friends Step Outs

Throughout the past year, I hope my step outs helped you get some good tips and tricks along the way 🙂 Here are my last set of steps!

Thank You Friends Tutorial by Shannon Morgan for Scrapbook Adhesives by 3L

Following along the above steps, you can see how I “built” the card.

  1. Begin with a patterned paper card base and add a white cardstock layer. Make sure to leave a border of the card base peeking through. Then add a patterned paper layer.
  2. Apply 3D Foam Squares White in Small on the backs of the die cut flower centers to create dimension for the card. Then place on top of the flower die cuts. Make as many as you’d like. I created two. Set aside.
  3. Layer a few paper layers such as a vellum layer and two patterned paper layers. Along with circle accents in between. Adhered all and the dimensional flowers with the E-Z Runner® Grand Refillable Dispenser.
  4. Add the frame with 3D Foam Squares White in Small to add some dimension to the card. Tab and label stickers were added to the frame. In the final image above, you can see alpha stickers, sequins (secured with the Dual Tip Glue Pen) and other embellishments were used to finish the card.

Thank You Friends Tutorial by Shannon Morgan for Scrapbook Adhesives by 3L


Thanks for letting me inspire you today and during this past year. Be well and keep crafting!

Creative Time: 45 Minutes
Skill Level: Beginner

Materials Needed
Scrapbook Adhesives by 3L®

3D Foam Squares White Small
E-Z Runner® Grand Refillable Dispenser
Adhesive Dots Mini

HomeHobby by 3L®
Dual Tip Glue Pen

Other
Cardstock; Patterned Papers; Sequins; Twine; Alpha Stickers; Label and Tab Stickers; Doily; Heart Kraft Stickers

Pin It!

Thank You Friends Tutorial by Shannon Morgan for Scrapbook Adhesives by 3L Pinterest

Valentine Home Decor

Valentine’s Day is right around the corner!  Shellye here today with a sweet Valentine home decor project using pre-cut wood pieces and scrapbook paper.

Valentine Home Decor by Shellye McDaniel for Scrapbook Adhesives by 3L

Valentine Home Decor Piece Step Outs

Although I ordered my pre-cut kit online, you can find similar designs at craft and hobby stores.  Basically, any wood shapes can be dressed with this easy step!

Valentine Home Decor by Shellye McDaniel for Scrapbook Adhesives by 3L

To begin, I adhered the Adhesive Sheets 6X12 inch to the backside of the patterned paper.  Next, I traced around the wood shape onto the white backing of the adhesive sheet and then trimmed out.  Now I have a solid covering of adhesive that will stay put!

Valentine Home Decor by Shellye McDaniel for Scrapbook Adhesives by 3L

After I completely “dressed” the various pieces with paper, I distressed the edges with walnut ink.  To mimic candy, I added colorful enamel dots.

Valentine Home Decor by Shellye McDaniel for Scrapbook Adhesives by 3L

I added hand-cut flowers to the hearts with 3D Foam Squares, White, Small I embellished the center of the flowers with a small button that I attached with Adhesive Dots Mini.

Valentine Home Decor by Shellye McDaniel for Scrapbook Adhesives by 3L

For the turn knob, I used silver Metallic Transfer Foils Holographic and applied it using Premium Double-Sided Tape.

I hope you enjoyed my Valentine Home Decor piece. Again, you can dress all types of wooden pieces with this easy method!  Thank you for joining us today!

Creative Time: 45 minutes
Skill Level: Intermediate

Materials needed
Scrapbook Adhesives by 3L®

Adhesive Sheets 6X12 inch
3D Foam Squares, White, Small
Adhesive Dots Mini
Metallic Transfer Foils Holographic

Other:
Paisleys & Polka Dots: Wood Kit

Love It! Save It to Pinterest!

Valentine Home Decor by Shellye McDaniel for Scrapbook Adhesives by 3L Pinterest

Visit our Website and Blog!
Sign up for our Newsletter so you never miss a contest or giveaway!

instagram purple icon facebook icon purple pinterest purple icon twitter purple icon YouTube icon blog subscription purple icon

DIY Heart Shaker Card

I have a Love You Heart Shaker Card with lots of shiny foil to share today! Love how pretty the red foil is against the black! This card is perfect for Valentine’s Day which is not far away! It could also be used for an anniversary card.

This card features a heart-shaped shaker created with Crafty Foam Tape Black inside to give space for lots of glitter, tiny hearts, and micro gold beads to shake it. The “Love You” sentiment was cut from 3D Foam Creative Sheet (black sheet) and covered with red foil. Love how pretty and dimensional the words are done that way! If the foam letters tend to stretch because it is a narrow font when removing from the die, cut the words with the die on the printed logo liner side of the 3D Foam Creative Sheets. Mine left a tiny edge of white along the letters in some places so I removed with a point of a craft knife and colored with a red alcohol marker.

DIY Heart Shaker Card Tutorial by Judy Hayes for Scrapbook Adhesives by 3L

Heart Shaker Card Details

Apply a gold crinkle paper on one side of a 3D Foam Creative Sheet in black. Nest two heart etched dies together and place on top of the gold crinkle paper. Secure the dies with washi tape and die-cut to create a gold heart-shaped frame.

For the card layers, I used black cardstock and a larger piece of red cardstock for a beautiful contrast. I stamped a gold script on the black cardstock panel and fastened to the red cardstock using the NEW E-Z Runner® Petite Permanent Dots Refillable Dispenser. Love the size of this new dispenser!

Using the smaller heart die from the same heart dies of the previous step, I die-cut a heart-shaped window from the layered card panel. Take the gold heart-shaped frame from the previous step remove its back liner and place around the card panel window.

Die-cut from clear acetate using the larger heart etched die. Apply Premium Double-Sided Tape 1/8” around the edges of the heart-shaped window on the back of the card panel and place the acetate. Flip the card panel over to place a large 3D Foam Heart on top of the acetate and apply red foil from 3D Foam Creative Embellishment Kit.

Die-cut the sentiment from a black 3D Foam Creative Sheet and apply red foil. So pretty! Then place three small 3D Foam Hearts in a row and covered them with gold foil. To me, the foil reveal is like magic!

DIY Heart Shaker Card Tutorial by Judy Hayes for Scrapbook Adhesives by 3L

Shaking It Up

For the shaker feature, I cut Crafty Foam Tape Black in half lengthwise to make it narrower. Start with the point of the heart-shaped window on the back of the card panel and apply the two pieces on each side along the edges. Snip the edges of the foam tape so it would bend/shape around the curve parts.

A couple of pieces of the Crafty Foam Tape Black were placed behind the large red foil heart to keep its shape.

Now for the fun part: add all the glittery gold and red pieces into the heart shape! To close, I die-cut a large white cardstock heart and applied Crafty Foam Tape Black to fasten over the back of shaker heart.

DIY Heart Shaker Card Tutorial by Judy Hayes for Scrapbook Adhesives by 3L

Fasten the shaker card panel to a white card front with 3D Craft Foam Tape Black around all the edges and in the center, I added a bit of E-Z Runner® Petite Permanent Dots Refillable Dispenser. The final touch was to add a tiny gold cord bow with an Adhesive Dots Micro on top of the large red foil heart.

DIY Heart Shaker Card Tutorial by Judy Hayes for Scrapbook Adhesives by 3L

Thanks for visiting!
Judy

Creative Time: 60 Minutes
Skill Level: Advance

Materials Needed
Scrapbook Adhesives by 3L®

3D Foam Hearts
3D Foam Creative Sheets
Crafty Foam Tape Black
3D Foam Creative Embellishment Kit
Adhesive Dots Micro
E-Z Runner® Petite Permanent Dots Refillable Dispenser

HomeHobby by 3L®
Premium Double-Sided Tape ⅛ʺ

Other:
Penny Black “script” stamp; Imagine Crafts/Tsukineko Delicata Golden Glitz ink; Spellbinders Hearts dies; Clear Acetate; Cardstock: Red, Black, White; Gold Crinkle Paper; Gold Cord; Shaker – Micro Gold Beads, Red Mylar Hearts, Red Chunky Glitter, Red Sequins, Gold Chunky Glitter


Pin It!

DIY Heart Shaker Card Tutorial by Judy Hayes for Scrapbook Adhesives by 3L Pinterest

Textured Background Technique

Hi, everyone! Teri here with a stamped card today that features fun textured inked sky that was easy to create with a little ink, cardstock and adhesive from Scrapbook Adhesives by 3L®.

Textured Background Technique by Teri Anderson for Scrapbook Adhesives by 3L

Creating the Textured Background with Ink

Start with a panel of white cardstock. Use an E-Z Dots® Permanent Refillable Dispenser to randomly apply some dots to it. Make sure your dots are in small groups that are 1/2 inch to an inch long! Go longer and you’ll end up with lines in your sky!

Textured Background Technique by Teri Anderson for Scrapbook Adhesives by 3L

Take a blending sponge and cover it with blue ink. Slowly blend the ink in circles onto the panel.

Apply the ink lightly at first. Keep adding on layers of ink to darken the ink up and expose the adhesive dots.

Textured Background Technique by Teri Anderson for Scrapbook Adhesives by 3L

Once you’ve added as much ink as you desire, use your fingers (or a paper towel) to rub off the dots. You’ll end up with a cool textured ink sky!

Complete your panel by adding some strips of cardstock to mimic grass to it. You’ll also want to add a few stamped critters and a sentiment. Don’t have friendship stamps like the ones I used? That’s OK! Use something you already have.

Textured Background Technique by Teri Anderson for Scrapbook Adhesives by 3L

Creating a Flock Textured Background

Once you’ve completed the panel, you can adhere it to a card! Want to kick things up a notch? Make a textured background on your card! It’s easy!

Textured Background Technique by Teri Anderson for Scrapbook Adhesives by 3L

Grab some 3D Foam Hearts and randomly adhere them on the card. Don’t worry if they are all facing the same direction here. You are going for an unexpected but fun look!

Textured Background Technique by Teri Anderson for Scrapbook Adhesives by 3L

Remove the backing paper from the hearts. Dump flock onto them. Push the flock onto the hearts to make sure they are covered completely with the flock. Remove the excess flock.

Now, you want to do one more round of burnishing. That’s because you really want to make sure the flock is not going to come off the hearts. Take the backing paper from one of the large hearts and rub it onto each of the hearts. (You can also burnish flock with wax paper, but I find the leftover backing paper works just as well!)

Textured Background Technique by Teri Anderson for Scrapbook Adhesives by 3L

Once you’ve completed your flock textured background, add the inked panel to your card.

Textured Background Technique by Teri Anderson for Scrapbook Adhesives by 3L

Creative Time: 45 Minutes
Skill Level: Beginner

Materials Needed
Scrapbook Adhesives by 3L®

E-Z Runner® Grand Refillable Dispenser
E-Z Dots® Permanent Refillable Dispenser
3D Foam Hearts
3D Foam Circles White Mix

Other
Puppy Parents and Puppy Dog Kisses Stamps and Dies by Sunny Studio Stamps; Furever Friends Stamps by Sunny Studio Stamps; Rectangle Die by My Favorite Things; White Flock by Stampendous!; Blue and Black Ink Pads; Markers; Green and White Cardstock

Save It to Pinterest!

Textured Background Technique by Teri Anderson for Scrapbook Adhesives by 3L Pinterest

Visit our Website and Blog!
Sign up for our Newsletter so you never miss a contest or giveaway!

instagram purple icon facebook icon purple pinterest purple icon twitter purple icon YouTube icon blog subscription purple icon

DIY Faux Gold Leaf Succulent Planter

Hi friends! Dana Tatar here today sharing a fun home décor tutorial that features Gold Foil Transfer Sheets to create a faux gold leaf finish. To combat the dreary Winter days I added a pop of color and a touch of glam to my space. I chose a faux cement succulent planter for this project, but any container will work. I know from past experience that I can’t keep house plants alive! I’m really happy with my new statement piece!

DIY Faux Gold Leaf Succulent Planter by Dana Tatar for Scrapbook Adhesives by 3L

How to Apply A Faux Gold Leaf Finish to a Succulent Planter

DIY Faux Gold Leaf Succulent Planter by Dana Tatar for Scrapbook Adhesives by 3L

  1. Adhesive Sheets provide a clear application of strong permanent adhesive for edge-to-edge coverage on all types of surfaces. Begin by selecting the size of Adhesive Transfer Sheet that fits best with your planter size. I used the 4×6 inch sheet. Adhesive Transfer Sheets are offered in 6×12 and 12×12 inch sheets as well.

DIY Faux Gold Leaf Succulent Planter by Dana Tatar for Scrapbook Adhesives by 3L

2.  First, remove the yellow backing paper from the Adhesive Sheet and align the sheet onto the planter. Then, press firmly and rub to transfer the adhesive onto the planter.

DIY Faux Gold Leaf Succulent Planter by Dana Tatar for Scrapbook Adhesives by 3L

3. Cover the adhesive with a Gold Foil Transfer Sheet. Next, rub and peel away to apply the Metallic Transfer Foil to the planter. Repeat steps 2 and 3 until the planter is covered. Gold Foil Transfer Sheets are included in both the 3D Foam Creative Embellishment Kit and the 3D Foam Holiday Embellishment Kit.

DIY Faux Gold Leaf Succulent Planter by Dana Tatar for Scrapbook Adhesives by 3L

4. Once the first application of foil is complete, go back and spot apply adhesive and foil to any areas without foil. It doesn’t have to be perfect! Veining and flaked areas add to the rustic aesthetic of the faux gold leaf finish.

Designer Tip: Try applying Metallic Transfer Foil from used sheets for a more random/natural finish.

How to Seal a Faux Gold Leaf Finish onto a Cement Planter

5. Lastly, seal the planter with a coat of clear gesso.

Thanks so much for stopping by today! I hope your New Year is off to a great start.
~Dana

Creative Time: 1 Hour
Skill Level: Intermediate

Materials Needed:
Scrapbook Adhesives by 3L®
3D Foam Creative Embellishment Kit
3D Foam Holiday Embellishment Kit
Adhesive Sheets 4×6 Inch

Other
Faux Cement Succulent Planter; Clear Gesso (Golden)


Pin It!

DIY Faux Gold Leaf Succulent Planter by Dana Tatar for Scrapbook Adhesives by 3L Pinterest