You are in our US store • Switch to Europe store

E-Z Dots Permanent Background Birthday Card

I created this E-Z Dots Permanent Background Birthday Card with an easy technique using embossing powders and E-Z Dots Permanent Refillable Dispenser or its related products like E-Z Runner® Grand Permanent Dots Refill!

It’s  Judy here today to show you how to make this quick background and embossing powders in different colors to make it your own!
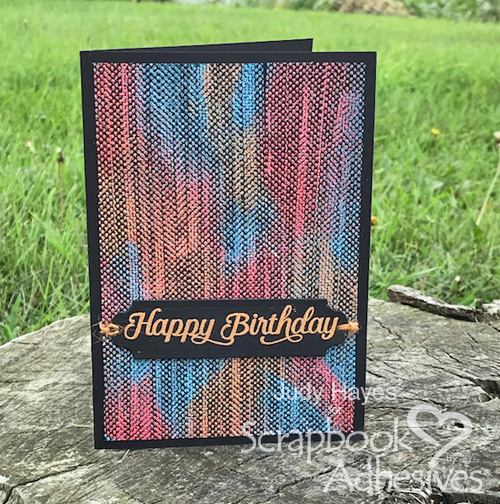
E-Z Dots Permanent Background Birthday Card by Judy Hayes for Scrapbook Adhesives by 3L

Creating the Background

E-Z Dots Permanent Background Birthday Card by Judy Hayes for Scrapbook Adhesives by 3L

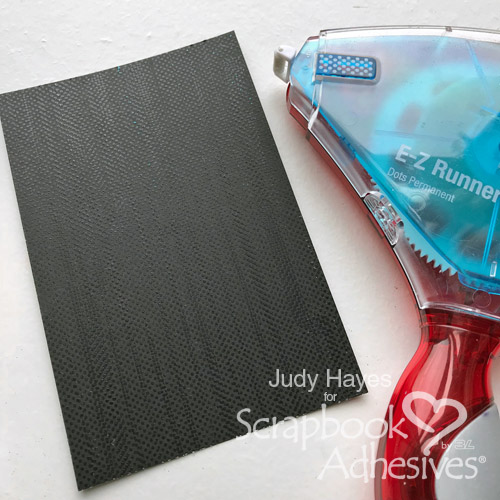
Start with cardstock cut desired finished size.  My piece is 4 x 6 inches. Cover with adhesive dots using E-Z Runner® Grand Refillable Dispenser and E-Z Runner® Grand Permanent Dots Refill. Overlap is okay.

Here’s a quick video on how to change out the E-Z Runner Grand Refills, view below.

Cover with embossing powder of three different colors. First, apply embossing powder from the edge in a small area and remove excess. Next, apply another color allowing excess to slide off over the previously covered area.  Continue with different colors until completely covered.  Heat with a heating tool to melt the embossing powder. Voila! A dots background!
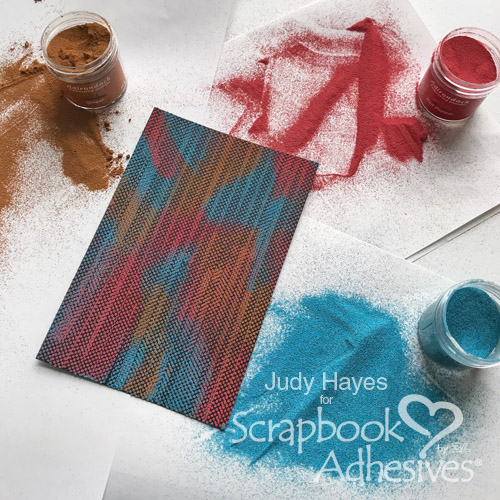
E-Z Dots Permanent Background Birthday Card by Judy Hayes for Scrapbook Adhesives by 3L

Cardmaking Details

E-Z Dots Permanent Background Birthday Card by Judy Hayes for Scrapbook Adhesives by 3L

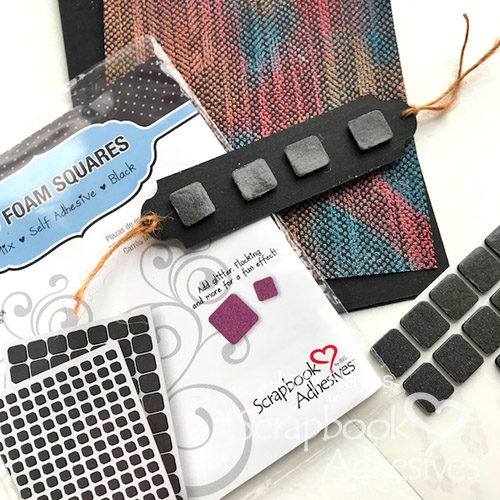
Stamp and heat emboss “happy birthday” on a black cardstock label die cut.  Apply 3D Foam Squares – Black Mix to its back.  Fasten twine to ends.  Position and press in place on dots background piece.  Fasten twine to back with E-Z Runner® Grand Refillable Dispenser with E-Z Runner® Grand Permanent Dots Refill.
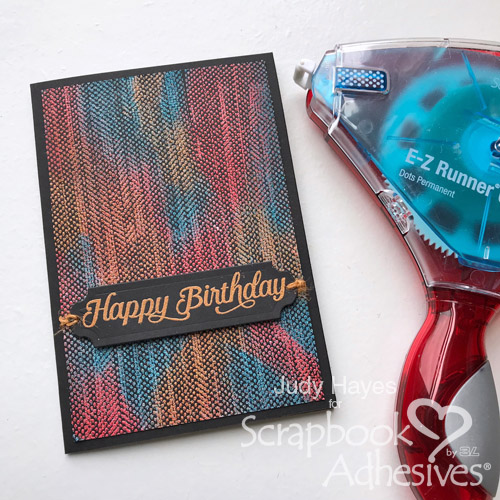
E-Z Dots Permanent Background Birthday Card by Judy Hayes for Scrapbook Adhesives by 3L

Fasten the dots card panel to a 4.5 x 6.5 inch black card base using E-Z Runner® Grand Refillable Dispenser with E-Z Runner® Grand Permanent Dots Refill.
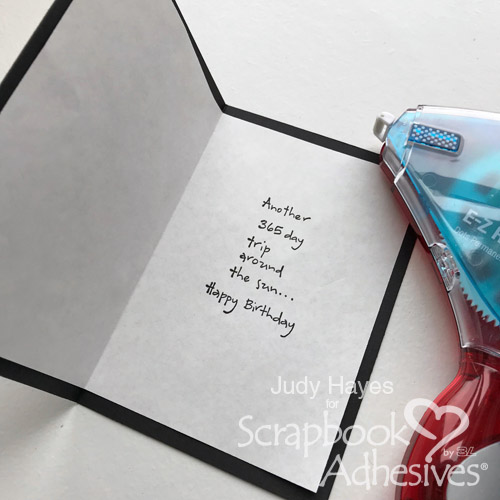
E-Z Dots Permanent Background Birthday Card by Judy Hayes for Scrapbook Adhesives by 3L

Cut 6 x 8.5 inch piece of printer paper.  Fold and stamp with verse.  Fasten inside the card with E-Z Runner® Grand Refillable Dispenser and E-Z Runner® Grand Permanent Dots Refill applied near the fold. Now, it’s ready to be sent!
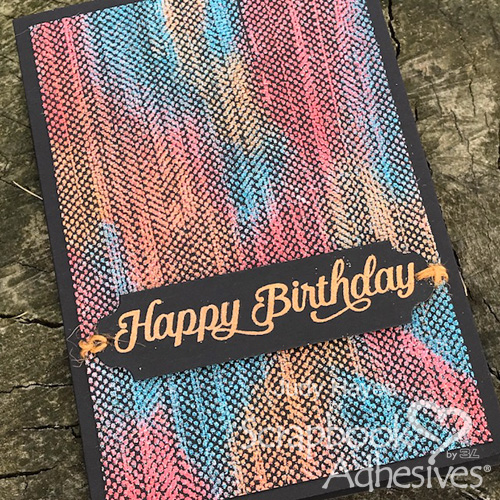
E-Z Dots Permanent Background Birthday Card by Judy Hayes for Scrapbook Adhesives by 3L

This is a technique that can have a totally different look with different embossing powder colors or paper color.  Try it with just one color embossing powder like gold on black!  Or black on bright cardstock! Endless combinations.

Thank you for visiting!
 judy

Creative Time: 30-45 minutes
Skill Level: Intermediate

Materials Needed:
Scrapbook Adhesives by 3L®:
E-Z Runner® Grand Refillable Dispenser
E-Z Runner® Grand Permanent Dots Refill
3D Foam Squares – Black Mix

Other Supplies:
Spellbinders® Paper Arts: Happy Day Elegant; Imagine Crafts/Tsukineko: Versamark Ink; Embossing Powders: Turquoise, Red Pepper, Ginger; Black Cardstock; Twine; White Printer Paper
Interactive Peek-a-Boo Card Tutorial

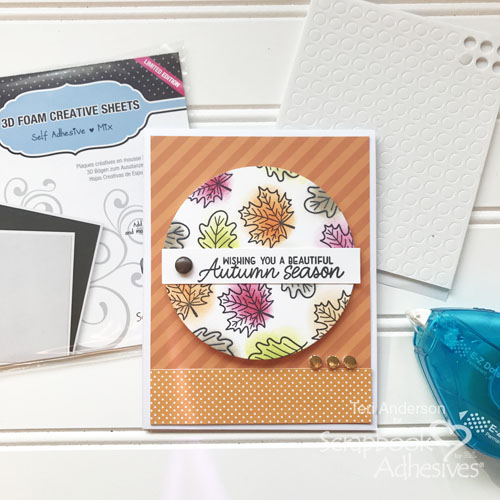
Hi, everybody! Teri here with a stamped card featuring a fun Peek-a-Boo element that’s easy to pull off with the 3D Foam Creative Sheets from Scrapbook Adhesives by 3L.

If you love making interactive cards, you are going to enjoy trying this interactive card making technique!

Interactive Peek-a-Boo Slider Card Tutorial by Teri Anderson for Scrapbook Adhesives by 3L

Creating the Peek-a-Boo Slider!

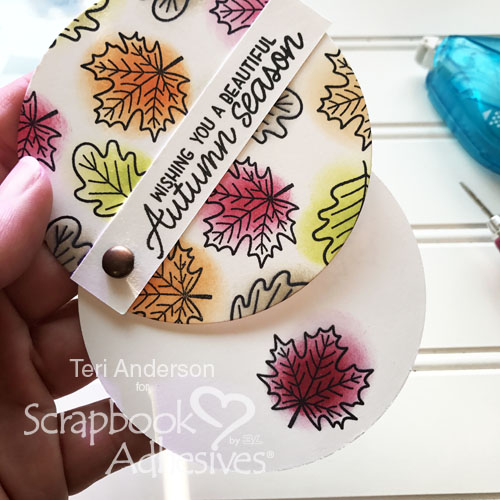
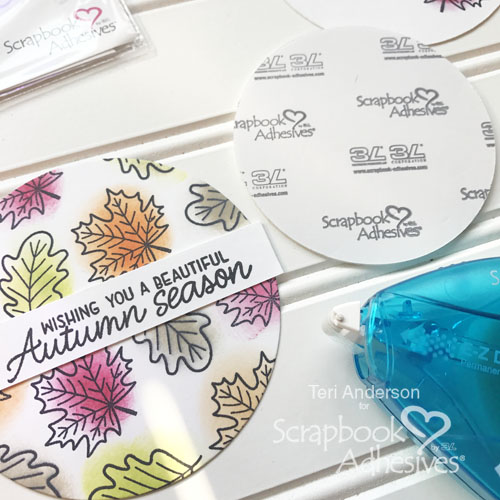
Start by stamping and die-cutting two large circles from cardstock. You’ll also want to die-cut a circle out of one of the 3D Foam Creative Sheets.

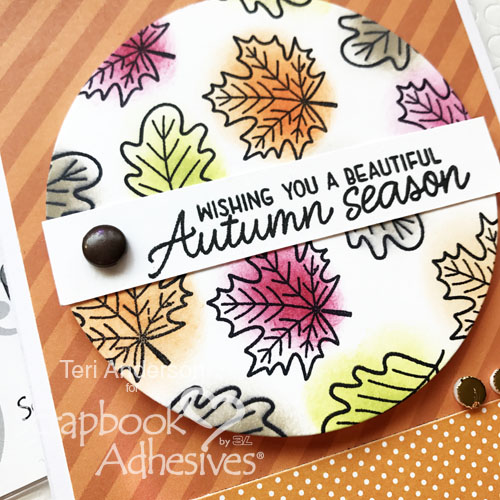
Stamp a sentiment on a strip of cardstock and adhere it to one of the circles. I love using the E-Z Dots Permanent Dispenser for this. If you happen to get some stray adhesive on your work surface or on another piece of paper, it rubs off easily! I love that.

Interactive Peek-a-Boo Card Tutorial by Teri Anderson for Scrapbook Adhesives by 3L

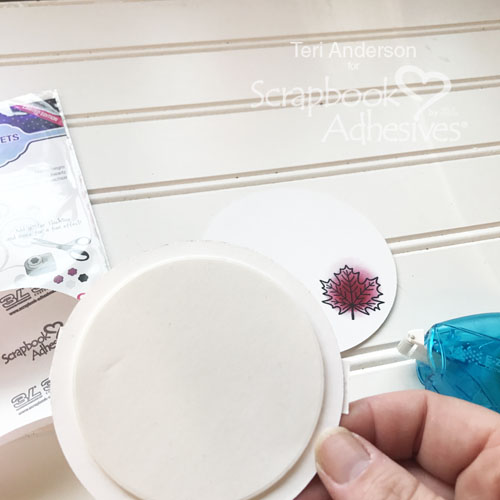
Mount the foam circle to the backside of what will be the top circle. Be sure to leave one side of the foam’s backing paper attached. You’ll see why in a second.

Interactive Peek-a-Boo Card Tutorial by Teri Anderson for Scrapbook Adhesives by 3L

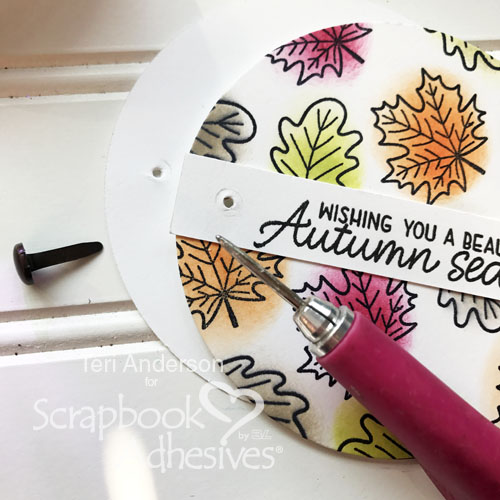
Set the circles on top of each other. Use a push pin or paper piercing tool to poke a hole through both circles.

Interactive Peek-a-Boo Card Tutorial by Teri Anderson for Scrapbook Adhesives by 3L

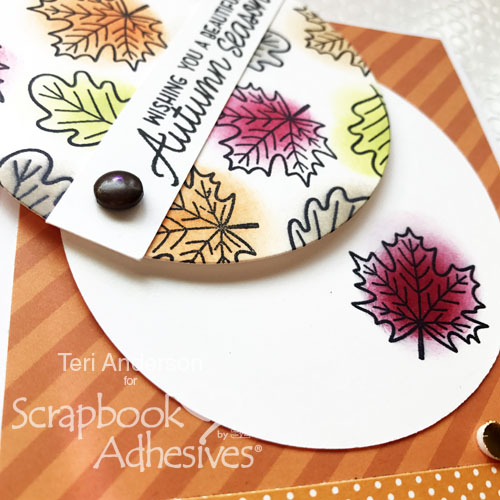
Connect the circles together with a brad. Remember when I said to leave the backing paper on the foam circle? Here’s where the magic comes in! The backing paper helps make the circles easily slide!

Interactive Peek-a-Boo Card Tutorial by Teri Anderson for Scrapbook Adhesives by 3L

Putting the Peek-a-Boo Slider on a Card!

Finish your card by adding your Peek-a-Boo Slider to it. Consider writing a sentiment inside it or adding a few more stamped images.

Interactive Peek-a-Boo Card Tutorial by Teri Anderson for Scrapbook Adhesives by 3L Interactive Peek-a-Boo Card Tutorial by Teri Anderson for Scrapbook Adhesives by 3L

Repeat the circle theme of your card by adding a few small foam circles to it. Making an Autumn-themed card? Remove the backing paper and burnish some foil onto the small circles.

I hope you are inspired to make your own Peek-a-Boo Slider card! If you are, please share a link to your project in the comments! I’d love to see it and leave you some love!

Creative Time: 1 hour
Skill Level: Beginner

Materials Needed:
Scrapbook Adhesives by 3L®:
3D Foam Creative Sheets
3D Foam Circles White Mix
E-Z Dots Permanent Dispenser
3D Foam Creative Embellishment Kit

Other:
Beautiful Autumn stamp set from Sunny Studio Stamps; Circle dies by Spellbinders; Patterned papers from Simple Stories; Green, Orange, Red, Brown and Black Ink Pads; White Cardstock; Brad

Backpack Name Tag with Self-Laminating Cards

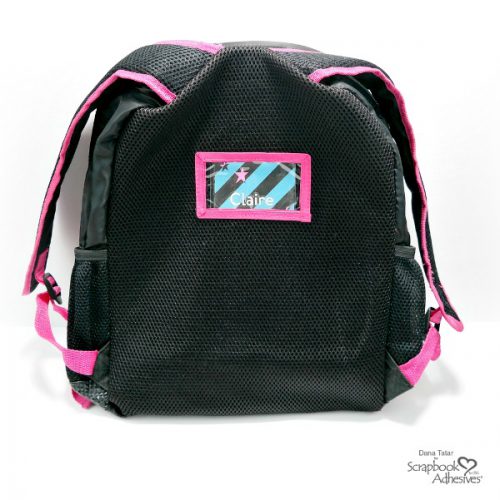
Hi friends! Dana Tatar here with you today sharing a quick craft idea for a child’s backpack during the back-to-school season. My family moved over the Summer, which was equal parts exciting and nerve-racking. My daughters started in a new school a couple weeks ago and I wanted to be sure to have their names somewhere on their belongings. I made way more trips to the lost-and-found last year than I liked and I’m hoping to avoid that this year.

DIY Self-Laminating Backpack Name Tag

I used Adhesive Sheets and Self-Laminating Cards to create personalized backpack name tags. My daughters selected patterned paper and cardstock in their favorite colors. The cards are clear, so I was able to add contact information to the back of each card.

How to Create Backpack Name Tags

Skill Level: Beginner  Project Time: 30 Minutes

How to use Scrapbook Adhesives by 3L Self-Laminating Cards to create a backpack name tag.

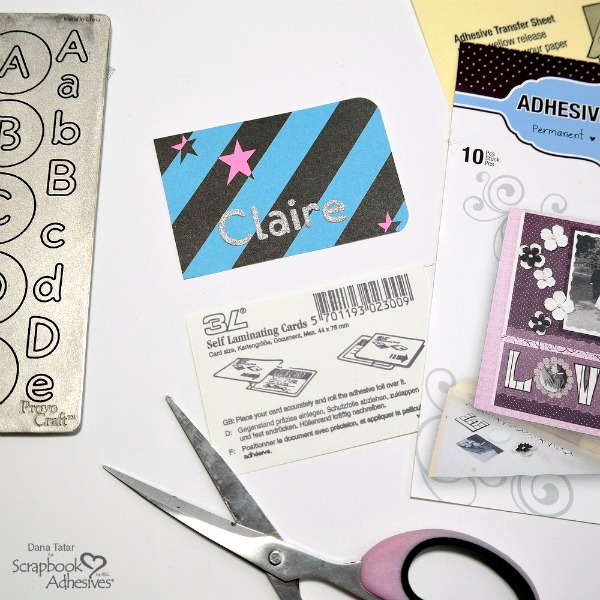
Step 1: Cut a piece of patterned paper to fit inside a Self-Laminating Card. Be sure to cut the patterned paper smaller than the card so that the edges seal. Add contact information to the back of the patterned paper.

Step 2: Remove the yellow backing paper from a 4×6 Adhesive Sheet. Align cardstock onto the adhesive. Use any die-cut machine, punches, or scissors to create letters. Remove the backing liner from each letter and adhere to the card.

Step 3: Place the completed name tag inside the Self-Laminating Card. Remove the liner and press the sides together to seal.

DIY Patterned paper and die-cut glitter letter backpack name tag in a Self-Laminating Card

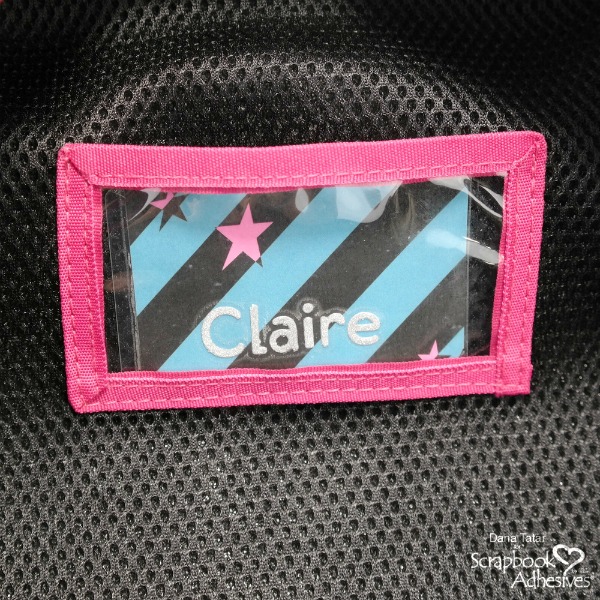
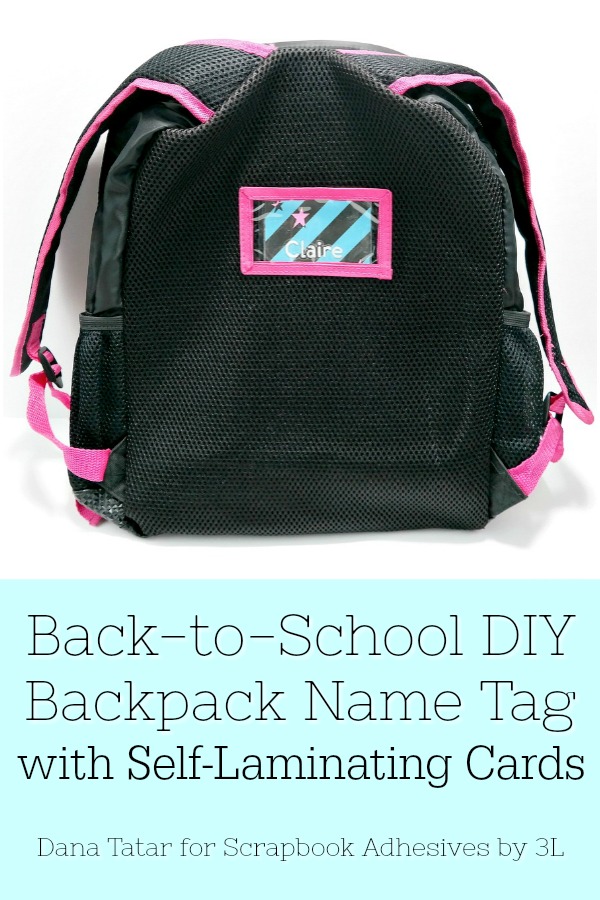
The laminated name tags fit inside the pockets on my daughter’s backpack. Try this project with the Self-Laminating Tags with Loops if a window pocket is not present on the bag.

Thanks for stopping by today. I hope your school-age family and friends have a great year!
~Dana

Scrapbook Adhesives by 3L® Supplies:
Adhesive Sheets 4×6 Inch
Self-Laminating Pouches – Cards Wallet

Other Supplies: Glitter Cardstock (DCVW); Patterned Paper (Bam Pop!); Letter Dies (ProvoCraft); Die-Cut Machine
Pin It!

Back-to-School DIY Backpack Name Tag with Self-Laminating Cards

Fall Leaf Card With Foil Flakes

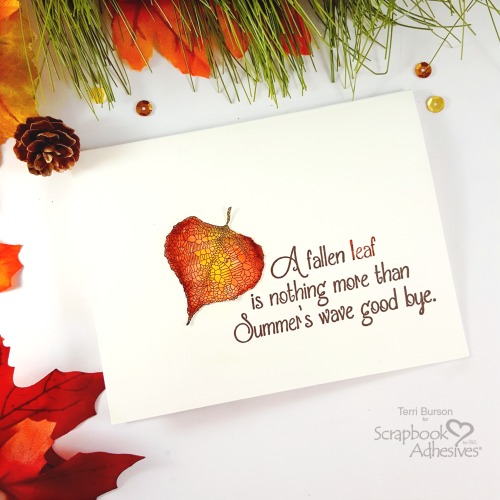
Autumn is officially one month away and I am so ready for its arrival.  Hello, my crafty friends, Terri here, with a Fall leaf CAS card with foil flakes.  What are foil flakes?  Scroll down to find out!

Fall Leaf Card With Foil Flakes by Terri Burson for Scrapbook Adhesives by 3L

Stamping and Coloring

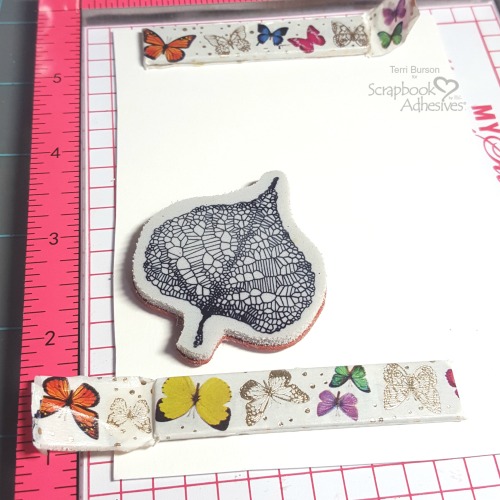
First, I need to color and stamp my leaf. I mostly use mixed media paper for stamping and coloring, along with hybrid ink to stamp. It’s the perfect combination to color and not worry about my ink bleeding. I’ve used brush markers for coloring today.

Fall Leaf Card With Foil Flakes by Terri Burson for Scrapbook Adhesives by 3L

Dual Tip Glue Pen for Foil Flakes

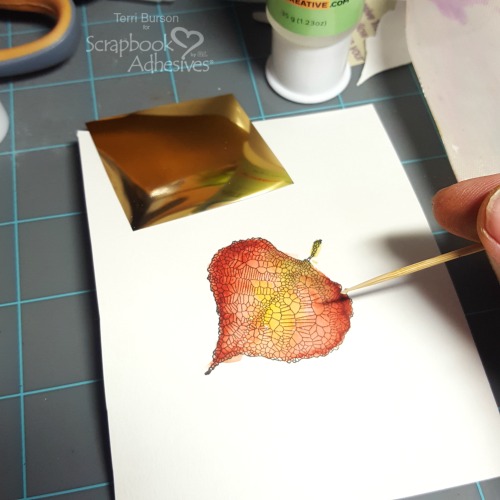
I wanted just a touch of foil on my leaf. To achieve this, I dropped a bit of glue from my Dual Tip Glue Pen onto my craft mat and dabbed the glue with a toothpick. Taking care not to be heavy handed with the glue, I just touched tiny drops to the leaf, waited just a minute, then applied the foil from the 3D Foam Creative Embellishment Kit, shiny side up. I gently rubbed the foil and used my craft heat gun to zap a little heat.

Fall Leaf Card With Foil Flakes by Terri Burson for Scrapbook Adhesives by 3L

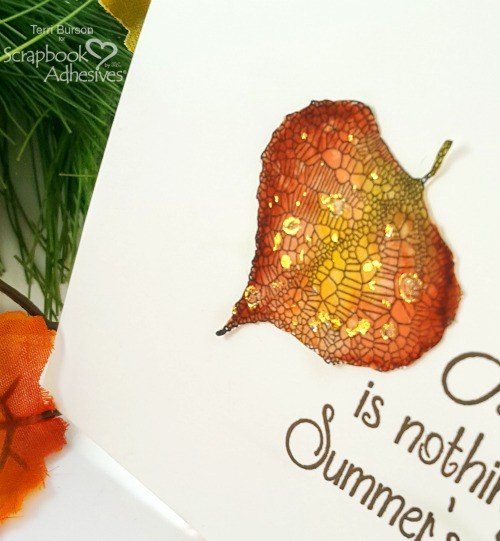
Once I peeled the foil lining, there were scattered tiny flakes of foil.  Now, you can “Wear Your Adhesive On The Outside!”  You may wish to repeat this technique to get more flakes, as desired.  Next, it’s time to fussy cut my leaf and apply it to my card. My E-Z Runner® Grand Refillable Dispenser with E-Z Runner® Grand Ultra Strong Refill cartridge make this possible. I call it, the “Dynamic Duo!”

Fall Leaf Card With Foil Flakes by Terri Burson for Scrapbook Adhesives by 3L

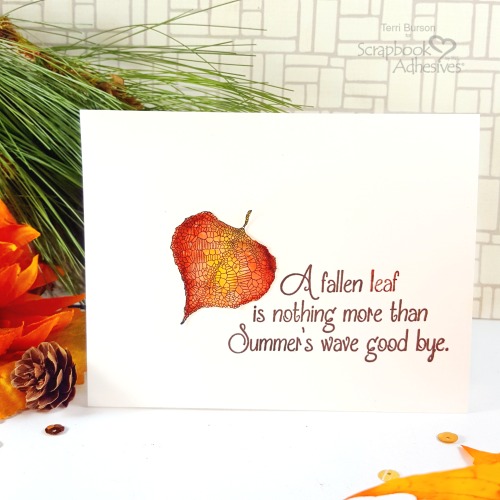
It is so hard to capture the flakes of foil in a straight shot but you can see the shimmery gold at this angle.  Quick and easy detailing that adds that extra wow factor to your projects.

Fall Leaf Card With Foil Flakes by Terri Burson for Scrapbook Adhesives by 3L

If you’re interested in the products that I’ve used on today’s project, be sure to stop by my blog at Waving My Wand for product links.   See you next time….Terri

  • Creative Time: 15 Minutes
    Skill Level: Beginner

Materials Needed:
Scrapbook Adhesives by 3L®:

3D Foam Creative Embellishment Kit
E-Z Runner® Grand Ultra Strong Refill
E-Z Runner® Grand Refillable Dispenser

Home Hobby® Adhesives:
Dual Tip Glue Pen

Other Products Used:
Crackerbox & Suzy Stamps, Scissors, mixed media paper, Misti, brush markers, water brush, craft mat, heat tool, ink

Cute Birthday Card with Adhesive Dots

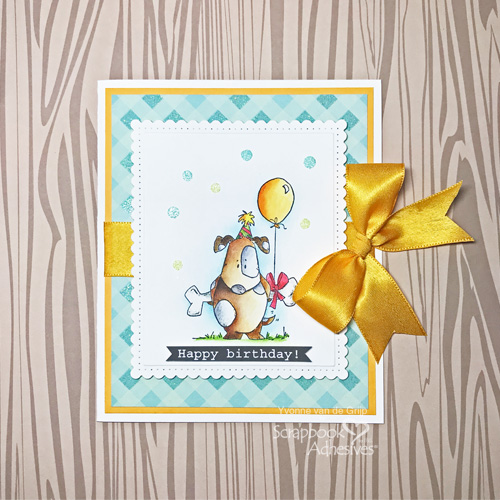
Hi everyone! Do you like cute and funny cards? Yvonne here today sharing a birthday card featuring Crafty Foam Tape White and Adhesive Dots.

Cute Birthday Card with Adhesive Dots by Yvonne van de Grijp for Scrapbook Adhesives by 3L

I love cute stamps and being a dog lover I chose a doggy stamp for today’s birthday card. And with happy and bright colors added…well…who would not get a big smile on their face receiving this card? Let me show you how to make the card. So….are you ready?

Making the Card Base

First, mount a piece of patterned cardstock onto yellow cardstock using the E-Z Runner® Grand Refillable Dispenser.

To adhere the ribbon, run the E-Z Runner® Grand Refillable Dispenser onto its back.

After wrapping the ribbon around the layered panel, fold the ends to the back of the panel and then adhere the panel to a white card base.

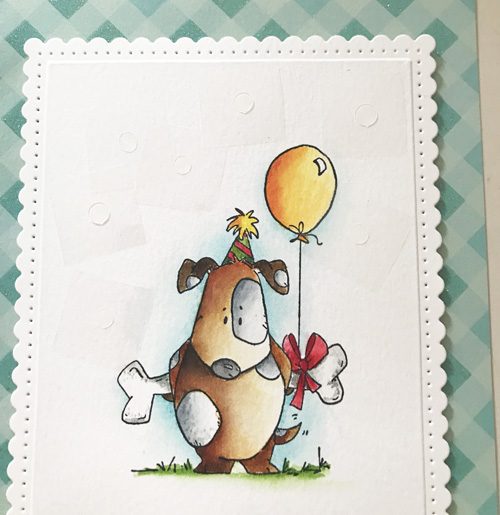
Now stamp the cute dog image onto cardstock and color the image. (Because I chose watercolors for coloring I used  watercolor cardstock).

After coloring, die-cut and emboss the image.

Cute Birthday Card with Adhesive Dots by Yvonne van de Grijp for Scrapbook Adhesives by 3L

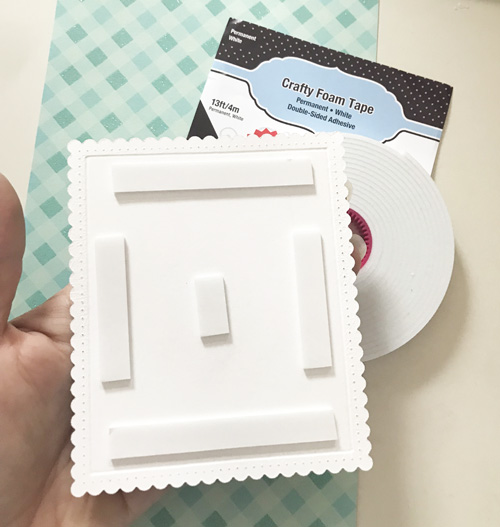
To create an extra dimensional layered panel on the card, adhere some Crafty Foam Tape White to the back of the die-cut. Then remove the line and adhere to the card base.

Embellishing the Card

First I printed a happy birthday banner and cut it to the right size using a paper trimmer and scissors so it will fit the card best.

Then to adhere the sentiment right under the stamped image. For this you best use some Crafty Foam Tape White (which you cut into small stripes so it will not be sticking out from under the birthday sentiment).

Cute Birthday Card with Adhesive Dots by Yvonne van de Grijp for Scrapbook Adhesives by 3L

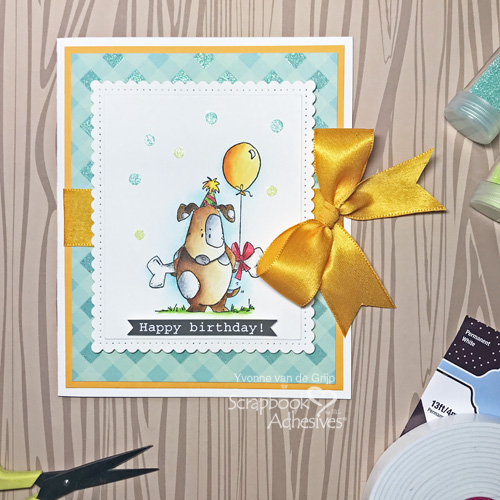
Now adhere some Adhesive Dots Micro and Adhesive Dots Mini onto the card. (I put them around the head of the dog so they look like bubbles). Next, you remove the liner from some of the Adhesive Dots and then sprinkle some blue glitter upon and gently rub over the Adhesive Dots. As a result, the glitter will stick better to the Adhesive Dots.

Next, you remove the liner from the other Adhesive Dots and sprinkle some green glitter upon. Work color by color because this way your glitter colors will not get mixed up on your card and as a result, you will get clean (single color) glittered Dots.

Finally, finish the card by adding a satin bow which I adhered using Adhesive Dots.

And voila…. now your cute doggy birthday card is ready so you can give it to someone special!

Cute Birthday Card with Adhesive Dots by Yvonne van de Grijp for Scrapbook Adhesives by 3L

Creative Time: 90 minutes (with coloring time)
Creative Skill: Intermediate

Materials Needed:
Scrapbook Adhesives by 3L®:
E-Z Runner® Grand Refillable Dispenser
Crafty Foam Tape White
Adhesive Dots Micro
Adhesive Dots Mini

Other Supplies:
Edged Dies: Spellbinders® Paper Arts (Fancy Edged Rectangles), Cardstock (Watercolor, White, yellow, patterned), Whipper Snapper  Designs (stamp Birthday Surprise), Ribbon, glitter, Paper Trimmer, Scissors
Visit our Website and Blog!
Sign up for our Newsletter so you never miss a contest or giveaway!

instagram purple icon facebook icon purple pinterest purple icon twitter purple icon YouTube icon blog subscription purple icon

Creative Photo Corner Sunflowers

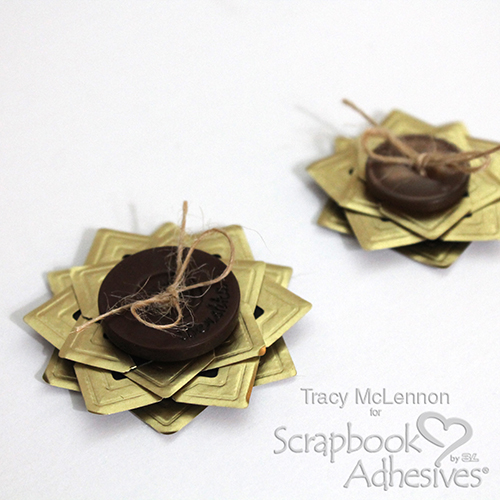
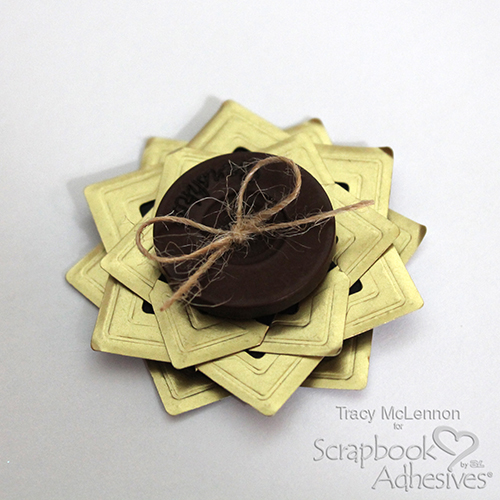
Welcome back my crafting friends! Today I have a sweet and easy little tutorial to share. Here is how I created these simple Creative Photo Corner Sunflowers.

I love to create quick and easy embellishments that I can add to future projects. Here is the complete tutorial on how you can create these sweet and easy Creative Photo Corner Sunflowers.

Creative Photo Corner Sunflowers by Tracy McLennon for Scrapbook Adhesives by 3L

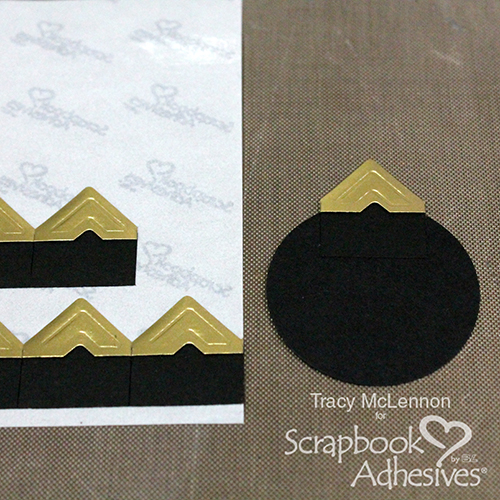
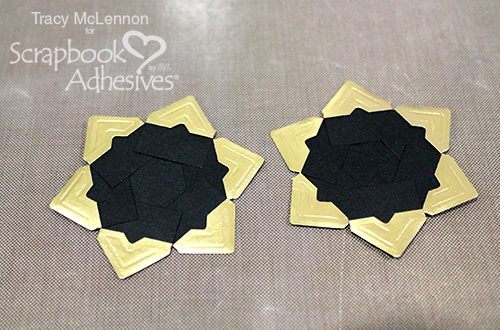
First of all, I cut out two 1.5″ circles from black cardstock. Then I started adding the Gold Creative Photo Corners around the circle. You can see below how I lined up the gold edge with the edge of the black cardstock circle.

Creative Photo Corner Sunflowers by Tracy McLennon for Scrapbook Adhesives by 3L

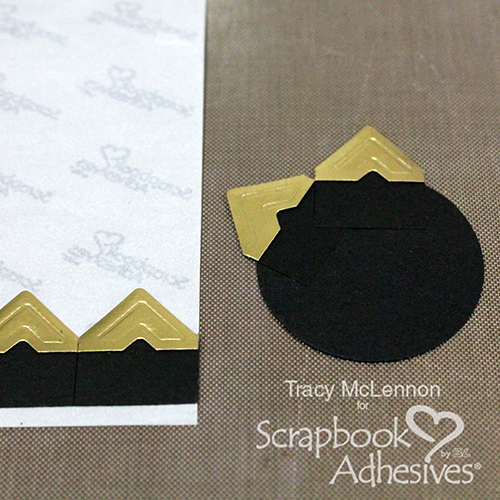
Then in the next photo you see that I add the next Creative Photo Corner right next to the last and continue.

Creative Photo Corner Sunflowers by Tracy McLennon for Scrapbook Adhesives by 3L

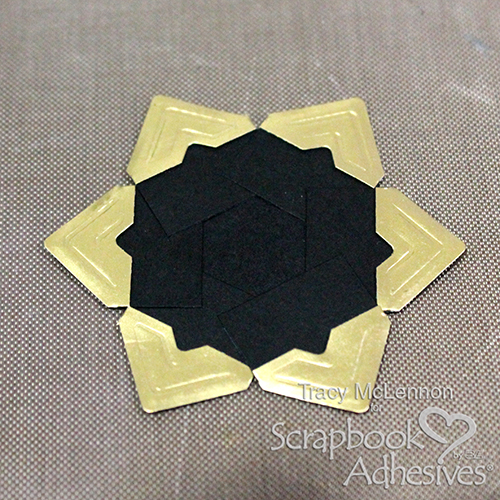
With the 1.5″ circle, you should be able to fit 6 Creative Photo Corners around. Do the same with the second 1.5″ circle.

Creative Photo Corner Sunflowers by Tracy McLennon for Scrapbook Adhesives by 3L

Creative Photo Corner Sunflowers by Tracy McLennon for Scrapbook Adhesives by 3L

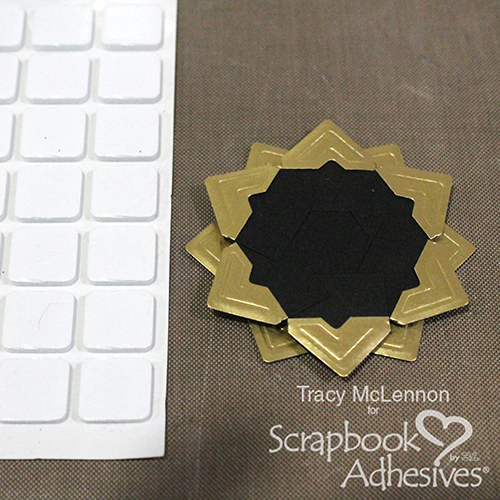
Adhere these 2 circles together using 3D Foam Squares White Regular.

Creative Photo Corner Sunflowers by Tracy McLennon for Scrapbook Adhesives by 3L

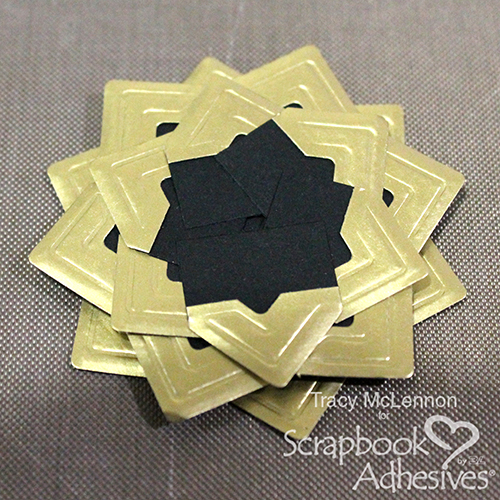
Using a 1″ cardstock circle, repeat the same process overlapping the Creative Photo Corners just a little bit more than before. Adhere that smaller circle directly to the layers below using Adhesive Dots Medium.

Creative Photo Corner Sunflowers by Tracy McLennon for Scrapbook Adhesives by 3L

To complete the sweet and easy Creative Photo Corner Sunflowers, I added a large brown button with a burlap string bow tie, using Adhesive Dots Medium.

Creative Photo Corner Sunflowers by Tracy McLennon for Scrapbook Adhesives by 3L

Thanks so much for stopping by!
Tracy

Creative Time: 20 Minutes
Skill Level: Beginner

Materials Needed:
Scrapbook Adhesives by 3L®:
Adhesive Dots Medium
Creative Photo Corners Gold
3D Foam Squares White Regular Size

Other Products Used:
Circle Punches- 1″ and 1.5″, Black Cardstock


Sublime Birthday Card

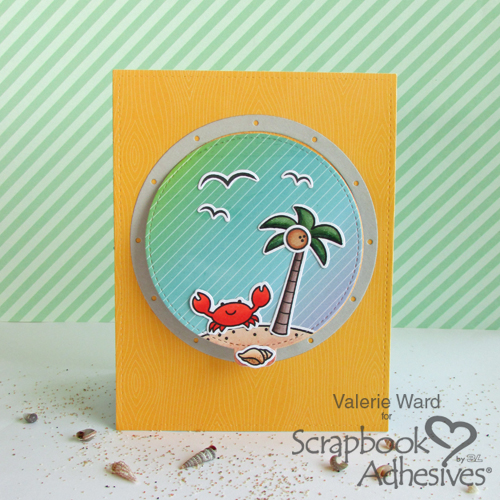
I have a super-duper, color-filled, fun & crazy-busy birthday card for you! Hello, crafters! It’s Valerie here today sharing how I use my Scrapbook Adhesives by 3L® adhesives to really help me get through all the adhering of images with ease!

Sublime Birthday Card by Valerie Ward for Scrapbook Adhesives by 3L

Let’s Celebrate a Birthday!

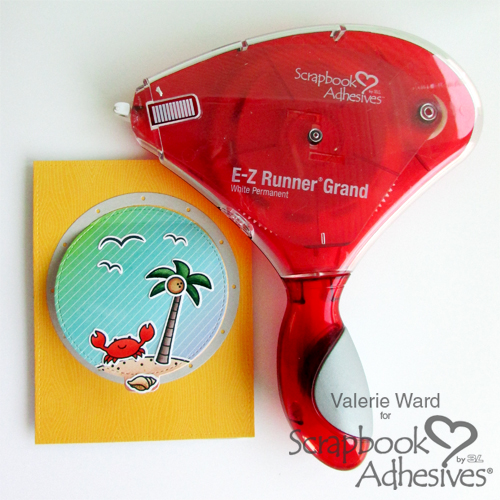
First, I started by using my E-Z Runner Grand Refillable Dispenser to adhere the yellow sheet onto the front of the cardstock. The colored images and the porthole frame were all adhered with Permanent Fine Adhesive.

Sublime Birthday Card by Valerie Ward for Scrapbook Adhesives by 3L

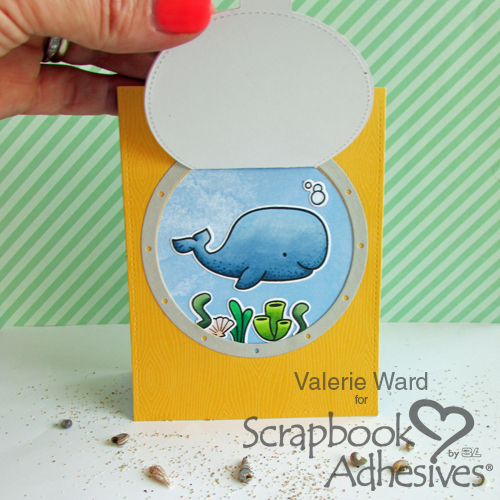
The porthole frame, the colored images, and the patterned paper were adhered to the card front using Permanent Fine Adhesive.
Sublime Birthday Card by Valerie Ward for Scrapbook Adhesives by 3L

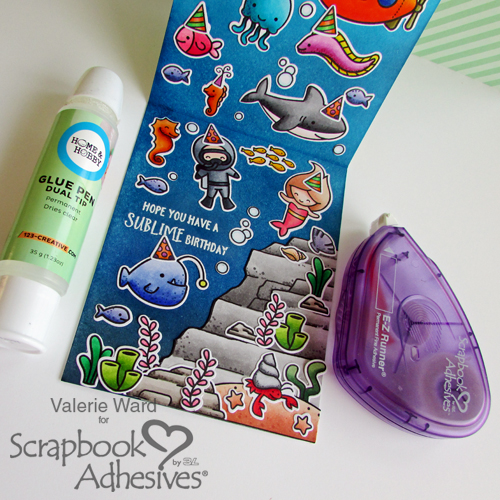
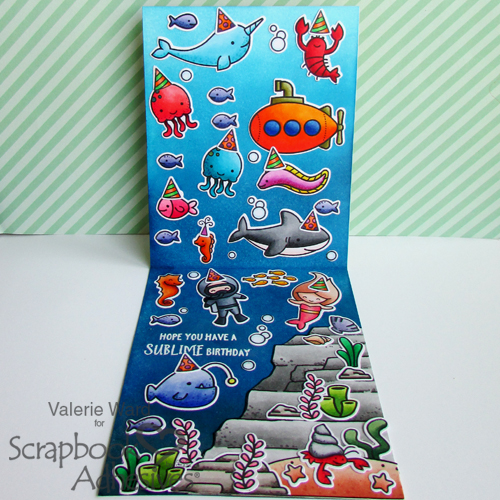
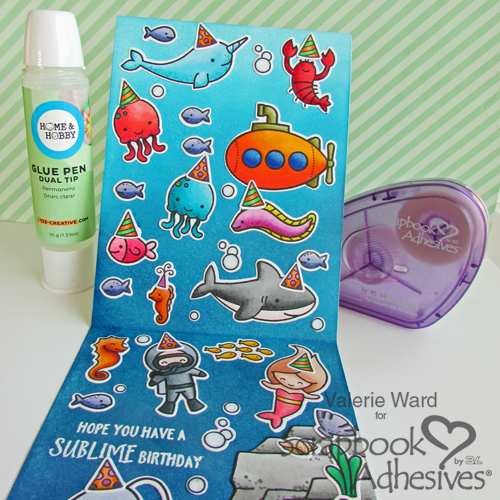
On the inside of the card, all the colored images were also adhered using either Permanent Fine Adhesive or the Dual Tip Glue Pen.
Sublime Birthday Card by Valerie Ward for Scrapbook Adhesives by 3L

It looks like quite the party, doesn’t it?!

Sublime Birthday Card by Valerie Ward for Scrapbook Adhesives by 3L

Sublime Birthday Card by Valerie Ward for Scrapbook Adhesives by 3L

Thanks for stopping by and checking out the project we have for you today!
Valerie

  • Creative Time: more than 90 minutes
  • Skill Level: Beginner

Materials Needed:
Scrapbook Adhesives by 3L:

E-Z Runner Grand Refillable Dispenser and E-Z Runner Grand Permanent Strips Refill
E-Z Runner Permanent Fine Adhesive

HomeHobby by 3L®:
Dual Tip Glue Pen

Pretty in Pink with Creative Photo Corners

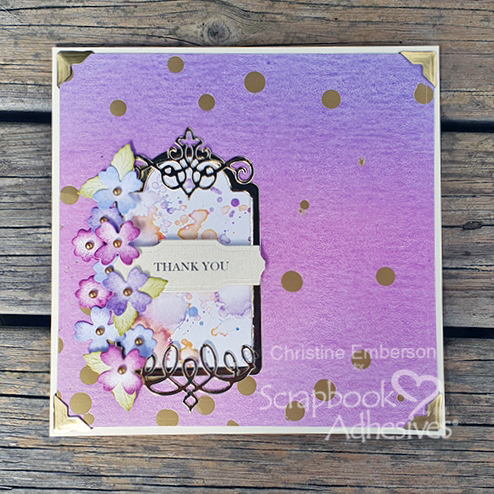
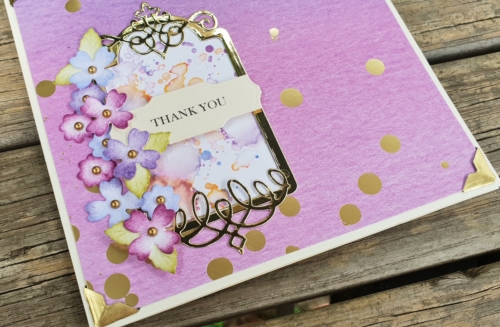
Christine here,  I’ve chosen to use Creative Photo Corners Gold to add a touch of glamour to my pretty in pink flowery card.  Please take a look to see how this card is easily made with Scrapbook Adhesives by 3L products.

Pretty in Pink with Creative Photo Corners by Christine Emberson for Scrapbook Adhesives by 3L

Let’s Start

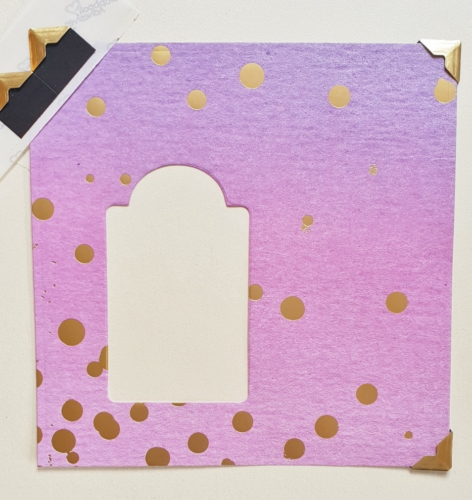
I selected a pretty pink and gold design patterned paper from Paper House Productions – Color Washed Collection, die-cut a tag aperture and affixed a Creative Photo Corners Gold to each corner.

Pretty in Pink with Creative Photo Corners by Christine Emberson for Scrapbook Adhesives by 3L

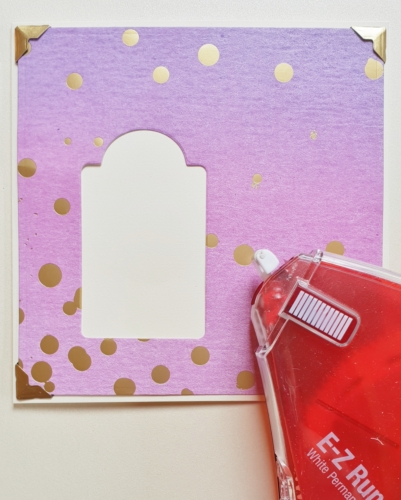
I matted this onto an ivory card base using E-Z Runner Grand Refillable Dispenser.  Because this adhesive is dispensed in little strips this makes it ideal to apply as little or as much as you need, also with 150 feet of adhesive you are not refilling very often!

Pretty in Pink with Creative Photo Corners by Christine Emberson for Scrapbook Adhesives by 3L

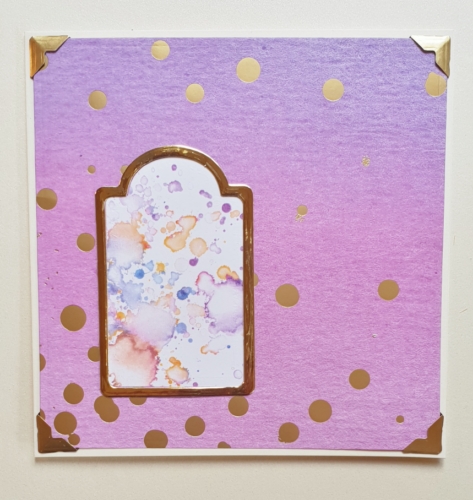
For the aperture feature, I reversed the patterned paper.  I die cut a frame from gold mirror card to coordinate with the corners.

Pretty in Pink with Creative Photo Corners by Christine Emberson for Scrapbook Adhesives by 3L

The 3D Foam Squares White Small are ideal for embellishments and perfect for this sentiment label. It is possible to have both sizes of foam squares in one pack with 3D Foam Squares White Mix.

Pretty in Pink with Creative Photo Corners by Christine Emberson for Scrapbook Adhesives by 3L

The finished project with added tiny flowers, gemstones, and those shining Creative Photo Corners Gold.

Pretty in Pink with Creative Photo Corners by Christine Emberson for Scrapbook Adhesives by 3L

Be sure to check out all the super handy adhesives on the website. Thanks for stopping by!
Christine Emberson

  • Creative Time: 30 minutes
  • Skill Level: Beginner

Scrapbook Adhesives by 3L®:
E-Z Runner Grand Refilliable Dispenser
Creative Photo Corners Gold
3D Foam Squares White Small

Others:
Dies: Spellbinders Paper Arts (6×6 Matting Basics, Swirl Tags)
Ivory Card Base; Gold Mirror Card; Watercolour Card; Distress Inks; Patterned Paper: Paper House – Color Washed

You Lift Me Up Dimensional Card

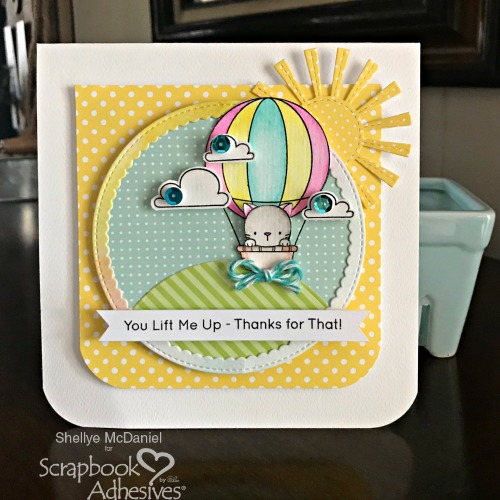
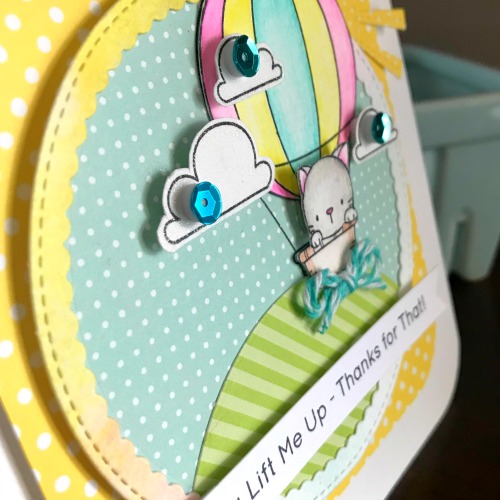
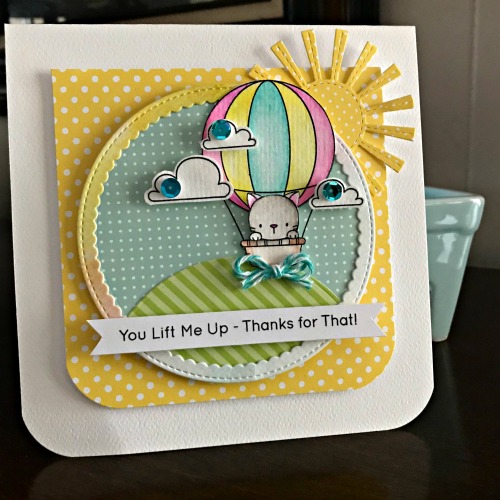
Hi there!  Shellye McDaniel along today with a sweet dimensional You Lift Me Up card to bring a smile to someone special 🙂

You Lift Me Up Dimensional Card by Shellye McDaniel for Scrapbook Adhesives by 3L

I started with this adorable Up In The Air stamp set and the Stitched Circle Frame Dies from My Favorite Things. Both sets really went well together – don’t you think?

You Lift Me Up Dimensional Card by Shellye McDaniel for Scrapbook Adhesives by 3L

Making Dimensional Elements Happen

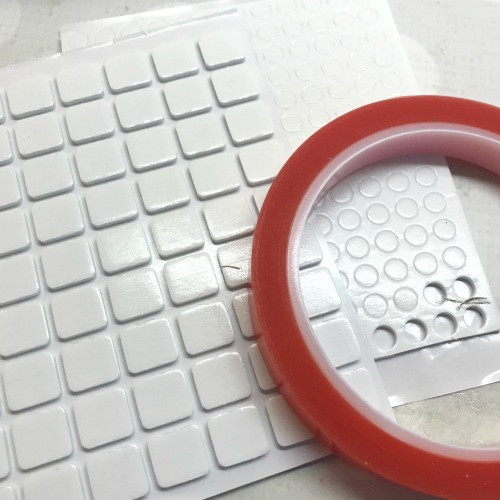
After cutting the white card base to 6 x 6″, I layered on a card panel using 3D Foam Squares White Regular to give it its first layer of dimension.

Next, I die-cut the circle shapes and the sun shape. For the grassy hill, I die-cut using half of a circle. Assemble the circles and hill using Extreme Double-Sided Tape 1/2″.

You Lift Me Up Dimensional Card by Shellye McDaniel for Scrapbook Adhesives by 3L

After I stamped the images onto watercolor paper, I colored and fussy cut them out.

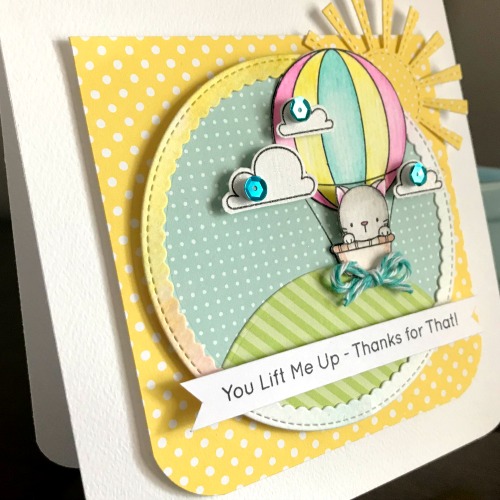
To give the sequins some fun dimensional interest, I used 3D Foam Circles White Mix in the smaller size to attach the sequins to the clouds. The clouds, cat and balloon basket were popped up with the 3D Foam Circles too!

I found the Extreme Double-Sided Tape 1/2″ to be perfect for adding the other pieces to the card. Used the embellished circle die cut as a guide to adhere the sun die cut.

Lastly, the embellished circle die cut adhered with 3D Foam Squares White Regular for another dimensional layer.

You Lift Me Up Dimensional Card by Shellye McDaniel for Scrapbook Adhesives by 3L

In finishing, I stamped the sentiment onto cardstock, trimmed it out and then fish-tailed the ends.  Just added it to the card front with the 3D Foam Circles White Mix.

You Lift Me Up Dimensional Card by Shellye McDaniel for Scrapbook Adhesives by 3L

Now this You Life Me Up Dimensional Card is ready to send off!

Thank you for joining us today!

  • Creative Time: 30 minutes
    Skill Level: Intermediate

Materials Needed:
Scrapbook Adhesives by 3L® Products used:

3D Foam Circles White
3D Foam Squares White Regular

HomeHobby by 3L®:
Extreme Double-Sided Tape 1/2″

Stamps: My Favorite Things

Patterned Paper: Echo Park Paper

Sea Life Card with 3D Foam Creative Sheets + Foil

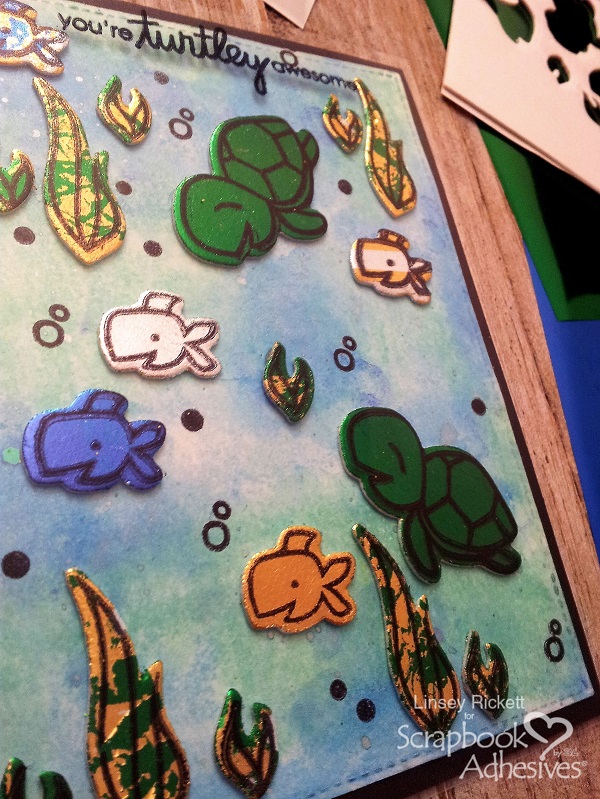
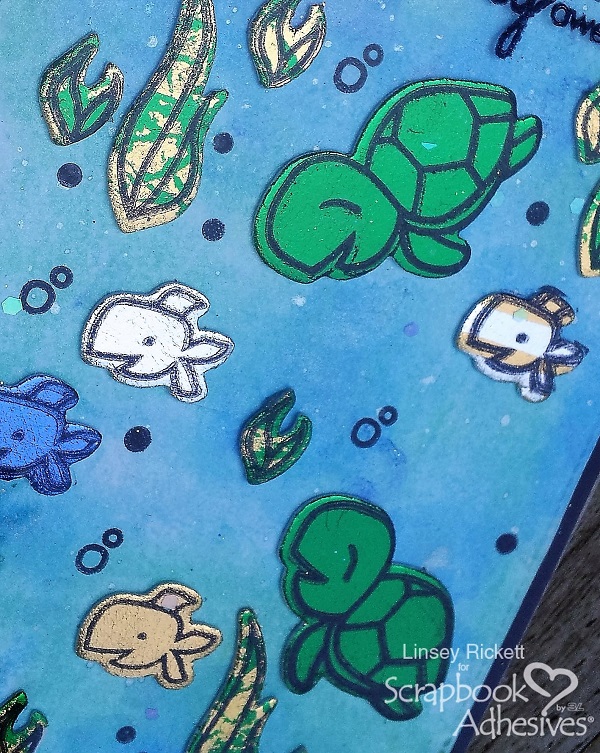
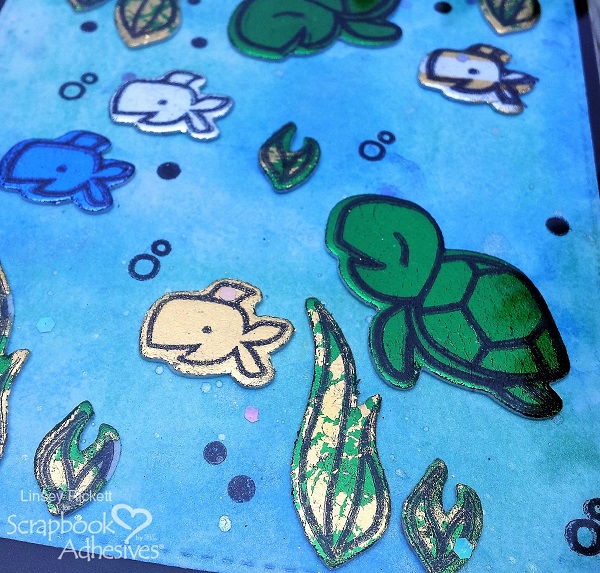
Making sea creatures come to life with 3D Foam Creative Sheets and foil is a whale of a good time! Hello there, Linsey here today sharing a colorful under the sea card featuring the 3D Foam Creative Embellishment Kit.

Sea Life Card with 3D Foam Creative Sheets + Foil by Linsey RIckett for Scrapbook Adhesives by 3L

Creating a Sea Life Card Background

The background was created using mixed media techniques. First, cut a white cardstock card panel to size and prep with a layer of gesso.

Once dry, apply shades of blue and green Gelatos and spritz with water to activate the color. Create as much depth as desired by moving the color around on the cardstock panel while wet. Using a heat gun in random spots to pool.

Dip a paintbrush tip into silver ink spray bottle and flick lightly with the tip facing the panel several times to create a shimmering reflective light effect in the water.

Adding tiny bits of sequin glitter is another option. Now we have a perfect base from which to build a colorful metallic under-the-sea scene upon…

Sea Life Card with 3D Foam Creative Sheets + Foil by Linsey RIckett for Scrapbook Adhesives by 3L

Making Sea Creatures

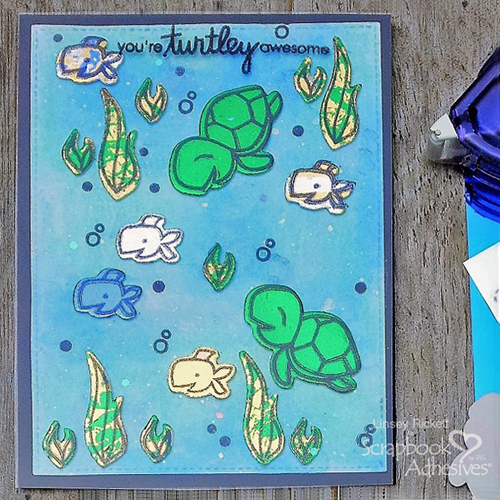
Using the 3D Foam Creative Embellishment Kit, die-cut turtle, fish, and seaweed shapes several times each from 3D Foam Creative Sheet. Create the desired scene by arranging the die cut shapes on the panel before removing the backings. Once decided, adhere them permanently to the base.

Begin applying foils to each piece individually by removing the top liner and applying different colored foils (touch the foil to the exposed adhesive with the colorful side facing up). A couple different ways to do this is by applying 1 solid color to a shape or 2 or more colors to a single shape, as was done on the seaweed plants.

Have fun experimenting with the 3D Foam Creative Embellishment Kit and discover different ways to use foils to shapes!

Sea Life Card with 3D Foam Creative Sheets + Foil by Linsey RIckett for Scrapbook Adhesives by 3L

Finish card by stamping coordinating images over the foiled shapes with black permanent ink. If desired, add a stamped sentiment.

Adhere underwater panel to the card base with E-Z Runner® Grand Refillable Dispenser.

For interest, a clear plastic window sheet was applied over the entire front of the card with a bit of E-Z Runner® Permanent Fine Adhesive Dispenser.

Sea Life Card with 3D Foam Creative Sheets + Foil by Linsey RIckett for Scrapbook Adhesives by 3L

Thanks so much for stopping by today! Create with 3D Foam Creative Embellishment Kit and share your beautiful art with us! Until next time, happy crafting!

  • Creative Time: 1 Hour
  • Skill Level: Intermediate

Linsey

Materials Needed
Scrapbook Adhesives by 3L®:

E-Z Runner® Grand Refillable Dispenser
3D Foam Creative Embellishment Kit
E-Z Runner® Permanent Fine Adhesive Dispenser

Other:
White and Black Cardstock; Stamp and Die (Courteous Cuties set by Paper Smooches); Cuttlebug Diecutting Machine; Gesso; Gelatos/Water Spritzer/Paintbrush; Heat Gun (optional); Tattered Angels Glimmer Mist-Silver Sugar; Iridescent Glitter Flakes; Jet Black Staz On Ink; Clear Plastic Window Sheet