You are in our US store • Switch to Europe store

Cyanotype Prints with 3D Foam Shapes

Hi friends! Dana Tatar here today sharing a super fun kids craft tutorial. School is out for Summer and I’m looking for ways to unplug from technology and enjoy the great weather.
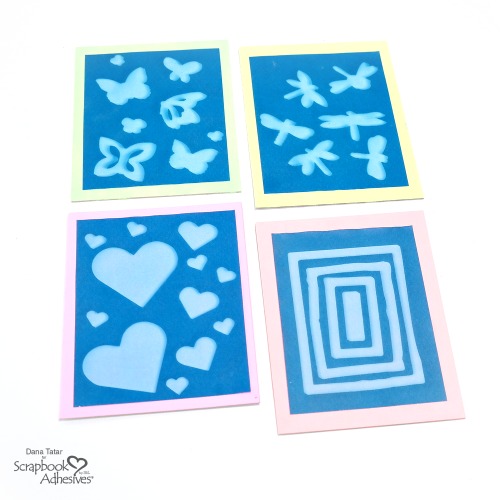
3D Foam Cyanotype Prints with Neon Matting

Creating cyanotype prints with 3D Foam Shapes is a great way to be creative outdoors. I’m not sure who had more fun with this project, my daughters or me!

How to Create Cyanotype Prints with 3D Foam Shapes
Creative Time: 30 Minutes (Plus Drying Time)/Beginner Level
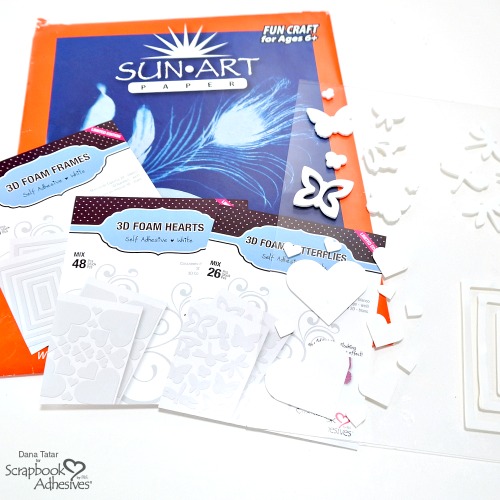
How to Set Up a Cyanotype Print with 3D Foam Shapes

1. Select a variety of 3D Foam Shapes. Peel the backing sheet from the foam shapes and arrange them onto a piece of acrylic. I created 4 mini prints using one sheet of cyanotype paper.
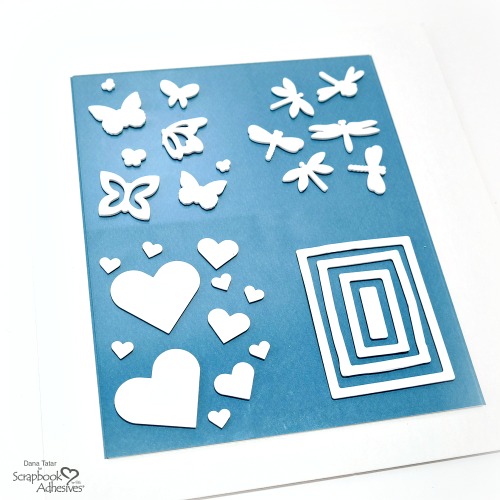
How to Set Up a Cyanotype Print with 3D Foam Shapes

2. Prepare the print for sun exposure. Place the SunArt paper, blue side up, onto a base surface such as a piece of cardboard. Top the SunArt paper with the acrylic sheet decorated with 3D Foam Shapes.
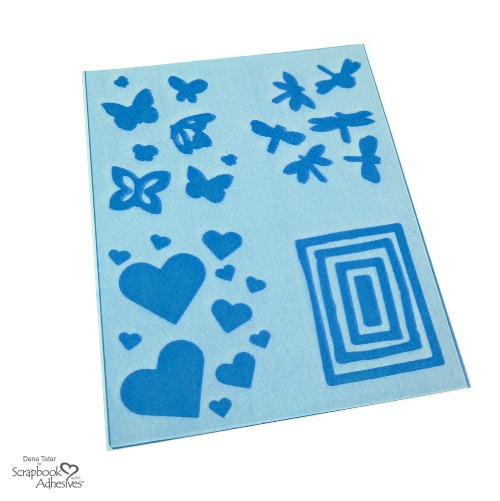
3D Foam Cyanotype Print After Sun Exposure

3. Expose the paper to sunlight for several minutes. The paper is light-sensitive and will gradually turn a light blue.
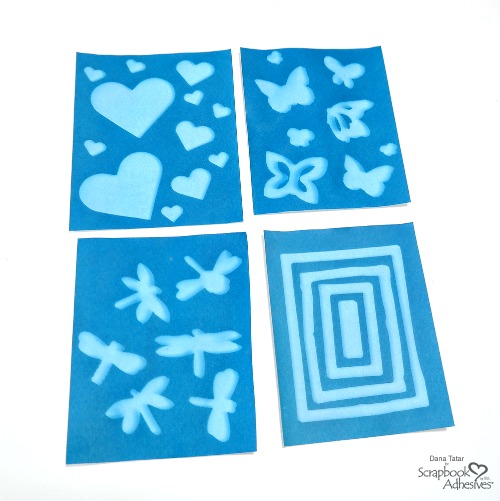
3D Foam Cyanotype Sun Prints After Water Rinse

4. Submerge the print in a tray of water for about 1 minute to rinse the artwork. The images created with the 3D Foam Shapes will turn a lighter shade of blue during this process. To create a print with more intense blue tones, add a few drops of lemon juice to the tray of water. Let the prints dry overnight or speed up the drying process with a heat tool.
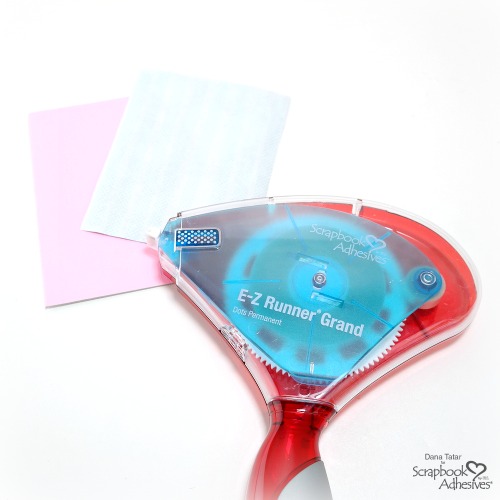
How to Use E-Z Runner Grand to Mat Cyanotype Prints

5. Cut the sun paper into mini prints. For a fun pop of color, paint pieces of cardboard with neon paint. Attach each print to the matting with the E-Z Runner Grand Dispenser filled with Permanent Dots Adhesive.

I hope I have inspired you with this project! Which 3D Foam Shapes would you choose for your cyanotype print? Let me know in the comments section.
~Dana

Scrapbook Adhesives by 3L® Supplies:
E-Z Runner® Grand Refillable Dispenser
E-Z Runner® Grand Permanent Dots Refill
3D Foam Hearts, Frames, and Butterflies

Other Supplies: Cardboard, Neon Paint (DecoArt), SunArt Paper

Pin It!
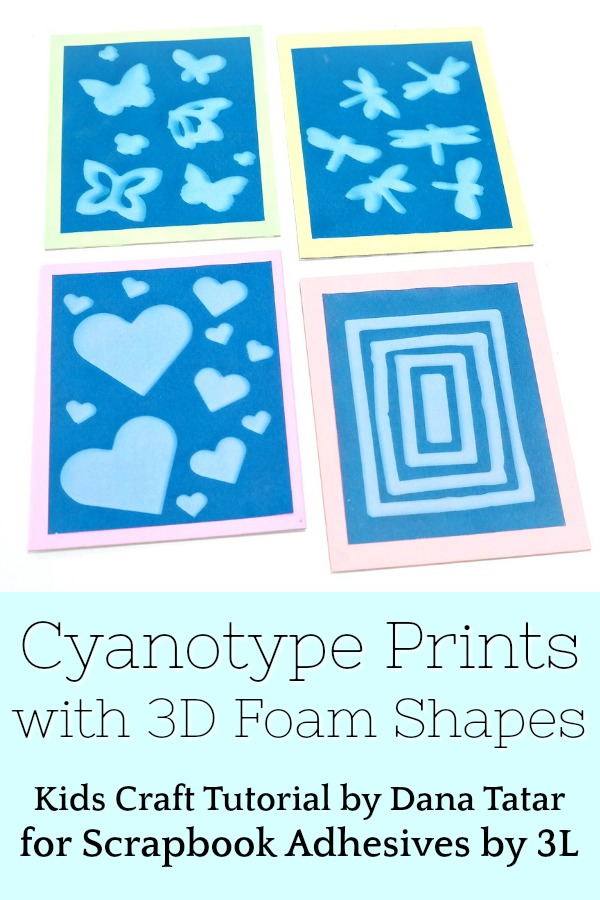
Cyanotype Prints Created with 3D Foam Shapes

Delicate and Elegant Wedding Card

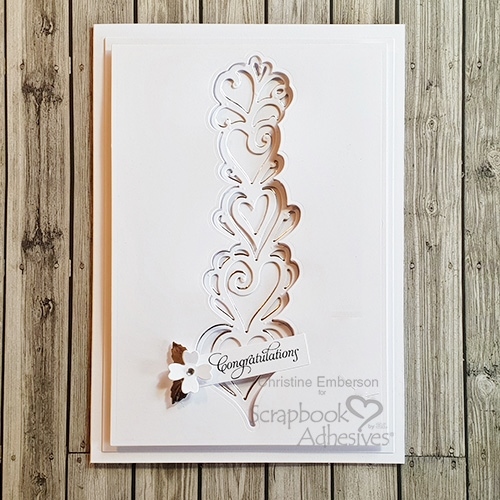
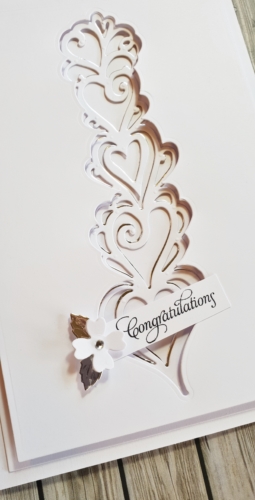
Hi everyone, Christine here today with a clean and simple white elegant card.  See that delicate die cut inside the aperture?  No problem affixing it into place when using Adhesive Sheet 4 x 6″.  It’s so easy!

Delicate White Elegant Card with Adhesive Sheets by Christine Emberson for Scrapbook Adhesives by 3L

Delicate Card Making Details

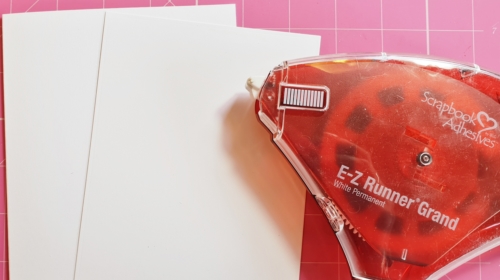
My card base has a white card mat affixed in place with the E-Z Runner Grand® Refillable Dispenser.

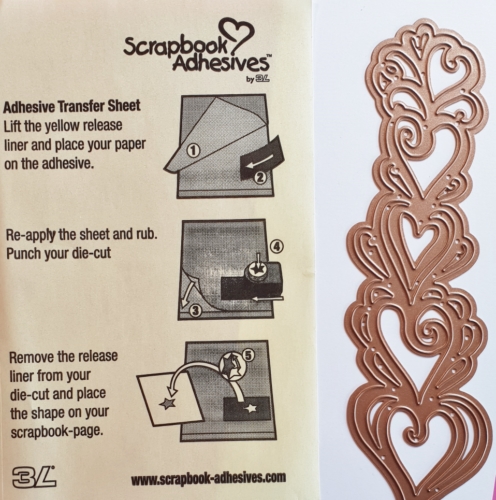
To adhere those delicate die cuts we all love but find tricky, use Adhesive Sheets.  They come in a variety of sizes (12″ x 12″, 6″ x 12″ and 4″ x 6″)  perfect for all projects.

Take off the top liner sheet of a 4″ x 6″Adhesive Sheet and apply cardstock on to it. Die-cut through your machine with your etched die.  When you remove the sheet your die cut has a perfect edge-to-edge layer of adhesive.

Here’s a short video on How to Use Adhesive Sheets for Die Cutting:

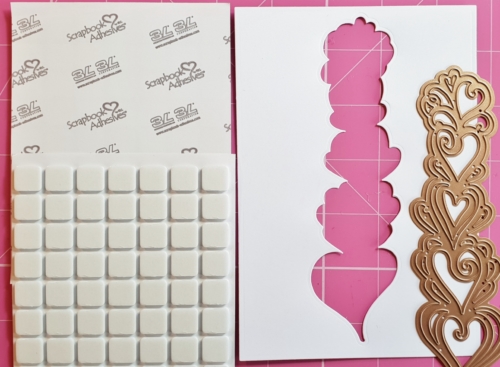
I’ve used the die to die cut from silver foil card and again using an Adhesive Sheet attached this to the reverse, slightly offset to create a drop shadow. The Adhesive Sheet makes it so clean and speedy, no messy liquid glue involved!

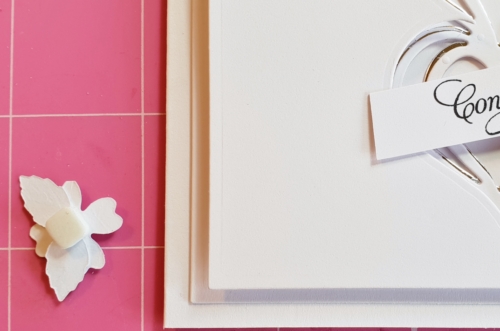
The next step was to use the die to cut an aperture into a further white card mat.  Once cut attach 3D Foam Squares White Regular to the reverse.  Affix this onto card base and mat.

With the addition of a small sentiment and a small leaf and flower secured with 3D Foam Square White Small my card is finished.  Perfect for a wedding or anniversary.

Thanks for stopping by today.  Make your next die cutting project with Adhesive Sheets, you’ll wish you tried them ages ago! Christine

Scrapbook Adhesives by 3L® Products used:
3D Foam Squares White Regular
3D Foam Squares White Small
Adhesive Sheets 6×4″
E-Z Runner Grand® Refillable Dispenser
Others:
Dies: Spellbinders Paper Arts (Hearts and Butterflies Border, 5 x 7 Matting Basics, Homespun)
White Card; Silver Foil Card;  Stamped Sentiment;


Dual Tip Glue Pen to the Rescue

Have you ever been working with a collection and found that an embellishment isn’t quite what you need? Maybe it’s missing a color or some texture? Often times adhesives can rescue you and help you modify the project! Christine joining you today to showcase how I used the Dual Tip Glue Pen to modify a chipboard embellishment and make it work better for my layout!

Using the Dual Tip Glue Pen to rescue embellishments

In the Paper Crafting Industry we have lots of pre-made embellishments and products.  But when you want to add a personalized touch OR the product just isn’t quite the look you are going for, adhesives can become your best friend.  Especially if you are willing to “Wear Your Adhesives on the Outside.”

Dual Tip Glue Pen to the Rescue

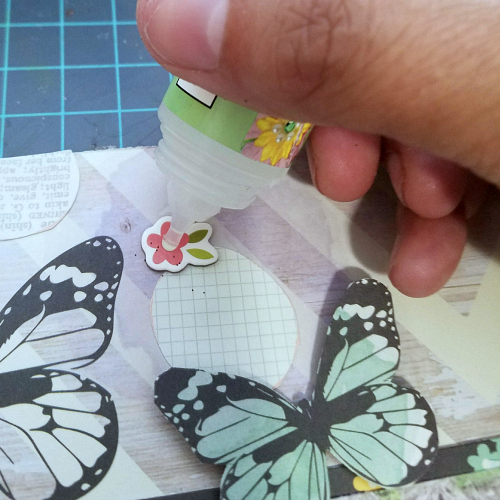
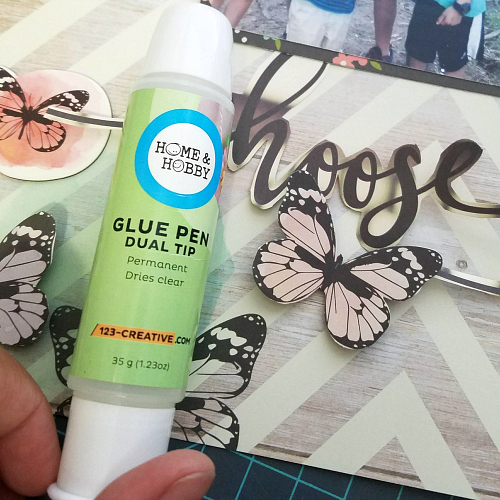
In this case I had these adorable chipboard flower embellishments.  But because I was working with a lot of black they were overwhelming the layout in their original form.  They needed just a touch of black.  Dual Tip Glue Pen to the Rescue! I used this handy little adhesive and just added a dot to the center of each flower.  I then added black glitter to bring in some black.

Of course let’s not forget the usefulness of this adhesive in a traditional manner as well!  I cut out a thin script title and it made securing it much easier!

Other Handy Adhesives

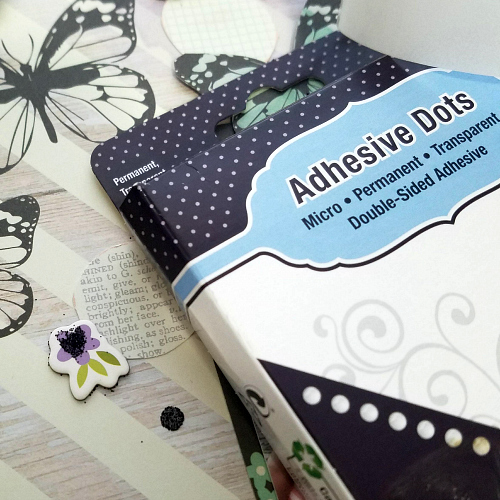
I used a similar approach with my glitter to add some dots to the patterned paper however in this case I used the Micro Adhesive Dots to add glitter. Adhesives are a great way to add color and texture – be it through glitter, embossing powder, flocking, foil….the possibilities are endless!

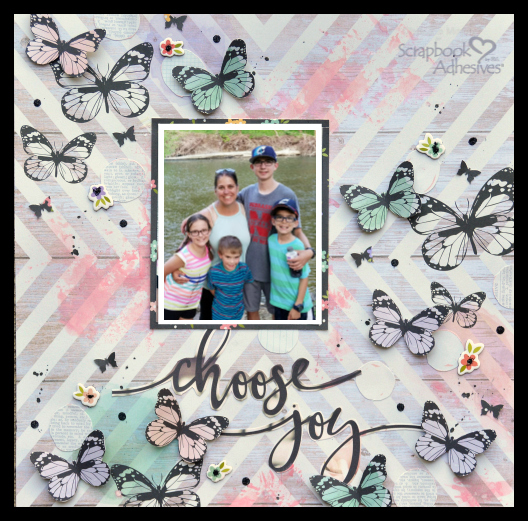
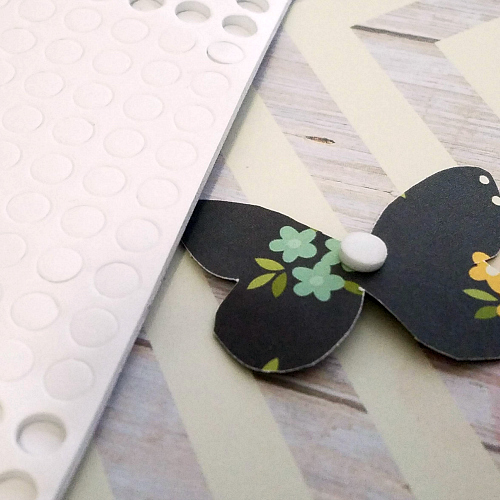
Most of the butterflies on this layout were fussy cut from a patterned paper.  Then I added them using the Small 3D Foam Circles!  By adding them to the center I was then able to make the wings pop up and add some dimension to the whole layout.

So the next time you are looking to make the product work for you – consider pulling out your adhesive to change things up!

Christine

Creative Time: 25 minutes/Beginner Level

Materials Needed:
Scrapbook Adhesives by 3L®:
E-Z Runner Grand Refillable Dispenser
Adhesive Dots Micro
3D Foam Circles White Mix
HomeHobby by 3L®:
Dual Tip Glue Pen

Other Supplies: The ScrapRoom May Flavors of the Month Kit, Black Glitter from Doodlebug Design


Let’s Hit The Great Outdoors!

With Summer just around the corner, I’m beginning to feel those outdoors happy vibes that long, warm days bring. Who’s with me? Hi friends, Linsey here today sharing my latest craft project inspired by my love for all things Summer! Come along and take an adventure with me into the great outdoors!

Let's Hit The Great Outdoors by Linsey Rickett for Scrapbook Adhesives by 3L

Bringing the Outdoors In!

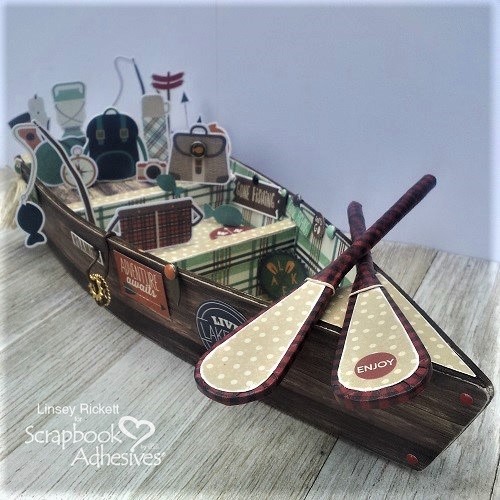
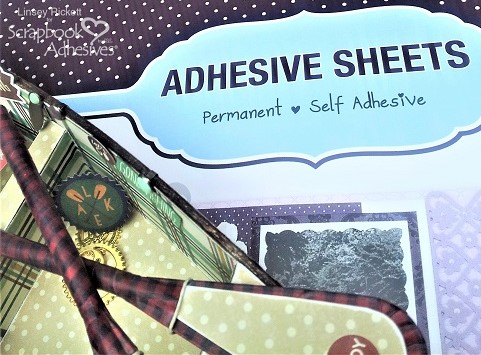
I started with a 12″ long unfinished wooden canoe and covered it inside and out with designer patterned paper. I was delighted to discover that Adhesive Sheets 12 x 12 inch work beautifully for this process. Because these are actual sheets of high quality, permanent adhesive, they cover the entire piece of paper so you get no bumps or lifting around the edges. I highly recommend them for a project like this and a whole lot more.

Let's Hit The Great Outdoors by Linsey Rickett for Scrapbook Adhesives by 3L Image 2

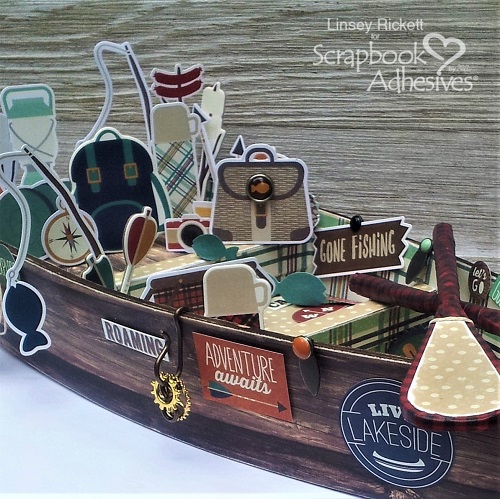
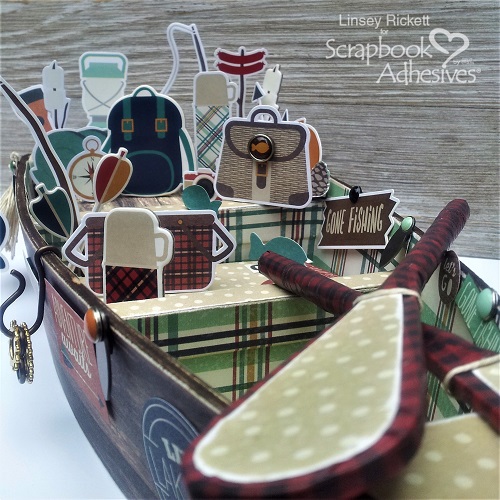
Next, I went to town decorating my canoe with a variety of paper die cuts, chipboard pieces, cardstock stickers and metal embellishments. Everything is packed for a fun weekend of camping, fishing, canoeing, hiking, roasting hot dogs and marshmallows for s’mores and sleeping under the stars!

Let's Hit The Great Outdoors by Linsey Rickett for Scrapbook Adhesives by 3L Image 3

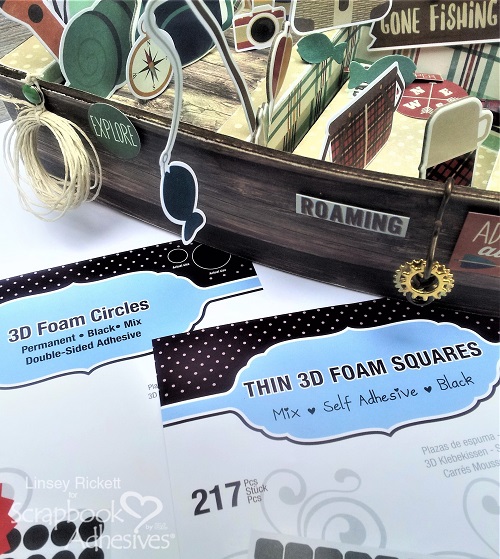
I used both Thin 3D Foam Squares Black Mix and 3D Foam Circles Black Mix. Love that they offer both 2mm and 1mm heights as well as in white option. It allows for customized embellishment placement which is really nice, especially for a 3D project like this.

Let's Hit The Great Outdoors by Linsey Rickett for Scrapbook Adhesives by 3L Image 4

With my trusty E-Z Runner® Grand Refillable Dispenser, I secured pieces in a few places too. No matter what the project, Scrapbook Adhesives by 3L® has you covered!

Let's Hit The Great Outdoors by Linsey Rickett for Scrapbook Adhesives by 3L Image 5

Thanks so much for stopping by today and allowing me to share my altered wooden canoe with you! I hope you’ve been inspired to create something fabulous! Until next time, happy crafting!

Creative Time: 60 minutes+ Intermediate Level

Materials Needed:
Scrapbook Adhesives by 3L®:

Adhesive Sheets 12×12 inch
3D Foam Circles Black Mix
Thin 3D Foam Squares Black Mix
E-Z Runner® Grand Refillable Dispenser

Other:
Unfinished Wooden Canoe
Cabin Fever Paper/Sticker Collection by Simple Stories
Dark Brown Ink
Metal Accents
Natural Twine

♥ Bless You Confirmation Card

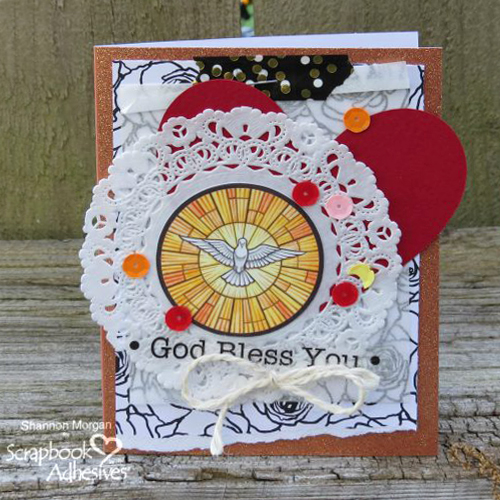
Good morning, Shannon here sharing a layered Confirmation Card with you. I created it using some of my Scrapbook Adhesives by 3L® staples. Layering brings out wonderful dimension on the card. Even though things are still “flat”, the card looks like it’s reaching out to you 🙂

♥ Bless You Confirmation Card by Shannon Morgan for Scrapbook Adhesives by 3L

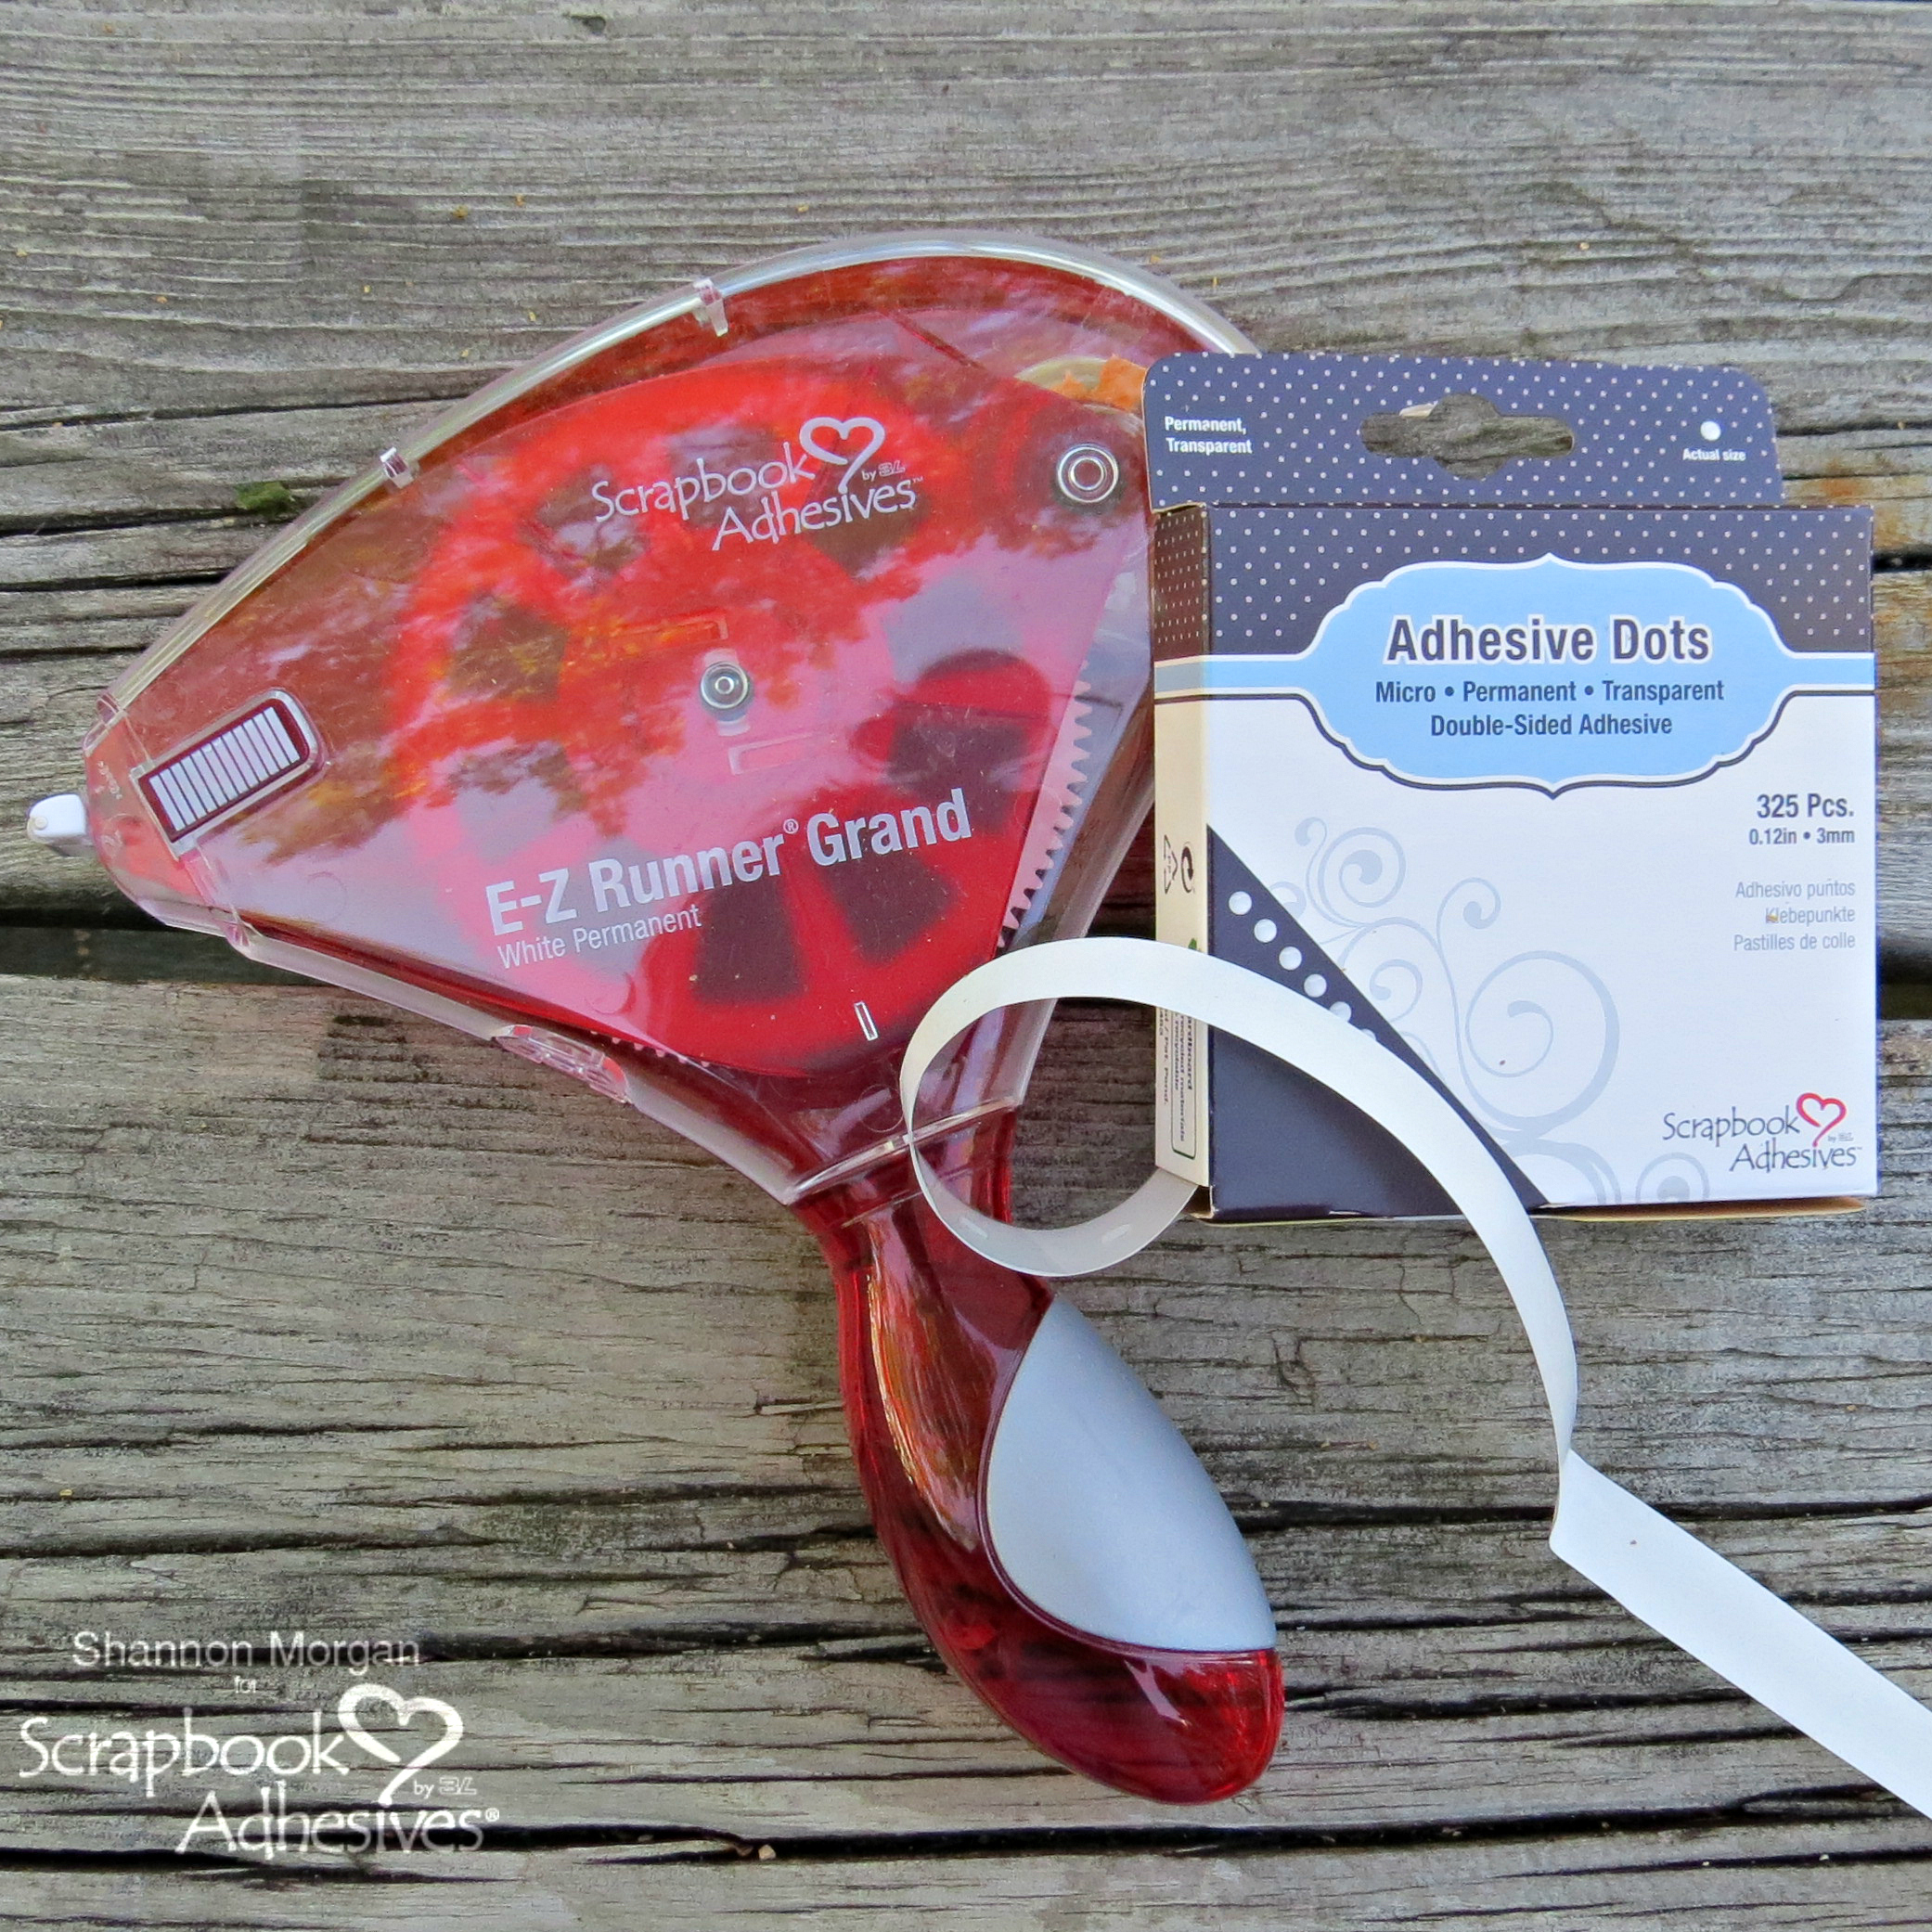
If you look at the layers, you’ll see it’s pretty simple to assemble this card, the best part? You’ll only need your  E-Z Runner® Grand Refillable Dispenser and Adhesive Dots Micro for this card.

Layering the Confirmation Card

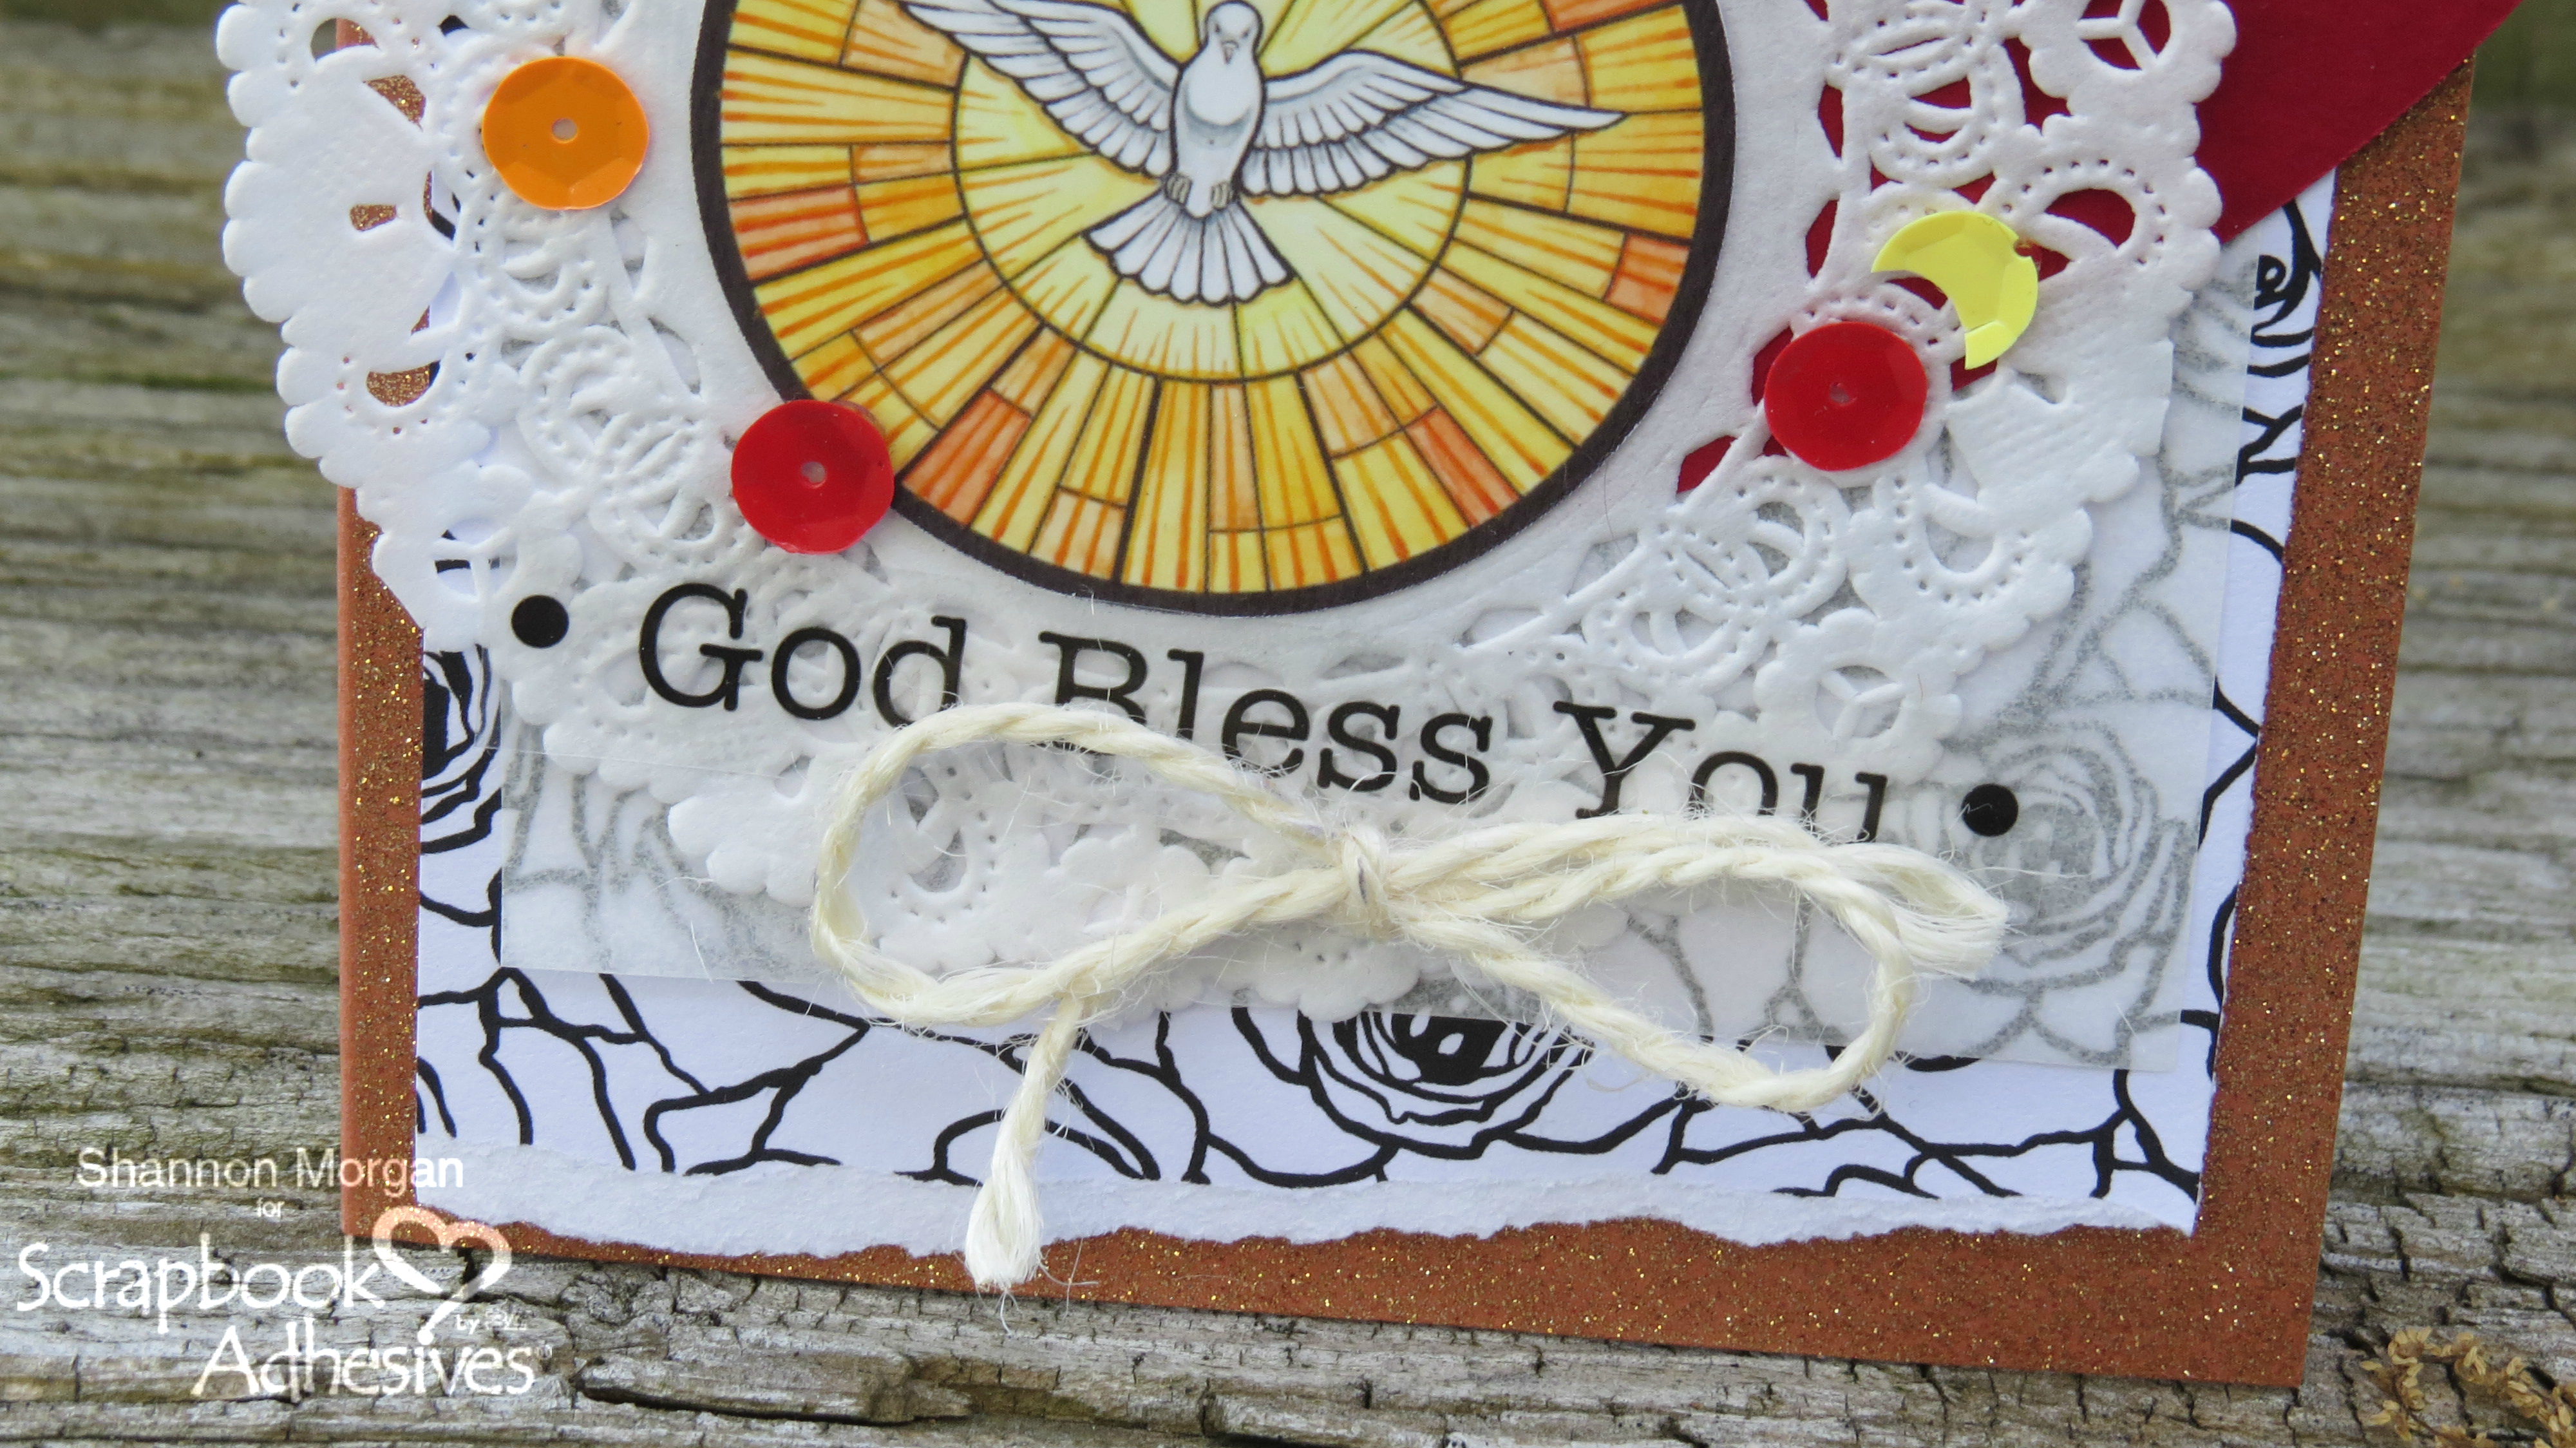
Trim the patterned paper to fit the card base as its first layer and adhere with E-Z Runner® Grand Refillable Dispenser. Next layer a piece of tracing paper/vellum again with the E-Z Runner Grand. Note: I crinkled the top to give it a little extra interest to the card.

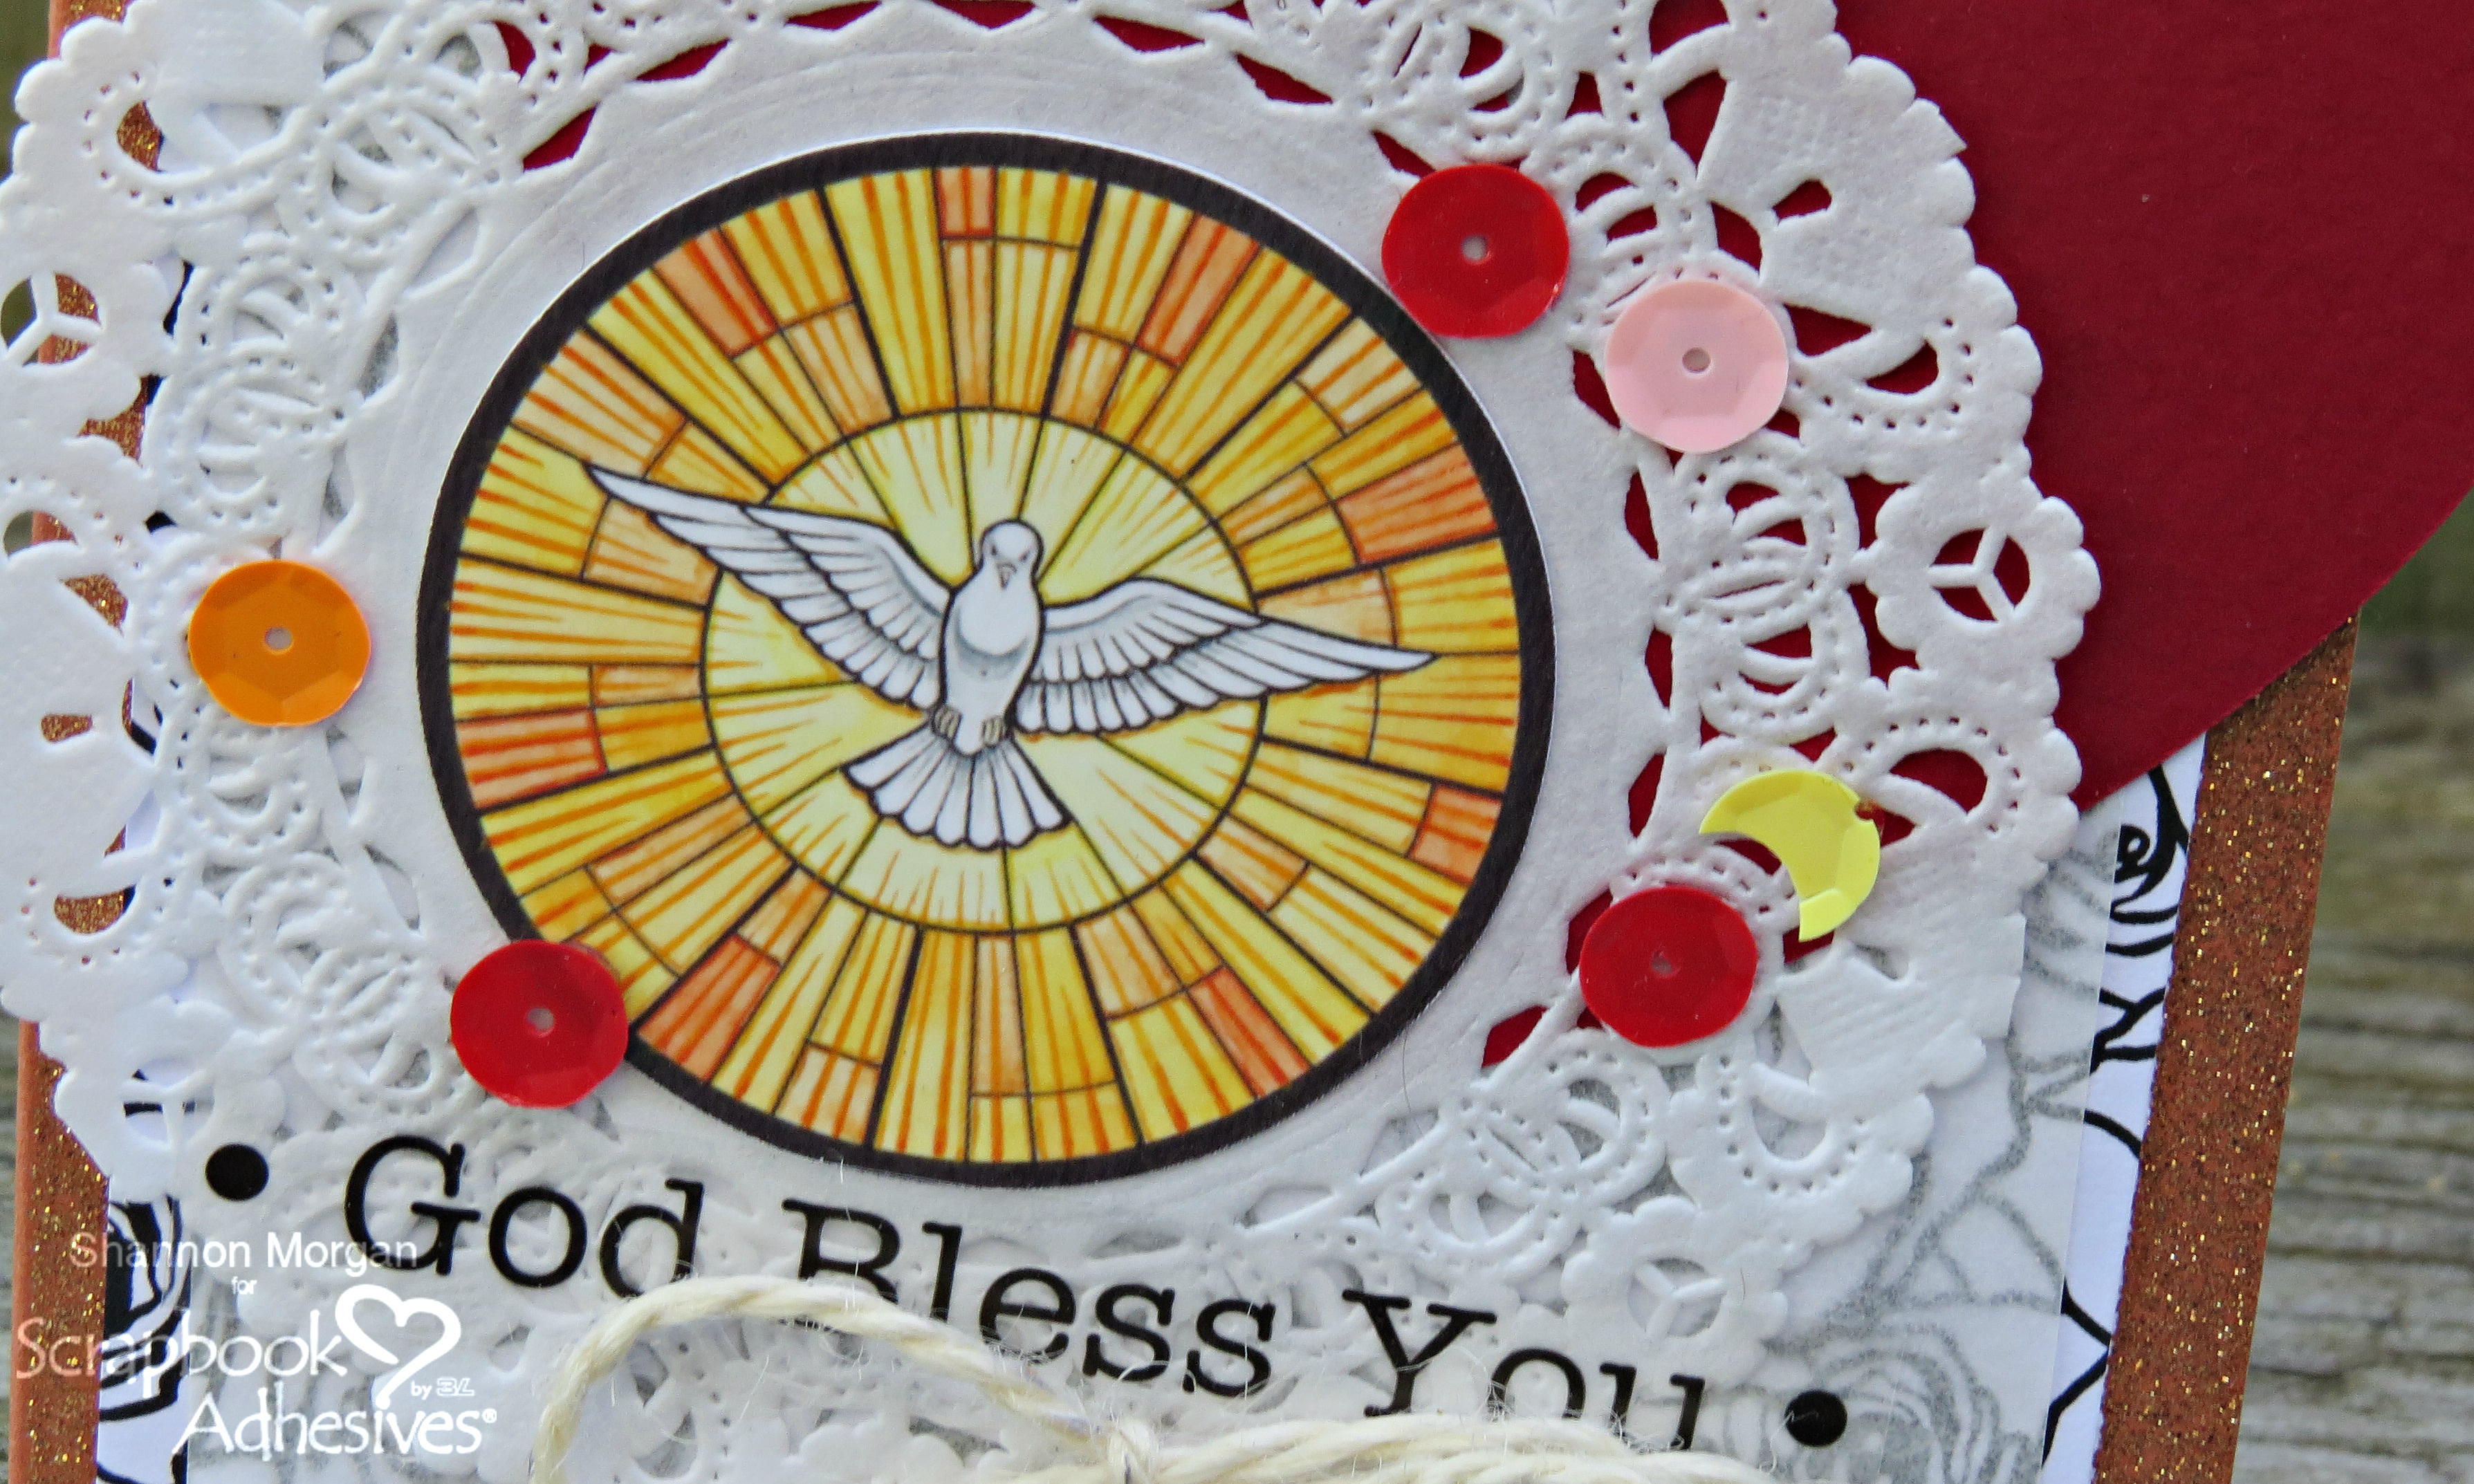
When placing the heart offset a little and add the doily next. To secure, I used both the E-Z Runner® Grand Refillable Dispenser and Adhesive Dots Micro. The Adhesive Dots Micro is perfect to get those delicate parts of the doily in place on the card.

For the dove focal element, I found the clip art on the computer, printed and hand cut it. The sentiment is a clear sticker that I added on top of the doily.

I secured the sequins on the card by using Adhesive Dots Micro. For the bow, I looped some twine, tied it in a bow and secured it with an Adhesive Dots Micro. A piece of washi tape and a staple added, the Confirmation card is finished to be ready for a special recipient.

Creative Time: Beginner to Intermediate/30-40 minutes

Materials Needed:
Scrapbook Adhesives by 3L®:

E-Z Runner® Grand Refillable Dispenser
Adhesive Dots Micro

Other:
Cardstock, Patterned paper, Tracing paper, Paper doily, Sequins, Twine, Washi tape and staple

How to Make Paper Embellishment Bits

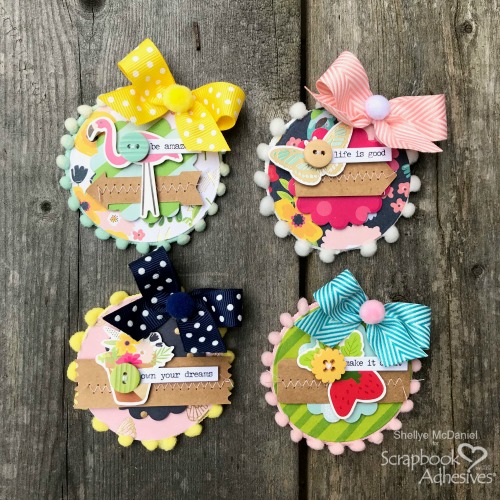
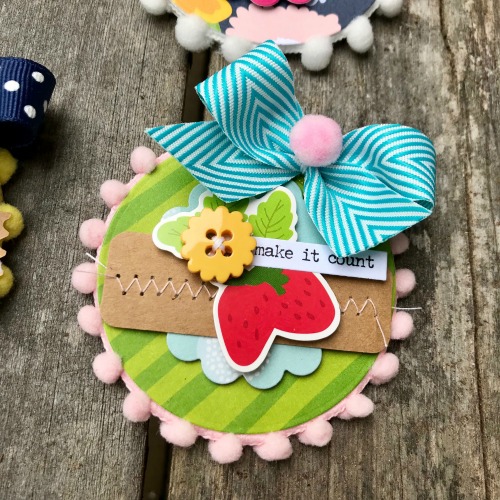
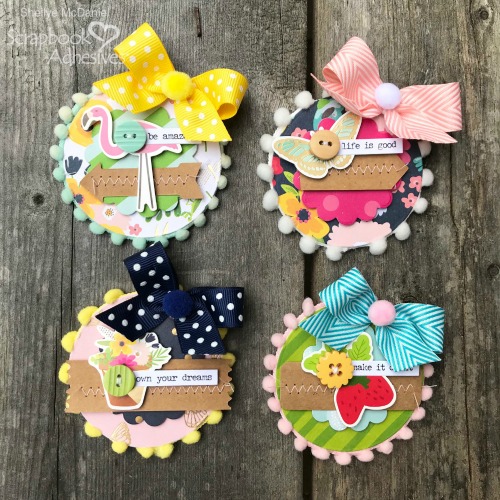
Hello!  Shellye McDaniel bringing you a really fun and easy upcycling project that fits into all sorts of paper crafting.  Paper Embellishment Bits are great for embellishing your card fronts, scrapbook pages, planners and more!

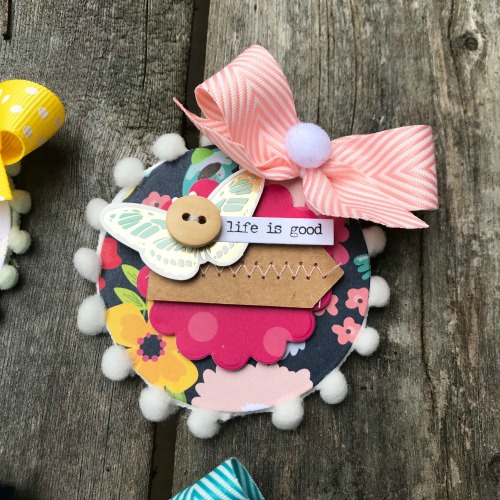
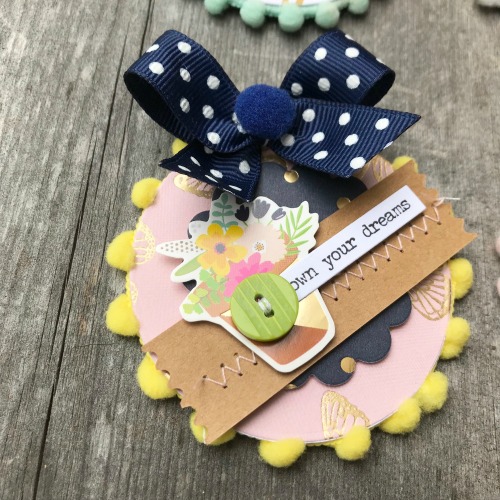
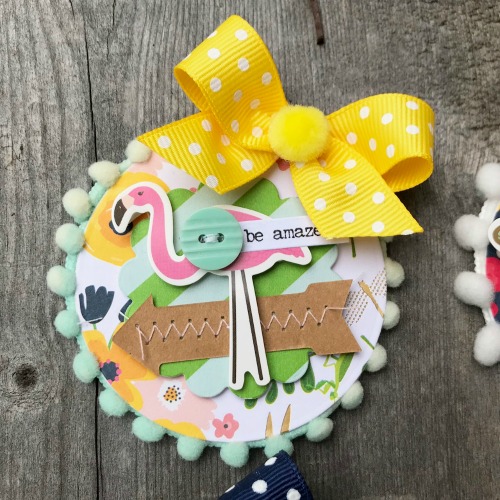
Paper Embellishment Bits by Shellye McDaniel for Scrapbook Adhesives by 3L

Let’s Begin Embellishment Construction

Gather up various Scrapbook Adhesives such as Adhesive Sheets 4 x 6 inch, Crafty Foam Tape in Black, 3D Foam Circles White Mix and Adhesive Dots Small.

Paper Embellishment Bits by Shellye McDaniel for Scrapbook Adhesives by 3L

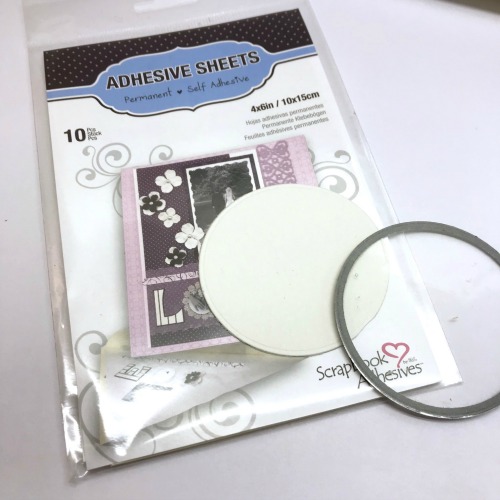
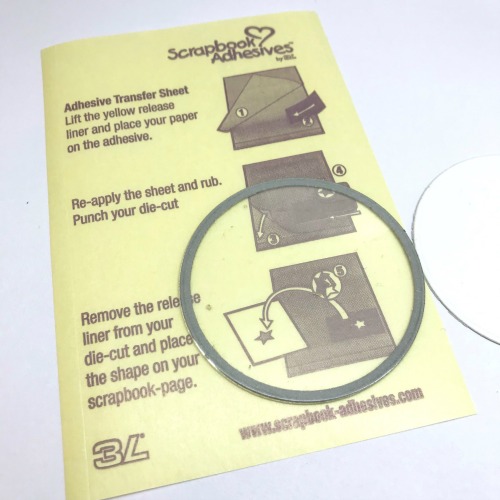
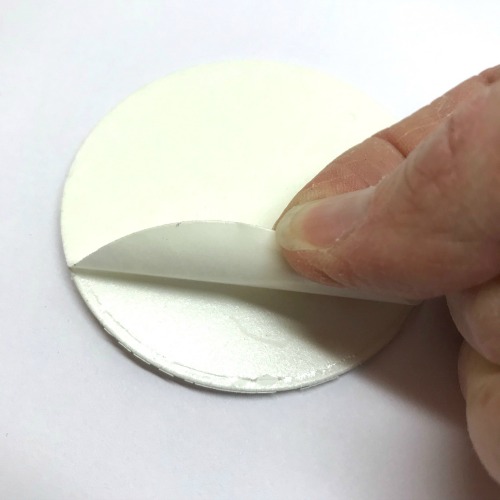
For these particular embellishments, I used a die to cut a 2″ circle from lightweight chipboard and an Adhesive Sheet 4 x 6 inches.

Paper Embellishment Bits by Shellye McDaniel for Scrapbook Adhesives by 3L

Paper Embellishment Bits by Shellye McDaniel for Scrapbook Adhesives by 3L

Paper Embellishment Bits by Shellye McDaniel for Scrapbook Adhesives by 3L

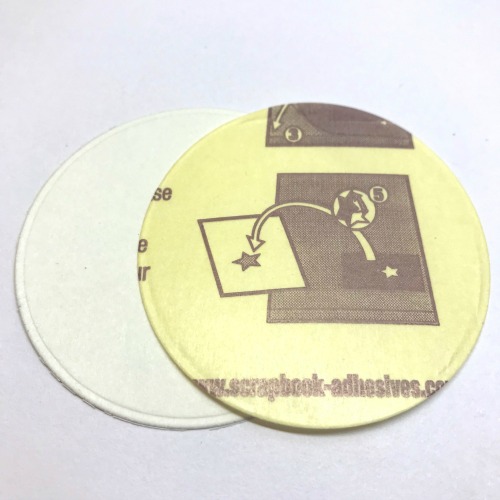
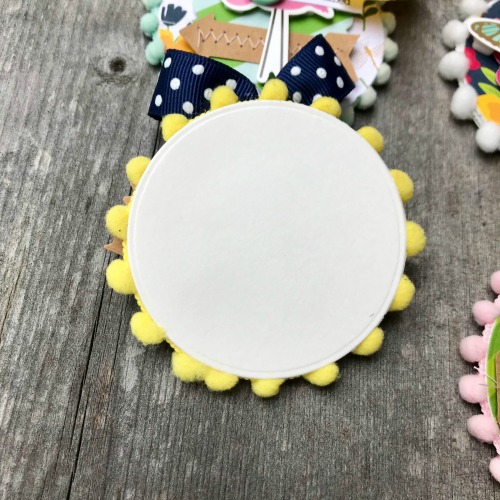
Next, apply the die cut adhesive circle to the chipboard circle and then remove protective paper.

Paper Embellishment Bits by Shellye McDaniel for Scrapbook Adhesives by 3L

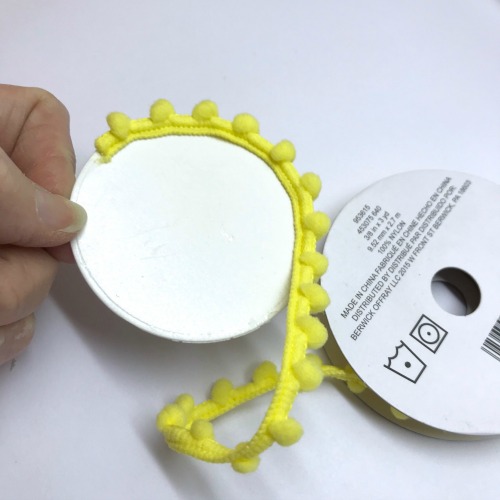
Use a favorite trim and press it into the adhesive as you work your way around the circle.

Paper Embellishment Bits by Shellye McDaniel for Scrapbook Adhesives by 3L

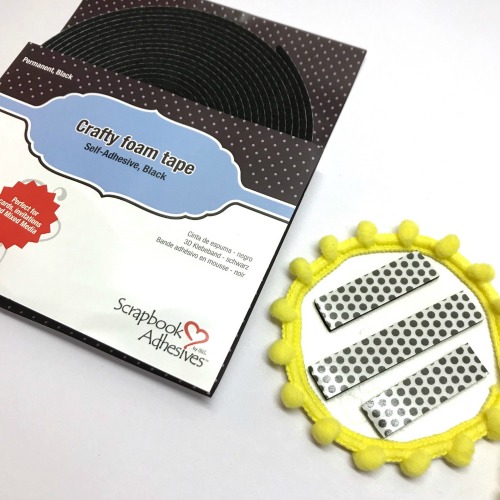
Following the trim addition, apply strips of Crafty Foam Tape in Black to the adhesive side of the chipboard circle.

Paper Embellishment Bits by Shellye McDaniel for Scrapbook Adhesives by 3L

Cut a second circle from the chipboard and adhere to the strips of Crafty Foam Tape in Black.

Dressing Up!

Paper Embellishment Bits by Shellye McDaniel for Scrapbook Adhesives by 3L

Paper Embellishment Bits by Shellye McDaniel for Scrapbook Adhesives by 3L

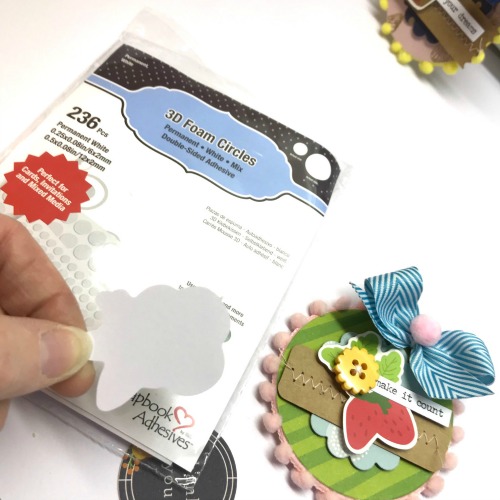
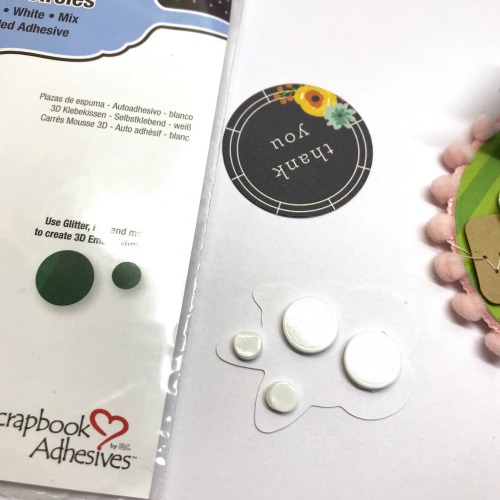
3D Foam Circles White Mix is perfect when you need to cover a lot of areas or just a little.  To each of the small die-cuts, I used the 3D Foam Circles White Mix before layering them on top of the bottom pieces.

Paper Embellishment Bits by Shellye McDaniel for Scrapbook Adhesives by 3L

Paper Embellishment Bits by Shellye McDaniel for Scrapbook Adhesives by 3L

Paper Embellishment Bits by Shellye McDaniel for Scrapbook Adhesives by 3L

After stitching through all of the buttons with thread, use an Adhesive Dot Small to adhere them to the embellishments.

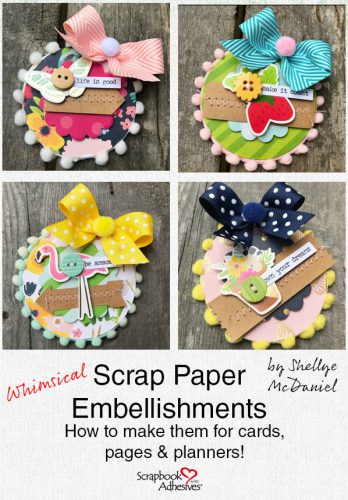
Here is one last look at these whimsical Paper Embellishment Bits:

Paper Embellishment Bits by Shellye McDaniel for Scrapbook Adhesives by 3L

Thank you for visiting today!

Shellye McDaniel

  • Creative Time: 1 Hour
  • Skill Level: Intermediate

Materials Needed:
Scrapbook Adhesives by 3L®:
Adhesive Sheets 4 x 6 inch
Crafty Foam Tape in Black
3D Foam Circles White Mix
Adhesive Dots Small

Pin It!

Use Scrap Paper to create Embellishments by Shellye McDaniel

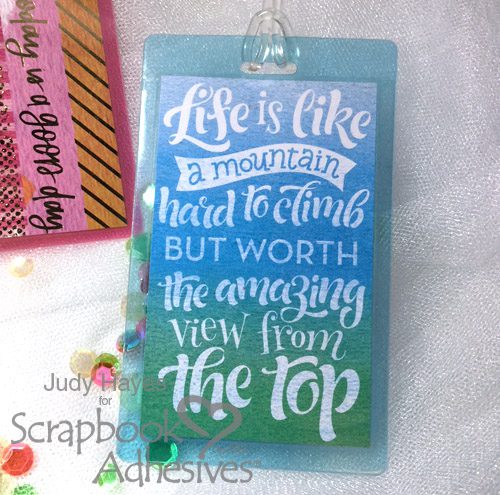
Fun Luggage Tags with Self-Laminating Tags

Hello friends!  Today, I’m sharing some quick fun luggage tags! With the graduation season upon us, I thought these tags would be perfect little gifts for graduates!

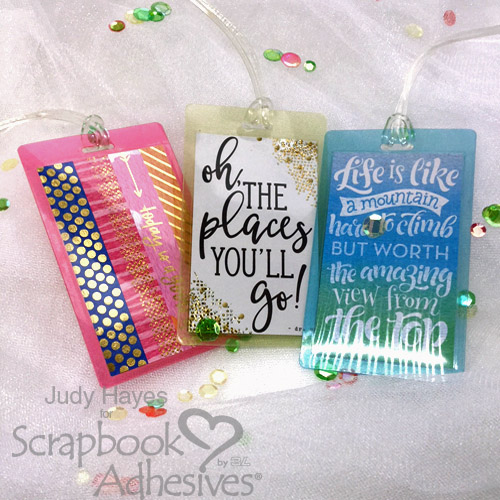
Fun Luggage Tags with Self-Laminating Tags by Judy Hayes for Scrapbook Adhesives by 3L

Creating Quick and Easy Luggage Tags

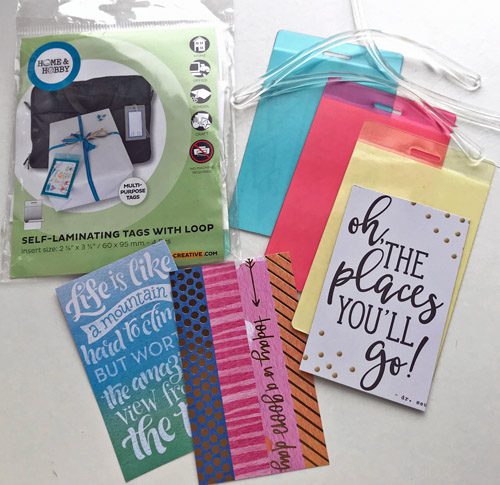
Self-Laminating Tags with Loops make these tags easy! Just add fun colors by simply cutting colorful patterned papers into 2 3/8 x 3 3/4 inches to fit in the laminated tags.

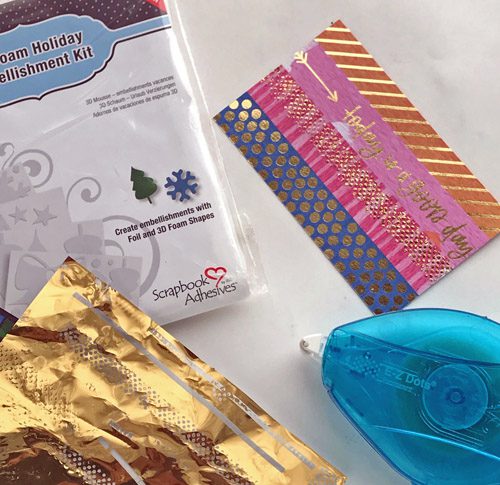
Let’s embellish the cut papers before sealing them in the laminated tags.  I’ve used a combination of E-Z Dots® Permanent Refillable Dispenser and E-Z Runner® Micro Refillable Dispenser with gold foil from the 3D Foam Holiday Embellishment Kit. Use them to add gold accent on front and back of two cut papers. It gives it such a great effect, don’t you think?

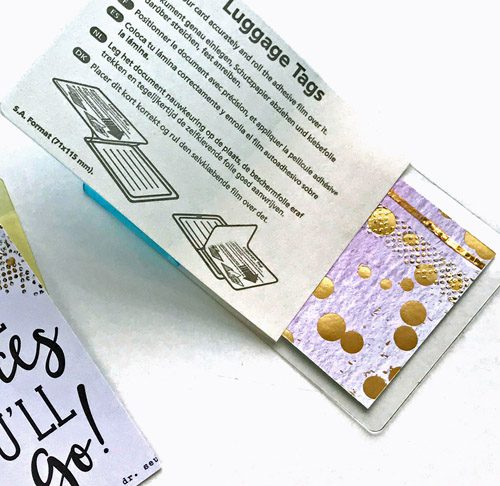
Next, add the embellished cut paper into the Self-Laminating Tags with Loops.. Then gently peel back adhesive liner and press tag edges together. The photo below shows that the instructions are printed on the liner. Lastly, thread the clear loop through the opening.

That’s it – Fun Luggage Tags are made! There are a set of four different colored tags that includes clear, pink, blue and yellow. Each tag has personality 🙂

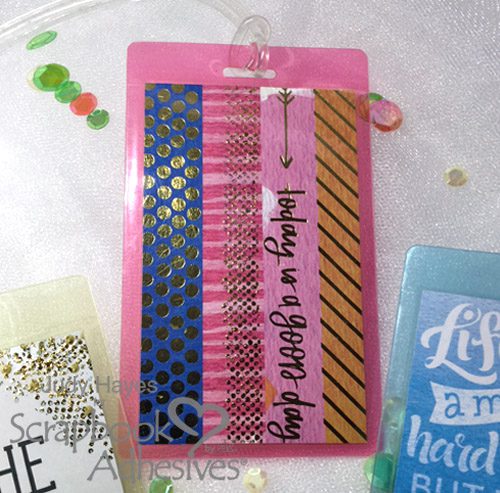
This pink tag has gold dots strip added using E-Z Dots® Permanent Refillable Dispenser and gold foil.

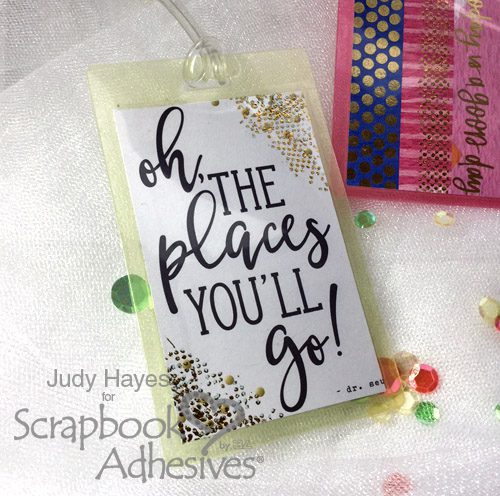
Another tag I added gold dots on corners with gold foil and E-Z Dots® Permanent Refillable Dispenser.

For this blue tag, gold stripe and dots on the back with E-Z Runner® Micro Refillable Dispenser and gold foil.

Thank you so much for stopping!

Happy crafting!
Judy

Creative Time: 30 minutes/Beginner Level

Materials Needed:
Scrapbook Adhesives by 3L®:
Self-Laminating Tags with Loops
E-Z Dots® Permanent Refillable Dispenser
E-Z Runner® Micro Refillable Dispenser
3D Foam Holiday Embellishment Kit

Other Supplies: Papers with inspiration verses – Paper House Color Washed, Bella Blvd Make Your Mark, Simple Stories Graduation

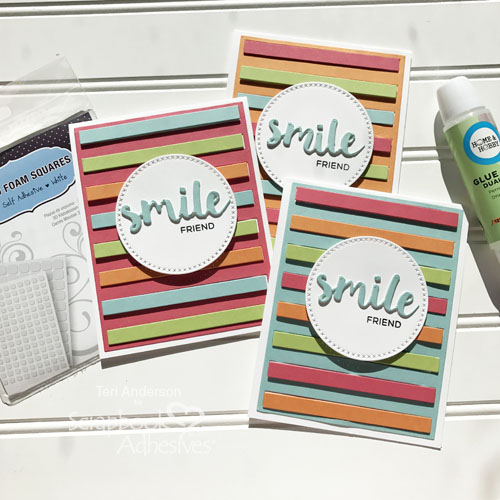
3D Smile Friend Card Set

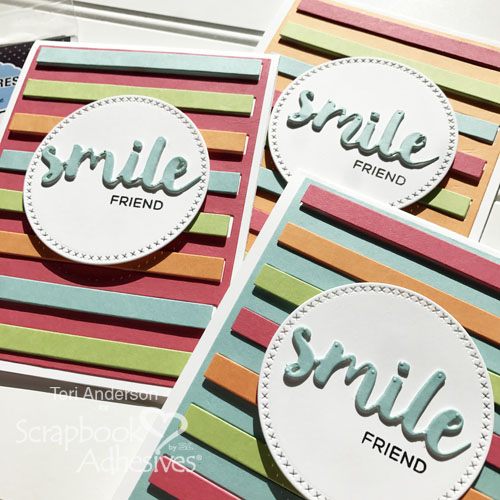
Hi, everyone! Teri here with a set of handmade cards that will bring a smile 🙂 Using 3D Foam products from Scrapbook Adhesives by 3L®, it is an excellent way to add pop and dimension to all your paper crafting and memory keeping projects.

3D Smile Friend Card Set for Scrapbook Adhesives by 3L by Teri Anderson

Making those Smile Card Backgrounds

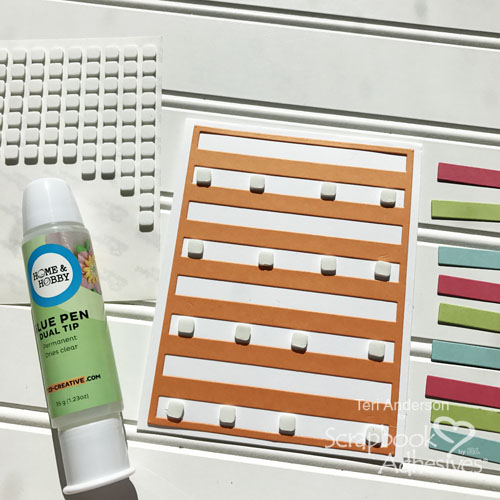
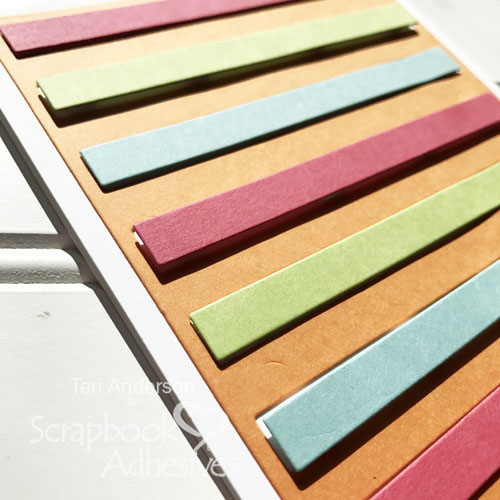
The striped backgrounds were easy to create. I cut several striped rectangles from pink, green, orange and blue cardstock.

Next, I folded three cards and adhered the rectangles to them with Dual Tip Glue Pen. One of the tips on the Dual Tip Glue Pen has a thin tip which makes it perfect for applying adhesive to intricate die cuts.

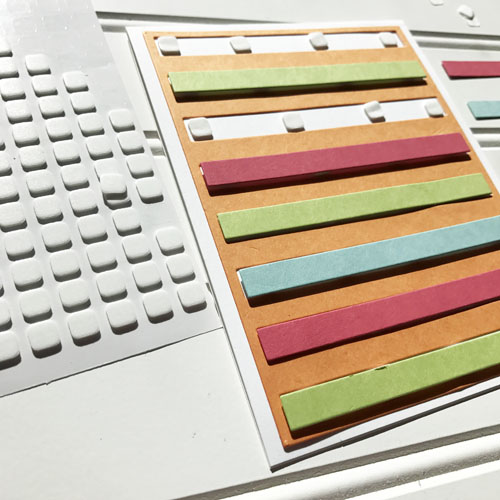
To create dimension, I added stripes to each rectangle by adhering the stripes with 3D Foam Squares White Small and Thin 3D Foam Squares.

First I started adhering some stripes with 3D Foam Squares White Small.

Then I used Thin 3D Foam Squares to adhere the remaining stripes. The result was this cool multi-layered background for each card.

Adding the Sentiments

To complete my card set, sentiments were added to them and were kept simple by using the same sentiment on each one.

Each sentiment consists of a 3D “smile” word that I created with the 3D Foam Creative Embellishment Kit. Simply adhere blue cardstock to a piece of 3D Creative Foam Sheet and die-cut the word three times from it. Then place each word on circles die-cut from white cardstock with “friend” stamped underneath them!

For extra dimension, I adhered the embellished circle die cuts with Crafty Foam Tape. Note: I used several strips to ensure the circles would not warp.

I hope you are inspired to make some 3D cards of your own! I’d love to see them! Be sure to share links to your projects in the Comments section.

Creative Time: 1 hour/Beginner Level

Materials Needed:
Scrapbook Adhesives by 3L®:
3D Foam Squares Small White
Thin 3D Foam Squares Mix
Crafty Foam Tape White 
3D Foam Creative Embellishment Kit

HomeHobby by 3L®:
Dual Tip Glue Pen

Other:
Striped Rectangle, Circle and Smile dies from My Favorite Things; Flowers for Her Clear Stamp Set from Technique Tuesday; Pink, Orange, Green, Blue, and White Cardstock; Black Ink Pad

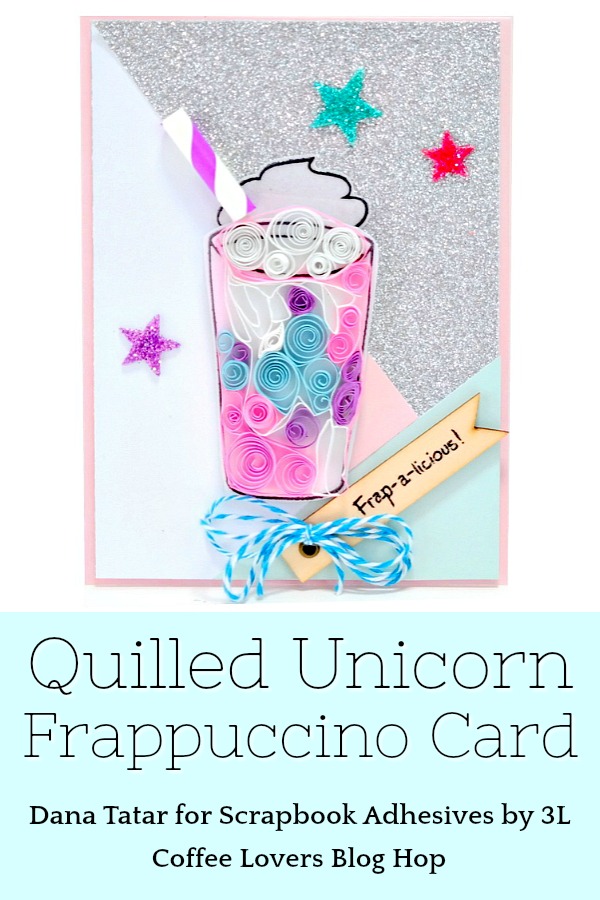
Unicorn Frappuccino Card with Coffee Lovers

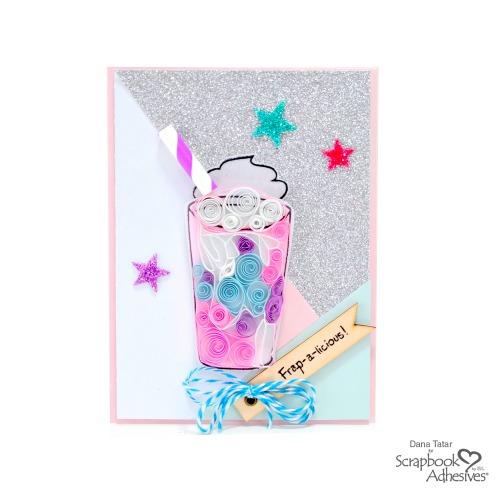
Can you resist this adorable and wonderful UNICORN FRAPPUCCINO CARD?!  It’s the PERFECT kick off to the Coffee Lovers Spring/Summer 2018 Blog Hop! Dana Tatar used a little bit of quilling and Dual Tip Glue Pen to make this focal piece POP!

We are excited to be a participant and a SUPER SPONSOR too! The Coffee Lovers community is a coffee-loving (or tea or cocoa) group of card makers open to everyone. Their blog serves up inspirational coffee-related posts and bi-annual coffee blog hops that anyone can join!  Blogging participants get a chance to win giveaways!

Quilled Unicorn Frappuccino Card by Dana Tatar

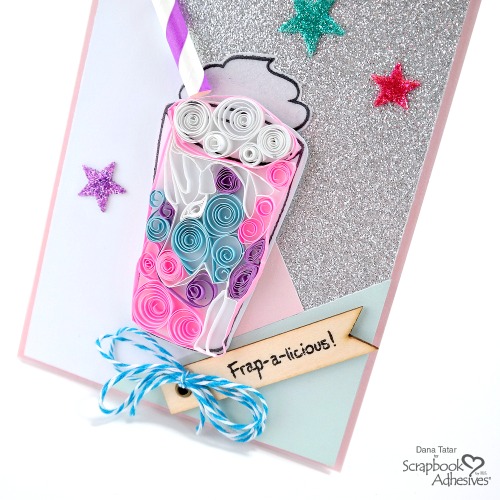
Hi fellow coffee lovers! Dana Tatar here today sharing my love of coffee with a super fun and sparkly quilled Unicorn Frappuccino card. To cool down I order an iced caramel macchiato. I will definitely switch up my standard brew and try something new if there is a fun seasonal option.Quilled Unicorn Frappuccino Card with Glittered 3D Foam Hearts by Dana Tatar for Scrapbook Adhesives by 3LQuilling was the perfect way to mimic the swirls of color in a Unicorn Frappuccino. I used quilling paper and a Dual Tip Glue Pen to construct the design. I chose white quilling paper for the unicorn head, and pink, purple, and blue quilling paper to fill in the rest of the space. Next, I glued the quilled piece onto a stamped vellum cup and then attached the vellum to the card using the E-Z Runner® Permanent Fine Adhesive Dispenser. This adhesive works amazingly with vellum. The opaque adhesive dries clear over time for an invisible hold!

Finishing Touches

Quilled Unicorn Frappuccino Card with Glittered 3D Foam Hearts

I constructed a colorful geometric mat for the front of my card. Once the paper was pieced together with E-Z Runner® Ultra Strong Adhesive, I attached it to a card base using Crafty Foam Tape. Adhesive Lines are my first choice for attaching all types of narrow embellishments to my craft projects. I used them to attach both the paper straw and the wood tag to the front of the card.

Finally, I added some finishing touches to the front of the card. 3D Foam Stars sprinkled with glitter added fun dimension and a pop of color. Lastly, I attached a multi-loop twine bow to the wood tag with a Small Adhesive Dot.

Thanks for stopping by today! I’d love to know what your favorite coffee concoction is. Leave me your answer in the comments section.
~Dana

  • Creative Time: 45 mins
  • Skill Level: Intermediate

Materials Needed:
Scrapbook Adhesives by 3L® Supplies:
Dual Tip Glue Pen
E-Z Runner® Ultra Permanent Dispenser
E-Z Runner® Permanent Fine Adhesive Dispenser
Adhesive Dots Small
Crafty Foam Tape White
3D Foam Stars
Adhesive Lines

Other: Patterned Paper: Simple Stories; White Cardstock: Recollections; Quilling Paper and Tools: Quilled Creations; Vellum; Wood Tag: Jillibean Soup; Twine: Maya Road; Frothy Concoctions Clear Stamp Set: Paper Wings Productions; Jet Black Staz-On Ink: Tsukineko; Paper Straw; Glitter

Pin It!
Quilled Unicorn Frappuccino Card with Glittered 3D Foam Hearts


For more inspiration and to link up, click: Coffee Lovers Spring/Summer 2018 Blog Hop

Can’t find the comment section (at the bottom of this post), please CLICK: Unicorn Frappuccino Card with Coffee Lovers and scroll down to the bottom of the post.

Connect and Stick with 3L!

Visit our Website and Bookmark our Blog!
Sign up for our Newsletter so you never miss a contest or giveaway!

instagram purple facebook purple pinterest purple twitter purple SAby3L YouTube icon blog purple

Upcycled Heat Embossed Coasters

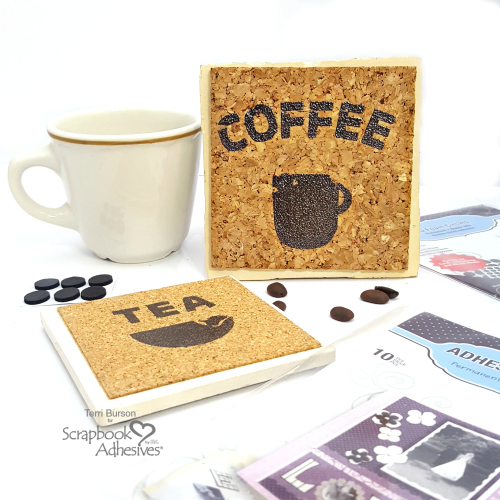
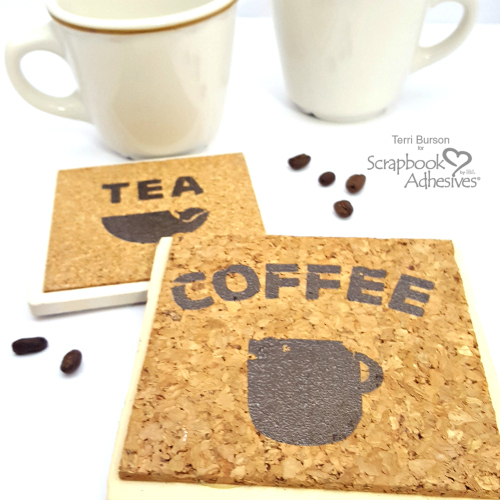
Today’s project features upcycled heat embossed coasters. I’ve had this idea for awhile and finally visited some thrift stores. looking for something I could use.  Bingo!  I found just what I needed on my first stop.  Terri here, with a video tutorial for this altered project.  “Stick” around!


Upcycled Heat Embossed Coffee Coasters by Terri Burson for Scrapbook Adhesives by 3L

Items Needed for Upcycled Coasters

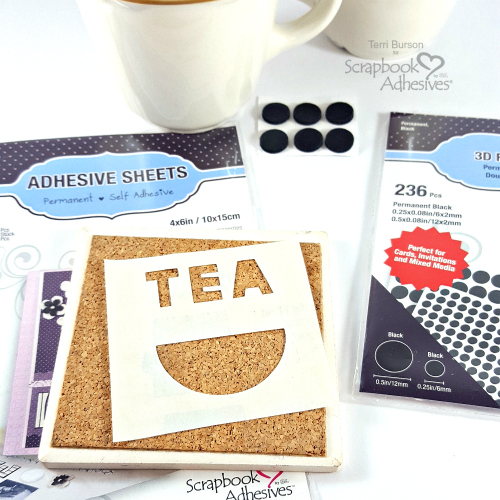
I have two different sized coasters measuring 4×4 inch and 3×3 inch.  For this project, I used an electronic die cut machine to scale down my measurements.  However, alphabet die cuts would work, using a manual die cut machine, as long as the sizes work accordingly.  Here’s a short list:

  • Coasters
  • Manual or Electric die cut machine
  • Adhesive Sheets 4×6 inch 
  • 3D Foam Circles Black Mix (or white)
  • Brown Embossing Powder or choice of color
  • Craft Heat Tool
  • Burnishing Tool
  • Sharp tool or toothpick
  • Baby powder
  • Optional washi tape to mask area
  • Optional dryer sheet


Bonus Tips and Advice

Working on this project, there were two things I knew going in.  One, I was not expecting perfection.  In fact, I was hoping for a vintage feel and slight imperfections.  This is an upcycled project and as such, maintaining authenticity and a distressed look was key.  This was such fun to create and a great way to “Wear Your Adhesive On The Outside”!

I tried a couple things on the “coffee” coaster first.  That included masking parts of the cork area with washi tape.  My thought was, avoid getting embossing powder in the nooks and crannies of all that open cork space.  I did not use the masking process on the second coaster and it turned out great!  I did however, swipe both coasters with a dryer sheet.  It’s a little trick used to repel excess powders from accumulating.  If you’ve seen crafters use an embossing buddy (powder filled pouch), the dryer sheet does the same thing.  Craft hack!  Lastly, I also thought it might be possible to use stencils, for those who don’t have die cutting equipment.  Try pressing your Adhesive Sheets 4×6 inch into the stenciled area and rub well.  Let me know how that works!
 

I’ve got a video tutorial for this fun, upcycled coasters!  There is key information not included here, so don’t miss it.  3D Foam Circle bumpers and baby powder?  Another craft hack found in the video.

You’ll also find the full listing of product links on my blog at Waving My Wand.  Have a crafty day, everyone!  Terri

Creative Time: Beginner to Intermediate (30-45 min)

Materials Needed:
Scrapbook Adhesives by 3L® 
Adhesive Sheets 4×6 inch
3D Foam Circles Black Mix

Other:
Coasters, Embossing powder, Craft heat tool, Die-cutting machine and Burnishing tool