You are in our US store • Switch to Europe store

Hooray U.S.A. Flag!

Michele here with a Fourth of July card to share! I was going through my stash of adhesives and when I pulled out the 3D Foam Squares in white, it reminded me a bit of a flag shape.  I love the idea of the squares being perfectly spaced, so I decided I would glitter them to resemble the American flag! Using 3D Foam gives dimension to the project!

Horray USA Flag card & tutorial by Michele Kovack for Scrapbook Adhesives by 3L

Would you like to see how I created these fun glittery tiles using the 3D Foam Squares? 

close upThe Flag Tutorial

First, get out your package of 3D Foam Squares.  🙂

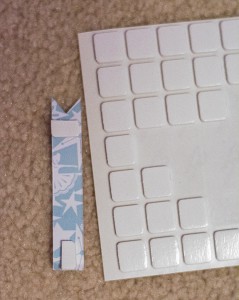
step1If you want your “flag” to be a bit more narrow,  cut the bottom row off.

step2You  will use that bottom row later on.

step3

Carefully, peel off only the top layer of the squares. Be careful not to pull them off the sheet.  Sprinkle with blue glitter.

step4

If the glitter between the squares bugs you, you can take a dry paint brush later and brush it off.  Peel liners from every other row and sprinkle with red glitter, then repeat with white glitter.

step5 copy

step6

If you want to achieve a faux tile look to your flag, add Dual Tip Glue Pen to each square, set aside, and let it dry. You will notice I changed my white glitter, because I felt the finer glitter didn’t have enough impact.  (photo above) The chunkier white glitter looks much better! (photo below)

step7

Layer the flag over blue card stock, using the E-Z Squares® to adhere it.

step8

To add a red layer with dimension pull out  that extra row of 3D Foam Squares  that was cut off earlier and use them here!

step9

To add  ribbon to the card,  you will notice there is a bit more room on the left side of the card.  This is where the ribbon will go and not cover up too much of the flag.

step10

To layer two colors of ribbon, attach the second ribbon with a Dodz Adhesive Dots Small.

step11Place the Dodz Adhesive Dots Small under the blue ribbon to attach it to the red ribbon.

step12

To add a sentiment coming out from under the ribbon, use Dodz Adhesive Dots Small to attach it.

step13

step14

I like to add something to the middle of my ribbons, in this case a glittery star. I found the perfect sized star in this package of 3D Foam Party Shapes. 

step15

Since it is sticky on both sides,  just plop it right in the middle of the ribbon.

step16

step17

And one last look at the finished project.

horray usa two

Thank you so much for stopping by! I hope I’ve inspired you to look at your adhesives in a different way!  Happy 4th of July!

Patritotic cards, scrapbook pages, banners & projects

Click to see more patriotic projects!

Michele

Supplies used:

Save

A Card with Thanks

Hi, it is Christine here today with a layered ‘Thanks’ card.  I chose a coffee colour palette using the pretty Graphic 45 – Botanical Tea papers with special Scrapbook Adhesives by 3L® finishing touches.

CEmberson-Hello1

Firstly a kraft card base with striped patterned paper easily affixed with E-Z Runner® Permanent Strips Refillable.

CEmberson-Hello2

I then selected some additional panels of card and added Creative Photo Corners – Kraft.

CEmberson-Hello3

I inked the edges of these lightly and added a couple of strips of decorative paper horizontally.

CEmberson-Hello4

For effective speedy bunting, I used 3D Foam Pennants. Simply attach to your chosen paper and cut around with scissors.

CEmberson-Hello5

Again, you can ink the edges of these.

CEmberson-Hello6

I then assembled all the elements of my card using 3D Foam Squares Regular, White for that extra dimension which really makes the card special.

CEmberson-Hello1

The die cuts are Spellbinders® Sprigs, Blooms Three, Ovals and Frame Two.

CEmberson-Hello7

A close up of the 3D Foam Pennants for the bunting and Creative Photo Corners.  I like to use the photo corners a lot…and not necessarily on photos!

CEmberson-Hello8Thank you for joining me today – happy crafting!

Christine

Supplies:

A Creative Photo Corner Flag

It’s almost the 4th of July! What a great time to celebrate all things patriotic! Today my flag project is something that I’ve been tossing around in my head for a little while, and I’m so happy that it worked out the way I imagined it would.

I love how the Creative Photo Corners stack and create chevron patterns, so I combined the two concepts for this:

Creative Photo Corner Flag by Beth PingryIt’s really pretty easy to make, and only took one package of white Creative Photo Corners!

Creating a Photo Corner Chevron Flag

I airbrushed the white Creative Photo Corners with markers. You could color them directly, but I like the variations in color from airbrushing.

BethPingry-Flag2

Then I layered them across a piece of paper in rows. I went with 9 across, with the blue field having 3 across.

Tip: trim the sheet into rows of Creative Photo Corners, then peel back part of the backing paper and align on the project. Then you can pull the rest of the paper off and they stay straight. This is easier than applying them one by one by hand.

BethPingry-Flag3Also, you may need to wipe excess ink from the backing paper, as it does not completely dry, and will get on your fingers. But hey, it adds to the character of the project, right?

BethPingry-Flag4Last, add glitter to a 3D Foam Star and add it to the blue field.

To finish, I mounted the flag to kraft cardstock with E-Z Runner® Permanent Strips,  then a white chipboard base using Crafty Foam Tape for dimension. I punched holes and pulled a jute ribbon through and secured it to the back side with the Crafty Foam Tape.

You could also frame it!

Thanks for coming by today!

Patritotic cards, scrapbook pages, banners & projects

Click to see more patriotic projects!

Beth

I used these supplies:


Save

A Canada Day Cupcake

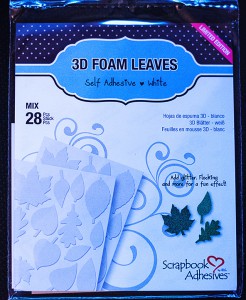
Happy Canada Day everyone! Well, I’m one day early, but it’s my turn to post here today, so I wanted to share a fun party craft idea. Using the 3D Foam Leaves and Crafty Foam Tape, I created a Canadian Flag as a cupcake topper.

kellyklapstein-canada-15

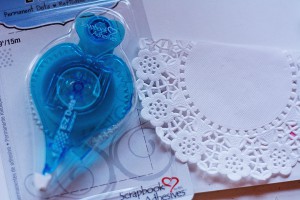
Here are the supplies you need, plus Crafty Foam Tape

kellyklapstein-canada-1On each sheet of 3D Foam Leaves, you will find two maple leaves of different sizes.  I used the smaller one on the flag, along with two bordering strips of Crafty Foam Tape.

kellyklapstein-canada-2


kellyklapstein-canada-3

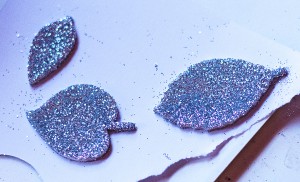
Then the red glitter came out!

kellyklapstein-canada-4

kellyklapstein-canada-5

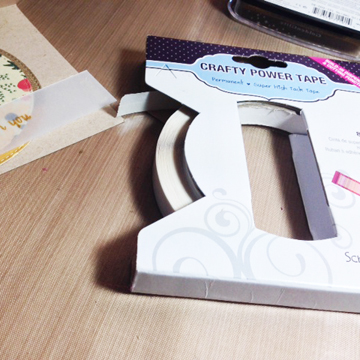
Next, I cut off a piece of bamboo skewer and pulled out my Crafty Power Tape.

kellyklapstein-canada-6

The Crafty Power Tape is super high tack and holds this flag together with the skewer on the inside fold.

kellyklapstein-canada-7

kellyklapstein-canada-8

I designed my own decorative cupcake liner and cut it out with my digital cutting machine, then adhered the ends together with Crafty Power Tape.

kellyklapstein-canada-9

Then I placed the larger maple leaf in the centre…

kellyklapstein-canada-10

More red glitter…kellyklapstein-canada-11

Love how that maple leaf sparkles and shines!

kellyklapstein-canada-12

The best part was the cupcake, of course!

kellyklapstein-canada-13

I told my husband that I REALLY needed to buy some speciality cupcakes for the occasion! (and for taking photos of my project! ha ha)

kellyklapstein-canada-14

Did you know that Crafty Power Tape also comes in this handy smaller RED dispenser? It looks Canadian!

Even if you do not live in Canada, you can make cupcake toppers with other 3D Foam Shapes, like the 3D Foam Stars or Hearts.

Now the hard part is waiting one more day to eat this cupcake on July 1st!

Happy Crafting!

Kelly Klapstein (Visit my blog www.kellycreates.ca)

SUPPLIES: Scrapbook Adhesives by 3L Crafty Foam Tape, 3D Foam Leaves and Crafty Power Tape.

Core’dinations Cardstock, Clearsnap Glitter, Brother ScanNCut

Save

Celebrate Patriotic Card Tutorial

Hi my friends! It’s Lisa here with you today and I have fun and funky little card to share with you today to start you off with your pre-Independence Day celebrations. We LOVE all things Patriotic in my house so this card may just be put up as a decoration. 🙂

LisaAdametz-Celebrate-1

For this card, the solid circle images were stamped using Distress Inks that were inked up, spritzed lightly with water and THEN stamped. That gives the finished image that kind of watercolored, less “finished” look.

LisaAdametz-Celebrate-2

The second stamp (which is the scribble circles) is then stamped over that for both the blue and red solid images in Black Archival Ink. There are small hashtag images or dash lines which can also be used at this time.

I die cut the inner circles out of patterned paper next.

LisaAdametz-Celebrate-3

Then I popped up the center circles using the 3D Foam Squares White Mix. I like having these on hand because sometimes I’m just not sure what size squares I want to use for dimension. The mix-packs take out the guess work.

LisaAdametz-Celebrate-4

After stamping on the stems of the flowers and die-cutting some petals it was time to adhere the petals. I used my favorite adhesive for this  MyStik® Permanent Strips Adhesive.

LisaAdametz-Celebrate-5

I used a curved die and more patterned paper to create interest at the corner of the paper. I used the MyStik®, once again, to keep it in place.

In the meantime I also stamped my sentiment (which I cut apart) in Versamark on cardstock weight vellum, used white embossing powder, and heat set it. After doing this, and prior to attaching/wrapping the sentiment, I decided to die-cut a few stars. I die-cut a few out of the paper pack and one out of the piece of vellum where the sentiment was stamped.

Due to the shape and sheerness (at least of the vellum star) I decided to use the Adhesive Sheets to adhere these down. I have a large 12 x 12″ piece that I love to use even for the tiny pieces because I can use it for everything. This is by *far* the best adhesive for those tiny, intricate and detailed things you just don’t know how to get to stick! And it works amazing for vellum!

LisaAdametz-Celebrate-6

LisaAdametz-Celebrate-7

Now I just place my stars where I want them and wrap my sentiment. Of course, to get the sentiment to stay where I want it, I’m breaking out the big guns: The Crafty Power Tape. 🙂

LisaAdametz-Celebrate-8

And there you have it! A super cute, funky, fun and very festive card for Independence Day.  I added a little bit of ink to the edges, but it’s totally not necessary. This card is super easy to make and looks great with all the patterns of red, white, and blue. Hope you break out your adhesives, patterned paper, and have some fun on YOUR July 4th. It’s less than a week away.

Hope you’re having a wonderful weekend.

Patritotic cards, scrapbook pages, banners & projects

Click to see more patriotic projects!


Hugs,

Lisa Adametz-sig

Supplies:

Scrapbook Adhesives by 3L®:
MyStik® Permanent Adhesive
Adhesive Sheets 12×12”
3D Foam Squares White Mix
Crafty Power Tape 81’

Other Supplies:
Simon Says Stamp: Scribble Flowers Stamp & Die; A2 Card Curved Edge Die
Avery Elle: Celebrate (stamp)
Ranger: Distress Inks, Jet Black Archival Ink, White EP
Authentique: Pride (patterned paper pack)
Tsukineko: Versamark
Bazzill: Cardstock weight vellum

Save

Save

Visit our Website and Blog!
Sign up for our Newsletter so you never miss a contest or giveaway!

instagram purple icon facebook icon purple pinterest purple icon twitter purple icon YouTube icon blog subscription purple icon

Fairytale Wedding Exploding Box Tutorial

Hello Friends. Asia King here. Today I’m sharing a project that is completely new to me and I can’t believe it’s taken me such a long time to try this! I’m talking about an exploding box/card.

Fairytale Wedding_Asia King15

I frequently come across beautiful exploding boxes in blogland but somehow I’d never thought of making one myself. Perhaps I mistakenly assumed it was really difficult – but it isn’t at all! If you’ve never tried it I hope this project will inspire you to have a go.

This project was a commissioned wedding gift and my instructions were that the Bride loved shabby chic, lace and hearts. Oh and that the card should have a matching box. I think I met all the requirements :).

Fairytale Wedding_Asia King16

Here are the steps for the project.

1. Prepare a base for the card using a 12″ x 12″ double-sided scrapbook paper. Score vertically and horizontally in 4″ increments. You should get 9 squares. Next cut out the corner squares as shown below and fold the pages in. The square in the middle will be the base/bottom of the box.

Fairytale Wedding_Asia King1

2. Decorate the outer sides with some lace and E-Z Dots® Mini Permanent (shown but now discontinued), but you can use the E-Z Dots® Permanent in Original or Refillable.

Fairytale Wedding_Asia King2

3. Cut out decorative inserts for the pages/sides from patterned papers and adhere with Crafty Foam Tape White.

Fairytale Wedding_Asia King3

You can also add some distressing and stamping as required.

Fairytale Wedding_Asia King4

4. Fussy cut any additional graphics and elements and mount them onto the pages with Crafty Foam Tape White and Thin 3D Foam Squares Mix White.

Fairytale Wedding_Asia King5

5. For the 3D birdcage cut 4 birdcage fronts from Grunge Paper and heat emboss with White Shabby Chic Enamel. Prepare a small box insert for the bottom of the birdcage (with each side equal to the width of the birdcage die-cut) and adhere the sides with E-Z Dots® Permanent. Align the die cuts to the box sides, mark and punch the holes and attach the birdcage fronts with decorative brads. Then adhere the birdcage to the card base with Mounting Squares White keeping it open for now. Fill the bottom of the cage with Dodz Adhesive Dots 3D and sprinkle over with some raffia.

Fairytale Wedding_Asia King6

6. Place a small decorative bird inside the birdcage. Add some DIY eggs made from Dodz Adhesive Dots 3D and crushed Color Fragments.

Fairytale Wedding_Asia King7

7. Add additional embellishments around the birdcage with Dodz Adhesive Dots 3D.

8. Add some finishing elements to the box fronts with cut out stamped panels decorated with Creative Photo Corners Black and adhered with 3D Foam Squares Black.

Fairytale Wedding_Asia King9

9. Also add some die-cut labels adhered with  Thin 3D Foam Squares Mix White.

Fairytale Wedding_Asia King10

10. For the lid cut a square with dimensions 6 and 1/8 inch on each side. Score all sides 1″ from the left and cut a small slit to form the lid. Adhere the sides with E-Z Runner® Permanent Strips.

Fairytale Wedding_Asia King11

11. Add more lace decorations with E-Z Dots Permanent and Dodz Adhesive Dots 3D.

Fairytale Wedding_Asia King12

12. I also created a bunch of small roses from matching papers using small – 5 petal flowers punch and Dodz Adhesive Dots Small. Then I added some more flowers with Dodz Adhesive Dots 3D.

Fairytale Wedding_Asia King13

13. If required, add some more touches with 3D Foam Hearts and 3D Foam Leaves dipped in Micro Glitter.

Fairytale Wedding_Asia King14

 And here are some additional views of the box.

Fairytale Wedding_Asia King17

For further close ups, please also visit my blog :).

Fairytale Wedding_Asia King18

I hope you enjoyed this tutorial! Thanks for stopping by and for your lovely comments!

Supplies:

E-Z Dots® Mini Permanent, Crafty Foam Tape White,  Thin 3D Foam Squares Mix White,  Mounting Squares – WhiteDodz Adhesive Dots 3D,  Creative Photo Corners  Black,  3D Foam Squares BlackDodz Adhesive Dots SmallE-Z Runner® Permanent Strips,  3D Foam Hearts, 3D Foam Leaves, E-Z Dots Permanent Refillable, E-Z Dots Permanent Original

Other supplies:

Stamps – Married Monograms & Fairy Tale Wedding (Stampendous); Creative Stamping magazine – The Celebrations Collection

Papers – DCVW Mariposa collection; Bazzill Basics Paper Heritage collection

Embellishments: Taupe Color Fragments and Cinnamon Micro Glitter (Stampendous); lace, flowers, Bird Cage die; Spellbinders Foliage die, brads, decorative flower mist

Asia King Blog signature

Save

Neat and Tangled Blog Hop Day 5- You Are Awesome Card

Hello! Welcome to the last day of the last day of the Neat & Tangled Blog hop!


AJOtto-NeatTangled-1My card today uses the Tiny Triangles background and the You + Me set.

AJOtto-NeatTangled-2


I start by stamping the triangles on the upper portion of my card.  I also stamp part of my sentiment below where my patterned paper will go- I adhere it temporarily with E-Z Dots® Repositionable Refillable, stamp the sentiment and then secure the strip with E-Z Squares® Refilllable.  Just. in. case. 🙂 Stamp accidents happen! 😉

AJOtto-NeatTangled-3After my patterned paper is adhered, I wrapped a piece of twine around. To adhere my die cut, I always lay it over where it’s to be placed- and then place my 3D Foam Squares appropriately to avoid sitting on the twine.  That can look lumpy sometimes.


AJOtto-NeatTangled-4 I then secure my stamped heart cut out with the smaller 3D Foam Square from the pack and finish it off with a few enamel dots.
At the end of the week we will pull a winner from all entries through our Rafflecopter box. Please enter through the Rafflecopter system with a blog comment. Additional entries are available too! Good Luck and thanks for visiting! Come back each day to enter, contest runs from June 23-27 at 11:59pm Central Time! Don’t forget to visit the Neat and Tangle’s Blog for more chances to win!
a Rafflecopter giveaway

Enjoy!

AJ

stamps:  Tiny Triangles backgroundYou + Me from Neat & Tangled

Patterned paper- Echo Park, My Minds Eye enamel Dots, Spellbinders ink, twine

scrapbookadhesiveshop-01

Neat and Tangled Blog Hop Day 4

Hello, Latisha here with you.  Today I am sharing a card using the Neat & Tangled Swirly Twirly Tags stamp set.

LY 0626 neatntangledcard

1.  Cut/score white card stock.

2.  Trim down white corrugated paper from Fancy Pants Designs.

3.  Adhere panel to the card front using Scrapbook Adhesives by 3L Crafty Power Tape.

LY 0626 neatntangledcard3

4.  Trim down pattern paper, round bottom corners using a corner rounder.

5.  Adhere pattern paper to the card using Scrapbook Adhesives by 3L 3D Foam Squares (white, regular).

LY 0626 neatntangledcard4

6.  Stamp the tag image with orange ink onto white card stock.

7.  Stamp the hello sentiment with black ink, inside the tag.

8.  Using scissors cut out the tag.

9.  Adhere the tag to the card using 3D Foam Squares.

10.  Add twine to embellish.

LY 0626 neatntangledcard5

The 3D Foam Squares are really great to use on projects because of the depth it creates.

At the end of the week we will pull a winner from all entries through our Rafflecopter box. Please enter through the Rafflecopter system with a blog comment. Additional entries are available too! Good luck and thanks for visiting! Come back each day to enter, contest runs from June 23-27 at 11:59pm Central Time! Don’t forget to visit the Neat and Tangled’s Blog for more chances to win!

a Rafflecopter giveaway

Materials Used:

scrapbookadhesiveshop-01

Neat and Tangled Blog Hop Day 4 – Trendy Triangles

Welcome to Day 4 of our Neat and Tangled Blog Hop!

Hello Blogosphere! It’s Tiffany here today with a trendy triangle card and I used Neat and Tangle’s My Favorite and Tiny Triangles Stamp Sets!

NeatAndTangledTiff1I used 3D Foam Pennants and glitter foils as custom embellishments! To adhere everything, I used my go-to MyStik® Permanent Strips. EASY peasy!

NeatAndTangledTiff2

At the end of the week we will pull a winner from all entries through our Rafflecopter box. Please enter through the Rafflecopter system with a blog comment. Additional entries are available too! Good luck and thanks for visiting! Come back each day to enter, contest runs from June 23-27 at 11:59pm Central Time! Don’t forget to visit the Neat and Tangled’s Blog for more chances to win!

a Rafflecopter giveaway

Adhesives

Stamps

  • Neat and Tangled (My Favorite, Tiny Triangles)

Products

  • Staz-On Black Ink
  • Impress Pool Ink

Thanks for joining me today!

TiffJohnsonSignature

scrapbookadhesiveshop-01

Neat and Tangled Blog Hop Day 3 – Kindness Matters

Welcome to Day 3 of our blog hop with Neat and Tangled!

Hi! Erica here today, and I’m sharing two cards I created using the Kindness Matters stamp set by Neat and Tangled. I created both cards using the Time Traveler Collection by Prima Marketing and adhered my layers of pattern paper together using the MyStik® Permanent Strips.

Kindness Card Number 1 by Erica Houghton for Scrapbook Adhesives by 3L

I adhered the flowers and ribbon on both cards using the Crafty Foam Tape. This tape is strong, and sticky making it perfect for those heavier or dimensional embellishments.

Kindness Card Two by Erica Houghton for Scrapbook Adhesives by 3L

At the end of the week we will pull a winner from all entries through our Rafflecopter box. Please enter through the Rafflecopter system with a blog comment. Additional entries are available too! Good luck and thanks for visiting! Come back each day to enter, contest runs from June 23-27 at 11:59pm Central Time! Don’t forget to visit the Neat and Tangled’s Blog for more chances to win!

a Rafflecopter giveaway

Adhesives

Stamps

  • Neat and Tangled – kindness matters stamp

Paper

  • Prima Marketing, Time Traveler

Embellishments

  • Prima Marketing, Time Traveler – tag me
  • Prima Marketing – flowers

Products

  • Ranger Ink – Tim Holtz – distress ink

Thanks for joining me today!

Erica Houghton