You are in our US store • Switch to Europe store

Travel Tag Trio

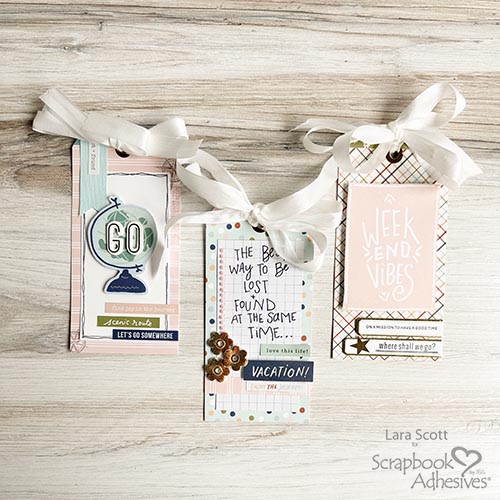
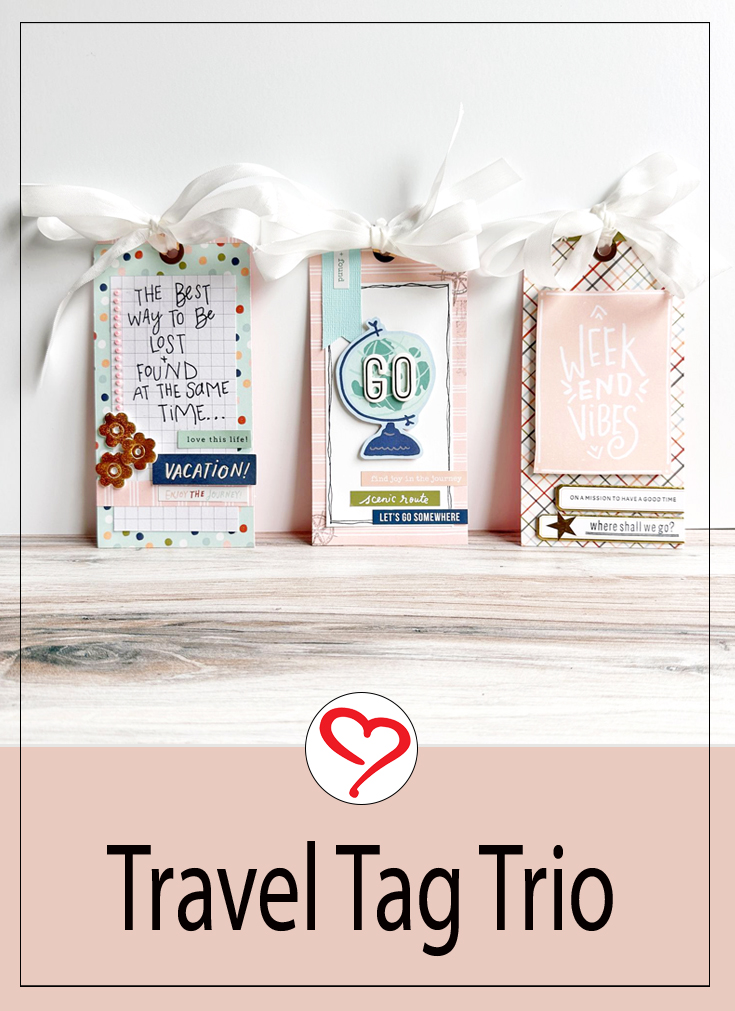
Hey Y’all, Lara here again with a great Travel Tag Trio set that was super easy to create! You can make these tags as simple or detailed as you want. Use up those scraps! Or any other odds and ends you might have around. Depending on your tags’ details, they can take 5-30 minutes each. They are also great for kids’ projects.

Travel Tag Trio by Lara Scott for Scrapbook Adhesives by 3L

Travel Tag Backgrounds

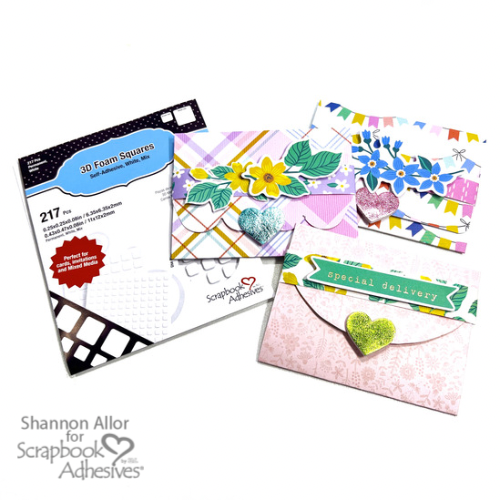
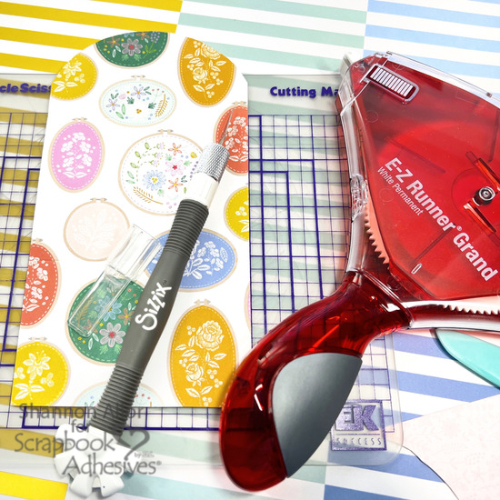
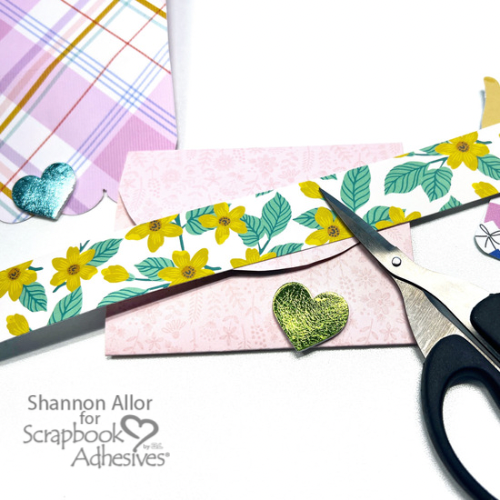
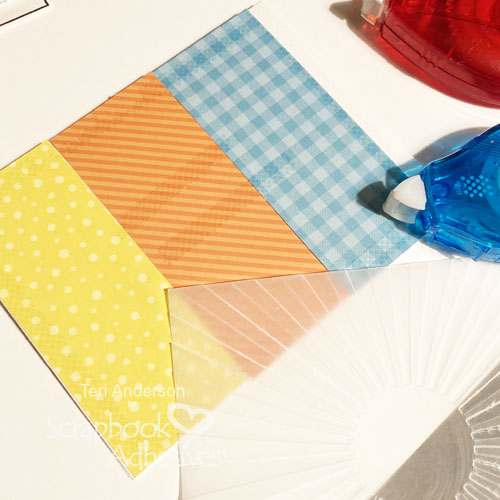
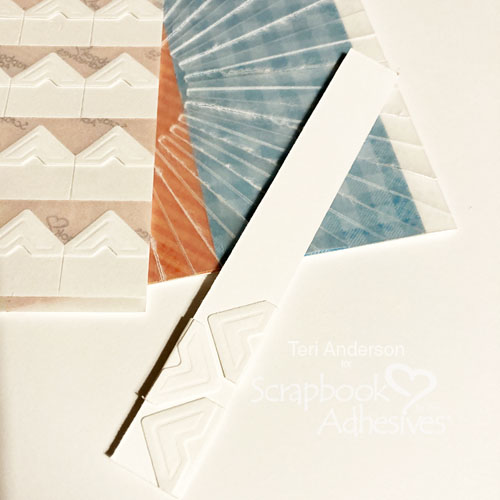
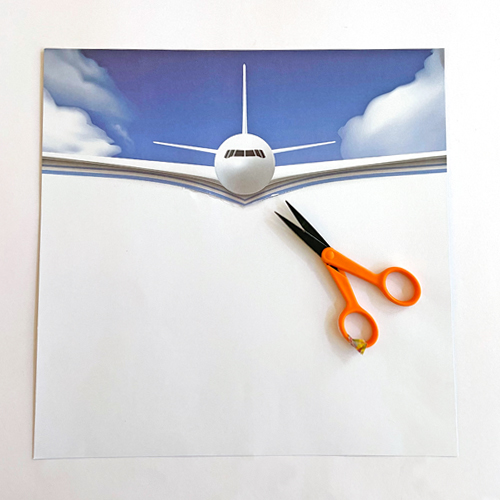
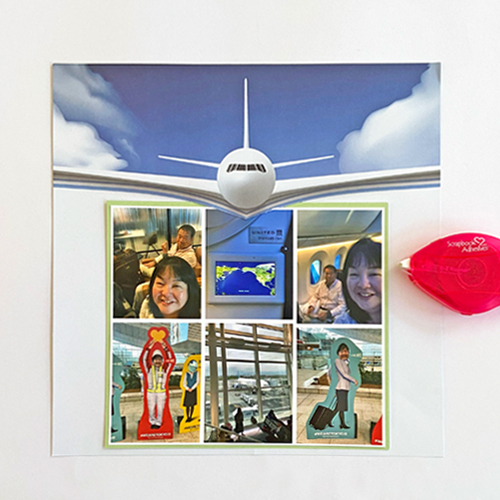
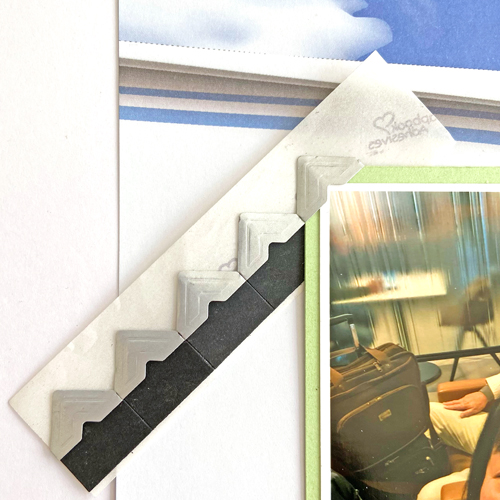
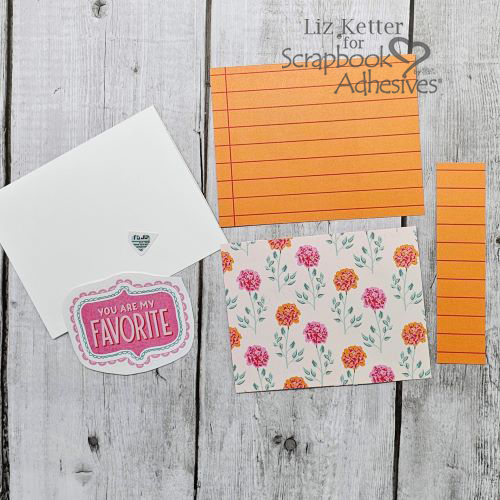
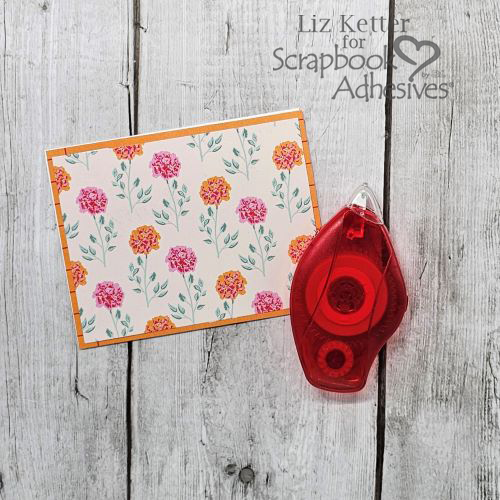
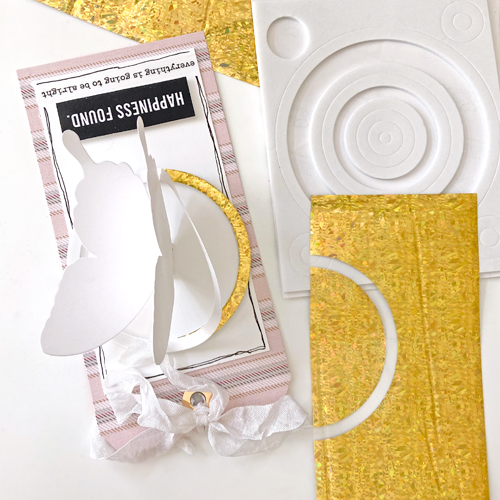
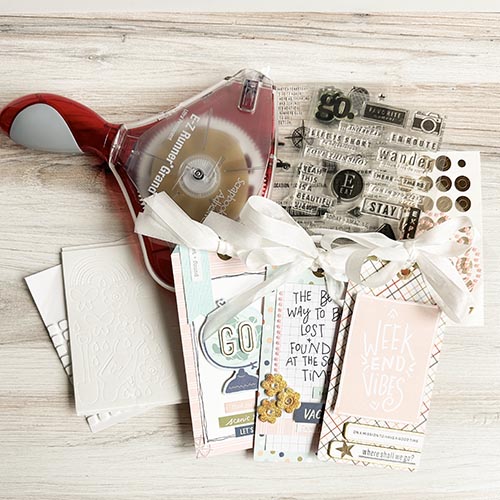
All three tags are approximately 6.25 x 3.125″ but you can make your own by cutting out a tag shape or using a die-cut machine to create your own. The process for each tag started the same. Each was covered with patterned paper and secured with the E-Z Runner® Grand Ultra Strong Refillable Dispenser. Then I added a little coordinating extra 3/8″ wide strip on the top of the tag, punched a hole, and added gold foil hole reinforcers that I designed and cut out on my electronic cutting machine.

Travel Tag #1 – Lost and Found

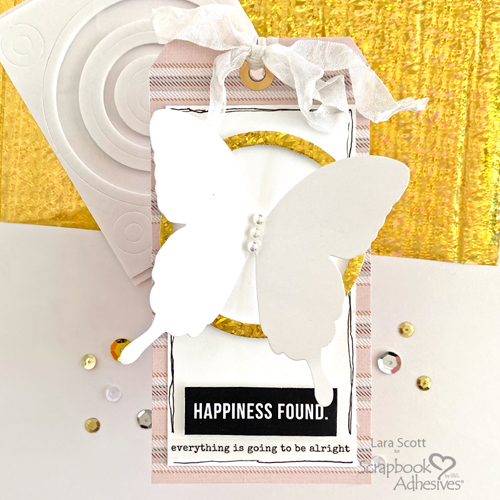
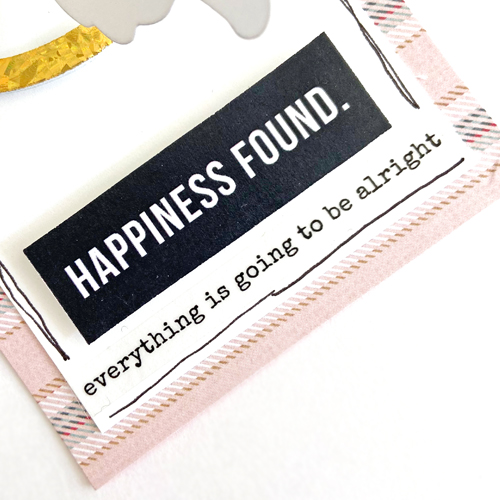
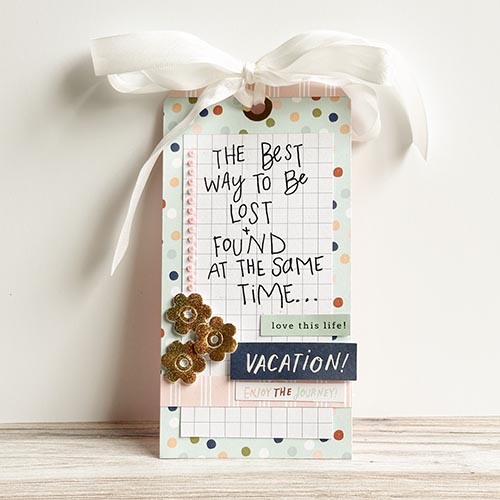
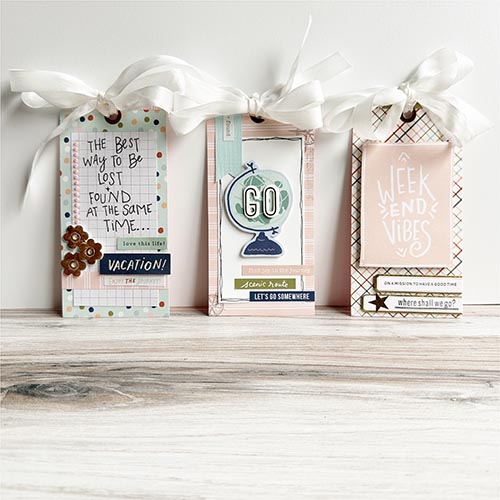
This was probably the most detailed tag since I hand-lettered and used the Wear Your Adhesive on the Outside technique with foil. On a piece of 2.5 x 5″grid paper, I hand-wrote the quote “The Best Way to be Lost and Found at the Same Time.” Then added another piece of striped paper across the bottom part of the grid paper. Designer’s Tip: Use this piece from the marketing strip on the bottom of the paper.

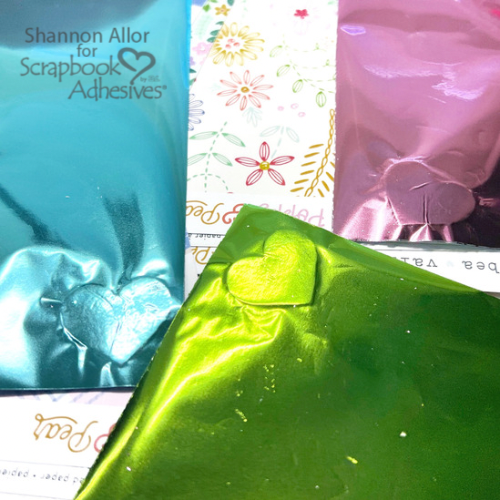
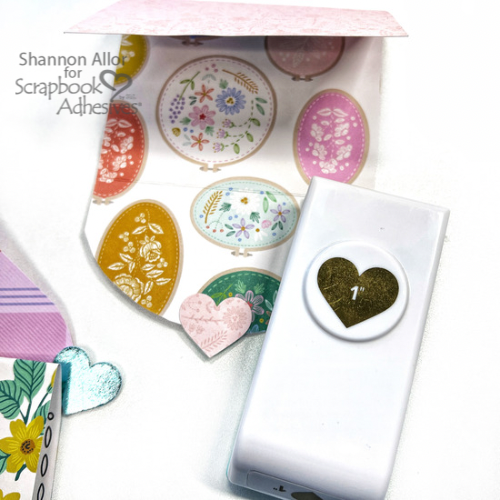
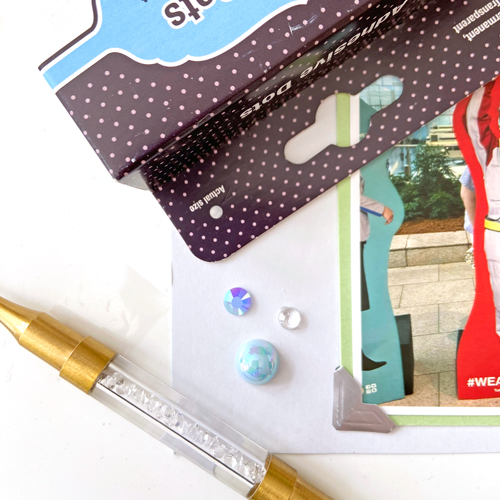
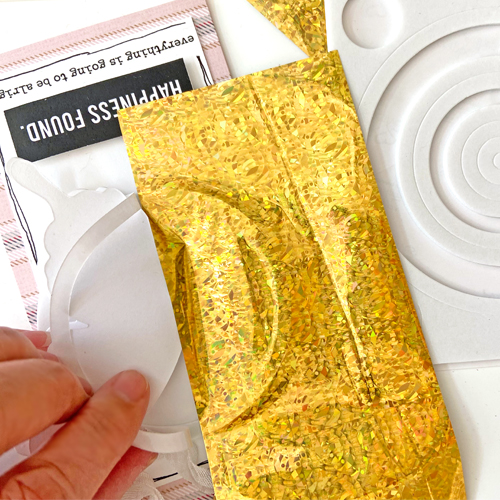
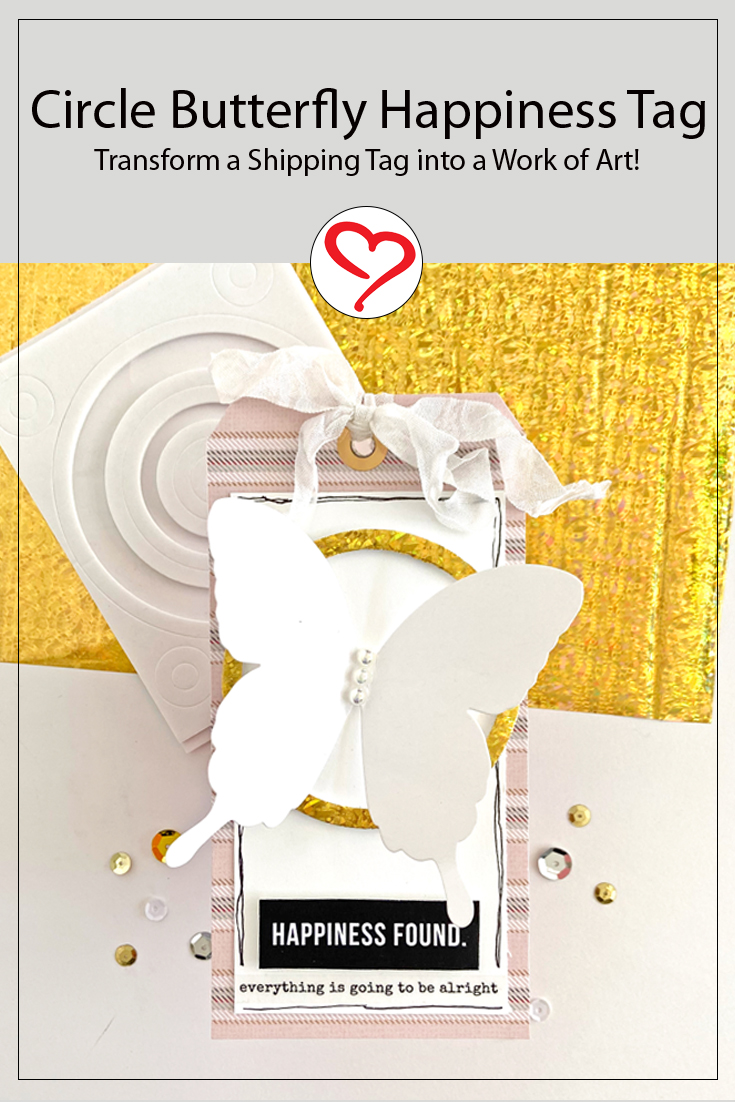
For the flowers, I used them from the 3D Foam Garden Shapes. After placing them on the tag, remove the top liner and place a piece of fine glitter gold foil from the Metallic Transfer Foil Sheets Holographic Colors over the exposed adhesive. Make sure the color side is facing you. Gently rub the foil to transfer the color to the flowers. Add a little bling, tie on a piece of ribbon, and add a few stickers and you have a great gift tag or embellishment for a travel scrapbook page or mini book.

Travel Tag Trio by Lara Scott for Scrapbook Adhesives by 3L

Travel Tag #2 – Go

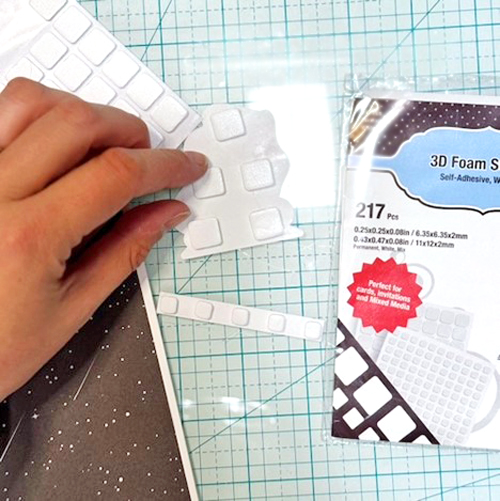
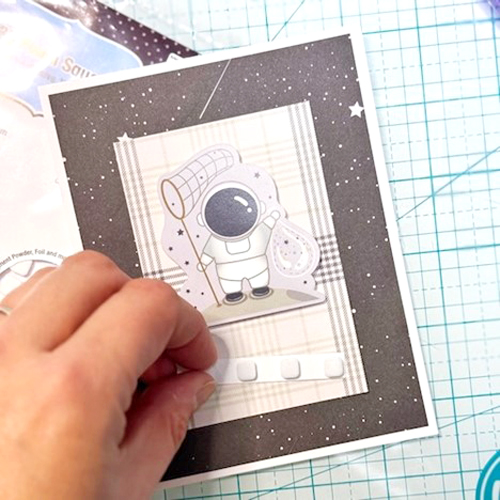
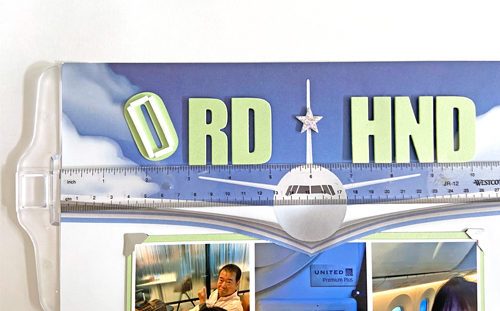
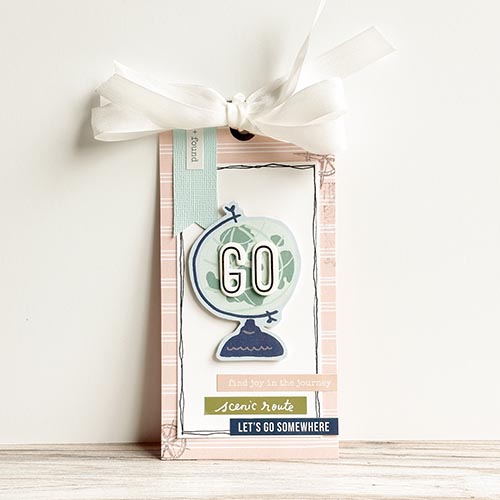
Travel Tag #2 includes simple stamping and layering of a piece of white cardstock cut to 2.5 x 4.75″ with a few hand-drawn lines. Cut out a small banner from light blue cardstock and add a sticker. Cut out the globe from one of the label papers, and add some dimension with 3D Foam Squares White Small. Then place the letter stickers to spell Go. After adding a few stickers and some ribbon, it is done!

Travel Tag Trio by Lara Scott for Scrapbook Adhesives by 3L

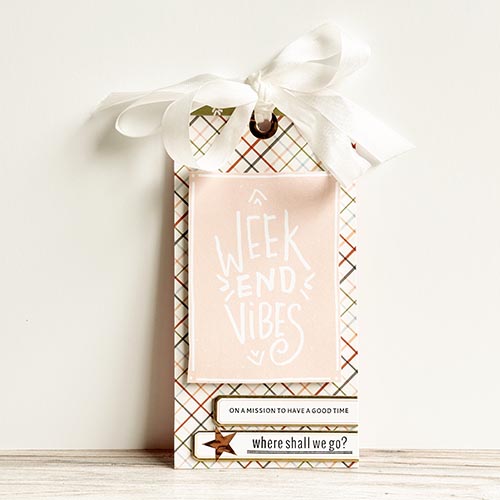
Travel Tag #3 – Weekend Vibes

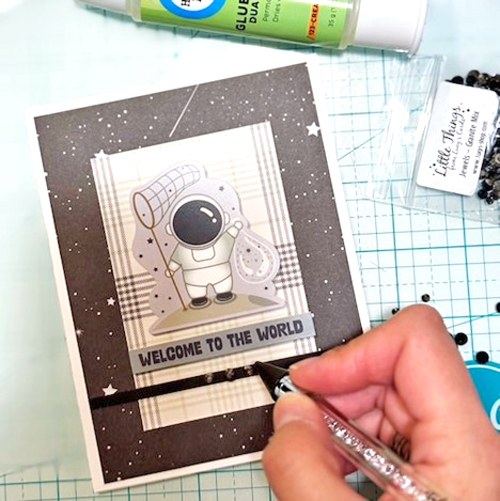
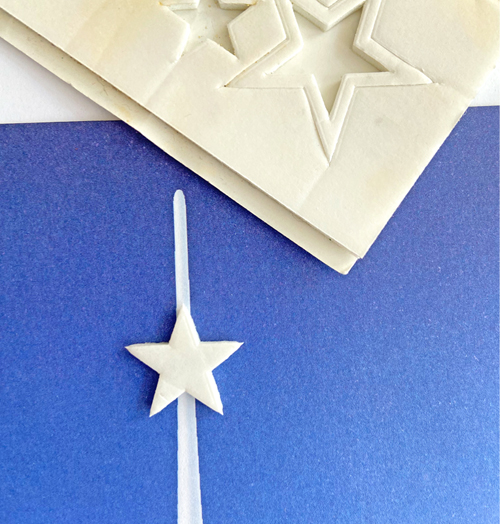
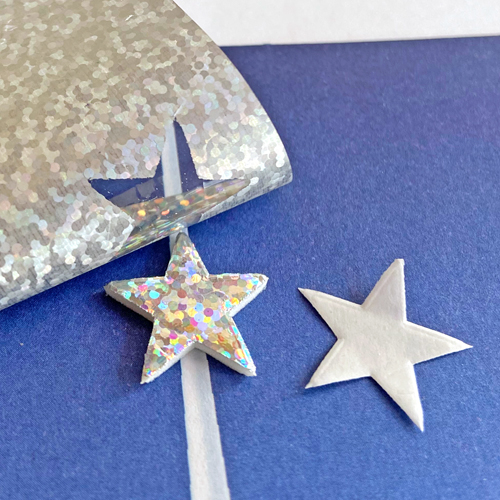
Tag #3 is probably the most simple. Cut out the Weekend Vibes from a label paper and add to the tag with Crafty Foam Tape White 13ft. Stamp on two gold foil chipboard labels, adhere to the tag, and trim off the excess. Add a gold star and some ribbon and you have a great little tag that takes about five minutes. I think it took me longer to decide what to put on the tags than to make them.

Travel Tag Trio by Lara Scott for Scrapbook Adhesives by 3L

A Few More Views

Travel Tag Trio by Lara Scott for Scrapbook Adhesives by 3L

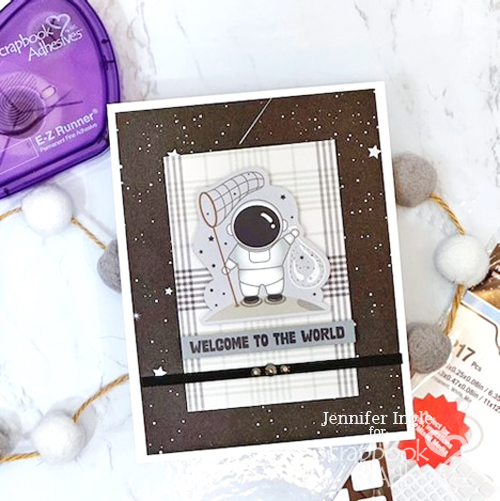
I had never done the Wear Your Adhesive on the Outside technique before with the 3D Foam Shapes and the Metallic Transfer Foil Sheets. It was fun and I will incorporate that concept in future projects. So be on the lookout!

Travel Tag Trio by Lara Scott for Scrapbook Adhesives by 3L

Thanks for visiting!
Lara Scott

Creative Time: 40 mins (for all three tags)
Skill Level: Beginner

Materials Needed:
Scrapbook Adhesives by 3L®

E-Z Runner® Grand Ultra Strong Refillable Dispenser

3D Foam Squares White Small

Crafty Foam Tape White 13ft

3D Foam Garden Shapes

Metallic Transfer Foil Sheets Holographic Colors

Other: Papers and Stickers: Simple Stories (Safe Travels Collection); Stamp: Kerrie Bradford (Go and Found Stamp Set); Ink: Tsukineko (Versafine in Onyx Black); Craft Dies: Sizzix; Nestability Bling: Want2Scrap; Chipboard Letter Stickers; Blank Tags, Grid paper, Gold Edge Chipboard Labels (Ali Edwards) Chipboard Light Blue and White Cardstock; Gold Foil Vinyl (for electronic die cut machine use); Hole reinforcers (Lara Scott Designs); White Ribbon

Click Preferred Retailers List

Save to Pinterest!

Travel Tag Trio by Lara Scott for Scrapbook Adhesives by 3L Pinterest

Visit our Website and Blog!
Sign up for our Newsletter so you never miss a contest or giveaway!

instagram purple icon facebook icon purple pinterest purple icon twitter purple icon YouTube icon blog subscription purple icon

Hearts & Floral Gift Card Trio

Hi, Shannon here today! I am bringing you this fun project, Hearts & Floral Gift Card Trio, featuring the “Adhesive On the Outside” Technique! I grabbed a bunch of scraps from the American Crafts “Poppy & Pear” and some of my favorite Scrapbook Adhesives By 3L products!

Hearts & Floral Gift Card Trio by Shannon Allor for Scrapbook Adhesives by 3L

Gift Card Trio Base

For the base, cut three 7.5 x 3″ patterned paper pieces. Be sure that the patterns are pleasing to the eye on both sides. Score with the long side up (7.5″ side) on a scoreboard at 2″ and 5″. Then crease the lines with a bone folder.

For each base, I cut three different flap closures (rounded corners, rounded flap end, and scalloped edge). For two of the base, I created two slits with a craft knife to fit the gift cards. The third one, I plan to secure the gift card with an Adhesive Dots Large Repositionable.

Hearts & Floral Gift Card Trio by Shannon Allor for Scrapbook Adhesives by 3L

Wear Your Adhesive on the Outside with Foil

I wanted to see how well the 3D Foam Creative Sheets Small in White would work with a one-inch heart punch. It was so easy and cut like butter! Next, I removed one of the liners and centered each foam heart on the flap end of the gift card holder (front side), positioning the tip of the heart over the edge.

Now for the fun part, the “Wear Your Adhesive on the Outside” technique! Peel off the top liner of the punched foam heart, and place the foil from the Metallic Transfer Sheets in Pastel with the color side facing you. Then lightly burnish it with your fingertip to transfer the color. It adheres to the foam shape with ease. Don’t worry if you miss a spot. Just reapply the foil to fill in the missing area.

Hearts & Floral Gift Card Trio by Shannon Allor for Scrapbook Adhesives by 3L

Next, I punched out from a patterned paper scrap and attached it to the back side of the heart with the E-Z Runner® Grand Permanent Strips. This was perfect to finish off the exposed side of the hearts!

Hearts & Floral Gift Card Trio by Shannon Allor for Scrapbook Adhesives by 3L

Belly Bands for Gift Card Trio

I’ve created little belly bands using a contrasting pattern for each. Start with a one-inch strip and fold it around the gift card holder. Apply just a small amount of the E-Z Runner® Grand Permanent Strips adhesive to hold the ends together. To pop up a sentiment or floral element in the bands, I used several 3D Foam Squares White Mix.

Hearts & Floral Gift Card Trio by Shannon Allor for Scrapbook Adhesives by 3L

Thanks for Visiting!
Shannon Allor

Creative Time: 60 mins
Skill Level: Intermediate

Materials Needed:
Scrapbook Adhesives by 3L®

E-Z Runner® Grand Permanent Strips

3D Foam Squares White Mix, 3D Foam Creative Sheets Mix, and 3D Foam Creative Sheets Small White

Metallic Transfer Foil Sheets Pastel Colors and Metallic Transfer Foil Sheets Celebrate Colors

Adhesive Dots Large Repositionable

Other: American Crafts Poppy & Pear Collection

Click Preferred Retailers List

Save to Pinterest!

Hearts & Floral Gift Card Trio by Shannon Allor for Scrapbook Adhesives by 3L Pinterest

Visit our Website and Blog!
Sign up for our Newsletter so you never miss a contest or giveaway!

instagram purple icon facebook icon purple pinterest purple icon twitter purple icon YouTube icon blog subscription purple icon

Welcome to the World Card

Hello, friends! This is Jingle here today with a super fun Welcome to the World Card for a special little one! I used fantastic papers and stickers from PhotoPlay Paper, along with my Scrapbook Adhesives by 3L favorites, to make this simple design come to life.

Welcome to the World Card by Jennifer Ingle for Scrapbook Adhesives by 3L

Welcome to the World Card Layers

Create a white card base. Trim the star patterned paper slightly smaller than the base and adhere with the E-Z Runner® Permanent Fine Adhesive Dispenser. I love this adhesive because it gives you a little time to reposition if you need it. Also, it stays flat beneath thinner papers and doesn’t show through!

Welcome to the World Card by Jennifer Ingle for Scrapbook Adhesives by 3L

Adding Elements

This next step is super fun! Create elements with stickers. Grab a powder tool (or just some cornstarch and a small brush) and dust the back of the stickers you want to use on your card. This eliminates their stickiness. Now you can use an adhesive of your choice.

Welcome to the World Card by Jennifer Ingle for Scrapbook Adhesives by 3L

After the stickers were dusted, I used the 3D Foam Squares White Mix which allows for dimension and interest to the design!

Welcome to the World Card by Jennifer Ingle for Scrapbook Adhesives by 3L

To anchor the sticker elements, I centered a plaid panel on the card front with E-Z Runner® Permanent Fine Adhesive Dispenser. Next, adhere the foam-backed stickers onto the plaid panel.

Welcome to the World Card by Jennifer Ingle for Scrapbook Adhesives by 3L

Finishing Touches

To finish, let’s add a little sparkle! Adhere a black strip of cardstock to the card with the E-Z Runner® Permanent Fine Adhesive Dispenser. To adhere the small smoke colored gems to the card, I used dots of Dual Tip Glue Pen.

Welcome to the World Card by Jennifer Ingle for Scrapbook Adhesives by 3L

This truly is a fun card to create! I hope you have enjoyed my process with this sweet Welcome to the World Card.

Welcome to the World Card by Jennifer Ingle for Scrapbook Adhesives by 3L

Thanks for stopping by!
Jennifer Ingle (aka Jingle)

Creative Time: 30 mins
Skill Level: Beginner

Materials Needed:
Scrapbook Adhesives by 3L®

E-Z Runner® Permanent Fine Adhesive Dispenser

3D Foam Squares White Mix

HomeHobby™ by 3L

Dual Tip Glue Pen

Other: Papers + Stickers: PhotoPlay (To the Moon and Back Collection); Gems: Little Things by Lucy’s Card (Smoked Gem Stones); Black + White Cardstock

Click Preferred Retailers List

Save to Pinterest!

Welcome to the World Card by Jennifer Ingle for Scrapbook Adhesives by 3L Pinterest

Visit our Website and Blog!
Sign up for our Newsletter so you never miss a contest or giveaway!

instagram purple icon facebook icon purple pinterest purple icon twitter purple icon YouTube icon blog subscription purple icon

Thankful Shaker Card

Hello crafty friends! Tracy here, and today I have a sweet little Thankful Shaker Card to share. Follow along for all of the crafty details.

Thankful Shaker Card by Tracy McLennon for Scrapbook Adhesives by 3L

Let’s Get Started!

Let’s cut all of my card front layers. I have the pre-cut card base so I need a yellow cardstock piece for inside the card. Then the purple patterned piece for the card panel and a pink cardstock for the card front of the Thankful Shaker Card.

Thankful Shaker Card by Tracy McLennon for Scrapbook Adhesives by 3L

Adhere the inside yellow cardstock and the purple patterned paper to the card using the E-Z Runner® Ultra Strong Refillable Dispenser. I added a Creative Photo Corners White on each corner of the pink cardstock before securing it to the card front with the E-Z Runner® Ultra Strong Refillable Dispenser. This gives the front stability when die-cutting in the next step.

Thankful Shaker Card by Tracy McLennon for Scrapbook Adhesives by 3L

Die-cut a hole out of the card front to match the pre-cut card base. Add the scalloped sticker around the shaker opening. Next filler the shaker cup with the Spring Mix Upz. Add the self-adhesive shaker cup inside the card using the card front opening as a guide.

Thankful Shaker Card by Tracy McLennon for Scrapbook Adhesives by 3L

Add the die-cut pieces and stickers to the card front. Use Thin 3D Foam Squares Black Mix for some extra dimension to this Thankful Shaker Card.

Thankful Shaker Card by Tracy McLennon for Scrapbook Adhesives by 3L

Thanks so much for stopping by!
Tracy McLennon

Creative Time: 30 mins
Skill Level: Beginner

Materials Needed:
Scrapbook Adhesives by 3L®
Creative Photo Corners White
E-Z Runner® Ultra Strong Refillable Dispenser
Thin 3D Foam Squares Black Mix

Other: Patterned Paper: Bella Blvd (Just Because Collection); Shaker: Buttons Galore (Mix Upz); Circle Dies; Pink and White Cardstock

Save to Pinterest!

Thankful Shaker Card by Tracy McLennon for Scrapbook Adhesives by 3L Pinterest

Visit our Website and Blog!
Sign up for our Newsletter so you never miss a contest or giveaway!

instagram purple icon facebook icon purple pinterest purple icon twitter purple icon YouTube icon blog subscription purple icon

Inked Happy Birthday Card

Looking for a colorful Happy Birthday Card? Hi, Margie here today! I am sharing an Inked Happy Birthday Card and showing what adhesives I used to ensure elements stick!

Inked Happy Birthday Card by Margie Higuchi for Scrapbook Adhesives by 3L

Inked Birthday Background

My card size is a standard A2 size (4.25 x 5.5 inch) so I cut down my white cardstock card panel to 4 x 5.25 inch. Using the fun ink tool applicators, I inked my background in three colors. Let it dry completely or hit it with a heat tool.

Inked Happy Birthday Card by Margie Higuchi for Scrapbook Adhesives by 3L

Working on the Sentiment

For a clean adhesion, I apply Adhesive Sheets 4 x 6in. on the back of a white cardstock piece before die-cutting Happy Birthday. I love the edge-to-edge coverage – think sticker! Next die-cut the black sentiment outline. Remove the backing from the sentiment and place it on the outline piece.

Assembling the Inked Birthday Card

Let’s work on the card panel first. Using the E-Z Runner® Permanent Strips Dispenser, center the sentiment on the inked card panel. Then apply several 3D Foam Strips Large White to the back and place it on the card base. I like using them as they don’t curl up like the big rolls of foam tape…although I love those too. LOL!

Wear Your Adhesive on the Outside with 3D Foam Circles

Instead of sequins and gems, I used the smallest size of the 3D Foam Circles White Mix and the silver fine glitter sheet from the Metallic Transfer Foil Sheets Holographic Colors pack to embellish. Randomly place your circles, remove the top liner, and place the foil over the exposed adhesive (make sure the color side is facing you). Rub gently to transfer the color to the foam, peel off, and done! So easy!

Thanks for stopping by!
Margie Higuchi

Creative Time: 40 mins
Skill Level: Intermediate

Materials Needed:
Scrapbook Adhesives by 3L®

E-Z Runner® Permanent Strips Refillable Dispenser or E-Z Runner® Permanent Strips Dispenser

3D Foam Circles White Mix

3D Foam Strips Large White

Adhesive Sheets 4 x 6in.

Metallic Transfer Foil Sheets Holographic Colors

Other: Ink: Ranger Ink (Distress Oxide in Spiced Marmalade, Mustard Seed and Salty Ocean); Ink Applicator: Local King Rubber Stamp (Magic Mushroom Ink Applicators); Craft Dies: Craft Fancy (CF309 Masculine Happy Birthday Set); White + Black Cardstock

Click Preferred Retailers List

Save to Pinterest!

Inked Happy Birthday Card by Margie Higuchi for Scrapbook Adhesives by 3L

Visit our Website and Blog!
Sign up for our Newsletter so you never miss a contest or giveaway!

instagram purple icon facebook icon purple pinterest purple icon twitter purple icon YouTube icon blog subscription purple icon

Hello Friend Panda Card

Hi, friends! Is anyone else excited for the carefree days of Summer? Teri here with a Summer-inspired Hello Friend Panda Card. It’s perfect to send to a friend during the hot days of June, July, and August!

Hello Friend Panda Card by Teri Anderson for Scrapbook Adhesives by 3L

Stamp Panda and Summer Images

Start by stamping, die-cutting, and coloring in a few Summer-themed images. Don’t have the stamps I used? That’s OK! Pick some stamps that embody the feel of the season!

Hello Friend Panda Card by Teri Anderson for Scrapbook Adhesives by 3L

Embellish your images by adhering them together. Use a flat adhesive on some of the images. I love using the E-Z Runner® Petite Permanent Dots Refillable Dispenser for this because the adhesive is dry and not messy, plus I can work quickly with it.

Hello Friend Panda Card by Teri Anderson for Scrapbook Adhesives by 3L

Use 3D Foam to adhere some of the remaining images. This will give them pop. I used 3D Foam Strips because they are long and skinny and can easily be cut up to fit any small space. You can also use them together to make thicker strips!

Decorate Your Card

Set your images aside. Adhere strips of patterned paper onto a card. Emboss a panel of vellum and adhere it on top of the card with the E-Z Runner® Petite Permanent Dots Refillable Dispenser.

Hello Friend Panda Card by Teri Anderson for Scrapbook Adhesives by 3L

Take a strip of cardstock. Create a pattern by adhering Creative Photo Corners in White onto it. Mount the strip to your card.

Hello Friend Panda Card by Teri Anderson for Scrapbook Adhesives by 3L

Add your stamped images onto your card, along with a sentiment. Complete your card by adding few sequins or small embellishments to it.

Hello Friend Panda Card by Teri Anderson for Scrapbook Adhesives by 3L

I hope you are inspired to make a Summer-themed Hello Friend Panda Card of your own! Thanks for stopping by today!

Happy Creating!

Teri Anderson

Creative Time: 60 minutes
Skill Level: Intermediate

Materials Needed:
Scrapbook Adhesives by 3L®

3D Foam Strips

E-Z Runner® Permanent Strips Refillable Dispenser

E-Z Runner® Petite Permanent Dots Refillable Dispenser

Creative Photo Corners White

Adhesive Dots Micro

Other: Cardstock and Vellum: Neenah; Stamps and Dies: Sunny Studio (Big Panda); Embossing Folder: Sunny Studio (Sunburst); Patterned Paper: Sunny Studio (Dots & Stripes Jewel Tones, Joyful Holiday and Surprise Party 6×6 Paper Packs); Ink: Pinkfresh Studio (Black); Markers (Copic); Confetti: Simon Says Stamp!

Save to Pinterest!

Hello Friend Panda Card by Teri Anderson for Scrapbook Adhesives by 3L Pinterest

Visit our Website and Blog!
Sign up for our Newsletter so you never miss a contest or giveaway!

instagram purple icon facebook icon purple pinterest purple icon twitter purple icon YouTube icon blog subscription purple icon

Glittered Celebrate Card

Hi everyone, Yvonne here with a sparkling Glittered Celebrate Card that is super easy to create. It is suitable for beginner cardmakers.

Glittered Celebrate Card by Yvonne van de Grijp for Scrapbook Adhesives by 3L

I used the Wear Your Adhesive on the Outside technique in creating this Glittered Celebrate Card. Wanna join me in making this fun card?

Glittered Celebrate Card Base

Start by trimming a piece of patterned paper to a rectangle top card panel. Then adhere onto a yellow card panel using the E-Z Runner® Ultra Strong Refillable Dispenser as your adhesive. Next, adhere to a white card base.

Die-cutting 3D Foam

3D Foam Sheets Medium White are perfect for die-cutting and will create a gorgeous uplifting effect for this Glittered Celebrate Card. First, die-cut the Celebrate element from 3D Foam Creative Sheets Medium White.

Glittered Celebrate Card by Yvonne van de Grijp for Scrapbook Adhesives by 3L

Then carefully take out the whole die-cut.

Glittered Celebrate Card by Yvonne van de Grijp for Scrapbook Adhesives by 3L

Make sure no piece of the die-cut falls out. Next carefully remove the back liner of the foam die-cut.

Glittered Celebrate Card by Yvonne van de Grijp for Scrapbook Adhesives by 3L

Then adhere the whole foam die-cut onto the card base.

Wear Your Adhesive on the Outside with Glitter

Now the glitter fun starts! Carefully remove the top liner of two letters (I chose C and R) and cover them with blue glitter. Rub the glitter into the letters to secure, and tap off the excess glitter.

Glittered Celebrate Card by Yvonne van de Grijp for Scrapbook Adhesives by 3L

Repeat the glittering steps with the other letters, using different colors. When all the letters are glittered, remove the outside liner (including the small bits within the letters) and sprinkle white glitter all over.

Glittered Celebrate Card by Yvonne van de Grijp for Scrapbook Adhesives by 3L

After applying the glitter, remember to tap off the excess. Now you’ve completed the Wear Your Adhsive on the Outside technique. So simple with stunning results!

Glittered Celebrate Card by Yvonne van de Grijp for Scrapbook Adhesives by 3L

And…voilá, your Glittered Celebrate Card is ready. I hope you enjoyed this tutorial and wish you happy crafting!

Yvonne van de Grijp

Glittered Celebrate Card by Yvonne van de Grijp for Scrapbook Adhesives by 3L

Creative Time: 30 minutes

Skill Level: Beginner

Materials needed:

Scrapbook Adhesives by 3L®

E-Z Runner® Ultra Strong Refillable Dispenser

3D Foam Creative Sheets Medium White

Other: Patterned Paper: Simple Stories (Sunkissed Collector’s Essential Kit); Etched Dies: My Favorite Things (Die-namics Celebrate Speech Bubble); Die-Cutting and Embossing Machine: Spellbinders® Paper Arts (Platinum 6 Machine); White, Gold, Blue, Green, Pink, and Purple Glitter; White and Black Cardstock; Scissors; Paper Trimmer

Save to Pinterest!

Glittered Celebrate Card by Yvonne van de Grijp for Scrapbook Adhesives by 3L Pinterest

Visit our Website and Blog!
Sign up for our Newsletter so you never miss a contest or giveaway!

instagram purple icon facebook icon purple pinterest purple icon twitter purple icon YouTube icon blog subscription purple icon

Airport Shenanigans Layout

Happy iNational Scrapbook Day! Hi, Margie here today with a layout from our trip to Japan last fall. Pictures are from the two airports we used to get to our destination. Do you have photos like these? Let me share how I document our Airport Shenanigans!

Airport Shenanigans Layout by Margie Higuchi for Scrapbook Adhesives by 3L

Pictures of our Airport Shenanigans

Do you have pictures of your shenanigans at the airport? We had a lot to choose from but ended up with our top six favorites to put into a collage format. I mat the image onto a light green cardstock based on some green tones in the pictures.

Next, I cut along the bottom edge of the airplane to tuck the matted photo in. I didn’t want to hide the plane and thought this was a good compromise 🙂 To secure, I applied the E-Z Runner® Permanent Strips Refillable Dispenser and then accented each corner with a Creative Photo Corners Silver.

Airport Title

My title was going to be straightforward (airport codes) so I decided to add a sparkly accent in the middle. With the smallest 3D Foam Stars, I placed it on the tail of the plane and took off the top liner. With a piece of fine silver glitter foil sheet from the pack, I covered the star with the color side facing me and rubbed it to transfer the color to the star. Peel off and you have an instant embellishment!

Die-cut the airport codes with a light green cardstock and place 3D Foam Strips behind the letters to pop them up. Designer’s Tip: use a T-ruler to help line up your title.

For the finishing touches, I added a computer-generated journal and secured it with 3D Foam Strips. Randomly placed rhinestones with a combination of Adhesive Dots Micro and Adhesive Dots Mini.

Thanks for Visiting!
Margie Higuchi

Creative Time: 30 mins
Skill Level: Intermediate

Materials Needed:
Scrapbook Adhesives by 3L®

E-Z Runner® Permanent Strips Refillable Dispenser

3D Foam Strips

3D Foam Stars

Adhesive Dots Micro and Adhesive Dots Mini

Creative Photo Corners Silver

Metallic Transfer Foil Sheets Holographic Colors

Other: Patterned Papers: Reminisce (Take Flight Collection); Gems: Buttons Galore & More; Craft Dies: The Ton (Bold Alphas Upper Coverplate Die Set); Light Green Cardstock

Click Preferred Retailers List

Save to Pinterest!

Airport Shenanigans Layout by Margie Higuchi for Scrapbook Adhesives by 3L Pinterest

Visit our Website and Blog!
Sign up for our Newsletter so you never miss a contest or giveaway!

instagram purple icon facebook icon purple pinterest purple icon twitter purple icon YouTube icon blog subscription purple icon

Heartfelt My Favorite Friendship Card

Hi, Liz here today! I am up with my next card in my Heartfelt Card series. I decided to make another friendship card. It just seems that lately many of my friends need a little reminder that someone is thinking of them.

These cards are simple and easy to create with supplies that you have on hand. I like to have a stash of cards ready to send out at a moment’s notice. Don’t worry if you don’t have a stash of cards. I have you covered. With just paper, stickers, and adhesive you can create a card in 30 minutes or less. Let’s get going with the tutorial!

Heartfelt My Favorite Friendship Card by Liz Ketter for Scrapbook Adhesives by 3L

My Favorite Friendship Card Panels and Elements

This card has a horizontal opening rather than a vertical opening. Be sure that any directional items on your paper are going the right way before you cut. You can see on my card that I have a floral background on my card. I had to make sure that I cut that piece of paper the right way so the flowers go up instead of sideways on the card.

Cut 2 background panels, one at 4 1/4″ x 5 1/2″ for the bottom base and one at 4″ x 5 1/4″ for the base topper. Cut a strip 4″ x 1/1/4″ for the band. Gather sentiment stickers.

Heartfelt My Favorite Friendship Card by Liz Ketter for Scrapbook Adhesives by 3L

Assemble the Card Background

Using the E-Z Runner® Permanent Strips Refillable Dispenser adhere the base panel to the card, then center and attach the floral panel on top.

Heartfelt My Favorite Friendship Card by Liz Ketter for Scrapbook Adhesives by 3L

Add Dimension with Lifted Elements

To lift the elements and create dimension on this card, I used the 3D Foam Squares White Mix. These packs are my Go-To when it comes to dimension-making with their two different sizes. The regular size squares were used to adhere the band. For the blue heart embellishment, I popped it up with the smaller foam squares for a sweet touch.

Heartfelt My Favorite Friendship Card by Liz Ketter for Scrapbook Adhesives by 3L

You are finished with the Heartfelt My Favorite Friendship Card! Now wasn’t that quick and easy? I keep the E-Z Runner® Permanent Strips Refillable Dispenser and the 3D Foam Squares White Mix on the top of my craft desk so they are available for any project.

I hope I have inspired you to create a card or two.

Thanks for visiting!
Liz

Creative Time: 30 mins
Skill Level: Beginner

Materials Needed:
Scrapbook Adhesives by 3L®

E-Z Runner® Permanent Strips Refillable Dispenser

3D Foam Squares White Mix

Other: Patterned Papers: Simple Stories (Heart Eyes Collection)

Click Preferred Retailers List

Save to Pinterest!

Heartfelt My Favorite Friendship Card by Liz Ketter for Scrapbook Adhesives by 3L Pinterest

Visit our Website and Blog!
Sign up for our Newsletter so you never miss a contest or giveaway!

instagram purple icon facebook icon purple pinterest purple icon twitter purple icon YouTube icon blog subscription purple icon

Circle Butterfly Happiness Found Tag

Who doesn’t love a butterfly? My Happiness Found Tag features this beautiful butterfly shape framed with 3D Foam Circle Frames White. Hi, Lara here today to show you how I created this elegant tag.

Circle Butterfly Happiness Found Tag by Lara Scott for Scrapbook Adhesives by 3L

Happiness Found Tag Layers

For the base of the tag, I covered a 3 x 6-inch shipping tag with patterned paper and then added a gold opening reinforcer with the E-Z Runner® Permanent Strips Refillable Dispenser. The next layer was a 2.5 x 5-inch rectangle cut from white cardstock. I placed a clear sentiment sticker at the bottom and outlined the rectangle with a black marker.

Adding Details

Next, I popped up a pre-printed sentiment with the smaller size of the 3D Foam Squares White Mix above the sticker sentiment. The butterfly shape was adhered and lifted with 3D Foam Strips placed on the back of its body to give it movement and interest. The 1/8″ width is the perfect size.

Circle Butterfly Happiness Found Tag by Lara Scott for Scrapbook Adhesives by 3L

Wear Your Adhesive on the Outside with 3D Foam Circle Frames

Getting to this point, I found that I needed a little something to accent the butterfly focal point. Using the seven largest 3D Foam Circle Frames White (counting from smallest to largest), I placed it behind the butterfly to anchor my design.

Peeling one half off the top liner, I placed the foil color facing me over the exposed adhesive and gently rubbed the foil to transfer the color to the circle frame. Then take the other half off of the liner and repeat the foiling steps. BTW, I chose the chunky gold glitter foil from the Metallic Transfer Foil Sheets Holographic Colors pack.

Circle Butterfly Happiness Found Tag by Lara Scott for Scrapbook Adhesives by 3L

I love how this Circle Butterfly Happiness Found Tag turned out! Maybe this tutorial helps you to give it a try. Thanks for visiting!

Happy Crafting!
Lara Scott

Creative Time: 30 mins
Skill Level: Intermediate

Materials Needed:
Scrapbook Adhesives by 3L®

E-Z Runner® Permanent Strips Refillable Dispenser

3D Foam Squares White Mix

3D Foam Strips and 3D Foam Circle Frames White

Metallic Transfer Foil Sheets Holographic Colors

Other: Patterned Paper; Butterfly Craft Die; Sentiment Sticker; Pre-Printed Sentiment; Black Marker; White Cardstock; White Self-Adhesive Pearls; Gold Hole Reinforcement; White Seam Binding

Click Preferred Retailers List

Save to Pinterest!

Circle Butterfly Happiness Found Tag by Lara Scott for Scrapbook Adhesives by 3L Pinterest

Visit our Website and Blog!
Sign up for our Newsletter so you never miss a contest or giveaway!

instagram purple icon facebook icon purple pinterest purple icon twitter purple icon YouTube icon blog subscription purple icon