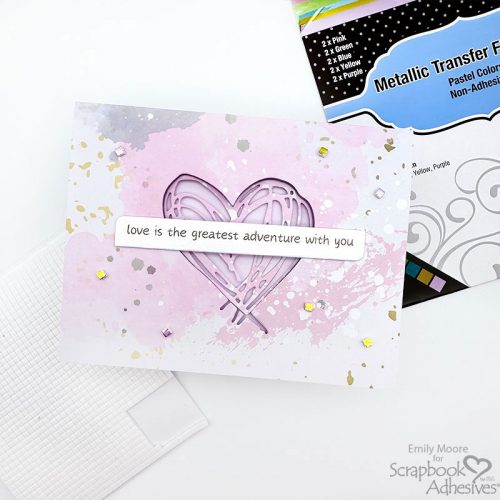
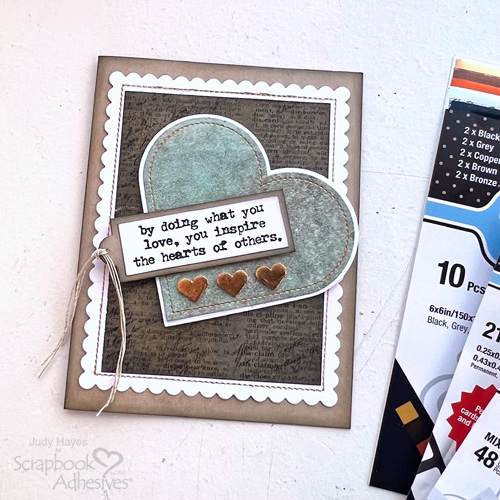
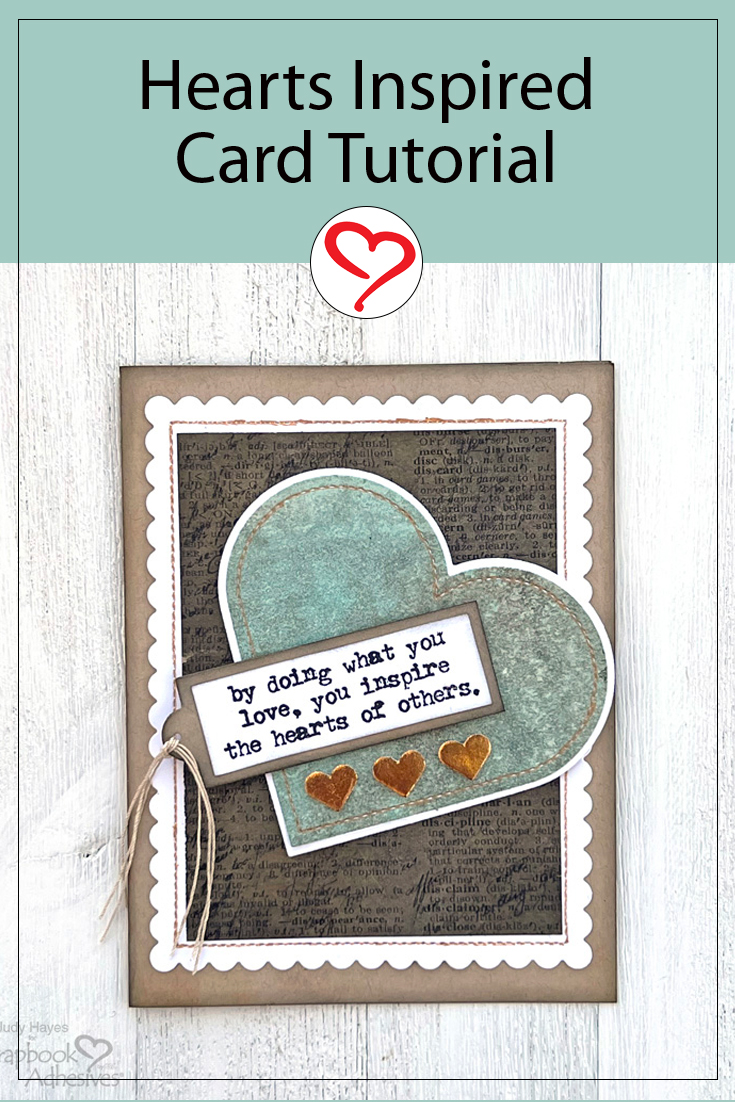
Hi, Judy here today! I spent some time dyeing papers last week and was inspired to use a couple of pieces for this Hearts Inspire Card. The background was from an old book page, and the largest heart features foiled 3D Foam Hearts for a pop of dimension and sparkle. See my tutorial below…

Hearts Inspire Card Base and Card Panel
Fold in half a piece of 5.5 x 8.5 inches tan cardstock to make a 4.25 x 5.5 inch card base. With a sponge applicator, apply Distress Black Ink along the edges.
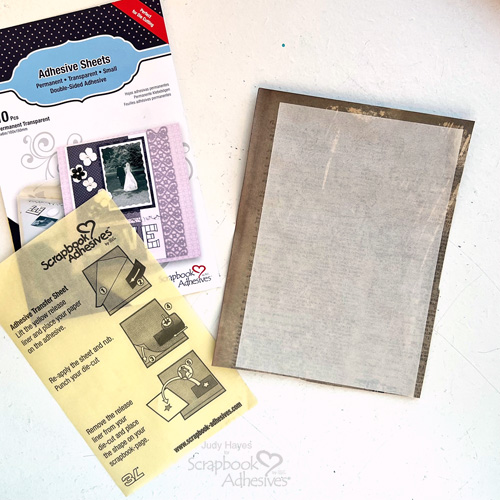
Apply an Adhesive Sheets 4 x 6in. to the back of a 3.25 x 4.375-inch piece of an old book page (make sure the book page fits the inner area of the scallop die). Rub a combination of Distress Vintage Photo and Black Soot ink around the edges. Stamp script randomly using Distress Archival Black Soot ink.
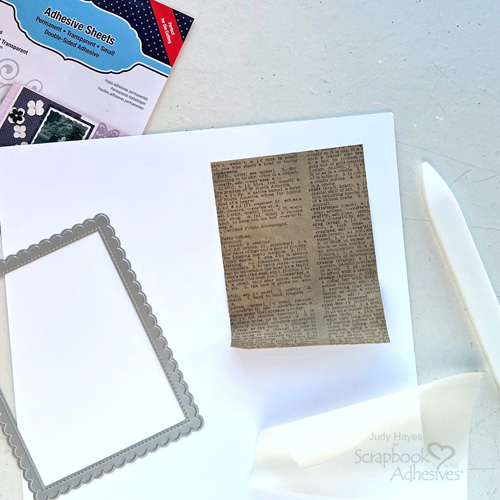
Next, peel the liner from the old book page and place it onto a piece of white cardstock, allowing space around the edges. Position the scallop die so the old book page is centered in the opening and die-cut a large scallop rectangle. This is much easier than trying to center the book page on a scallop rectangle after it’s cut out.
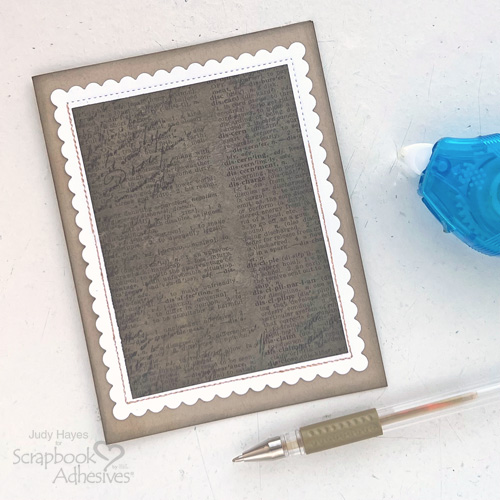
With the E-Z Runner® Petite Permanent Dots Refillable Dispenser, secure the layered panel to the card front. Use a gold metallic pen to trace along the dotted lines imprinted by scallop die.
Heart Focal Point
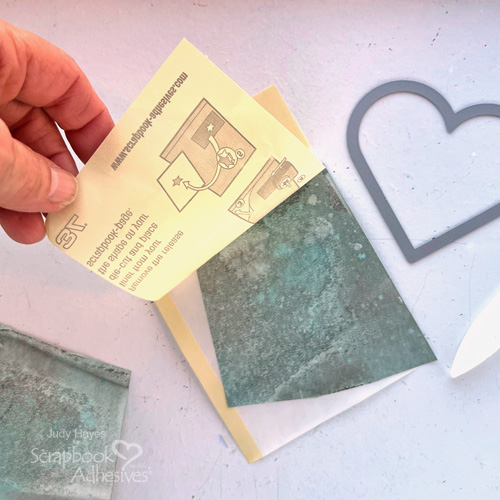
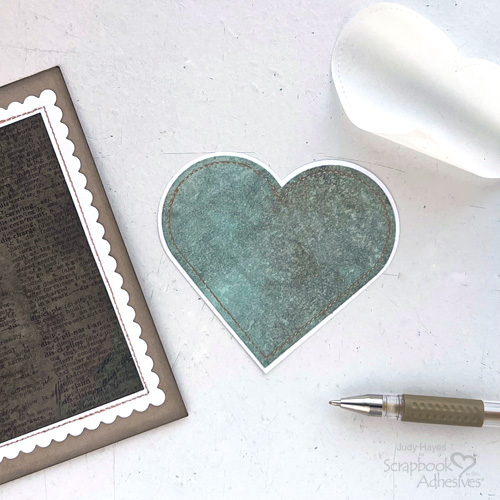
Take a piece of dyed paper large enough to cut a stitched heart die and place an Adhesive Sheets 4 x 6in. behind it. Make sure to rub well to transfer adhesive and die-cut with the stitched heart die. Next, cut a large heart from white cardstock using a heart die, peel the liner from the dyed heart, and layer the two hearts together. Use a gold metallic pen to trace along the stitch line around the edge of the heart.
Sentiment Tag
Stamp the verse on white cardstock with Archival Black Soot ink and trim it to 0.75 x 2.5 inches. Use a sponge applicator and lightly rub Distress Black Soot ink around the edges.
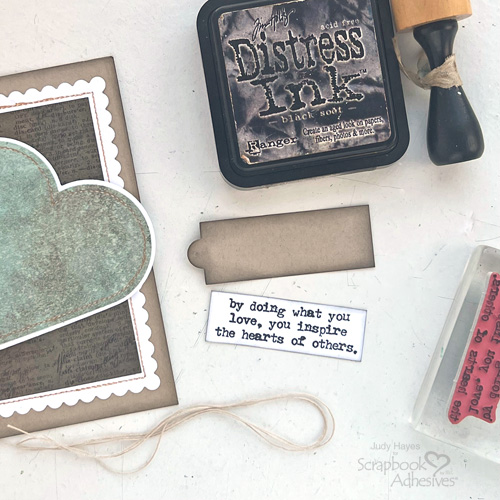
Cut a 2.625-inch long tag from tan cardstock. The tag I used was not long enough so place the tag die on cardstock with the bottom edge of the tag die extending off the die-cutting plate so that it doesn’t cut. Run through the die-cutting machine and trim off to the desired size. Use E-Z Runner® Petite Permanent Dots Refillable Dispenser to apply adhesive to the back of the verse and fasten it on the tag. Tie three lengths of string (I used crochet thread) to the tag.
Wear Your Adhesive on the Outside with 3D Foam Hearts & Metallic Transfer Foil Sheets
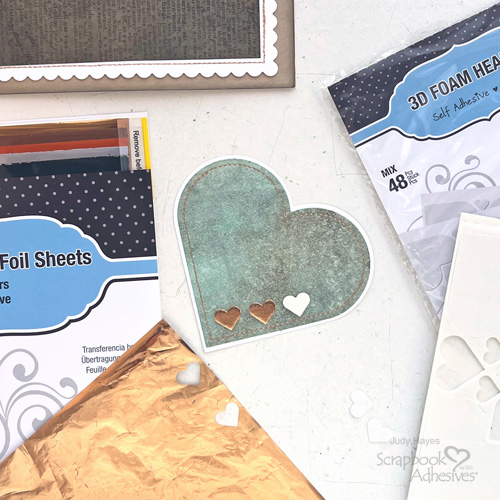
Place three small hearts from the 3D Foam Hearts along one straight side edge of the heart (refer to the photo). Peel off the liner, and apply a piece of gold foil from the Metallic Transfer Foil Sheets Nature Colors on the heart color side facing you. Rub well to transfer the color, and remove the foil sheet to reveal the result. Optional: Use a cotton swab to dab a small amount of Distress Archival Black Soot ink along the edges of each heart.
Finishing Touches
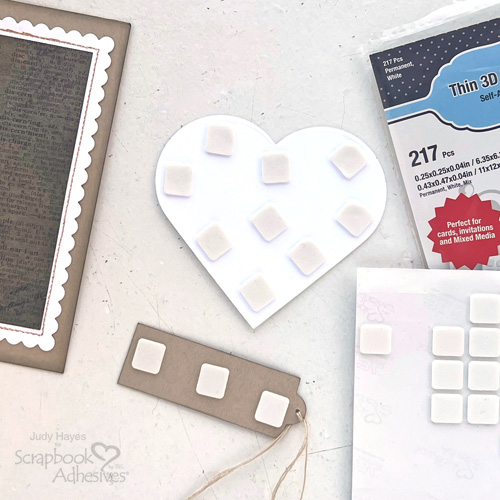
Place Thin 3D Foam Squares White Mix on the back of the tag and heart. Remove the liners from the tag and attach it to the heart, as shown in the picture below. Peel off the liners from the back of the heart, position it on the card at an angle, and press in place. Trim ends of string.
Thanks for stopping by!
Judy Hayes
Creative Time: 25 mins
Skill Level: Intermediate
Materials Needed:
Scrapbook Adhesives by 3L®
E-Z Runner® Petite Permanent Dots Refillable Dispenser
Thin 3D Foam Squares White Mix
Metallic Transfer Foil Sheets Nature Colors
Other: Stamp: Stampers Anonymous Tim Holtz (Love Notes, Dearly Departed); Ink: Ranger Ink (Distress Ink in Vintage Photo, Black Soot, Distress Archival Ink in Black Soot); Craft Dies: Gina K Designs (Master Layouts 4), Heidi Swapp (Mini Tags); Fossil (Tan) and White Cardstock; Stained Old Book Page; Dyed/Stained Paper; String (Crochet Thread); Gold Metallic Pen

Click Preferred Retailers List
Save to Pinterest!
Visit our Website and Blog!
Sign up for our Newsletter so you never miss a contest or giveaway!